

Go Sporting Goods 2000X TranSporter Motorboard User Manual
2000X TranSporter™
Motorboard
™
User Manual
V1.7
IMPORTANT
Battery Maintenance and Charging Instructions
1. You MUST charge your battery completely prior to initial use. This means
charging it for at least 2 hours.
2. Typical charge time is 120 minutes.
3. Charge before storage. You must charge every 30 days if not in use.
4. Only use the charger provided.
5. The Motorboard can be left on the charger indefinitely without harming the
battery.
6. Turn the Motorboard OFF when charging and when not in use.
7. You can read a more detailed battery charging guide later in this manual.
Safety Instructions
This product is not intended for extreme or off-road use. Please take proper
care of your Motorboard.
Do not
Do not
Do not
Do not
Always
If you have any questions, please contact us at support@gosportinggoods.com or on the
Web at www.gosportinggoods.com.
jump or abuse this product.
operate with the power switch OFF.
operate at speeds above 15 mph.
ride in wet conditions or on steep inclines.
ride safely and wear appropriate protective gear.
Failure to follow these instructions will
VOID YOUR WARRANTY!
Get Ready...
Congratulations on the purchase of your new 2000X TranSporter™ Motorboard. You’re in
for a great ride. You can Go faster, farther, more safely and silently than ever on a motorized
scooter. Plus, you can quickly recharge and Go again. Note: It is highly recommended
that the user be well-coordinated and be a minimum of 16 years of age.
Yo u r G o M o t o r b o a rd™ is unlike any other powered scooter on the market today. Yo u r
Motorboard is not a toy! It is equipped with the most advanced Drive System available,
which is comprised of TWO electric motors with Computerized Speed Control. This is a
new class of high-performance Motorboard combining advanced technology, materials, durability, safety features, nonpolluting “green” power, and value.
It is extremely important to read this User Manual before operating your Go Motorboard™. This manual includes key information regarding setup instructions, use, mainte-
nance, and safety procedures that will show you how to obtain maximum performance from
your Go Motorboard™. This User Manual applies only to the 2000X TranSporter Motor-
boards.
2000X
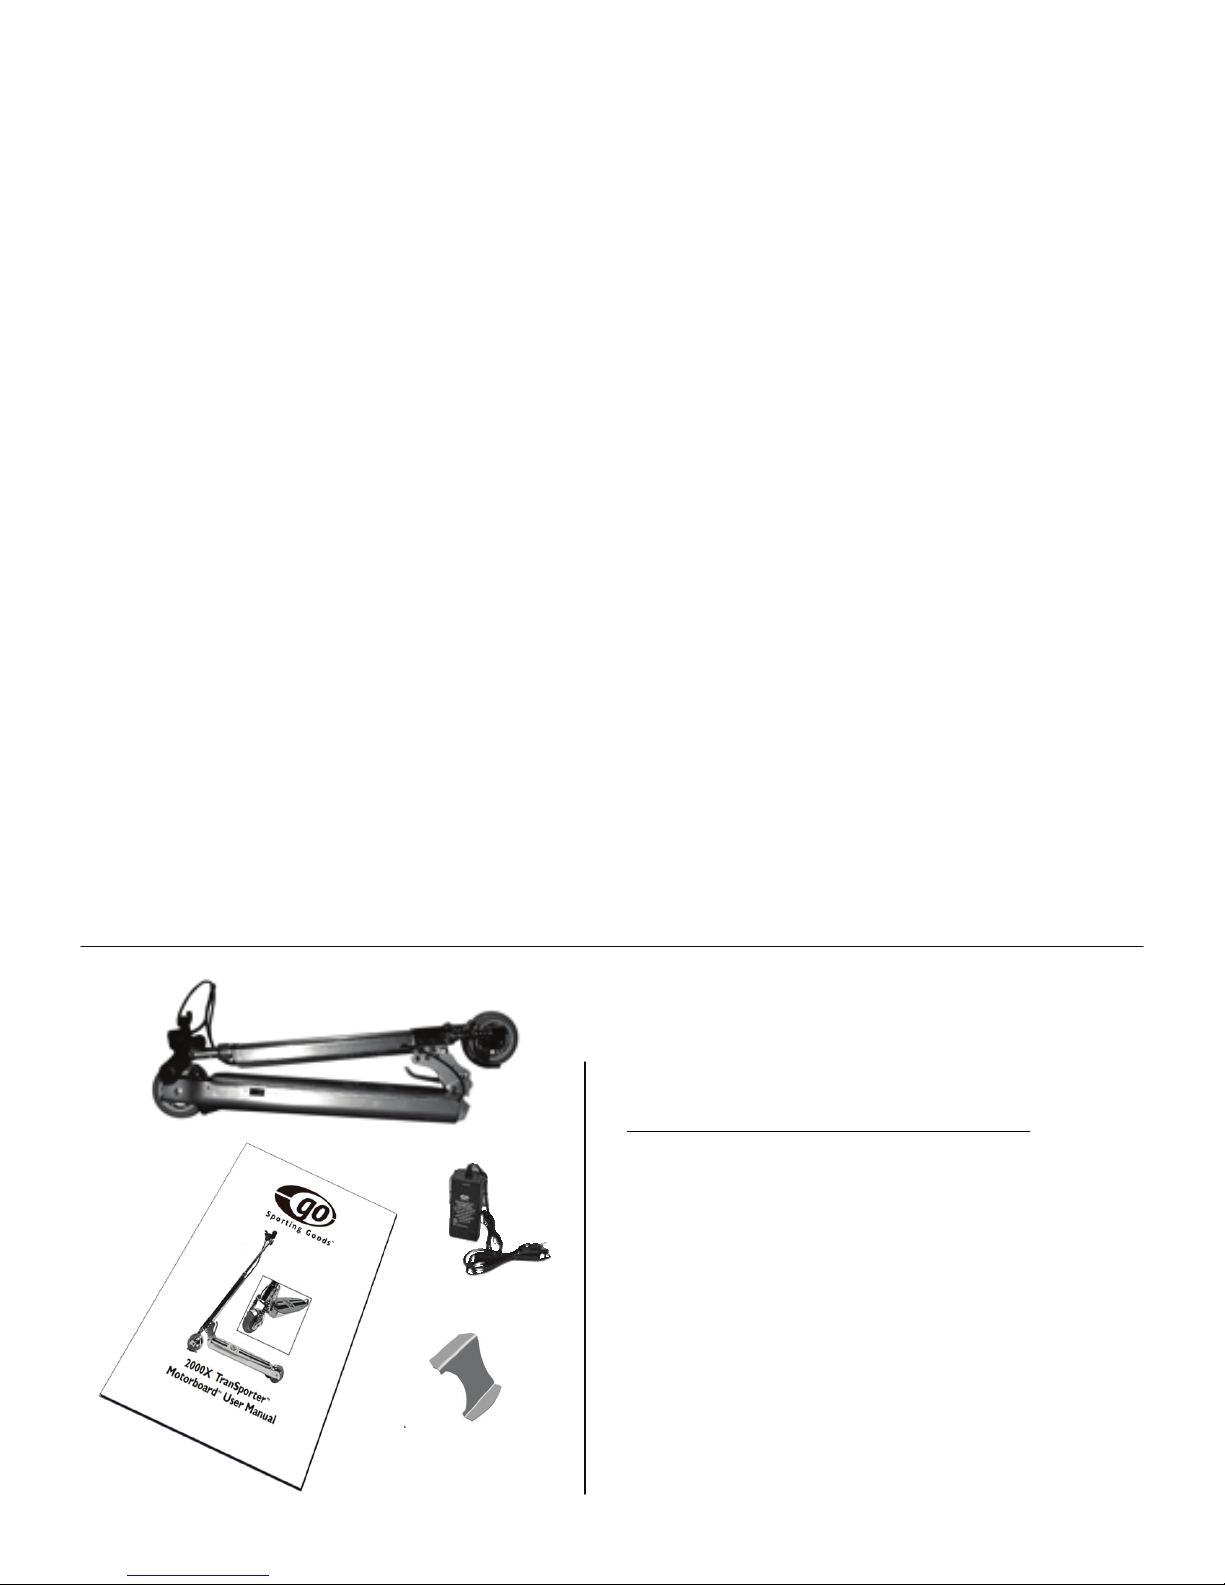
Contents of your Go Motorboard™ carton:
1. Go Motorboard™
2. 110v — 220v battery charger
3. User Manual
4. Tire Gauge
Get Set...
Please read the following information to properly
setup your Go Motorboard™ for first-time use.
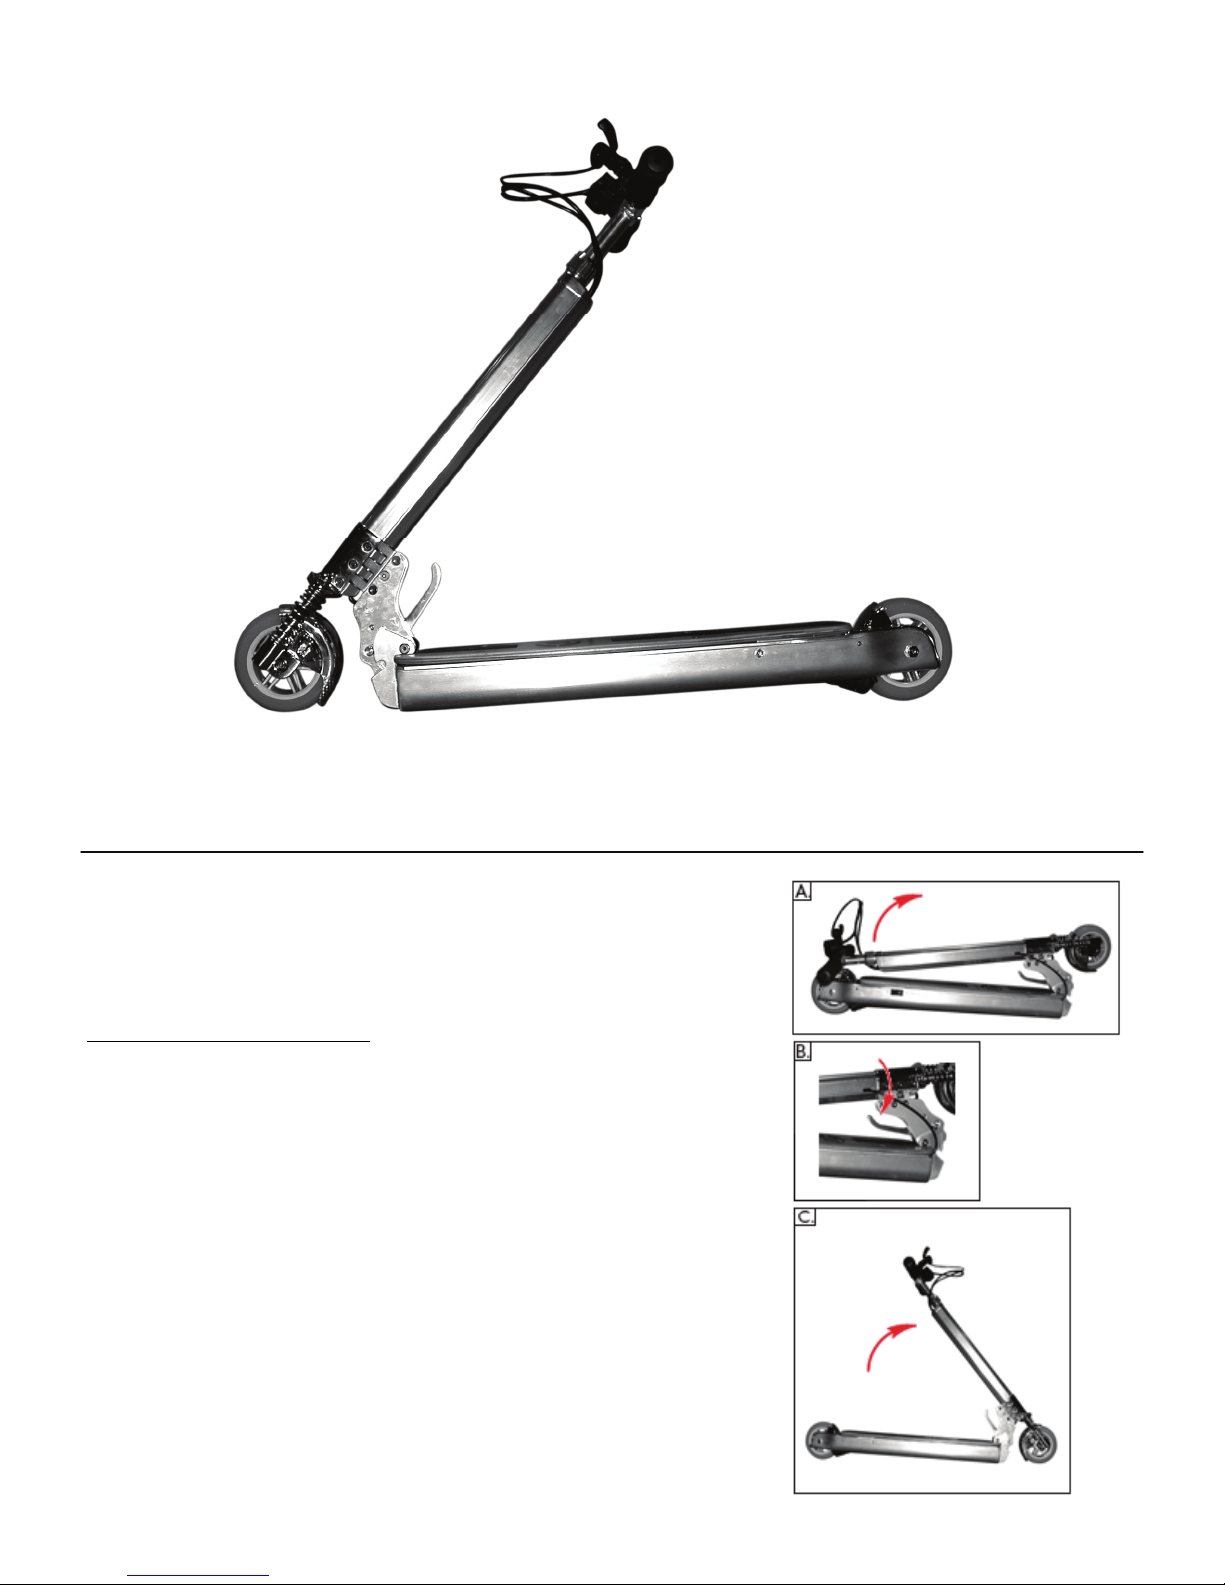
Unfold your Motorboard:
1) Place your folded Go Motorboard™, deckboard side up, on the
floor or other solid, even surface. (Fig. A)
2) Locate the Folding Lever. (This is a large lever located near the
Front Wheel and is adjacent to the Master Hinge at the base of
the Steering Column.) With your thumb, firmly press down and
hold the Folding Lever. (Fig. B)
3) With your other hand, hold the Steering Column and pull up
until it stops at an approximately 30-degree angle. Your Go Motorboard™ is now in the Kickstand Position. (Fig. C)
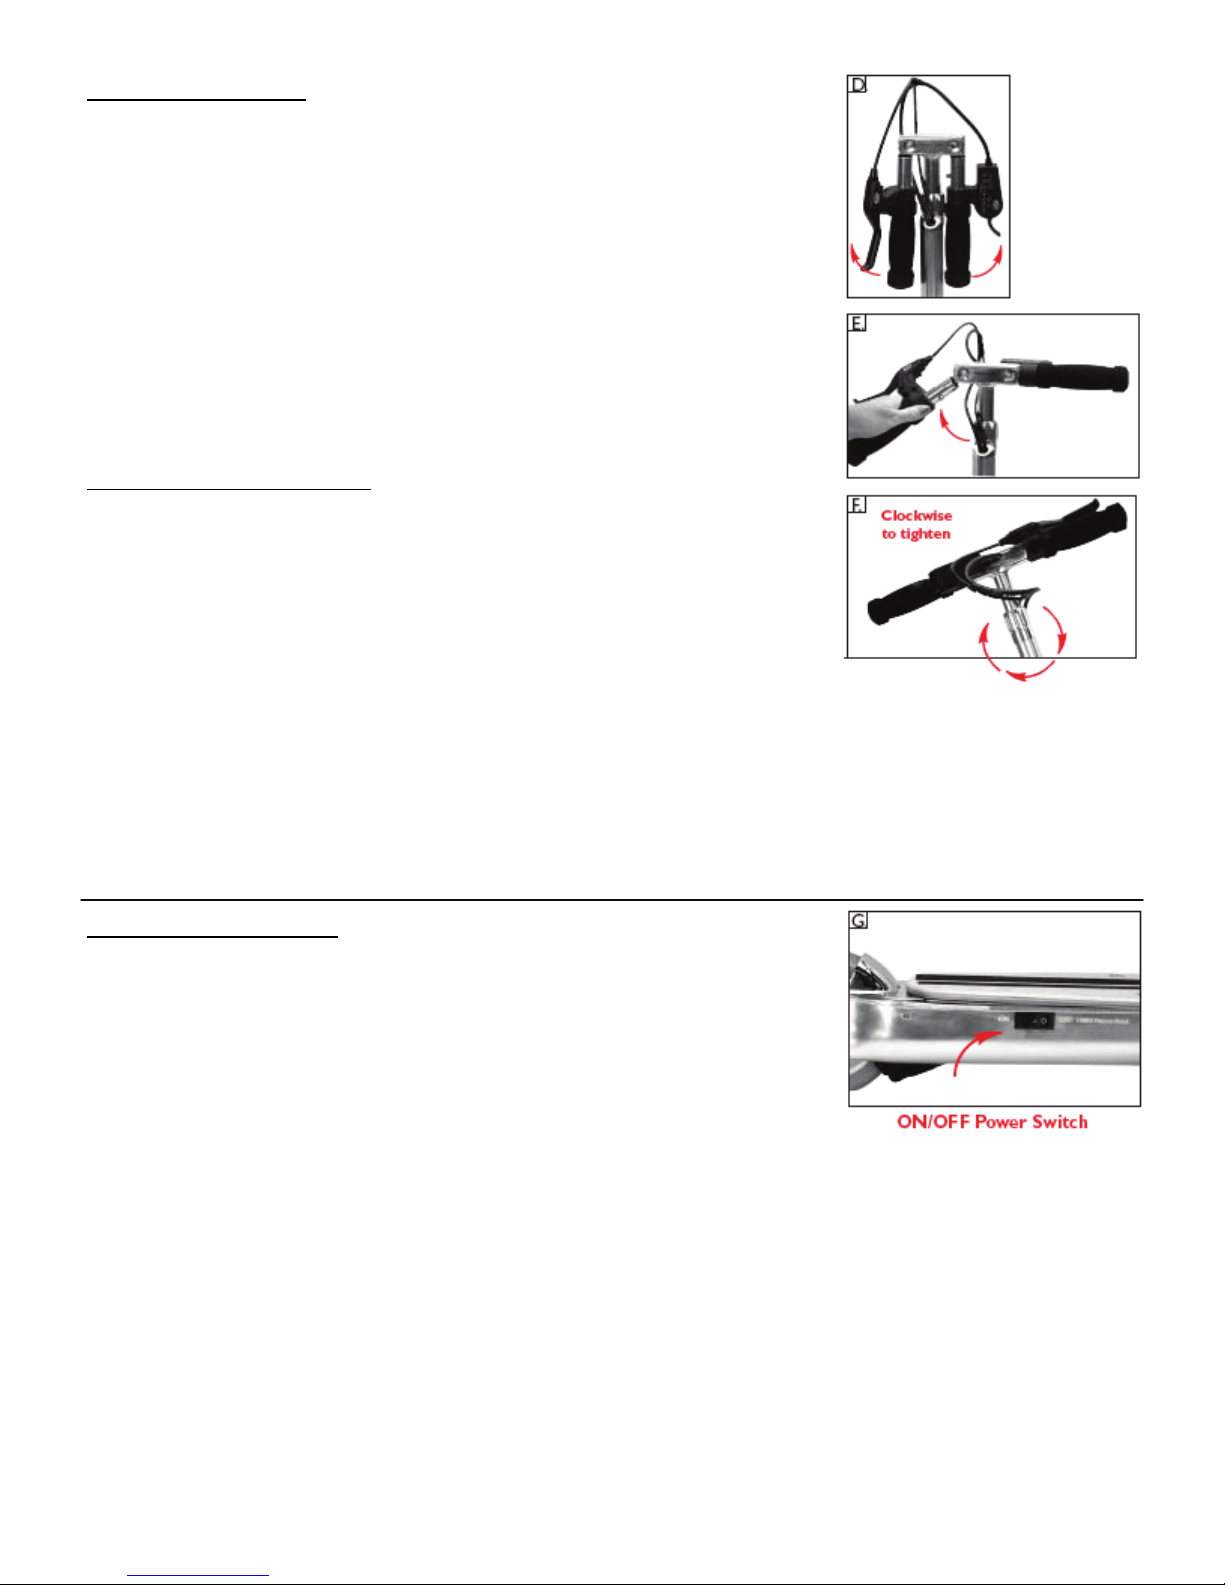
Secure Handlebars:
5) Locate the Foam Grips. (They are hanging from the Handlebar at the
top of the Steering Column on elastic cords). Pick up the right hand
Foam Grip and insert the metal shaft into the hole on the right side of
the handlebar. Rotate the Foam Grip forward/clockwise until you hear
a click and the Battery Gauge is in view facing upward. (Fig. D)
6) Locate the spring-loaded Handlebar Button. (This pencil eraser-sized
button is located on the metal shaft part of the foam grip.) Press in the
Handlebar Button with your thumb, while sliding the foam grip into
place with your other hand. The Handlebar Button will click/lock into
place in a small hole in the Handlebar. Repeat the same procedure for
the left hand Foam Grip with the Brake. (Fig. E)
Extend Steering Column:
7) Locate the Steering Column Nut. (This is a large, 1 1/2" diameter nut
located at the base of the Steering Column.) Loosen/turn the Steering
Column Nut counterclockwise. Slowly pull the Steering Column upward until it is fully extended and clicks/locks into place.
IMPORTANT: THE STEERING COLUMN MUST BE FULLY EXTENDED AND LOCKED INTO POSITION FOR SAFE USE.
8) Tighten/turn the Steering Column Nut clockwise. It should be tightened very firmly by hand. (Fig. F)
Do not use a wrench or other tool to tighten.
The setup of your Go Motorboard™ is now complete. Please read the following information prior to using your Go Motorboard for the first time.
Survey the Landscape:
Find a safe, clear, smooth area that is free of pedestrian and vehicular traffic.
Turn the Power “ON”: IT IS HIGHLY RECOMMENDED TO FULLY
CHARGE THE BATTERY PRIOR TO EXTENDED USE. Locate the “ON/
OFF” (Power) Switch under the Deckboard, on the right side, and turn the
unit “ON.” You will see a green light on the Speed Controller. (Fig. G)
IMPORTANT: ALWAYS TURN THE POWER “ON” BEFORE
RIDING. NEVER OPERATE THIS VEHICLE WITH THE
POWER SWITCH IN THE “OFF” POSITION OR YOU MAY
DAMAGE THE ELECTRONICS. You can operate your Go Mo-
torboard™ alternately as a push scooter and as a motorized Motorboard, as long as the power switch is turned “ON” prior to
any use.
Practice pushing yourself around: From the Kickstand Position,
place your Go Motorboard™ into Riding Position by pushing the
Handlebars forward until the Folding Lever locks into place. Your
 Loading...