

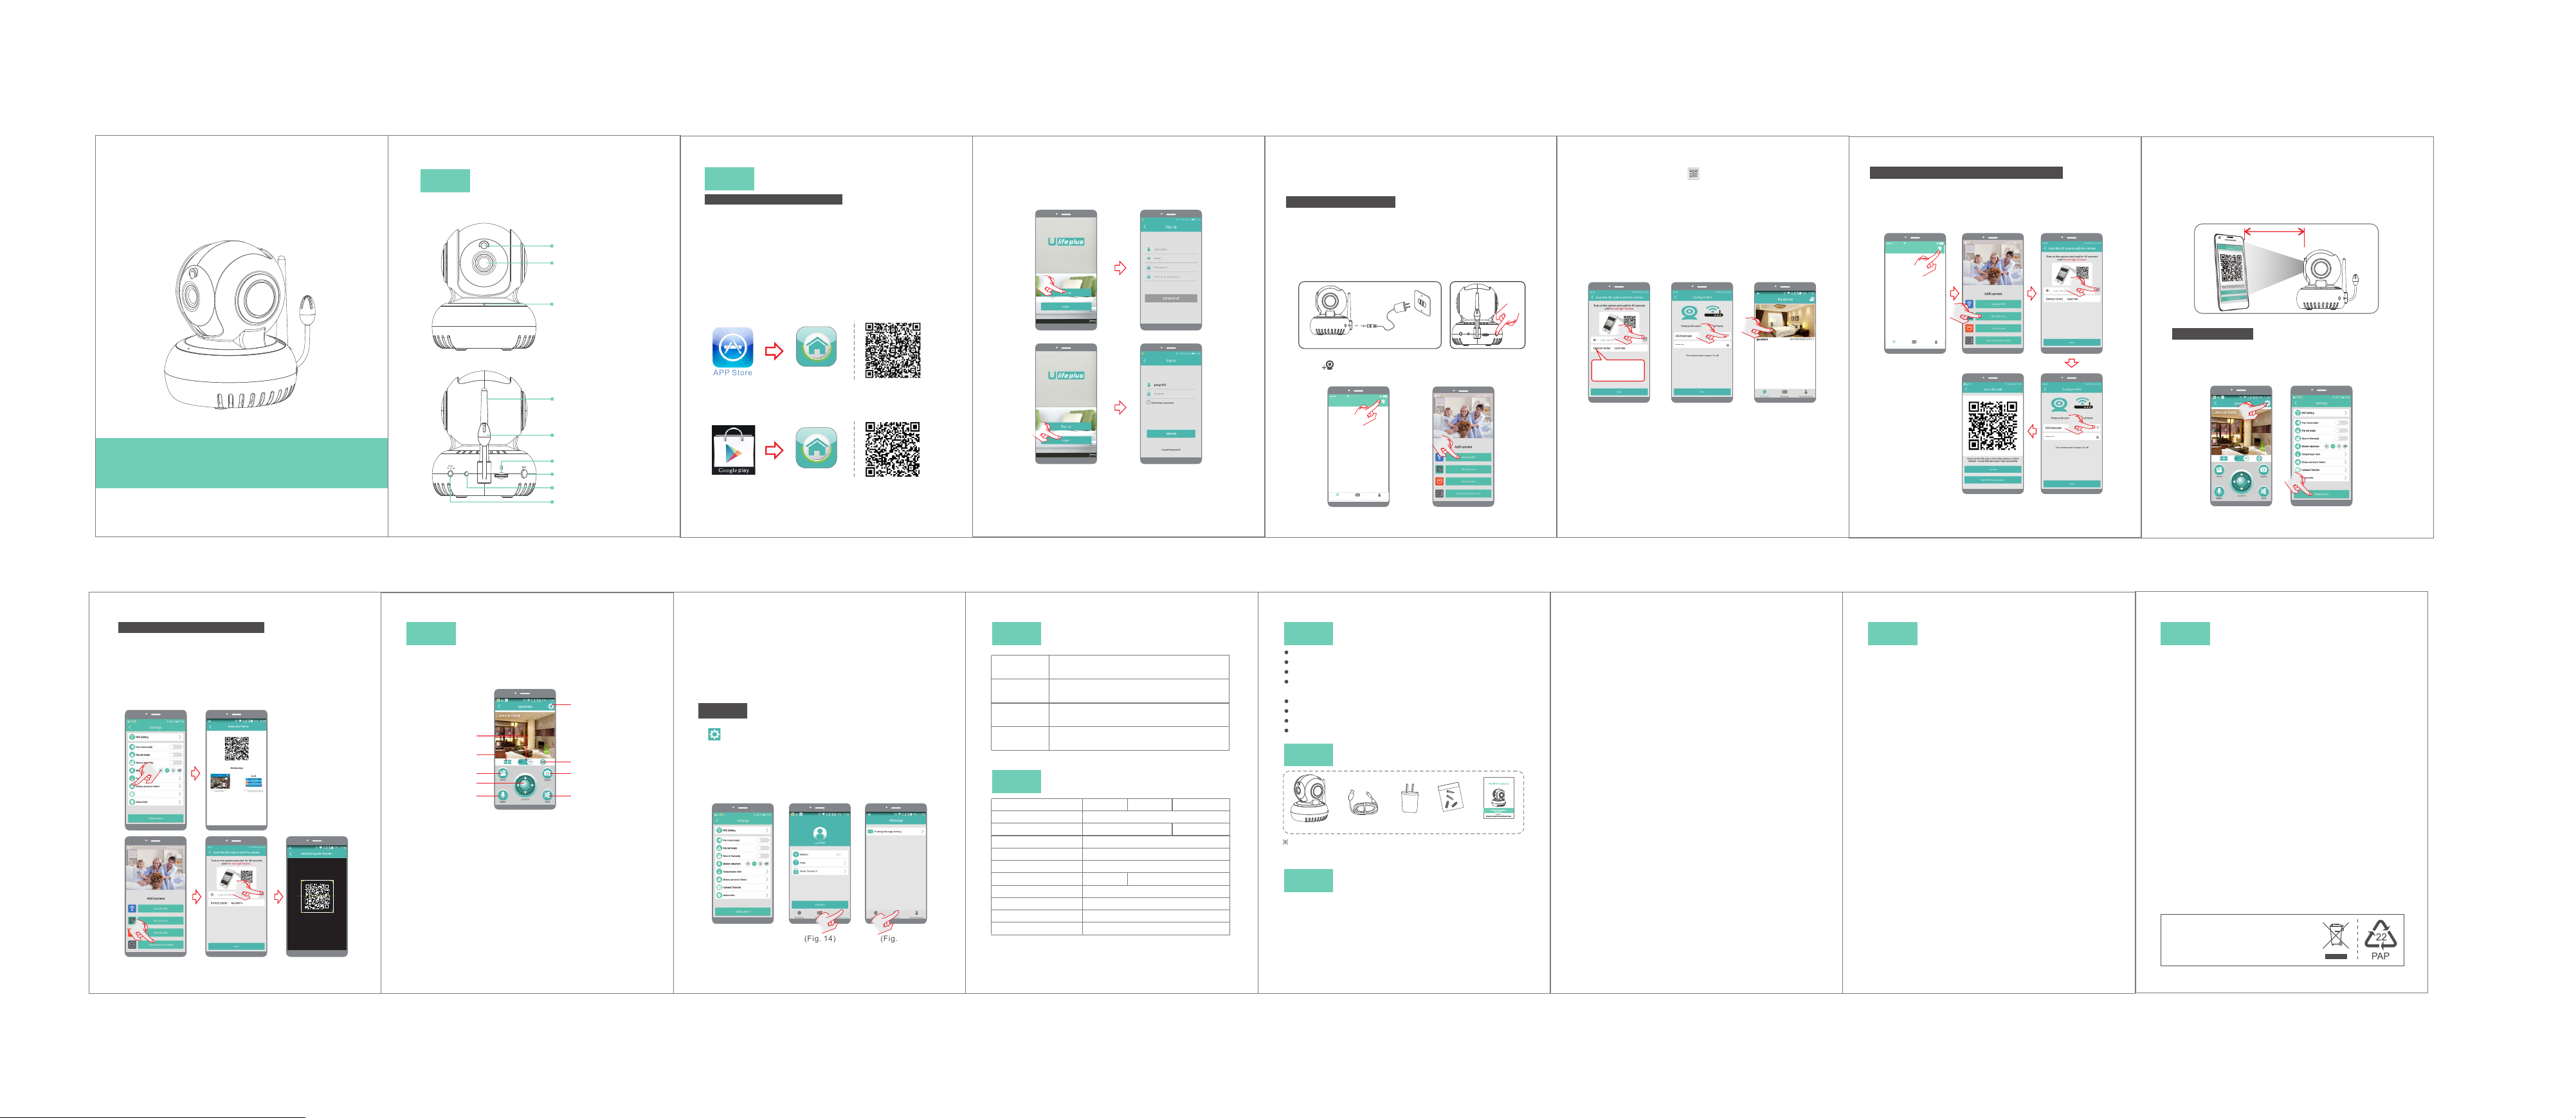
Page 1
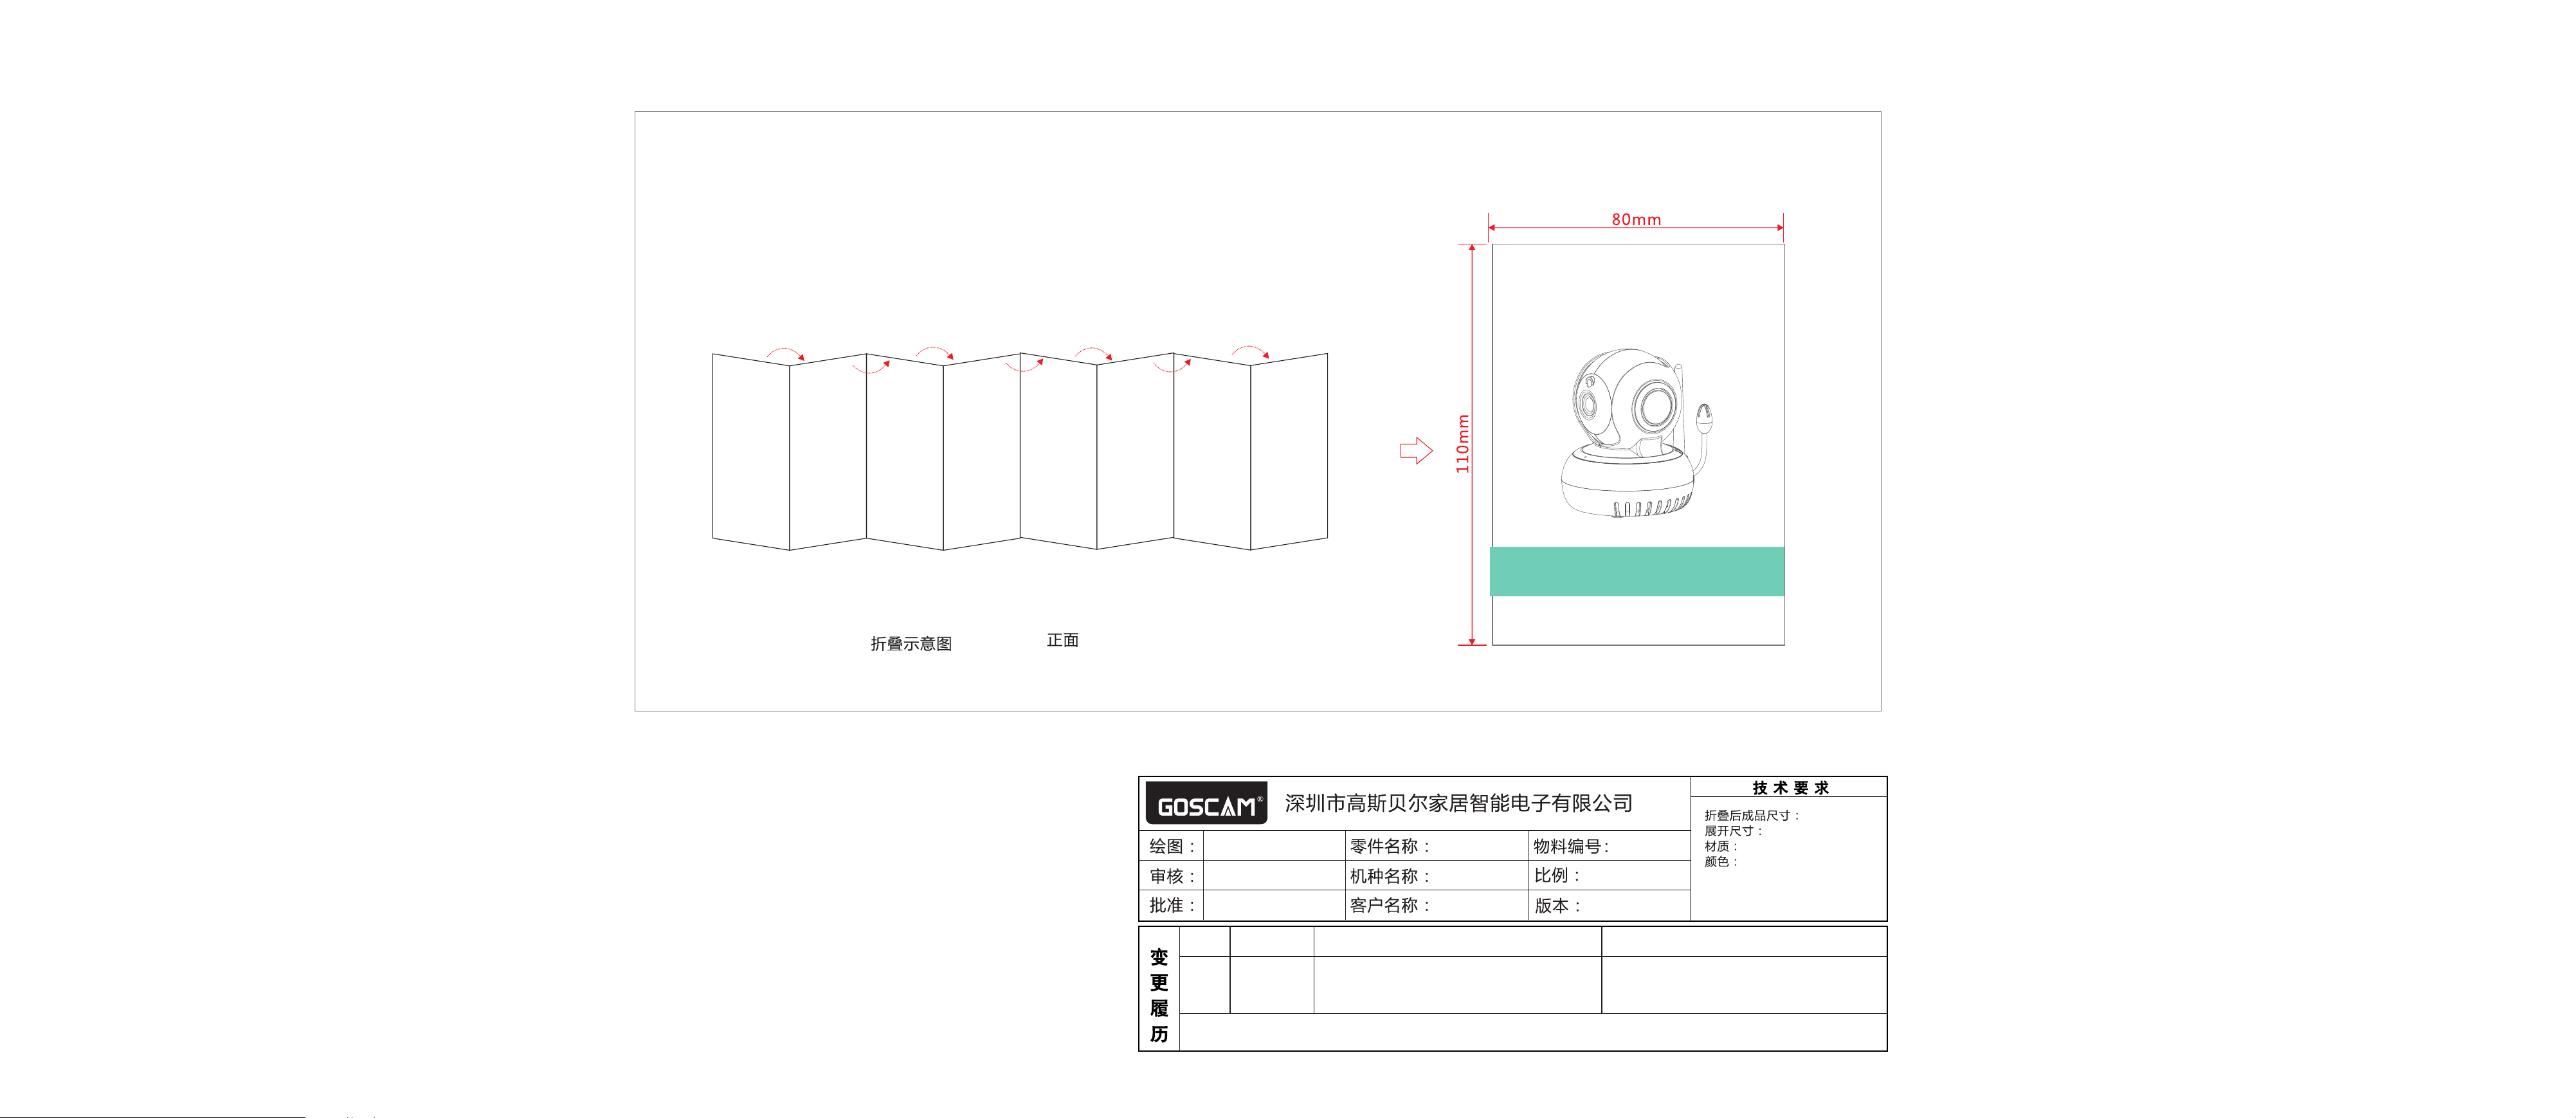
Folding Schematic Front side
HD WiFi Camera
Quick Start Guide
Model: T5886HCA
efo re using the product, p le as e re ad t he g ui de c ar ef ul ly t o av oi d
B
any dam ages to the product in vi rt ue o f fa ul ty o pe ra ti on o r mi su se .
汪敏 2017.06.02
新版本
变更时间 变更前
2017.06.02
B
说明:
中文 说 明书
T5886HCA
中性
电子档1: 1
1.1
技术规格部份有更改
内存改为64GB
80x110mm
640x110mm
10 5g铜 版纸
双面 四色 印刷
工艺:风琴折,封面在外
其他:16P
变更后
Page 2
HD WiFi Camera
Quick Start Guide
Mode l: T5 886HCA
Befor e us in g th e pr od uc t, p le as e re ad t he g ui de c ar ef ul ly t o av oi d
any damages to th e pr od uc t in v ir tu e of f au lt y op er at io n or m is us e.
I
Appea ranc e
- 1-
Ligh t se nso r
Came ra L ens
Micr op hon e
Ante nn a
Ther mo s ensit iv e
indu ct ion
Micr o SD c ard slo t
SET key
Indi ca tor lig ht
Powe r ad apt er p or t
II
Insta llat ion
Pre- In sta ll at ion P re parat io n
1.Re qu ire me nt s of ve rs ion: And ro id 4. 4, i OS 8.0, a nd
late r ve rsion s.
2. 2.4 G wi reles s ro ute r sh ould co nn ect t o th e In ter ne t;
smar tp hone sh ou ld co nn ect the W i- Fi of t he r outer.
When c on nec ti ng t o the c am era, bo th t he sm ar tphon e
and ca me ra shou ld b e wit hi n the ran ge o f thi s
wire le ss ro ut er.
3.Do wn loa d an d insta ll c lie nt -e nd APP
A.Open t he Ap p Sto re o n iP hon e/ iPa d, s ea rch f or
"U-l if e Plus" a nd i nst al l.Or sc an t he QR c od e to i nst al l
it dir ec tly.
U-li fe P lu s
B.Ent er t he "Goo gl e Pla y" s tore on An dr oid s ma rtpho ne .
Sear ch f or "U-l if e Plu s" a nd inst al l.O r sc an the QR
code t o in stall i t di rec tl y.
U-li fe P lu s
※Take the o pe rat io n of Andro id c lie nt -e nd as e xa mpl e,
and re fe r to And ro id c lie nt -end fo r IO S cli en t-end .
- 2-
4.Op en AP P, reg ister a n ID f irs t, t hen ple as e log in .
(spe ci al ch ar acter s ( su ch as "%" ," \", "< >" etc. .. )
are no t al low ed .)
Prom pt : ple as e us e a val id a nd us ea bl e mai lb ox duri ng
user r eg ist ra ti on, f or r ecove ri ng th e pa sswor d.
- 3-
Ther e ar e two way s to a dd th e ca mera fu nc tion in
Mobi le APP, namely, "ad di ng mode b y Wi Fi " a nd
"add in g mode by s ca nni ng t he Q R cod e ".
Addi ng m ode by WiFi
1. Ple as e con ne ct the ca me ra to pow er a nd sw it ch it on;
afte r sw itchi ng o n, it s in dicat or l igh t wi ll b e tur ne d on
and th e ca mera wi ll s tar t au to-ch ec k. Aft er f inish in g the
auto -c hec k, t he re wi ll b e “di ng -d ong ” so und rin gi ng.
(Fig . 1)
2.
Pres s SE T fo r 1 secon d, a nd af te r a “beep ” so und , th e
mach in e wil l en te r con fi gurat io n mod e. (Fig. 2 )
Cam era
Power
adapter
(Fi g. 1)
Power
source
(Fi g. 2)
3. Cli ck t o add equ ip men t; ( Fig. 3)
4.Cli ck “ Add w it h Wi Fi" . (F ig. 4)
中国移动 上午11: 50
My devic e
My Center
Message
Decice Lis t
(Fi g. 3 ) (Fi g. 4)
- 4-
5.Cli ck t he QR cod e ic on an d sc an the QR c od e of th e
came ra I D on the ca me ra. Af te r getti ng t he de vi ce 's ID ,
pls pr es s "Ne xt " (F ig. 5 )
6.Se le ct yo ur W iF i, an d in put you r Wi Fi pa ss word, a nd
then c li ck "N ex t" ( Fig .6 )
7.Aft er t wo beep s, c ame ra s tarts t o co nfi gu re t he Wi -F i
conn ec tio n. W he n the l ig ht turn s gr een , it i ndica te s the
conn ec tio n is e st abl is hed. Aft er s ucc es sful co nn ect io n,
the ap p wi ll po p up l ist of co nn ected c am era ( Fi g. 7).
Choo se t he item t o en ter r ea l-tim e mo nit or.
The d efaul t
ipc amera c an
be mo difie d.
(Fi g. 5 ) (Fi g. 6) (Fig. 7)
- 5-
Addi ng m ode by sc an ning th e QR c ode
1.Pow er c ame ra o n > Pr ess S ET f or 1 s econd > C li ck Add
by sca nn ing the Q R co de to a dd t he came ra > S can
devi ce I D > Enter t he n ame a nd p asswo rd f or ac ce ss to
WiFi . Pe rform o pe rat io ns as ins tr uct ed . (Figu re 8 s eri es )
中国移动 上午11: 50
My devic e
My Center
Message
Decice Lis t
(Fi g. 8 se ri es )
- 6-
2.Whe n th e mob il e ph one s ho ws the QR c od e ,pl ea se
plac e yo ur ph on e in f ont o f th e camer a (a s sho wn i n
Figu re 9 ). If it be ep s, sc an ning su cc eed s, a nd then
clic k on " Yes, I d id " . Whe n th e light t ur ns gr ee n, it
indi ca tes the b on din g is s ucces sf ul.
10~1 5c m
(Fi g. 9 )
Dele te d evice
1.In se tt ing pag e of a pp (F ig . 10), cl ic k “De le te d evi ce ”
to rem ov e the con ne cte d ca mera, c an r emo ve t he
bond in g wit h th e ac cou nt . then ot he rs ca n ad d the
came ra f ree ly.
(Fi g.10)
- 7-
Add ca me ra for mu lt i-u se rs
1.If y ou r cell ph on e APP has ad de d camer a an d
conn ec ted suc ce ssf ul ly, nex t tim e wh en othe rs a dds ,
You clic k "S har e yo ur c ame ra t o frien ds ".a nd t he n the re
will b e a QR c ode in yo ur AP P.You sha re t his QR co de t o
your f ri end s. An d he/sh e cl ick "Ad d ca mer a fr om frie nd "
to sca n th e QR code y ou p rov id ed.(F ig .11 series )
(Fi g. 11 se ri es )
Share your camera to friends
- 8-
III
With a s uc ces sf ul c onn ec tion, m on ito r vi ew supp or ts
real -t ime m on itori ng , tak in g ph oto s, r ecord in g vid eo s,
inte rc omm un ic ati on , modif yi ng se tt ing and o th er
oper at ion s.
1.Cli ck t o switc h be twe en s tanda rd d efi ni tion an d hi gh
defi ni tion of r ea l-t im e video .
2.Cli ck t o enter m ul ti- vi deo vie w, mo nit or a t most 4 re al time v id eo.
3.Cli ck t o start r ec ord in g video , cl ick a ga in to sto p
reco rd ing . Vide o wi ll be s av ed in sma rt pho ne .
4.Dra g to a dju st c am era v ie w angle .
5.Cli ck a nd ho ld t he b utt on t o trans mi t voi ce t o camer a.
Whil e ho ldi ng t he b utt on , the aud io f rom c am era wil l be
mute .
6.Cli ck t o enter s et tin g
7.Cli ck t o view an d do wnl oa d pho to s & vi deo s sa ved in
came ra m icr o- SD c ard .
8.Cli ck t o take a ph ot o. Ph ot o will be s av ed in s ma rtpho ne .
Monit or Vi ew and O pera tion s
6
1
2
3
4
5
(Fi g. 1 2)
7
8
9
- 9-
9.Cli ck t o mute th e au dio f ro m camer a. C lic k ag ain to
canc el .
Note s:
1.Pho to s and vid eo s tak en i n th e app w il l be save d in
smar tp hone.
2.Aut om atic ph ot os an d vi de os of m ov ement d et ect io n
will b e sa ved in mi cr o-S D ca rd of cam er a.
Sett in gs
1.On th e re al-ti me m oni to ring in te rfa ce , click t he s ettin g
icon f or e nteri ng i nto t he c amera s et tin g me nu . Th e
user c an s et up the r el eva nt f uncti on s for t he “ Camer a
time c he ck’ an d other s. ( Fig . 13 )
2.Ope n th e APP, enter “Us er c ent er ” page to c he ck
APP ve rsi on i nfo etc . (F ig .1 4)
3.Ope n th e APP, enter “me ss age ” pa ge to set m es sag e
push in g. (Fig . 15 )
(Fi g. 1 3)
※ Thi s cam er a is comp at ibl e wi th univ er sal AP P, act ua l
func ti on is sub je ct to c am era.
(Fi g. 14) (Fi g. 1 5)
- 10-
IV
Red indicator
remains
Red indicator
fla shes
Gre en
indicator
fla shes
Gre en
indicator
remains
Camera Indi cato r Inst ruct ion
Ind icate s that po wer fai lure or n etwor k not
con necte d.
Ind icate s that ca mera is c onnec ting to
net work.
Ind icate s the rou ter con necte d
suc cessf ully (n o Inter net).
Ind icate s the cam era is co nnect ed to ser ver
and w orkin g well.
V
Model No.
Ima ge sensor CMO S
Camera resoluti on
Camera rotation range 270°horizontal, 120°vertical
Nigh t vi si on r an ge ≤5m
Audi o se ns it iv ity ≤-47dB
Ope ration vol tage
Operation temperature
Ope ration humidity 15% ~ 8 5% R H
Siz e (LxWx H) 8 5 x8 8. 5 x1 03 .5 mm
Net wei ght 224 g
No add it ion al n otice w il l be ma de i n ca se of a ny
※
mino r ch ang e. O ur c omp an y reser ve s the r ig ht of
fina l in ter pr et ati on .
Produ ct Spe cifi cati ons
T5886HCA
DC+5V /2A DC+5V/1A
T5886GCA
1080P:1920x1080 720P:1280x720
-10℃ ~ + 5 0℃
T5886HAA/GAA
- 11- - 12-
V I
24/7 l iv e vi deo str ea mi ng
HD pro vi de s excel le nt v ide o qu al ity
Smar t mo ti on dete ct io n and not if ic ati on
Adva nc ed v ideo re co rd ing o n mi cr o-SD ca rd ( Ma xim al ly
supp or t th e cycli c re co rdi ng o f 64 GB m icr o SD c ar d.)
Moto ri ze d Pan/Ti lt
Nigh t vi si on (5m vi si bi lit y)
Two-w ay v oi ce tran sm it
Quic k & ea sy t o set up
VII
Cam er a
The p ic tu re is o nly for r efere nce and t he real o bject s hall pr evail
VII I
1.Sug ge st us in g qu ali fi ed mi cr o- SD ca rd t o avoid
inco mp atibi li ty. Form at m icro- SD c ard b ef or e usi ng .
2.Mov em ent det ec tio n: w hen mov em ent i s de tecte d
with in t he scop e of c ame ra , the cam er a wil l re cord vi de o
and ta ke p hotos a ut oma ti cally. Vi deo s an d photo s wi ll
be sav ed i n mic ro -SD car d.
Funct ion Fe atur es
Packi ng Lis t
USB c ab le
Power
adapter
Scr ew s
Tips
Qui ck Guid e
3.Sha re y our c am er a to fr ie nds: Sh ar e QR co de o f the
devi ce w ith you r fr ien ds .
4.Can ce l "Sh ar e your ca me ra to fri en ds" : De lete th e
came ra a nd ca nc el " Sha ri ng yo ur c am era t o fr iends ".
(You h av e to re -a dd the ca me ra to u se i t again )
5.Pus h me ssa ge : wh en mo ve men t is d et ect ed , alarm
mess ag e can b e se nt t o ser ve r and pus he d to yo ur
phon e.
6.Rem ot e mon it or ing : af ter the c am era i s co nnect ed t o
Inte rn et succ es sfu ll y, ap p can vie w th e mon it or v ia
Inte rn et, any ti me, a ny where .
7.Temp er atu re a la rm: I n ca se that t he t emp er ature
dete ct ed by the d ev ice i s hi gher th an t he se t va lue,
audi bl e ala rm w il l be ac ti vated o n ce ll ph on e (once
ever y 2 mi nutes ).
8.On ly s uppor t th e spe ci al char ac ter s in E nglis h mo de,
such a s: " @ , #, &, *, ~, {, }, - , =, + , /, ?, (, )" ,
Dont s up por t th e sp eci al c har ac te rs, s uc h as:"% ", " \",
"<>" .
9.Wh en t hi s machi ne h as a c ras h fa ul t or othe r ab no rmal
cond it io ns infl ue nc ing the u sa ge , it is rec om mende d to
cut ou t th e po wer and r es ta rt; or pr es s SET key f or 1 0
seco nd s, w hich ca n re st ore f ac to ry sett in gs , and the n
plea se r ec onnec t th e ro ute r.
- 13-
IX
1. Wi- Fi c an no t be c onnec te d
a) Ens ur e th at t he ante nn a of c am era is fi xe d we ll .
b) Ens ur e th at c amera i s in r an ge o f route r. Ke ep t he
dist an ce l es s th an 40ft s be tw ee n ro uter an d in do or
came ra , le ss t ha n 65fts f or o ut do or c amera .
c) Ens ur e th at S SI D and pas sw or d of W i- Fi cont ai ns n o
spec ia l ch ar ac ters. M od if y th e SS ID and pa ss wo rd o f
Wi-F i wi th o nl y En glish c ha ra ct er s, no spe ci al c ha ra cte rs .
d) Ens ur e th at S SI D and pas sw or d ar e no l onger t ha n 16
char ac te rs
e) Ens ur e th at S SID is br oa dc as ted.
f ) Ensu re t ha t th e DH CP is en abled o n ro ut er.
g) Ens ur e th at Wi-F i en cr yptio n me th od i s WPA 2- PS K/
WPA- PS K or AES .
h) Ens ur e th at W i-Fi si gn al i s 2. 4GHz.
i ) Ensu re t ha t th er e is no MAC f il te r on r ou ter or ad d MA C
addr es s to r ou te r white li st
j
We su gge st r eboot in g the r ou ter, and t he " sec ur it y
)
sett in gs, enc ry pti on m ethod " of W iFi p as sw ord s ho uld
neve r ch oose "a ut o-s el ect".
k) Rese t th e cam er a to s et up c on necti on a gai n. P ress
and ho ld S ET key for 5 se co nds .
2. Red i nd ica to r re mai ns , netwo rk c onn ec tion is f ai led .
a) Ens ur e that th e pa ssw or d of Wi-F i is c orr ec t.
b) Ens ur e that th e ne two rk c onnec ts t o Int er ne t fre el y.
c) Ens ur e that th e ca mer a is i n range o f Wi -Fi h ot spot.
3. Gre en i ndi ca to r fla sh es, con ne cti on t o serve r fa ile d.
a) Ens ur e that Wi -F i sig na l is stro ng e nou gh a nd
bandw id th is e no ug h for c on necti on . Mov e ne ar to
Wi-Fi h ot spot or i nc rea se t he band wi dth .
b) Ens ur e that ca me ra is n ot u nder in te rfe ro n of o the r
2.4G Hz s ignal .
Troubl esho otin g
- 14-
X
NOTE: This equipment has been tested and found to comply with the limits for a
Class B digital device, pursuant to part 15 of the FCC Rules.
These limits are designed to provide reasonable protection against harmful
interference in a residential installation. This equipment generates uses and can
radiate radio frequency energy and, if not installed and used in accordance with
the instructions, may cause harmful interference to radio communications. However,
there is no guarantee that interference will not occur in a particular installation.
If this equipment does cause harmful interference to radio or television reception,
which can be determined by turning the equipment off and on, the user is
encouraged to try to correct the interference by one or more of the following
measures:
- Reorient or relocate the receiving antenna.
- Increase the separation between the equipment and receiver.
- Connect the equipment into an outlet on a circuit different from that to which the
receiver is connected.
- Consult the dealer or an experienced radio/TV technician for help
Changes or modifications not expressly approved by the party responsible for
compliance could void the user's authority to operate the equipment.
This device complies with Part 15 of the FCC Rules. Operation is subject to the
following two conditions:
(1) this device may not cause harmful interference, and
(2) this device must accept any interference received, including interference that
may cause undesired operation.
The Maximum Permissible Exposure (MPE) level has been calculated based
on a distance of d=20 cm between the device and the human body. To maintain
compliance with RF exposure requirement, use product that maintain a 20cm
distance between the device and human body. Hereby, we declares that this
device is in compliance with the essential requirements and other relevant
provisions of Directive 2014/53/EN.
Notice: Observe the national local regulations in the location where the device I
s to be used. This device may be restricted for use in some or all member states
of the European Union (EU)
FCC/C E Cert ific atio n Info rmat ion
EU Environmental Provisions
E-wast e cannot be mix ed with house hold
garbag e; corres pondi ng local gov ernme nt
sector or rec yclin g station s shall be
respon sible for ci rcula r process .
- 15-
Page 3

NOTE: This equipment has been tested and found to comply with the limits for a
Class B digital device, pursuant to part 15 of the FCC Rules. These limits are
designed to provide reasonable protection against harmful interference in a
residential installation. This equipment generates uses and can radiate radio
frequency energy and, if not installed and used in accordance with the instructions,
may cause harmful interference to radio communications. However, there is no
guarantee that interference will not occur in a particular installation. If this
equipment does cause harmful interference to radio or television reception, which
can be determined by turning the equipment off and on, the user is encouraged to
try to correct the interference by one or more of the following measures:
- Reorient or relocate the receiving antenna.
- Increase the separation between the equipment and receiver.
-Connect the equipment into an outlet on a circuit different from that to which the
receiver is connected.
-Consult the dealer or an experienced radio/TV technician for help
Changes or modifications not expressly approved by the party responsible for compliance
could void the user's authority to operate the equipment.
This device complies with Part 15 of the FCC Rules. Operation is subject to the following two
conditions:
(1) this device may not cause harmful interference, and
(2) this device must accept any interference received, including interference that may
cause undesired operation.
This device is acting as slave and operating in the 2.4 GHz (2412 ~2462 MHz) band.
FCC Radio Frequency Exposure Statement
The device has been evaluated to meet general RF exposure requirements. The device can be used in
fixed exposure conditions. The min separation distance is 20cm.
 Loading...