


QTY
PARTS DESCRIPTION
24
3/8” HEX NUTS
24
3/8” x 1 “ HEX BOLTS
QTY
1
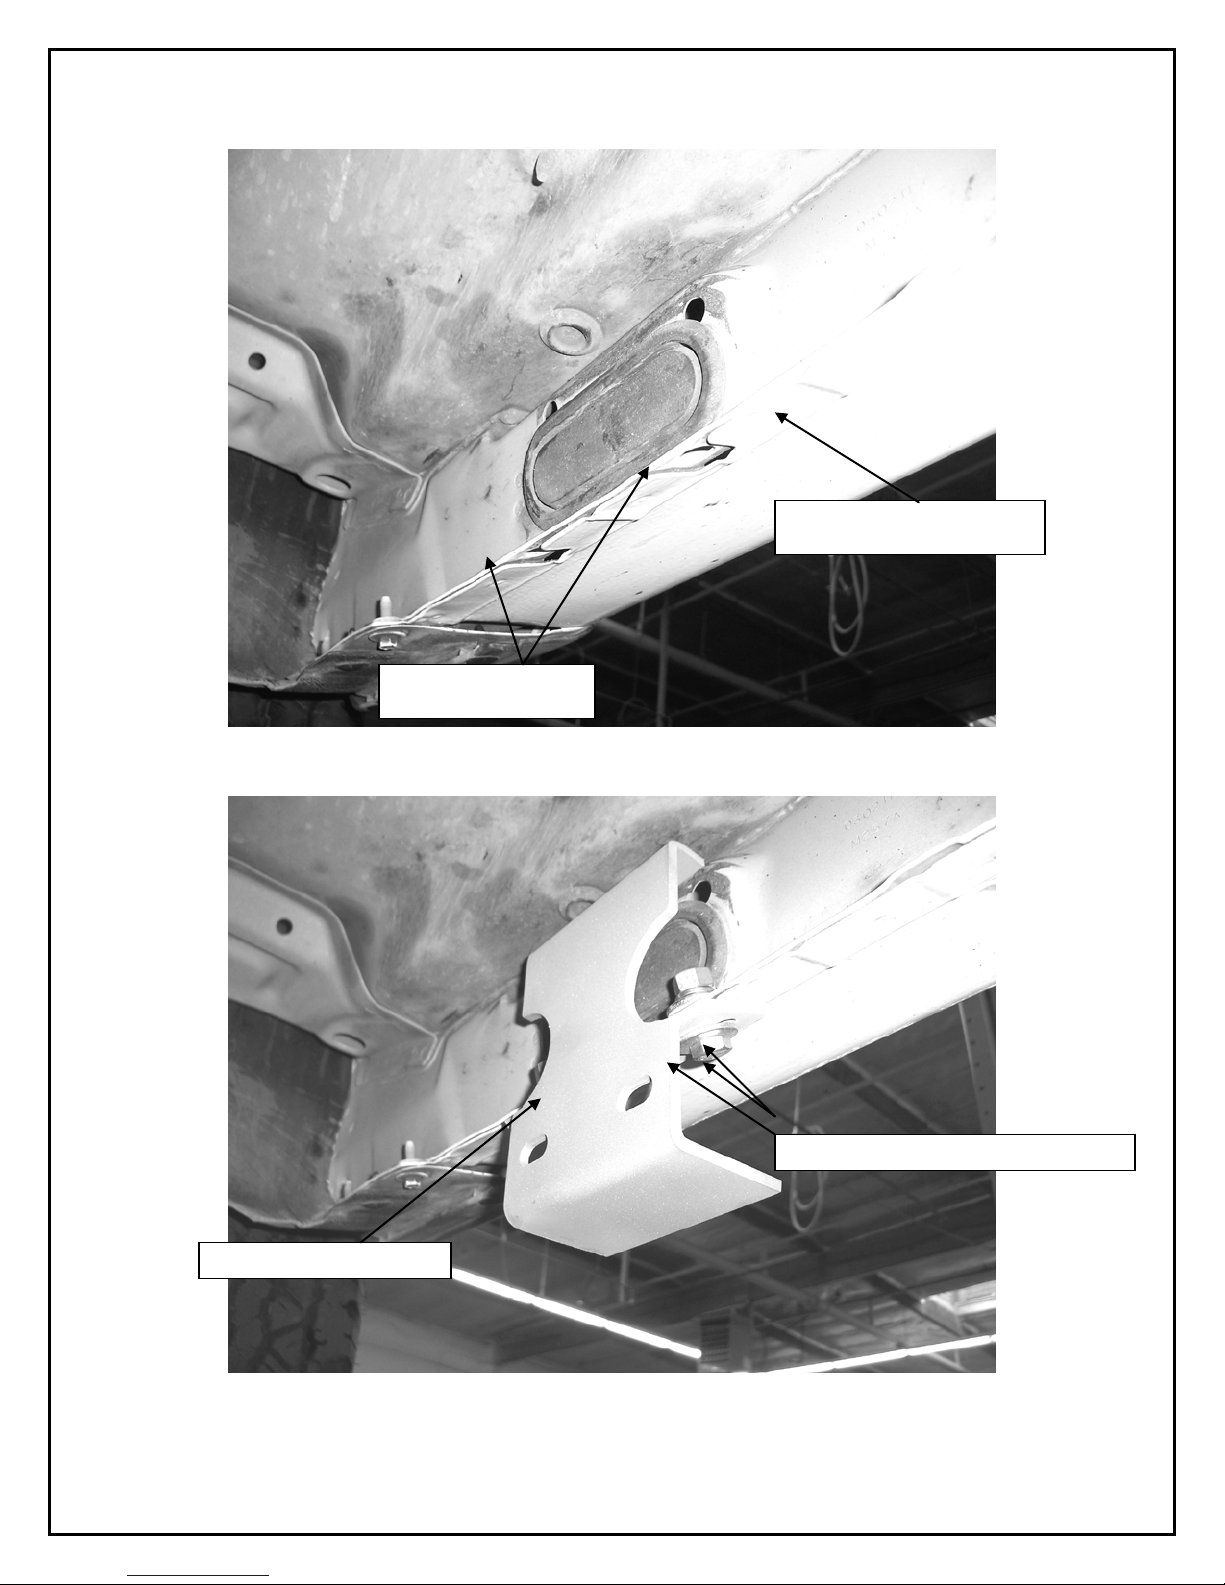
FRO NT BRAC KET MOU NTING HOLES
CENTER AND REAR BRACKET MOUNTING HOLES
DOMINATOR 2 SERIES SI DESTEPS
ASSEMBL Y & INSTALLATION INSTRUCTIONS for PART NO. D24125
97-04 FORD F-150 HERITAG E S UP ER Cab
97-98 FORD F-150 3DR SUPE R CAB P/U 2/4WD
99-03 FORD F-150, F-250 LD 4DR SUPER CAB P/U 2/ 4WD
Do not attempt to install this product on any vehicle other than the one it is designed for and listed above!
48 3/8” FLAT WASHERS
24 3/8” LOCK WASHERS
2
4
1
PARTS DESCRIPTION
F05 FRONT MOUNTING BRACKETS
F06 CENTER AND REAR MOUNTING BRACKETS
D24125P PASSENGER SIDESTEP
D24125D DRIVER SIDESTEP
INSTALLATION INSTRUCTIONS
STEP 1. Read the i nstr uc tions completely before you begin t he installation.
If the vehicle is equi pped with factory running boards, rem ov e boar ds and fasteners.
EP 2. This installation uses three mount ing brackets per side.
FO5 MOUNTING BRACKET
3/8” X 1” HEX BOLT WASHERS & NUT
PASSENGER SIDE LOWER
F05 FRONT BRACKET
ST
BODY PINCH MOLD
MOU NTI NG H OL ES
EP 3. Beginning with the passenger side, locate the holes in the lower body pinc h m old for the front mounting
ST
bracket.
EP 4. Loosel y att ac h the flange of the front mounting bracket to the bottom of the lower body pinch mold using
ST
the 3/8” x 1” hex bolts, washers, and nuts as shown.

F06 CENTER BRACKET
MOU NTI NG H OL ES
F06 MOUNTING BRACKET
3/8” X 1” HEX BOLT, WASHERS & NUT
ST
EP 5. Locate the holes in the lower body pinch m old for the center-mounting bracket.
STEP 6. Loosely attac h the flange of the mounting bracket to the bottom of t he lower body pinch mold using the
3/8” x 1” hex bolts, washers, and nuts.

F06 REAR BRACKET
MOU NTI NG H OL ES
F06 MOUNTING BRACKET
3/8” X 1” HEX BOLT WASHERS & NUT
EP 7. Locate the holes in the lower body pinch m old for the rear-mounting bracket.
ST
ST
EP 8. Loosel y att ac h the flange of the mounting bracket to the bottom of t he lower body pinch mold using the
3/8” x 1” hex bolts, washers, and nuts.
STEP 9. Posit ion the passenger sidestep up to the mounting br ac k ets and loosely attach it to the brack ets using the
3/8” x 1” hex bolts, washers and nuts as shown.

STE
MOU NTING BRACKE T
3/8” X 1” HEX BOLTS WASHERS & NUTS
PASSENGER SIDESTEP
P 10. Ali gn si destep with the body, and then tight en all m ounting bracket and sidestep nuts and bolts.
STEP 11. Repeat the above steps to install the driver side mounting brackets and sidestep.
 Loading...