

Qty
Part Description
11
5/16” x 1” Hex Bolt
11
5/16” Flat Washer
11
5/16” Lock Washer
12
3/8” x 1 ¼” Hex Bolt
13
3/8” Lock Washer
1
Vinyl Gasket
Qty
13
3/8” Hex Nut
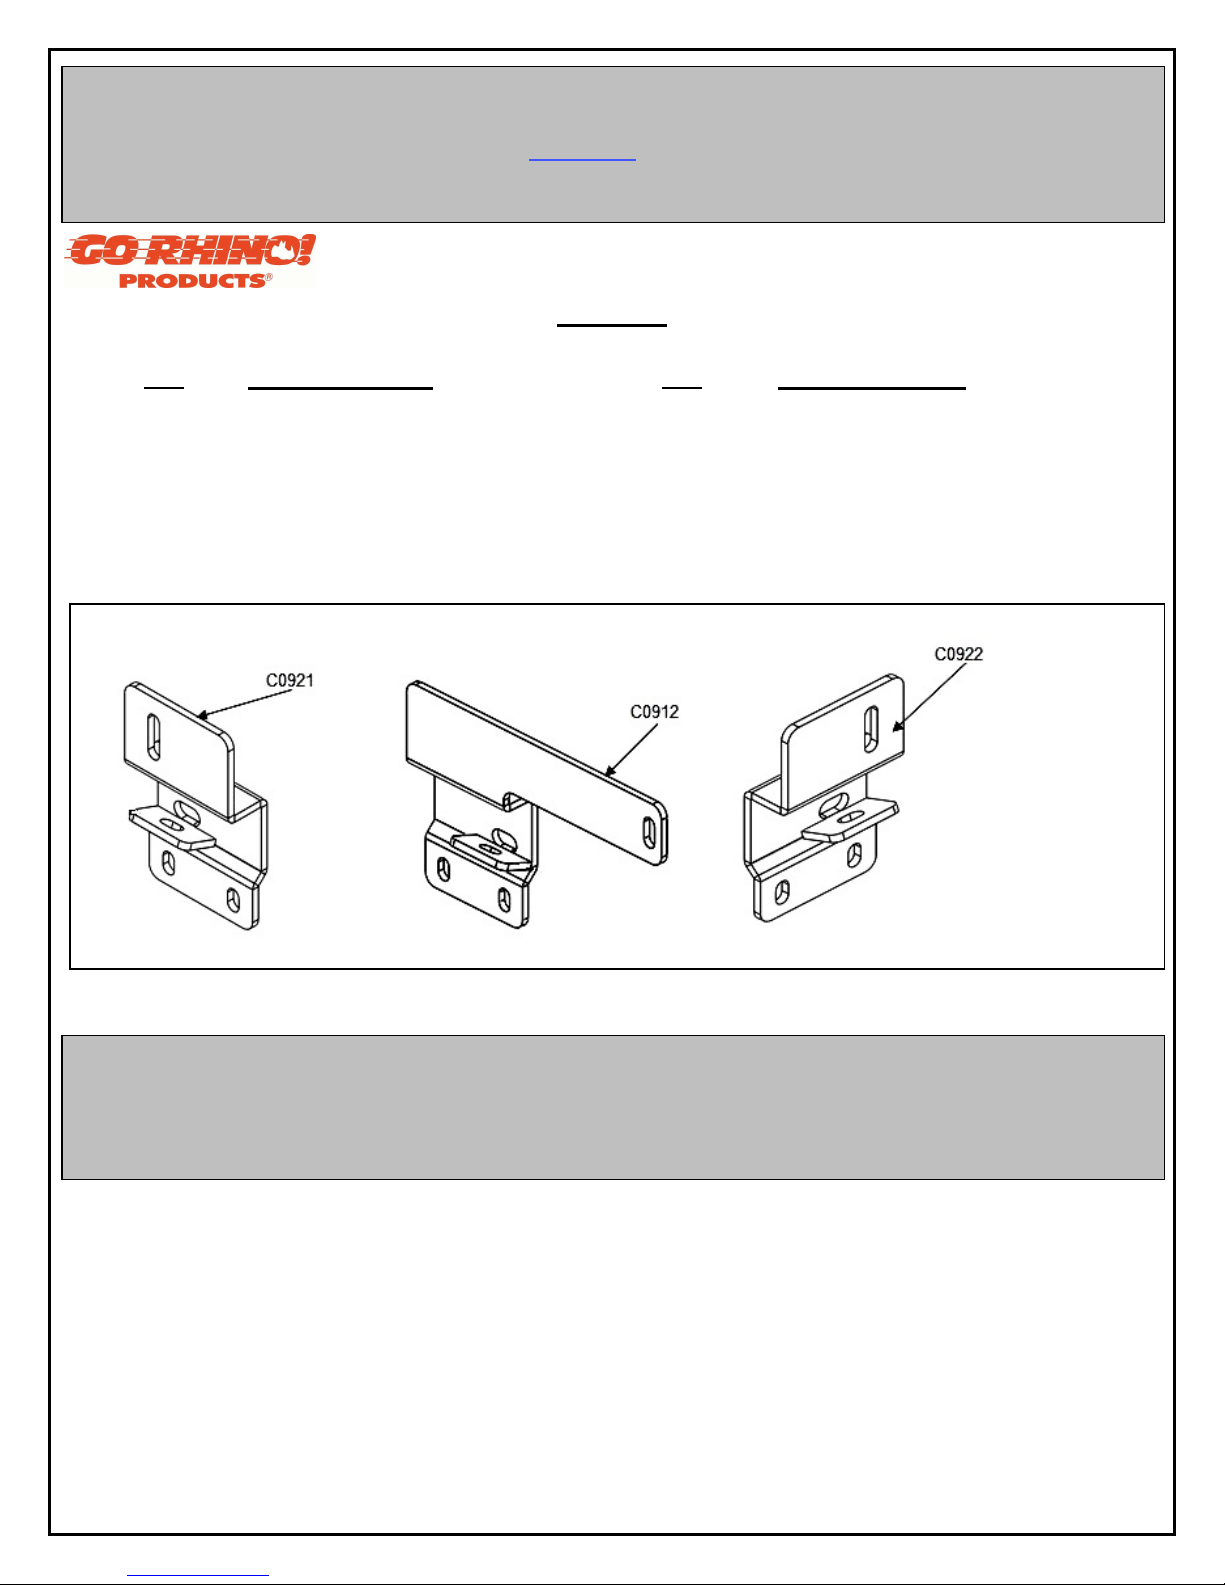
1
C0912 Passenger Front Bracket
2
C0922 Passenger Center & Rear Bracket
1
D24043P Passenger S ide Step
1
D24043D Driver Side Step
INSTALLATION INSTRUCTIONS
Ratchet & Extension Approximate installation time: 45min
DOMINATOR II Series SideSt eps Part Number D24044 (B-PS)
2015 Chevrolet Silverado / GMC Sierra 2500HD, 3500HD Double Cab (Diesel)
Do not attempt to install this product on any vehicle other than the one it is designed for and listed above!
Parts List
11 5/16” U-Nut
1 3/8” T-Bolt
25 3/8” Flat Washer
3 C0921 Driver Front , Center & Rear Bracket
D24044 P
D24044D
Tool Required:
½” & 9/16” Sockets
½” & 9/16” Wrenches

Installation
#1
#2
#5
#6
#3
#4
Step-1 This installation uses three mounting brackets per side. Begin by installing the passenger side front bracket. Measure
from the front fender bolt rearward approximately 14”, locate the hole in the body pinch mold and install (1) 5/16” U-Nut as
shown. Photo #1 & #2
Step-2 Locate in front of the urea tank the plastic plug in the body rocker panel. Remove the plug, Install the vinyl gasket
over the threads of the 3/8” T-Bolt and install T-Bolt in the rocker panel as shown. Photo #3 & #4
Step-3 From the front of the urea tank, position the front mounting bracket between the tank and the body pinch mold. Slide
the bracket rearward and align the holes in the bracket with the T-Bolt and U-Nut. Photo #5 & #6

St
#9
#10
#7
#8
ep-4 Position the hole in the front of the bracket over the T-Bolt and install (1) 3/8” flat washer, (1) 3/8” lock washer and (1)
3/8” hex nut. Align the hole in the flange of the bracket with the U-Nut and ins ta ll (1) 5/16” flat washer, (1) 5/16” lock washer
and (1) 5/16” x 1” hex bolt. Leave the nut and bolt loose for final adjustment. Photo #7 & #8
St
ep-5 Passenger side Center bracket installation. Measure from
the front fender bolt rearward approximately 49 5/8” and locate the hole in the body pinch mold and the plastic plug in the
rocker panel. Remove the plastic plug from the rocker panel and install 5/16” U-Nuts in the rocker panel and pinch mold.
Attach one of the C0922 brackets to the rocker panel and pinch mold using the (2) 5/16” x 1” hex bolts, (2) 5/16” lock
washers and (2) 5/16” flat washers. Leave the bolts loose for final adjustment. Photo #9 & #10
St
ep-6 Passenger side rear bracket installation. Measure from
the front fender bolt rearward approximately 67” and repeat step 5 to install the remaining C0922 bracket.
Step-7 Attach the passenger side step to the front bracket Photo #11 and to the center and rear bracket Photo#12 using (2)
3/8” x 1 ¼” hex bolts, (4) 3/8” flat washers, (2) 3/8” lock washers and (2) 3/8” hex nuts for each bracket.

Step-8 Align the side step with the vehicle and tighten all nuts and bolts.
#13
#14
#11
#12
Step-9 Driver side bracket installation. Measure from the
front fender bolt rearward approximately 14” and locate the hole in the body pinch mold and the plastic plug in the rocker
panel. Remove the plastic plug from the rocker panel and install 5/16” U-Nuts in the rocker panel and pinch mold. Attach one
of the C0921 brackets to the rocker panel and pinch mold using the (2) 5/16” x 1” hex bolts, (2) 5/16” lock washers and (2)
5/16” flat washers. Leave the bolts loose for final adjustment. Photo #13 & #14
Step-10 Driver side center and rear brackets. Repeat steps 5 through 7 to install the driver side center bracket, rear bracket
and side step. Align the side step with the vehicle and tighten all nuts and bolts. Remember to check and retighten all nuts
and bolts periodically.
 Loading...