

Go Rhino 55185 Installation Instructions Manual
In
r
uctions
stalla tion Inst
Brackets Part # 55185
RC2
014 Chevrolet Silverado 1500 2/4WD
2
o not attempt to install this product on any vehicle other than the one listed above!
D
Parts List
It
em Qty. Part # Description Torque
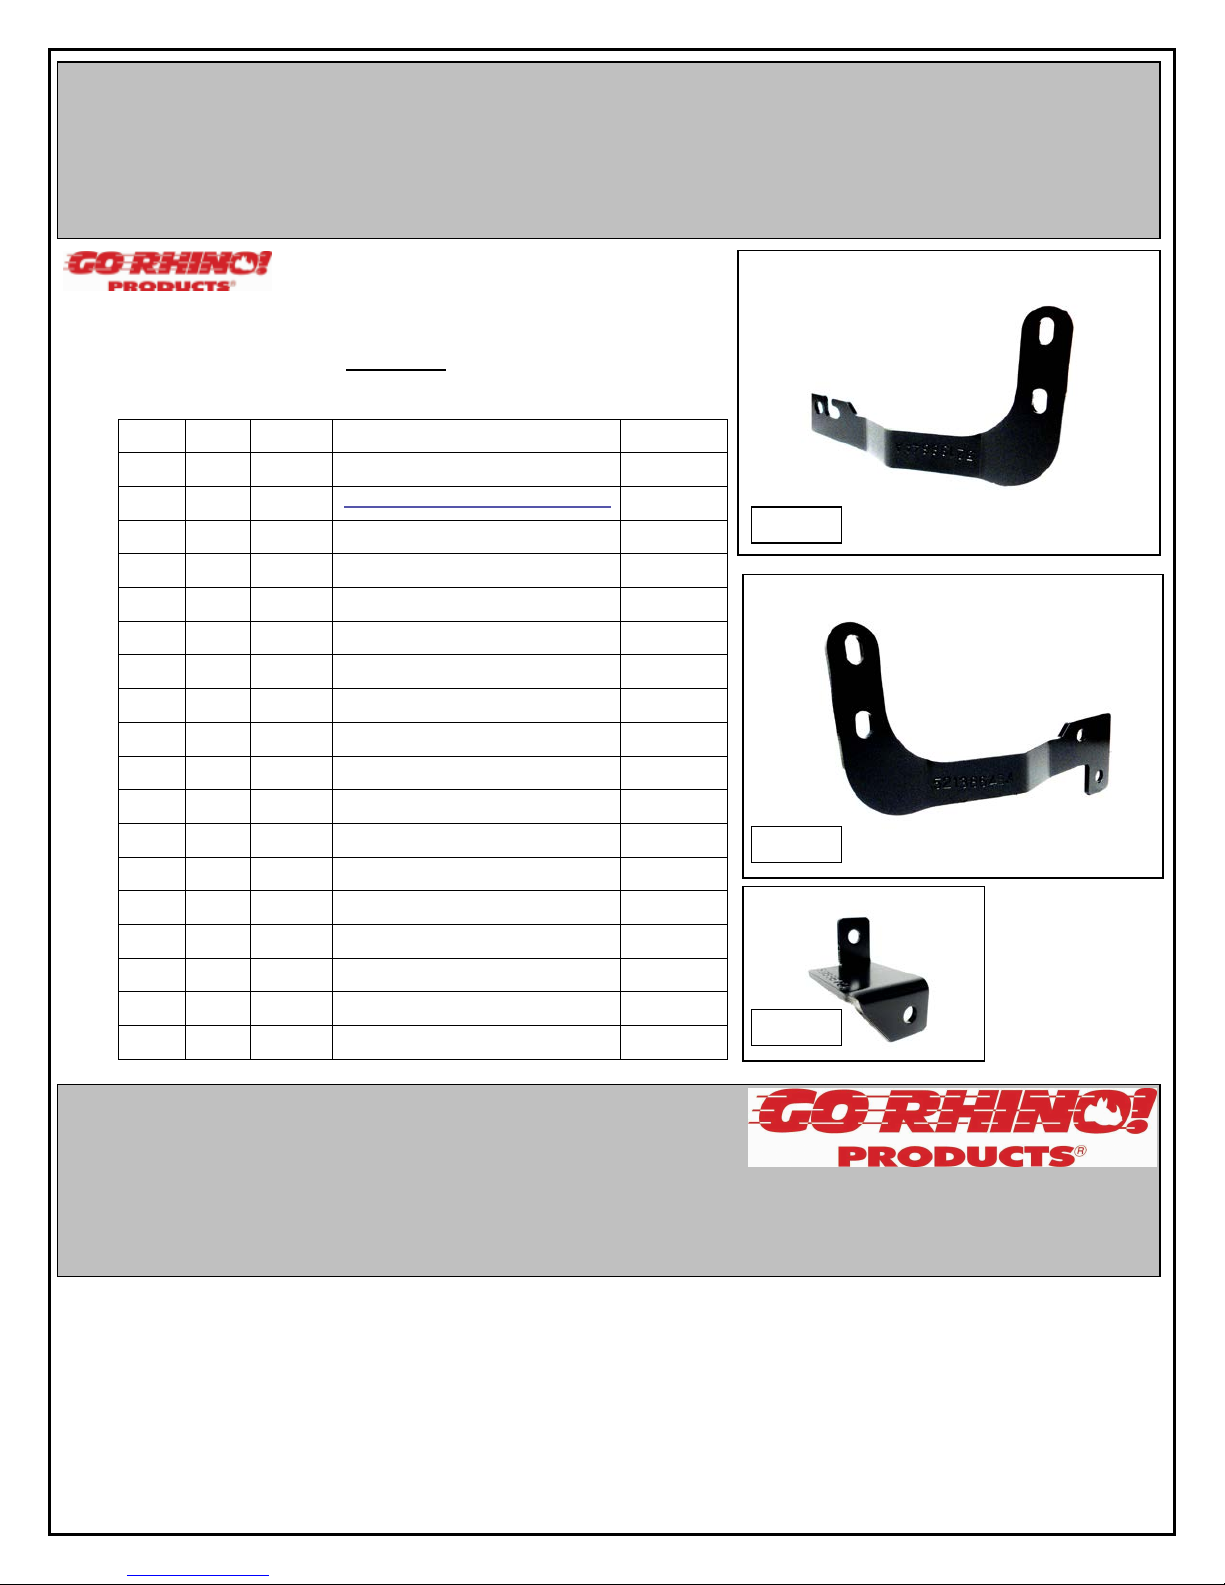
1 1 Driver Side Main Bracket
2 1 P
3 1
4 4 3/
5 4 3/
6 4 3/8” Lock Washer
7 4 3
8 4 1
9 1 1
10 5 1/
11 5 1/2” Lock Washer
12 5 1
assenger Side Main Bracket
P
assenger Side Auxiliary Bracket
8” x 1” Carriage Head Bolt 30 Ft. Lbs.
8” Flat Washer
/8” Hex Nut 30 Ft. Lbs.
/2” Rod Bolt 65 Ft. Lbs.
/2” x 1 ½” Hex Bolt 65 Ft. Lbs.
2” Flat Washer
/2” Hex Nut 65 Ft. Lbs.
#1
#2
ool Required:
T
18mm, 9/16” & 3/4” Socket
18mm, 9/16” & 3/4” Wrench
Ratchet & Ratchet Extension
N
ote: If your vehicle is not equipped with factory tow hooks, attach the main brackets and auxiliary bracket to the frame using
the supplied ½” rod bolts, ½” flat washers, ½” lock washers and ½” hex nuts.
1
#3
pproximate installation time: 45 min
A
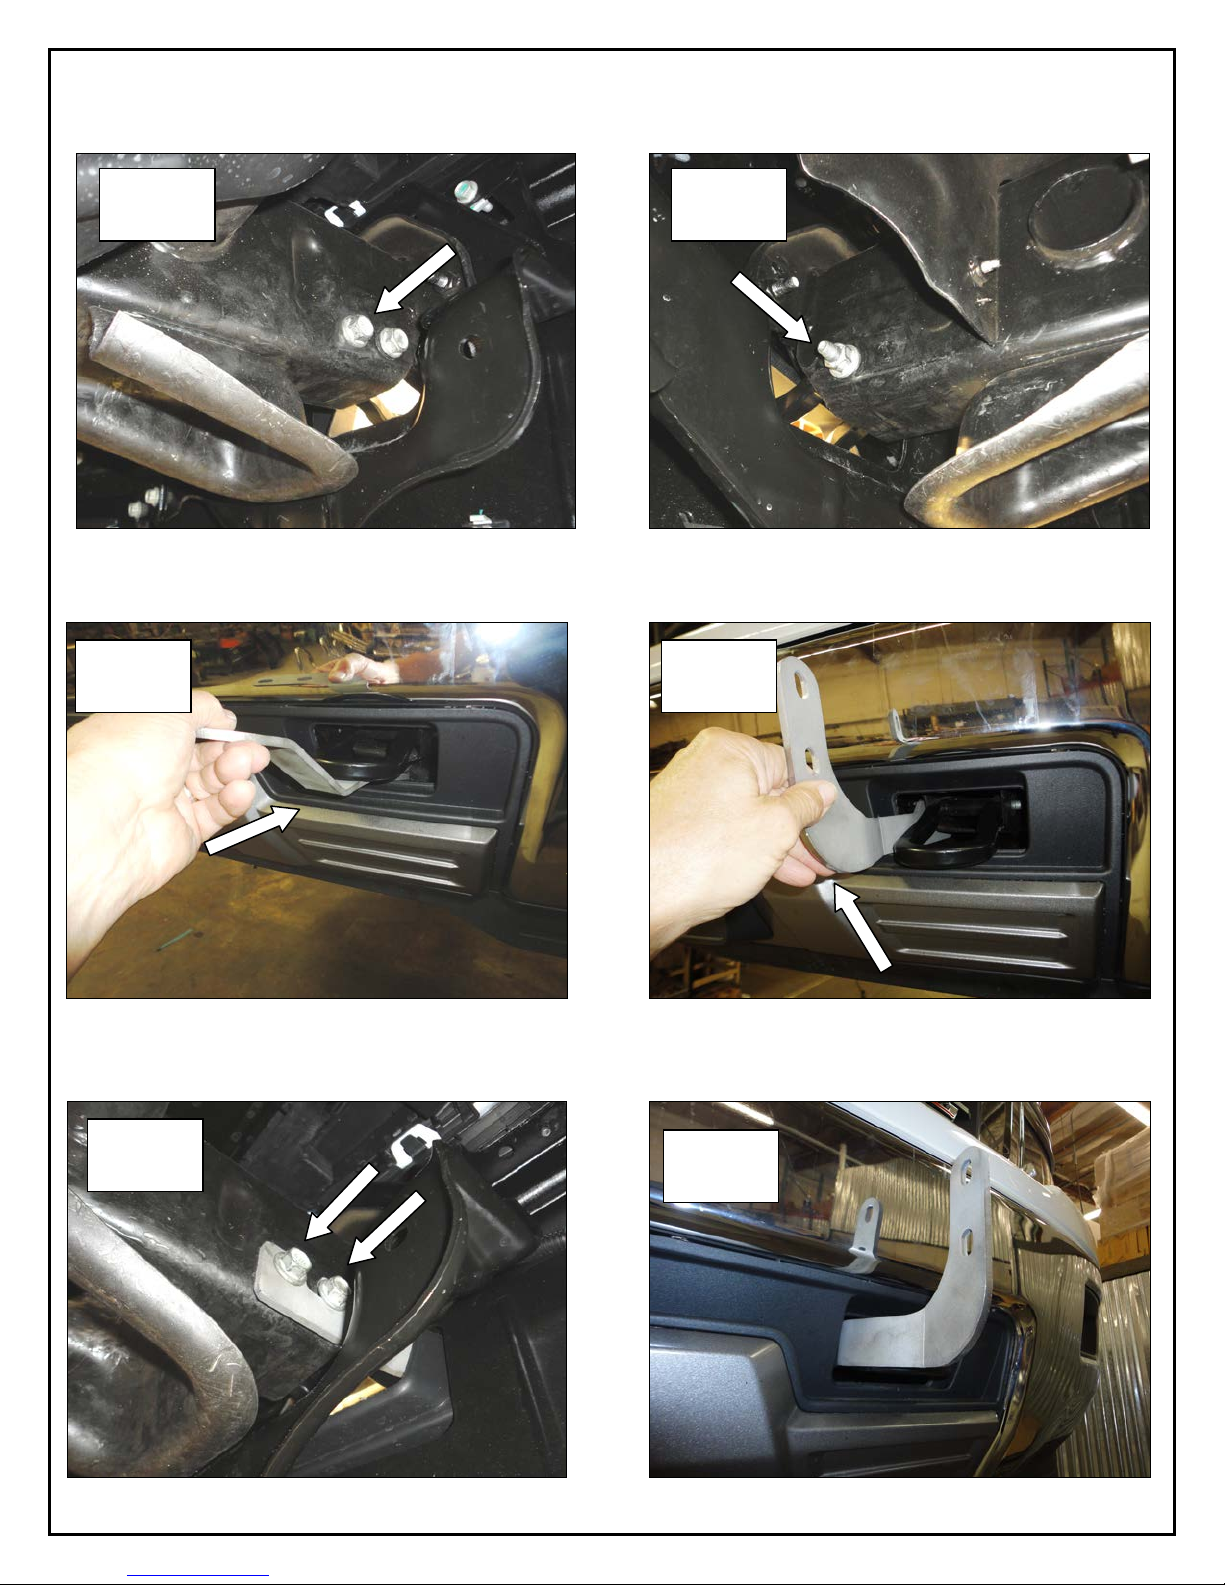
Step-1 Beginning with the driver side, remove the tow hook rear bolt, nut from the front bolt, (Photo 1 & 2) and the foam trim
panel from the tow hook opening.
#1
Driver Side
#2
Driver Side
Step-2 Shift the front tow hook bolt toward the center of the vehicle, then from the tow hook opening, slide the vehicle
attachment end of the driver side main bracket under the frame, and rotate the bracket, (Photo 3 & 4).
#3
Driver Side
#4
Driver Side
Step-3 Hook the slot in the bracket over the shank of the front tow hook bolt, reinstall the front bolt nut and rear tow hook bolt
to secure the bracket to the side of the frame, (Photo 5). Leave the nut and bolts loose for final adjustment.
#5
Driver Side
#6
Driver Side
2
 Loading...