

Go Rhino 24371T Installation Instructions Manual
1
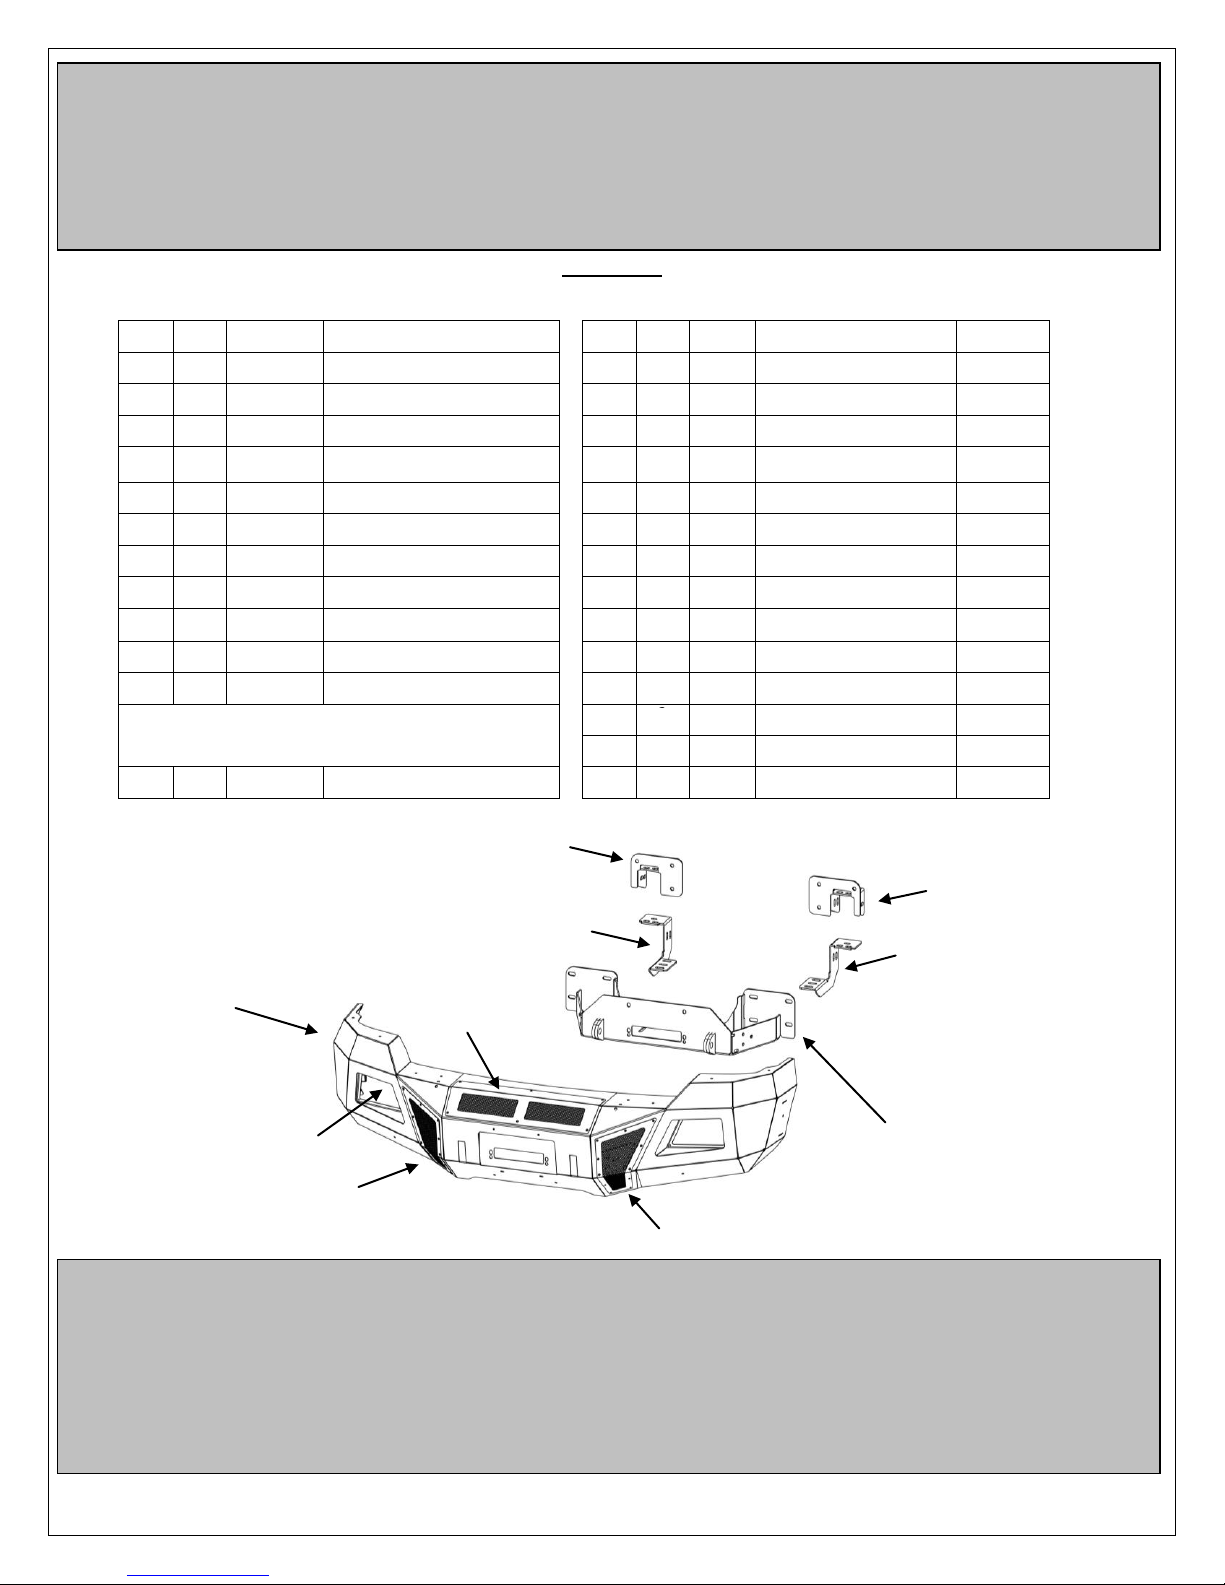
Item
Qty.
Part #
Description
Item
Qty.
Part #
Description
Torque
1 1 24371T
Bumper Replacement shell
13
20 ½” x 1 ½ ” Hex Bolt
64Ft. Lbs
2 1
Passenger Frame Bracket
14 6
½” x 1 ½” Carriage Bolt
64 Ft. Lbs
3 1
Driver Frame Bracket
15
34 ½” Flat Washer
4 2 Driver Auxiliary Bracket
16
26 ½” Lock Washer
5 1
Passenger Auxiliary Bracket
17
20 ½” Hex Nut
6 1
Driver Vent Cover
18 6
7/16” x 2 ” Hex Bolt
42 Ft. Lbs
7 1
Passenger Vent Cover
19
12 7/16” Flat Washer
8 1 Winch Cover
20 6
7/6” Lock Washer
9 2
Light Pod Plate
21 6
7/6” Hex Nut
10 1
License Plate Bracket
22
38 ¼” x ¾” Button Head Bolt
11 4
Hole Plug
23
10 ¼” Nylon Lock Nut
24 2
3/8” x 1 ¼” Hex Bolt
26 Ft. Lbs
Required for Installation (Sold Separately)
25 2
3/8” Lock Washer
26 2
3/8” Flat Washer
12 1 24273TW
Mounting Plate/Winch Tray
27 2
3/8” Hex Nut
Installation Instructions
BR10 Front Bumper Replacement Part # 24371T
2011-2015 Ford F-250, F-350 Super Duty 2/4WD
Do not attempt to install this product on any vehicle other than the one listed above!
Tool Required:
13mm, 15mm, 18mm, 7/16”, 9/16” & 3/4” Sockets
13mm, 15mm, 18mm, 7/16”, 9/16” & 3/4” Wrenches
Slotted Blade Screw Driver
5/32” Hex Key
Ratchet, Ratchet Extensions & Swivel Joint Adapter
Approximate installation time: 90 min
1 7 5
9
4 3 6
8
12
ILLUSTRATION #1
2
Parts List
6
6
6
6
2
Read the assembly and installation instructions completely and verify that all of the parts listed are accounted for. If you have
#1
#2
Driver
Side
#3
Driver
Side
#4
Driver
Side
defective, missing or damaged parts or need assistance, please contact Go Rhino Products for fast, friendly customer service
at: 1-888-427-4466 or email: warranty@gorhino.com
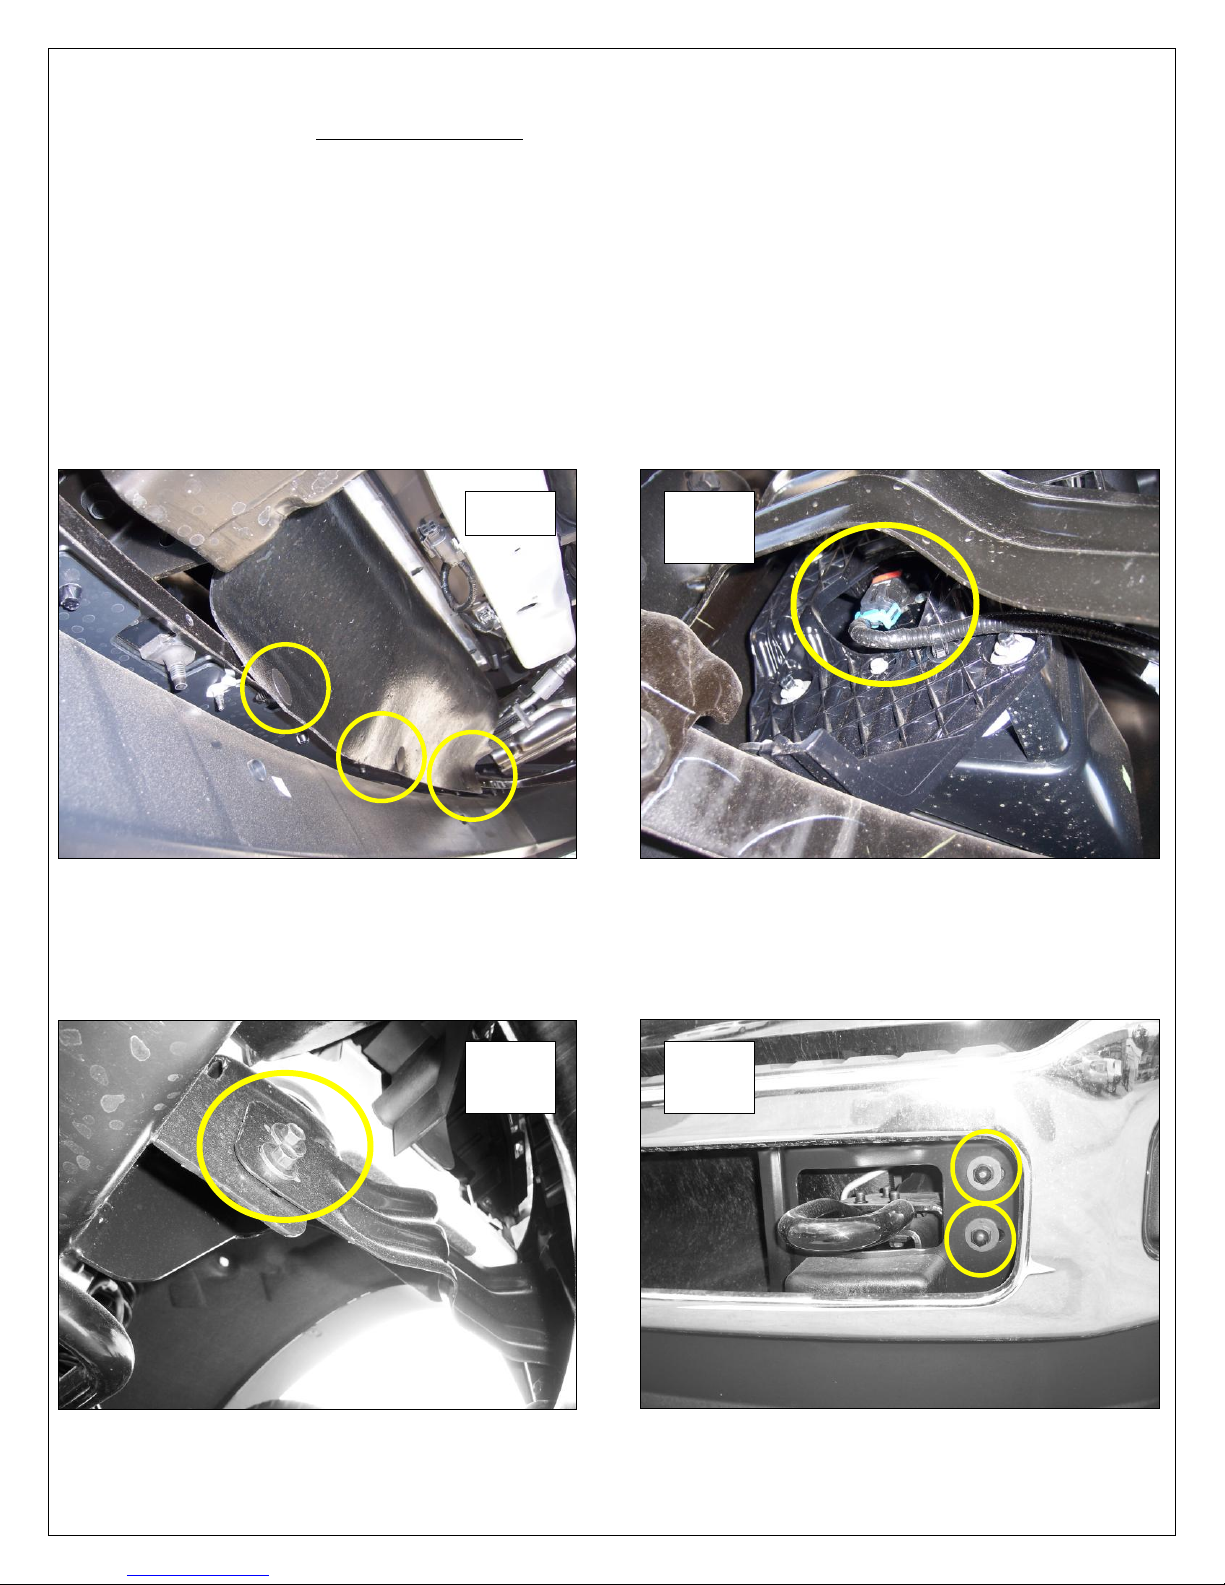
Front Bumper Removal
Step-1 Remove the plastic fasteners and rubber air deflector from the bumper and bottom of the vehicle, (Photo 1).
Note: If the vehicle has these options or equipment.
Fog Lights
Unplug the fog light wiring harness and remove the plastic fastener securing the wiring harness to the bumper, (Photo 2).
Engine Block Heater
Remove the plastic fastener securing the power cord to the bumper.
Step-2 Remove the bolts (2) per side securing the bumper support brackets to the bumper, and loosed the bolts (2) per side
securing the support bracket to the vehicle frame, (Photo 3).
Step-3 Remove the bolts (2) per side securing the front of the bumper to the bumper brackets, (Photo 4).
Remove the bumper from the vehicle and set it aside.
 Loading...