

Page 1
Page 2
efrigerator - Freezer EN
Thank you for your trust and for buying this appliance. We hope it will
successfully serve the purpose for many years.
Refrigerator with freezer is for domestic use
only.
The upper part of the appliance is
refrigerator and is used for storing fresh foods
at the temperature of 0°C and higher.
Before Putting Into Use.........................2
Instructions for Use
We Care for the Environment
A few tips on how to save power with your
refrigerator-freezer combo
Important...............................................3
Disposing of the Worn Out Appliance
Placing and Installation ........................4
Choosing the Right Place
Placing the Self-standing Appliance
Connection to Power Supply
Description of the Appliance ................5
Refrigerator (A)
Freezer (B)
Operation Control .................................7
Before Putting Into Use
Before connecting the appliance to the
mains supply, leave it stand for about 2
hours, which will reduce a possibility of
malfunctions in the cooling system due to
transport handling.
Clean the appliance, and be thorough,
especially in the interior (See Cleaning and
Maintenance).
In case the interior accessories are not
correctly placed, rearrange them as
described in chapter Description of the
Appliance.
Instructions for Use
These instructions for use are intended for the
user. They describe the appliance and its
correct and safe use. They were prepared for
various types/models of refrigerators therefore
The lower part is freezer and is used for
freezing fresh foods and storing frozen foods
for longer periods of time (up to one
year, depending on the kind of foods you store).
The compartment is marked with four stars.
Temperature Selection
Use...........................................................7
Storing Fresh Foods
Freezing Fresh Foods
Storing Frozen Foods
Ice Making
Changing the Direction of Opening the
Door......................................................10
Maintenance and Cleaning .................11
Automatic Defrosting of the Refrigerator
Manual Defrosting of the Freezer
Cleaning the Appliance
Switch Off the Appliance When Not In Use
Trouble-Shooting Guide......................12
you may find in it description of some functions
and accesories that your appliance does not
have.
We Care for the Environment
Our products use environmentally friendly
packaging, which can be either recycled or
disposed of in an environmentally friendly
manner. To this end, individual packaging
materials are clearly marked.
These instructions are printed either on
recycled paper or chlorine free bleached
paper.
When your appliance finally wears out,
please try not to burden the environment
with it; call your nearest authorised service
agent. (See Disposing of the Worn Out
Appliance).
Instructions for Use2
Page 3
A few tips on how to save power with
your refrigerator-freezer combo
Observe the installation instructions.
Do not open the appliance door more
frequently than necessary.
Occasionally check whether air can circulate
freely behind the appliance.
Condenser unit mounted on the appliance
back wall must be kept clean at all times
(see section “Cleaning the appliance”).
If the seal is damaged or loose, replace it as
soon as possible.
Store your food in closed containers or other
appropriate packaging.
Before placing the food in the refrigerator, let
it cool down to room temperature.
Important
Defrost your frozen food in the refrigerator
compartment.
Remove the freezer drawers and door as
described in the instructions, in order to
make use of the entire capacity.
Defrost your conventional freezer when a
frost layer approximately 3-5 millimetres
thick has accumulated on the surfaces in the
freezer compartment.
Make sure the shelves are evenly distributed
and that the food is arranged in a way that
allows free circulation of air (heed the
recommended food arrangement as
described in the instructions).
In appliances fitted with a fan, do not block
the fan slots.
This appliance is manufactured in
compliance with relevant safety standards.
However, it is still advisable it is not used
without due supervision by persons with
diminished physical, motoric, or mental
capabilities or persons with inadequate
experience or knowledge. The same
recommendation applies to minors using the
appliance.
If you have bought this appliance to replace
an old one equipped with a lock that cannot
be opened from inside (lock, bolt), make sure
that the lock is broken. This will make
it impossible for children to lock themselves
inside the appliance and suffocate.
The appliance must be correctly connected
to the mains supply. (see: Connecting to the
Mains Supply).
If the food has strange smell or color, throw it
away, because it is very likely that it is spoiled
and therefore dangerous to eat.
Disconnect the appliance from the power
supply before repairing it (only a qualified
technician should repair it), before cleaning
and before replacing the light bulb.
Do not defrost the appliance with other
electric appliances (as for example with hair
dryer) and never scrape the frost layer with
sharp objects. Use only enclosed tools or
tools recommended by the manufacturer.
For the sake of environment protection - be
careful not to damage the rear wall of the
appliance (the condenser unit or the tubes for example when moving the appliance) or
any part of the refrigerating system inside the
appliance.
The refrigerating sy stem of the app liance is filled
with refrigerant and oil, so when the appliance is
damaged, handle it with care and dispose it of in
compliance with environmental protecting
precautions. (See We Care for the
Environment).
In the supply cord is damaged, it must be
replaced by the manufacturer or his service
agent or a qualified person in order to avoid
hazard.
The rating plate is inside the appliance or outside
on the rear wall.
Warning! Ventilation slots on the appliance
or a built-in element must always be clean
and unobstructed.
Warning! Do not use mechanical devices or
tools to defrost the refrigerator, nor any other
methods except for those recommended by
the manufacturer.
Warning! When installing, cleaning, or
removing the appliance, make sure the
insulation on the refrigeration system parts is
not damaged. Thus you will also prevent
damage to the environment.
Warning! Do not use electric appliances in
the refrigerator or freezer interior, except for
those expressly allowed by the refrigeratorfreezer manufacturer.
Instructions for Use 3
Page 4

The symbol on the product or on its
packaging indicates that this product
may not be treated as household
waste. Instead it shall be handed over
to the applicable collection point for the
recycling of electrical and electronic
equipment. By ensuring this product is
disposed of correctly, you will help prevent
potential negative consequences for the
environment and human health, which
could otherwise be caused by inappropriate
waste handling of thisproduct. For more
detailed information about recycling of this
product, please contact your local city
office, your household waste disposal
service or the shop where you purchased
the product.
Placing and Installation
Choosing the Right Place
Place the appliance in a dry and regularly
ventilated room. Allowed ambient temperature
depends on the model (class) of the appliance
and is stated on the rating plate of the
appliance.
Never place the appliance near heat emitting
devices (e.g. cooker, radiator, water heater or
similar devices) and do not expose it to direct
sunlight. The appliance should be positioned at
least 3 cm away from the electric or gas cooker
and at least 30 cm away from the oil or coal
stove. If this is not possible, use an appropriate
insulation. Behind the appliance there should
be free space at least 200 cm
the appliance the high kitchen units should be
at least 5 cm away from the appliance in order
to assure adequate ventilation of the
condenser unit.
2
wide and above
Disposing of the Worn Out Appliance
When your appliance finally wears out,
dispose it of. If the appliance has a lock,
break it, in order to prevent eventual
accidents (danger of children get locked
inside the appliance).
The refrigerating system of the appliance is
filled with refrigerant and insulating
substances which should be separately
treated and processed. Call your nearest
authorised service agent or specialised
servicing centre. If you don't find one, contact
your local authorities or your distributor. Be
careful not to damage the tubes on the rear
wall of the appliance (danger of pollution).
Two spacers attached to the appliance must
be fitted onto the upper edge of the
condenser, thus preventing the appliance
from being installed too close to the wall.
Spacers are manufactured for all-purpose
function depending on the distance of the
condenser from the wall. Therefore turn
spacers correspondingly and fix them to the
appliance.
Class Ambient temperature
SN (sub-normal) from + 10°C to + 32°C
N (normal) from + 16°C to + 32°C
ST (sub-tropical) from + 16°C to + 38°C
T (tropical) from + 16°C to + 43°C
Placing the Self-standing Appliance
Place the appliance firmly on a solid base.
Some appliances have adjustable feed on
the front side; use them to level the
appliance.
Instructions for Use4
The appliance may stand freely or it can be
placed next to a kitchen furniture element or
a wall. Mind the space required to open the
door and pull out the drawers and shelves
(see installation diagram).
Page 5

35 mm
o
90
Connection to Power Supply
Connect the appliance with the cable and plug
to the power supply socket outlet with a ground
terminal (safety socket). Required nominal
voltage and frequency are indicated on the
rating plate.
The connection to the mains supply and
earthing have to be made according to current
standards and regulations. The appliance
resists temporary voltage tolerance up to -6 to
+6 %.
Description of the Appliance
Refrigerator (A)
Refrigerator is used for storing fresh foods for
few days.
Shelf (1)
(the number of shelves depends on model)
Shelf can be optionally placed on the guides
inside the appliance. It is protected against
Instructions for Use 5
pulling out. If you want to remove it, slightly lift
up the back part and pull it out.
Quickly perishable food should be stored on
the back i.e. the coldest part of the shelves.
Bottle rack
(only some models have it)
Bottle rack (number depends on model) is
intended for storing the bottles. There are two
Page 6
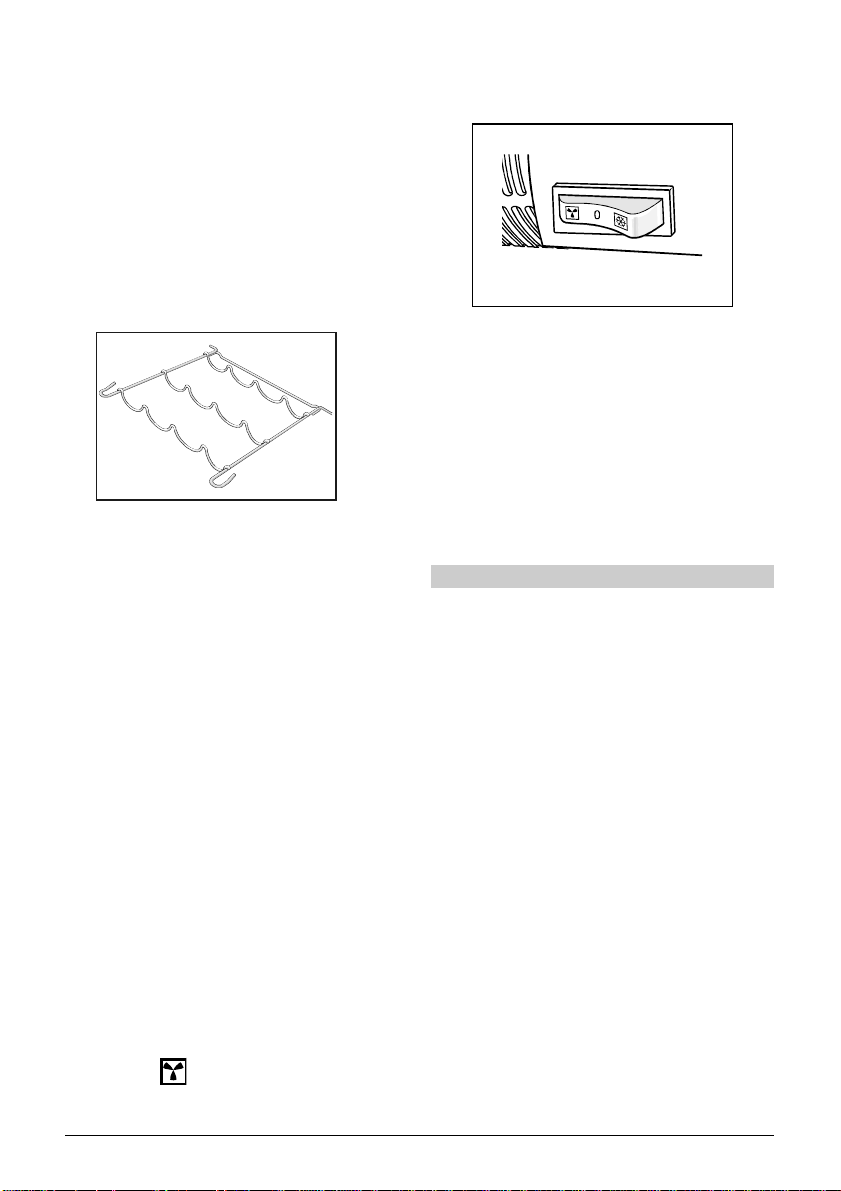
installation positions available (horisontal or
lifted in the font) thus enabling the positioning
of bottles on the stopper as well.
It is protected against the extraction. If you
want to extract it, lift its rear part and pull
towards yourself.
Warning!
When storing longer bottles, install the rack on
higher position not disturbing the closing of the
door inner liner (vessels, bottles or food stored
in the door), however its positioning on guides
in the appliance is optional.
Defrost Water Outlet (2)
The interior of the refrigerator is cooled with
cooling plate incorporated in the rear wall.
Under the plate there is a channel and an
outlet for defrost water.
Regularly check the defrost water outlet and
the channel, because they should never be
clogged (as for example with food rests). If
clogged, use a plastic straw and clean it.
Fruit and Vegetable Container (3)
The container is on the bottom of the appliance
under the glass shelf. It provides adequate
humidity which has favourable effect on fruit
and vegetables stored in it (less dehydration).
The fan
(certain models only)
The fan distributes evenly the inside
temperature and reduces dew on storage
shelf surfaces.
When the refrigerator door is opened, the
fan stops operating.
It is recommended to switch the fan on:
when the ambient temperature in the
room is increased (above 30°C),
in case of increased humidity (during
summer season).
Switching the fan on/off
ON =
OFF =
0
Note: Energy consumption is increased during
fan operation.
Door Liner
The door liner consists of various shelves or
holders used for storing eggs, cheese, butter
and yogurt as well as other smaller packages,
tubes, cans etc.
The lowr shelf is used for storing bottles.
Illumination in the Interior of the
Refrigerator
The light for illuminating the interior of the
appliance is on, when the door is opened. The
operation of the light does not depend on the
position of the thermostat knob.
Freezer (B)
Freezer is used for freezing fresh foods and for
storing already frozen foods.
Freezing Compartment (4)
is used for freezing fresh foods.
Storing Basket (5)
is used for storing packages of frozen foods.
Defrost Water Outlet (6)
(See Cleaning and Maintenance).
Cold accumulators (7)
(some models only)
In the upper part of the freezing compartment
there are two cold accumulators.
Before switching on the freezer for the first
time, remove the accumulators and insert them
again after the red light is off.
Both accumulators maintain uniform
temperature of frozen foods therefore
assuring higher quality of foods and reducing
energy consumption.
If you remove the accumulators, the
compartment can be used for freezing fruits
(for example berries) or for ice making.
These accumulators can as well be used for
maintaining lower temperatures of foods and
bottles, for example when you make a trip or
a picnic.
Instructions for Use6
Page 7
Bottle stopper (8)
(in some models only)
The bottle stopper (number depends on the
model) prevents the bottles from moving in the
door rack.
Operation Control
NOTE:
The appliance can be equipped with various
accesories, depending on the model of the
appliance.
Door handles have various shapes,
depending on the model.
Various accesories (spice container, tube
holder or additional shelves) can be bought
in authorized centres.
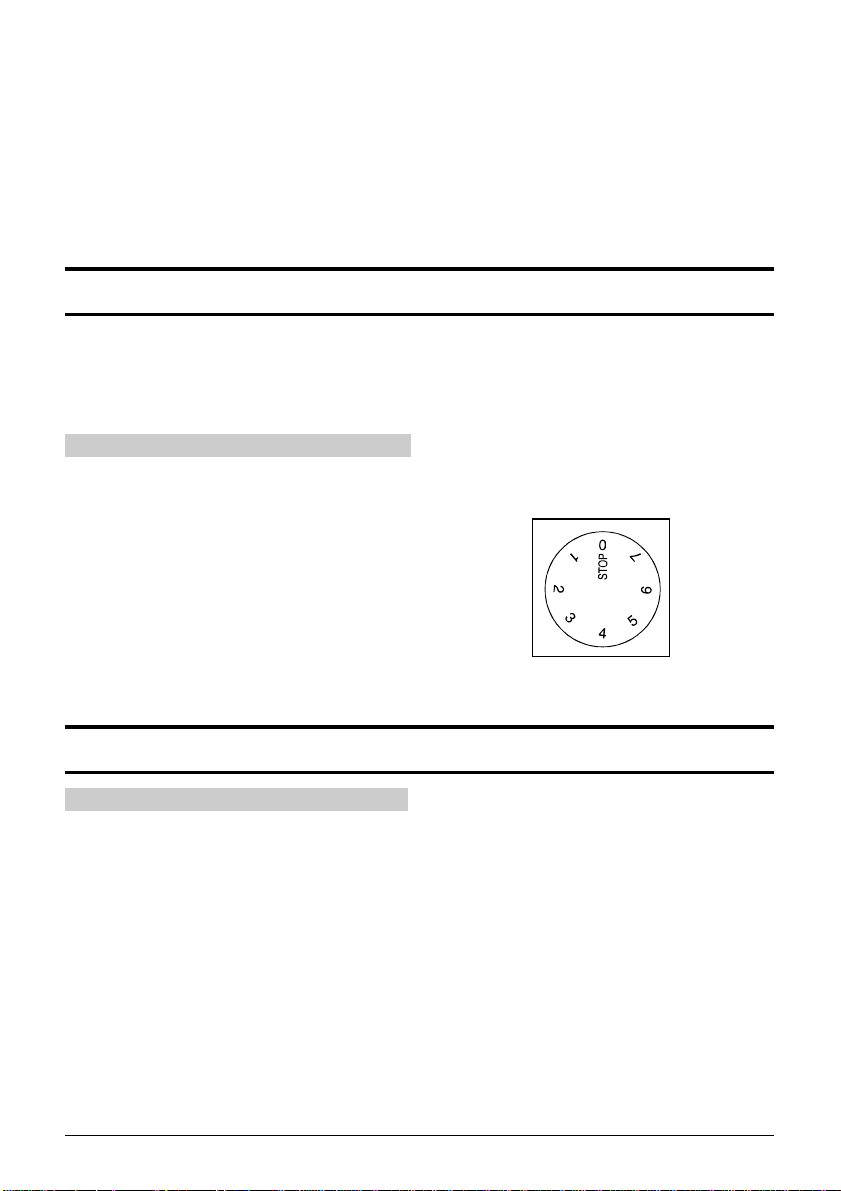
The appliance is controlled with thermostat
knob, situated in the right upper part inside the
appliance.
Turn the knob from STOP (0) position towards
7 and backwards.
Temperature Selection
Higher settings on the knob (towards 7)
mean lower temperatures (colder) in all
compartments of the appliance. Temperature
in the interior of the appliance may even drop
below 0°C. Higher settings should be used
only in case lower temperature is
recommended or required.
When the ambient temperature is normal, we
recommend medium setting.
Changes of the ambient temprature affect
temperature in the interior of the appliance
(choose correct setting of the thermostat
knob).
Use
Storing Fresh Foods
Proper use of the appliance, adequately
packed food, correct temperature and taking
into account hygienic precautions will
substantially influence the quality of the food
stored.
Foods to be stored in the refrigerator should
be properly packed as to prevent mixing
various moisture degrees and odors (in
polyethylene bags or sheet, aluminium foil,
wax paper, or stored in covered containers
or bottles).
Before storing food in the refrigerator,
remove the excessive packaging (like
yoghurt in multi-package).
Pack systematically and make sure that
foodstuffs do not touch each other (various
In STOP (0) position the appliance does not
operate (the cooling system is switched off),
yet power supply is not interrupted (the light
is on, when you open the refrigerator door).
Temperature in the refrigerator also depends
on how often the door is opened.
When the fan is on (only for models with
built-in fan), we recommend new setting of
temperature in the appliance.
odours may mix). Assure adequate air
circulation around packages.
Never store inflammable, volatile or
explosive substances.
Beverages with high alcohol percentage
shall be stored in tightly sealed bottles in
vertical position.
Food should not touch the rear wall of the
refrigerator!
Foods should be cooled down before storing.
Crispy and delicate foods should be stored
in the coldest parts of the refrigerator.
Try not to open the door too often.
Set the thermostat to the setting where lower
temperatures are reached. Set the
thermostat gradually as to avoid freezing of
the foods.
Instructions for Use 7
Page 8

Use a thermometer and measure the
temperature in the individual compartments.
Place the thermostat in a glass vessel filled
with water. Temperature readings are most
reliable few hour after steady state is
reached.
Some organic solutions like volatile oils in
lemon and orange peel, acid in butter etc.
can cause damages when in contact with
plastic surfaces or gaskets for longer period
that your refrigerator needs cleaning.
Unpleasant odor can be eliminated or
reduced by washing the interior of the
refrigerator with a mild solution of water and
vinegar. We also recommend using
activated carbon filters to clean the air or to
neutralize odors.
If you plan a longer journey, make sure to
remove quickly perishable articles of food
out of the appliance before you leave.
of time.
Unpleasant odor inside the refrigerator is a
sign that something is wrong with foods or
Fresh Food Storage Time in the Refrigerator
Article of food Storage time (days)
Butter + + + + + + + = = = = =
Eggs + + + + + + + + + + = = = =
Meat: fresh uncut + + =
chopped + =
smoked + + + + + + + + + + = = = =
Fish + =
Marinade + + + + + + + + + + = = = =
Root + + + + + + + + = = = = = =
Cheese + + + + = = = = = = = = = =
Sweets + + = = = =
Fruit + + = = = = = = = =
Prepared dishes + + = =
Legend: + reccomended storage time = possible storage time
Freezing Fresh Foods
Carefully select food you intend to freeze;
it should be of adequate quality and
suitable for freezing.
Use correct packaging and wrap it right.
The packaging should be air tight and
shouldn't leak since this could cause
substantial vitamin loss and dehydration
of foods.
Foils and bags should be soft enough to
tightly wrap around the foods.
Mark packages with following data: kind
and amount of foods and the date of
loading.
It is most important that the food is frozen
as quickly as possible. Therefore we
recommend the size of the package not
to be too large and to be cooled before
loading into the freezer.
The amount of fresh foods that can be
loaded in the freezer within 24 hours is
indicated on the rating plate (freezing
capacity). If the loaded amount is too large,
the quality of freezing is reduced which
affects the quality of frozen foods.
1 2 3 4 5 6 7 8 9 10 11 12 13 14
Freezing Procedure
If you have a model without the
integrated switch for intensive cooling,
turn the thermostat knob to position 4-6
some 24 hours before loading. After 24
hours load the freezer shelf with fresh
food packages. Some 24 hours after
loading, turn the thermostat knob to
operating position if necessary (see
"Temperature selection"), and then reload
the frozen packages into the storage
baskets.
If you have a model with integrated
switch for intensive cooling, switch it
on some 24 hours before loading the
appliance with larger amounts of fresh
foods and turn the thermostat knob to
position 4-6. After 24 hours load the
appliance with fresh food packages. After
loading, wait for another 24 hours and
switch off the switch and turn the
thermostat knob to required position (see
"Temperature selection").
The switch is ON when the marking
(I)or colour marking is visible, and OFF
Instructions for Use8
Page 9

when the marking (0) is visible or colour
marking is not visible (depending on model).
The next time you want to freeze fresh
foods, repeat the freezing procedure and
be careful that packages with fresh foods
do not touch frozen packages.
For freezing smaller amount of foods (up
to 1 kg) there is no need to change the
thermostat setting (see Temperature
Selection).
Storing Frozen Foods
Packages of frozen foods are stored in the
basket. If you remove the baskets, you can
store frozen packages directly on the
cooling shelves.
To allow the required circulation of cool
air, do not place any food above the
indicated line – see image below (only
with some models).
Commercially Frozen Foods
The storage time and the recommended
temperature for storing commercially frozen
foods are indicated on the packaging. For
storing and using consider the
manufacturer's instruction.
When shopping, be careful and choose only
adequately packed foods provided with
complete data and stored in freezers where
the temperature is not higher than -18°C.
Do not buy packages of food covered with
frost layer. This indicates that the package
was thawed before at least once.
Be careful that packages don't start to thaw,
as the temperature raise reduces the quality
of foods.
Approximate Storage Time forFrozen Foods
Food Storage time (in months)
Vegetable + + +
Fruit +++
Bread, pastries +
Milk +
Ready-made meals +
Meat: Beef +++
Veal + + +
Pork + + +
Poultry + + +
Game + + +
Minced meat +
Smoked sausages +
Fish: lean +
fat +
Offal +
Defrosting Frozen Food
Partially thawed or defrosted foods should
be used as soon as possible. Cold air
preserves the food but it does not destroy
1 2 3 4 5 6 7 8 9 10 11 12
microorganisms which rapidly activate after
defrosting and make foods perishable.
Partial defrosting reduces the nutritional
value of foods, especially of fruits,
vegetables and ready-made meals.
Instructions for Use 9
Page 10
Ice Making
(certain models only)
Recommended thermostat position for ice
making is on the middle setting. Fill two
thirds of the ice tray with cold water or any
other liquid convenient for freezing. Insert
the ice tray into the guides or on the cooling
plate. Time required for the ice to form,
largely depends on ambient temperature,
thermostat setting and on how often you
open the door. It usually takes 2-6 hours
(depends on which model of refrigerator you
have). With smaller refrigerators we
recommend you make a stock of ice cubes
(store them in a separate plastic box). The
easiest way to empty the ice tray is to turn
the tray around, pour it with cold water and
slightly twist it (bend it).
Changing the Direction of Opening the Door
If you find the direction of opening the door on
your appliance inconvenient, you can change
it. Holes on the opposite side have already
been prepared in the factory.
Unscrew the kick-plate and remove it by
pushing downwards.
Unscrew the lower hinge and take off the
lower door together with the middle hinge
washer.
Unscrew the middle hinge and take off the
upper door together with the upper hinge
washer. Remove the fastener on the
opposite side of the appliance (on the place
where the middle hinge is fixed).
Unscrew the upper hinge fastener and fix it
on the opposite side of the appliance.
Take off, change and replace the door hinge
fixture and the fixture plugs.
Put the upper hinge washer and the upper
door on the upper hinge fastener.
Rotate the middle hinge for 180° and fix it on
the opposite side of the appliance. Put the
middle hinge washer and the lower door on
the hinge from the lower side.
Put the lower hinge on the lower door and fix
it.
Replace the cover plate of the lower hinge to
the opposite side of the kick-plate and place
it to the appliance.
In case your appliance is equipped with a
handle mounted on the side of the
appliance, take it off and replace it on the
other side. (If there is more than one handle,
replace them all, following the same
procedure.)
Some screws are covered with caps. Take
them off before undoing the screws.
Use the decorative caps and plug the
remaining middle hinge holes as well as the
remaining holes of the side handles (if you
have a model with side handles).
Check the gasket, it shouldn't be creased
and it should seal well. Should the seal not
adhere to the casing of the appliance
perfectly, it will have to be heated from a
suitable distance (by means of hair drier, for
example) and lightly stretched to the
required height.
Instructions for Use10
Page 11

1 Upper hinge fastener
2 Upper hinge washer
3 Middle hinge
4 Middle hinge washer
5 Lower hinge
Maintenance and Cleaning
6 Base plate
7 Cover plate of the lower hinge
8 Fixture plug of the door hinge
9 Door hinge fixture
Automatic Defrosting of the
Refrigerator
There is no need to defrost the refrigerator,
because ice depositing on the inner back wall
is defrosted automatically.
Ice is depositing on the inner back wall during
the compressor operation; later on, when the
compressor is not operating ice is defrosting
and water drops collect and drain through the
outlet in the inner back wall into the drain pan
situated above the compressor, from where it
evaporates.
Instructions for Use 11
Manual Defrosting of the Freezer
When the frost and ice layer in the freezer is
3-5 mm thick, you should clean the freezer.
Few hours before defrosting set the
thermostat to position 7, so that packages
are well frozen. Reset the thermostat to
STOP (0) position and disconnect the power
supply. Empty the freezer and take care that
the packages remain frozen.
Insert the enclosed pipe into the groove in
the bottom of the appliance and place a
vessel underneath to collect the defrost
water. Defrosting is accelerated if the door is
left open.
Avoid using defrosting sprays, as they may
cause damage to the plastic parts and may
be hazardous to health.
Page 12
Cleaning the Appliance
Disconnect the power supply before
cleaning the appliance.
Do not use coarse or aggressive cleaning
agents as you can damage the surface. Be
careful to remove any cleanser agent
remaining after cleaning.
Clean the exterior with water and detergent.
Varnished surfaces are cleaned with soft
cloth and an alcohol based cleaning agent
(for example glass cleaners). You may also
use alcohol (ethanol or isoprophylic alcohol).
The application of abrasive and specially
aggressive cleaners, such as the stainless
steel cleaners, is not appropriate for the
cleaning of plastic and coated parts.
Remove the detachable accesories in the
interior of the appliance and clean it with
water and liquid detergent. Plastic parts
cannot be washed in washing machine.
Wash the interior of the appliance with
lukewarm water, in which you added one or
two spoonfuls of vinegar.
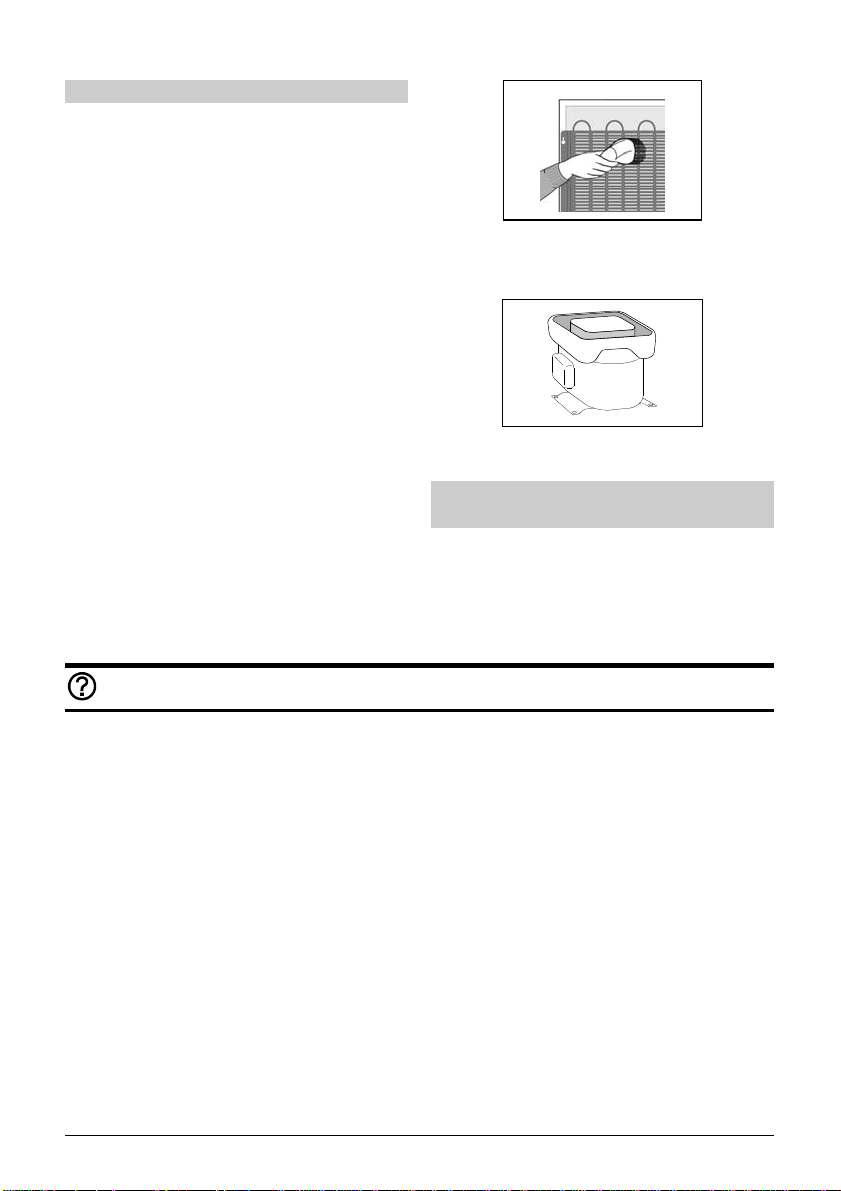
Every now and then wipe the condenser on
the rear wall. Use soft non-metal brush or
vacuum cleaner.
Do not forget to clean also the defrost water
receptacle above the refrigerator
compressor (do not remove the receptacle).
After cleaning, connect the appliance to power
supply and reload it.
Switch Off the Appliance When Not In
Use
If you do not intend to use the appliance for a
longer period, set the thermostat knob to the
STOP (0) position, disconnect the power
supply, take out the foods and defrost and
clean the appliance. Leave the door slightly
open.
Trouble-Shooting Guide
During the service, you can come across some
troubles that in most cases result from
improper handling of the appliance and can
easy be eliminated.
The Appliance Fails to Operate After
Connecting to the Mains Supply
Check the supply in the outlet socket and
make sure the appliance is switched on
(thermostat knob in operating position).
Continuous Operation of the Cooling
System
The door was frequently opened or it was left
opened for too long.
The door is not properly closed (the door
may sag, the gasket may be polluted or
damaged).
Perhaps you have overloaded the appliance
with fresh foods.
Instructions for Use12
The reason may be inadequate ventilation of
the compressor and condenser (assure
adequate air circulation and wipe off the
condenser).
Ice Formation on the Inner Rear Wall
As long as the defrost water runs to the
channel and through the outlet to the drain pan
on the compressor, automatic defrosting of the
appliance is assured.
In case the ice formation on the inner back wall
is increased (3-5 mm), ice should be manually
defrosted.
Set the thermostat knob to STOP (0) position
and leave the door open. Never use electric
devices for defrosting and do not scrape the
ice or frost layer with sharp objects.
After completed defrosting, turn the knob to
desired position and close the refrigerator door.
The cause of increased ice formation may be
one of the following:
Page 13

the door does not seal well (clean the
gasket if it is contaminated, or replace it
if it is damaged);
the door was frequently opened or it
was left opened for too long;
the food stored in the refrigerator was
warm;
the food or dish is touching the inner
back wall.
Water is Leaking From the Refrigerator
In case the discharge water outlet is clogged,
or the defrost water drips over the channel,
water leaks from the refrigerator.
Clean the clogged outlet, for example with a
plastic straw.
Manually defrost the increased ice layer.
See Ice Formation on the Inner Rear Wall.
The Freezer Door is Hard to Open
If you want to open the door that has just or
recently been closed, you may find it hard to
open. The reason why this happens is, that
when you open the door, warm air gets into the
appliance and when it is getting cool, the
underpressure seals the door. After few
minutes (5-10), the door can easily be opened.
Noise
Cooling in refrigerating-freezing appliances is
enabled by the cooling system with
compressor, which produces noise. How noisy
the appliance is depends on where it is placed,
how it is used and how old the appliance is.
During the operation of the compressor the
noise of liquid is heard and when the
compressor is not operating, the refrigerant
flow is heard. This is a normal condition and
it has no influence whatsoever on the
lifetime of the appliance.
After starting the appliance, the operation
of the compressor and the refrigerant flow
may be louder, which does not mean that
something is wrong with the appliance and it
has no influence on the lifetime of the
appliance. Gradually the noise is reduced.
Sometimes unusual and stronger noise is
heard, which is rather unusual for the
appliance. This noise is often a
consequence of inadequate placing.
The appliance shall be placed and
levelled firmly on solid base.
It should not touch the wall or kitchen
units standing next to it.
Check the accesories in the interior of
the appliance, they should be placed
correctly in their positions; also check
the bottles, tins and other vessels that
might touch each other and rattle.
Bulb Replacement
Before replacing the light bulb, disconnect the
appliance form the power supply.
Press the cover at the rear side (in the arrow 1
direction) and remove the plastic cover (in the
arrow 2 direction). Replace the bulb with a new
one (E14, max. 15 W).
Don't forget: the old bulb does not belong to
organic waste.
Light bulb is consuming good therefore our
in-guarantee service does not relate to it.
WE RESERVE THE RIGHT TO ALTER THE SPECIFICATIONS WITH NO INFLUENCE
ON THE OPERATION OF THE APPLIANCE.
Instructions for Use 13
Page 14

Холодильник с морозильной камерой RUS
Благодарим Вас за доверие, которое Вы оказали, приобретая наш
холодильник. Желаем, чтобы пользование им доставило Вам большое
удовольствие.
Холодильник с морозильной камерой
предназначен для использования в
домашнем хозяйстве.
Нижняя часть представляет собой
холодильник, предназначенный для
хранения свежих продуктов при температуре
выше 0°С.
Подготовка к работе .........................14
Руководство по эксплуатации
Забота об окружающей среде
Несколько рекомендаций по сохранению
температуры в Вашем холодильнике
Внимание! ...........................................15
Время поддержания температуры при
отключении электроэнергии
Установка и подключение ...............16
Выбор места
Установка аппарата
Подключение к электросети
Описание аппарата ...........................17
Холодильник (А)
Морозильник (B)
Управление .........................................19
Подготовка к работе
Перед подключением к электросети
аппарат должен “отдохнуть” около 2
часов.
Тем самым уменьшается возможность
влияния перегрузок при транспортировке
на работу аппарата.
Вымойте аппарат, особенно изнутри (см.
главу “Уход и техническое
обслуживание”).
Если оборудование аппарата не
находится на своих местах, распределите
его так, как указано в главе “Описание
аппарата “.
Руководство по эксплуатации
Руководство по эксплуатации холодильника
предназначено для потребителя. В нем
Верхняя часть представляет собой
морозильную камеру, предназначенную
для замораживания свежих и
долговременного хранения замороженных
продуктов (на срок до одного года, в
зависимости от типа продуктов). Камера
обозначается четырьмя звездочками.
Выбор температуры
Использование ...................................20
Хранение продуктов в холодильнике
Замораживание продуктов
Хранение замороженных продуктов
Изменение направления
открывания дверей ...........................22
Уход и техобслуживание ..................23
Автоматическое размораживание
холодильника
Ручное размораживание морозильной
камеры
Уборка холодильника
Отключение аппарата на длительный
срок
Устранение неисправностей ............24
описан аппарат и его правильное и
безопасное использование. В инструкции
дается описание различных моделей
холодильников, поэтому в нем могут быть
описаны функции и оборудование, которых
нет в Вашем аппарате.
Забота об окружающей среде
Для упаковки аппаратов используется
экологически чистые материалы, которые
могут быть без вреда для окружающей
среды вторично использованы
(рециклированы), сохранены или
уничтожены.
Наша инструкция также отпечатана на
рециклированной бумаге, отбеленной без
хлора.
Руководство по эксплуатации14
Page 15

Несколько рекомендаций по
сохранению температуры в Вашем
холодильнике
Прочитайте инструкцию по установке
прибора.
Не открывайте дверцы прибора чаще,
нежели это необходимо.
Время от времени проверяйте, может ли
свободно циркулировать воздух сзади
прибора.
Испаритель, который установлен на задней
стенке прибора должен быть всегда чистым
(смотрите раздел «Очистка прибора»).
Если гарантийный талон поврежден или
утерян, замените его как можно скорее.
Храните сво
контейнерах или в другой соответствующей
упаковке.
и продукты в закрытых
Внимание!
Перед тем, как ставить продукты в
холодильник, дайте ему охладиться до
комнатной температуры.
Разморозьте свои замороженные продукты
в холодильном отделении.
Снимите ящики и дверцу морозильной
камеры так, как это указано в инструкции для
того, чтобы максимально возможно было бы
использовать внутренний объем.
Разморозьте морозильное отделение,
если на его поверхности образовался лед
до 3-5 мм толщины.
У
достоверьтесь, что ящики равномерно
расположены, а продукты размещены таким
образом, что воздух может свободно
циркулировать ( обратите внимание на
рекомендации по размещению продуктов,
которые указаны в инструкции).
Прибор оборудован вентилятором, не
блокируйте его.
Прибор изготовлен в соответствии со всеми
предписанными в области безопасности
стандартами, но не смотря на это
использование прибора людьми с
ограниченными физическими,
двигательными и психическими
способностями, а также людьми, не
имеющими достаточного опыта или знаний
для его использования, допускается только
под присмотром.
Эти рекомендации распространяются также
на малолетних лиц.
Аппарат должен быть подключен к
электросети
“Подключение к электросети”).
Во время работы аппарата не
прикасайтесь мокрыми руками к
охлаждающим поверхностям, т.к. к ним
может примерзнуть кожа.
Не замораживайте напитки в бутылках,
особенно пенящиеся напитки, как
минеральная вода, шипучее вино, пиво,
кола и т.д., т.к. при замерзании жидкость
расширяется и бутылка может лопнуть.
Перед ремонтом, уборкой и заменой
лампочек аппарат необходимо отключить
из электросети (ремонт должен
производить специалист).
Не размораживайте холодильник с
помощью электроприборов (фен для
правильно (см. главу
волос и т.д.) и не устраняйте лед с
помощью острых предметов.
По краю корпуса морозильной камеры
располагается нагреватель, который
работает одновременно с компрессором и
предотвращает примерзание уплотнителя
двери к корпусу
Во избежание несчастных случаев при
повреждении соединительного кабеля,
замена его осуществляется заводомизготовителем или уполномоченной
сервисной службой, или же специалистом
соответствующей квалификации.
Таблица основных данных по Вашему
аппарату находится внутри или на задней
стенке холодильника.
Пред
упреждение: Не закрывайте
вентиляционные отверстия прибора и
кухонного элемента, куда встроен прибор,
содержите их в чистоте
Пред
упреждение: Для оттаивания не
пользуйтесь механическими предметами и
способами, не рекомендованными
производителем.
Предупреждение: Во время установки,
очистки и утилизации прибора следите за
тем, чтобы не повредить изоляцию или части
системы охлаждения. Таким образом, можно
предотвратить возможное загрязнение
окружающей среды.
морозильника.
.
Руководство по эксплуатации 15
Page 16

Предупреждение: Не используйте внутри
прибора электрические устройства, кроме
разрешенных производителем.
Символ на изделии или на его
упаковке указывает, что оно не
подлежит утилизации в качестве
бытовых отходов. Вместо этого его
следует сдать в соответствующий пункт
приемки электронного и
электрооборудования для последующей
утилизации. Соблюдая правила
утилизации изделия, Вы поможете
предотвратить причинение окружающей
среде и здоровью людей потенциального
ущерба, который возможен, в противном
случае, вследствие неподобающего
обращения с подобными отходами. За
более подробной информацией об
утилизации этого изделия просьба
обращаться к местным властям, в службу
по вывозу и утилизации отходов или в
магазин, в котором Вы приобрели
изделие.
Время поддержания температуры
при отключении электроэнергии
В случае повреждения электросети и
отключения электроэнергии не открывайте
морозильник, кроме как в случае отсутствия
электроэнергии более чем 16 часов. После
этого используйте замороженные продукты
или обеспечьте им достаточное охлаждение.
Установка и подключение
Выбор места
Аппарат установите в сухом,
проветриваемом помещении. Допустимая
температура окружающей среды для
правильной работы соответствующего типа
аппарата указана в таблице данных. Для
моделей с встроенным переключателем
интенсивного охлаждения учитывайте главу
“Выбор температуры”. Холодильник не
должен находиться рядом с приборами,
отдающими теплоту, например, с плитой,
батареей, нагревателем воды и т.д. и на
него не должны
солнечные лучи.
Класс Температура
SN (субнормальный) от +10°С до +32°С
N (нормальный) от +16°С до +32°С
ST (субтропический) от +16°С до +38°С
T (тропический) от +16°С до +43°С
попадать прямые
окружающей среды
Установка аппарата
Аппарат должен стоять ровно и устойчиво
на достаточно твердой основе. На
передней стороне некоторые модели
имеют регулируемые ножки, которыми
выравнивается аппарат.
Машине прилагаются два дистанционных
Прибор предназначен для установки
фиксатора, которые требуется поместить
на верх конденсатора. Они не дают
возможность помещения машины
слишком близко стены. Фиксаторы
произведены универсально зависимо от
различного расстояния конденсатора от
машины, поэтому требуется их
соответствующе повернуть и вставить в
машину.
.
отдельно или рядом с кухонной мебелью
или стеной. Для свободного открывания
дверцы и извлечения ящиков и полок
соблюдайте необходимые расстояния,
указанные на схеме установки.
Руководство по эксплуатации16
Page 17

35 mm
o
90
Описание аппарата
Подключение к электросети
Аппарат подключается к электросети с
помощью присоединительного кабеля.
Стенная розетка должна иметь заземление
(безопасная розетка). Предписанное
номинальное напряжение и частота указаны
в таблице данных аппарата.
Подключение к электросети и заземление
аппарата должны быть выполнены по
действующим стандартам и предписаниям.
Аппарат выдерживает краткосрочные
перепады напряжения, однако не более,
чем от -6 до +6%.
Холодильник (А)
В холодильнике хранятся свежие продукты
в течение нескольких дней.
Полочка (1)
Полочку Вы можете устанавливать на
желаемой высоте на направляющих на
внутренней поверхности холодильника.
Руководство по эксплуатации 17
Стеклянные полки (только у некоторых
моделей) защищены пластиковыми
дистанционными фиксаторами. Если хотите
вытащить полку, необходимо вначале
подвинуть дистанционные фиксаторы к
себе. Дистанционные фиксаторы возможно
также устранить, но рекомендуется
сохранить их для возможной позднейшей
транспортировки.
Page 18

Скоропортящиеся продукты храните на
дальней, более холодной части полочки.
Носитель бутылок
(только в некоторых моделях)
Носитель (количество зависит от модели)
предназначен для сохранения бутылок.
Бутылки возможно поместить в двух
положениях (горизонтально или приподнято
спереди вверх за одну направляющую).
Носитель позволяет также положение
бутылок на пробку. Он защищён от
выпадания. Его можете вытащить только
пустого следующим образом: приподнимите
его сзади и потяните к себе.
Предупреждение!
В случае, если на дверце находятся полки,
поместите носитель таким образом, что
длина бутылок не препятствует закрыванию
дверцы.
На носитель можете поместить макс. 9
бутылок ёмкостью 0,75 л или больше
(общиим весом макс.13 кг) – смотри
этикетку под корпусом термостата в
аппарате.
Отверстие для стока воды (2)
На задней стенке холодильника находятся
желоб и отверстие, куда стекает оттаявшая
вода. Это отверстие не должно быть
засорено (например, остатками пищи),
поэтому ее постоянно проверяйте и по
необходимости очищайте.
Контейнер для фруктов и овощей (3)
Контейнер находится на дне холодильника
под стеклянной полочкой. Таким образом
обеспечивается влажность, которая
обеспечивает подходящие условия
хранения фруктов и овощей.
Вентилятор
(только в некоторых моделях)
Вентилятор способствует более
равномерному распределению
температуры и снижает образование
конденсата на рабочих поверхностях.
Вентилятор не работает в то время, когда
дверца холодильника открыта.
Рекомендуется включать вентилятор в
следующих случаях:
при повышении температуры в
помещении (свыше 30°C),
при повышении влажности (в летнее
время).
Включение/выключение вентилятора
Включение =
Внимание: при включенном вентиляторе
увеличивается расход энергии.
Выключение =
Внутренняя сторона двери
холодильника
Дверь с внутренней стороны оборудована
полочками или контейнерами, которые
предназначены для хранения сыра, масла,
яиц, йогурта и других небольших свертков,
тюбиков, консервных банок и т.д.
В нижней части двери находится полочка
для бутылок.
Освещение холодильника
Лампочка для освещения холодильника
загорается, когда дверь холодильника
открыта (не зависит от положения ручки
терморегулятора).
Морозильник (B)
В морозильнике замораживаются свежие и
хранятся уже замороженные продукты.
Морозильная камера (4)
Предназначен для замораживания свежих
продуктов.
0
Руководство по эксплуатации18
Page 19

Корзина для хранения (5)
В ней хранятся уже замороженные
продукты.
Желоб для стока оттаявшей воды (6)
(см. главу “Уход и техобслуживание).
Панель управления морозильника (7)
(только в некоторых моделях)
В верхнее отделение внутренней части
морозилки помещены два вкладыша,
предназначенные для аккумуляции
холода - аккумуляторы.
Передтем, как включаете впервые
морозилку, уберите аккумуляторы и
вставьте их, когда угаснет красная
лампочка.
Аккумуляторы поддерживают более
равномерную температуру замороженных
продуктов питания. Поэтому качество
замороженных продуктов питания лучше
и срок хранения при выключении питания
электроэнергией
дольше.
Управление
Скользящий элемент (8)
(только при некоторых моделях)
Скользящий элемент (количество в
зависимости от модели) предназначен для
ограничения передвижения бутылок.
ПРИМЕЧАНИЕ:
Внутреннее оборудование аппарата
может изменяться в зависимости от
модели аппарата.
Форма ручки дверцы может быть разной в
зависимости от модели аппарата.
По желанию в сервисных центрах Горенье
Вы можете купить также контейнер для
приправ и пряностей, для тюбиков с
подставкой и увеличить количество
полочек.
Аппарат управляется с помощью ручки
терморегулятора,, расположенной в правой
верхней части внутренней поверхности
холодильника (поворачивается от
обозначения STOP (0) до 7 и назад).
Выбор температуры
Самая высокая позиция ручки (7) означает
самую низкую температуру (холодную) во
всех частях аппарата. Температура внутри
холодильника может падать также ниже
0°С. Высокие позиции используйте только
в том случае, если необходима или
рекомендована низкая температура
охлаждения. При нормальной
температуре окружающей среды
рекомендуем устанавливать
терморегулятор в средние положения.
Изменение температуры окружающей
среды влияет на температуру в
Необходимо регулировать температуру
соответственно.
аппарате.
Руководство по эксплуатации 19
В положении STOP (0) аппарат не
работает (охладительная система
отключена), однако он находится под
напряжением (загорается лампочка, если
открыть дверь холодильника).
Температура в холодильнике зависит от
частоты открывания двери.
Page 20

Использование
Хранение продуктов в холодильнике
Продукты, которые будут храниться в
холодильнике, должны быть свежими,
упакованы так, чтобы они не издавали и
не поглощали запахов и воды, (например
в фольгу или полиэтиленовую пленку, в
вощеную бумагу и т.д. или храниться в
закрытой посуде или банках).
Не храните в холодильнике
воспламеняющиеся, испаряющиеся или
взрывоопасные материалы.
Бутылки с большим содержанием
алкоголя должны быть хорошо закрыты и
должны храниться в вертикальном
положении.
Продукты не должны касаться задней
стенки холодильника!
Некоторые органические растворы,
эфирные масла в кожуре лимона и
апельсина, кислота в масле и т.д. при
долговременном контакте с
пластмассовыми поверхностями могут
вызывать повреждения и
преждевременное старение.
Неприятный запах указывает на
загрязнение внутренних поверхностей
холодильника
Запах устраняется или ослабляется, если
в воду для мытья добавить немного
уксуса.
Рекомендуем также использовать
фильтры с активированным углем,
которые очищают воздух и нейтрализуют
неприятные запахи.
Если Вы надолго уезжаете из дома, не
оставляйте скоропортящиеся продукты в
холодильнике.
или на порчу продуктов.
Время хранения продуктов в холодильнике
Продукты Время хранения (в днях)
Масло +++++++=====
Яйца ++++++++++====
Мясо: сырое в
куске
ырое в нарезке +=
копченое ++++++++++====
Рыба +=
Маринады ++++++++++====
Овощи ++++++++======
Сыр ++++==========
Десерты ++====
Фрукты ++========
Готовые блюда ++==
Обозначения: + рекомендуемое время хранения = возможное время хранения
Замораживание продуктов
Замораживайте в морозильнике только
предназначенные для этого или
хорошо выдерживающие низкую
температуру продукты. Продукты
должны быть свежими и наилучшего
качества.
Выберите подходящую для продукта
упаковку и правильно его упакуйте.
1 2 3 4 5 6 7 8 9 10 11 12 13 14
++=
упаковка не должна пропускать
воздух и влагу, чтобы не вызвать
засыхание или потерю витаминов
фольга и пакеты должны быть
мягкими и эластичными, чтобы
тесно прилегать
На замороженных продуктах укажите
данные о типе, количестве продуктов и
укажите дату замораживания.
к содержимому.
Руководство по эксплуатации20
Page 21

Прежде всего важно, чтобы продукт
был как можно скорее заморожен,
поэтому рекомендуем не делать
слишком большие свертки, а также
охлаждать продукты перед тем, как
положить их в морозильник.
Количество свежих продуктов, которые
можно за 1 раз разместить в течение
24 часов, указано в таблице данных
(масса замораживания). Если масса
больше предписанной, качество
замораживания ухудшается, также
ухудшается
замороженных продуктов.
качество уже
Порядок замораживания
Для аппарата, не имеющего
переключатель интенсивного
охлаждения за 24 часа перед
замораживанием установите ручку
терморегулятора в положение 4-6. По
истечении 24 часов положите свежие
продукты на полочку морозильника.
Приблизительно 24 часа спустя по
необходимости установите ручку
термостата в положение рабочей
температуры (см. главу “Выбор
температуры”) и уже замороженные
продукты переложите в корзины для
хранения.
Для аппарата, имеющего
переключатель интенсивного
охлаждения за 24 часа перед
замораживанием большого количества
свежих продуктов включите
вышеупомянутый переключатель и
установите ручку терморегулятора в
положение 4-6. По истечении 24 часов
положите свежие продукты на полочку
морозильника. Приблизительно 24
часа спустя отключите
переключатель и установите ручку
термостата в положение желаемой
температуры (см. главу “Выбор
температуры”).
Выключатель включен, когда видно
обозначение
обозначение и выключен, когда на
выключателе обозначение
не видно цветное обозначение (только
в некоторых моделях).
(I) или цветное
(0) или
При дальнейшем замораживании
порядок замораживания повторите.
Свежие продукты не должны касаться
уже замороженных.
Для замораживания небольших
количеств (до 1 кг) не нужно менять
температурный режим (см. главу
“Выбор температуры”).
Хранение замороженных
продуктов
Замороженные продукты храните в
корзине морозильника. При желании
корзины можно вынуть, а продукты
положить на полочки.
Для обеспечения циркуляции воздуха
не загружайте продукты выше
указанной границы, как показано на
рисунке (в некоторых моделях).
Продукты, замороженные
промышленным способом
При покупке замороженных продуктов
обращайте внимание на упаковку:
на ней должны быть обозиачены время и
температура хранения. При хранении и
использовании учитывайте указания
производителя. Выбирайте только
хорошо упакованные продукты, имеющие
полные данные и хранящиеся в
морозильниках при температуре не выше
-18°С. Не покупайте заиндевелых
продуктов, т.к. они были уже несколько
раз размораживались.
Руководство по эксплуатации 21
Page 22

Старайтесь избежать размораживания
продуктов, т.к. повышение температуры
сокращает время хранения и ухудшает их
качество.
Приблизительный срок хранения замороженных продуктов
Продукты
Овощи
Фрукты
Хлеб, выпечка
Молоко
Готовые блюда
Мясо: говядина
телятина
свинина
птица
дичь
мелко нарезанное
Копченые колбасы
Копченые колбасы
жирная
Субпродукты
1 2 3 4 5 6 7 8 9 10 11 12
+
+
+
Субпродукты
+++
+
+
+
+++
++ +
+++
+++
+
+
+++
+++
Оттаивание замороженных продуктов
Размороженные продукты нужно
использовать сразу. При консервации
продуктов с помощью низкой
температуры не уничтожаются
микроорганизмы, которые после
размораживания быстро активизируются
и портят продукт.
Частичное размораживание уменьшает
пищевую ценность продуктов, особенно
фруктов и овощей, а также уже готовых
блюд.
Изменение направления открывания дверей
Если Вас не устраивает направление
дверей, Вы можете изменить его.
Необходимые для этого отверстия на
противоположной стороне корпуса уже есть.
Отвинтите подножную планку и снимите,
надавив на нее.
Отвинтите нижний шарнир и снимите
нижнюю дверь вместе с подкладкой
среднего шарнира.
Отвинтите средний шарнир и снимите
верхнюю дверь вместе с подкладкой
верхнего шарнира. Затем удалите
затычки на противоположной стороне
корпуса аппарата (на месте прикрепления
среднего шарнира).
Отвинтите втулку верхнего шарнира и
привинтите его на противоположную
сторону корпуса.
На дверях поменяйте между собой
прокладки шарниров двери и втулки
прокладок.
Насадите двери вместе с подкладкой
верхнего шарнира на втулку верхнего
шарнира.
Средний шарнир разверните на 180° и
привинтите его на
противоположную
сторону корпуса аппарата. Затем на
шарнир с нижней стороны насадите
подкладку среднего шарнира и нижнюю
дверь.
Насадите нижний шарнир на нижнего
дверь и привинтите его.
Установите декоративную пластину
нижнего шарнира на другую сторону
подножной планки и привинтите ее
обратно к аппарату.
В случае, если у аппарата есть боковые
ручки, переставьте их на другую сторону.
Поскольку винты для укрепления накрыты
крышкой, ее следует предварительно
снять.
Втулками закройте оставшиеся отверстия
на противоположной стороне двери на
Руководство по эксплуатации22
Page 23

месте первоначального нахождения
шарнира.
В конце проверьте состояние магнитных
уплотнений (уплотнитель не должен
сминаться и везде должно хорошо
прилегать).
Там, где уплотнение не прилегает на
корпус аппарата, надо с подходящего
расстояния согреть (например сушилкой
для волос) и несколько растянуть его до
соответствующей высоты.
1 Втулка верхнего шарнира
2 Подкладка верхнего шарнира
3 Средний шарнир
4 Подкладка среднего шарнира
5 Нижний шарнир
Уход и техобслуживание
Автоматическое размораживание
холодильника
Холодильник не нужно размораживать, т.к.
лед на задней стенке размораживается
автоматически.
Лед, который намерзает на задней стенке
при работе компрессора, во время паузы в
его работе оттаивает и в виде капелек
стекает вниз, затем через отверстие в
Руководство по эксплуатации 23
6 Подножная планка
7 Покровная пластинка нижнего шарнира
8 Втулка прокладки шарнира двери
9 Прокладка шарнира двери
задней стенке холодильника стекает в
емкость на компрессоре, откуда испаряется.
Ручное размораживание
морозильной камеры
На внутренних поверхностях морозильника
намерзает иней или лед, который нужно
размораживать, когда он достигает
толщины 3-5 мм.
Page 24

За 24 часа до размораживания
установите переключатель в режим
непрерывной работы (горит желтая
лампочка), чтобы продукты сильнее
охладились. После этого освободите
морозильник и замороженные продукты
положите так, чтобы они не
размораживались.
Отключите аппарат от электросети.
Прилагающуюся трубку вставьте в желоб
на дне морозильника и подставьте под
трубку посуду, в которую будет стекать
оттаявшая вода. Размораживание
ускорится
, если оставить дверь открытой.
Уборка холодильника
Перед уборкой аппарата отключите его из
сети !
Не используйте грубых и агрессивных
чистящих средств,
чтобы не повредить поверхность.
Снаружи мойте аппарат водой и жидким
детергентом.
Лакированные поверхности чистите
мягкой тряпкой и средством для чистки,
содержащим алкоголь (напр.средство для
чистки стекла). Употребить можете также
алкоголь (этанол или изопропиловый
спирт).
Для пластмассовых и лакированных
не рекомендуется применение
частей
абразивных или специальных
агрессивных средств для чистки, как напр.
средства для чистки нержавеющей стали.
Достаньте съемное оборудование из
аппарата и вымойте его под проточной
водой жидким детергентом. Пластиковые
части не предназначены для мытья в
посудомоечной машине.
Достаньте продукты из холодильника и
вымойте внутренние поверхности
теплой водой с добавлением уксуса.
Своевременно стирайте пыль мягкой
неметаллической щеткой или пылесосом
с конденсатора на задней стороне
аппарата.
Надо очистить также бачок над
компрессором холодильника (не
устранять его).
После очистки аппарат присоедините к
электрической сети, включите аппарат, и
снова положите в него пищевые
продукты.
Отключение аппарата на
длительный срок
После уборки аппарат подключите к
электросети, включите его и положите
продукты назад.
Если не будете пользоваться аппаратом в
течении долгого времени, установите ручку
терморегулятора в положение STOP (0).
Отключите аппарат от электросети,
достаньте из него продукты, разморозьте,
вымойте и оставьте двери приоткрытыми.
Устранение неисправностей
Во время использования холодильника
могут появиться неисправности . Приводим
здесь некоторые случаи неисправностей,
которые в большинстве являются
последствием неправильного
использования, и их Вы сможете устранить
сами.
Руководство по эксплуатации24
Аппарат не работает после подключения
к электросети.
Проверьте, есть ли напряжение в розетке
и включен ли аппарат (ручка
терморегулятора в рабочем положении).
Page 25

Система охлаждения долгое время
работает непрерывно.
Слишком часто открывается дверь или
дверь остается долго открытой.
Неправильно закрыта дверь (попадание
чуждых предметов в дверной проем,
отвисла дверь, проверьте уплотнитель... )
В холодильнике слишком большое
количество свежих продуктов.
В связи с недостаточным охлаждением
компрессора и конденсатора, проверьте,
есть ли ток воздуха за аппаратом и
очистите конденсатор.
Намерзание льда на задней стенке
холодильника.
Пока вода стекает в желоб и через
отверстие протекает в емкость на
компрессоре, автоматическое
размораживание холодильника будет
проходить нормально. В случае, если на
задней стенке намерзает слишком большой
пласт льда (3-5 мм), его разморозьте
вручную. Ручку термостата установите в
положение STOP (0) и оставьте дверь
холодильника открытой. Не оттаивайте лед
с помощью электроприборов (фен для
волос и т.д.) и не устраняйте лед с
помощью острых предметов. После
окончания размораживания установите
ручку в желаемое положение и закройте
дверь холодильника.
Слишком сильное намерзание льда
является последствием:
ослабления уплотнителя двери (если
уплотнитель запачкан или
поврежден, его вымойте или
замените),
дверь открывается слишком часто
или остается долго открытой,
если в холодильник кладется горячая
пища,
пища
или посуда касаются задней
стенки холодильника.
Из холодильника течет вода.
Вода течет из холодильника, если засорено
отверстие для стока воды или оттаявшая
вода течет мимо желоба для сбора воды.
Засоренное отверстие прочистите с
помощью какого-либо неострого
пластмассового предмета.
Слишком толстый слой льда
размораживайте вручную (см.
“Намерзание льда на задней стенке
холодильника”).
Затруднено открывание дверей
Если Вы хотите сразу или через короткое
время повторно открыть дверь
морозильника, Вы можете почувствовать
некоторое затруднение. Во время
открывания двери холодный воздух вышел
из аппарата, его заместил теплый воздух из
окружающей среды. При охлаждении этого
воздуха давление внутри аппарата
уменьшается, что и является причиной для
затрудненного открывания двери. Через
несколько минут (5-10) состояние
нормализуется и дверь
открыть без труда.
можно будет
Шум
Для охлаждения в холодильно-морозильной
технике используется охладительная
система с компрессором, что может
вызывать появление определенного шума.
Сила шума зависит от установки,
правильного использования и “возраста”
аппарата.
Во время работы компрессора может
быть слышен шум текущей жидкости, а во
время паузы - переливающейся
охлаждающей жидкости. Это нормально и
не влияет на срок службы аппарата.
В начале работы аппарата шум работы
компрессора и переливающейся
охлаждающей жидкости может быть
сильнее. Это не является показателем
повреждения и не влияет на срок службы
аппарата. Постепенно эти шумы
уменьшаются.
Иногда во время работы аппарата
появляются также необычные или
сильные шумы, которые необычны для
аппарата и являются в большинстве
случаев последствием
несоответствующей установки:
аппарат должен
устойчиво на твердом основании.
он не должен касаться стены или
соседних элементов обстановки.
проверьте, как стоят бутылки, банки и
т.д., не происходит ли шум из-за их
контакта между собой.
стоять ровно и
Руководство по эксплуатации 25
Page 26

Замена лампочки
Перед заменой лампочки обязательно
отключите аппарат из сети. Сожмите рукой с
дальней стороны крышку, которая
закрывает лампочку (в направлении стрелки
1), чтобы она выскочила. Затем снимите
крышку (в направлении стрелки 2) и
замените лампочку (Е 14, мах. 15 Вт).
Перегоревшие лампочки не выбрасывайте
вместе с органическим мусором.
Лампочка является расходным
материалом и на нее не действует наша
гарантия !
МЫ ОСТАВЛЯЕМ ЗА СОБОЙ ПРАВО НА ИЗМЕНЕНИЯ, КОТОРЫЕ НЕ ВЛИЯЮТ
НА ФУНКЦИОНИРОВАНИЕ АППАРАТА.
Руководство по эксплуатации26
Page 27

Холодильник з морозильною камерою UK
Ми вдячні Вам за придбання цього приладу. Ми сподіваємося, що Ви отримаєте
велике задоволення під час користування впродовж багатьох років.
Холодильник з морозильною камерою
призначений для використання у
домашньому господарстві.
Верхня частина – це холодильник, який
призначений для зберігання свіжих продуктів
при температурі вище 0°С.
Підготовка до роботи ........................27
Інструкція для експлуатація
Турбота про довкілля
Декілька порад щодо збереження
температури у Вашому холодильнику
Важливо...............................................28
Час підтримання температури при
виключенні електроенергії
Утилізація старого приладу
Установка та підключення ..............29
Вибір місця
Розміщення приладу
Підключення до електромережі
Опис приладу .....................................31
Холодильник (A)
Морозильна камера (B)
Управління .........................................33
Вибір температури
Підготовка до роботи
Перед підключенням приладу до основного
живлення, необхідно, щоб він постояв
впродовж 2 годин. Тим самим зменшується
можливість впливу перевантажень під час
транспортування на роботу приладу.
Почистіть прилад, особливо зсередини (див.
„Технічне обслуговування та чищення”).
Якщо внутрішнє обладнання розміщено не
правильно, помістіть його згідно розділу „ Опис
приладу”.
Інструкція для експлуатація
Інструкція для експлуатації призначена для
користування споживачем. В ній описано
прилад та його правильне та безпечне
використання. В інструкції дається опис
різних моделей холодильників, тому можуть
Нижня частина – це морозильна камера,
яка призначена для заморожування свіжих
продуктів та їх довготривалого зберігання
(на термін до одного року, в залежності від
виду продукту). Камера позначається
чотирма зірочками.
Використання.....................................33
Зберігання продуктів
Заморожування продуктів
Зберігання заморожених продуктів
Зміна напрямку відкривання
дверцят ................................................36
Технічне обслуговування та
чищення ..............................................37
Автоматичне розморожування
холодильника
Ручне розморожування морозильника
Очищення приладу
Вимкнення приладу
Усунення ушкоджень........................38
бути описані функції та обладнання, яких
немає у Вашому холодильнику.
Турбота про довкілля
Для упакування наших приладів
використовуються екологічно чисті матеріали,
які можна зберегти, знищити або вдруге
використати , не завдаючи шкоди довкіллю.
Такі матеріали мають відповідне позначення.
Ці інструкції також друкуються на
переробленому папері, який відбілено без
хлору.
Коли прилад зносився, спробуйте не
обтяжувати цим навколишнє середовище;
викличіть спеціаліста сервісної служби ( див.
„Утилізація старого приладу”).
Інструкція для експлуатації 27
Page 28

Декілька порад щодо збереження
температури у Вашому
холодильнику
Прочитайте інструкцію по встановленню
приладу.
Не відчиняйте дверцята приладу частіше, ніж
це потрібно.
Час від часу перевіряйте, чи вільно може
циркулювати повітря позаду приладу.
Випарник, який встановлений на задній стінці
приладу повинен бути завжди в чистим (
дивіться розділ « Очищення приладу»).
Якщо гарантійний талон пошкоджений або
втрачений, замініть його якомога швидше.
Зберігайте сво
контейнерах або в іншій відповідній упаковці.
Перед тим, як ставити продукти в
холодильник, дайте йому охолонути до
кімнатної температури.
ї продукти в закритих
Важливо
Розморозьте свої заморожені продукти в
холодильному відділенні.
Зніміть шухляди та дверцята морозильної
камери так, як вказано в інструкції для того,
щоб максимально можливо було б
використовувати внутрішній об`єм.
Р
озморозьте морозильне відділення, якщо на
його поверхні накопичився лід до 3-5 мм
товщини.
Запевніться, що шухляди рівномірно
розміщенні, а продукти розставлені таким
чином, що повітря може вільно циркулювати
(зверніть увагу на рекомендації щодо
розміщення продуктів, які вказані в інструкції).
Прилад обладнаний вентилятором, не
блокуйте його.
Прилад виготовлений відповідно до діючих
стандартів безпеки; Однак, ми не
рекомендуємо самостійно користуватись
приладом людям з фізичними вадами,
психічними розладами, порушенням моторики
або людям, у яких немає достатнього досвіду
робот из такими приладами. Ті ж рекомендації
щодо користування приладом стосуються і
дітей.
Якщо Ви придбали цей прилад, щоб замінити
старий, що обладнаний замком, який не можна
від
крити з внутрішньої сторони (замок, болт),
переконайтеся, що замок зламано, щоб
запобігти зачинення дітей всередині приладу
та удушення.
Прилад необхідно правильно підключити до
електромережі. (див. „Підключення до
електромережі”).
Під час роботи приладу не торкайтеся
мокрими руками охолоджуючих елементів,
оскільки може примерзнути шкіра.
Не заморожуйте шипучі напої, такі як
мінеральна вода, шипуче ви
тощо, оскільки при замерзанні рідини
розширюються і пляшка може лопнути.
Не їжте заморожені продукти (хліб, фрукти,
овочі), оскільки Ви можете застудитися.
Якщо продукти мають дивний запах та колір,
викиньте їх. Ймовірно, вони зіпсовані та
небезпечно їх їсти.
но, пиво, кола,
Від’єднайте прилад від електромережі перед
ремонтом (ремонт повинен проводити лиш
спеціаліст), очищенням та заміною лампочок.
Використовуйте лише прилади, які
рекомендовані виробником.
Заради захисту довкілля – будьте обережні,
щоб не пошкодити задню стінку приладу
(конденсатор або трубки – наприклад, під час
пересування приладу) або іншу частину
приладу. Не використовуйте гострі предмети
для розморожування приладу. Використовуйте
лише негострі прилади або прилади,
рекомендовані виробником.
Система охолодження приладу за
хладогентом та маслом, тому, коли є
пошкодження, розмістіть його обережно
відповідно до застережень захисту
навколишнього середовища (див. „Турбота
про довкілля”).
По краю корпусу морозильної камери є
нагрівальний елемент, який працює разом з
компресором, та запобігає примерзанню
ущільнювача дверцят до корпусу
морозильника.
Для уникнення нещасного випадку при
ушкодженні кабелю, його повинні замінити
завод-виробник або сп
служби.
Таблиця основних даних знаходиться
всередині або на задній стінці холодильника.
еціаліст сервісної
повнена
е
Інструкція для експлуатації28
Page 29

Upozorněnн: Слідкуйте, щоб вентиляційні
отвори та внутрішні елементи приладу Були
чистими та доступними.
Upozorněnн: Не користуйтесь будь-якими
механічними пристосуваннями під час
розморожування холодильника крім тих, які
рекомендовані виробником.
Upozorněnн: Щоб уникнути витоку, будьте
уважні, не пошкодьте ізоляцію або трубки на
задній стінці прилада під час його
установлення, чищення або т
на утилізацію.
Upozorněnн: Не користуйтесь електричними
приладами усередині приладу, крім тих, які
рекомендовані виробником.
Цей символ на виробі або на його
упаковці позначає, що з ним не
можна поводитися, як із побутовим
сміттям. Замість цього його
необхідно повернути до відповідного
пункту збору для переробки електричного
та електронного обладнання.
Забезпечуючи належну переробку цього
виробу, Видопомагаєте попередити
потенційні негативні наслідки для
навколишнього середовища та здоров’я
людини, які могли би виникнути за умов
неналежного позбавлення від цього
виробу. Щоб отримати детальнішу
інформацію стосовно переробки цього
ранспортування
виробу, зверніться до свого місцевого
офісу, Вашої служби утилізації або до
магазина, де Ви придбали цей виріб.
Час підтримання температури при
виключенні електроенергії
Не відкривайте морозильник у випадку
ушкодження електромережі або виключення
електроенергії! Якщо електроенергія
відсутня більше чим 16 годин, витягніть
продукти з морозильника, використайте їх
або забезпечте їм достатнє охолодження
(можливо ви маєте додатковий прилад).
Утилізація старого приладу
Якщо Ваш прилад відслужив свій термін, його
необхідно утилізувати. Якщо прилад має
замок, зламайте його, щоб запобігти
можливого нещасного випадку (можливість
зачинення дітей усередині приладу).
Система охолодження приладу заповнена
охолоджувачем та ізоляційним газом, які
потребують спеціальної процедури утилізації.
Викличіть спеціаліста зі служби утилізації або
спеціального сервісного центру. Зв’яжіться з
органами місцевого управління або Ва
постачальником. Слідкуйте, щоб не пошкодити
трубопровід на задній стінці приладу (є загроза
забруднення довкілля).
шим
Установка та підключення
Вибір місця
Розмістіть прилад в сухому приміщенні, що
добре провітрюється. Припустима
температура навколишнього середовища
залежить від моделі приладу та зазначена у
таблиці. Якщо прилад працює при
температурі нижче +16°C, то холодильник
працює нормально, а в морозильній камері
температура може підвищуватися,
зменшуючи тим самим час зберігання
заморожених продуктів. Для моделей з
вбудованим перемикачем інтенсивного
охолодження враховуйте інструкцію в главі
температури”. Не розміщуйте прилад
„Вибір
поблизу джерела тепла (наприклад плит,
радіаторів, водонагрівачів, тощо) та не
піддавайте прямим сонячним променям.
Прилад необхідно розмістити на відстані як
мінімум 3 см від електричної або газової
плити, та 30 см від масляної печі або плити
Інструкція для експлуатації 29
на твердому паливі. Якщо це не можливо,
використайте відповідну ізоляцію. За
приладом повинно бути 200 см² порожнього
місця, а у висоту – як мінімум 5 см від
поверхні меблів, щоб забезпечити необхідну
вентиляцію для приладу.
Клас Температура
SN (субнормальний) від + 10°C до + 32°C
N (нормальний) від + 16°C до + 32°C
ST (субтропічний) від + 16°C до + 38°C
T (тропічний) від + 16°C до + 43°C
Розміщення приладу
Розмістіть прилад стійко на тверду поверхню.
навколишнього
середовища
Деякі прилади мають регулюючі ніжки на
передній частині. Використайте їх для
вирівнювання приладу.
Page 30

До комплекту приладу додаються фіксатори-
гільзи, які необхідно установити на верхній
край конденсатора, що запобігає надто
близького розміщення приладу до стіни.
Фіксатори-гільзи – універсальні та підходять
для різної відстані між конденсатором і стіною.
Поверніть їх відповідною стороною та
зафіксуйте їх на приладі.
Прилад можна встановити окремо або поруч з
елементом кухонних меблів чи стіною.
Переконайтесь, що ви залишили достатньо
місця, щоб вільно відкрити двері і витягнути
ящики та полиці (дивіться монтажну схему).
35 mm
Підключення до електромережі
Підключіть прилад до електромережі за
допомогою кабелю та безпечної
штепсельної розетки, яку необхідно
заземлити.
Необхідна номінальна напруга та частота
зазначені в таблиці приладу. Підключення
до електромережі та заземлення повинні
бути виконані згідно діючих стандартів та
розпоряджень. Прилад витримує
короткострокові перепади напруги від -6 до
+6 %.
УВАГА!
Цей прилад сконструйований для
підключення до мережі змінного струму із
заземлювальним (третім) захисним
проводом.
Для Вашої безпеки підключайте прилад
тільки до електромережі із захисним
заземленням. Якщо Ваша розетка не
обладнана захисним заземленням,
зверніться до кваліфікованого фахівця.
Не переробляйте штепсельну вилку і не
використовуйте перехідні пристрої.
При підключенні до мережі без захисного
заземлення можливе ураження електричним
струмом.
o
90
Інструкція для експлуатації30
Page 31

Опис приладу
Холодильник (A)
У холодильнику зберігаються свіжі продукти
впродовж кількох днів.
Полиця (1)
(кількість залежить від моделі)
Полиця може бути оптимально розміщена
на спрямовувачах всередині приладу. Вона
захищена від випадання. Якщо Ви хочете
витягнути її, злегка підніміть задню частину
та витягніть. Продукти, що швидко псуються,
зберігайте на задній, більш холодній частині
полиці.
Увага!
Якщо на дверцятах є полиці, розмістіть
утримувач так, щоб довжина пляшок не
перешкоджала закриванню дверцят.
На утримувач можете розмістити 9 пляшок з
об’ємом 0,75 л або більше (макс. загальна
вага 13 кг) – дивіться етикетку під корпусом
термостату у приладі.
Утримувач для пляшок
(лише в деяких моделях)
Утримувач пляшок (кількість залежить від
моделі) призначений для зберігання пляшок.
Рекомендуємо дві корисні позиції
розміщення (горизонтальна або під кутом)
таким чином, пляшки можна розмістити на
стопорі. Це захищає від випадання. Якщо Ви
хочете витягнути, підніміть задню частину та
потягніть на себе.
Інструкція для експлуатації 31
Отвір для стоку води (2)
Необхідно постійно перевіряти жолоб та
отвір для стоку води, оскільки вони не
повинні бути засміченими (наприклад,
залишками їжі). В іншому випадку, почистіть
їх, використовуючи пластмасову соломину.
Page 32

Контейнер для фруктів та овочів (3)
Контейнер знаходиться на дні холодильника
під скляною полицею та використовується
для зберігання фруктів та овочів. Таким
чином, створюється вологість, яка
забезпечує сприятливі умови для зберігання
фруктів та овочів. (найменше
зневоднювання).
Вентилятор
(тільки в деяких моделях)
За допомогою вентилятора всередині приладу
рівномірно встановлюється температура і
зменшується конденсат на полицях приладу.
Коли дверцята холодильника відкриті,
вентилятор припиняє працювати.
Рекомендуємо вмикати вентилятор:
коли кімнатна температура
підвищується (понад 30°C),
у разі підвищеної вологості (впродовж
літа).
Увімкнути/вимкнути вентилятор
УВІМК. =
Примітка: Енергоспоживання підвищується
під час роботи вентилятора.
ВИМК. =
0
Дверцята
Дверцята оснащені різними полицями та
утримувачами, що використовуються для
зберігання яєць, сиру, масла, йогурту та
інших невеликих згортків, тюбиків,
консервних банок, тощо. Нижня полиця
використовується для зберігання пляшок.
Освітлення холодильника
Лампочка для освітлення холодильника
загоряється, коли відкрито дверцята
холодильника. Функціювання лампочки не
залежить від розміщення ручки
терморегулятора.
Морозильна камера (B)
Морозильна камера призначена для
заморожування свіжих продуктів та для їх
зберігання.
Ящик для заморожування (4)
використовується для заморожування
свіжих продуктів.
Ящик для зберігання (5)
Використовується для зберігання
заморожених продуктів.
Отвір для стоку води (6)
(Дивись „Технічне обслуговування та
чищення”).
Акумулятори холоду (7)
(лише в деяких моделях)
У верхній частині морозильної камери є два
акумулятора холоду.
Перед першим увімкненням морозильної
камери, витягніть акумулятори. Коли
погасне червона лампочка, поставте їх на
попереднє місце.
Акумулятори підтримують однакову
температуру заморожених продуктів,
забезпечуючи цим самим високу якість
продуктів та зменшення споживання
електроенергії.
Якщо Ви витягнете акумулятори, то це
відділення можна
з
аморожування фруктів (наприклад, ягід) або
для приготування льоду.
Ці акумулятори Ви також можете
використовувати для збереження низької
температури продуктів та пляшок під час
подорожі або пікніка.
Стопор для пляшок (8)
(лише в деяких моделях)
Стопор для пляшок (кількість залежить від
моделі) захищає від пересування пляшок в
дверцятах приладу.
використовувати для
Інструкція для експлуатації32
Page 33

ПРИМІТКИ:
Прилад може бути обладнаний різними
аксесуарами в залежності від моделі приладу.
Ручки дверцят мають різну форму в
залежності від моделі приладу.
Управління
Різні аксесуари (контейнер для спецій,
утримувач тюбиків, додаткові полиці та
перегородка для охолоджуючої камери) Ви
можете придбати в сервісних центрах.
Прилад керується за допомогою ручки
терморегулятора, яка знаходиться в правій
верхній частині внутрішньої поверхні
холодильника. ЇЇ необхідно повертати за
годинниковою стрілкою від STOP (0) до 7 та
назад.
Вибір температури
Максимальна позиція ручки (7) - це найнижча
температура (найхолодніша) в усіх частинах
приладу. При максимальній позиції
температура всередині приладу може
понижуватися нижче 0°C. Якщо температура
навколишнього середовища нормальна, ми
рекомендуємо установити терморегулятор в
середнє положення.
Зміна температури навколишнього
середовища впливає
Використання
Зберігання продуктів
Належне використання приладу, відповідно
упакований продукт, регулювання
температури та гігієнічні застереження
будуть істотно впливати на якість зберігання
продуктів.
Продукти, що зберігаються в холодильнику,
повинні бути упаковані належним чином, щоб
запобігти змішуванню різних ступенів
вологості та запахів (наприклад, в
поліетиленову плівку, фольгу, вощений папір,
тощо), або зберігатися в закритій посуді або
пляшках.
Перед зберіганням продуктів у холодильнику,
видаліть надмірну упаковку.
Систематично упаковуйте та перевіряйте, щоб
продукти не торкалися один одного (можуть
змішуватися різні запахи). Забезпечте
відповідну циркуляцію повітря нав
пакунків продуктів.
Ніколи не зберігайте матеріали, що можуть
зайнятися, випаруватися та вибухонебезпечні.
коло
на температуру в холодильнику ( у цьому
випадку відрегулюйте температуру).
У положенні STOP (0) прилад не працює,
(охолоджуюча система - в
все-таки знаходиться під напругою (лампочка
загоряється при відкриванні дверцят
холодильника).
Напої з великим вмістом алкоголю повинні
бути добре закритими та повинні зберігатися у
вертикальному положенні.
Продукти не повинні торкатися задньої стінки
холодильника!
Перед зберіганням в холодильнику продукти
необхідно охолодити.
Хрусткі та тендітні продукти повинні
зберігатися в найхолоднішій частині
холодильника.
Намагайт
необхідності.
Встановіть терморегулятор на найнижчу
температуру. Поступово регулюйте
терморегулятором, щоб уникнути
заморожування продуктів.
За допомогою термометра виміряйте
температуру в окремих відділеннях. Помістіть
терморегулятор у скляну ємкість, заповнену
водою. Значення температури найбільш
достовірне через кілька годин після
досягнення стабільного положення.
еся відкривати дверцята лише для
имкнена), але він
Інструкція для експлуатації 33
Page 34

Деякі органічні речовини, такі як ефірна олія у
скоринках лимону та апельсину, кислота у
маслі, тощо, при довгостроковому контакті з
пластмасовими поверхнями можуть
спричинити пошкодження та передчасне
старіння.
Неприємний запах у холодильнику вказує на
зіпсовані продукти або на забруднення
внутрішніх поверхонь холодильника.
безпосередньо миттям холодильника з
додаванням у воду невеликої кількості оцт
Ми також рекомендуємо використовувати
фільтри з активованим вугіллям, що
очищують повітря або нейтралізують
неприємні запахи.
Якщо Вас не буде довгий час вдома, не
залишайте у холодильнику продукти, що
швидко псуються.
у.
Неприємний запах можна усунути
Час зберігання свіжих продуктів у холодильнику
Продукти Час зберігання (в днях)
Масло +++++++=====
Яйця ++++++++++====
М’ясо: сире
кусками
М’ясо: сире
кусками
копчене ++++++++++====
Риба +=
Маринади ++++++++++====
Овочі ++++++++======
Сир ++++==========
Десерти ++====
Фрукти ++========
Готові блюда ++==
Значення: + рекомендований час зберігання = можливий час зберігання
Заморожування продуктів
Ретельно виберіть продукти, які Ви
збираєтеся заморозити; вони повинні бути
відповідної якості та придатні для
заморожування.
Використайте відповідну тару та правильно
упакуйте.
Упаковка не повинна пропускати
повітря та вологу, щоб не
спричинити засихання та втрату
вітамінів.
Фольга та пакети повинні бути
м’якими та еластичними, щоб тісно
прилягали до продуктів.
На заморожених продуктах вк
кількість продукту та дату заморожування.
Дуже важливо, щоб продукт був
заморожений як найшвидше. Тому ми
рекомендуємо не робити великих пакунків,
а також охолодити їх перед
заморожуванням.
Кількість продуктів, які можна розмістити у
морозильнику впродовж 24 годин, вказана
у таблиці (об’єм заморожування). Якщо
вага більша, чим вказана, погіршується
1 2 3 4 5 6 7 8 9 10 11 12 13 14
++=
+=
якість заморожування та вже з
аморожених
продуктів.
Порядок заморожування
У приладі, що немає перемикача
інтенсивного охолодження, встановіть
ручку терморегулятора на позиції 4-6
за 24 години до заморожування. Через
24 години покладіть на полицю
морозильника продукти. Через 24 години
після цього по необхідності установіть
ручку терморегулятора у положення
робочої температури (див. „Вибір
температури”), і потім перекладіть
заморожені продукти в ящик для
ажіть вид,
зберігання.
У приладі, що має перемикач інтенсивного
охолодження, за 24 год
ини до
заморожування великої кількості продуктів
установіть ручку терморегулятора у
позицію 4-6. Через 24 години покладіть
продукти на полицю. Через 24 години
вимкніть перемикач та установіть ручку
терморегулятора у положення необхідної
температури (див. „Вибір температури”).
Інструкція для експлуатації34
Page 35

Вмикач включено, якщо видно значення „I”
або кольорове значення, і вимкнено, якщо
видно значення 0, або не видно
кольорового значення (залежить від
моделі).
Не розміщуйте продукти вище
позначеної лінії, щоб не завадити
вільній циркуляції холодного повітря –
дивіться малюнок нижче ( тільки для
деяких моделей).
При подальшому заморожуванні продуктів,
повторіть порядок заморожування.
Слідкуйте, щоб свіжі продукти не торкалися
заморожених.
Для заморожування невеликої кількості
продуктів (до 1 кг) немає необхідності
міняти температурний режим (див. „Вибір
температури”).
Зберігання заморожених
продуктів
Заморожені продукти зберігайте в
ящиках. Ви можете витягнути ящики, а
заморожені продукти покласти на полиці.
Продукти, заморожені промисловим
способом
Час зберігання та рекомендована
температура для зберігання продуктів,
що заморожені
промисловим способом, зазначені на
упаковці. Для зберігання керуйтеся
інструкцією виробника. Вибирайте лише
добре упаковані продукти, на яких
вказано повні данні та які зберігаються в
морозильниках при температурі не вище 18°C. Не купуйте продукти, які покриті
пластом інею, оскільки вони були кілька
раз розморожені. Намагайтеся уникати
розморожування
продуктів, оскільки
підвищення температури зменшує час
зберігання та погіршує якість продукту.
Приблизний термін зберігання заморожених продуктів
Продукти Час зберігання (в місяцях)
Овочі +++
Фрукти +++
Хліб, випічка +
Молоко +
Готові блюда +
М’ясо: яловичина +++
телятина +++
свинина +++
птиця +++
дичина +++
дрібно
порізане
Копчені ковбаси +
Риба: нежирна +
жирна +
Субпродукти +
12345 6 7 8 9 101112
+
Інструкція для експлуатації 35
Page 36

Розморожування заморожених
продуктів
Частково або повністю розморожені
продукти необхідно використовувати
якнайшвидше. При низькій температурі
продукти зберігаються, але не
знищуються мікроорганізми, які швидко
активуються після розморожування та
псують продукти. Часткове
розморожування зменшує харчову
цінність продуктів, особливо фруктів,
овочів та готових блюд.
Зміна напрямку відкривання дверцят
Ви можете змінити напрямок відкривання
дверцят. Необхідні отвори зроблені на
протилежній стороні корпусу приладу на
заводі.
Відкрутіть пластину та зніміть її, натиснувши
донизу.
Відкрутіть нижню петлю та зніміть нижні
дверцята разом з шайбою середньої петлі.
Відкрутіть середню петлю та зніміть верхні
дверцята разом з шайбою верхньої петлі.
Зніміть заглушку з протилежної сторони
приладу (де фікс
Відкрутіть заглушку верхньої петлі та
зафіксуйте її на протилежній стороні приладу.
Зніміть та поміняйте місцями фіксатор дверної
петлі та заглушки фіксатора.
Установіть шайбу верхньої петлі та верхні
дверцята на заглушку верхньої петлі.
Поверніть середню петлю на 180° та
зафіксуйте на протилежній стороні приладу.
Установіть шайбу середньої петлі та ни
дверцята на петлю з нижньої сторони.
ується середня петля).
жні
Установіть нижню петлю на нижні дверцята та
зафіксуйте.
Перекладіть кришку-пластинку нижньої петлі
на протилежну сторону пластини та прикріпіть
до приладу.
Якщо Ваш прилад оснащено ручкою, зніміть її
та переставте її на іншу сторону. (Якщо є
декілька ручок, переставте їх усіх таким самим
чином).
Деякі гв
Використайте декоративні заглушки для
Перевірте, чи правильно установлено
Якщо ущільнювач погано пристав до корпусу
инти мають заглушки. Зніміть їх перед
тим, як відкрутити гвинти.
отворів, що залишилися.
ущільнювач (не повинно бути складок та
повинен щільно прилягати навколо дверцят).
приладу, необхідно його нагріти з підходящої
відстані (наприклад, феном для волосся) та
легко розтягнути до від
повідної висоти.
Інструкція для експлуатації36
Page 37

1 Заглушка верхньої петлі
2 Шайба верхньої петлі
3 Середня петля
4 Шайба середньої петлі
5 Нижня петля
6 Основна пластина
7 Кришка-пластинка нижньої петлі
8 Заглушка фіксатора дверної петлі
9 Фіксатор дверної петлі
Технічне обслуговування та чищення
Автоматичне розморожування
холодильника
Немає необхідності розморожувати
холодильник, оскільки лід на задній стінці
розморожується автоматично. Лід на задній
стінці розморожується під час роботи
компресора; коли компресор не працює, лід,
що розтав, у вигляді капель стікає вниз
через отвір в задній стінці холодильника у
ємкість над компресором та випаровується.
Ручне розморожування
морозильника
Коли товщина льоду або інею в
морозильнику досягне 3-5 см, його
необхідно розморозити.
Інструкція для експлуатації 37
За кілька годин до розморожування встановіть
ручку терморегулятора на позицію 7, щоб
продукти добре заморозилися. Установіть
терморегулятор на STO P (0) та вимкніть
прилад від електромережі. Опорожніть
морозильник та покладіть продукти так, щоб
вони не розморожувалися.
Вставте трубочку, що додається, у отвір на дні
морозильника та помі
куди буде стікати вода. Щоб прискорити
розморожування, відкрийте дверцята
морозильника.
Для розморожування не використовуйте
аерозолі, оскільки вони можуть пошкодити
пластмасові частини та можуть бути
небезпечними для здоров’я.
стіть під нею ємкість,
Page 38

Очищення приладу
Перед очищенням приладу вимкніть його з
електромережі.
Не використовуйте грубозернистих та
агресивних засобів для чищення, щоб не
пошкодити поверхні.
Прилад помийте всередині водою та рідким
миючим засобом.
Лаковані поверхні помийте м’якою ганчіркою
та засобом для миття, що містить алкоголь
(наприклад, засіб для чищення скла). Ви також
можете використати алкоголь (етанол або
ізопропиловий спирт).
Для плас
рекомендується використовувати абразивні
або спеціальні агресивні миючі засоби, як
наприклад засоби для чищення нержавіючої
сталі.
Частини, що зроблені з нержавіючої сталі,
необхідно чистити спеціальними миючими
засобами. Використайте м’яку ганчірку та
нанесіть на поверхню тонкий пласт миючого
засобу.
Витягніть аксесуари, що знімаються, та
вимийте їх за допомогою во
миючим засобом. Пластмасові частини не
можна мити у посудомийній машині.
Помийте всередині приладу ледь теплою
водою, додавши до неї одну-дві столові ложки
оцту.
Час від часу стирайте пил з конденсатора за
допомогою м’якої неметалевої щітки або
пилососом.
тмасових та лакованих поверхонь не
ди та рідким
Не забувайте чистити ємкість для стоку води
над компресором (не витягуючи його).
Після очищення підключіть прилад до
електромережі та покладіть продукти.
Вимкнення приладу
Якщо Ви не збираєтеся користуватися
приладом довгий час, установіть ручку
терморегулятора на позицію STOP (0),
вимкніть з електромережі, витягніть
продукти, розморозьте та почистіть прилад.
Залиште дверцята злегка відкритими.
Усунення ушкоджень
Під час користування приладом, Ви можете
зіткнутися з пошкодженнями, які можете
усунути самостійно. Як правило, вони
виникають при неправильному використанні
приладу.
Прилад не працює після підключення до
електромережі
Перевірте чи є напруга в розетці і чи
включений прилад (ручка терморегулятора в
робочій позиції).
Система охолодження довгий час
працює без перерви
Надто часто відчиняються дверцята або
залишаються відчиненими довгий час.
Інструкція для експлуатації38
Неправильно закриті дверцята (дверцята
відвиснули, ущільнювач забруднено або
ушкоджено).
Можливо надто велика кількість продуктів.
Недостатнє охолодження компресора та
конденсатора (перевірте, чи є потік повітря за
приладом та почистіть конденсатор).
Намерзання льоду на задній стінці
Поки вода стікає в жолоб та через отвір в
ємкість на компресорі, автоматичне
розморожування приладу буде проходити
нормально.
Коли на задній стінці намерзає надто
великий пласт льоду (більше 3-5 мм),
прилад необхідно розморозити вручну.
Page 39

Установіть ручку терморегулятора в позицію
STOP (0) та залиште дверцята
відчиненими. Ніколи не використовуйте
електроприлади для розморожування та не
усувайте лід гострими приладами.
Після розморожування установіть ручку
терморегулятора в бажане положення та
зачиніть дверцята холодильника.
Причиною сильного намерзання льоду може
бути:
дверцята зачиняються не щільно
(почистіть ущільнювач, якщо він
забруднений, або замініть, якщо
ушкоджений);
надто часто відкриваються дверцята
або залишаються відкритими довгий
час;
якщо в холодильник кладуться гарячі
продукти;
продукти чи посуд торкається задньої
стінки.
З холодильника тече вода
Вода тече з холодильника, якщо засмічено
отвір для стоку води, або відтала вода тече
мимо жолоба для стоку води.
Очистіть отвір за допомогою пластмасового
негострого предмету.
Надто товстий пласт льоду розморожуйте
вручну (див. „Намерзання льоду на задній
стінці”).
Важко відчиняти дверцята
морозильника
Якщо Ви хочете зразу або через короткий
час вдруге відкрити дверцята морозильника,
Ви відчуєте утруднення. Відчинивши
дверцята, тепле повітря попадає всередину.
При його охолодженні тиск всередині
приладу зменшується, що і є причиною
важкого відкривання дверцят. Через кілька
хвилин (5-10), Ви можете відкрити дверцята
без зусиль.
Під час роботи компресора Ви можете чути
шум рідини, що тече, а під час паузи – шум
охолоджуючої рідини, що переливається. Це
нормальна робота і не впливає на термін
служби приладу.
На поч
Інколи, під час роботи приладу, з’являється
атку роботи приладу шум роботи
компресора та охолоджуючої рідини, що
переливається, може бути високим. Але це не
показник пошкодження та не впливає на
термін служби приладу. Поступово ці шуми
зменшаться.
незвичайний або сильний шум, який не
звичний для роботи приладу. Причиною появи
такого шуму зазвичай є нев
установка
Прилад повинен стояти рівно та
стійко на твердому покритті.
Він не повинен торкатися стіни або
інших елементів, що стоять поряд.
Перевірте правильне розміщення
обладнання приладу. А також
перевірте розміщення пляшок, банок
та інших ємкостей, контакт між якими
може спричинити шум.
ідповідна
Заміна лампочки
Перед заміною лампочки, вимкніть прилад з
електромережі. Натисніть на кришечку на
задній стороні (по напрямку стрілки 1 ) та
зніміть пластмасову кришечку (по напрямку
стрілки 2). Замініть лампочку на нову (E14,
макс. 15 Вт). Запам’ятайте: перегорівшу
лампочку не викидайте разом з органічним
сміттям.
Лампочка – це видатковий матеріал, тому
наша гарантія на неї не поширюється.
Шум
Для охолодження в холодильноморозильних приладах використовується
охолоджуюча система з компресором, що
може викликати шум. Сила шуму залежить
від установки, використання та „віку”
приладу.
МИ ЗАЛИШАЄМО ЗА СОБОЮ ПРАВО НА ВНЕСЕННЯ ЗМІН, ЩО НЕ
ВПЛИВАЮТЬ НА ФУНКЦІЮВАННЯ ПРИЛАДУ.
Інструкція для експлуатації 39
Page 40

 Loading...