

THE JACKBOX
User Manual v.1

Contents
The JackBox hardware ............................................................................................................................. 2
Adding the JackBox to your rig ................................................................................................................ 3
Why would I need a JackBox ? ................................................................................................................ 5
What exactly does the JackBox do? ........................................................................................................ 6
How do I calibrate expression pedals connected to the JackBox ? ......................................................... 7
Advanced expression pedal functionality ............................................................................................... 8
The expression pedal commands: an overview .................................................................................. 8
Changing the expression pedal range or sweep style ......................................................................... 9
Using one expression pedal to control multiple devices .................................................................. 10
Modifying the expression pedal behavior ......................................................................................... 10
Blocking expression pedal messages ................................................................................................. 11
Global expression pedal setup .......................................................................................................... 12
Dynamic expression pedal behavior ................................................................................................. 12
1
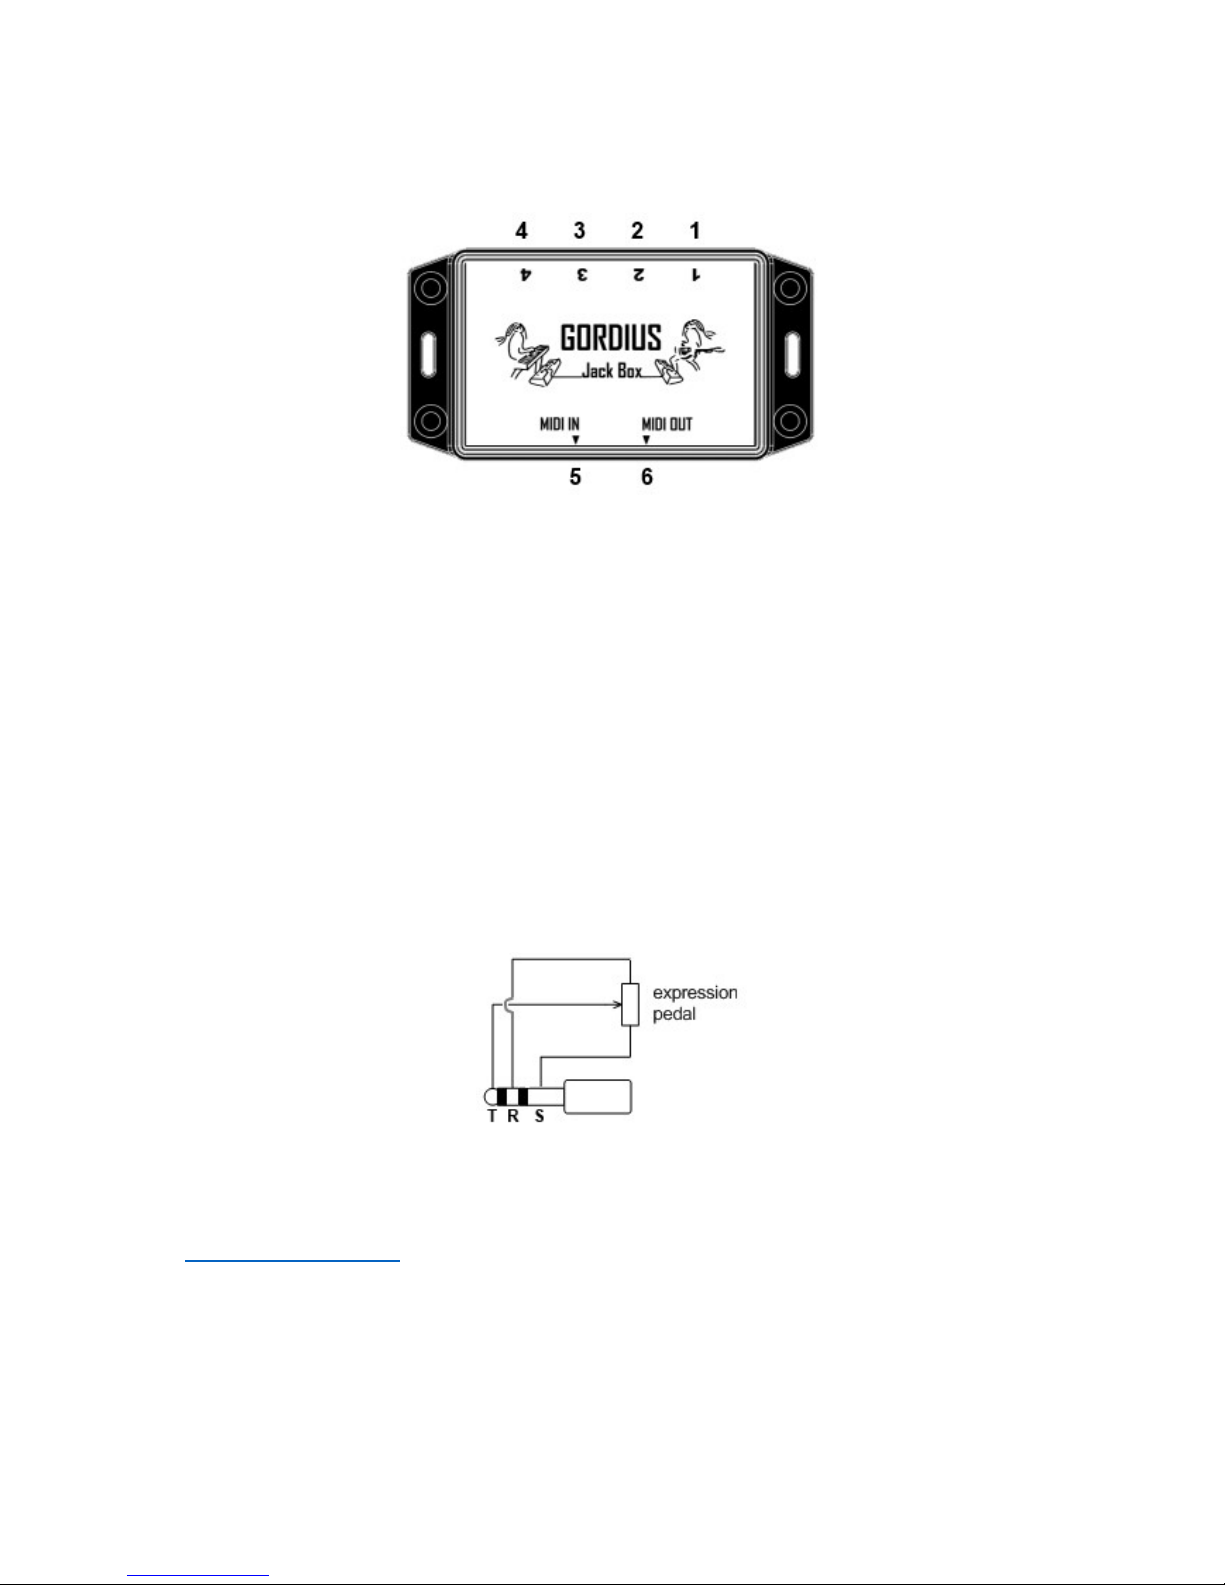
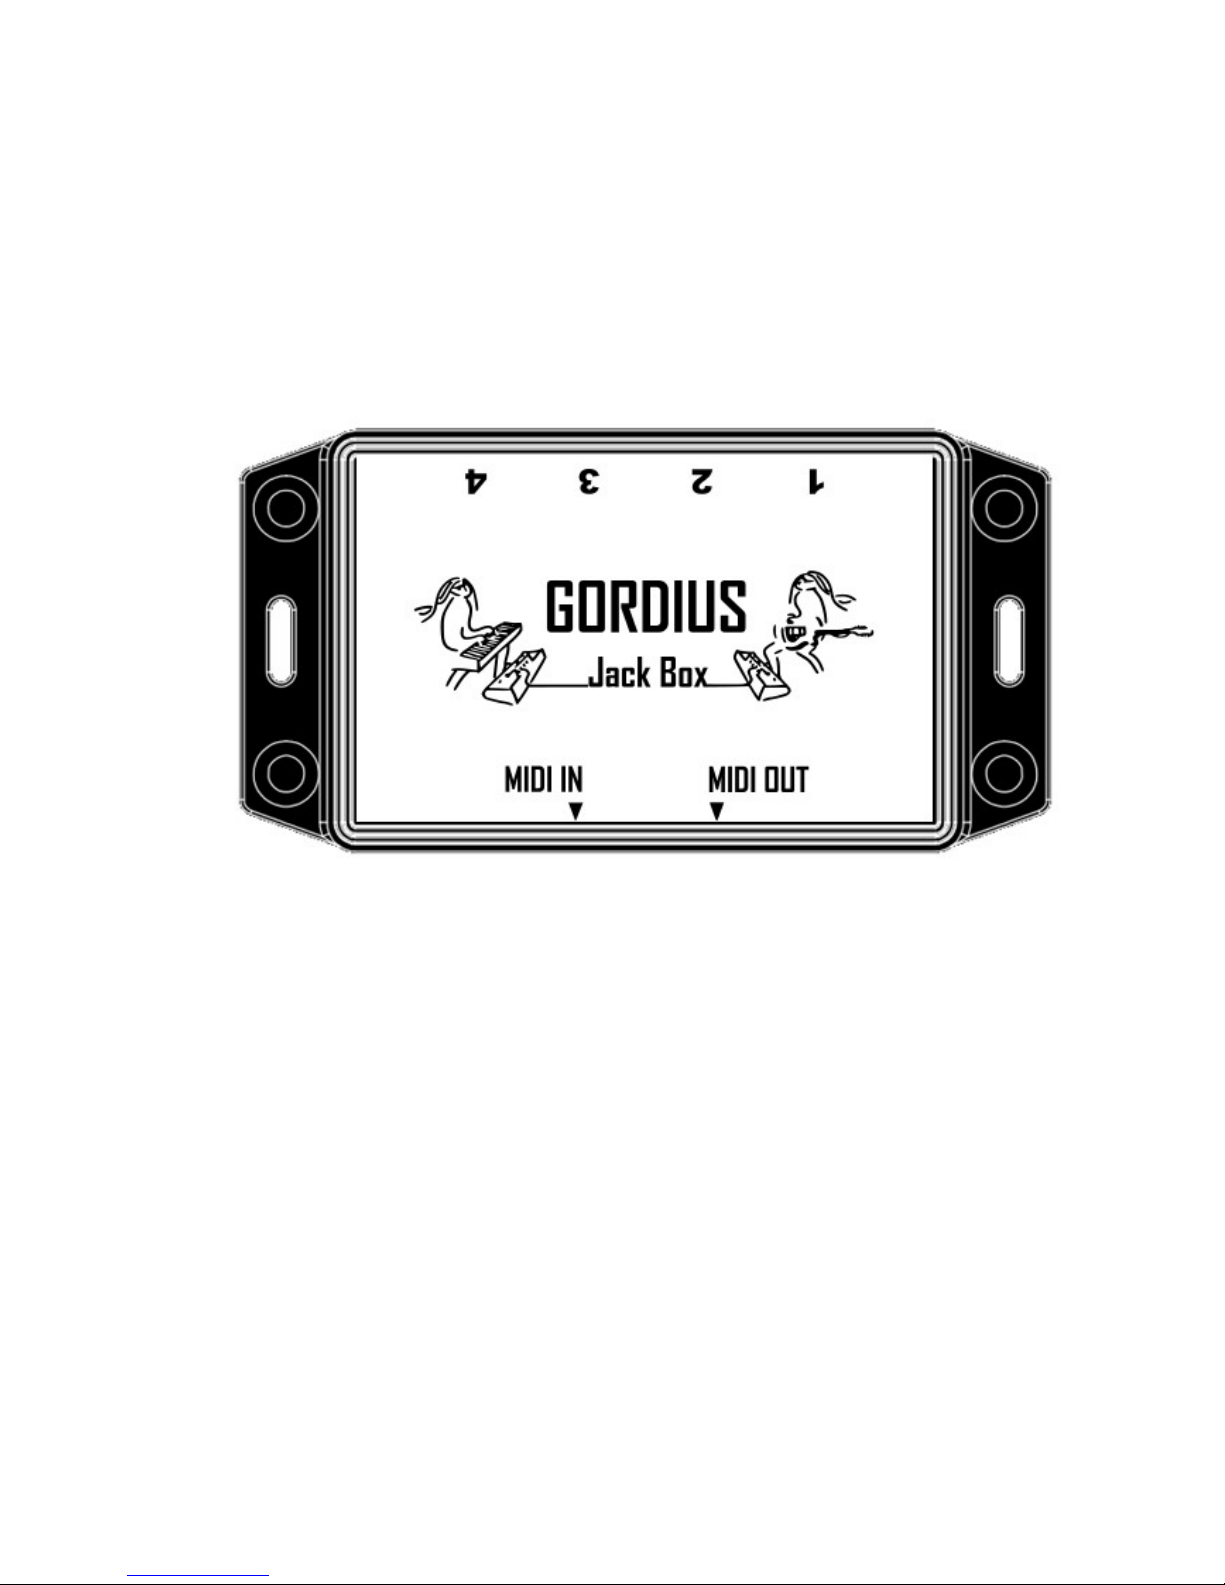
The JackBox hardware
1. stereo jack input for expression pedal (*)
2. stereo jack input for expression pedal (*)
3. stereo jack input for expression pedal (*)
4. stereo jack input for expression pedal (*)
5. 7-pins MIDI input. Connect it to the 7-pins MIDI connector of the FCB1010 (**)
6. 7-pins MIDI output. Connect it to the 7-pins MIDI connector of the TinyBox4Kemper
(*) The expression pedals need to have standard wiring, as depicted below. The resistor value of the
internal potentiometer is not important, the auto-calibration circuit of the JackBox is compatible with
a wide range of potmeter resistances. Also the type of potmeter (logarithmic or linear) is not
important, since the TinyBox digital processing allows you to choose a sweep curve which adapts the
expression pedal potmeter behavior.
(**) The 7-pins cable transfers MIDI to and from FCB1010, along with FCB1010 phantom power. For
plug-and-play compatibility the FCB1010 needs to be equipped with a “Single Cable Kit” (available at
http://shop.tinybox.rocks ) which makes the FCB1010 phantom powered and gives it the same 7-pins
MIDI connector for connection with the TinyBox4Kemper.
The JackBox can also be used without an FCB1010. In that case just leave the MIDI IN connector open.
The JackBox takes power from the TinyBox4Kemper through the JackBox MIDI OUT connector
2
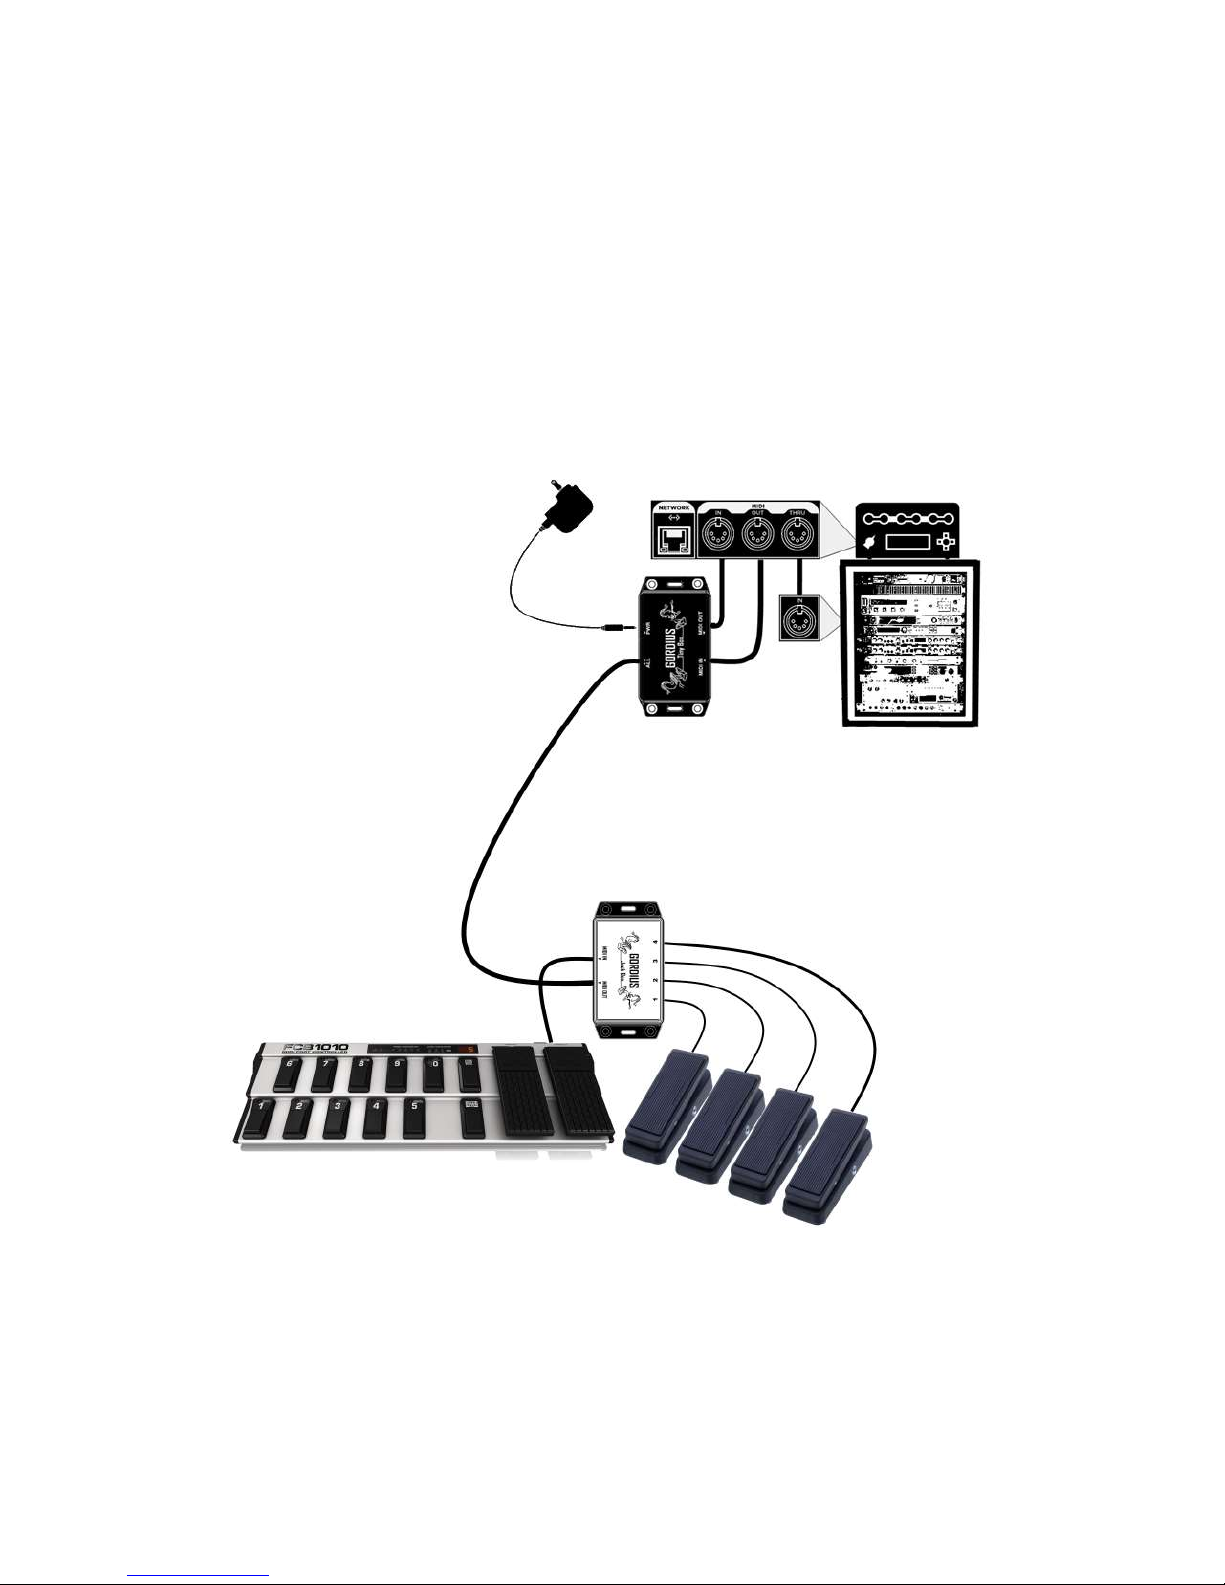
Adding the JackBox to your rig
The JackBox allows you to turn up to 4 regular expression pedals into advanced continuous MIDI
controllers. The MIDI stream of the JackBox can be seamlessly merged with the UnO4Kemper MIDI
stream coming from the FCB1010, by connecting the FCB1010 to the JackBox as depicted below, using
a short 7-pin MIDI cable (this type of cable can be optionally ordered along with the JackBox).
Adding the JackBox to an FCB1010 equipped setup
3

Also when using the Kemper Remote as MIDI controller, or when using no foot controller at all, you
can add the JackBox to your rig by connecting it to the TinyBox4Kemper, as shown below. This wiring
gives the advantage that you don’t need to run multiple long analog cables from your expression pedals
to the rack. Instead you run one single MIDI cable which carries power and the digital MIDI signal.
Adding the JackBox to a Kemper Remote equipped setup
When using the Remote as MIDI controller, adding a JackBox results in a second cable running from
your feet to the rack. Therefore you may prefer to connect your expression pedals directly to the
Remote instead. Only add a JackBox to your rig when you want the advanced expression pedal
functionality which the TinyBox4Kemper provides, as described in the next chapters.
4

Why would I need a JackBox ?
When you use an FCB1010 to select rigs, you already have 2 built-in expression pedals available. Since
the MIDI signal of those pedals is already processed by the TinyBox4Kemper, all the advanced
functionality described below is available to you even without JackBox. The reasons why you would
prefer to add the JackBox to this rig can be :
- 2 expression pedals are not enough, you prefer having 4 expression pedals at your feet.
- You don’t like the feel of the plastic FCB1010 pedals. Your standalone expression pedals may
be more sturdy, or you may simply prefer how they feel.
- You don’t like the sweep of the FCB1010 pedals. As they operate with an optical sensor and a
printed film, the sweep of some units may be subpar (due to dirt or light leakage) or sometimes
correct calibration is not possible (due to misalignment of the optical sensor)
When you use a Kemper Remote to select rigs, you have the possibility to connect expression pedals
directly to the Remote. Similar as the JackBox, the Remote digitizes the pedal movements and sends
the info to the Profiler through a single cable. You will only want to add a JackBox to your rig if you
need the extra functionality which the TinyBox4Kemper gives you, like :
- controlling more devices than only the Kemper Profiler
- adjusting different Profiler parameters than the standard volume, wah, pitch, morph
- specifying a different sweep curve or parameter adjustment range
- modifying the pedal function depending on the selected Profiler rig or effect
5

What exactly does the JackBox do?
Short answer: not too much actually…
Longer answer: as you will read in the next chapters, the JackBox lets you do pretty advanced things
with your standard expression pedals. However, it is good to understand that this advanced
functionality is not done by the JackBox itself, but by the TinyBox4Kemper it is connected to. The
JackBox acts as a sort of a dummy remote pedal control for the TinyBox4Kemper.
The JackBox converts the movement of up to 4 regular expression pedals into a digital MIDI stream.
The MIDI messages of all 4 pedals are merged together and sent as one MIDI stream to the JackBox.
Since this same MIDI cable can also carry power, the JackBox doesn’t need any external power supply.
The JackBox itself doesn’t need any programming. It uses a hardcoded MIDI channel and MIDI CC
(ControlChange) number to send the expression pedal info to the TinyBox4Kemper. All the magic then
happens inside that TinyBox, which can be fully programmed to do advanced stuff with the expression
pedal signals, as you can read in next chapters. The JackBox uses following hardcoded settings:
- MIDI channel = 13
- MIDI ControlChange value range = 0 – 127
- MIDI ControlChange Number :
o Expression pedal 1 : CC07 ( = volume *)
o Expression pedal 2 : CC01 ( = modulation wheel *)
o Expression pedal 3 : CC04 ( = foot controller *)
o Expression pedal 4 : CC11 ( = expression controller *)
(*) the mentioned functions for each pedal are actually irrelevant. These are the functions which the
MIDI standard assigned to each of the used CC numbers, however the actual function for each of these
messages depends on what the manufacturer of the controlled device decided to do with it. The
Kemper Profiler for instance uses the 4 ControlChange numbers for :
o CC07 = Volume
o CC01 = Wah
o CC04 = Pitch
o CC11 = Morph
But most important: as you will read later on the TinyBox4Kemper allows you to modify the actual CC
number (or numbers!) being sent by each pedal, and also the MIDI channel on which these are sent.
So it is actually not important which MIDI messages the JackBox itself sends to the TinyBox, since they
are further processed inside the box anyway.
6

How do I calibrate expression pedals connected to the JackBox ?
Expression pedal calibration is not necessary!
The JackBox contains an auto-calibration circuit which senses the range of the connected expression
pedal and automatically adapts the analog-to-digital conversion circuit to it. So you can just connect
your expression pedals and you are good to go.
Be aware that the auto-calibration circuit may briefly get confused while you are plugging in or out
expression pedals, so during that short period a few incorrect MIDI messages may be transmitted.
A second restriction is that this auto-calibration circuit requires a specific type of wiring for the
expression pedals: it expects the most common wiring which is depicted on p.2 of this manual, with
the pedal wiper being connected to the stereo jack tip, and the pedal wiper ends connected to ring
and sleeve of the stereo jack. There are a few expression pedals on the market which don’t follow this
standard wiring and have tip and ring connections reversed. If you happen to own one of these, you
will need to swap the 2 connections in your pedal or in the used jack cable to have it working with the
JackBox.
7

Advanced expression pedal functionality
The JackBox can turn a regular expression pedal into a pretty advanced continuous MIDI controller.
However, as explained in a previous chapter, this functionality is not part of the JackBox design itself.
It is all part of the highly programmable TinyBox4Kemper. In that box you can program the expression
pedal behavior as part of the advanced MIDI functionality which the box provides for simultaneous
control of multiple devices. Therefore you can read all about this functionality and how to program it
in the TinyBox4Kemper manual. But let us describe the expression pedal specific features in more
detail here. Just refer to the TinyBox4Kemper manual when it comes to learning how to do the actual
programming of the box.
The expression pedal commands: an overview
ScaleSweep [CC01/CC04/CC07/CC11] channelname from-till [sweepstyle]
ActivateSweep [CC01/CC04/CC07/CC11] channelname CtrlChange number
ActivateSweep [CC01/CC04/CC07/CC11] channelname PitchBend
ActivateSweep [CC01/CC04/CC07/CC11] channelname ChannelPressure
BlockSweep [CC01/CC04/CC07/CC11] channelname
Once you are familiar with the TinyBox4Kemper you will know you can fully program the box using a
simple programming language called “G#”. This language provides a set of commands to generate MIDI
control messages, or modify or filter MIDI messages which are passing through the box. Some of those
commands are specifically meant to modify the behavior of an incoming stream of CC01,CC04,CC07 or
CC11 ControlChange messages. Exactly, those are the messages sent by the JackBox!
The expression pedal related commands are listed above. While the commands correctly mention the
ControlChange message they act upon, being “CC01”,”CC04”,”CC07” or “CC11”, in case of the JackBox
this actually means “expr.pedal 1”, “expr.pedal 2”, “expr.pedal 3” or “expr.pedal 4”.
When you are using an UnO4Kemper equipped FCB1010, you already have 2 built-in expression pedals
available. As you can read in the UnO4Kemper manual, each of those pedals can be configured to send
CC01,CC04,CC07 or CC11 messages. So you can easily combine those 2 pedals with 2 extra analog
expression pedals connected to the JackBox. Just make sure all 4 pedals send a different CC number.
8

Changing the expression pedal range or sweep style
ScaleSweep [CC01/CC04/CC07/CC11] channelname from-till [sweepstyle]
Thanks to the JackBox auto-calibration circuit the expression pedals always send out a full MIDI range,
which is 0 – 127. However in some cases you might want to use the full pedal sweep to adjust only a
part of the parameter range. Simplest example is volume: you might not want to adjust the volume
down to silence with your volume pedal. Instead you could specify that the pedal gradually adjusts
between a “normal” and a “boosted” volume setting.
Command example :
ScaleSweep CC07 Kemper 80-127
- ScaleSweep is the command
- CC07 refers to the first expression pedal (which controls volume by default)
- Kemper refers to the MIDI channel (in a TinyBox4Kemper setup you can use intuitive channel
names instead of a number between 1 and 16)
- 80-127 is the outgoing MIDI value range when using the full expression pedal sweep
Apart from the sweep range, also the sweep “style” can be specified. You can use 3 possible sweep
styles :
- Linear is obvioulsy the default style which gives a linear pedal behavior
- SlowRising simulates the behavior of an expression pedal with “log” or “audio” taper. The
transmitted MIDI values change slower at the start of the range (heel down), and change faster
at the end of the range (tip down). This is typically the behavior you want when adjusting
volume, because the human ear is more sensitive for volume changes at low volumes
- FastRising simulates the behavior of an expression pedal with “inverse log” or “inverse
audio” taper. The transmitted MIDI values change faster at the start of the range (heel down),
and change slower at the end of the range (tip down). You would typically use this setting
when you want to use an volume pedal with audio taper for linear adjustments (for instance
for wah or pitch control). The FastRising curve will compensate for the slow rising behavior of
the audio taper inside the volume pedal.
Command example :
ScaleSweep CC07 Kemper 0-127 SlowRising
9

Using one expression pedal to control multiple devices
ActivateSweep [CC01/CC04/CC07/CC11] channelname CtrlChange number
The main asset of the TinyBox4Kemper is that it allows you to control multiple devices simultaneously.
In that line it also provides the possibility to use one single expression pedal for controlling multiple
devices. To do so the TinyBox4Kemper copies all incoming expression pedal MIDI messages to a
different MIDI channel.
Command example :
ActivateSweep CC07 Octaver CtrlChange 7
- ActivateSweep is the command
- CC07 refers to the first expression pedal (which controls volume by default)
- Octaver refers to the MIDI channel of an extra device in the MIDI chain
- CtrlChange 7 indicates that the copied MIDI messages still use CC number 07 (= volume)
Remark :
It is important to know that the ScaleSweep command, discussed in the previous topic, is applied
after the ActivateSweep command. This means that the incoming expression pedal messages are
first copied to multiple MIDI channels, and after that a sweep style and range can be applied to each
of those channels. As a result multiple devices can have a different adjustment range or sweep curve
applied, even when being controlled from one and the same expression pedal. A very powerful feature!
Modifying the expression pedal behavior
ActivateSweep [CC01/CC04/CC07/CC11] channelname CtrlChange number
The same command can also be used to modify the behavior of an expression pedal. When you specify
a different CtrlChange number, the number of the incoming CC message (for instance CC07) is modified
to the other CC number, meaning that the expression pedal now adjusts a different parameter of the
device.
Command example :
ActivateSweep CC07 Kemper CtrlChange 73
With the sample command above you can temporarily adapt your main volume pedal to adjust the
Profiler monitor volume instead. You could for instance assign an unused stomp in a rig to send this
command on activation, and revert to the regular behavior (by specifying “CtrlChange 7”) on
stomp deactivation. This way you would toggle between main volume and monitor volume adjustment
using a stomp switch.
10

ActivateSweep [CC01/CC04/CC07/CC11] channelname PitchBend
ActivateSweep [CC01/CC04/CC07/CC11] channelname ChannelPressure
The first command above turns your expression pedal into a PitchBend pedal, and the second
command turns it into a pressure sensitive device. This may not be relevant for control of the Kemper
Profiler. As you will know, the Profiler doesn’t listen to PitchBend MIDI messages. Instead CC04 is used
as pitch control for the Profiler.
However when you for instance would integrate a MIDI controlled synthesizer module into your rig,
this feature may be very interesting. It actually gives the guitar player a “handy” (pun intended)
alternative for some common controls which a keyboard player has at his reach: a pitchbend stick
(which sends PitchBend MIDI messages), and a pressure sensitive keyboard (which can send MIDI
ChannelPressure messages depending on how hard the keys are being pressed).
The commands above will simply replace the incoming ControlChange messages of the expression
pedal with PitchBend or ChannelPressure messages on the given MIDI channel.
Remark :
While most MIDI messages have a 7-bit resolution, PitchBend is an exception which can use 14-bit
values. Therefore JackBox calculates PitchBend messages with a full 14-bit resolution. Just make sure
to use a linear sweep when sending out PitchBend messages, that’s what a pitch controller expects.
Blocking expression pedal messages
BlockSweep [CC01/CC04/CC07/CC11] channelname
This command disables one of the expression pedals on a certain MIDI channel. It will mainly be used
after having activated a certain expression pedal function for a device using the ActivateSweep
command above. For instance the ActivateSweep command could be sent when activating a
stompbox, while the BlockSweep command would be sent when deactivating the same stompbox.
Another use could be for blocking the default JackBox message stream. As mentioned at the start of
the manual, the JackBox sends its MIDI messages on MIDI channel 13. If you have no device listening
on that channel those messages will not harm, but still you might prefer not to forward them from
TinyBox4Kemper down the MIDI chain in order not to flood the Kemper Profiler with unused MIDI
messages. The BlockSweep command can filter them out.
11

Global expression pedal setup
LINK presetname TO STARTUP
The commands discussed in the previous topics give you all functionality you need to configure your
expression pedals in a complex rig with multiple devices. In most cases you will want have a certain
global configuration to start from, which could then be dynamically adapted depending on the active
Profiler rig.
The TinyBox4Kemper provides the LINK command above to specify a preset which is activated as
soon as the TinyBox is powered. For that reason this preset will typically not contain any MIDI messages
sent to the different devices in the rig (those devices might not yet be up and running when powering
the TinyBox4Kemper). But it can contain any combination of ActivateSweep and ScaleSweep
commands which initialize the default expression pedal behavior, stored inside the TinyBox4Kemper.
Dynamic expression pedal behavior
A big asset of the JackBox-TinyBox4Kemper combination is that the expression behavior can be
modified depending on the active rig or effects. This is the essential approach of the TinyBox4Kemper
programming structure: any combination of commands (including expression pedal control
commands) can be linked to an individual Profiler rig or performance slot, or to a specific effect slot.
If you want to take it even a step further, you can. The “G#” programming language used in the
TinyBox4Kemper offers the possibility of using “variables” and “conditional logic”. You can do pretty
advanced things with this, resulting in different expression pedal behavior depending on a lot of
different factors. We will leave it to your imagination to do wild things with this – but don’t panic, even
without any of those advanced features you already have pretty powerful and dynamic expression
pedal control!
Have fun !
12
 Loading...