

Page 1

USER MANUAL
HERO3_Plus_Silver_UM_ENG_FRA_REVA.indb 1 6/26/13 3:26 PM
Page 2

Join the GoPro party at facebook.com/gopro to see
what other GoPro owners are capturing and sharing.
Share your footage and join the GoPro movement!
HERO3_Plus_Silver_UM_ENG_FRA_REVA.indb 2 6/26/13 3:26 PM
Page 3

table of contents
Accessories 4
Mounts + Accessories 5
HERO3+ Features 6
Camera LCD Status Screen 8
Camera Menu Flow Chart 9
Camera Soware Updates 10
Basics 10
Camera Modes 13
Camera Settings 20
Capture Settings 31
Set Up 35
Wi-Fi + Wi-Fi Remote 43
Connecting to GoPro App 44
Storage/microSD™ Cards 45
System Requirements 46
Transferring Files 47
Playback 48
Battery 50
Important Warning Messages 53
Camera Housing 54
Using the Mounts 58
Customer Support 60
HERO3_Plus_Silver_UM_ENG_FRA_REVA.indb 3 6/26/13 3:26 PM
Page 4
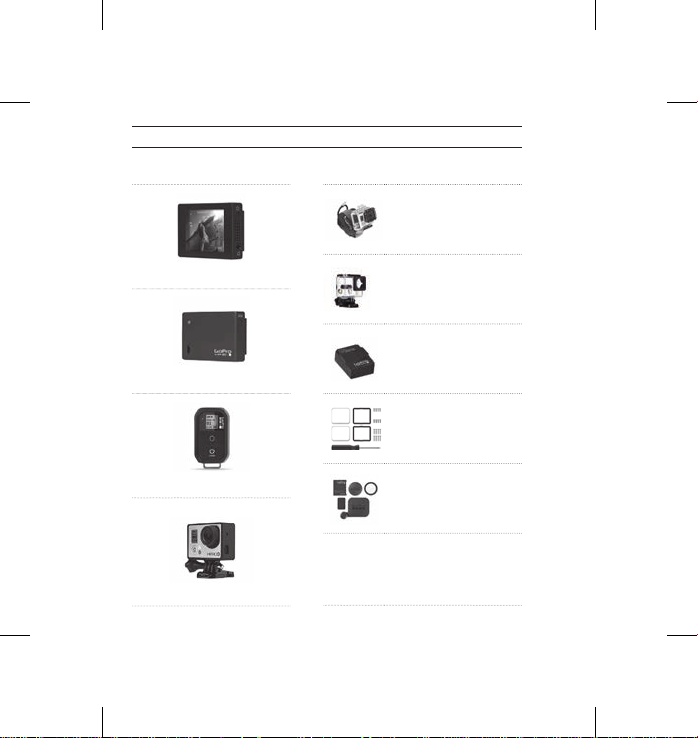
WeaR It. mount It. loVe It.
FEATURED ACCESSORIES
LCD Touch BacPac
Battery BacPac
™
™
Wi-Fi Remote
The Frame
HERO3+ ACCESSORIES
Wrist Housing
Standard Housing
Rechargeable Battery
Dive Housing
Lens Replacement Kit
Protective Lens + Covers
More HERO3+ accessories available at gopro.com
4
HERO3_Plus_Silver_UM_ENG_FRA_REVA.indb 4 6/26/13 3:26 PM
Page 5

MOUNTS + ACCESSORIES
see moRe at GoPRo.com
Helmet Front Mount Chesty Handlebar/Seatpost/
Floaty Backdoor Head Strap
Roll Bar Mount Tripod Mounts Anti-Fog Inserts Jaws Flex
Curved + Flat
Adhesive Mounts
+ QuickClip
Side Mount Camera Tethers
Pole Mount
Suction Cup Vented Helmet
Surfboard Mounts
Strap
Clamp Mount
Dual Battery
Charger
5
HERO3_Plus_Silver_UM_ENG_FRA_REVA.indb 5 6/26/13 3:26 PM
Page 6
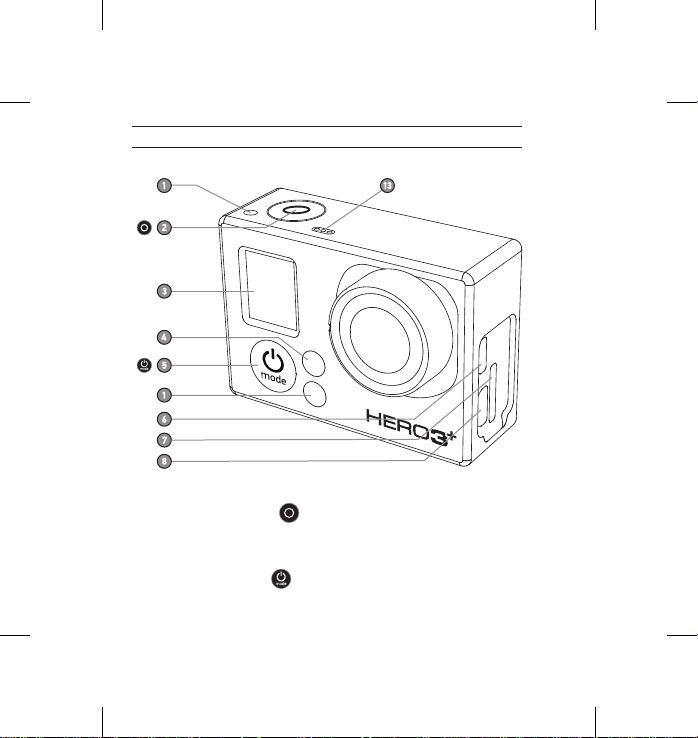
HeRo3+ featuRes
1. Camera Status Lights (Red)
2. Shutter/Select Button
3. LCD Status Screen
4. Wi-Fi Status Lights (Blue
5. Power/Mode Button
6
HERO3_Plus_Silver_UM_ENG_FRA_REVA.indb 6 6/26/13 3:26 PM
)
6. Micro HDMI Port
(Cable not included)
7. MicroSD Card Slot
(SD card not included)
8. Mini-USB Port
(Supports Composite A/C
cable/3.5mm stereo mic
adapter, not included)
Page 7
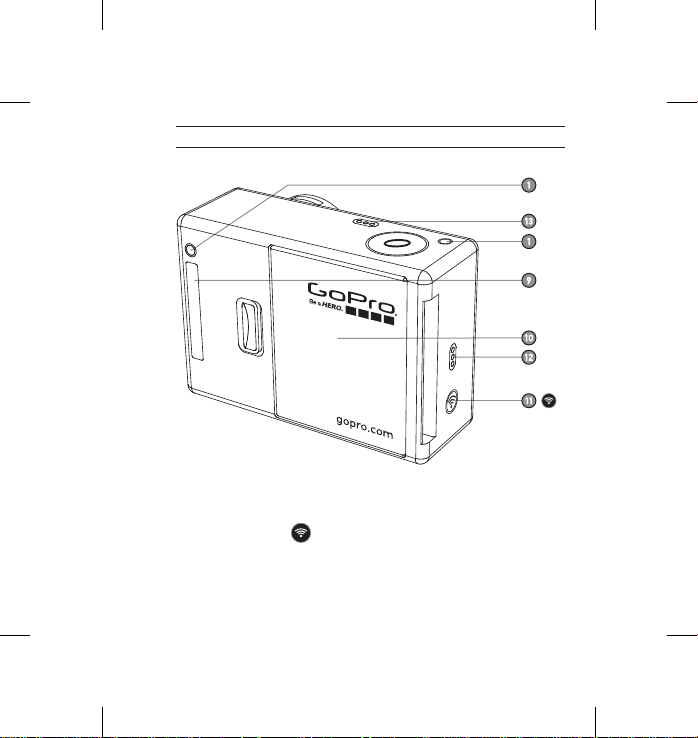
HeRo3+ featuRes
9. HERO Port
10. Battery Door
11. Wi-Fi On/Off Button
12. Audio Alert
13. Microphone
HERO3_Plus_Silver_UM_ENG_FRA_REVA.indb 7 6/26/13 3:26 PM
7
Page 8
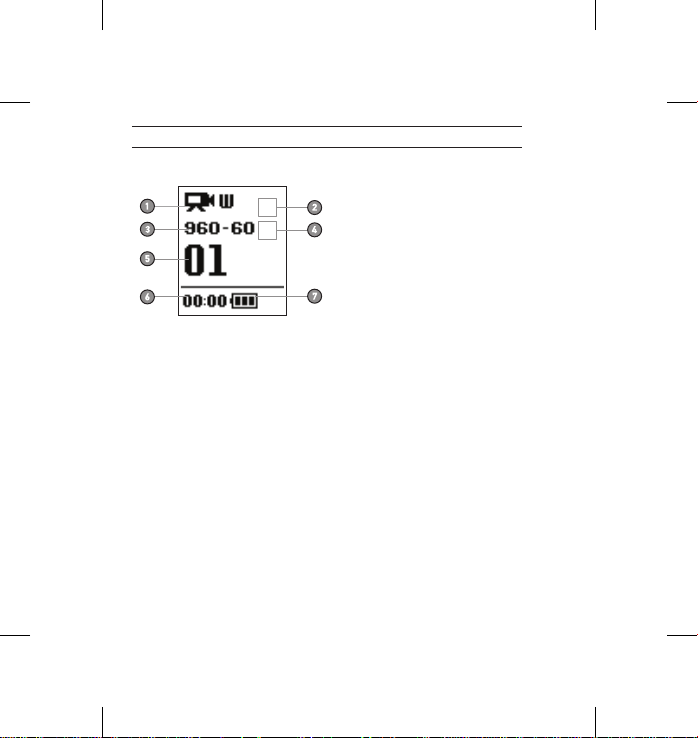
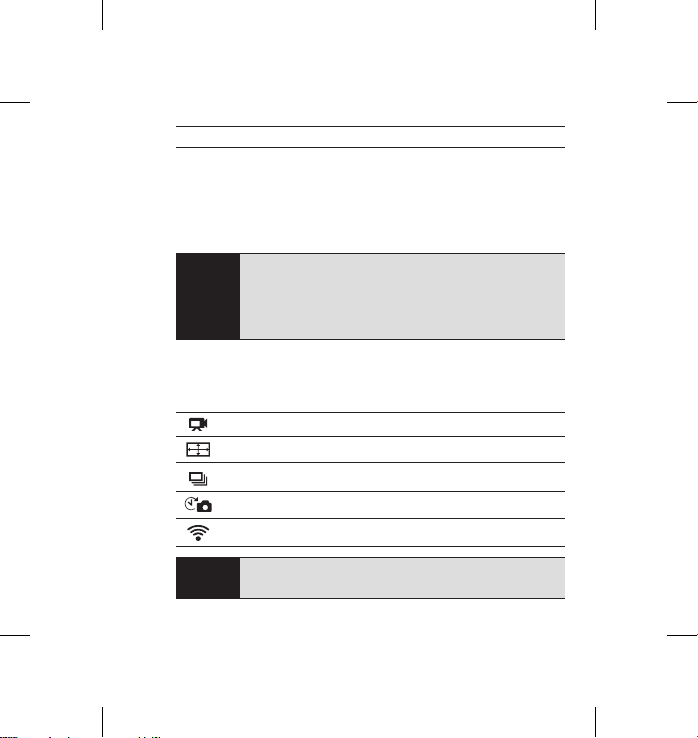
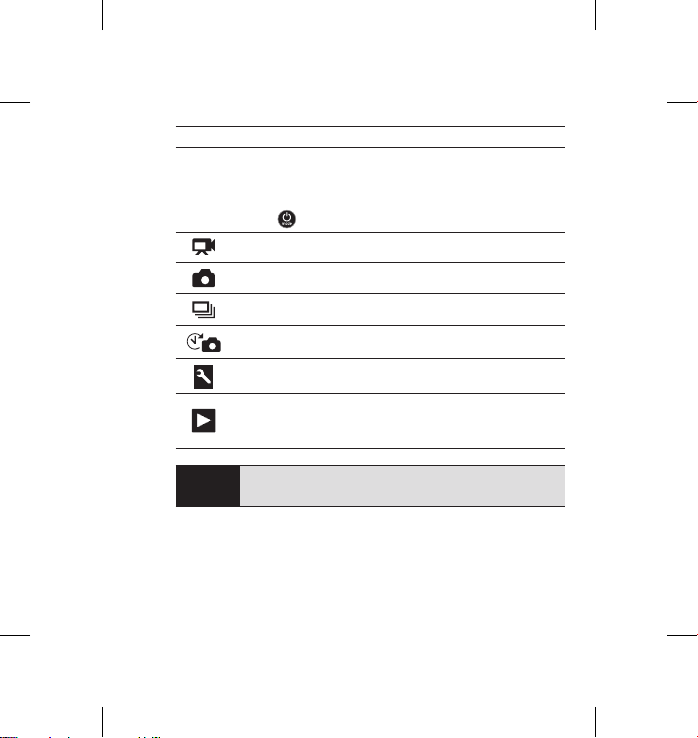
cameRa lcd status scReen
The LCD screen displays the following information about HERO3+ modes and settings:
1. Camera Modes/FOV (Field of View)
2. Capture Setting Modes (not shown)
3. Resolution/fps (Frames Per Second)
4. Time Interval Settings: (not shown)
5. Counter
6. Time/Storage/Files
7. Battery Life
NOTE: The icons displayed above will vary depending on what mode your camera is in.
8
HERO3_Plus_Silver_UM_ENG_FRA_REVA.indb 8 6/26/13 3:26 PM
Page 9
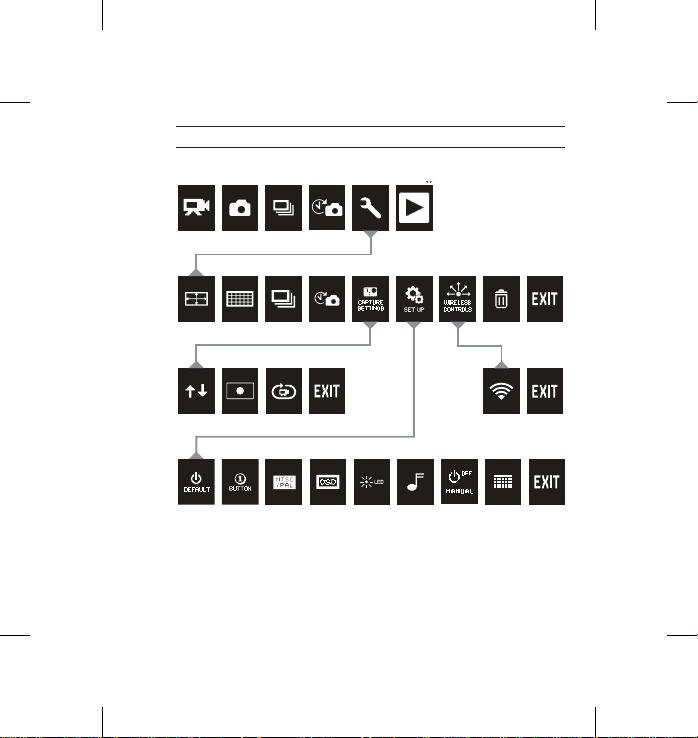
cameRa menu floW cHaRt
MODES
CAMERA SETTINGS
CAPTURE SETTINGS WI-FI
SET UP
*Playback only appears in LCD Status Screen if camera is connected
to a TV or LCD Touch BacPac™ (optional accessory, sold separately).
9
HERO3_Plus_Silver_UM_ENG_FRA_REVA.indb 9 6/26/13 3:26 PM
Page 10
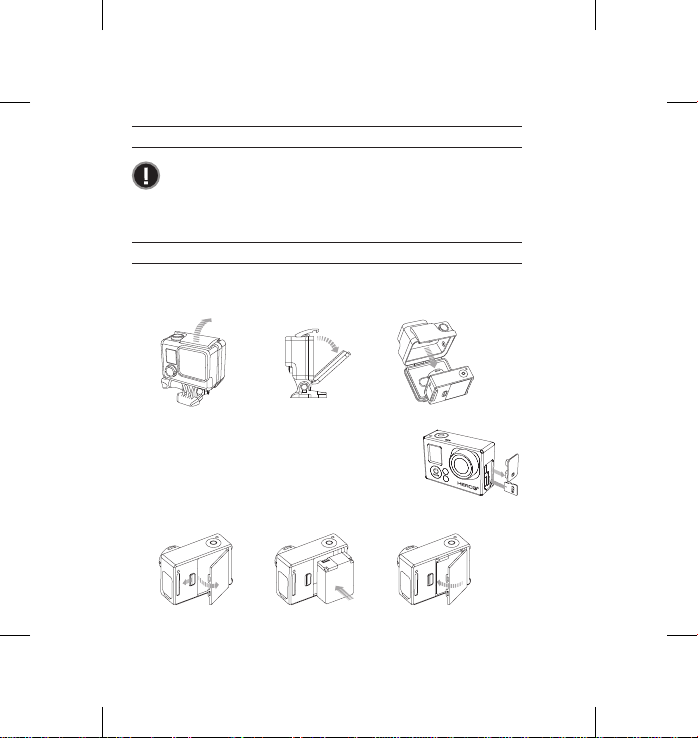
Slim housing surfboard mount installation
Slim housing remove camera
Slim housing insert camera
Slim housing closed Swapping housing doors
Quick Release Buckle + Thumb Screw + Slim housing = Complete Unit
cameRa softWaRe uPdates
To get the latest features and best performance from your HERO3+
camera, make sure you’re using the most current camera soware.
To check if soware updates are available, visit: gopro.com/update.
usInG YouR HeRo3+: basIcs
GETTING STARTED
1. Remove camera from housing
2. Remove camera side door and insert a microSD,
microSDHC™ or microSDXC™ card into the
card slot. A microSD card with a Class 10 speed
rating is required.
3. Open camera back door, insert battery, close camera back door.
HERO3_Plus_Silver_UM_ENG_FRA_REVA.indb 10 6/26/13 3:26 PM
10
Page 11
usInG YouR HeRo3+: basIcs
4. Charge the battery. The included lithium-ion battery comes partially
charged. To charge, connect the included USB cable to camera and
connect the other end of the cable to a power source such as a computer,
GoPro Wall Charger or GoPro Auto Charger. No damage will occur to
the camera or battery if used prior to a full charge.
When camera is OFF and charging:
• Red Camera Status Light will turn ON when camera
PRO
is charging.
TIP:
• Red Camera Status Light will turn OFF when charging
is complete.
▶See BATTERY LIFE for more information.
CAMERA DEFAULT SETTINGS
The HERO3+ Silver Edition camera powers up with the following default settings:
Video Resolution 960p60 fps
Photo Resolution 10MP
Burst Photo 10 photos in 1 second
Time Lapse 0.5 seconds
Wi-Fi OFF
PRO
Want to change your VIDEO and PHOTO settings?
TIP:
▶See SETTINGS menu to make changes.
11
HERO3_Plus_Silver_UM_ENG_FRA_REVA.indb 11 6/26/13 3:26 PM
Page 12
usInG YouR HeRo3+: basIcs
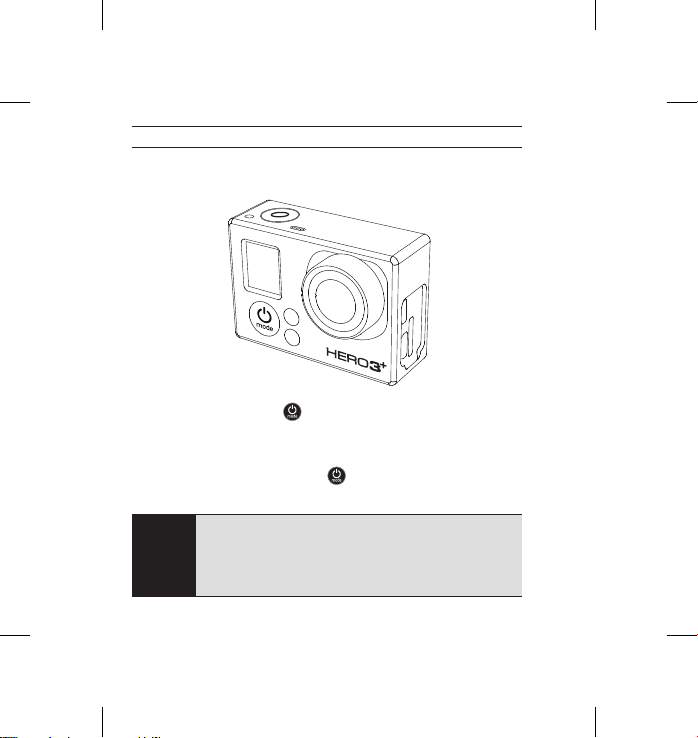
POWERING ON AND OFF
To power ON:
Press the Power/Mode Button
three times and the Sound Indicator emits three beeps.
To power OFF:
Press and hold the Power/Mode Button
flash several times and the Sound Indicator emits seven beeps.
Want to t urn your HE RO3+ into a “o ne-butt on” came ra that
automatically starts recording PHOTOS o r VIDEOS once it
PRO
turn s ON? Set the c amera to ONE BUTTON m ode.
TIP:
▶See ONE BUTTON mode for more information.
12
HERO3_Plus_Silver_UM_ENG_FRA_REVA.indb 12 6/26/13 3:26 PM
. The red Status Indicator Lights flash
. The red Status Indicator Lights
Page 13
usInG YouR HeRo3+: cameRa modes
OVERVIEW
The HERO3+ features several camera modes. To cycle through the modes, press
Power/Mode Button
PRO
TIP:
. The modes will appear in the following order:
VIDEO
PHOTO
BURST PHOTO
TIME LAPSE
SETTINGS
PL AYBACK
Record Video
Capt ure a singl e Photo
Capt ure up to 10 Photos in one se cond
Capt ure a serie s of
Adjust camera
Play back Video an d Photos. Appear s only if ca mera
is con nected t o a TV or LCD Touc h BacPac™
(optio nal acce ssory, s old separ ately).
Photos
Settings
at timed intervals
Use BURST PHOTO to capture fast-moving subjects.
▶See PLAYBACK for more information.
HERO3_Plus_Silver_UM_ENG_FRA_REVA.indb 13 6/26/13 3:26 PM
the
13
Page 14
usInG YouR HeRo3+: cameRa modes
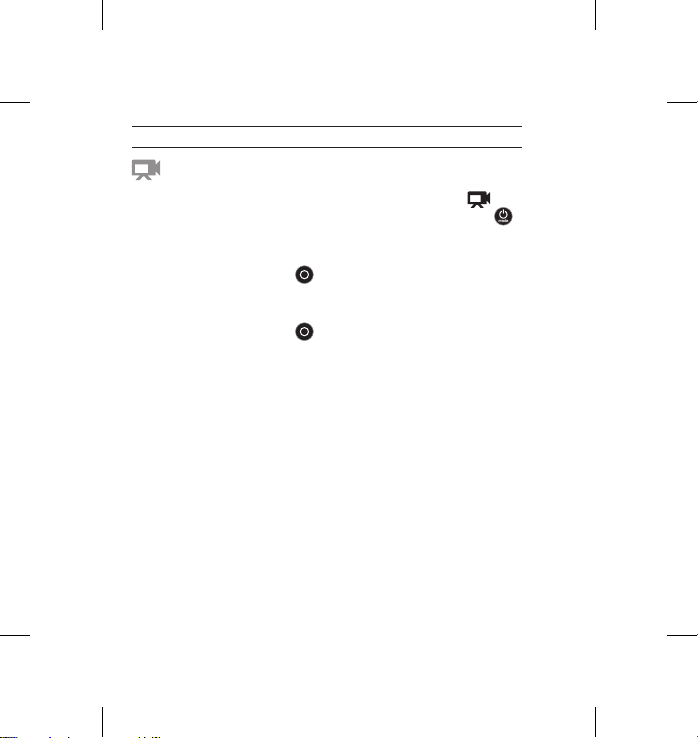
VIDEO
To record Video, verify the camera is in Video mode. If the Video icon
on your camera’s LCD screen
repeatedly until it appears.
To start recording:
Press the Shutter/Select Button
red Camera Status Lights will flash while recording.
To stop recording:
Press the Shutter/Select Button
three times and the camera emits three beeps to indicate recording has stopped.
The HERO3+ automatically stops recording when the memory card is full or the
battery is out of power. Your video will be saved before the camera powers OFF.
▶See VIDEO mode for instructions on how to change resolution settings.
14
HERO3_Plus_Silver_UM_ENG_FRA_REVA.indb 14 6/26/13 3:26 PM
is not showing, press the Power/Mode Button
. The camera will emit one beep and the
. The red Camera Status Lights flash
Page 15
usInG YouR HeRo3+: cameRa modes
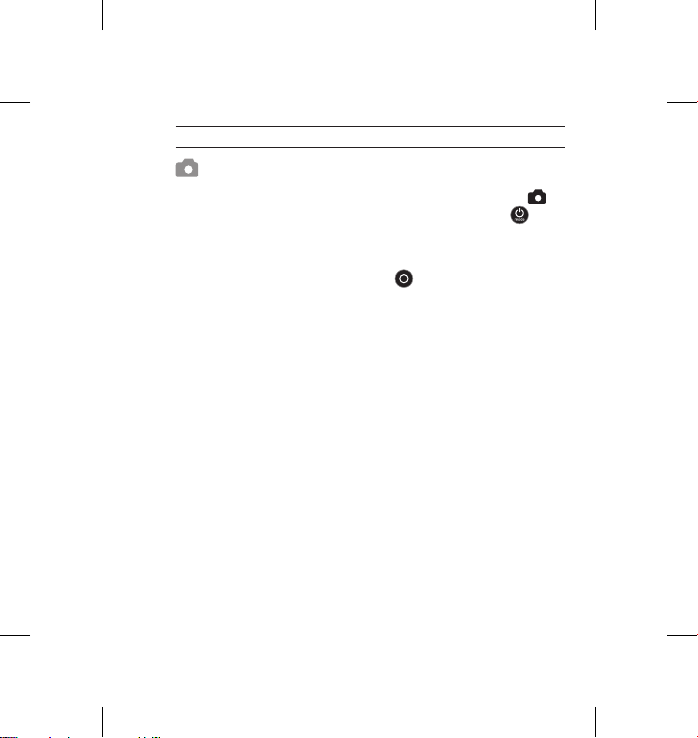
PHOTO
To capture a Photo, verify the camera is in Photo mode. If the Photo icon
on your camera’s LCD is not showing, press the Power/Mode Button
repeatedly until it appears.
To take a photo:
Press and release the Shutter/Select Button
and the red Camera Status Lights flash.
▶ See PHOTO modes for instructions on how to change resolution s
HERO3_Plus_Silver_UM_ENG_FRA_REVA.indb 15 6/26/13 3:26 PM
. The camera beeps two times
15
Page 16
usInG YouR HeRo3+: cameRa modes
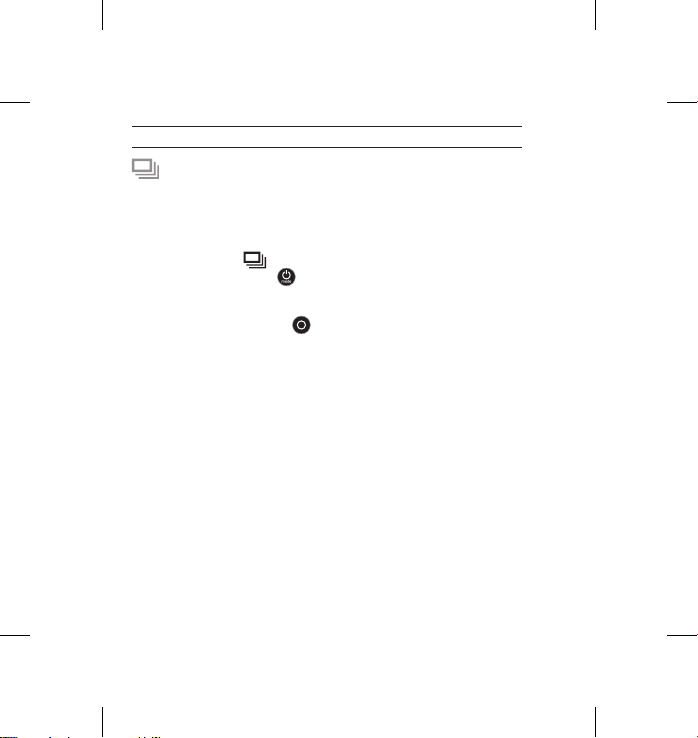
BURST PHOTO
In
Burst Photo
3 photos /1 second, 5 photos /1 second
To capture a Burst Photo series, verify the camera is in Burst Photo mode.
If the Burst Photo icon
press the Power/Mode Button
To take a
Press the Shutter/Select Button
and the camera beeps multiple times.
▶See BURST PHOTO for instructions on how to change the interval settings.
16
HERO3_Plus_Silver_UM_ENG_FRA_REVA.indb 16 6/26/13 3:26 PM
mode your camera takes multiple photos in short time intervals—
on your camera’s LCD screen is not showing,
Burst Photo
series:
and 10 photos /1 second.
repeatedly until it appears.
. The red Camera Status Lights flash
Page 17
usInG YouR HeRo3+: cameRa modes
TIME LAPSE
Time Lapse mode captures a series of photos at 0.5, 1, 2, 5, 10, 30 or 60
second intervals.
T
o capture a Time Lapse series, verify the camera is in Time Lapse mode.
If the Time
Lapse icon is not showing on your camera’s LCD screen,
press the Power/Mode Button
To take Time Lapse:
Press the Shutter/Select Button . The camera initiates countdown and the red
Camera Status Lights
To stop Time Lapse:
Press the
Shutter/Select Button . The red
times and the camera emits three beeps to indicate that Time Lapse has stopped.
▶See TIME LAPSE for instructions on how to change the interval settings.
HERO3_Plus_Silver_UM_ENG_FRA_REVA.indb 17 6/26/13 3:26 PM
repeatedly until it appears.
flash each time a Photo is taken.
Camera Status Lights
flash three
17
Page 18
usInG YouR HeRo3+: cameRa modes
SETTINGS
The Settings menu allows you to adjust a variety of camera settings including:
Video Resolution
Photo Resolution
Time Lapse
Burst Photo
Continuous Photo
▶ See SETTINGS menu to make changes, learn how to navigate menu options
and read more details on each setting.
18
HERO3_Plus_Silver_UM_ENG_FRA_REVA.indb 18 6/26/13 3:26 PM
Page 19
usInG YouR HeRo3+: cameRa modes
PLAYBACK
Playback Video and Photos by connecting your HERO3+ to a TV
(requires Micro HDMI, Composite or Combo Cable, sold separately).
You can also playback Video and Photos on the LCD Touch BacPac™
(optional accessory, sold separately). The Playback icon
only if camera is connected to a TV or LCD Touch BacPac.
▶See PLAYBACK for more information on viewing your VIDEOS and PHOTOS.
HERO3_Plus_Silver_UM_ENG_FRA_REVA.indb 19 6/26/13 3:26 PM
appears
19
Page 20
cameRa settInGs
SETTINGS
To enter the Settings menu:
1. Verify the camera is in the Settings mode. If the Settings icon
camera’s LCD screen is not showing, press the Power/Mode Button
repeatedly until it appears.
2. Press the Shutter/Select Button
3. Use the Power/Mode Button
options.
4. Press the Shutter/Select Button
5. To exit, hold down the Shutter/Select Button
through to
PRO
TIP:
20
HERO3_Plus_Silver_UM_ENG_FRA_REVA.indb 20 6/26/13 3:26 PM
and press the Shutter/Select Button .
If at any time you wish to exit from the Settings menu,
press and hold the Shutter/Select Button
to enter Settings menu .
to cycle through the various Settings
to select desired option.
for two seconds or cycle
on your
for two seconds.
Page 21
cameRa settInGs
VIDEO RESOLUTION/ FPS/FOV MODES
You can change Resolution, fps (frames per second) and FOV (field of view)
in the Video mode menu. You can also turn Auto Low Light mode ON/OFF.
Once in the Settings menu:
1. Press the Shutter/Select Button
2. Use the Power/Mode Button
3. Press the Shutter/Select Button
4. Use the Power/Mode Button
and the Shutter/Select Button
5. To change additional options, repeat step 4.
6. To exit, hold down the Shutter/Select Button
cycle through to
select it.
HERO3_Plus_Silver_UM_ENG_FRA_REVA.indb 21 6/26/13 3:26 PM
and press the Shutter/Select Button to
to enter .
to cycle through options.
to enter desired menu.
to cycle through each sub-menu option
to select it.
for two seconds or
21
Page 22

cameRa settInGs
The HERO3+ Silver Edition offers the following Video Capture modes:
Video
Resolution
1080p 60 50 Ultra Wide,
1080p 30 25 Ultra Wide,
960p 60 50 Ultra Wide
960p 30 25 Ultra Wide 1280x960
720p 120 100 Ultra Wide,
720p 60 50 Ultra Wide
720p 30 25 Ultra Wide,
WVGA 120 100 Ultra Wide 848x480
WVGA 60 50 Ultra Wide 848x480
22
HERO3_Plus_Silver_UM_ENG_FRA_REVA.indb 22 6/26/13 3:26 PM
NTSC
fps
PAL
fps
Field of View
(FOV)
Medium,
Narrow
Medium,
Narrow
Medium,
Narrow
Medium,
Narrow
Medium,
Narrow
Scree n Resolution
1920x1080
16:9
1920x1080
16:9
1280x960
4:3
4:3
1280x720
16:9
1280x720
16:9
1280x720
16:9
16:9
16:9
Page 23

cameRa settInGs
Video
Resolution
1080p 1080p60 is great for all shots, as high resolution and
Best Use
frame rate yield stunning results. Try 1080p30 when
shooting with a tripod or for fixed-mounted shots.
960p Use for body-mounted shots. Provides the largest
720p Best resolution and frame rate for handheld shots.
WVGA For smaller data files, this is standard definition resolution.
HERO3_Plus_Silver_UM_ENG_FRA_REVA.indb 23 6/26/13 3:26 PM
viewing area and smooth results for high-action capture.
Use 960p60 when slow motion is desired—use 960p30
when shooting in low-light conditions.
Use 720p120 or 720p60 when slow motion is desired.
Use 720p30 in low-light conditions.
Also good when slow motion is desired.
23
Page 24
cameRa settInGs
The HERO3+ can capture photos at 10MP, 7MP and 5MP resolutions.
Any change to photo resolution also affects photos captured in Photo,
Burst Photo and Time
Photo
Resolution
10MP Wide (Default)
7MP Wide
5MP Medium
24
HERO3_Plus_Silver_UM_ENG_FRA_REVA.indb 24 6/26/13 3:26 PM
PHOTO RESOLUTION MODES
Lapse modes.
Field of View
(FOV)
Page 25
cameRa settInGs
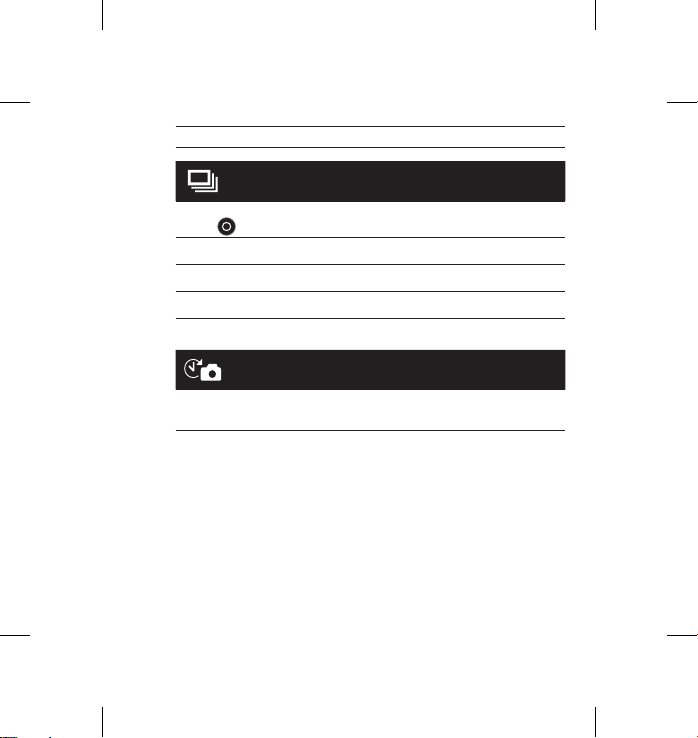
OPTIONS
the
Burst Photo mode captures a series of Photos when
Button
is pressed. Photos can be captured at the following rates:
3 photos in 1 second
5 photos in 1 second
10 photos in 1 second (Default)
TIME LAPSE
Several time interval options are available for Time Lapse mode,
including 0.5, 1, 2, 5, 10, 30 and 60 seconds.
HERO3_Plus_Silver_UM_ENG_FRA_REVA.indb 25 6/26/13 3:26 PM
Shutter/Select
25
Page 26
cameRa settInGs
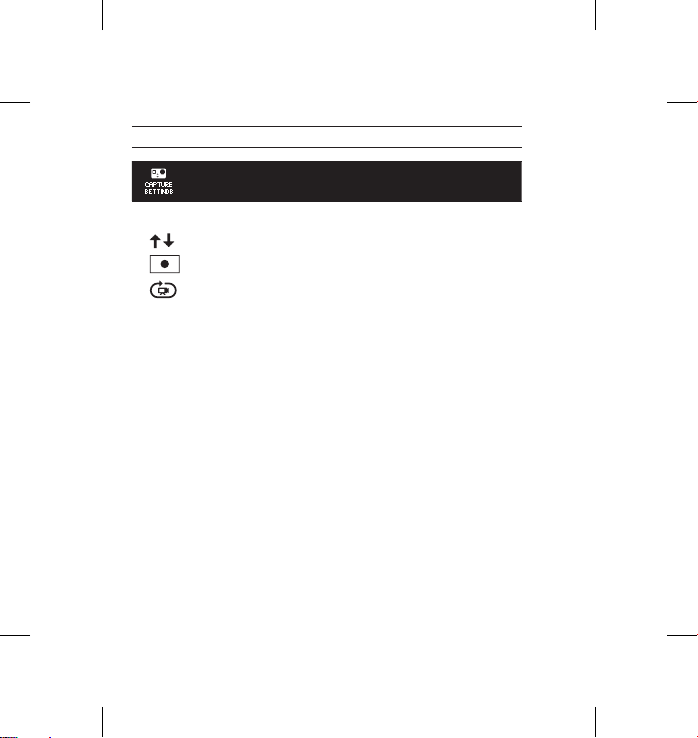
CAPTURE SETTINGS MENU
Capture Settings allows you to adjust the following advanced capture options:
Camera Orientation
Spot Meter
Looping Video
▶See CAPTURE SETTINGS section for a complete list of capture options.
26
HERO3_Plus_Silver_UM_ENG_FRA_REVA.indb 26 6/26/13 3:26 PM
Page 27
cameRa settInGs
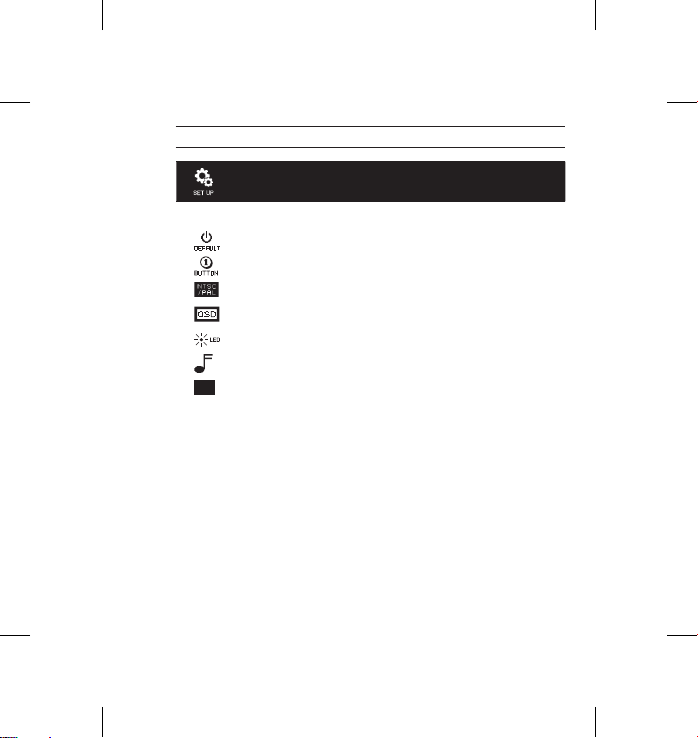
SET UP MENU
The Set Up menu allows you to adjust the following camera settings:
Default mode at Power Up
One Button Mode
NTSC/PAL
On Screen Display
Camera Status Lights
Sound Indicator
Month/Day/Year/Time
▶See SET UP MENU section for a complete list of set up options.
27
HERO3_Plus_Silver_UM_ENG_FRA_REVA.indb 27 6/26/13 3:26 PM
Page 28
cameRa settInGs
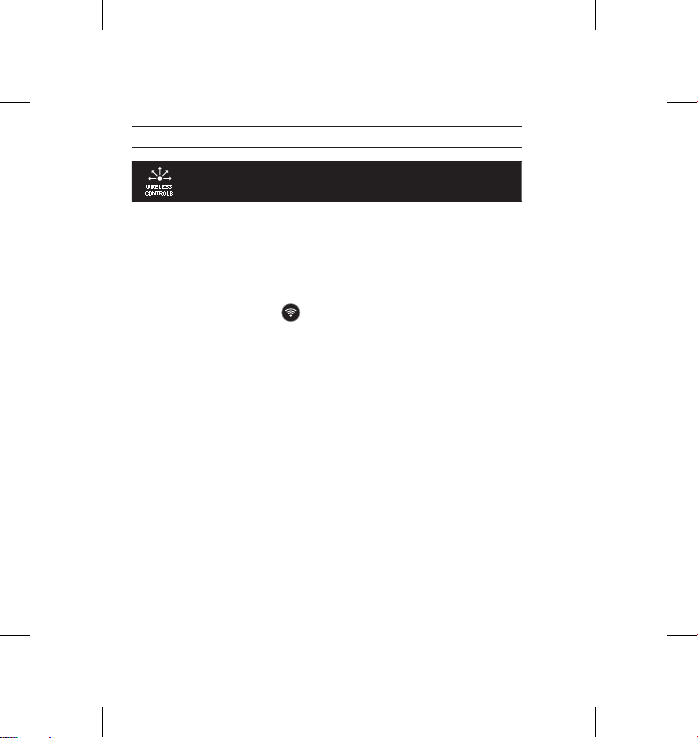
WIRELESS CONTROLS
The camera’s built-in Wi-Fi allows you to connect to the Wi-Fi Remote
(optional accessory, sold separately) or smartphone/tablet via the GoPro
App. When Wi-Fi is ON, a Wi-Fi status icon will appear on the camera’s LCD
Status Screen and the blue Wi-Fi Status Lights will blink intermittently.
When you turn OFF the Wi-Fi, the Wi-Fi Status Lights flash seven times.
To turn Wi-Fi ON/OFF:
Press the Wi-Fi On/Off Button
used Wi-Fi mode will be active when Wi-Fi is ON.
▶See WIRELESS CONTROLS section for a complete list of wireless functions
NOTE: Your camera cannot connect to the Wi-Fi Remote (optional accessory,
sold separately) and GoPro App at the same time.
28
HERO3_Plus_Silver_UM_ENG_FRA_REVA.indb 28 6/26/13 3:26 PM
to turn Wi-Fi ON/OFF. The most recently
Page 29
cameRa settInGs
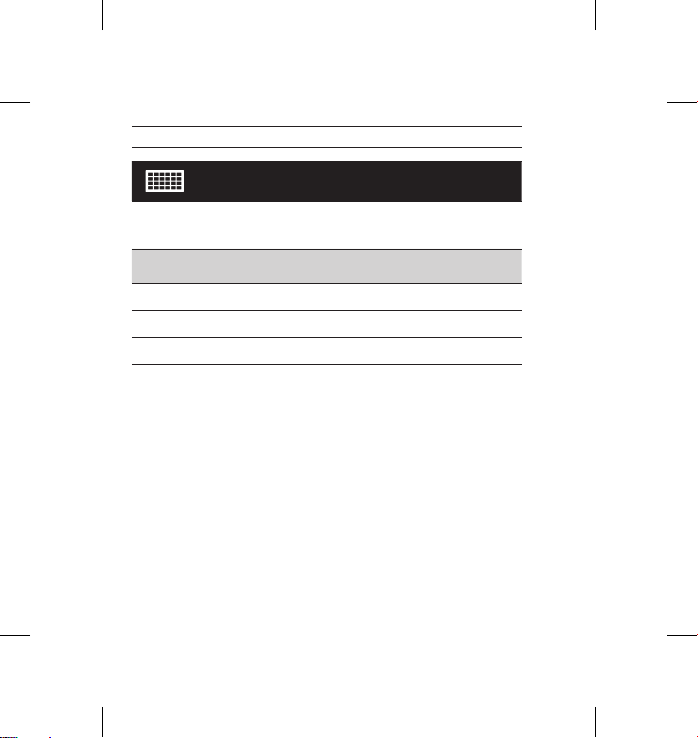
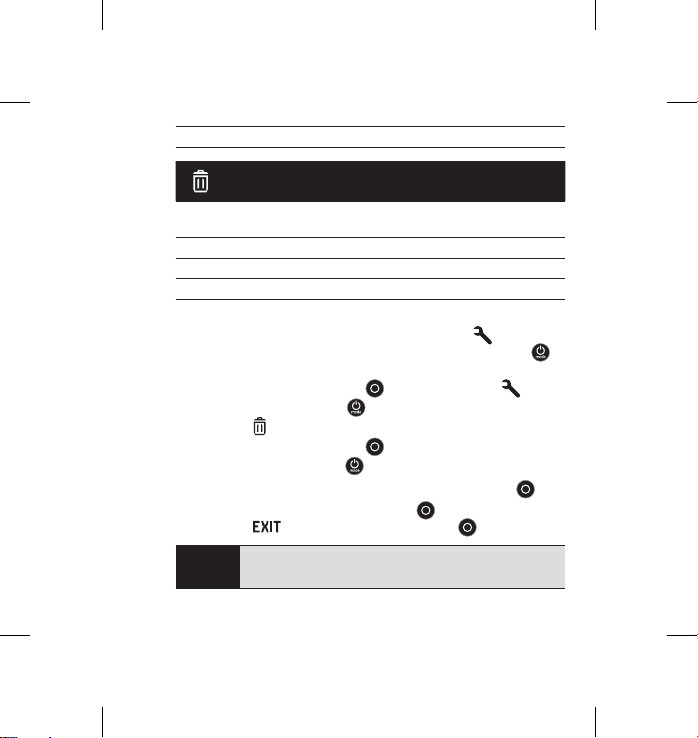
DELETE
Delete the last file or all files and format the memory card. During delete
LAST or ALL, the Camera Status Lights blink until operation is complete.
CANCEL
(Default)
LAST
ALL (Formats SD card)
To delete LAST or ALL:
1. Verify the camera is in Settings mode. If the Settings icon
camera’s LCD screen
repeatedly until it appears.
2. Press the Shutter/Select Button
3. Use the Power/Mode Button
the Trash
4. Press the Shutter/Select Button
5. Use the Power/Mode Button
6. Select highlighted option by pressing the Shutter/Select Button
7. To exit, hold down the Shutter/Select Button
through to
PRO
TIP:
HERO3_Plus_Silver_UM_ENG_FRA_REVA.indb 29 6/26/13 3:26 PM
is not showing, press the Power/Mode Button
to enter Settings menu .
.
and press the Shutter/Select Button .
Use caution—by selecting ALL, the memory card will be
formatted, deleting every file on your SD card.
to cycle through Settings to locate
to enter Delete.
to cycle through options.
on your
.
for two seconds or cycle
29
Page 30
cameRa settInGs
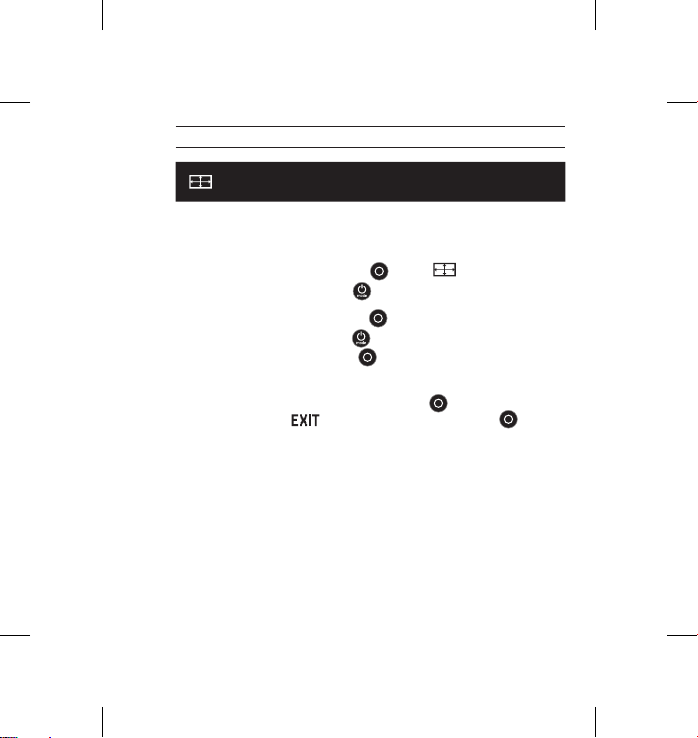
EXIT
From the
Settings menu.
30
HERO3_Plus_Silver_UM_ENG_FRA_REVA.indb 30 6/26/13 3:26 PM
screen, press the Shutter/Select Button to exit the
PRO
If at any time you wish to exit from the SETTINGS menu,
TIP:
press and hold the Shutter/Select Button
for two seconds.
Page 31

caPtuRe settInGs
CAPTURE SETTINGS
To enter the Capture Settings menu:
1. Verify the camera is in Settings mode. If the Settings icon
camera’s LCD screen
repeatedly until it appears.
2. Press the Shutter/Select Button
3. Use the Power/Mode Button
Capture Settings menu
4. Press the Shutter/Select Button
5. Use the Power/Mode Button
6. Press the Shutter/Select Button
7. Some options have a sub-menu. Use the Power/Mode Button
to cycle through the sub-menus.
8. Press the Shutter/Select Button
9. To exit, hold down the Shutter/Select Button
or cycle through to
to select it.
HERO3_Plus_Silver_UM_ENG_FRA_REVA.indb 31 6/26/13 3:26 PM
is not showing, press the Power/Mode Button
to enter the Settings menu .
to cycle through Settings to locate the
.
to enter Capture Settings.
to locate the desired option to change.
to select the desired option.
to select a highlighted option.
and press the Shutter/Select Button
on your
for two seconds
31
Page 32

caPtuRe settInGs
You can customize the way your HERO3+ camera captures Video and Photos
in the Capture Settings menus, such as Upside Down, Looping Video and
White Balance.
UPSIDE DOWN
Mounting your HERO3+ Upside Down but wish the files to appear upright
when viewing or editing? This setting eliminates the need to flip your Video
or Photos aer recording.
Camera right side up (Default)
Camera upside down
SPOT METER
Turn on Spot Meter when filming from within a dark space pointing the
camera into a brighter setting, such as filming the outdoors from within a car.
When Spot Meter is set to ON,
OFF (Default)
ON
32
HERO3_Plus_Silver_UM_ENG_FRA_REVA.indb 32 6/26/13 3:26 PM
appears in the LCD window.
Page 33

caPtuRe settInGs
LOOPING VIDEO
Looping Video mode allows you to record a continuously looping video that
overwrites itself until you press the Shutter/Select Button
Looping Video options inlcude:
OFF (Default)
Max video
5 min video
20 min video
60 min video
120 min video
PRO
TIP:
HERO3_Plus_Silver_UM_ENG_FRA_REVA.indb 33 6/26/13 3:26 PM
Camera records until memory card is full, then overwrites
with a new video.
Camera records for 5 minutes, then begins a new video,
progressively overwriting the previous 5 minute video.
Camera records for 20 minutes, then begins a new video,
progressively overwriting the previous 20 minute video.
Camera records for 60 minutes, then begins a new video,
progressively overwriting the previous 60 minute video.
Camera records for 120 minutes, then begins a new video,
progressively overwriting the previous 120 minute video.
Multiple chapter files are written to your memory card.
This allows for small segments of content to be overwritten
during loop recording. When viewing on a computer screen,
you will see separate files for each time segment. Use video
editing soware if you wish to combine files into a longer video.
button to stop i t.
33
Page 34

caPtuRe settInGs
EXIT
From the EXIT screen, press the Shutter/Select Button
Capture Settings menu.
If at anytime you wish to exit from the CAPTURE SETTINGS
PRO
MENU, press and hold the Shutter/Select Button
TIP:
two seconds.
34
HERO3_Plus_Silver_UM_ENG_FRA_REVA.indb 34 6/26/13 3:26 PM
to exit the
for
Page 35

set uP
SET UP
To enter the Set Up menu:
1. Verify the camera is in Settings mode. If the Settings icon
camera’s LCD screen
repeatedly until it appears.
2. Press the Shutter/Select Button
3. Use the Power/Mode Button
Set Up menu
4. Press Shutter/Select Button
5. Use the Power/Mode Button
6. Press Shutter/Select Button
7. To exit, hold down Shutter/Select Button
through to
HERO3_Plus_Silver_UM_ENG_FRA_REVA.indb 35 6/26/13 3:26 PM
is not showing, press the Power/Mode Button
to enter the Settings menu .
to cycle through Settings to locate the
.
to enter Set Up.
to locate the desired option to change.
to select the desired option.
for two seconds or cycle
and press Shutter/Select Button to select it.
on your
35
Page 36

set uP
DEFAULT MODE AT POWER UP
You can set the camera’s Default mode of power up to any of the following modes:
VIDEO (default)
PHOTO
BURST PHOTO
TIME LAPSE
36
HERO3_Plus_Silver_UM_ENG_FRA_REVA.indb 36 6/26/13 3:26 PM
Page 37

set uP
ONE BUTTON
With One Button mode selected, the camera automatically begins recording
when powering the camera ON. One Button mode can be configured to start
in Video or Time Lapse.
OFF (Default)
ON
To turn One Button mode ON:
1. Verify the camera is in Settings mode. If the Settings icon
camera’s LCD screen
repeatedly until it appears.
2. Press the Shutter/Select Button
3. Use the Power/Mode Button
the Set Up menu
4. Press Shutter/Select Button
5. Use the Power/Mode Button
One Button mode
6. Press the Shutter/Select Button
7. Use the Power/Mode Button
8. Press the Shutter/Select Button
9. To exit, hold down the Shutter/Select Button
through to
The next time you power your camera ON, it will begin recording in its Default
Power Up Mode. To stop recording, push and hold
HERO3_Plus_Silver_UM_ENG_FRA_REVA.indb 37 6/26/13 3:26 PM
is not showing, press Power/Mode Button
to enter the Settings menu .
to cycle through Settings to locate
.
to enter Set Up.
to cycle through to locate
.
to enter One Button menu.
to cycle through options.
to select a highlighted option.
and press the Shutter/Select Button to select it.
on your
for two seconds or cycle
for two seconds.
37
Page 38

set uP
ONE BUTTON MODE (continued)
To exit One Button mode:
1. Power camera ON.
2. Press and hold the Shutter/Select Button
in the LCD window.
3. Press the Shutter/Select Button
4. Use the Power/Mode Button
5. Press the Shutter/Select Button
6. To exit, hold down the Shutter/Select Button
through to
PRO
TIP:
NOTE: One Button mode is disabled when connected to Wi-Fi Remote
(optional accessory, sold separately) or GoPro App.
38
HERO3_Plus_Silver_UM_ENG_FRA_REVA.indb 38 6/26/13 3:26 PM
and press the Shutter/Select Button .
To stop the capture process (VIDEO or TIME LAPSE)
when in ONE BUTTON, press and hold the Shutter/Select
Button
for two seconds. You will return to the ONE
BUTTON menu where you can turn ONE BUTTON mode OFF.
to highlight OFF.
until shows
to enter.
to select it.
for two seconds or cycle
Page 39

set uP
NTSC / PAL
The NTSC and PAL settings govern Video recording frame rate and playback
when viewing Video on a TV/HDTV. Select NTSC when viewing a TV/HDTV in
North America. Select PAL if viewing on a PAL TV/HDTV (most televisions
outside of North America) or if viewing on a PAL TV/HDTV in any region.
NTSC
(Default) PAL
1080p/60 fps 1080p/50 fps
1080p/30 fps 1080p/25 fps
960p/60 fps 960p/50 fps
960p/30 fps 960p/25 fps
720p/120 fps 720p/100 fps
720p/60 fps 720p/50 fps
720p/30 fps 720p/25 fps
WVGA/120 fps WVGA/100 fps
WVGA/60 fps WVGA/50 fps
ONSCREEN DISPLAY
To display or hide the recording icons and file information on Video or the
viewing screen during playback, turn Onscreen Display (OSD) OFF or ON.
OFF
ON (Default)
39
HERO3_Plus_Silver_UM_ENG_FRA_REVA.indb 39 6/26/13 3:26 PM
Page 40

set uP
CAMERA STATUS LIGHTS
Keep all four Camera Status Lights active, only two active (front and back)
or turn OFF all lights.
4 (Default)
2
OFF
SOUND INDICATOR
You can adjust volume or turn OFF the Sound Indicator.
100% (Default)
70%
OFF
MANUAL POWER OFF
The HERO3+ can be configured to automatically power OFF aer a specific
period of inactivity (when no Videos or Photos are being taken and no
buttons have been pressed).
MANUAL (Default)
60
sec
120sec
300sec
40
HERO3_Plus_Silver_UM_ENG_FRA_REVA.indb 40 6/26/13 3:26 PM
Page 41

set uP
MONTH / DAY / YEAR / TIME
Set the HERO3+ clock to ensure Video and Photo files are saved with the
correct date and time.
To change Month/Day/Year/Time:
1. Verify the camera is in Settings mode. If the Settings icon
is not showing, press the Power/Mode Button repeatedly until
LCD screen
it appears.
2. Press the Shutter/Select Button
3. Use the Power/Mode Button
the Set Up menu
4. Press the Shutter/Select Button
5. Use the Power/Mode Button
6. Press the Shutter/Select Button
Month (MM) will be highlighted.
7. Press the Shutter/Select Button
8. Use the Power/Mode Button
is highlighted.
9. Press the Shutter/Select Button
10. To advance to the next option, press the Shutter/Select Button
11. Repeat steps 7, 8 and 9 to make selections for day (DD), year (YY),
hour (HH) and minutes (MM).
12. To exit, hold down the Shutter/Select Button
through to
NOTE: If the battery is removed from the camera for an extended period of time
Month/Day/Year/Time will need to be set again.
.
and press the Shutter/Select Button .
to enter the Settings menu .
to cycle through Settings to locate
to enter the Set Up menu.
to locate the Month/Day/Year/Time menu .
to enter Month/Day/Year/Time menu;
to access the list of months (1 to 12).
to cycle through list until desired selection
to select.
HERO3_Plus_Silver_UM_ENG_FRA_REVA.indb 41 6/26/13 3:26 PM
on your camera’s
.
for two seconds or cycle
41
Page 42

set uP
EXIT
From the EXIT screen, press the Shutter/Select Button
Set Up menu.
If at anytime you wish to exit from the SET UP menu,
PRO
press and hold the Shutter/Select Button
TIP:
two seconds.
42
HERO3_Plus_Silver_UM_ENG_FRA_REVA.indb 42 6/26/13 3:26 PM
to exit the
for
Page 43

WI-fI + WI-fI Remote
WIRELESS CONTROLS
The built-in Wi-Fi allows your HERO3+ camera to connect to the Wi-Fi Remote
(optional accessory, sold separately) or to the GoPro App using a smartphone
or tablet.
To turn Wi-Fi ON/OFF via the Wi-Fi On/Off Button
Press the Wi-Fi On/Off Button
ON, the Wi-Fi mode will be set to the most recently used mode.
WI-FI REMOTE (SOLD SEPARATELY)
Use the Wi-Fi Remote (sold separately) to control up to 50* cameras remotely
from distances of up to 600’/180m. The Wi-Fi Remote is wearable and waterproof
to 10’/3m. For instructions on pairing and connecting the Wi-Fi Remote to the
camera, please see the Wi-Fi Remote User Manual included with the remote.
*Actual results may vary depending on presence of wireless interference.
HERO3_Plus_Silver_UM_ENG_FRA_REVA.indb 43 6/26/13 3:26 PM
to turn Wi-Fi ON/OFF. When turning Wi-Fi
:
43
Page 44

connectInG to GoPRo aPP
USING YOUR HERO3+ WITH THE GOPRO APP (FREE)
The GoPro App lets you control your camera remotely using a smartphone or
tablet. Features include full camera control, live preview, playback and sharing
of select content and more.*
Follow these steps to connect your HERO3+ to the GoPro App.
1. Download the GoPro App to your smartphone or tablet at the
Apple App Store, Google Play or Windows Phone marketplace.
2. Press the Power/Mode Button
3. Press the Wi-Fi On/Off Button
Shutter/Select Button
4. Use the Power/Mode Button
press the Shutter/Select Button
5. In your smartphone’s or tablet’s Wi-Fi network settings, connect to the
camera’s Wi-Fi network. The network name will begin with “GOPRO-BP-”,
followed by a series of letters/numbers.
6. Enter the password “goprohero”. (This is the camera’s default password.
You can customize the password at gopro.com/update. If you’ve already
customized the password, enter that password instead of “goprohero”.)
7. Open the GoPro App on your smartphone or tablet. You will now be able
to control the camera with your smartphone or tablet plus view, playback
and share select content.*
PRO
See what your HERO3+ sees by viewing it on your smartphone
or tablet’s screen.
TIP:
*For device compatibility, please see gopro.com.
44
HERO3_Plus_Silver_UM_ENG_FRA_REVA.indb 44 6/26/13 3:26 PM
to power camera ON.
twice, then press the
to enter Wi-Fi menu .
to cycle through options,
to select GoPro App.
Page 45

stoRaGe/mIcRosd caRds
The HERO3+ camera is compatible with 4GB, 8GB, 16GB, 32GB and 64GB
capacity microSD, microSDHC and microSDXC memory cards. You must use
a microSD card with a Class 10 speed rating. GoPro recommends using brand
name memory cards for maximum reliability in high-vibration activities.
To insert microSD card: To remove microSD card:
1. Slide memory card into card slot
with label facing front of camera.
2. The card will click into place when
fully inserted.
Use care when handling memory cards. Avoid liquids, dust and
debris. As a precaution, turn off the camera before inserting or
PRO
removing the card. Check manufacturer guidelines regarding
TIP:
use in acceptable temperature ranges.
HERO3_Plus_Silver_UM_ENG_FRA_REVA.indb 45 6/26/13 3:26 PM
1. Place fingernail against edge of
memory card and lightly press
further into camera.
2. Card will spring out far enough
to be removed.
45
Page 46

sYstem RequIRements
The HERO3+ camera is compatible with Microso® XP (Service Pack 2) or later
and Mac OS X 10.4.11 or later.
WINDOWS MAC
Windows XP (Service Pack 2 or later)
or Vista
3.2GHz Pentium 4 or faster 2.0GHz Intel Core Duo or faster
DirectX 9.0c or later
Minimum 1GB of system RAM Minimum 1GB of system RAM
Video card with minimum 256MB
of RAM
Want to see your Video and Photos on the big screen?
Connect your HERO3+ directly to your TV/HDTV using a
PRO
Micro HDMI Cable, Composite Cable or Combo Cable
TIP:
(optional accessories, sold separately).
46
HERO3_Plus_Silver_UM_ENG_FRA_REVA.indb 46 6/26/13 3:26 PM
Mac OS® X 10.4.11 or later
Video card with minimum 128MB
of RAM
Page 47

tRansfeRRInG fIles
TO TRANSFER VIDEO AND PHOTO FILES TO A COMPUTER
On a PC:
1. Connect the camera to the computer using included USB cable.
2. Press the Power/Mode Button
3. Double click “My Computer” and locate “Removable Disk”.
4. If “Removable Disk” is not showing, close “My Computer” folder
and reopen it. The “Removable Disk” icon should appear.
5. Double click “Removable Disk” icon.
6. Double click “DCIM” folder icon.
7. Double click “100GOPRO” icon to view all Photo and Video files.
8. Copy files to the computer or external hard drive.
On a Mac:
1. Connect the camera to Mac using included USB cable.
2. Press the Power/Mode Button
3. Icon will appear on desktop. Double click the icon to access files.
4. Copy files to computer or external hard drive.
HERO3_Plus_Silver_UM_ENG_FRA_REVA.indb 47 6/26/13 3:26 PM
to turn ON the camera.
to turn ON the camera.
47
Page 48

Pl aYback
TO VIEW VIDEOS AND PHOTOS
Videos and Photos can be viewed on a TV/HDTV or the LCD Touch BacPac
(optional accessory, sold separately).
PLAYBACK ON TV/HDTV
To browse Videos and Photos:
1. Plug the camera into a TV/HDTV with a Micro HDMI Cable,
Composite Cable or Combo Cable (optional accessories).
2. Turn camera ON.
3. On your camera, press the Power/Mode Button
Playback
4. HERO3+ displays thumbnail previews of all Videos and Photos on
the SD card. Photo sets taken in Continuous Photo, Photo Burst
and Time Lapse display the first Photo in a series.
5. While in thumbnail preview, use the Power/Mode Button
through thumbnails. Press the Shutter/Select Button
6. Use
media files on your memory card.
7. Depending on whether you are viewing Videos or Photos, different
control options will appear. Use the Power/Mode Button
the Shutter/Select Button
NOTE: Burst Photo and Time Lapse files will display the first Photo in the series.
To view all Photos in a series, use the Power/Mode Button
View and press the Shutter/Select Button
48
HERO3_Plus_Silver_UM_ENG_FRA_REVA.indb 48 6/26/13 3:26 PM
. Press the Shutter/Select Button .
and to navigate backward and forward to see more
to navigate.
to cycle to
to cycle
to view.
and
to select
.
Page 49

Pl aYback
PLAYBACK ON LCD TOUCH BACPAC (SOLD SEPARATELY)
Playback using the LCD Touch BacPac™ follows a similar process/procedure
as described with a few slight variations.
▶See the LCD Touch BacPac User Manual for more information.
49
HERO3_Plus_Silver_UM_ENG_FRA_REVA.indb 49 6/26/13 3:26 PM
Page 50

bat teRY
MAXIMIZING BATTERY LIFE
To maximize battery life, turn Wi-Fi OFF. To maximize battery life when
shooting longer-duration activities, turn OFF or detach the LCD Touch BacPac™
(optional accessory, sold separately). Extreme cold temperatures may decrease
battery life. To maximize battery life in cold conditions, keep camera in a warm
place prior to use. Shooting with Protune mode turned ON will increase power
consumption.
*Based on GoPro engineering testing. Actual performance may vary based on
settings, environmental conditions, wireless connectivity and other factors.
Maximum battery capacity will normally decrease with time and use.
50
HERO3_Plus_Silver_UM_ENG_FRA_REVA.indb 50 6/26/13 3:26 PM
Page 51

bat teRY
CHARGING THE BATTERY
The battery icon displayed in the camera’s LCD will blink when the battery drops
below 10%. If recording is occurring when battery reaches 0%, the camera will
save the file and power OFF.
To charge the battery:
1. Connect the camera to a
computer or USB power supply
(such as the GoPro Wall Charger
or GoPro Auto Charger).
2. The red Status Indicator Light
remains ON while the battery
is charging.
3. The red Status Indicator Light
will turn OFF when the battery is
fully charged.
The battery will charge to 80% in one hour and 100% in two hours when using
GoPro’s 1000mAh USB-compatible Wall or Auto Charger. Other chargers may
charge at a slower rate.
You can also charge the battery outside the camera using the Dual Battery Charger
(optional accessory, sold separately).
No damage will occur to the camera or the battery if used prior to full charge.
Spare batteries and additional charging accessories are available at: gopro.com.
51
HERO3_Plus_Silver_UM_ENG_FRA_REVA.indb 51 6/26/13 3:26 PM
Page 52

bat teRY
USING THE CAMERA WHILE CHARGING
You can capture Video and Photos while charging the camera’s battery.
Simply plug the camera into a computer, any USB charging devices, or for
best results, the GoPro Auto or Wall Chargers using the included USB Cable.
Performance of non-GoPro chargers cannot be guaranteed.
REMOVING THE BATTERY FROM THE CAMERA
The
HERO3+
battery is designed to have a tight fit to maximize reliability
in high-vibration activities.
To remove the battery:
1. Remove the battery door by placing your thumb in the indentation in the
battery door (on the back of the camera) and sliding it to the le.
2. Allow the door to pop out. Grasp the battery pull-tab and remove from the camera.
52
HERO3_Plus_Silver_UM_ENG_FRA_REVA.indb 52 6/26/13 3:26 PM
Page 53

ImPoRtant WaRnInG messaGes
MICROSD CARD MESSAGES
NO SD
SD FULL Card is full. Delete files or swap card.
SD ERROR Camera unable to access card.
No card present. The camera requires a microSD, microSDHC
or microSDXC card to record Video or take Photos.
FILE REPAIR ICON ON THE LCD
If you see the File Repair icon on the LCD screen, your Video file
was corrupted during recording. Press any button and the camera
will repair the file.
TEMPERATURE WARNING ICON ON THE LCD
The Temperature Warning icon will appear on the LCD when the
camera has become too hot and needs to cool down. Simply let it sit
and cool before attempting to use it again. Your camera will not allow
itself to overheat —do not worry, no damage has occurred.
53
HERO3_Plus_Silver_UM_ENG_FRA_REVA.indb 53 6/26/13 3:26 PM
Page 54

Slim housing surfboard mount installation
Slim housing remove camera
Slim housing insert camera
Slim housing closed Swapping housing doors
Quick Release Buckle + Thumb Screw + Slim housing = Complete Unit
Slim housing insert camera
cameRa HousInG
ASSEMBLING THE CAMERA HOUSING
To remove camera from housing:
1. Li front of latch up to disengage from camera housing.
2. Pivot latch backward and pull up to release backdoor.
3. Pull open housing backdoor and remove camera.
To secure camera in housing:
1. Open housing and drop camera into position.
2. Close housing backdoor.
3. Pivot hinged arm backwards and hook lip of latch into grooved top
of housing backdoor.
4. Push latch down to snap into place.
HERO3_Plus_Silver_UM_ENG_FRA_REVA.indb 54 6/26/13 3:26 PM
54
Page 55

cameRa HousInG
Your HERO3+ camera housing comes with two types of backdoors—
Skeleton (non-waterproof) and Standard (waterproof).
Skeleton Backdoor Standard Backdoor
The Skeleton Backdoor (non-waterproof)
provides better sound quality by allowing
more sound to reach the camera’s
microphone. It also reduces wind noise
at speeds up to 100mph when mounted
on helmets, motorcycles, bikes and other
fast-moving vehicles. Use this backdoor
only when sand, excessive dirt/dust
and water damage is not a risk. This
backdoor is also recommended for use
inside vehicles.
Apply Rain-X or a similar anti-beading solution to the camera
housing lens to prevent water spots from forming when using your
PRO
camera in rain or water. When Rain-X is not available, periodically
TIP:
licking your lens is a good backup solution. Trust us, it works.
HERO3_Plus_Silver_UM_ENG_FRA_REVA.indb 55 6/26/13 3:26 PM
The Standard Backdoor makes the
housing waterproof to 131’/40m.
Use this door when you need to
protect the camera from water and
other environmental hazards.
55
Page 56

cameRa HousInG
SWAPPING HOUSING DOORS
You can switch the Backdoor of your HERO3+ camera to suit your activity
and shooting conditions.
To change backdoor:
1. Open the Backdoor of the housing so that it is hanging downwards.
2. Pull downwards on the Backdoor until it snaps free from the hinge.
3. Line up replacement Backdoor into the hinge opening.
4. Push upwards on the Backdoor until it clicks into place.
56
HERO3_Plus_Silver_UM_ENG_FRA_REVA.indb 56 6/26/13 3:26 PM
Page 57

cameRa HousInG
PREVENTING WATER DAMAGE TO YOUR CAMERA
The rubber seal that lines the camera housing forms a waterproof barrier
that protects your
Keep the camera housing’s rubber seal clean—a single hair or grain of sand
can cause a leak and damage your camera.
Aer every use in salt water, rinse the outside of the camera housing with
non-salt water and dry. Not doing this can eventually cause corrosion of the
hinge pin and salt buildup in the seal, which can cause failure.
To clean the seal, rinse in fresh water and shake dry (drying with a cloth may
cause lint to compromise the seal). Re-install the seal into the grooves in the
backdoor of the camera housing.
WARNING: Failure to follow these steps each time you use your
result in leaks that may damage or destroy your camera. Your warranty does
not cover water damage resulting from user error.
HERO3_Plus_Silver_UM_ENG_FRA_REVA.indb 57 6/26/13 3:26 PM
HERO3+
in wet and underwater conditions.
HERO3+
can
57
Page 58

usInG tHe mounts
ATTACHING YOUR CAMERA TO MOUNTS
To attach your
Buckle, thumb screw or hardware depending on the mount you are using.
For more information on mounts, visit: gopro.com/support.
HERO3+
camera to a mount, you will need a Quick Release
Quick Release
Buckle
Thumb Screw Housing Complete Unit
USING CURVED + FLAT ADHESIVE MOUNTS
The Curved + Flat Adhesive Mounts make it easy to attach the camera to curved
and flat surfaces of helmets, vehicles and gear. Using the Quick Release Buckle,
the assembled camera housing can be clicked on and off the secured Curved or
Flat Adhesive Mounts.
Flat Adhesive Mount Curved Adhesive Mount
58
HERO3_Plus_Silver_UM_ENG_FRA_REVA.indb 58 6/26/13 3:26 PM
Page 59

usInG tHe mounts
ATTACHING ADHESIVE MOUNTS
Apply to clean surface only. Wax, oil, dirt or other debris will
PRO
reduce adhesion, which can result in a weak bond and risk of
TIPS:
losing camera should connection fail.
Attach mount in room temperature conditions.
Mount’s adhesive will not bond properly if applied in
cold or damp environments to cold or damp surfaces,
or if the surface is not room temperature.
Adhesive mounts should only be mounted to smooth surfaces;
porous or textured surfaces will not enable a proper bond.
When applying mount, firmly press into place and ensure
full contact over entire surface.
For best results, attach the mount 24 hours prior to use.
▶See: gopro.com/support for more information on mounts.
Locking Plug
Using the HERO3+ in high impact sports such as surfing or skiing
where significant impact may occur? Use the special Locking Plug
which securely locks the Quick Release Buckle fingers into place,
helping prevent accidental housing release from the mount.
The circular ring fits over the thumbscrew and acts as a leash
to prevent dropping or losing the locking plug.
59
HERO3_Plus_Silver_UM_ENG_FRA_REVA.indb 59 6/26/13 3:26 PM
Page 60

customeR suPPoRt
GoPro is dedicated to providing the best possible service.
To reach GoPro Customer Support, visit gopro.com/support.
60
HERO3_Plus_Silver_UM_ENG_FRA_REVA.indb 60 6/26/13 3:26 PM
Page 61

MANUEL DE L’UTILISATEUR
FRANÇAIS
HERO3_Plus_Silver_UM_ENG_FRA_REVA.indb 1 6/26/13 3:26 PM
Page 62

Soyez de la fête GoPro sur facebook.com/gopro et
consultez les images prises par d’autres utilisateurs de GoPro.
Montrez vos images et prenez part à la révolution GoPro !
HERO3_Plus_Silver_UM_ENG_FRA_REVA.indb 2 6/26/13 3:26 PM
Page 63

table de s matièr es
Accessoires 4
Supports et accessoires 5
Fonctionnalités de la HERO3+ 6
Écran d’état LCD de la caméra 8
Diagramme de l’interface utilisateur de la caméra 9
Mise à jour du logiciel de la caméra 10
Principes de base 10
Modes de la caméra 13
Réglages de la caméra 20
Configurations des prises de vue 31
Configuration 35
Commandes sans fil 43
Connexion à l'appli GoPro 44
Archivage / cartes microSD™ 45
Configuration système requise 46
Transfert de fichiers 47
Lecture 48
Durée de fonctionnement de la batterie 50
Messages d'avertissement importants 52
Boîtier de la caméra 53
Utilisation des supports 57
Assistance clientèle 59
HERO3_Plus_Silver_UM_ENG_FRA_REVA.indb 3 6/26/13 3:26 PM
Page 64

Wear it. mount it. love it.
ACCESSOIRES
ACCESSOIRES SPÉCIFIQUES
À LA CAMÉRA HERO3+
Boîtier de poignet
Wi-Fi Remote
™
Boîtier de remplacement
™
™
Batterie rechargeable Li-ion
Dive Housing
Kit d’objectifs de rechange
Couvercles et portes
Accessoires HERO3+ supplémentaires
disponibles sur gopro.com
LCD Touch BacPac
Battery BacPac
Support de cadre
4
HERO3_Plus_Silver_UM_ENG_FRA_REVA.indb 4 6/26/13 3:26 PM
Page 65

consulteZ goPro.com Pour en savoir Plus
SUPPORTS ET ACCESSOIRES
Support de fi xation
à l’avant de casques
Porte arrière
fl ottante
Support de montage
sur barre de
renversement
Supports adhésifs
incurvés ou plats
Harnais de fi xation au
niveau de la poitrine
Sangle de tête +
kit de fi xation rapide
Support de montage
sur trépied
Support de fi xation
latérale
Support pour guidon /
tige de selle / poteau
Ventouse Sangle pour
Accessoires
anti-buée
Ancrages caméra
Supports de
montage sur
planche de surf
casque ventilé
Support fl exible à
mâchoires
Dual Battery
Charger
5
HERO3_Plus_Silver_UM_ENG_FRA_REVA.indb 5 6/26/13 3:26 PM
Page 66

Fonctionnalités de la Hero3+
1. Voyants indicateurs d’état (rouges)
2. Bouton SHUTTER/SELECT
3. Écran d’état LCD
4. Voyant indicateur Wi-Fi (bleu)
5. Bouton POWER/MODE
6
HERO3_Plus_Silver_UM_ENG_FRA_REVA.indb 6 6/26/13 3:26 PM
6. Port Micro HDMI
(câble non livré avec l’appareil)
7. Fente de carte microSD
(carte SD non livrée avec l’appareil)
8. Port mini-USB
(compatible avec un câble composite
A/V adaptateur de micro stéréo
3,5 mm non livré avec l’appareil)
Page 67

Fonctionnalités de la Hero3+
9. Port HERO
10. Porte de la batterie
11. Bouton marche/arrêt Wi-Fi
12. Alarme sonore
13. Microphone
HERO3_Plus_Silver_UM_ENG_FRA_REVA.indb 7 6/26/13 3:26 PM
7
Page 68

écran d’état lcd de la caméra
L’écran LCD affiche les renseignements suivants en ce qui concerne
les modes et réglages HERO3+ :
1. Modes de la caméra / Champ de vision
2. Modes de prises de vues (non illustrés)
3. Résolution/IPS (images par seconde)
4. Réglages des intervalles de temps (non illustrés)
5. Compteur
6. Heure/Archivage/Fichiers
7. Durée de fonctionnement de la batterie
REMARQUE : Les icônes affichées ci-dessus varient en fonction du mode
8
HERO3_Plus_Silver_UM_ENG_FRA_REVA.indb 8 6/26/13 3:26 PM
de votre caméra.
Page 69

diagramme de l’interFace utilisateur de la ca méra
MODES
RÉGLAGES DE LA CAMÉRA
CONFIGURATION DE PRISES DE VUE WI-FI
CONFIGURATION
* Lecture ne s’affiche sur l’écran d’état LCD que si la caméra est branchée à un
téléviseur ou un LCD Touch BacPac™ (accessoire facultatif, vendu séparément).
9
HERO3_Plus_Silver_UM_ENG_FRA_REVA.indb 9 6/26/13 3:26 PM
Page 70

Slim housing surfboard mount installation
Slim housing remove camera
Slim housing insert camera
Slim housing closed Swapping housing doors
Quick Release Buckle + Thumb Screw + Slim housing = Complete Unit
mise à jour du logiciel de la caméra
Pour profiter des fonctionnalités les plus récentes et obtenir le
meilleur rendement de votre caméra HERO3+, assurez-vous de vous
servir du logiciel le plus récent pour la caméra. Pour vérifier s'il existe
des mises à jour, consultez : gopro.com/update.
utilisation de votre Hero3+ : PrinciPes de base
POUR COMMENCER
1. Retirez la caméra du boîtier :
2. Insérez une carte microSD, microSDHC™ ou
microSDXC™ dans la fente des cartes avec
l’étiquette dirigée vers l’avant, en commençant
par la partie la plus étroite de la carte. Il est
nécessaire d’utiliser une carte microSD de classe 10.
3. Mettez la batterie dans la caméra.
HERO3_Plus_Silver_UM_ENG_FRA_REVA.indb 10 6/26/13 3:26 PM
10
Page 71

utilisation de votre Hero3+ : PrinciPes de base
4.
Chargez la batterie. La batterie au lithium-ion est livrée partiellement chargée.
Pour la charger, connectez le câble USB pourvu à cet effet à la caméra et l’autre
extrémité du câble sur une source d’alimentation électrique telle qu’un ordinateur,
le chargeur mural GoPro ou le chargeur automobile GoPro. La caméra ou la batterie
ne subira aucun dommage si on l’utilise avant qu’elle ne soit pleinement chargée.
Lorsque la caméra est éteinte et en chargement :
• Les voyants indicateurs d'état rouges s'allument
TRUC
PRO :
Voir DURÉE DE FONCTIONNEMENT DE LA BATTERIE pour en savoir plus.
pendant le chargement.
DE
• Les voyants indicateurs d'état rouges s'éteignent
lorsque le chargement est terminé.
RÉGLAGES DE LA CAMÉRA PAR DÉFAUT
La caméra HERO3+ Silver Edition s’allume avec les réglages par défaut suivants :
Résolution vidéo 960p30 images par seconde (ips)
Résolution photo 10 méga-pixels (MP)
Rafales de photos 10 photos en 1 seconde
Accéléré 0,5 seconde
Wi-Fi Éteint
Vous souhaitez modifier vos configurations VIDÉO et PHOTO ?
TRUC
DE
Voir le menu CONFIGURATIONS pour en savoir plus sur
PRO :
comment faire les changements.
11
HERO3_Plus_Silver_UM_ENG_FRA_REVA.indb 11 6/26/13 3:26 PM
Page 72

utilisation de votre Hero3+ : PrinciPes de base
MARCHE ET ARRÊT
Pour mettre l’appareil en marche :
Appuyez sur
trois fois et l'indicateur sonore émet trois bips.
Pour éteindre l'appareil :
Appuyez sur
d'état rouges clignotent à plusieurs reprises et l'indicateur sonore émet sept bips.
12
HERO3_Plus_Silver_UM_ENG_FRA_REVA.indb 12 6/26/13 3:26 PM
et relâchez. Les voyants indicateurs d'état rouges clignotent
pendant deux secondes et relâchez. Les voyants indicateurs
Vous vo ulez tran sform er votre ca méra HERO3 + en une
cam éra « Une tou che » qui co mmence a utomati quemen t à
TRUC
enregistrer des photos ou des vidéos lorsqu'on l'allume ?
DE
Mett ez la camé ra en mode UNE TOUCHE.
PRO :
Voir le m ode UNE TOUCHE pour en s avoir plus .
Page 73

utilisation de votre Hero3+ : modes de la caméra
APERÇU
La HERO3+ offre plusieurs modes de caméra. Pour passer d’un mode à l’autre,
appuyez sur
Voir LECTURE pour en savoir plus.
HERO3_Plus_Silver_UM_ENG_FRA_REVA.indb 13 6/26/13 3:26 PM
. Les modes se succèdent dans l’ordre suivant :
VIDÉO
PHOTO
RAFALE DE PHOTOS
ACCÉLÉRÉ
CONFIGURATIONS
LECTURE
TRUC
Servez-vous de RAFALE DE PHOTOS pour prendre des
DE
images de sujets en mouvement rapide.
PRO :
Enregistrement vidéo
Pris e d'une seu le photo
Pris e de jusqu'à 10 photos en une se conde
Pris e d'une sér ie de photos à des intervalles donnés
Réglage des
configurations de la caméra
Lect ure de vidéos et de photos. Ne s'a ffiche que s i la
camé ra est br anchée à u n télévi seur ou LCD Tou ch
BacPac™ (accessoire fac ultatif, vendu séparément).
13
Page 74

utilisation de votre Hero3+ : modes de la caméra
VIDÉO
Pour enregistrer des images vidéo, assurez-vous que la caméra est en mode
vidéo. Si l'icône Vidéo
appuyez
sur à plusieurs reprises jusqu’à ce qu’elle s’affiche.
Pour commencer à enregistrer :
Appuyez sur
indicateurs d'état rouges clignoteront pendant l’enregistrement.
Pour interrompre l’enregistrement :
Appuyez sur
clignotent trois fois et la caméra émet trois bips sonores pour indiquer que
l’enregistrement est interrompu.
La HERO3+ s’arrête automatiquement d’enregistrer lorsque la carte mémoire
est pleine ou que la batterie est épuisée. Votre vidéo sera enregistrée avant que
la caméra ne s'éteigne.
Voir le mode VIDÉO pour savoir en plus sur les modalités de modification des
réglages de résolution.
14
HERO3_Plus_Silver_UM_ENG_FRA_REVA.indb 14 6/26/13 3:26 PM
ne s'affiche pas
et relâchez. La caméra émet un bip et les voyants
et relâchez. Les voyants indicateurs d'état rouges
sur l’écran LCD de votre caméra,
Page 75

utilisation de votre Hero3+ : modes de la caméra
PHOTO
Pour prendre une photo, assurez-vous que la caméra est en mode Photo.
Si l'icône Photo ne s'affiche pas sur l’écran LCD de votre caméra, appuyez
sur
à plusieurs reprises jusqu’à ce qu’elle s’affiche.
Pour prendre une photo :
Appuyez sur et relâchez. La caméra émet deux bips sonores et les voyants
indicateurs d'état rouges clignotent.
Voir le mode PHOTO pour savoir en plus sur les modalités de modification
des ré glages de résolution et les autres fonctionnalités du mode Photo.
15
HERO3_Plus_Silver_UM_ENG_FRA_REVA.indb 15 6/26/13 3:26 PM
Page 76

utilisation de votre Hero3+ : modes de la caméra
RAFALE DE PHOTOS
En mode Rafale
de temps — 3 photos / 1 seconde, 5 photos / 1 seconde et 10 photos / 1 seconde.
Pour prendre une
Rafale de photos
LCD de votre caméra, appuyez sur
s'affiche.
Pour prendre une rafale de photos :
Appuyez sur
et la caméra émet plusieurs bips sonores.
Voir le mode RAFALE DE PHOTOS pour en savoir plus sur les modalités
de modification des réglages des intervalles.
16
HERO3_Plus_Silver_UM_ENG_FRA_REVA.indb 16 6/26/13 3:26 PM
de photos
, votre caméra prend plusieurs photos à de courts intervalles
rafale de photos
. Si l'icône
et relâchez. Les voyants indicateurs d'état rouges clignotent
, assurez-vous que la caméra est en mode
Rafale de photos
ne s’affiche pas sur l’écran
à plusieurs reprises jusqu’à ce qu’elle
Page 77

utilisation de votre Hero3+ : modes de la caméra
ACCÉLÉRÉ
Le mode Accéléré prend une série de photos à des intervalles de 0,5, 1, 2, 5, 10, 30
ou 60 secondes.
Pour prendre une série d’images par intervalles en mode Accéléré,
assurez-vous que la caméra est en mode Accéléré. Si l’icône Accéléré
ne s’affiche pas sur l’écran LCD de votre caméra, appuyez sur à plusieurs
reprises jusqu’à ce qu’elle s’affiche.
Pour prendre des images à intervalles :
Appuyez sur
voyants indicateurs d'état clignotent toutes les fois que l'on prend une photo.
Pour mettre fin à la prise d’images par intervalles :
Appuyez sur
trois fois et la caméra émet trois bips sonores pour indiquer que la prise d'images
par intervalles est terminée.
Voir le mode ACCÉLÉRÉ pour en savoir plus sur les modalités de modifications
des réglages des intervalles.
HERO3_Plus_Silver_UM_ENG_FRA_REVA.indb 17 6/26/13 3:26 PM
et relâchez. La caméra commence un compte à rebours et les
et relâchez. Les
voyants indicateurs d'état
rouges clignotent
17
Page 78

utilisation de votre Hero3+ : modes de la caméra
CONFIGURATIONS
Le menu Configurations vous permet de régler différentes configurations de la
caméra, en particulier :
la résolution vidéo
la résolution photo
la prise de photos à intervalles
la prise de rafales de photos
• et bien d’autres encore
Voir le menu des CONFIGURATIONS pour effectuer des changements,
savoir comment naviguer dans les options du menu et en savoir plus sur
chaque réglage.
18
HERO3_Plus_Silver_UM_ENG_FRA_REVA.indb 18 6/26/13 3:26 PM
Page 79

utilisation de votre Hero3+ : modes de la caméra
LECTURE
Vous pouvez visionner des vidéos et des photos en branchant votre caméra
HERO3+ à un téléviseur (au moyen d'un câble Micro HDMI, composite ou
combiné, vendu séparément). Vous pouvez également visionner des vidéos
et des photos avec le LCD Touch BacPac™ (accessoire facultatif, vendu
séparément). Le mode Lecture ne s'affiche que si la camera est branchée à un
téléviseur ou un LCD Touch BacPac.
Voir le mode LECTURE pour en savoir plus sur la lecture des vidéos
et des photos.
19
HERO3_Plus_Silver_UM_ENG_FRA_REVA.indb 19 6/26/13 3:26 PM
Page 80

réglages de l a caméra
CONFIGURATIONS
Pour accéder au menu des configurations :
1. Assurez-vous que la caméra est au menu Configurations. Si l'icône
Configurations
appuyez sur
2. Appuyez sur
3. Servez-vous de
4. Appuyez sur
5. Pour quitter, maintenez
ou passez à
TRUC
DE
PRO :
20
HERO3_Plus_Silver_UM_ENG_FRA_REVA.indb 20 6/26/13 3:26 PM
ne s'affiche pas sur l'écran LCD de votre caméra,
à plusieurs reprises jusqu’à ce qu’elle s'affiche.
pour accéder au menu .
pour passer d'une option à l'autre des Configurations.
pour sélectionner l’option souhaitée.
enfoncé pendant deux secondes,
et appuyez sur .
Si vous souhaitez quitter le menu CONFIGURATIONS,
appuyez sur
secondes.
et maintenez-le enfoncé pendant deux
Page 81

réglages de l a caméra
RÉSOLUTION VIDÉO/IPS/MODES FOV
Vous pouvez modifier la résolution, le nombre d'images par seconde (ips)
et le champ de vision (FOV) lorsque vous utilisez le menu du mode Vidéo.
Lorsque vous êtes dans le menu Configurations :
1. Appuyez sur
2. Servez-vous de
3. Appuyez sur
4. Servez-vous de
secondaire et de
5. Pour modifier d’autres options, répétez l’étape 4.
6. Pour quitter, maintenez
ou passez à
HERO3_Plus_Silver_UM_ENG_FRA_REVA.indb 21 6/26/13 3:26 PM
pour accéder à .
pour passer d’une option à l’autre.
pour accéder au menu souhaité.
pour passer d’une option à l’autre du menu
pour la sélectionner.
enfoncé pendant deux secondes
et appuyez sur .
21
Page 82

réglages de l a caméra
La HERO3+ Silver Edition offre les modes de prise d’images vidéo suivants :
Résolution
vidéo
1080 p 60 50 Ultra large,
1080 p 30 25 Ultra large,
960 p 60 50 Ultra large 1280 sur 960
960 p 30 25 Ultra large 1280 sur 960
720 p 120 100 Ultra large,
720 p 60 50 Ultra large,
720 p 30 25 Ultra large,
WVGA 120 100 Ultra large 848 sur 480
WVGA 60 50 Ultra large 848 sur 480
22
HERO3_Plus_Silver_UM_ENG_FRA_REVA.indb 22 6/26/13 3:26 PM
NTSC
ips
PAL
ips
Champ de vision
(FOV)
Moyen,
Étroit
Moyen,
Étroit
Moyen,
Étroit
Moyen,
Étroit
Moyen,
Étroit
Résolution de
l'écran
1920 sur 1080
16:9
1920 sur 1080
16:9
4:3
4:3
1280 sur 720
16:9
1280 sur 720
16:9
1280 sur 720
16:9
16:9
16:9
Page 83

réglages de l a caméra
Résolution
vidéo
1080 p La résolution 1080p60 est parfaite pour toutes les images,
Meilleure utilisation
puisque une résolution élevée et la fréquence d'images
donnent des résultats remarquables. Essayez la résolution
1080p30 lorsque vous vous servez d'un trépied ou pour
des images stables,
960 p À utiliser lorsque la caméra est montée sur le corps.
720 p Meilleure résolution pour les prises de vue avec la
WVGA Pour les fichiers de données plus réduits, il s’agit de la
HERO3_Plus_Silver_UM_ENG_FRA_REVA.indb 23 6/26/13 3:26 PM
Permet le plus grand champ de vision et les résultats les
plus homogènes pour des images en action. Servezvous de la résolution 960p60 lorsque vous souhaitez des
mouvements au ralenti — servez-vous de la résolution
960p30 lorsque vous captez des images et que l'éclairage
est faible.
caméra à la main et au ralenti. Servez-vous de la
résolution 720p120 ou 720p60 lorsque vous souhaitez
des mouvements au ralenti. Servez-vous de la résolution
720p30 lorsque vous captez des images et que l'éclairage
est faible
résolution de définition standard. Également adaptée
lorsque l’on souhaite des images au ralenti.
23
Page 84

réglages de l a caméra
La HERO3+ peut prendre des photos à des résolutions de 10 MP, 7 MP et 5 MP.
Toute modification d’une résolution photo influence également les photos prises
en modes
Résolution
photo
10MP Large (défaut)
7MP Large
5MP Moyen
24
HERO3_Plus_Silver_UM_ENG_FRA_REVA.indb 24 6/26/13 3:26 PM
MODES DE RÉSOLUTION PHOTO
Photo, Rafale de photos et Accéléré.
Champ de vision
(FOV)
Page 85

réglages de l a caméra
RAFALE DE PHOTOS
Le mode Rafales de photos permet de prendre des séries de photos lorsque
l’on appuie sur
3 photos en 1 seconde
5 photos en 1 seconde
10 photos en 1 seconde (défaut)
Plusieurs options d’intervalles de temps existent pour le mode Accéléré,
y compris 0,5, 1, 2, 5, 10, 30 et 60 secondes.
HERO3_Plus_Silver_UM_ENG_FRA_REVA.indb 25 6/26/13 3:26 PM
. Les photos peuvent être prises aux vitesses suivantes :
ACCÉLÉRÉ
25
Page 86

réglages de l a caméra
MENU DE CONFIGURATION DE PRISES DE VUE
Le menu Configuration de prises de vue vous permet de régler les
configurations avancées suivantes de la caméra :
Orientation de la caméra
Posemètre
Boucle vidéo
Voir CONFIGURATIONS DE PRISES DE VUE pour consulter une liste complète
des options correspondantes.
26
HERO3_Plus_Silver_UM_ENG_FRA_REVA.indb 26 6/26/13 3:26 PM
Page 87

réglages de l a caméra
MENU CONFIGURATION
Le menu Configuration vous permet de procéder aux réglages suivants
de votre caméra :
Mode par défaut à l’allumage
Mode Une touche
NTSC/PAL
Affichage écran
Voyants indicateurs d’état
Indicateur sonore
Mois/Jour/Année/Heure
Voir la section MENU CONFIGURATION pour consulter une liste complète
des options correspondantes.
27
HERO3_Plus_Silver_UM_ENG_FRA_REVA.indb 27 6/26/13 3:26 PM
Page 88

réglages de l a caméra
COMMANDES SANS FIL
La fonctionnalité Wi-Fi intégrée à la caméra vous permet de vous connecter
à un Wi-Fi Remote, un smartphone ou une tablette au moyen de l’appli GoPro.
Lorsque le Wi-Fi est activé, une icône d'état Wi-Fi s'affichera sur l'écran
indicateur d'état LCD et les voyants indicateurs d'état bleus de Wi-Fi
clignoteront de façon intermittente. Lorsque vous désactivez le Wi-Fi,
les voyants indicateurs d'état de Wi-Fi clignotent sept fois.
Pour activer/désactiver le Wi-Fi :
Appuyez sur
récemment utilisé sera actif lorsque le Wi-Fi est activé.
Voir la section COMMANDES SANS FIL pour consulter une liste complète
des fonctions sans fil.
REMARQUE : Votre caméra ne peut se connecter au Wi-Fi Remote
28
HERO3_Plus_Silver_UM_ENG_FRA_REVA.indb 28 6/26/13 3:26 PM
pour activer/désactiver le Wi-Fi. Le mode Wi-Fi le plus
et à l'appli GoPro au même moment.
Page 89

réglages de l a caméra
EFFACEMENT
Efface le dernier fichier ou tous les fichiers et formate la carte de mémoire.
Pendant l’effacement du dernier fichier ou de tous les fichiers, les voyants
indicateurs d’état clignotent jusqu’à la fin de l’opération.
ANNULER (défaut)
DERNIER
TOUS (formate la carte SD)
Pour effacer le dernier fichier ou tout les fichiers :
1. Assurez-vous que la caméra est en mode Configurations. Si l'icône
Configurations
appuyez sur à plusieurs reprises jusqu’à ce qu’elle s'affiche.
2. Appuyez sur pour accéder au menu Configurations.
3. Servez-vous de
Configurations afin de trouver .
4. Appuyez sur pour accéder à l'option d'effacement.
5. Servez-vous de
6. Sélectionnez l’option en surbrillance en appuyant sur
7. Pour quitter le menu, maintenez
ou passez à
TRUC
DE
PRO :
HERO3_Plus_Silver_UM_ENG_FRA_REVA.indb 29 6/26/13 3:26 PM
ne s'affiche pas sur l'écran LCD de votre caméra,
pour passer d'une option à l'autre des
pour passer d’une option à l’autre.
et appuyez sur .
Attention — lorsque vous choisissez TOUS, la carte de mémoire
est formatée, ce qui efface tous les fichiers sur votre carte SD.
enfoncé pendant deux secondes
.
29
Page 90

réglages de l a caméra
QUITTER
À partir de l'écran
TRUC
DE
PRO :
30
HERO3_Plus_Silver_UM_ENG_FRA_REVA.indb 30 6/26/13 3:26 PM
, appuyez sur pour quitter le menu Configurations.
Si vous souhaitez quitter le menu CONFIGURATIONS,
appuyez sur
secondes.
et maintenez-le enfoncé pendant deux
Page 91

conFiguration de Prises de vue
CONFIGURATION DE PRISES DE VUE
Pour accéder au menu de configuration de prises de vue :
1. Assurez-vous que la caméra est en mode Configurations. Si l'icône
Configurations
appuyez sur à plusieurs reprises jusqu’à ce qu’elle s'affiche.
2. Appuyez sur pour accéder à .
3. Servez-vous de
afin de trouver
4. Appuyez sur pour accéder au menu Configuration de prises de vue.
5. Servez-vous de pour trouver l’option que vous souhaitez modifier.
6. Appuyez sur pour sélectionner l’option souhaitée.
7. Certaines options ont un menu secondaire. Servez-vous de pour passer
d’un menu secondaire à l’autre.
8. Appuyez sur
9. Pour quitter, maintenez enfoncé pendant deux secondes ou passez
à
HERO3_Plus_Silver_UM_ENG_FRA_REVA.indb 31 6/26/13 3:26 PM
ne s'affiche pas sur l'écran LCD de votre caméra,
pour passer d'une option à l'autre des Configurations
.
pour sélectionner l’option en surbrillance.
et appuyez sur .
31
Page 92

conFiguration de Prises de vue
Vous pouvez personnaliser les modalités de prises de vidéos et de photos de
votre caméra HERO3+ au moyen des menus Configurations de prises de vue,
comme par exemple à l'Envers, Boucle vidéo et Équilibre des blancs.
ENVERS
Vous avez fixé votre HERO3+ à l’envers mais vous souhaitez visionner ou
éditer les fichiers à l’endroit ? Ce réglage élimine le besoin de retourner votre
vidéo ou vos photos après l’enregistrement.
Caméra à l’endroit (défaut)
Caméra à l’envers
POSEMÈTRE
Activez le posemètre lorsque vous filmez d’un espace sombre en dirigeant
la caméra vers un endroit plus éclairé, comme par exemple lorsque vous
filmez l’extérieur à partir d’une voiture. Lorsque Posemètre est activé,
s’affiche dans la fenêtre LCD.
INACTIF (défaut)
ACTIF
32
HERO3_Plus_Silver_UM_ENG_FRA_REVA.indb 32 6/26/13 3:26 PM
Page 93

conFiguration de Prises de vue
BOUCLE VIDÉO
Le mode boucle vidéo vous permet d’enregistrer une vidéo en boucle continue qui
écrase l’enregistrement précédent jusqu’à ce que vous appuyiez sur le bouton
l’interrompre. La boucle vidéo n’est pas disponible si le mode Protune est activé.
Les options de boucle vidéo sont entre autres :
INACTIVE (défaut)
Vidéo Max
5 min vidéo
20 min vidéo
60 min vidéo
120 min vidéo
TRUC
PRO :
HERO3_Plus_Silver_UM_ENG_FRA_REVA.indb 33 6/26/13 3:26 PM
La caméra enregistre jusqu’à ce que la carte de mémoire soit
pleine, puis réécrit sur l’enregistrement avec une nouvelle vidéo.
La caméra enregistre pendant 5 minutes, puis commence
une nouvelle vidéo, en écrasant progressivement la vidéo
précédente de 5 minutes.
La caméra enregistre pendant 20 minutes, puis commence
une nouvelle vidéo, en écrasant progressivement la vidéo
précédente de 20 minutes.
La caméra enregistre pendant 60 minutes, puis commence
une nouvelle vidéo, en écrasant progressivement la vidéo
précédente de 60 minutes.
La caméra enregistre pendant 120 minutes, puis commence
une nouvelle vidéo, en écrasant progressivement la vidéo
précédente de 120 minutes.
Les fichiers de plusieurs chapitres sont enregistrés sur votre carte de
mémoire. Cela permet de faire en sorte que des petits segments de
contenu soient écrasés pendant l’enregistrement en boucle. Lorsque
vous visionnez les fichiers sur un écran d’ordinateur, vous voyez des
DE
fichiers séparés pour chaque segment de temps. Servez-vous d'un
logiciel d’édition de vidéo si vous souhaitez combiner des fichiers
dans une vidéo plus longue.
pour
33
Page 94

conFiguration de Prises de vue
QUITTER
À partir de l'écran QUITTER, appuyez sur
Configuration de prises de vue.
Si vous souhaitez quitter le menu CONFIGURATION DE
TRUC
DE
PRISES DE VUE, appuyez sur
PRO :
pendant deux secondes.
34
HERO3_Plus_Silver_UM_ENG_FRA_REVA.indb 34 6/26/13 3:26 PM
pour quitter le menu
et maintenez-le enfoncé
Page 95

conFiguration
CONFIGURATION
Pour accéder au menu Configuration :
1. Assurez-vous que la caméra est en mode Configurations. Si l'icône
Configurations
appuyez sur à plusieurs reprises jusqu’à ce qu’elle s'affiche.
2. Appuyez sur
3. Servez-vous de
afin de trouver .
4. Appuyez sur
5. Servez-vous de
6. Appuyez sur
7. Pour quitter, maintenez
à et appuyez sur .
HERO3_Plus_Silver_UM_ENG_FRA_REVA.indb 35 6/26/13 3:26 PM
ne s'affiche pas sur l'écran LCD de votre caméra,
pour accéder à .
pour passer d'une option à l'autre des Configurations
pour accéder au menu Configuration.
pour trouver l’option que vous souhaitez modifier.
pour sélectionner l’option souhaitée.
enfoncé pendant deux secondes ou passez
35
Page 96

conFiguration
MODE PAR DÉFAUT À L’ALLUMAGE
Vous pouvez configurer le mode de la caméra par défaut à l’allumage sur l’un des
modes suivants :
VIDÉO (défaut)
PHOTO
RAFALE DE PHOTOS
ACCÉLÉRÉ
36
HERO3_Plus_Silver_UM_ENG_FRA_REVA.indb 36 6/26/13 3:26 PM
Page 97

conFiguration
UNE TOUCHE
Lorsque le mode Une touche est choisi, la caméra commence automatiquement à
enregistrer dès son allumage. Le mode Une touche peut être configuré de façon à
commencer en mode Vidéo ou Accéléré.
DÉSACTIVÉ (défaut)
ACTIVÉ
Pour activer le mode Une Touche :
1.
Assurez-vous que la caméra est en mode Configurations. Si l'icône Configurations
ne s'affiche pas sur l'écran LCD de votre caméra, appuyez sur
jusqu’à ce qu’elle s'affiche.
2. Appuyez sur
3. Servez-vous de pour passer d'une option à l'autre des Configurations afin de
trouver
4. Appuyez sur pour accéder au menu Configuration.
5. Servez-vous de pour passer d'une option à l'autre afin de trouver .
6. Appuyez sur pour accéder au menu Une touche.
7. Servez-vous de pour passer d’une option à l’autre.
8. Appuyez sur pour sélectionner l’option en surbrillance.
9. Pour quitter, maintenez enfoncé pendant deux secondes ou passez à
et appuyez sur
La prochaine fois que vous allumerez votre caméra, elle commencera à enregistrer dans
son mode par défaut à l’allumage. Pour interrompre l’enregistrement, maintenez
enfoncé pendant deux secondes.
pour accéder au menu .
.
.
HERO3_Plus_Silver_UM_ENG_FRA_REVA.indb 37 6/26/13 3:26 PM
à plusieurs reprises
37
Page 98

conFiguration
MODE UNE TOUCHE (suite)
Pour quitter le mode Une touche :
1. Allumez la caméra.
2. Appuyez sur
dans la fenêtre LCD.
3. Appuyez sur
4. Servez-vous de
5. Appuyez sur
6. Pour quitter, maintenez
et maintenez-le enfoncé jusqu'à ce que s’affiche
pour accéder.
pour mettre OFF en surbrillance.
pour sélectionner.
et appuyez sur .
enfoncé pendant deux secondes ou passez à
Pour interrompre le processus de prise de vues (VIDÉO ou
ACCÉLÉRÉ) en mode UNE TOUCHE, appuyez sur
TRUC
maintenez-le enfoncé pendant deux secondes. Vous reviendrez
DE
PRO :
au menu UNE TOUCHE dans lequel vous pouvez désactiver le
mode UNE TOUCHE.
REMARQUE : Le mode Une touche est inactivé lorsque la caméra est reliée
38
HERO3_Plus_Silver_UM_ENG_FRA_REVA.indb 38 6/26/13 3:26 PM
au Wi-Fi Remote (accessoire facultatif, vendu séparément)
ou à l’appli GoPro.
et
Page 99

conFiguration
NTSC/PAL
Les configurations NTSC et PAL régissent la vitesse d’enregistrement et de lecture vidéo
lorsque l’on visionne des images vidéo sur un téléviseur ou téléviseur à haute définition.
Sélectionnez NTSC lors du visionnement sur un téléviseur ou téléviseur à haute définition en
Amérique du Nord. Sélectionnez PAL lors du visionnement sur un téléviseur ou téléviseur
à haute définition (la plupart des téléviseurs à l’extérieur de l’Amérique du Nord) ou lors du
visionnement sur un téléviseur ou téléviseur à haute définition PAL dans toute région.
NTSC (défaut) PAL
1080p/60 ips 1080p/50 ips
1080p/30 ips 1080p/25 ips
960p/60 ips 960p/50 ips
960p/30 ips 960p/25 ips
720p/120 ips 720p/100 ips
720p/60 ips 720p/50 ips
720p/30 ips 720p/25 ips
WVGA/120 ips WVGA/100 ips
WVGA/60 ips WVGA/50 ips
AFFICHAGE ÉCRAN
Pour afficher ou cacher les icônes d’enregistrement et les renseignements des fichiers sur la vidéo
ou l’écran de visionnement pendant la lecture, activez ou désactivez Affichage écran (OSD).
DÉSACTIVÉ
ACTIVÉ (défaut)
39
HERO3_Plus_Silver_UM_ENG_FRA_REVA.indb 39 6/26/13 3:26 PM
Page 100

conFiguration
VOYANTS INDICATEURS D’ÉTAT
Conservez les quatre voyants indicateurs d'état actifs, seulement deux
d'entre eux (avant et arrière) ou éteignez tous les voyants.
4 (défaut)
2
INACTIF
INDICATEUR SONORE
Vous pouvez régler le volume de l’indicateur sonore ou le désactiver.
100 % (défaut)
70 %
DÉSACTIVÉ
ARRÊT MANUEL
La HERO3+ peut être configurée pour s’éteindre automatiquement après
une période d’inactivité spécifique (lorsque l’on ne prend pas de vidéos ou de
photos et que l’on n’appuie sur aucun bouton).
MANUEL (défaut)
60 s
s
120
300 s
40
HERO3_Plus_Silver_UM_ENG_FRA_REVA.indb 40 6/26/13 3:26 PM
 Loading...