

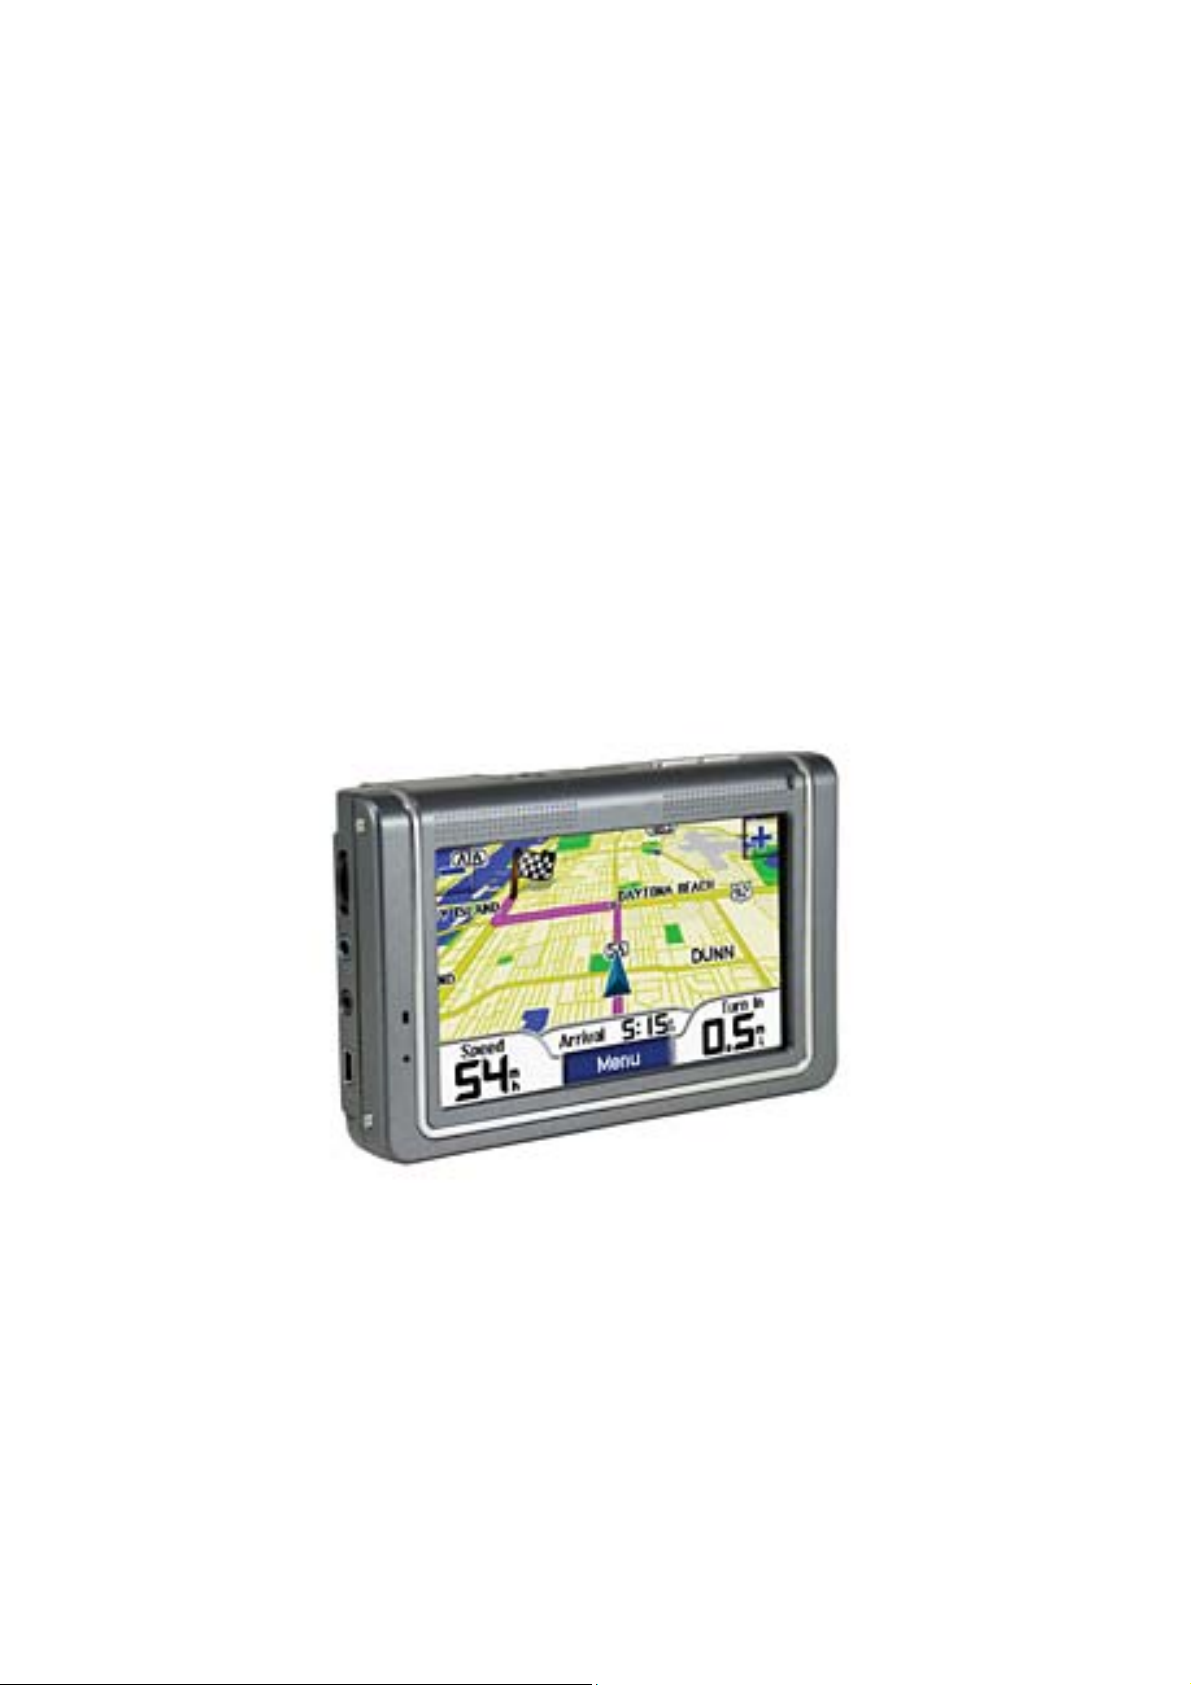
NAV-436 Car Navigator
User’s Manual
1

Contents
1 Application Area ........................................................................................ 3
2 Features .................................................................................................... 3
3 Product Description...................................................................................3
3.1 Product specification............................................................................... 3
3.2 Key Instruction...................................................................................... 5
3.3 Indicator LED Instruction ........................................................................ 5
4 GPS Accessories List.................................................................................. 6
5 Operation Instruction................................................................................ 6
5.1 Power On/Off ........................................................................................ 6
5.2 Touch-Screen Emendation.......................................................................7
5.3 Music ................................................................................................... 8
5.4 Audio Out ........................................................................................... 10
5.5 Video ................................................................................................. 10
5.6 Picture View........................................................................................ 13
5.7 E-Book............................................................................................... 15
5.8 GPS Monitor........................................................................................ 17
5.9 Language Setting................................................................................. 19
5.10 Backlight Setting................................................................................ 20
5.11 Volume Setting.................................................................................. 21
5.12 Power Supply Setting.......................................................................... 22
5.13 Time Setting...................................................................................... 23
5.14 System Information............................................................................ 24
5.15 Style Setting ..................................................................................... 25
5.16 Navigation Software Operation............................................................. 26
5.17 Bluetooth Hand Free Operation (Optional).............................................. 28
5.18 Video Input Setting (Optional) ............................................................. 31
5.19 Review Lens Function Instruction (Optional)........................................... 31
5.20 USB Synchronization Software Installation............................................. 32
6 Notice...................................................................................................... 38
7 Q&A......................................................................................................... 38
2

1 Application Area
All 4.3 inch GPS products of our company
2 Features
4.3” (16:9) WQVGA, 480x272 pixels, 262K color TFT LCD with touch screen
Built-in 2W 2 channel stereo speaker
GPS module: Mstar/SiRF III high sensitivity receiver(use actual configuration as accurate
one)
User friendly touch screen operation and press-key
Built in GPS antenna
SD Quickly run Navigation software from SD card
Audio : mp3,wav, midi files, etc
Video : asf,avi,mp4,wmv
Picture: BMP,JPG,PNG,GIF;
Built in li-on battery, use DC power or car adapter for charge
Two LED color direction:
orange LED is for battery charge,when GPS is charging, the orange LED is lighting after the
power is full, the orange LED will be off, and the green LED will be light.
Built in Bluetooth, support Hands-free(Optional)
Video in: Composite CVBS, PAL and NTSC
The unit will auto-change to rearview lens and display the condition of back view while
reverse car
(Optional)
3 Product Description
3.1 Product specification
Circumstance Parameter
Working Temperature
Range
Storage Temperatu re
Range
Working Humidity Range 45% to 80%RH
Storage Humidity Range 30% to 90%RH
Main Frequency 300MHz/400MHz (use actual configuration as accurate one)
CPU SAMSUNG S3C2440A-30/ S3C2440A-40
Memory 64MB
Capacity 64MB
Navigation Software
Storage
Operation System WINDOWS CE 4.2 NET
-10°C to +60°C
-20°C to +70°C
System Parameter
(use actual configuration as accurate one)
SD card
3

Video In CVBS
Video in Pressure 1.2 V(Vpp)
LCD size 4.3 inch
LCD Pixels 480*272
Basic Parameter
Audio Power
Consumption
Average Power
Consumption
Standby Power
Consumption
Battery 800mAh Li-Polymer battery
Battery Time Continue working for 3hrs or standby 200hrs
GPS module MSTAR MSB2112/SIRF III
Frequency 1.575GHZ
C/A CODE 1.023 MHZ chip rate
Channels
Tracking Sensitivity -161dBm
Orientation Precision 10m, 2D RMS; 5m, 2D RMS, WAAS enable
Speed 0.1m/s
Earphone two track 0.25W/CHANEL, single track 8Ohm/2W
1.5W
<20mW
GPS hardware Parameter
(use actual configuration as accurate one)
MSTAR:12Channels/SIRF:20Channels
Data Update Rate 1HZ
Recapture Time Average 0.1s
Hot Boot Time < 3s
Warm Boot Time Av erage 38s
Cold boot Ti me < 100 s
Most Orientation Length 18,000m
Most Speed 515m/s
Acceleration < 4g
Built-in Antenna Pressure 3.3V±5%
External Antenna
Electricity
15mA
4
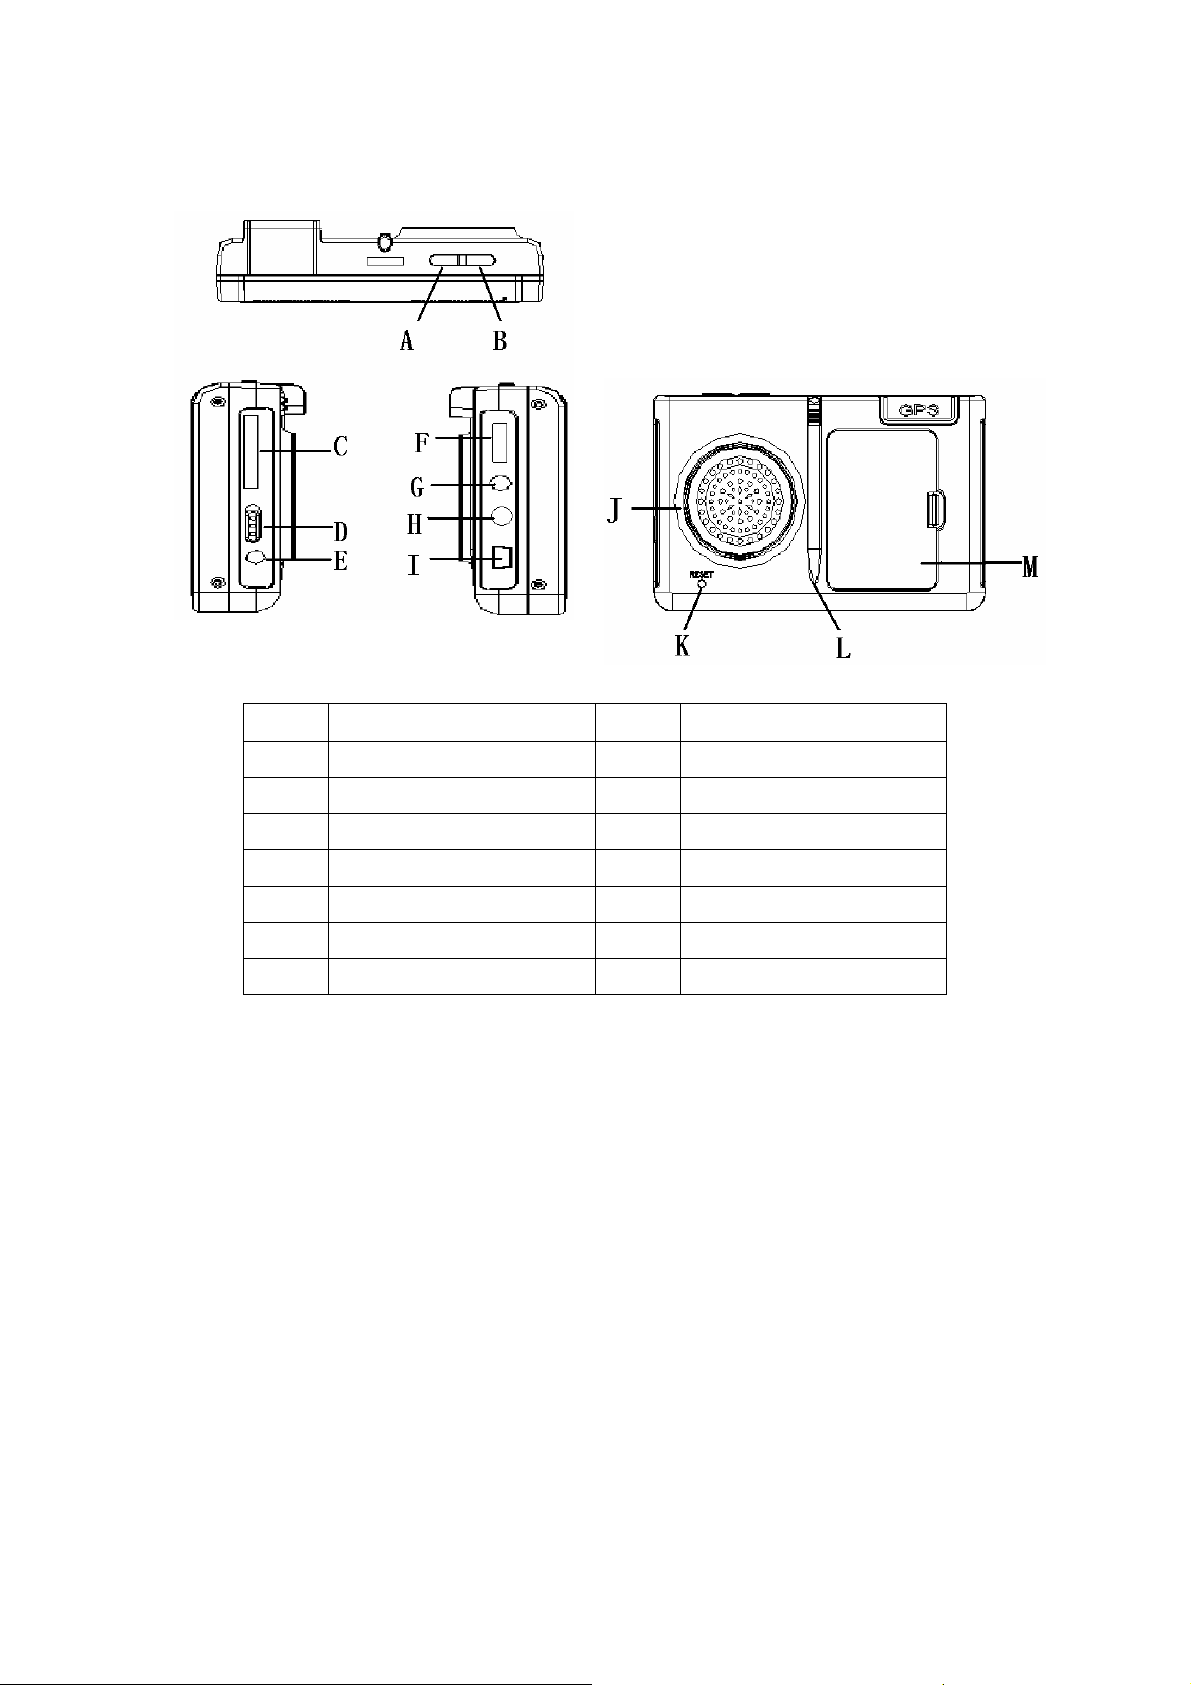
3.2 Key Instruction
Mark Instruction Mark Instruction
A Power Key B MENU Key
C SD card slot D Lock switch
E DC jack F Volume key
G Stero headphone jack H AV jack
I Mini USB jack J Bray exit
K Reset jack L Stylus
M Battery cover
Press “MENU” key when you use navigation, music, video, the GPS will return to program
interface
Long press “MENU” key, the GPS will enter into touch screen revision
Long press “POWER” for 3 seconds to turn on or off the GPS, short press “POWER” key to
enter into or wake up “SLEEP”;
Press “RESET” to rest the system;
Press lock key to lock the GPS
3.3 Indicator LED Instruction
Orange LED is for battery charge,when GPS is charging, the orange LED is lighting,
After the power is full, the orange LED will be off, and the green LED will be lig ht.
5
4 GPS Accessories List
GPS 1pcs
Stylus 1pcs
Car Adapter 1pcs
Car Bracket 1set
User Manual 1pcs
Warranty card 1pcs
USB cable 1pcs (optional)
Earphone 1pcs(Optional)
AC Adapter (optional)
AV cable (optional)
5 Operation Instruction
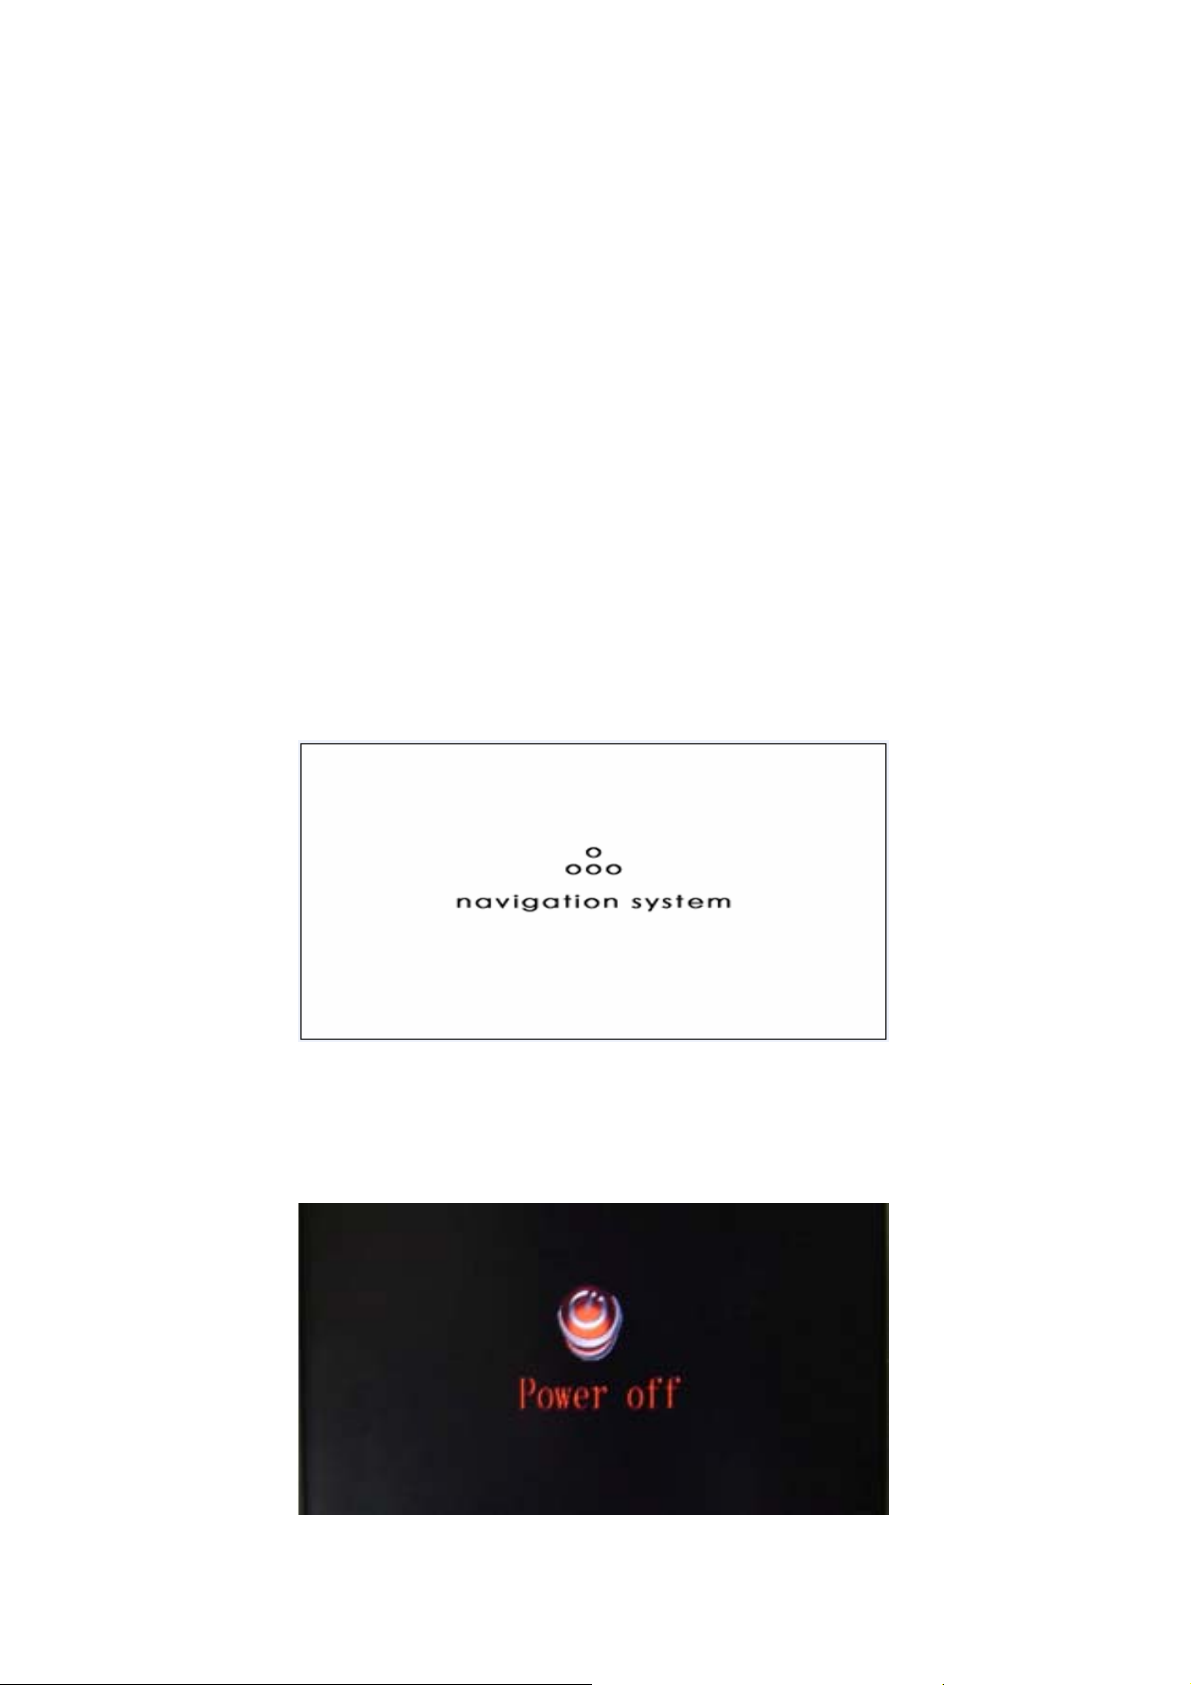
5.1 Power On/Off
Press “POWER” more than 3 seconds,working LED light, meanwhile you can see the
following picture,
Short press “POWER” when the unit is running,system will be sleeping, then press “POWER” ,
system could be get right in 1 second. Press “POWER” more than 3 seconds when the unit is
running, system will be power off, as the following picture,
6

5.2 Touch-Screen Emendation
Plug the Car Adapter / AC Adapter into the unit DC jack, system will enter into Program
interface in 6 seconds, as the following picture,
Press “
” icon, enter into Setting interface, as the following picture,
In setting menu, press“ ” icon, enter into touch-screen setting, as the following picture,
Long press the cursor position according to the menu hint, emendation cursor will move to top
left corner, then press the cursor again, the cursor will move to nether left corner, nether right
corner and top right corner, just following the cursor to emendation; If emendation is success,
you will see “OK” in the screen, press the screen to save the emendation, then you can exit.
7

5.3 Music
In the program interface,press“ ’’, enter into music playback interface, as following
picture,
press “ ”, choose music file storage path, you can see the following information,
Choose your favorite music file, and press“ ” or double click the file you chose, return to
music playing interface, as the following picture,
8

Press “ ”, you can choose all files you need, as the following picture,
Press“ ” and return to music playback interface,
Press“
interface。
Press “
Press “
Press “
Press “
Press“
Press“
Press “
Press “
”, you can append more music file, press“ ” and return to music playback
” and play the music, or double click the file name to play.
” to pause the music playing;
” to play the next music file; Press “ ” to play the last music file;
” to play circular; Press“ ” to play stochastic;
”, the volume will be off;
” to delete the file you chose; Press“ ” to delete all files;
” to return to program interface;
” to adjust the volume; Press ” to adjust rate of progress.
9
5.4 Audio Out
Plug earphone into earphone jack when you play music, then you can enjoy the music by
earphone, meanwhile, the loudhailer will be quiet.
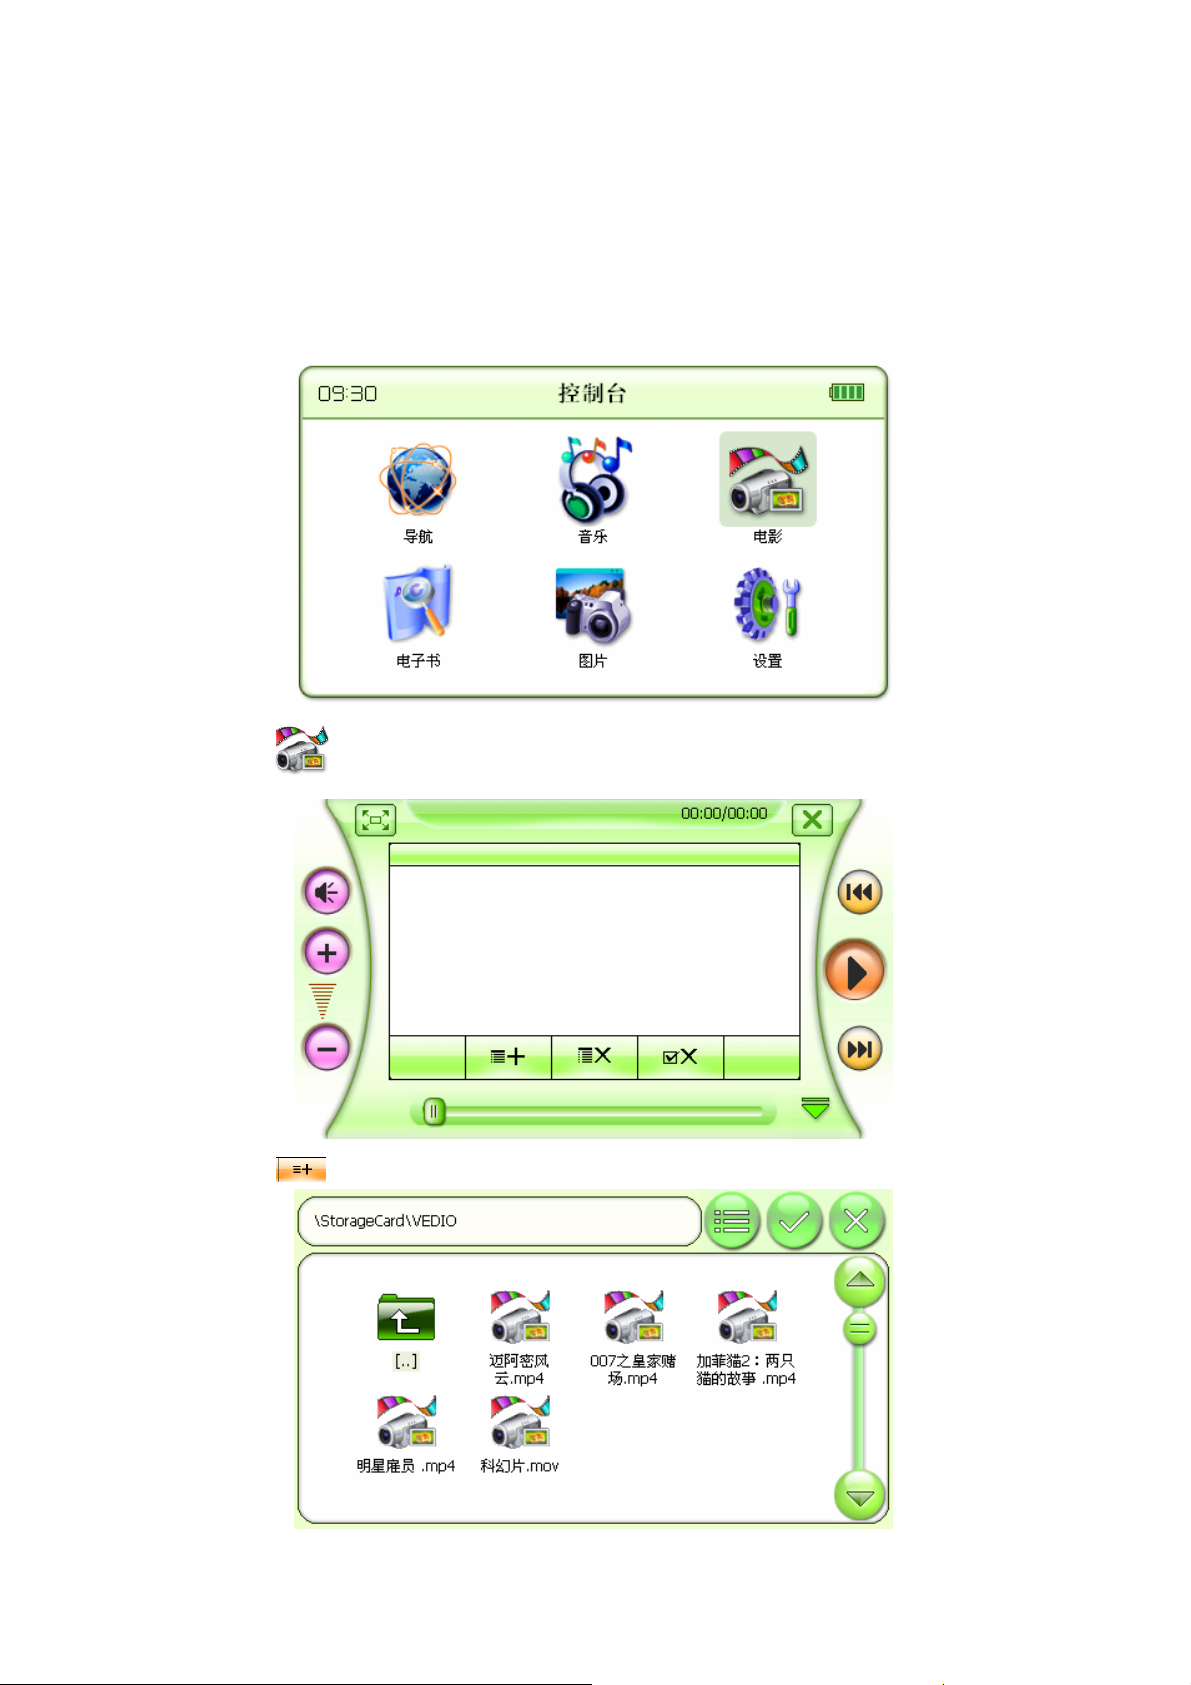
5.5 Video
In the program interface, as following picture,
press“ ”,you can see video play back interface as following,
Press “ ”, choose video file storage path, enter into the following interface,
10

After choose the video file you need, press“ ” or double click file name, then return to video
playback interface, as following picture,
Or press“
Press” ” and return to video playback interface,
” to choose all files, as following picture,
Press“ ” and append more video file, press“ ”, return to video playback interface
11

Press “ ” to play video; or you can double click video file name to play.
Press” ”, you can see the full screen, as following picture,
Press“ ”, volume will be quiet; Press “ ” volume will be normal;
Press“
Press“
Press “
Press “
12
” to choose next video file; Press“ ” to choose last video file;
” to delete file you chose; Press“ ” to delete all files
” to exit;
” to adjust volume;

5.6 Picture View
In the program interface, as the following picture,
Press “
”, enter into picture browser interface, as following picture,
Press“ ”,choose picture file storage path and enter into the following interface,
After choose your favorite picture file, press“ ” or double click file name, then return to
“Image Viewer” interface,
13

Press“
Press“
Press “
Press “
Press “
Press “
Press “
Press “
”, you can see the picture as full screen,
” to browse the last picture;
” to browse the next picture;
” to browse the picture in slide mode;
” to zoom out the picture;
” to zoom in the picture;
”, turn the picture to right 90℃;
” to exit from “Image Viewer” interface
14
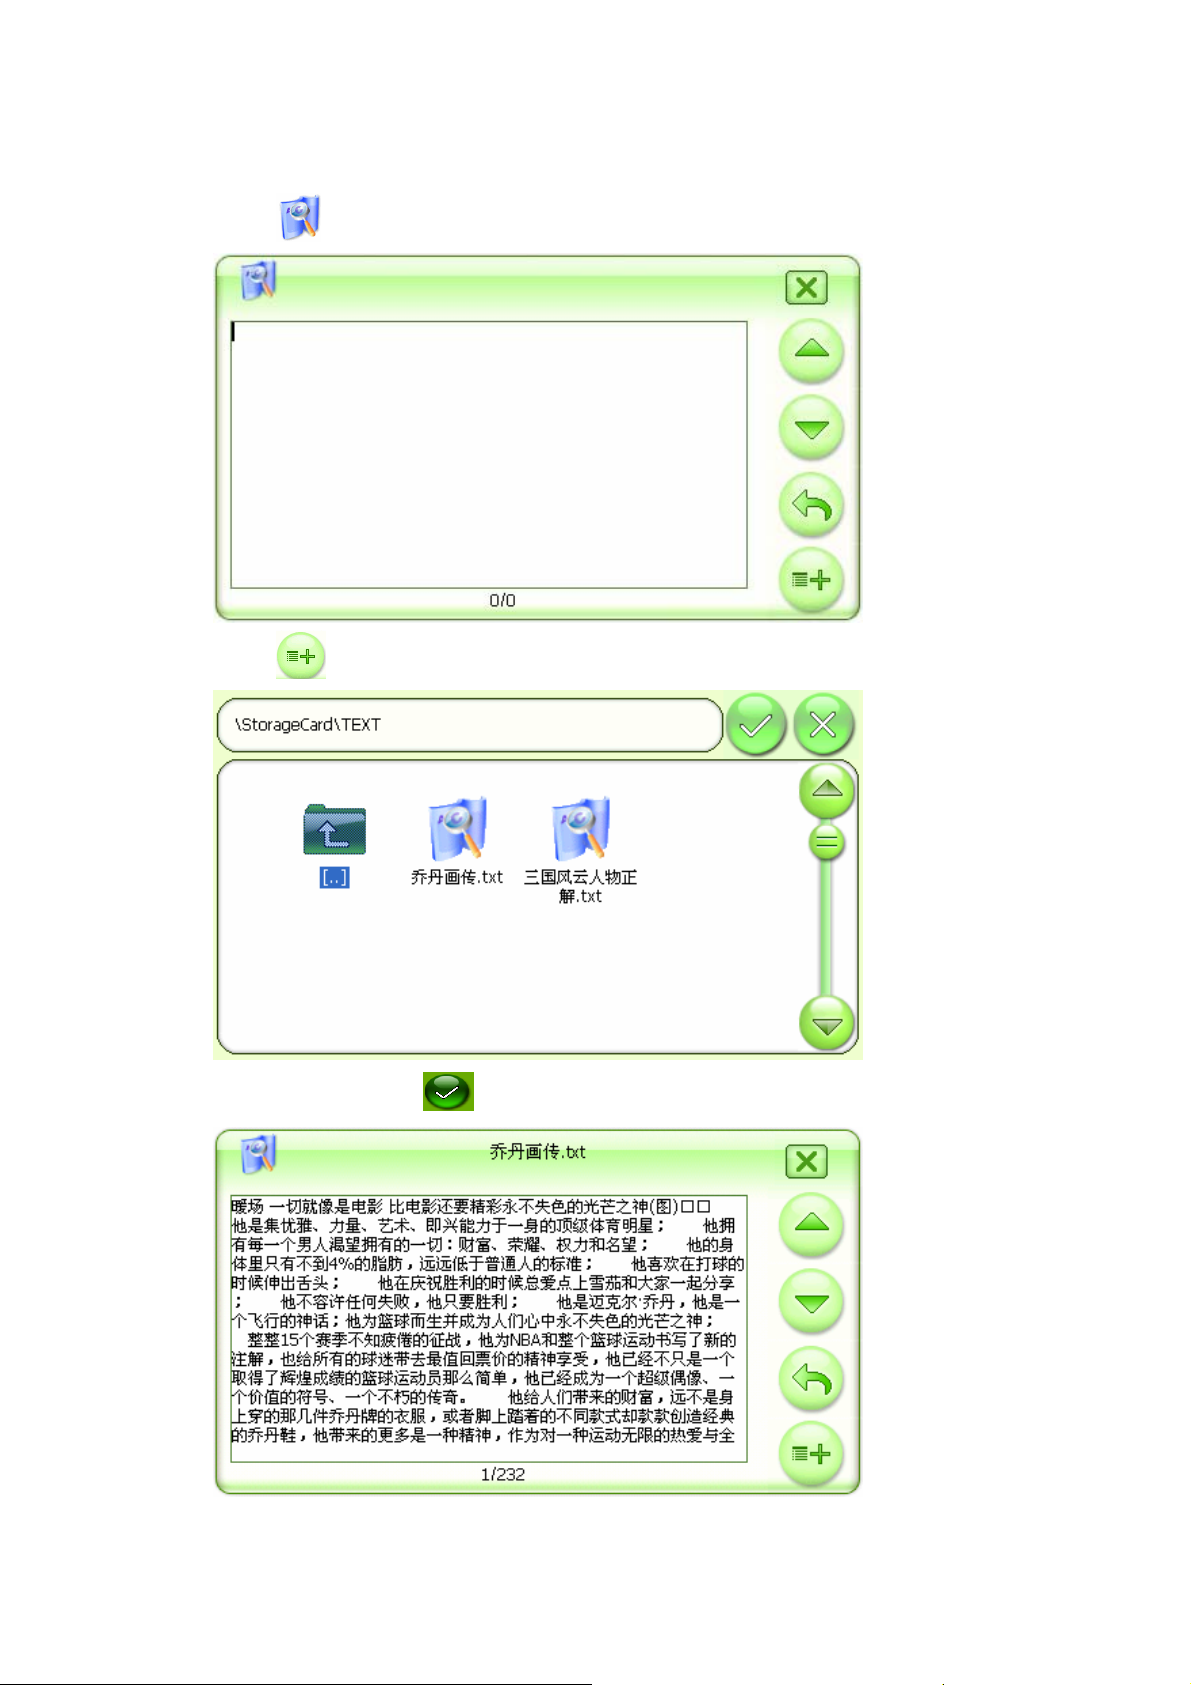
5.7 E-Book
Press “ ” enter into the E-book interface as following,
Press “
”, choose storage path of E-book as the following,
Press . txt file or press “
” as the following picture,
15

Press “ ”and “ ”, you can turn the page up or down;
Press “
” to set the page turning, as following picture,
Press figure keyboard and input page,
Press “
Press “
” to return to browser interface and turn to page layout you need;
” to delete the number you input;
Press“
Press “
” delete all number you input;
” to return to browser interface
16

5.8 GPS Monitor
In the program interface, as the following picture,
P
ress “ ”, enter into setting interface,
Press GPS monitor “ ”, enter into GPS monitor interface,
1. Press “ ” to restore GPS satellite test.
17

2. Press “ ” enter into satellite data stream interface,
3. Press “
”,enter satellite amount and signal interface,
4. Press “ ”, enter into longitude, latitude and time interface,
After get related information you need, press “
” and return to program interface
Notice: Please test GPS monitor in naked and clear place, or you could not receive good
satellite signal.
18

5.9 Language Setting
In the system setting interface, as following,
Press“ ”, enter into language setting interface,
After choose the interface language you need, press“ ” and return to system setting
interface
19

5.10 Backlight Setting
In the system setting interface, as following,
Press“ ”, enter into Brightness setting interface,
After adjust backlight brightness and automatic closing time, press “ ” and return to
system setting interface.
20

5.11 Volume Setting
In the system setting interface, as following,
Press“ ”, enter into volume interface,
In this interface, you can set system volume, silence, key volume, press“ ”, return to
system setting interface.
21

5.12 Power Supply Setting
In the system setting interface, as following,
Press“ ”, enter into power interface,
.
You can adjust system standby time based on your requirement.
22

5.13 Time Setting
In the system setting interface, as following,
Press“ ”, enter into time interface,
After you complete time setting, press“ ” and return to system setting interface
23

5.14 System Information
In the system setting interface, as following,
Press , and enter into system interface,
Initial setup: Reset the system setting to initialization;
Document repair: Restore file in flash;
24

5.15 Style Setting
In the system setting interface, as following,
Press “
” and enter into skin setting interface, choose skin interface you prefer, as
following,
After chose the skin you prefer, and press to return to program interface.
25
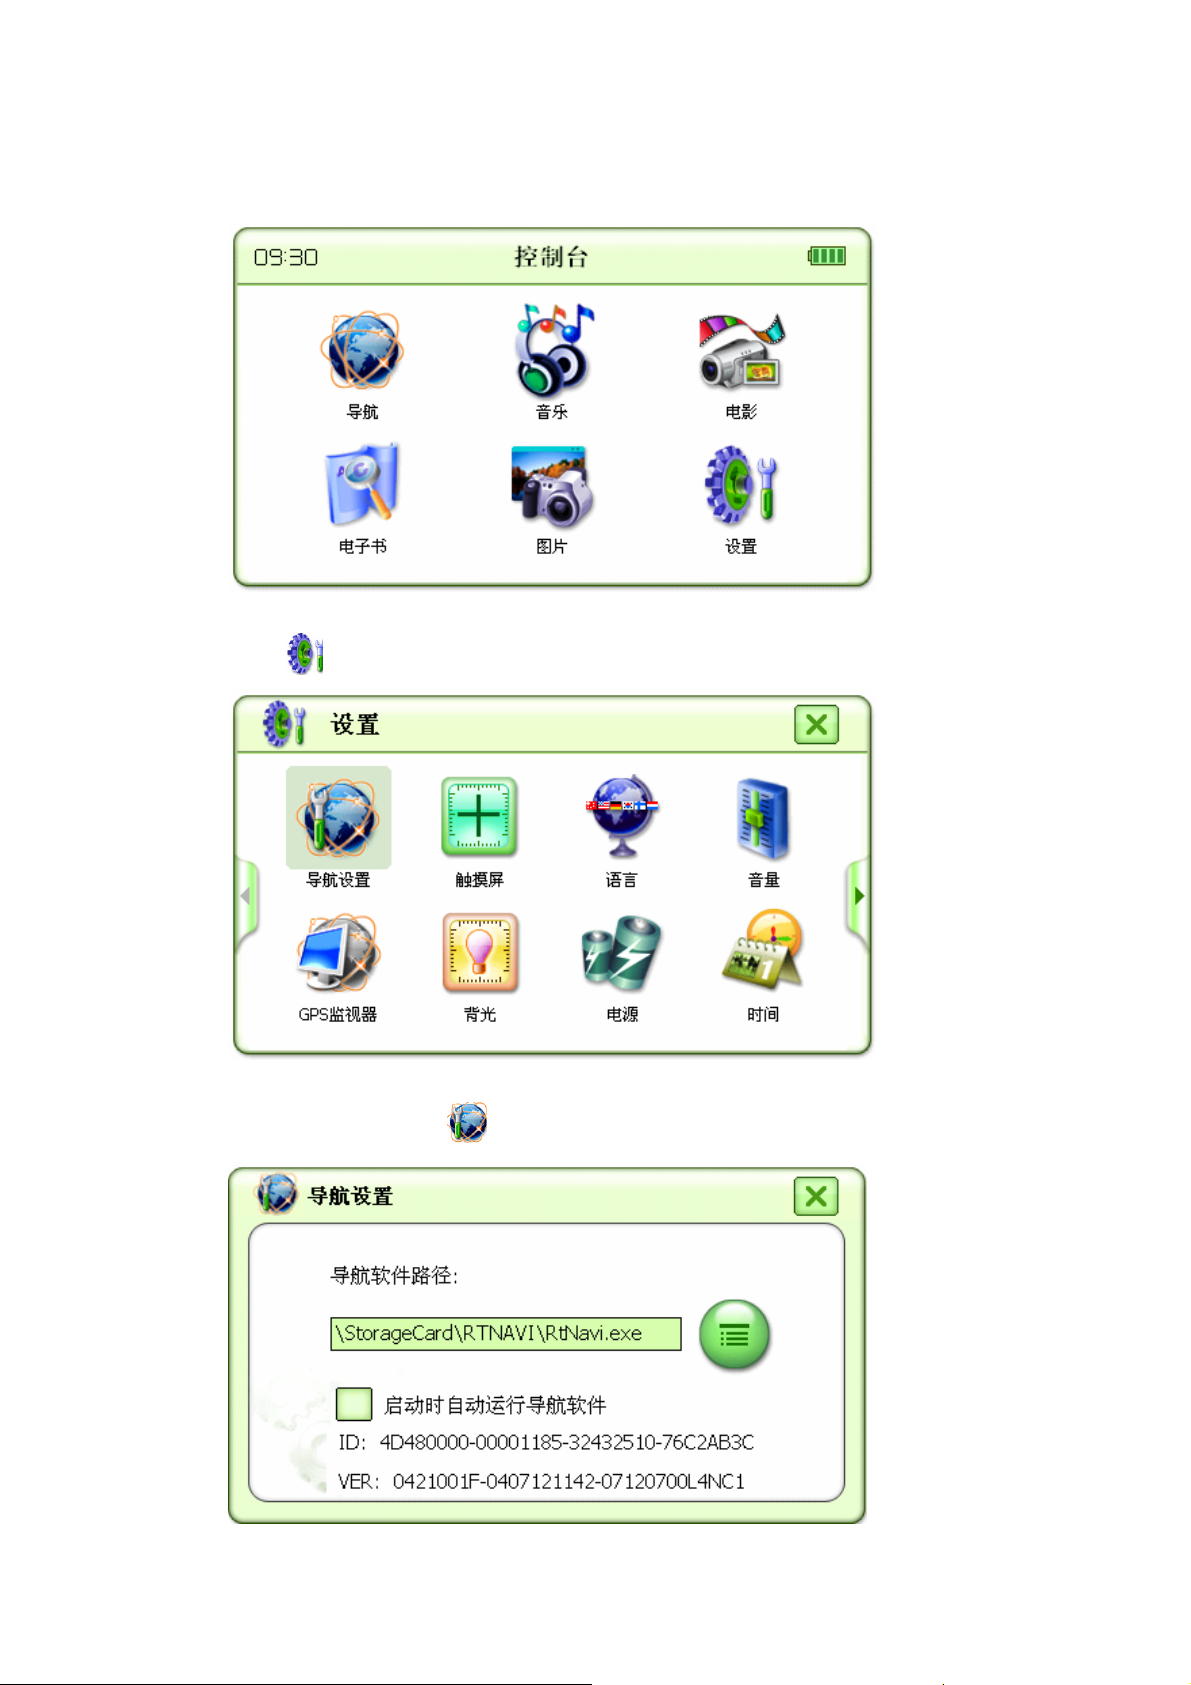
5.16 Navigation Software Operation
Plug in SD card which built-in navigation software,and enter into program interface,
Press“ ”, system will enter into system setting interface,
Press navigation setting“ ”, and enter into following interface,
26

Press“ ” and enter into the following interface,
Choose navigation software according to its storage path, press“ ” and exit, return to
program interface,
Press “ ”,system will enter into navigation interface, please operate the navigation based
on navigation software operation.
27

5.17 Bluetooth Hand Free Operation (Optional)
In the program interface, as following picture,
Press “ ”, enter into Bluetooth mode, as the following picture,
Press to set Pin code, as the following picture,
To set whether the unit has Bluetooth function when you are not in
Bluetooth interface
To set whether the unit could automatic answer when you have a call
28

Press , enter into input interface,
Press “ ” to exit after Pin code is set Matching with Bluetooth equipment
Press“ ” to set online partnership,
Find Bluetooth equipment by your mobile, then input the default password:1234
Bluetooth equipment management:
Press “
”, you can see the Bluetooth equipment you have matched before, as the following
picture,
--connect
selective equipment;
--cut selective
equipment
--delete all
Bluetooth equipment
29

Press “ ” to set call
--backspace --lift --re-dial --phone record key;
When you are calling, as the following picture,
--hang up, --adjust volume;
When you are talking with somebody by Bluetooth, as the following picture,
30

5.18 Video Input Setting (Optional)
Press and enter into Video Input interface,
After chose your favorite style, press
and return to main interface.
5.19 Review Lens Function Instruction (Optional)
Review Lens Function is useful when the unit is working or standby, if the unit is power off,
this function is useless. If you need to debarkation, please short press “power” and let the
unit be “sleeping”
31

5.20 USB Synchronization Software Installation
After download Activesyn4.5 software from Microsof t website, double click“ ”,
as following picture,
Press
and you will see the following picture,
Press
32
and you will see the following picture,

Press “
Press”
” and see the following picture,
” to select a different folder for installation;if you don’t want to change
folder, then press“
33
” and enter into the next interface,

Press “
” the driver will be installed automatically
After the driver installed, you will see the following picture,
Press “ ”
34

Press “ ”
Press “ ”
35

Press “ ”
After you connect the unit successfully, you can see the following picture,
36

After you installed the driver successfully, you will see this con“ ” on the desktop.
Then you will see
icon under “ ”
Double click “
and see the following picture,
Here you can copy, plaster or delete the data in this folder.
37

6 Notice
Please avoid exposing this unit to sunlight.
Please keep the unit dry.
Please avoid throwing this unit to damage it.
GPS antenna should be put flatly
GPS antenna should be dead against the sky
7 Q&A
Question Reason Resolvent
GPS could not power on GPS is locked
Power is out
Could not receive signal Use GPS inside Pls receive signal outside
Speed of power used fast
abnormality
Could not enter into
navigation mode
LCD display unclear TFT LCD is dirty Clean TFT LCD
No volume Volume setting is minimum Enter into volume setting to adjust
Touch screen function is
abnormality
Date/Time display wrong Reset Date/Time
Could not use key of GPS Key switch locked
The Tem. Is too low or too
high when you use GPS
Battery fall short of provision
Battery is aging
Navigation setting is wrong to
use
Did not revise Touch screen
function
Unlock the key switch
Recharge the power
Avoid using GPS under high or low
tem.
Change battery or charge batter by
car adapter
Reset navigation setting
the volume
Revise touch screen function
Unlock key switch
Press “RESER” and restart GPS
38
 Loading...