

GoPass ANL-901(C) Quick Start Manual
Q
Q
A
A
uii
u
V
V
c
k
c
k
L
L
-
9
-
9
Stt
S
0
0
a
a
1
1
rtt
r
(
(
G
G
C
C
uii
u
)
)
d
d
e
e
AVL-901(C) Hardware Quick Installation Guide
1. Precaution before Installation
z Prepare a SIM card for GSM communication. Use some other mobile ph one to confirm
that the PIN code has not been set, and that it can dial out and receive telephone calls
without problem.
z Before install the SIM card, make sure to cut off power from the AVL unit. The correct
installation method is to push the tray completely into the AVL unit, until you feel it is
hooked by something.
z It takes around over 20 minutes for the very fist time positioning.
z The factory default password is “8888”.
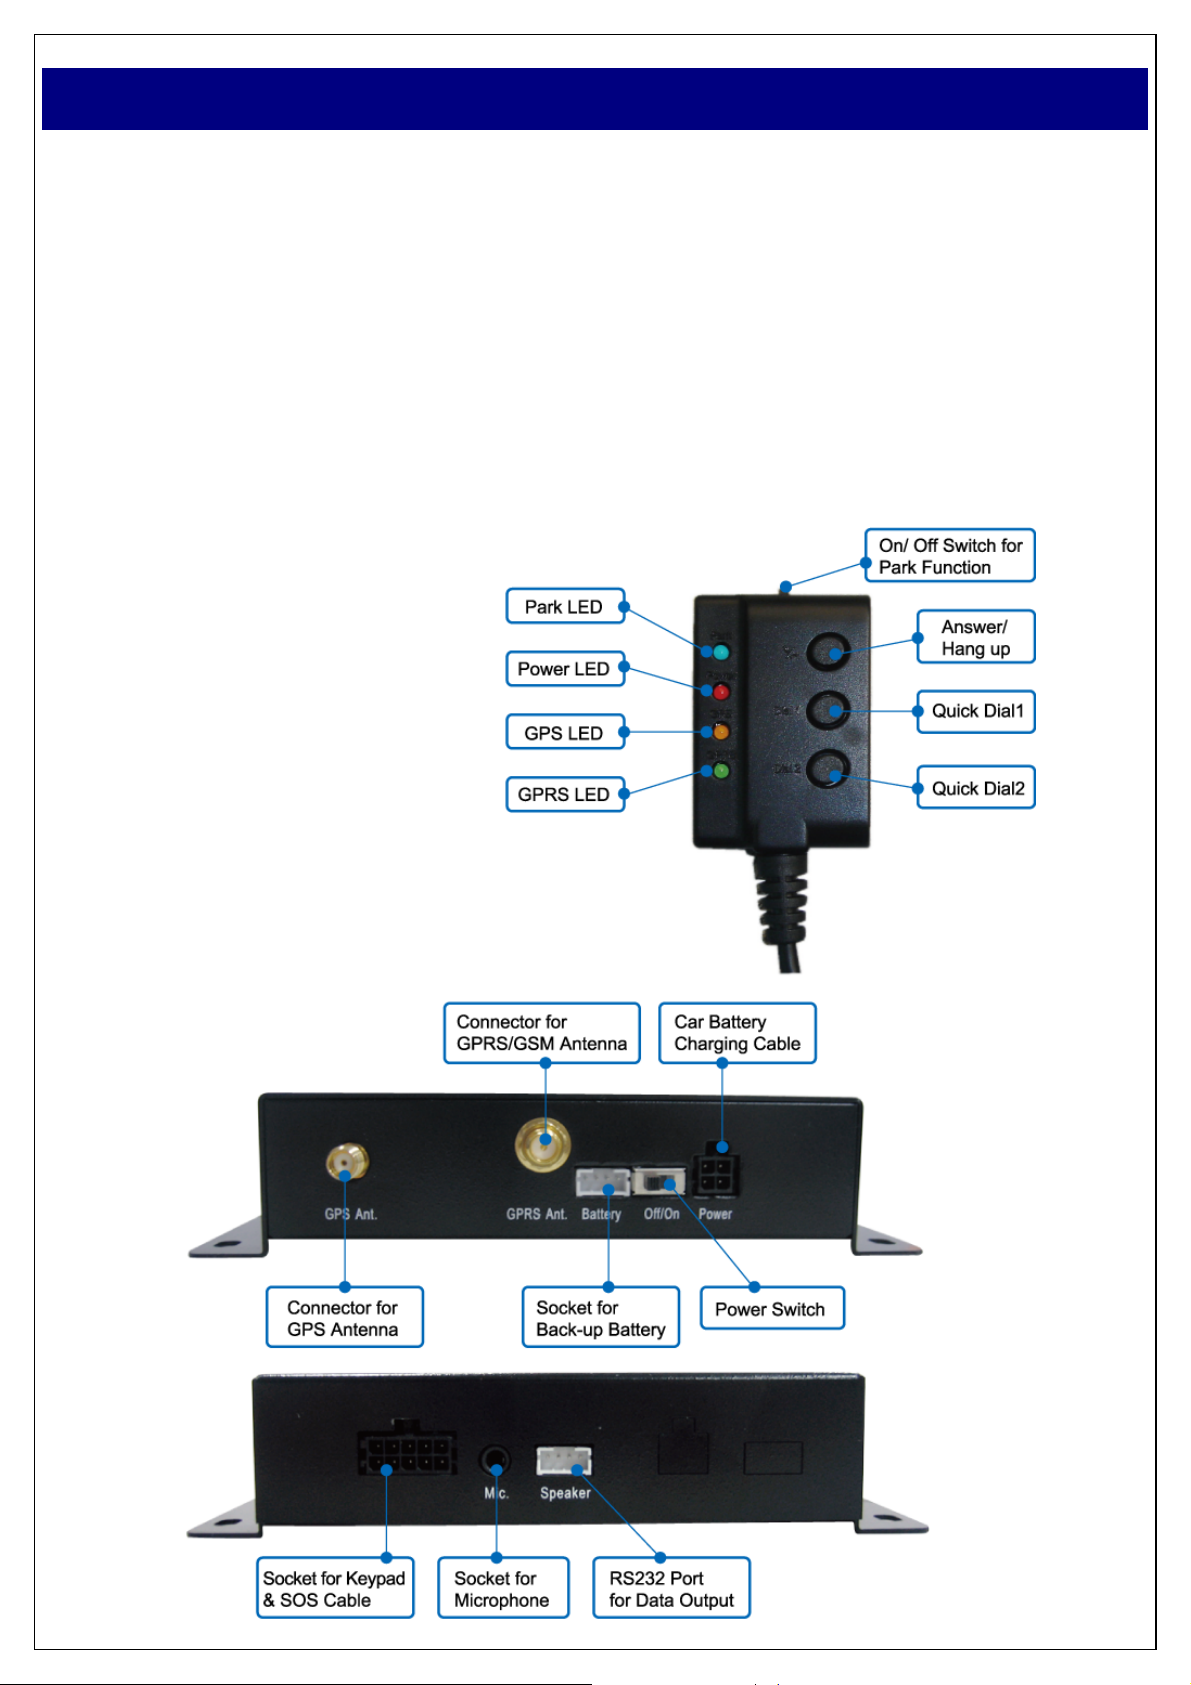
2. Panel Description
1
3. Installation
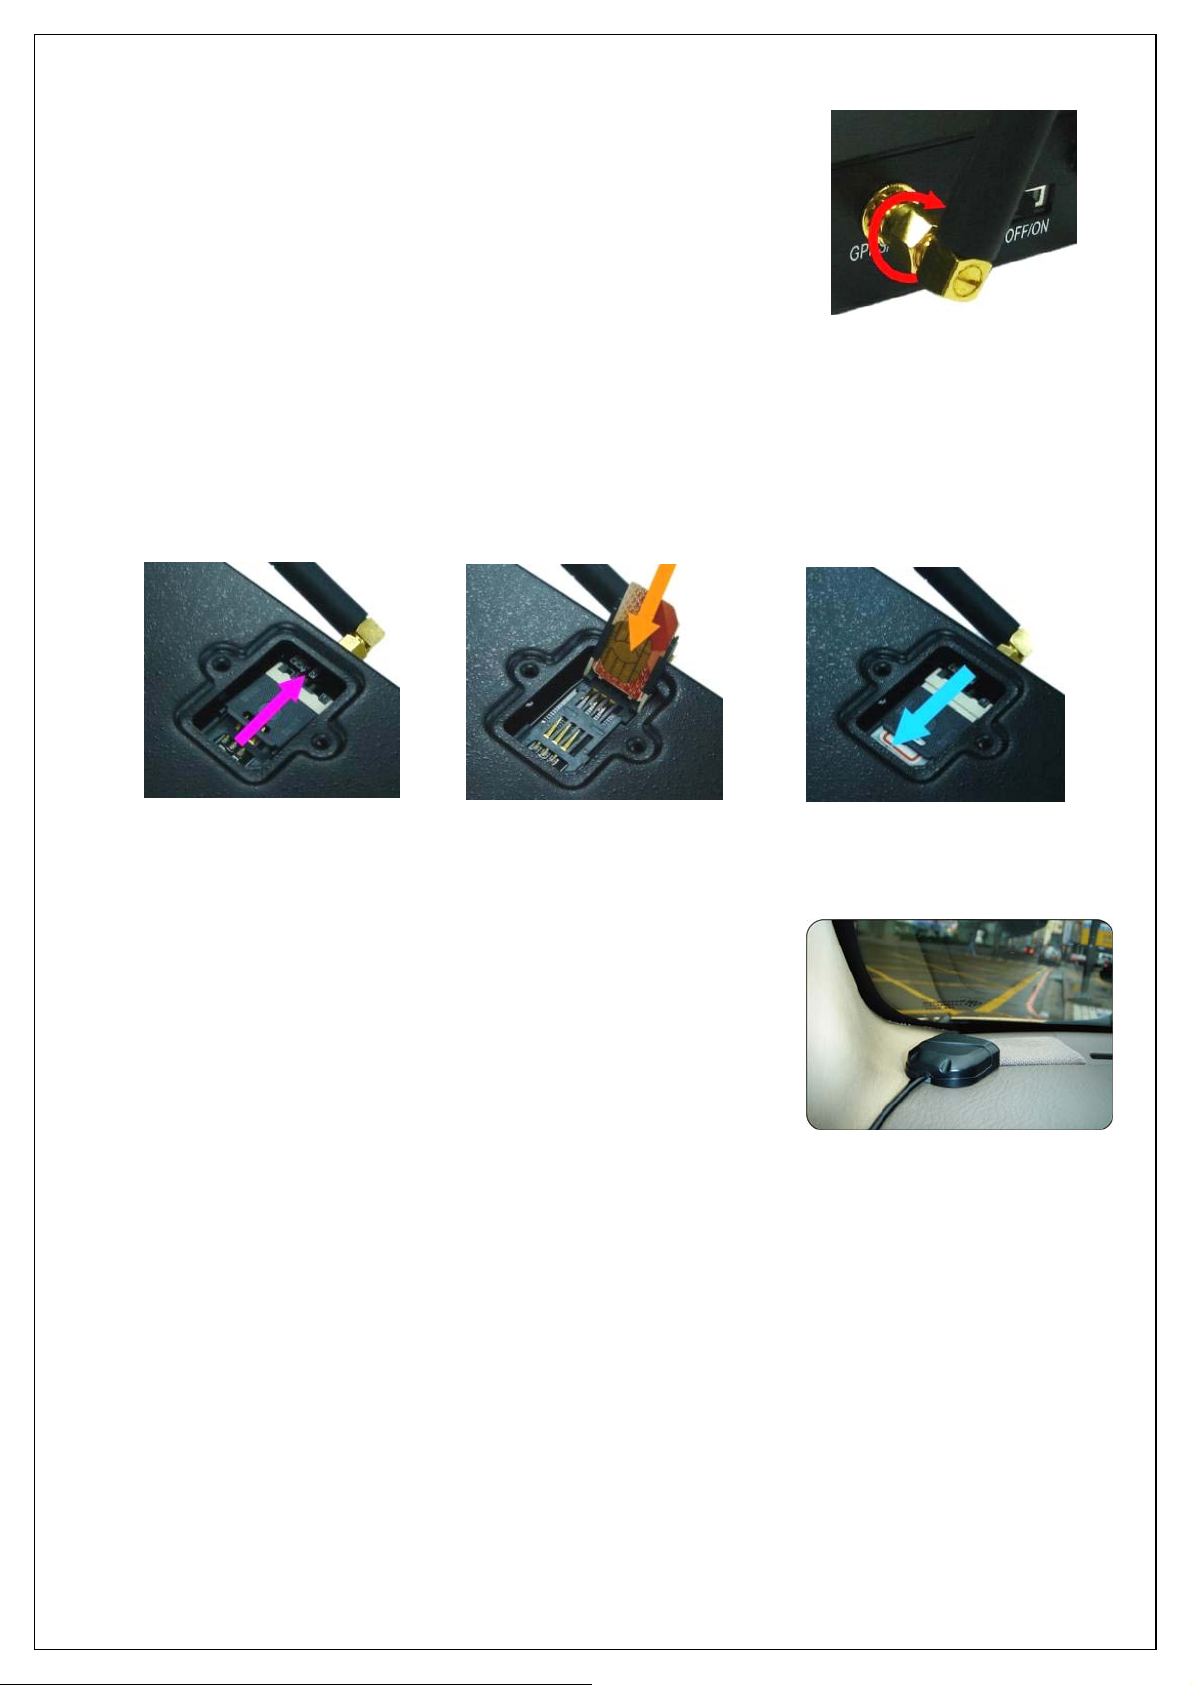
Step 1: Install GPRS Antenna
Connect the GPRS Antenna to the unit.
Fasten the connection by turning the screw in the bottom.
Please do not swing round the antenna itself.
Step 2: Install SIM Card
(1) Unscrew and remove the back cover of your locator. Push the holder top upward to
loose it.
(2) Insert the SIM card by sliding it into the card holder slot, with the chip module facing to
the connecto rs on PCB, as shown in th e picture.
(3) Flip down the holder top. Push the holder top leftward, and let it snap in completely.
1
Step 3: Connect GPS Antenna
GPS antenna is used to receive satellite signals in
the sky. It should be positioned at a place where it
will have an unobstructed view of the sky, such as
the metallic winds hield.
If your car is with metallic windshield, pl ease cut a hole
on the windshield above the place where you put the
GPS antenna, so that the antenna can receive the GPS
signals.
Step 4: Power On
Connect AVL-901(C) to the power source, slide power switch to “ON” to turn on the unit.
2
3
After power on, Power LED will light constantly; GPS LED will light steady orange or
flashing orange. The device will be ready to work in abou t 30-45 seconds after turn on
the power.
If AVL-901(C) is connected to the optional back-up battery, the unit will be alwa ys O N ;
power switch will be of no function.
Step 5: Check if GPS can works properly
Method:When GPS has got position fixed, the GPS LED will turn from const ant glow to
“blinking light”. Check if the GPS LED has turned to “blinking light”.
2

4. Operating In structions
(1) Geo-fence (Park) Function
Slide the Park switch to the left to activate Geo-fence function, the PARK LED will be
“constant glow”. AVL-901(C) will send a SMS alert message to the preset phone
numbers, if the car is moved beyond the preset distance range. Slide the Park switch
back to the right, the PARK LED will shut off; and Geo-fence (Park) function will be cut
off. The accuracy of GPS positioning is liable to be affected by tim e, weather, & other
environmental factors. It is suggested to set the geo-fence range over 200 meters.
(2) SOS Emergency Help Function
When SOS button is pressed for 2-3 seconds, the device will send out a SMS message
for emergency help, one time each 3 mi nutes. The person(s) who receive the messag e
can activate the voice monitoring function, and offer assistance in time. The phone
numbers list can be set by the users.
(3) Sound Monitoring Function
If you want to know what is happening inside the car, you can send a SMS command
code 100#Password to the unit to monitor the situation in the car, LIVE & REAL-TIME.
(4) Conversation Function
Call In: One can make phone call to A VL-901(C) by simply dialing the SIM card number.
To receive the incoming phone call, one should press the “Pick-Up/ Hang-Up”
button to start the phone conversation.
Call Out: AVL-901(C) has two buttons for speed dial; you can pr eset two sets of phone
numbers of those you want to talk with. After the setting, you can make phone
call to the preset phone numbers by pressing down either of the two speed
dial buttons, “Dial 1” or “Dial 2”.
(5) Setting the Volume & Ring
Volume: Press “Dial 1” for 3-5 seconds, the device will ring up. By then, you can press
Dial 1(+) or Dial 2(-) to adjust volume up/ down; and press “Pick-Up/
Hang-Up” button to confirm the setting.
Ringing: Press “Dial 2” for 3-5 seconds, the unit will ring up. By then, you can press
Dial 1(+) or Dial 2(-) to select the ring sound; and press “Pick- Up/ Hang-Up”
button to confirm the setting.
3
 Loading...