


ai
RMC3116-670-HSE
User Manual
Version 1.0

Shenzhen Gooxi Hengyu Technology Co., Ltd
Content
Manual Structure
Foreword
Chapter 1 Chassis Overview
Chapter 2 Easy Installation Instruction
Chapter 3 Chassis Parameters
Shenzhen Gooxi Hengyu Technology Co., Ltd
Foreword
This manual is about the installation and use information of RMC3116-670-HSE
chassis that provided to professional system integrators and personal computer
technicians. The installation and maintenance should be conducted by experienced
technicians only.
Gooxi RMC3116-670-HSE the fourth generation of server chassis is designed
based on standard 2U server and can be assembled into common computing server,
storage server, Internet bar server, database server, VOD storage server, HPC server,
and so on. The server chassis is different from ordinary desktop chassis that pays
more attention to appearance design, as it focuses on the quality and content. Gooxi
RMC3116-670-HSE server chassis uses imported first-class SGCC galvanized steel,
and possessed with the characteristics of fingerprint resistance, corrosion resistance,
heat resistance, heat transfer and thermal reflectivity, formability as well as
weldability.
In addition, taking into account the higher stability requirements of the server
during usage, Gooxi RMC3116-670-HSE server chassis has excellent heat dispersion.
To be specific, the heat dissipation channel is reasonably designed, which can take
away a large amount of heat in the chassis to ensure the stable operation of the server.
The scalability is an important factor to determine whether the server chassis
design is reasonable. Gooxi RMC3116-670-HSE server chassis has stronger
scalability than ordinary chassis, such as: hard disk expander, peripheral expander,
etc.
Shenzhen Gooxi Hengyu Technology Co., Ltd
Chapter 1 Chassis Overview
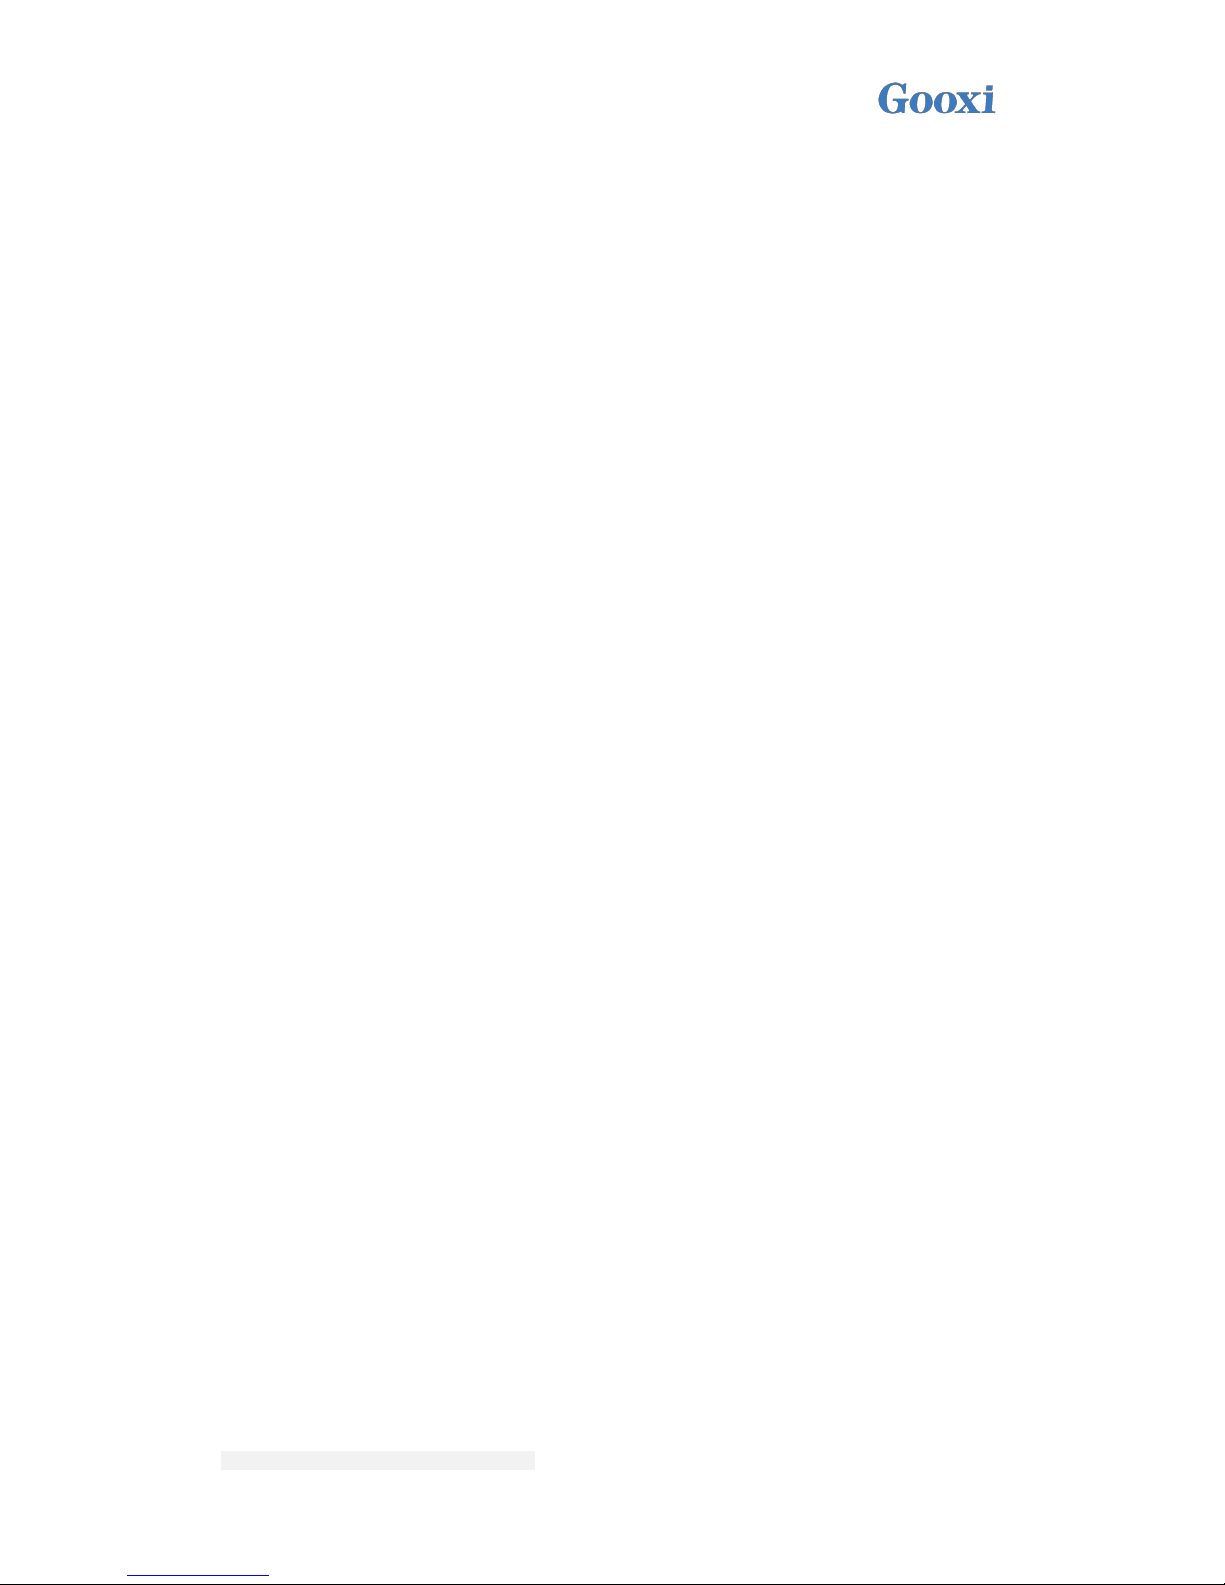
1.1 Chassis Structure
(1)
Top cover
(2)
Rear window
(3)
Front cover
(4)
Fan
(5)
Hard disk module
(6)
Power supply
(7)
3.5-inch hard disk box
(8)
Left-side ear
(9)
Right-side ear

Shenzhen Gooxi Hengyu Technology Co., Ltd
1.2 Rear Window Construction
①
Power site
②
I/O washer position
③
Expansion slot
1.3 Materials Package
64 pieces of #6-32*5mm countersunk screws are used for fixing hard disks.
10 pieces of active studs with the total height of 8mm are used to install the
motherboard.
16 pieces of #6-32*6mm cross recessed pan head
screws are used for fastening the motherboard and
power supply.
0~15 SAS - label.
One 100 * 120 * 0.045mm PE valve bag.
1.4 Chassis View
Front view:

Shenzhen Gooxi Hengyu Technology Co., Ltd
Rear view:
1.5 Related Indicators of Chassis Panel

Shenzhen Gooxi Hengyu Technology Co., Ltd
The above picture shows the front panel buttons and LED indicators; each button
or indicator light has its own function and status description that are described in the
following table:
LED Status Description
No.
Picture
LED Appearance
Description
1
-
LOGO label (labeling or
customized acrylic label)
②
The green light is on
The device is on
③
Reset
The button is used to restart
the server
④
The green light
flashes
The system is running
normally
⑤
The yellow light is
on
Alarm indication,
including system alarm, fan
alarm, power alarm, etc.; the
specific can be viewed
through IPMI management
software
⑥
The green light is on
Internet access 1 connection
is normal
⑦
The green light is on
Internet access 2 connection
is normal
⑧
USB interface
2*USB2.0 interface

Shenzhen Gooxi Hengyu Technology Co., Ltd
1.6 Introduction to Hard Disk Indicator
1、 Act LED
2、FaultLED
3、StatusLED
4、LED description is as follows:
Function
Act LED
Fault LED
Status LED
Hard disk at
site
ON
OFF
OFF
Hard disk
activity
Flash 4Hz/s
OFF
OFF
Hard disk
location
ON
Flash 4Hz/s
OFF
Hard disk
fault
ON
OFF
ON
RAID
reconstruction
ON
OFF
Flash 1Hz/s
1.7 Brief Introduction to Backplane
The standard configuration of Gooxi backplane model is RMC3116-BPE-12G,
and the specific description is as follows:
ActLED
Fault LED
StatusLED

Shenzhen Gooxi Hengyu Technology Co., Ltd
RMC3116-BPE-12G
Correspon
ding site
Interface / jumper /
slot
Corresponding
site
Interface / jumper / slot
1、2、3、4
4 ATX power input
9、10、11、12、13
SFF-8643 12Gb SAS input
interface
5、6、7、8
4 Sockets of 4PIN
temperature control fans
14
PMC PM8044 Expander chip
1.8 Introduction to the Output Interface of Backplane Hard Disk

Shenzhen Gooxi Hengyu Technology Co., Ltd
Chapter 2 Easy Installation Instruction
2.1 Introduction to the Disassemble Steps of Gooxi 3116 Chassis Cover
⑴
Unscrew the top cover screws
⑵
Press the button of chassis back cover

Shenzhen Gooxi Hengyu Technology Co., Ltd
⑶
Push the back cover
(4) Pull the back cover
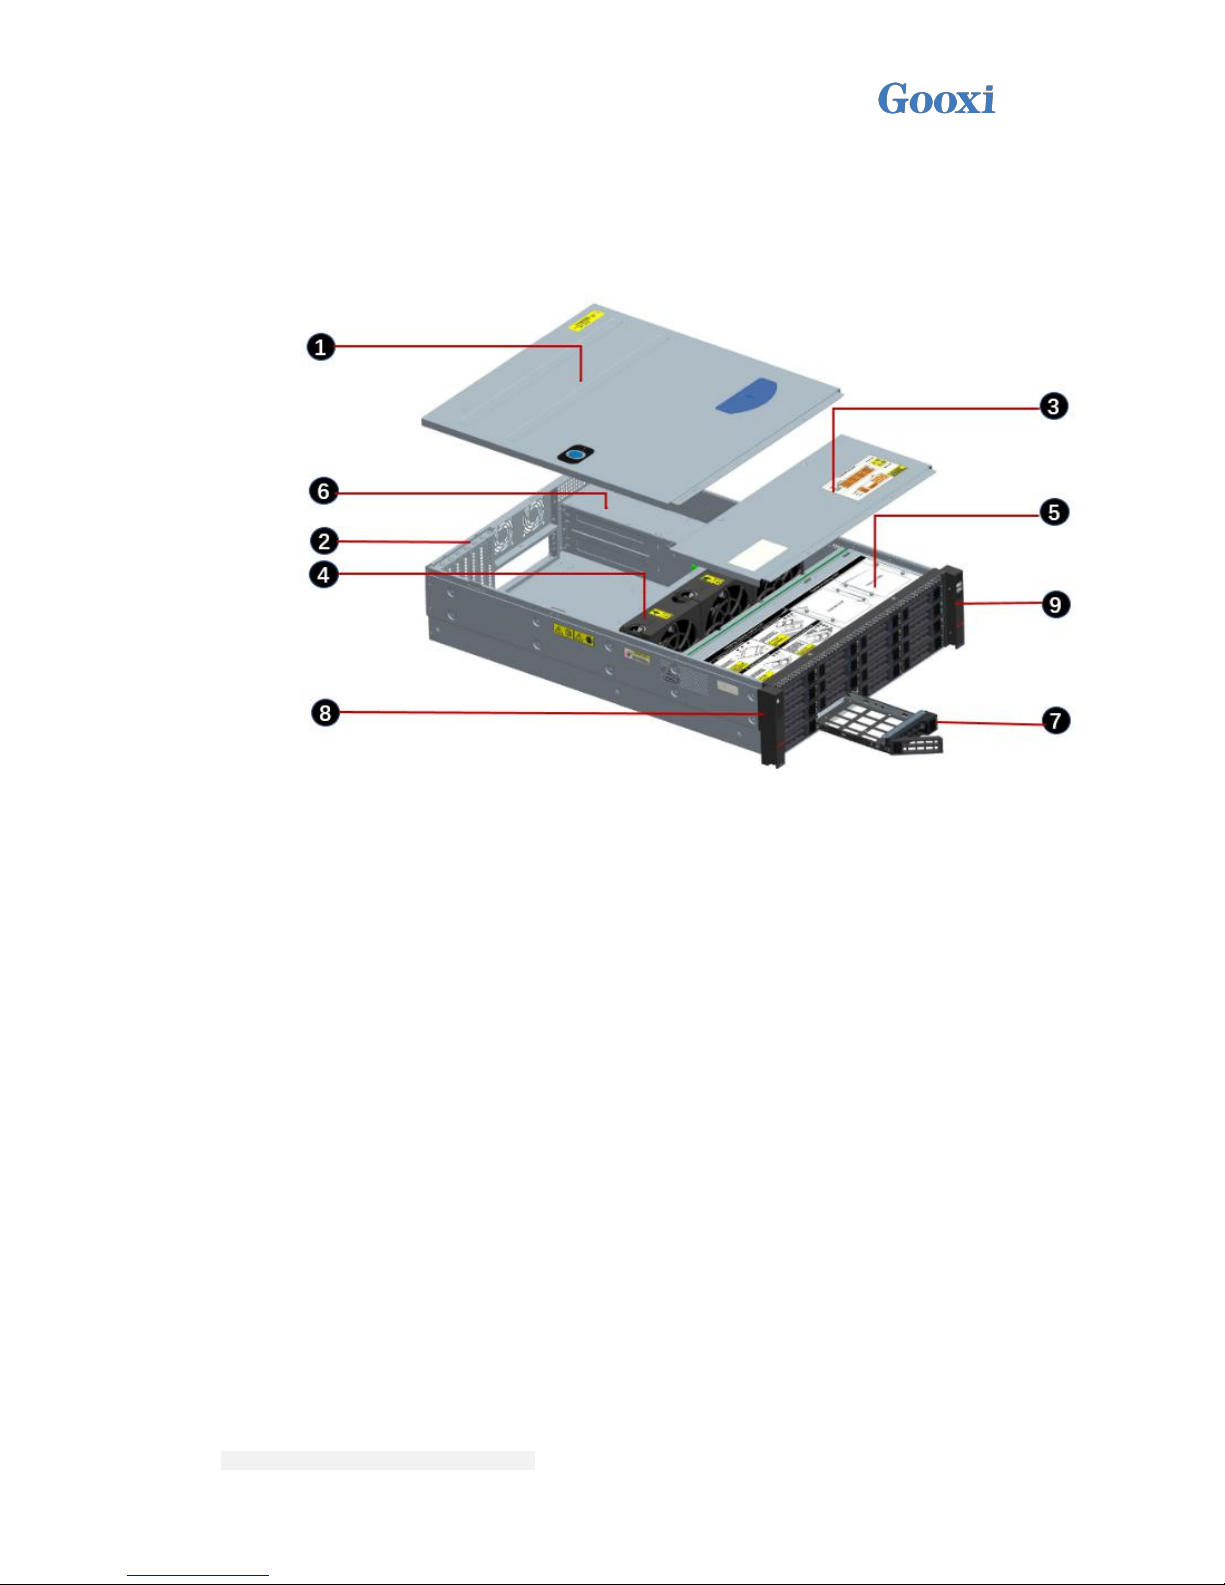
2.2 Introduction to the Installation Steps of Gooxi3116 Chassis Fan Module
⑴ Install the hot-swappable fan modules into the chassis, respectively.
(1) Finished completion effect of fan module.

Shenzhen Gooxi Hengyu Technology Co., Ltd
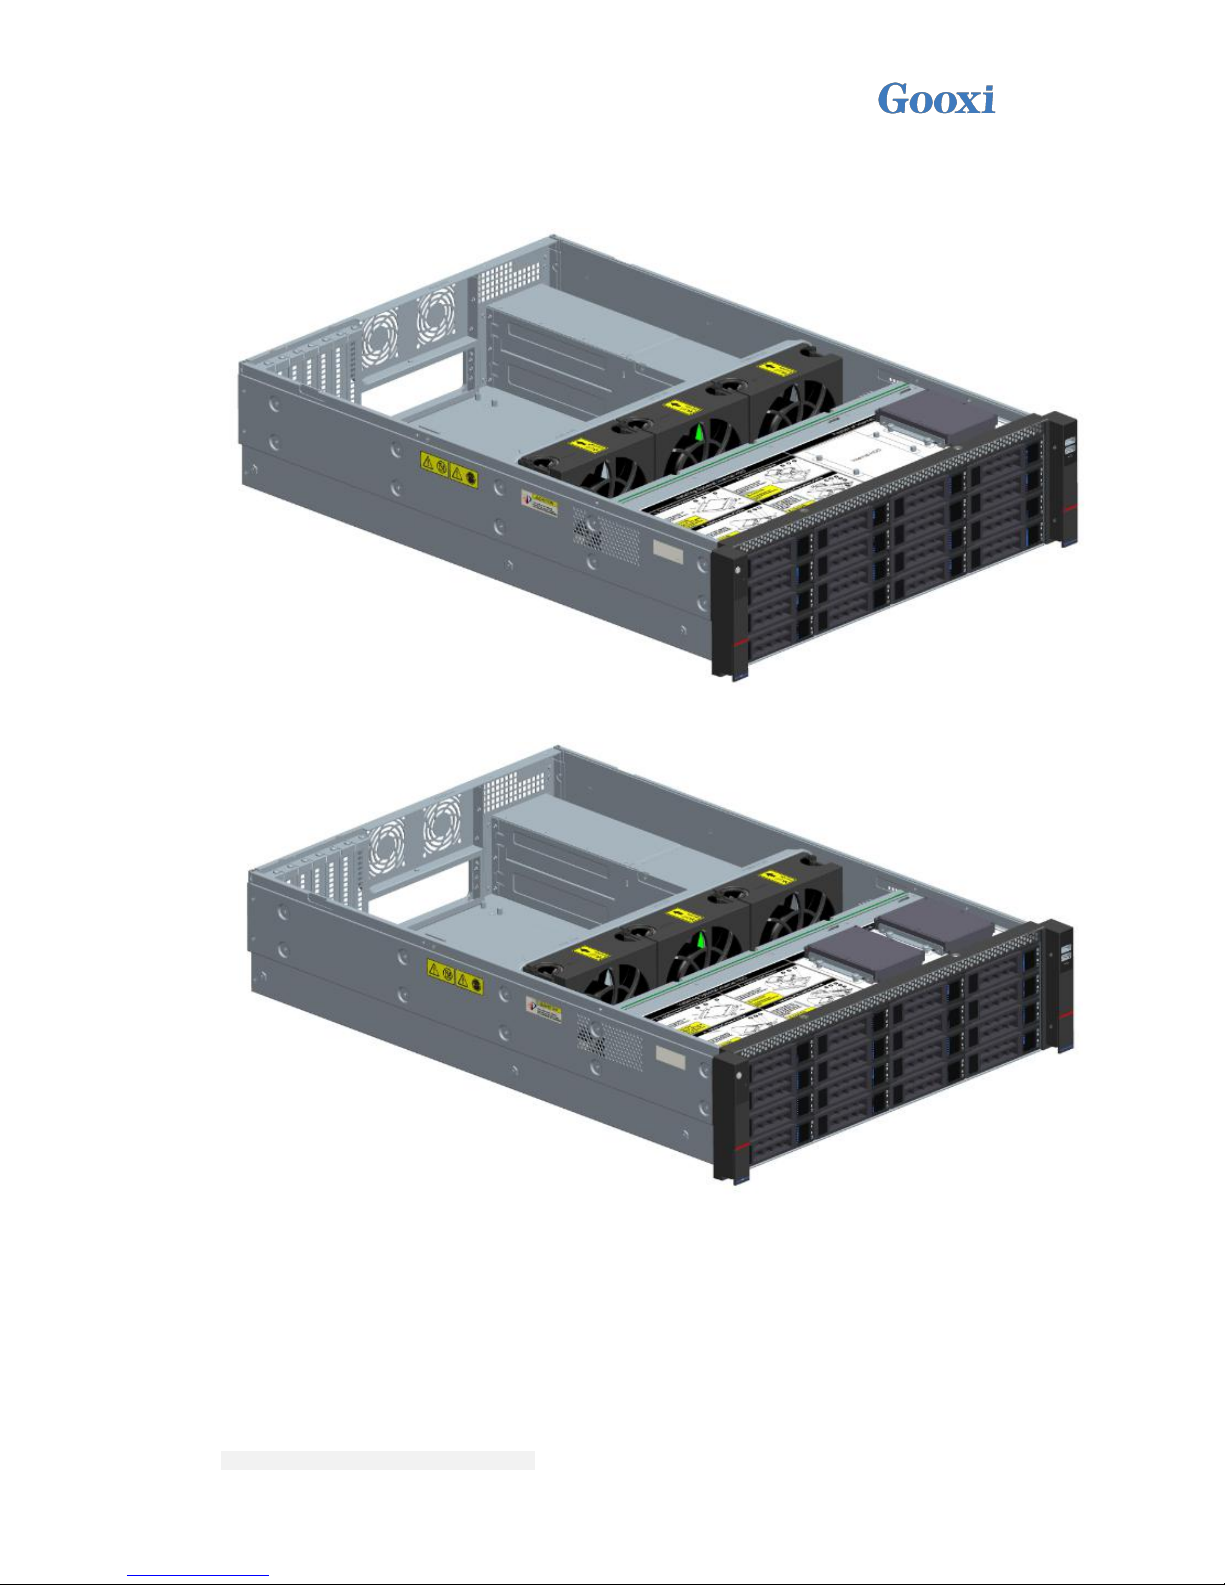
(2) Finished completion effect of the last three fan modules.

Shenzhen Gooxi Hengyu Technology Co., Ltd
2.3 Introduction to the Insert and Plug Steps of Gooxi3116 Chassis Hard Disk
⑴ Press the button to pull out the hard disk from the hard disk site.

Shenzhen Gooxi Hengyu Technology Co., Ltd
(2)Install the 3.5-inch hard drive to the hard drive bracket according to screw holes, as
shown in the figure below.
(3) The installed hard disk is shown in the following figure:

Shenzhen Gooxi Hengyu Technology Co., Ltd
(4) Insert hard disk to the chassis, and close the switch. As shown in the following
figure.
2.4 Introduction to the Installation Steps of Gooxi3116 Chassis Power Supply
(1) Place the power supply case to the chassis according to the hole site, as shown in
the figure below

Shenzhen Gooxi Hengyu Technology Co., Ltd
(2) Fix the power supply bracket, and screw on the screws at the position marked in
the figure below.

Shenzhen Gooxi Hengyu Technology Co., Ltd
(3) Insert the hot-swappable power modules PSU1 and PSU2, respectively
(4)The final installation effect of power supply

Shenzhen Gooxi Hengyu Technology Co., Ltd
2.5 Introduction to the Installation Steps of Motherboard on Gooxi 3116 Chassis
(1) Open the chassis, and place insulation pad according to the correct orientation.
Based on the hole of motherboard screw, motherboard active stud (8mm height) is
installed at the corresponding position on the insulation pad. As shown in the figure
below: Install Gooxi G1DE-4B dual circuit motherboard corresponding to the base
hole site.

Shenzhen Gooxi Hengyu Technology Co., Ltd
(2) After the motherboard active stud (8mm height) is installed, place the
motherboard into the chassis and fasten motherboard screw at the hole site. As shown
in the figure below:
2.6 Introduction to the Installation Steps of Built-in 2.5-inch Hard Drive on
Gooxi3116 Chassis
⑴ Dismantle the front cover.
(2)Install the 2.5-inch hard disk on the bracket.

Shenzhen Gooxi Hengyu Technology Co., Ltd
(3) As shown below: Install two 2.5-inch modules on the inside of the chassis
Shenzhen Gooxi Hengyu Technology Co., Ltd
(4) Completed installation effect
(5) Completed installation effect of two built-in hard disks
2.7 Introduction to the Installation Steps of Rear Hot-swappable 2.5-inch Hard
Drive on Gooxi3116 Chassis
(1) Replace the rear window of CRPS power supply case, the rear window suite
supports the installation of 2.5 modules. As shown below: Install the 2.5-inch module.

Shenzhen Gooxi Hengyu Technology Co., Ltd
(2) Completed installation effect
(3)Install two 2.5-inch hard disks on the hard disk box

Shenzhen Gooxi Hengyu Technology Co., Ltd
(4)Insert two 2.5-inch hard drives into the rear hard disk module, respectively
(5)The completed installation effect is as follows

Shenzhen Gooxi Hengyu Technology Co., Ltd
Note: If customer selects two optional 2.5-inch hot-swappable hard drives,
then Gooxi-type CRPS power must be equipped with.
Chapter 3 Chassis Parameters
Basic Parameters
Chassis style
Rack mount
Chassis structure
3U
Applicable motherboard
EEB(12*13)/CEB(12*10.5)/ATX(12*9.5)/Micro ATX

Shenzhen Gooxi Hengyu Technology Co., Ltd
Supported motherboard
brands
Gooxi、Intel、ASUS、SuperMicro、TYAN、MSI、GIGABYTE, etc.
Power type
Single charge and 1+1 redundant power
Number of supported power
supplies
1
SGPIO
Support
Backplane
12Gb/s SAS Expander backplane
Supported hot-swappable
hard drives
Supportive, compatible with SAS and SATA drives
Supported hot-swappable
hard fans
Support
Hard driver site
Sixteen 3.5-inch (or 2.5-inch) hot-swappable hard disk sites; two optional 2.5
inch built-in non-hot-swappable hard disk sites, and two 2.5-inch rear-built
hot-swappable expandable sites (optional)
CD driver site
None
Hard disk shockproof system
Hard disk bracket is designed with EMI shrapnel. The unique shockproof fan
design can reduce the resonance between the fan and hard disk without
affecting the reading and writing speed of hard disks.
Cooling system
12038 fans of three brands are standard configuration
Windshield
Support
Intelligent control of
temperature
7 half-height PCI or PCI-E expansion card sites
Expanded card site
Optional
Apparent Parameters
Front panel interface
1 on-off key, 1 restart key, 1 fan alarm lamp, 1 hard disk indicator and 2 network
indicators
Free screws dismantle
Support
Fixed mode of cabinet
Ordinary
Configuration Parameters
Product material
Imported SGCC (galvanized steel sheet), ABS panel and punching net
Chassis dimension
670*444*132mm(Depth * width * height)
Chassis weight
15.5kg
Package dimension
902*591*273mm(Depth * width * height)
Overall gross weight
21.5KG
Safety certification
CE、FCC、RoHS
Note: This manual is a general instruction of RMC3116-670-HSE series. Specific parameters of
each type please refer to the chassis detailed parameters.
 Loading...