

Page 1
Android 3.1
User’s Guide
April 15, 2011
AUG-3.1-CC-100
Creative Commons Attribution 3.0 License Edition
Android™ mobile technology platform 3.1
Page 2

Legal
Except as otherwise noted at http://code.google.com/policies.html#restrictions, the
contents of this manual is licensed under the Creative Commons Attribution 3.0
License, which is available at http://creativecommons.org/licenses/by/3.0/. When
using this work in whole or in part, please attribute the work to Google Inc. No
Google or third-party trademarks or brand features are included in this license.
Google, the stylized Google logo, Android, the stylized Android logo, Nexus, the
stylized Nexus logo, Android Market, the stylized Android Market logo, Gmail,
Google Apps, Google Calendar, Google Checkout, Google Earth, Google Goggles,
Google Latitude, Google Maps, Google Talk, Picasa, SafeSearch, and YouTube are
trademarks of Google Inc. All other company and product names may be
trademarks of the companies with which they are associated.
Availability of Google applications, services, and features may vary by country,
carrier, phone model, and manufacturer.
For more information about the Android mobile technology platform, visit http://
www.android.com
2
AUG-3.1-CC-100 Android User’s Guide
Page 3

Contents
3
About this guide 7
Starting Android the first time 9
Welcome to Android! 10
Activating your mobile data service 11
Setting your location preferences 12
Signing into your Google Account 13
Resetting your Google Account password 14
Additional accounts 14
Backing up and restoring your data 15
Finishing setup 17
Home and Android basics 19
Getting to know Home 20
Using the touchscreen 21
Using the Navigation buttons 22
Waking the tablet 23
Finding your apps 24
Monitoring your tablet’s status 25
Status icons 25
Notification icons 25
Managing notifications 26
Status Details and Quick Settings 28
Securing your tablet 31
Customizing Home screens 33
Working with widgets 36
Optimizing battery life 37
Working with apps 39
Opening and switching apps 40
Managing how apps use memory 42
Managing downloads 46
Entering and editing text 47
Using the onscreen keyboard 48
Entering text by speaking 52
Editing text 54
Connecting to networks and devices 57
Connecting to mobile networks 58
Connecting to Wi-Fi networks 60
Connecting to Bluetooth devices 65
Connecting to keyboards, mice, and other input de-
vices 69
Keyboards 69
Mice 69
Other input devices 70
Connecting to cameras 71
Connecting to a Windows computer via USB 72
Connecting to a Macintosh computer via USB 73
Sharing your mobile data connection 75
AUG-3.1-CC-100 Android User’s Guide
Page 4

4
Connecting to virtual private networks (VPNs) 79
Working with secure certificates 81
Google Search 83
Searching your tablet and the web 84
Using Google Search tips and tricks 88
Changing Google Search settings 90
Searchable items settings 90
Google Search settings 90
Voice Search and Voice Actions 91
Searching the web by speaking 92
Using Voice Actions 94
Changing Voice Search settings 97
Accounts 99
Adding and removing accounts 100
Configuring account sync and display options 103
Contacts 107
Opening your contacts 108
Changing which contacts are displayed 109
Adding contacts 111
Importing, exporting, and sharing contacts 113
Starring a contact 116
Searching for a contact 117
Editing contact details 118
Connecting quickly with your contacts 120
Joining contacts 121
Separating contact information 122
Gmail 123
Opening Gmail and your Inbox 124
Reading your messages 128
Copying text from a message 132
Composing and sending a message 134
Replying to or forwarding a message 137
Working with Priority Inbox 139
Working with conversations in batches 142
Starring a message 143
Labeling a conversation 144
Synchronizing conversations by label 146
Searching for messages 149
Archiving conversations 151
Muting a conversation 152
Reporting spam 153
Appending a signature to your messages 154
Using keyboard shortcuts 155
Conversation list shortcuts 155
Message shortcuts 155
Changing Gmail settings 156
General preferences 156
Account settings 157
Troubleshooting sync issues 158
Calendar 161
Viewing your calendar and events 162
Working in Day and Week views 164
Working in Month view 165
Viewing event details 166
Creating an event 167
Editing or deleting an event 168
Setting an event reminder 169
AUG-3.1-CC-100 Android User’s Guide
Page 5

5
Responding to event reminders 170
Synchronizing and displaying calendars 171
Changing Calendar settings 172
Google Talk 175
Signing in and opening your Friends list 176
Chatting by text 179
Chatting by voice or video 182
Changing and monitoring online status 185
Managing your Friends list 187
Changing Google Talk settings 189
Email 191
Opening Email, your Inbox, and other folders 192
Reading your messages 194
Responding to a message 195
Starring messages 196
Working with messages in batches 197
Composing and sending email 198
Appending a signature to your messages 199
Adding and changing email accounts 200
Email account settings 202
General settings 202
Account settings 202
Incoming server settings 204
Outgoing server settings 205
Downloading files 218
Working with bookmarks 219
Changing Browser settings 222
General 222
Privacy & security 222
Advanced 223
Labs 224
Maps, Navigation, Places, and Latitude 227
Camera 229
Gallery 231
Movie Studio 233
YouTube 235
Opening YouTube and watching videos 236
Discovering videos 239
Rating and commenting on videos 241
Working with channels 242
Uploading and sharing videos 244
Working with playlists 246
Changing YouTube settings 248
General settings 248
Search settings 248
About 248
Browser 207
Opening Browser 208
Navigating within a webpage 213
Navigating across webpages 215
Working with tabs 217
AUG-3.1-CC-100 Android User’s Guide
Music 249
Transferring music files to your tablet 250
Opening Music and working with your library 251
Playing music 253
Working with playlists 255
Page 6

6
Books 257
Clock 259
Viewing the date and time 260
Setting and changing alarms 261
Calculator 263
Using the Calculator 264
Market 265
Settings 267
Opening Settings 268
Wireless & networks settings 269
Wireless & Network settings screen 269
Wi-Fi settings screen 269
Advanced Wi-Fi settings screen 270
Bluetooth settings screen 270
Tethering & portable hotspot settings screen 271
VPN settings screen 271
Mobile networks settings screen 271
Sound settings 273
Screen settings 274
Location & security settings 275
Applications settings 277
Applications settings screen 277
Development screen 277
Accounts & sync settings 279
Accounts & sync settings screen 279
Account screen 279
Privacy settings 280
Storage settings 281
Language & input settings 282
Language & input screen 282
Google Voice Recognition settings screen 283
Text-to-Speech settings screen 283
Configure input methods screen 284
Android Keyboard settings screen 284
Accessibility settings 286
Date & time settings 287
About tablet 288
About tablet screen 288
AUG-3.1-CC-100 Android User’s Guide
Page 7

About this guide
This guide describes how to use release 3.1 of the Android™ mobile technology
platform, including updates to Android applications that have been released on the
Android Market™ downloadable applications service.
This guide does not describe the physical features of your tablet (its parts and
accessories, how to turn it on, and so on) or its specifications; for that information,
refer to your tablet’s owner’s guide.
7
AUG-3.1-CC-100 Android User’s Guide
Page 8

About this guide 8
AUG-3.1-CC-100 Android User’s Guide
Page 9

Starting Android the first
time
When you first turn on your tablet, you have the opportunity to activate your mobile
data service, to sign into your Google Account, and to decide how you want to use
some Google services.
9
In this section
AUG-3.1-CC-100 Android User’s Guide
“Welcome to Android!” on page 10
“Activating your mobile data service” on
page 11
“Setting your location preferences” on
page 12
“Signing into your Google Account” on
page 13
“Backing up and restoring your data” on
page 15
“Finishing setup” on page 17
Page 10
Starting Android the first time 10
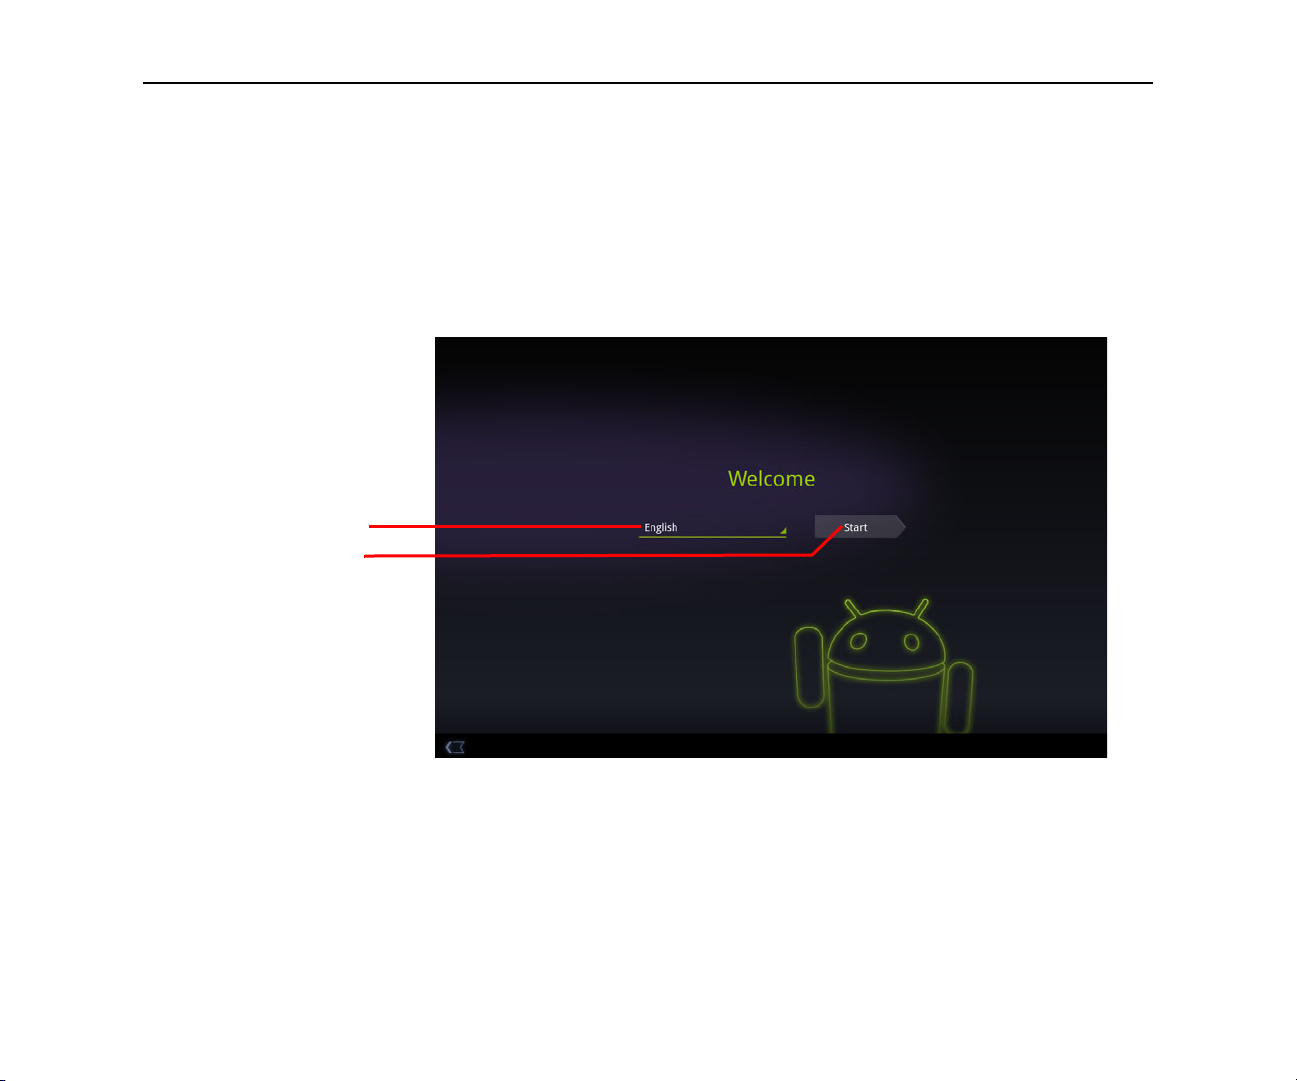
Touch Start.
Touch to use a different
language.
Welcome to Android!
The first time you power on your tablet (after setting it up, as described in your
tablet’s owner’s guide), you’re welcomed to Android and invited to pick a language
to work in and to start setting up and using your tablet.
S Touch English if you want to work in a different language.
S Touch Start to start setting up your tablet.
AUG-3.1-CC-100 Android User’s Guide
Page 11

Starting Android the first time 11
Activating your mobile data service
On some mobile data networks, you must activate mobile data service on your
tablet before you can use it to connect to the Internet. As soon as you touch Start
on the Welcome! screen, your tablet starts the activation process.
If your mobile network doesn’t require activation, or if your tablet only connects to
Wi-Fi networks, it skips this step and prompts you to connect to a Wi-Fi network
instead (see “Connecting to Wi-Fi networks” on page 60).
Then you can use that mobile data network Internet connection to sign into your
Google Account and finish setting up your tablet.
If you prefer not to activate you mobile data service now or if you are setting up
your tablet in a location without access to your carrier’s mobile network, you can
touch Skip to set up your tablet using Wi-Fi instead: you’re prompted to connect to
a local Wi-Fi network. See “Connecting to Wi-Fi networks” on page 60.
You can activate your mobile data service later using the Settings app; see
“Wireless & networks settings” on page 269.
AUG-3.1-CC-100 Android User’s Guide
Page 12
Starting Android the first time 12
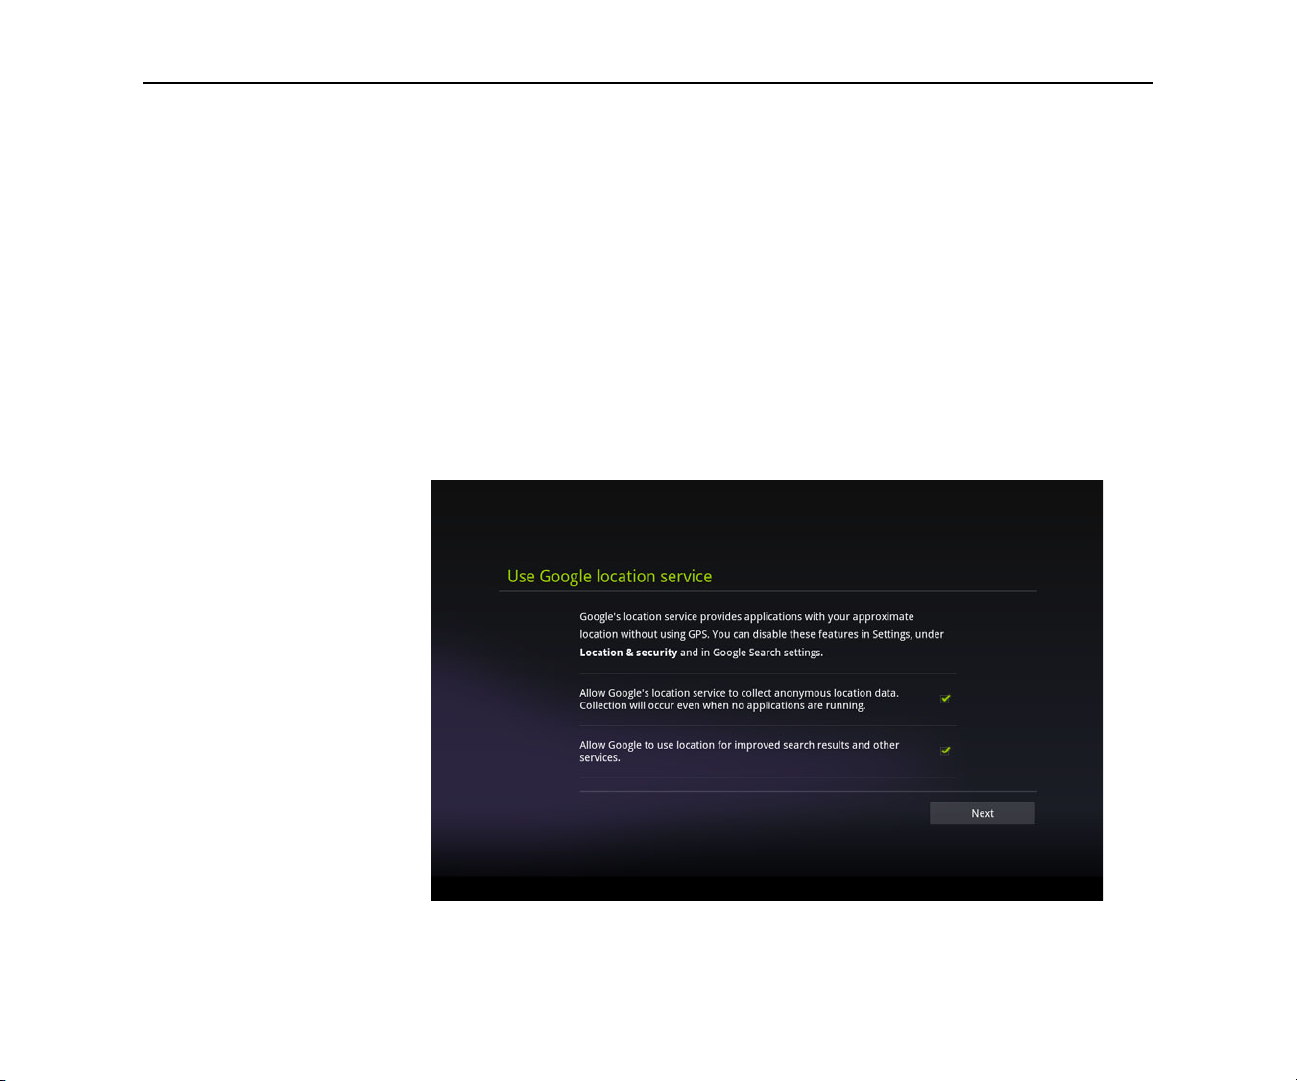
Setting your location preferences
Google’s location service uses the Wi-Fi and mobile data networks near you to
make your approximate location available to your apps. This location information
can make finding your precise location by GPS much faster; it can also provide
your location to apps when GPS isn’t available.
When you use Google’s location service, Google collects data about your location
and local networks, without associating the information it gathers with you or your
Google Account, to improve the service.
You can also choose whether to use your location in your Google Search results and
other Google services.
You can change these settings after setup; see “Location & security settings” on
page 275.
AUG-3.1-CC-100 Android User’s Guide
Page 13

Starting Android the first time 13
Enter your Gmail account.
Touch to enter your password.
Touch to create a new Google
Account.
Then touch Sign in.
Signing into your Google Account
You must sign into a Google Account to use Gmail, Google Talk, and other Google
Apps; to download apps from Android Market; to back up your settings and other
data to Google servers; and to take advantage of other Google services on your
tablet.
Important If you have backed up your Android settings using a Google Account
in the past and you want to restore those settings to your tablet, you
must sign into that account now, during setup: If you sign in after
setup, you can’t restore your settings.
If you don’t have a Google Account, you can also create one by touching Create
account.
AUG-3.1-CC-100 Android User’s Guide
When you sign in, you’re prompted to enter your username and password, using the
onscreen keyboard. For information about navigating the touchscreen and entering
text, see “Using the touchscreen” on page 21 and “Entering and editing text” on
page 47.
Page 14

Starting Android the first time 14
If you have an enterprise Gmail account through your company or other
organization, your IT department may have special instructions on how to sign into
that account.
When you sign in, your contacts, Gmail messages, Calendar events, and other
information from these apps and services on the web are synchronized with your
tablet.
If you don’t sign into a Google Account during setup, you are prompted to sign in or
to create a Google Account the first time you start an app that requires one, such
as Gmail or Android Market.
Resetting your Google Account password
If you have a Google Account but forget your password, you must reset it before you
can sign in. Go to http://www.google.com, click Sign In, click “Can’t access your
account?” in the sign-in box, and then follow the instructions for resetting your
password.
Additional accounts After setup, you can add Google and other kinds of accounts to your tablet, and
sync some or all of their data, as described in “Accounts” on page 99. However,
only the first Google Account you sign into is backed up to Google servers. Some
apps that only work with a single account display data only from the first account
that you sign into.
AUG-3.1-CC-100 Android User’s Guide
Page 15
Starting Android the first time 15
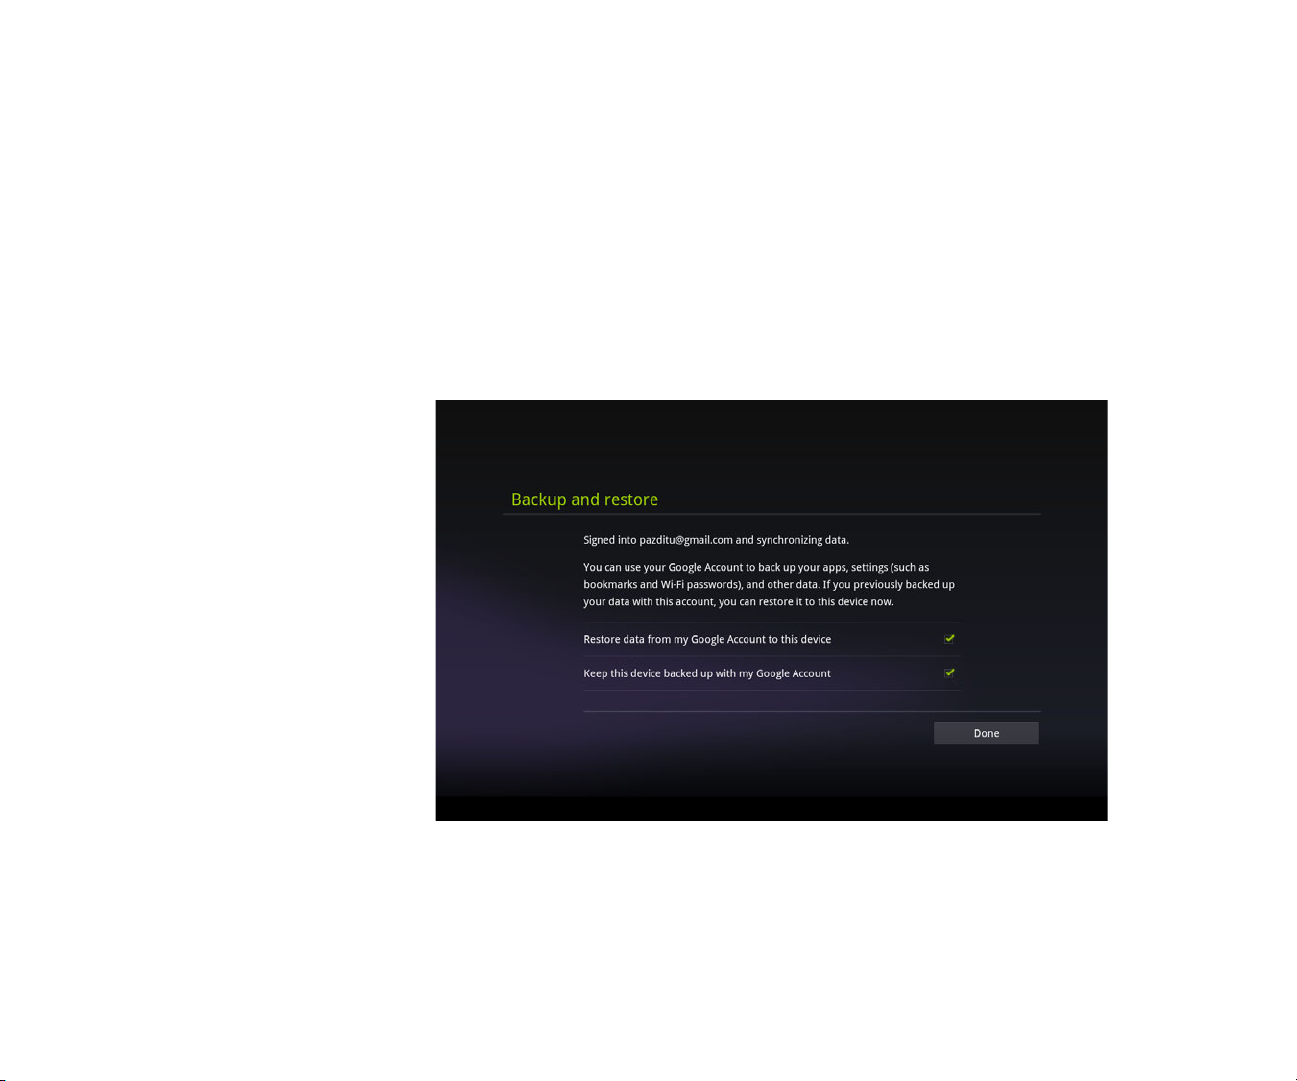
Backing up and restoring your data
You can back up your settings and other data with your Google Account, so if you
ever replace your tablet, you can restore your data on the new one. If you choose to
use this service, your data is backed up automatically.
If you previously used the backup service with the Google Account you just used to
sign in, you can also choose to restore your settings from your Google Account to
your tablet now.
Important If you want to restore your settings, you must do that now during
setup. You can’t restore data after setup is complete.
Many kinds of data are backed up, including:
G Your Android settings, such as your Wi-Fi networks and passwords, user diction-
ary, and so on
G Many Google application settings, such as your Browser bookmarks
G The apps you download from Android Market
AUG-3.1-CC-100 Android User’s Guide
Page 16

Starting Android the first time 16
Some third-party apps also make use of the backup service, so if you reinstall one,
its settings and data are restored.
You can change your backup settings after you finishing setting up your tablet, see
“Privacy settings” on page 280.
AUG-3.1-CC-100 Android User’s Guide
Page 17

Starting Android the first time 17
Finishing setup
If you aren’t connected to a mobile network, you’re prompted to set the date and
time on your tablet. See “Date & time settings” on page 287.
Otherwise, when setup is complete, Home opens, displaying your main Home
screen.
To learn more about Home and the basics of using Android, see “Home and
Android basics” on page 19.
AUG-3.1-CC-100 Android User’s Guide
Page 18

Starting Android the first time 18
AUG-3.1-CC-100 Android User’s Guide
Page 19

Home and Android basics
Once you’ve finished setting up your tablet, Home opens. It’s a good idea to
become familiar with the basics of your tablet and how to use it—Home and its
Home screens, the touchscreen, securing your tablet, monitoring and responding
to status and notification messages, and so on.
19
In this section
AUG-3.1-CC-100 Android User’s Guide
“Getting to know Home” on page 20
“Using the touchscreen” on page 21
“Using the Navigation buttons” on
page 22
“Waking the tablet” on page 23
“Finding your apps” on page 24
“Monitoring your tablet’s status” on
page 25
“Managing notifications” on page 26
“Status Details and Quick Settings” on
page 28
“Securing your tablet” on page 31
“Customizing Home screens” on page 33
“Working with widgets” on page 36
“Optimizing battery life” on page 37
Page 20
Home and Android basics 20
Getting to know Home
After you finish setting up your tablet, Home opens.
Home is your starting point for all the features of your tablet. You can use the
Customize button to add shortcuts to apps, widgets, and other features to your
Home screens, and to change the wallpaper (see “Customizing Home screens” on
page 33.)
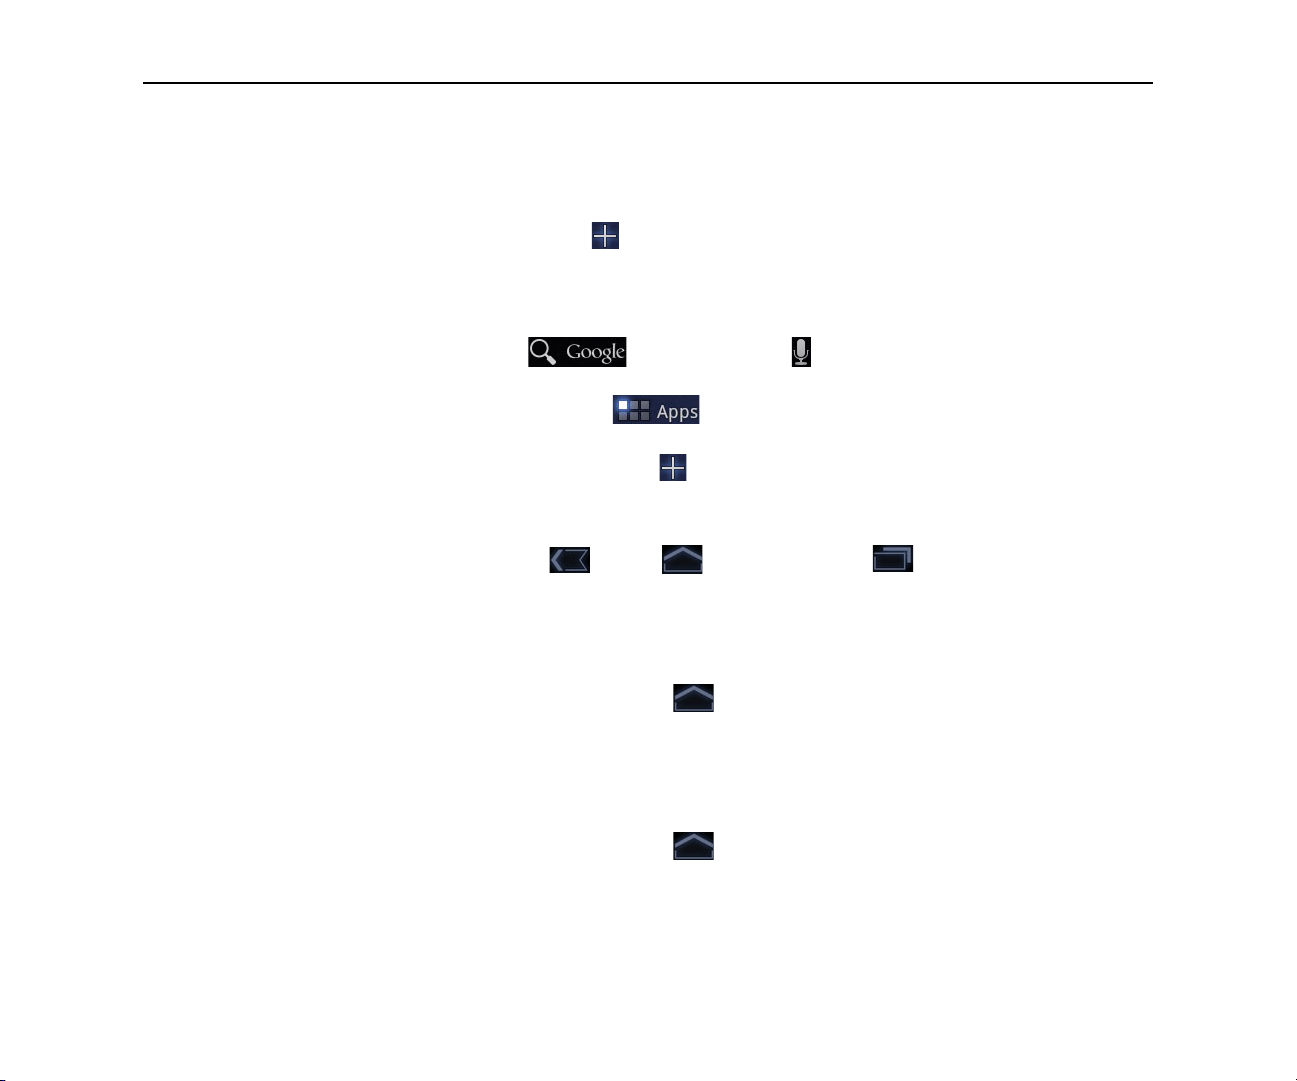
At the top of the screen, Home displays:
G Search and Voice Search buttons to search your tablet and the
web by typing or speaking (see “Google Search” on page 83)
G The Apps button to find all your installed apps (see “Opening and
switching apps” on page 40)
G The Customize button for adding items to your Home screens (see “Cus-
tomizing Home screens” on page 33
At the bottom of the screen, the System bar displays:
G The Back , Home , and Recent Apps buttons, for navigating
among your apps (see “Using the Navigation buttons” on page 22)
G Notification icons, the time, and Status icons (see “Monitoring your tablet’s sta-
tus” on page 25 and “Managing notifications” on page 26).
Return Home S Touch the Home button in the System bar at any time, in any app.
View other Home
screens
AUG-3.1-CC-100 Android User’s Guide
S Slide your finger left or right across the current Home screen.
The other Home screens provide more space for widgets, shortcuts, and other
items. For more on sliding, see “Using the touchscreen” on page 21.
S Touch the Home button to return to the central Home screen.
Page 21

Home and Android basics 21
Using the touchscreen
The main way to control Android features is by using your finger to manipulate
icons, buttons, menu items, the onscreen keyboard, and other items on the
touchscreen. You can also change the screen’s orientation.
Touch To act on items on the screen, such as app and settings icons, to type
letters and symbols using the onscreen keyboard, or to pres onscreen buttons, you
simply touch them with your finger.
Touch & hold Touch & hold an item on the screen by touching it and not lifting
your finger until an action occurs.
Drag Touch & hold an item for a moment and then, without lifting your finger,
move your finger on the screen until you reach the target position. For example,
you drag items on the Home screen to reposition them, as described in
“Customizing Home screens” on page 33.
Swipe or slide To swipe or slide, you quickly move your finger across the surface
of the screen, without pausing when you first touch it (so you don’t drag an item
instead). For example, you slide the Home screen left or right to view the other
parts, and in some Calendar views you slide to view earlier or later periods.
Double-tap Tap quickly twice on a webpage, map, or other screen to zoom. For
example, you double-tap a section of a webpage in Browser to zoom that section to
fit the width of the screen. Double-tapping after pinching to zoom in some apps
reflows a column of text to fit the width of the screen.
Pinch In some apps (such as Maps, Browser, and Gallery), you can zoom in and
out by placing two fingers on the screen at once and pinching them together (to
zoom out) or spreading them apart (to zoom in).
Rotate the screen On most screens, the orientation of the screen rotates with
the tablet as you turn it. You can turn this feature on and off, as described in
“Screen settings” on page 274.
AUG-3.1-CC-100 Android User’s Guide
Page 22
Home and Android basics 22
Using the Navigation buttons
The System bar’s Navigation buttons make it easy to quickly switch among Android
apps.
In some media apps, the System bar controls are replaced by dim dots when you’re
watching a movie, slide show, and so on, so you can better enjoy them without the
distraction of the System bar. You can touch a dot as it if were the control it stands
for, or touch a blank area of the System bar to restore it to full view.
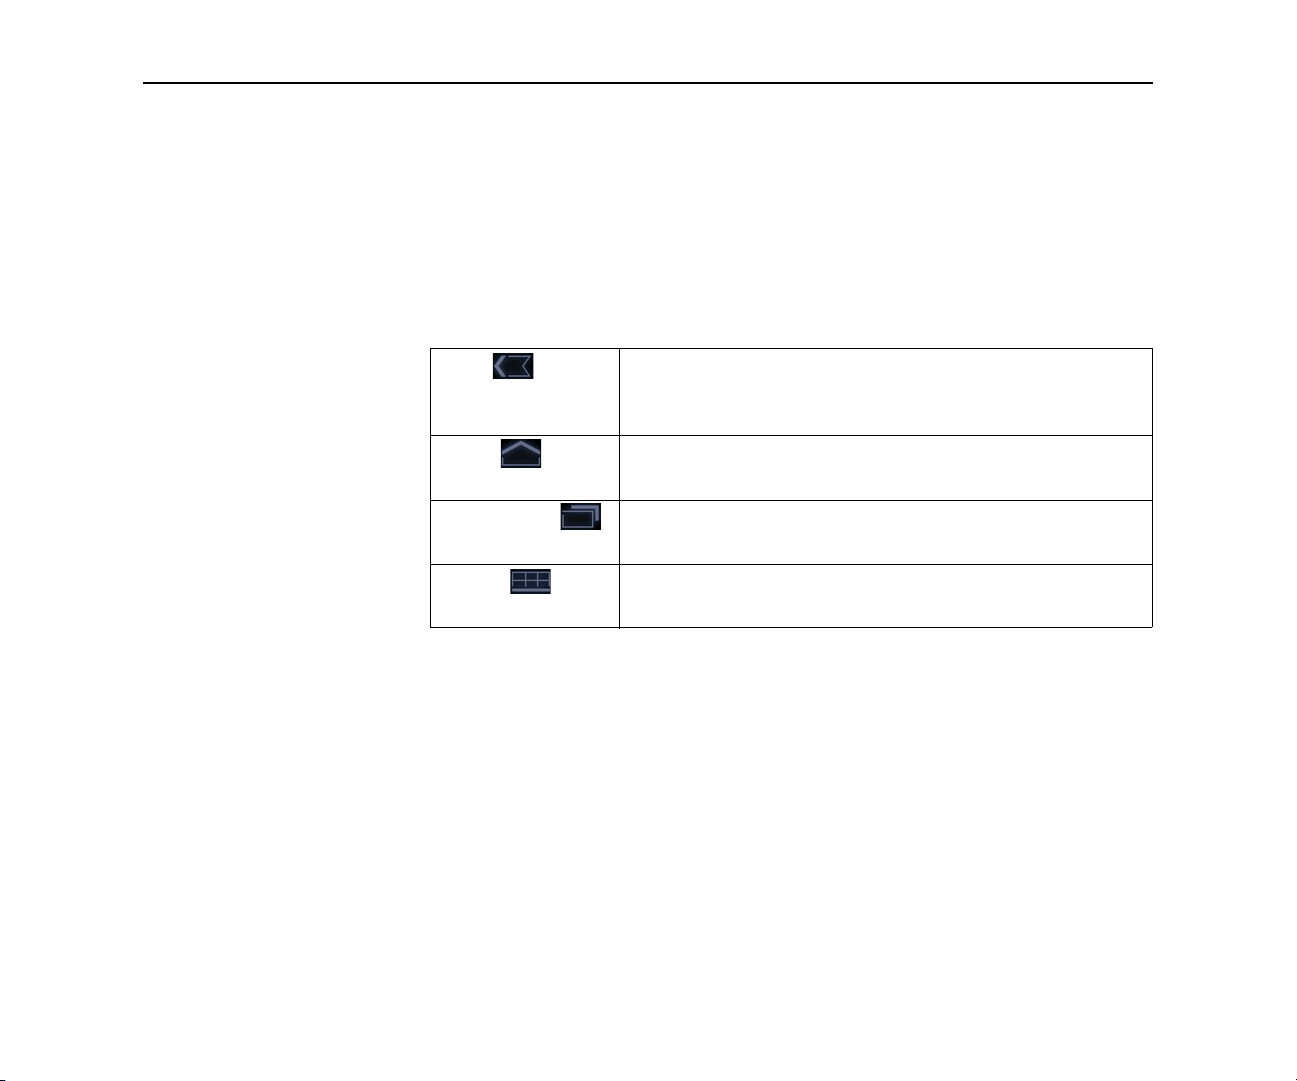
Back Opens the previous screen you were working in. If the
onscreen keyboard is open, the button changes to a down
arrow and touching it closes the keyboard.
Home Opens Home. If you’re viewing a left or right Home screen,
opens the central Home screen.
Recent Apps Opens a list of thumbnail images of apps you’ve worked
with recently; touch an app to open it.
Legacy Opens the options menu for applications designed for pre-
vious versions of Android.
AUG-3.1-CC-100 Android User’s Guide
Page 23

Home and Android basics 23
Waking the tablet
If you don’t use the tablet for a while, the screen dims and then darkens, to
conserve the battery.
1 Press the Power button.
The lock screen opens (unless you’ve turned it off; see “Securing your tablet”
on page 31).
2 Touch & hold the lock icon and when it turns into a circle, drag it to the edge of
the larger circle that surrounds it. Or if you’ve secured the lock screen, enter a
pattern, PIN, or password.
See “Securing your tablet” on page 31.
The last screen you were viewing opens.
AUG-3.1-CC-100 Android User’s Guide
Page 24
Home and Android basics 24
Finding your apps
The Apps screen displays all the apps on your tablet. It’s your starting point for
opening and managing the apps that came with the system and that your
downloaded from Android Market or other locations.
See “Working with apps” on page 39 for details about opening apps, switching
among them, and more.
Open and work with the
Apps screen
S Touch the Apps button at the top-right of any Home screen to open
the Apps screen.
The Apps screen closes when you open an app.
You can also close it by touching Home .
S Touch My apps to view just the apps you’ve downloaded from Android Market.
See “Market” on page 265.
S Swipe left or right to bring more apps into view.
If you have more apps installed than can fit on one screen, you can see outlines
of additional apps on adjacent screens.
S Touch an app on the Apps screen to open it.
See “Opening and switching apps” on page 40.
S Drag an app down so you can add a shortcut for it to a Home screen.
Thumbnails of your Home screens appear when you drag an app; you can pause
on one to place the shortcut where you want.
See “Customizing Home screens” on page 33.
S Drag an app to the Information icon to open a screen with details about the
app.
S Drag an app on the My Apps tab to the Uninstall icon to uninstall the app from
your tablet.
You can’t uninstall the apps that are included with Android: only the apps
you’ve downloaded.
AUG-3.1-CC-100 Android User’s Guide
Page 25

Home and Android basics 25
Notification icons
Status icons
Monitoring your tablet’s status
The right side of the System bar displays icons indicating that you’ve received
notifications, the current time, and icons indicating the tablet’s status.
If you have more notifications than can fit in the System bar, a plus icon prompts
you to open the Notifications panel to view them all. See “Managing notifications”
on page 26. <Is this still true?>>
Status icons Status icons indicate the status of your tablet at the right edge of the System bar
and in the Status Details panel (which opens if you touch the time).
To learn more about the different kinds of mobile networks, see “Connecting to
networks and devices” on page 57.
Network status icons turn blue if you have a Google Account added to your tablet
and the tablet is connected to Google services, for syncing your Gmail, Calendar
events, contacts, for backing up your settings, and so on. If you don’t have a
Google Account or if, for example, you’re connected to a Wi-Fi network that is not
connected to the Internet, the network icons are gray.
Notification icons Notification icons indicate that you’ve received a notification from the system or
form an application. They appear to the left of the time in the System bar. See
“Managing notifications” on page 26 for information about responding to these
notifications. In addition these icons, apps you install on your tablet may use their
own notification icons.
AUG-3.1-CC-100 Android User’s Guide
Page 26
Home and Android basics 26
Managing notifications
Notifications report the arrival of new messages, calendar events, and alarms, as
well as ongoing events, such as when you have configured your tablet as a Wi-Fi
hotspot.
When you receive a notification, its icon appears in the System bar, to the left of
the time, along with a summary that appears briefly (see “Notification icons” on
page 25).
Depending on your settings and the model of your tablet, you may also hear a
notification sound, a light may blink, and so on. These settings and adjusting
sound volume and other general notification settings are described in “Sound
settings” on page 273.
You can open the Notifications list to view all of your current notifications.
Most apps that send notifications, such as Gmail and Google Talk, have their own
settings, which you can use to configure whether and how they send notifications,
whether they sound a ringtone, and so on. See the documentation for those apps
for details.
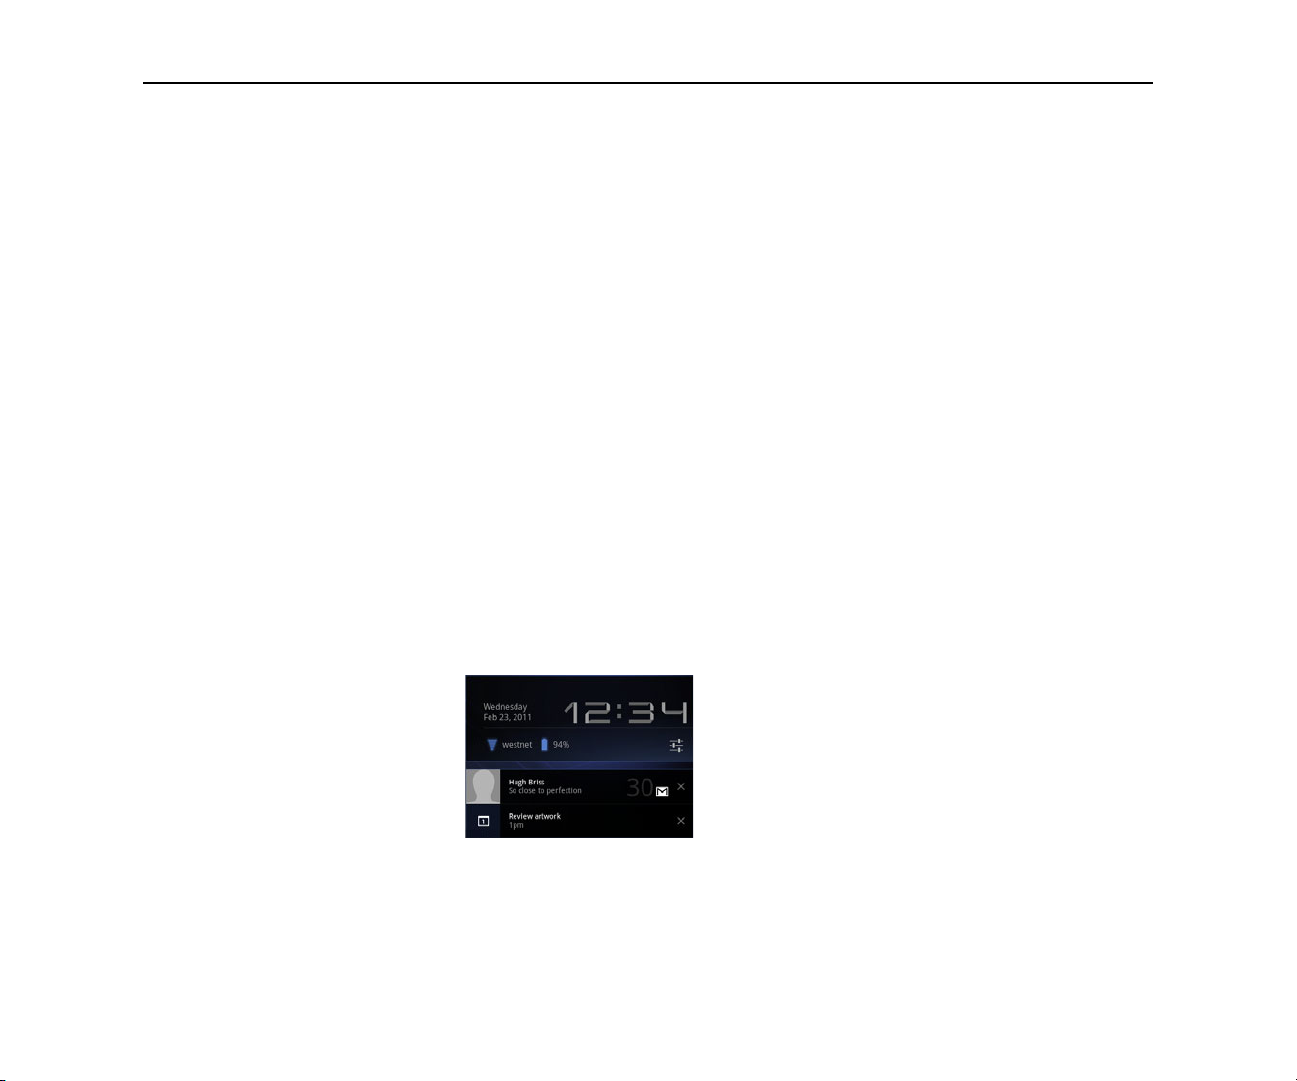
Open the Notifications
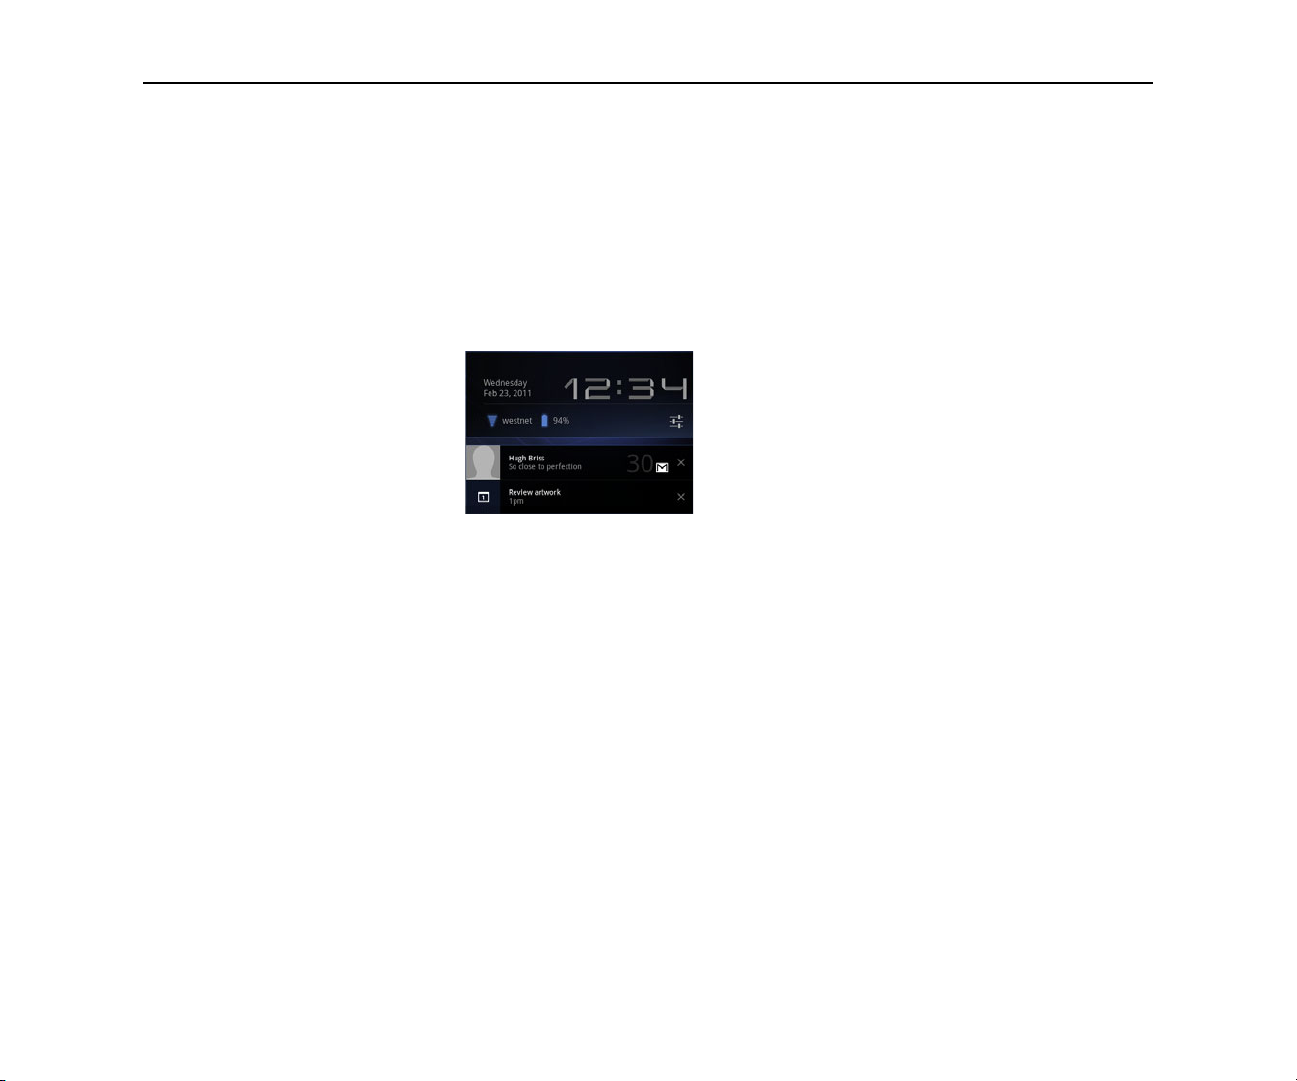
1 Touch the time in the System bar.
list
2 Touch a notification summary to respond to it.
You can also touch a notification’s Close button to remove it from the
Notifications list, or touch elsewhere on the screen to close the list.
AUG-3.1-CC-100 Android User’s Guide
Page 27

Home and Android basics 27
Respond to a
Notification
1 Touch a Notification icon in the System bar.
The notification’s summary panel opens.
Notification panels can contain a great variety of information and controls,
including:
G A summary of a message, along with the date and even a picture of the
sender.
G Controls, such as buttons to pause a playing song or to skip to the next or
previous track.
G Progress bars, such as those that indicate how much of an app you’ve down-
loaded from Market.
2 Touch the summary to open it in its app.
You can also just touch its Close button to remove the notification.
AUG-3.1-CC-100 Android User’s Guide
Page 28
Home and Android basics 28
Status Details and Quick Settings
You can get more details about the current date and time, networking, and battery
status in with the Status Details. You can also open the Quick Settings to view and
control the most common settings for your tablet, as well as accessing the
complete Settings application.
Open Status Details S Touch the time in the System bar.
If you have any current notifications, their summaries are listed below the
Status Details: touch one to respond to it. See “Managing notifications” on
page 26.
Close the Status Details by touching any other part of the screen.
Work with Quick
Settings
AUG-3.1-CC-100 Android User’s Guide
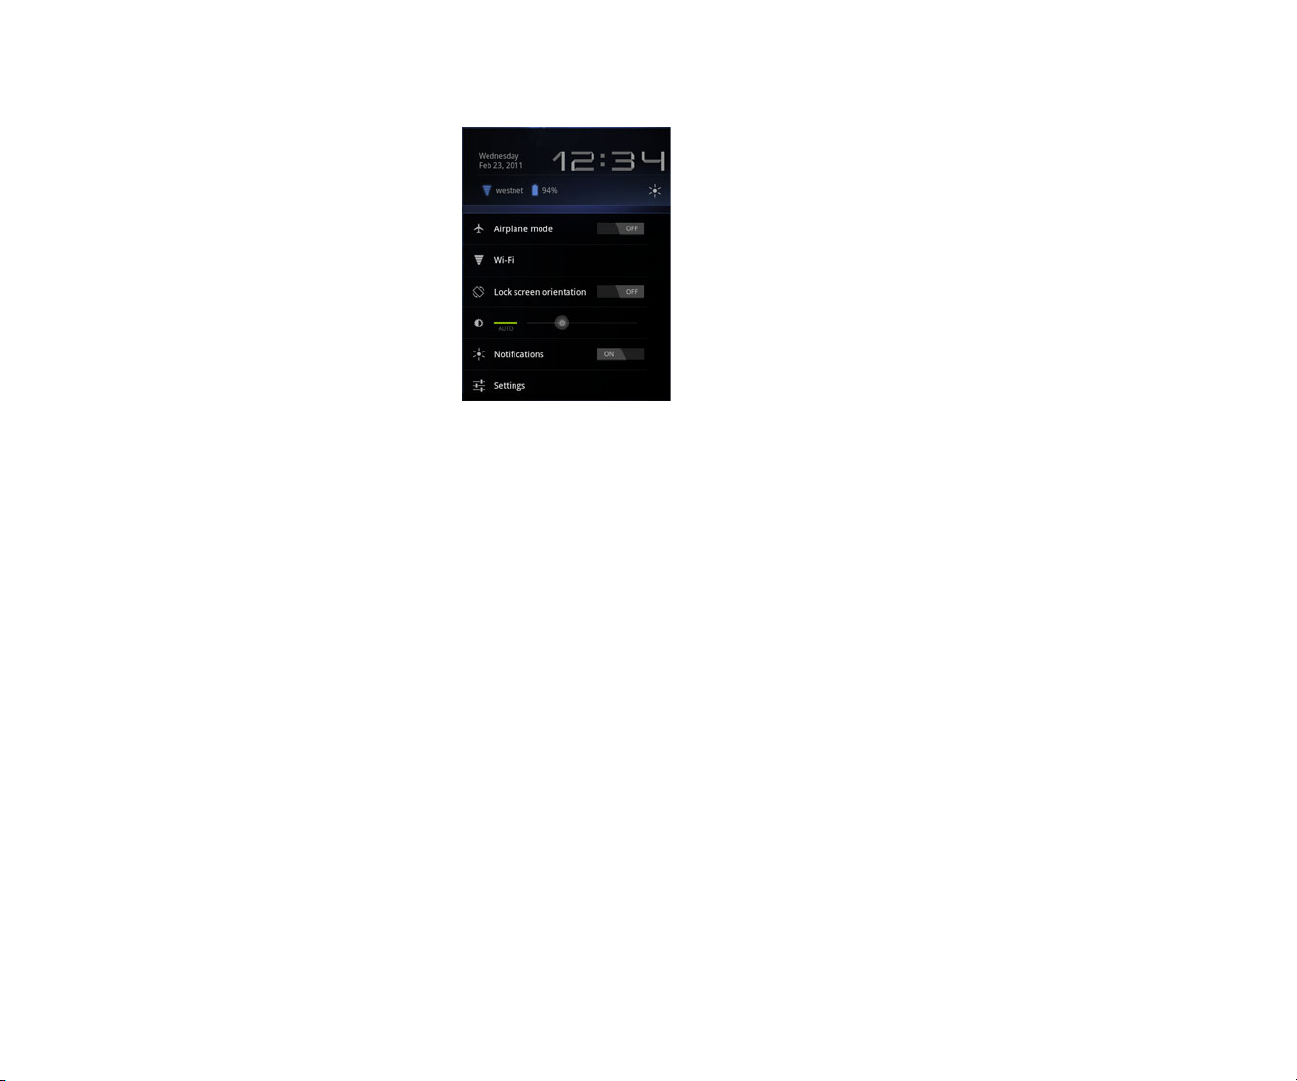
The Quick Settings make it convenient to view or change the most common tablet
settings and to open the full Settings app.
1 Open the Status Details.
2 Touch anywhere in the Status Details.
The Quick Settings open below the Status Details, replacing the list of current
notifications.
Page 29
Home and Android basics 29
3 View or change the settings you want.
You can close the Quick Settings again by touching anywhere else on the
screen.
The Quick Settings are:
Airplane mode Drag the switch to On to turn off all the tablet’s radios that
transmit data, including mobile data and Wi-Fi. See “Wireless & Network settings
screen” on page 269.
Wi-Fi Touch to open the Wi-Fi settings. See “Connecting to Wi-Fi networks” on
page 60.
Lock screen orientation Drag the switch to On to lock the screen in landscape
orientation, so it doesn’t rotate when you turn the tablet. See “Using the
touchscreen” on page 21.
Brightness Drag the slider to change the brightness of the screen. Or touch Auto
to have the tablet set screen brightness automatically, using its sensors to measure
the amount of light in your surroundings.
Notifications Drag the slider to Off if you don’t want to be disturbed by system
or application notifications about new mail, invitations to chat, and so on. See
“Managing notifications” on page 26.
AUG-3.1-CC-100 Android User’s Guide
Page 30

Home and Android basics 30
Settings Touch to open the Settings application. See “Settings” on page 267.
AUG-3.1-CC-100 Android User’s Guide
Page 31

Home and Android basics 31
Securing your tablet
Initially, when you turn on or wake the tablet, the lock screen requires you to drag a
lock icon to unlock the screen. But you can secure the lock screen by requiring
that you draw a pattern or enter a numeric PIN or password, so only you can access
your data, buy apps from Market, and so on. You may also be required to secure
you lock screen by a policy set by an email account or other account you add to
your tablet.
See “Location & security settings” on page 275 for other ways to protect your
tablet and privacy, and for details about other lock screen settings.
You can also encrypt the data on your tablet, so you must enter a numeric PIN or a
password to decrypt it each time you power it on.
Secure your lock screen 1 Touch the time in the System bar, touch the time in the Status Details panel,
and touch Settings at the bottom of the Quick Settings.
You can also open Settings by touching its icon in the Apps screen or on a
Home screen (if you placed a shortcut to it there).
2 Touch Location & security.
3 Touch Configure lock screen.
4 Touch Pattern, PIN, or Password.
If you touch Pattern, you’re guided to create a pattern you must draw to unlock
the screen. The first time you do this, a short tutorial about creating an unlock
pattern appears. Then you’re prompted to draw and redraw your own pattern.
If you touch PIN or Password, you’re prompted to set a numeric PIN or a
password you must enter to unlock your screen.
The next time you turn on your tablet or wake up the screen, you must draw
your unlock pattern or to enter your PIN or password to unlock it.
Encrypt your tablet You can encrypt all the data on your tablet: Google Accounts, application data,
music and other media, downloaded information, and so on. If you do, you must
enter a numeric PIN or password each time you power on your tablet.
AUG-3.1-CC-100 Android User’s Guide
Page 32

Home and Android basics 32
Warning! Encryption is irreversible. The only way to revert to an unencrypted
tablet is to perform a a factory data reset, which erases all your data
(see “Privacy settings” on page 280).
1 Prepare for encryption.
Before you can start encrypting your tablet, you must:
G Set a lock screen PIN or password (see “Secure your lock screen” on
page 31)
G Charge your tablet’s battery
G Plug in your tablet
G Schedule an hour or more for the encryption process: you must not interrupt
it or you will lose some or all of your data
2 Open Settings and touch Location & security > Encrypt tablet.
Read the information on the Encrypt Tablet screen carefully.
Warning! You must not interrupt the encryption process or you will lose data.
The Encrypt tablet button is dimmed if your battery is not charged or if your
tablet is not plugged in.
If you change your mind about encrypting your tablet, touch Back .
3 Touch the Encrypt tablet button.
4 Enter your lock screen PIN or password and touch Continue.
5 Touch the Encrypt tablet button again, to confirm you want to continue.
The encryption process starts and displays its progress.
Encryption can take an hour or more, during which time your tablet may restart
several times.
When encryption is complete, you’re prompted to enter your PIN or password.
Subsequently, you must enter your PIN or password each time you power on
your tablet, to decrypt it.
AUG-3.1-CC-100 Android User’s Guide
Page 33

Home and Android basics 33
Customizing Home screens
You can add app icons, shortcuts, widgets, and other items to any part of any
Home screen where there’s free space. You can also change the wallpaper.
For an introduction to Home, see “Getting to know Home” on page 20.
Add an item to a Home
screen
1 Open the Home screen where you want to add the item.
For an introduction to working with Home, including how to switch Home
screens, see “Getting to know Home” on page 20.
2 Touch the Customize button at the top-right of the screen.
3 Touch the category of item you want to add.
If there are no empty spots on the Home screen, Add is dimmed; you must
delete or move an item before you can add another item, or switch to another
Home screen.
4 In the menu that opens, touch the tab for the category of item you want to add.
G Widgets are miniature apps. They are described in detail in “Working with
widgets” on page 36.
G App shortcuts are app icons you can place on your Home screens, so you
can touch them to open those apps without opening the Apps screen first.
G Wallpapers are images from Gallery (pictures you shot with Camera, synced
from Picasa, and so on), still images included with the system, and live wallpapers (such as a map that centers on your location or an animated scene).
AUG-3.1-CC-100 Android User’s Guide
Page 34

Home and Android basics 34
They take the place of the default background to your Home screens. See
“Change Home screen wallpaper” on page 35.
G More includes shortcuts to Browser bookmarks, to directions in Maps, and
an assortment of other useful items.
If there are more items in the category than can fit on one screen, outlines of
additional items appear to the left or right. You can slide the screen left or right
to see the additional items.
5 Drag an item onto the Home screen where you want to add it.
If you pause before lifting your finger, the Home screen enlarges so you can
place the item where you want it. Otherwise, it gets placed in the first available
spot.
Some items prompt you for more information before they are added to a Home
screen. For example, bookmarks prompt you to pick the Browser bookmark you
want to add, Contacts shortcuts prompt you to pick the contact you want, and
so on.
Move a a Home screen
item
Remove an item from
the Home screen
AUG-3.1-CC-100 Android User’s Guide
1 Touch & hold the item you want to move, until the Home screen grid appears.
Don’t lift your finger.
2 Drag the item to a new location on the same Home screen, or drag the item to
the outline of another Home screen to the left or right to move it to another
Home screen.
3 When the item is where you want it, lift your finger.
1 Touch & hold the item you want to remove, until the Home screen grid appears.
Don’t lift your finger.
The Remove button appears in the top-right of the screen.
2 Drag the item to the Remove button.
3 When the icon turns red, lift your finger.
The item is removed from the Home screen, but it’s not deleted from your
tablet. You can always put it back; see “Add an item to a Home screen” on
page 33.
Page 35

Home and Android basics 35
Change Home screen
wallpaper
1 Touch the Customize button at the top-right of a Home screen.
2 Touch Wallpapers.
3 Touch Gallery, Live wallpapers, or Wallpapers.
Touch Gallery to use a picture that you have captured using the camera or
copied to your tablet. You can crop the picture before setting it as a wallpaper.
Working with pictures is described in “Gallery” on page 231.
Touch Live wallpapers to open a scrolling list of animated wallpapers installed
on your tablet. Some live wallpapers change according to the time of day, in
response to touching the screen, tell the time, or offer other information. Some
live wallpapers have a Settings button.
Touch Wallpapers to open a screen where you can sample the wallpaper
images that come with the tablet. Slide the miniature images left and right to
view the samples. Touch a sample to view a larger version.
You can download additional wallpapers from Android Market. See “Market” on
page 265.
4 Touch Save or Set wallpaper.
AUG-3.1-CC-100 Android User’s Guide
Page 36

Home and Android basics 36
Working with widgets
Widgets are miniature apps that you can place on your Home screens. Some
widgets are standalone applications, some open a related application when you
touch them, and others provide a subset of useful information or controls for their
related applications.
Stock widgets include a clock, a Gmail widget that displays recent messages, a
music player, a picture frame, a calendar that shows upcoming appointments, and
so on. You can also download widgets from Android Market.
Browsing among available widgets and adding, moving, and removing them from
you Home screens is described in “Customizing Home screens” on page 33.
Some widgets simply display information and or act as shortcuts for opening their
applications, such as the Picture Frame widget.
Some widgets give you controls to view and manage their application’s content,
such as the Clock widget or the Music Player widget.
Other widgets, such as the Calendar and Gmail and Email widgets, are like
miniature applications.
You can scroll information displayed by different widgets in different ways, for
example, you can scroll up or down among events in the Calendar widget, or with a
carousel effect in the Books widget.
If you touch & hold some widgets, such as the Gmail widget, handles appear at its
edges so you can resize it.
AUG-3.1-CC-100 Android User’s Guide
Page 37

Home and Android basics 37
Optimizing battery life
You can extend your battery’s life between charges by turning off features that you
don’t need. You can also monitor how apps and system resources consume battery
power.
Extend the life of your
battery
Check the battery charge
level
S Turn off radios that you aren’t using.
If you aren’t using Wi-Fi, Bluetooth, or GPS, use the Settings app to turn them
off. See “Wireless & networks settings” on page 269 and “Location & security
settings” on page 275. (The GPS receiver is only turned on when you’re using
an app that makes use of it.)
S Turn down screen brightness and set a shorter screen timeout.
See “Screen settings” on page 274.
S If you don’t need them, turn off automatic syncing for Gmail, Calendar,
Contacts, and other apps.
See “Configuring account sync and display options” on page 103.
S Use the Quick Settings to check and control the status of radios, the display
brightness, and syncing.
See “Status Details and Quick Settings” on page 28.
S If you know you won’t be near a mobile or Wi-Fi network for a while, switch to
Airplane mode.
You tablet uses extra power to search for mobile networks. See “Status Details
and Quick Settings” on page 28.
S Open the Settings app and touch About tablet > Status.
The battery status (charging, discharging) and level (as a percentage of fully
charged) are displayed at the top of the screen.
Monitor and control
what uses the battery
AUG-3.1-CC-100 Android User’s Guide
The Battery Use screen shows which apps consume the most battery power. You
can also use it to turn off apps that you’ve downloaded, if they are consuming too
much power.
Page 38

Home and Android basics 38
S Open the Settings app and touch Applications > Battery use.
The Battery Use screen lists the apps that have been using the battery, from
greatest to least battery use.
The discharge graph at the top of the screen shows battery level over time,
since you last charged the tablet, and how long you’ve been running on battery
power. Thin green lines below the chart indicate short periods of time when you
were connected to a charger. The thin blue line shows when the tablet was
active.
S Touch an app in the Battery Use screen to learn details about its power
consumption.
Different apps offer different kinds of information. Some apps include buttons
that open screens with settings to adjust power use.
S Touch the discharge graph to open a screen with details about when the tablet’s
radios, screen, and other features were using the battery.
AUG-3.1-CC-100 Android User’s Guide
Page 39

39
Working with apps
You can open and switch among numerous apps: Android manages your tablet’s
resources for you so you don’t need to quit one to get the most out of another one.
You can learn about how your apps memory. You can also view and work with the
files and other items you’ve downloaded in such apps as Browser and Gmail.
In this section
AUG-3.1-CC-100 Android User’s Guide
“Opening and switching apps” on
page 40
“Managing how apps use memory” on
page 42
“Managing downloads” on page 46
Page 40

Working with apps 40
Opening and switching apps
Home’s Apps screen has icons for all of the apps on your tablet, including any apps
that you downloaded and installed from Android Market or other sources.
When you open an app, the other apps you’ve been using don’t stop; they keep on
running: playing music, opening webpages, and so on. You can quickly switch
among your apps, to work with several at once. The Android operating system and
apps work together to ensure that apps you aren’t using don’t consume resources
unnecessarily, stopping and starting them as needed. For this reason, there’s no
need to stop apps unless you’re certain that one you downloaded is misbehaving.
For details about how apps use memory and how you can manage them, see
“Managing how apps use memory” on page 42.
See “Market” on page 265 to learn how to discover and install additional apps
(including productivity tools, utilities, games, references, and many other kinds of
apps) on your tablet.
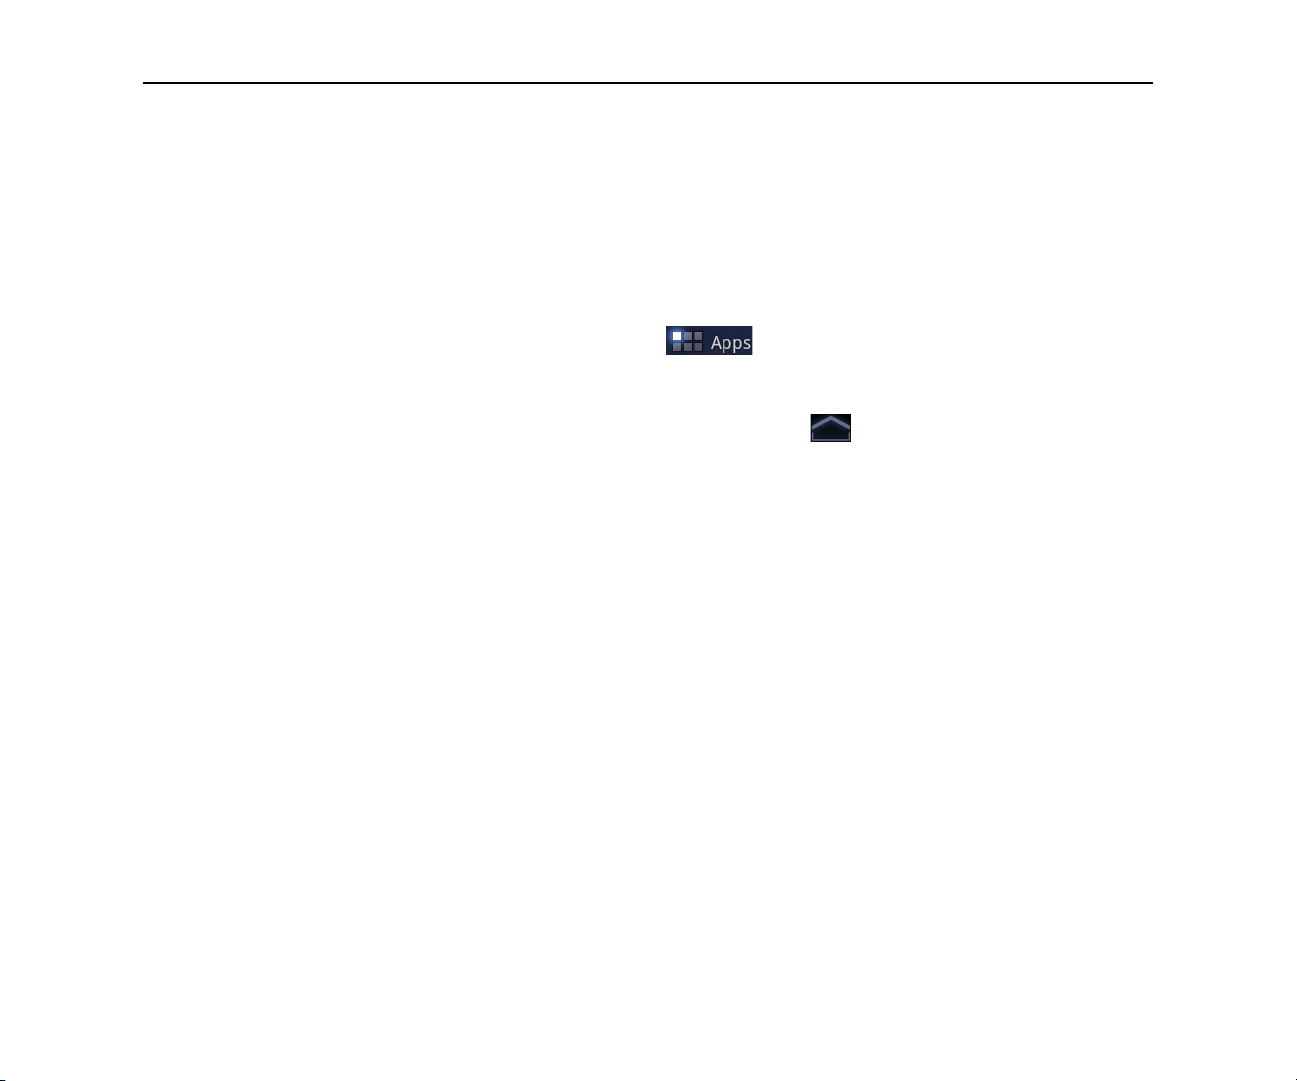
Open the Apps screen S In Home, touch the Apps button to (at the top right).
If you have more apps than can fit on the Apps screen, you can slide the screen
left or right to view more.
You can add shortcut to an app to a Home screen by touching & holding the app
on the Apps screen until outlines of the Home screens appear below the app
icons. Then drag the app icon to a the Home screen. If you pause before
releasing your finger on a Home screen, that Home screen enlarges, so you can
place the shortcut where you want it.
You can also add shortcuts using the Customize screen; see “Customizing
Home screens” on page 33.
S Touch the Home button to close the Apps screen and return Home.
The Launcher closes automatically if you touch an icon to open its app.
Open an app S Touch an app’s icon on the Apps screen.
OR
S Touch an app’s shortcut icon on a Home screen (if you added one there).
AUG-3.1-CC-100 Android User’s Guide
Page 41

Working with apps 41
Switch to a recently
used app
Switch to the previous
app you were using
1 Touch the Recent Apps button in the System bar.
A list of the names and thumbnails of apps you’ve used recently opens.
If you’ve been using more apps recently than can fit on the screen, you can
scroll the list up and down.
2 Touch a name or thumbnail to open that app.
You can also touch the Back button or touch away from the Recent Apps
list to return to your current app.
S Touch the Back button in the System bar.
AUG-3.1-CC-100 Android User’s Guide
Page 42

Working with apps 42
Managing how apps use memory
As described in “Opening and switching apps” on page 40, you typically don’t
need to worry about managing apps beyond installing, opening, and using them.
The operating system manages how they use memory and other resources
automatically. But there are times when you may want to know more about how
apps are using the memory and other resources in your tablet.
Apps use two kinds of memory in your tablet: internal storage and RAM. Apps use
internal storage for themselves and any files, settings, and other data they use.
They also use RAM (memory that is designed for temporary storage and fast
access) when they are running.
All tablets have internal storage. The operating system manages and carefully
guards the portion of internal storage where the system image, apps, and some
kinds of files and other data for those apps are stored, because it can contain your
private information; you can’t view its contents when you connect the tablet to a
computer with a USB cable. The other portion of internal storage, where music,
files you download in Browser or Gmail, and so on, is visible when you connect the
tablet to a computer (see “Connecting to networks and devices” on page 57).
The operating system also manages how apps use your tablet’s RAM. It only allows
apps and their component processes and services to use RAM when they need it. It
may cache processes that you’ve been using recently in RAM, so they restart more
quickly when you open them again, but it will erase the cache if it needs the RAM
for new activities.
AUG-3.1-CC-100 Android User’s Guide
Page 43

Working with apps 43
You manage how apps use internal storage directly and indirectly in many ways as
you use your tablet, for example, by:
G Installing or uninstalling apps (see “Market” on page 265 and “Uninstall an
app” on page 45)
G Downloading files in Browser, Gmail, and other apps
G Creating files (for example, by taking pictures)
G Deleting downloaded files or files you created (see “Managing downloads” on
page 46 and the documentation for the apps you use)
G Copying files to or from your tablet and a computer, via USB or Bluetooth (see
“Connecting to networks and devices” on page 57)
You rarely need to manage how apps use RAM: the operating system does this for
you. But you can monitor how apps use RAM and stop them if they misbehave as
described in “Stop a misbehaving app” on page 44.
Open the Manage
Applications screen
S Open the Settings app and touch Applications > Manage applications.
The Manage Applications screen has three tabs, with lists of apps and their
components in each. At the bottom of each tab is a graph of the memory used
by the items in the list and amount of free memory.
S Touch an app, process, or service in a list to open a screen with details about it
and, depending on the item, to change its settings, stop it, uninstall it, and so
on.
Most of these tasks are described in this section.
S Touch the Downloaded tab to view the apps you’ve downloaded from Market or
other sources.
S Touch the All tab to view all the apps installed on your tablet.
The list includes apps that are bundled with your release of Android and apps
you downloaded from Market or other sources.
S Touch the Running tab to view the apps and their processes and services that
are running or cached.
See “Stop a misbehaving app” on page 44.
AUG-3.1-CC-100 Android User’s Guide
Page 44

Working with apps 44
S When viewing the Downloaded or All tab, touch the By Size icon or the
Alphabetical icon to switch the order of the list.
Get details about an app 1 Open the Manage Applications screen.
2 Touch an app, process, or service.
You can also open the Application Info screen from Home’s Apps screen, by
touching & holding an app and then dragging it to the Info icon.
The Application Info screen for each app lists its name and version, along with
details about the app. Depending on the app and where it came from, it may
also include buttons for managing the app’s data, forcing the app to stop, and
uninstalling the app. It also lists details about the kinds of information about
your tablet and data that the app has access to.
DIfferent kinds of apps have different kinds of information and controls, but
commonly include:
G Use the Force stop button to stop an app that is misbehaving (see “Stop a
misbehaving app” on page 44).
G If you installed the app from Android Market or another source, you can use
the Uninstall button to remove the app and all of its data and settings from
the tablet. See “Market” on page 265 and “Uninstall an app” on page 45
for more information about uninstalling and reinstalling apps.
G Storage Gives details about the amount of tablet storage that an app uses.
G You can delete an app’s settings and other data by touching the Clear data
button.
G Cache If the app stores data in a temporary area of the tablet's memory, lists
how much information is stored, and includes a button for clearing it.
G Launch by default If you have configured an app to launch certain file types
by default, you can clear that setting here.
G Permissions Lists the kinds of information about your tablet and data the
app has access to.
Stop a misbehaving app You can monitor how much RAM running apps and cached processes are using and
if necessary, stop them.
AUG-3.1-CC-100 Android User’s Guide
Page 45

Working with apps 45
1 Open the Manage Applications screen.
2 Touch the Running tab.
3 At the top-right of the screen, touch Show cached processes or Show
running services to switch back and forth.
The Running tab shows the apps, processes, and services that are currently
running or that have cached processes and how much RAM they are using. The
graph at the bottom of the screen shows the total RAM in use and the amount
free.
You can touch a misbehaving app, process, or service and in the screen that
opens touch the Stop button. You can also touch the Report button, to send
the developer information about how the app misbehaved on your tablet.
Important Stopping an app or operating system processes and services disables
one or more dependant functions on your tablet. You may need to
restart your tablet to restore full functionality.
Uninstall an app You can uninstall apps you downloaded from Market and other sources. (You can
also use Market to uninstall apps you downloaded from there; see “Managing
downloads” on page 46)
1 Open the Manage Applications screen.
2 Touch the Downloads tab.
3 Touch the app you want to uninstall.
4 Touch the Uninstall button.
5 Touch OK in the screen that asks you to confirm you want to uninstall the app.
AUG-3.1-CC-100 Android User’s Guide
Page 46

Working with apps 46
Managing downloads
Files, apps, and other items you download in Browser, Gmail, Email, or in other
ways, are stored on your tablet’s internal storage. You can use the Downloads app
to view, reopen, or delete what you’ve downloaded.
Some mobile networks place restrictions on the size of the files you can download,
to manage the demands on their networks or to help you avoid unexpected charges.
When you try to download an oversized-file when connected to such networks,
you’re asked or required to delay downloading the file, until you are next connected
to a Wi-Fi network, when the download will resume automatically. You can view and
manage these queued files in the Downloads app as well.
Downloaded files are stored in the Download directory in your tablet’s internal
storage. You can view and copy files from this directory when connected to a
computer, as described in “Connecting to networks and devices” on page 57.
Open Downloads and
manage downloaded
files
AUG-3.1-CC-100 Android User’s Guide
S Touch the Downloads icon in Home: on the Apps screen or a shortcut on a
Home screen (if you added one there).
See “Opening and switching apps” on page 40.
S Touch an item to reopen it.
S Touch headings for earlier downloads to view them.
S Check items you want to delete; then touch Delete.
The item is deleted from your tablet.
S Touch the Menu button and touch Sort by size or Sort by time to switch
back and forth.
Page 47

47
Entering and editing text
You can use the onscreen keyboard to enter text in web pages, when composing
mail, and anyplace else with a text field, or you can enter text by speaking instead
of typing. You can also edit text: insert, delete, copy, and even paste between
applications.
In this section
AUG-3.1-CC-100 Android User’s Guide
“Using the onscreen keyboard” on
page 48
“Entering text by speaking” on page 52
“Editing text” on page 54
Page 48

Entering and editing text 48
Touch the Shift key once to capitalize the
next letter you type. Double-tap for ALL
CAPS.
Touch space or a punctuation mark to
enter Android’s best guess at the word
you mean to enter.
Using the onscreen keyboard
You can enter text using the onscreen keyboard. Some apps open the keyboard
automatically. In others, you touch a text field where you want to enter text to open
the keyboard.
The onscreen keyboard has a number of settings, as described in “Language &
input settings” on page 282. You can also open the Android keyboard settings by
touching the Settings key .
You can enter text by speaking instead of by typing. See “Entering text by
speaking” on page 52.
Enter text by typing S Touch a text field to open the keyboard.
The onscreen keyboard opens.
AUG-3.1-CC-100 Android User’s Guide
If you touch in a text field where there is already text entered, the insertion
point is set where you touch and the insertion point tab appears. You can
Page 49

Entering and editing text 49
Touch a suggestion to enter it in place of
the underlined word in the text field.
drag the insertion point by its tab to move the insertion point, to pick exactly
where you want to add more text. You can also select a word or more at a time
and copy, cut, and paste text. See “Editing text” on page 54.
AUG-3.1-CC-100 Android User’s Guide
S Touch the keys on the keyboard to enter text.
As you type, words that the keyboard has suggestions for are underlined.
If you set the keyboard to show correction suggestions, they appear in a strip
above the keyboard. The underlined word in the strip is the suggested word. You
can also touch another word in the strip to enter it instead.
You turn the suggestion feature on or off and change whether suggestions are
shown with the Android keyboard settings.
Page 50

Entering and editing text 50
S Touch space or a punctuation mark to enter a suggested word in place of the
underlined word.
If you mistype a word that the keyboard recognizes, it corrects it automatically
(unless you turn that feature off).
If you touch the space key, the suggestion strip offers a series of punctuation
marks you can touch, to replace the space with.
S Use the Delete key to erase characters to the left of the cursor.
S When you’re finished typing, touch the Close Keyboard button .
Enter capital letters S Touch & hold the Shift key while you type, to enter capital letters: when you
release the Shift key, the lowercase letters reappear.
S Touch Shift once to switch to capital letters for one letter.
S Double-tap Shift to switch to ALL CAPS; touch Shift again to restore lowercase
letters.
Enter numbers, symbols,
and other characters
Change the input
language
AUG-3.1-CC-100 Android User’s Guide
S Touch the Numbers and Symbols key to enter numbers, symbols, and
other special characters.
S Touch the More key for more special characters.
S Touch a key that has a gray ellipsis in its corner to open a small panel
where you can drag to enter a different character.
S Touch & hold the shift key while you touch a key with a gray character in its
corner to enter the gray character (the gray character turns white to
indicate on the key). Or just touch & hold that key to enter the gray character.
S Touch & hold a vowel or the C, N, or S key to open a small panel where you can
drag onto the accented vowel or other alternate letter or number you want to
enter.
If you’ve used the Input Method settings to make more than one language or input
method available, the Input Method button appears in the System bar when
the onscreen keyboard, voice input panel, or other input method is open.
Page 51

Entering and editing text 51
You can open the Input Method settings by touching the Keyboard Settings
key on the onscreen keyboard, by touching Configure input methods in the
panel that opens when you touch the Input Method button , or in Settings.
1 Touch the Input Method button in the System bar.
2 Touch the language or other input method you want to use.
AUG-3.1-CC-100 Android User’s Guide
Page 52

Entering and editing text 52
Text that you enter by speaking is
underlined. You can continue entering
text to keep it, or delete it.
Entering text by speaking
You can use voice input to enter text by speaking. Voice input is an experimental
feature that uses Google’s speech-recognition service, so you must have a data
connection on a mobile or Wi-Fi network to use it.
Enter text by speaking You can enter text by speaking, in most places that you can enter text with the
onscreen keyboard.
1 Touch a text field, or a location in text you’ve already entered in a text field.
2 Touch the Microphone key on the onscreen keyboard.
3 When prompted to “Speak now,” speak what you want to enter.
Say “comma,” “period,” “question mark,” “exclamation mark,” or
“exclamation point” to enter punctuation.
AUG-3.1-CC-100 Android User’s Guide
When you pause, what you spoke is transcribed by the speech-recognition
service and entered in the text field, underlined. You can touch the Delete
Page 53

Entering and editing text 53
key to erase the underlined text. If you start typing or entering more text by
speaking, the underline disappears.
You can edit the text that you enter by typing or speaking. See “Editing text” on
page 54.
You can change the language you want to use for voice input by touching the
Input Method button just as you do for the onscreen keyboard. See “Change the
input language” on page 50.
AUG-3.1-CC-100 Android User’s Guide
Page 54

Entering and editing text 54
Editing text
You can edit the text you enter in text fields and cut, copy, or paste text, within or
across apps. Some apps don’t support editing some or all of the text they display;
others may offer their own way to select text you want to work with.
Edit text 1 Touch the text you want to edit.
The cursor is inserted where you touched.
The cursor is a blinking vertical bar that indicates where text you type or paste
will be inserted. When it first appears, it has an tab you can use to drag the
cursor, to move it where you want.
If you previously copied text, the Paste panel appears briefly above the cursor:
touch the panel to paste (see “Paste text” on page 56)
2 Drag the cursor by its tab to the location where you want to edit text.
The tab disappears after a few moments, to get out of your way. To make it
reappear, just touch the text again.
3 Type, cut, paste, or delete text (as described in this section)
4 Touch the Close Keyboard button when you’re done.
Select text You select text that you want to cut, copy, delete, or replace.
1 Touch & hold the text or word you want to select.
The selected text is highlighted, with a tab at each end of the selection.
AUG-3.1-CC-100 Android User’s Guide
Page 55

Entering and editing text 55
Drag a selection tab to expand or reduce
the range of selected text.
2 Drag either selection tab to expand or reduce the range of selected text. Or
touch Select all in the Application bar.
If you change your mind, you can unselect the text by touching elsewhere on
screen.
3 Use the tools in the Application bar to cut, copy, or paste to replace the
selected text.
You can also simply enter text by typing or speaking, to replace the selection
with what you type, or touch the Delete key to deleted the selected text.
Cut or copy text 1 Select the text to cut or copy.
See “Select text” on page 54.
2 Touch Cut or Copy in the Application bar.
If you touch Cut, the selected text is removed from the text field. In either
case, the text is stored so that you can paste it into another text field.
AUG-3.1-CC-100 Android User’s Guide
Page 56

Entering and editing text 56
Paste text 1 Cut or copy the text to paste.
See “Cut or copy text” on page 55.
2 Place the cursor in the text field where you want to paste the text, or select text
you want to replace by pasting.
You can paste text that you copied from one app into a text field in any app.
3 Touch Paste in the Application bar.
You can also touch the Paste panel that opens above the cursor.
The text is inserted at the cursor. The text that you pasted also remains in a
temporary area on the tablet, so you can paste that same text in another
location.
AUG-3.1-CC-100 Android User’s Guide
Page 57

57
Connecting to networks and devices
Your tablet can connect to a variety of networks and devices, including mobile
networks for data transmission, Wi-Fi data networks, and Bluetooth devices, such
as headsets. You can connect your tablet to a computer, to transfer files from your
tablet, using a USB connection or Bluetooth, or to a keyboard, mouse, other input
devices, or to a camera to import its photos. You can also share your tablet’s mobile
data connection via USB, Bluetooth, or as a portable Wi-Fi hotspot.
In this section
AUG-3.1-CC-100 Android User’s Guide
“Connecting to mobile networks” on
page 58
“Connecting to Wi-Fi networks” on
page 60
“Connecting to Bluetooth devices” on
page 65
“Connecting to keyboards, mice, and
other input devices” on page 69
“Connecting to cameras” on page 71
“Connecting to a Windows computer via
USB” on page 72
“Connecting to a Macintosh computer via
USB” on page 73
“Sharing your mobile data connection”
on page 75
“Connecting to virtual private networks
(VPNs)” on page 79
“Working with secure certificates” on
page 81
Page 58

Connecting to networks and devices 58
Connecting to mobile networks
Your tablet is configured to use mobile networks to transmit data (unless your
tablet is configured for Wi-Fi only). Depending on your model of tablet and how you
purchased it, it may simply connect to your carrier’s network when you turn it on.
Or you may need to insert a SIM card or configure details about how to connect to
a specific carrier. Be sure to consult your tablet’s vendor and its owner’s guide for
details.
Different locations may have different mobile networks available. Initially, your
tablet is configured to use the fastest mobile network available for data. But
depending on your model of tablet, you may be able to configure your tablet to use
slower networks for data, to extend the life of your battery between charges. You
can also configure your tablet to access a different set of networks entirely, or to
behave in special ways when roaming.
Icons in the System bar, to the right of the time, indicate which kind of data
network you’re connected to and the network signal strength.
Network status icons turn blue if you have a Google Account added to your tablet
and the tablet is connected to Google services, for syncing your Gmail, Calendar
events, contacts, for backing up your settings, and so on. If you don’t have a
Google Account or if, for example, you’re connected to a Wi-Fi network that is not
connected to the Internet, the network icons are gray.
When you’re connected to slower networks, you may want to postpone using your
tablet for data-intensive tasks until you are connected to a faster network again, or
find a Wi-Fi network to connect to. See “Connecting to Wi-Fi networks” on
page 60.
Determine what network
you’re using
AUG-3.1-CC-100 Android User’s Guide
On some kinds of networks, you can view the name of the network you’re
connected to.
1 Open the Settings application.
See “Opening Settings” on page 268.
2 Touch Wireless & networks > Mobile networks.
Page 59

Connecting to networks and devices 59
Disable data when
roaming
Limit your data
connection to slower
networks
Edit or create a new
access point
You can prevent your tablet from transmitting data over other carriers’ mobile
networks when you leave an area that is covered by your carrier’s networks. This is
useful for controlling expenses if your mobile data contract doesn’t include data
roaming.
1 Open the Settings application.
2 Touch Wireless & networks > Mobile networks and uncheck Data
roaming.
With Data roaming unchecked, you can still transmit data with a Wi-Fi
connection. See “Connecting to Wi-Fi networks” on page 60.
If your tablet connects to GSM mobile networks, you can extend your battery life by
limiting your data connections to slower, 2G networks (GPRS or EDGE). When you
are connected to a 2G network, you may want to postpone activities that transmit a
lot of data, such as sending, uploading, or downloading pictures or video, until you
are connected to a faster mobile or other wireless network.
1 Open the Settings application.
2 Touch Wireless & networks > Mobile networks and check Use only 2G
networks.
If your tablet connects to GSM mobile networks, and if you and your GSM carrier
determine that you need to change the settings of your current access point name
(APN) or to create a new one, you must obtain the APN and detailed settings from
your provider.
1 Open the Settings application.
2 Touch Wireless & networks > Mobile networks > Access Point Names.
3 Touch an existing APN to edit it. Or touch New APN.
Enter the APN settings that you obtained from your carrier by touching each
setting that you need to edit.
4 When you’re finished, touch Save.
5 If you created a new APN, touch it in the APNs screen to start using it.
AUG-3.1-CC-100 Android User’s Guide
Page 60

Connecting to networks and devices 60
Connecting to Wi-Fi networks
Wi-Fi is a wireless networking technology that can provide Internet access at
distances of up to 100 meters, depending on the Wi-Fi router and your
surroundings.
To use Wi-Fi on your tablet, you connect to a wireless access point, or “hotspot.”
Some hotspots are open and you can simply connect to them. Others implement
security features, so you must configure your tablet so it can connect to them.
There are numerous systems for securing Wi-Fi connections, including some that
rely on secure certificates or other schemes to ensure that only authorized users
can connect. See “Working with secure certificates” on page 81.
Turn off Wi-Fi when you’re not using it, to extend the life of your battery between
charges. You can also set whether you want to disconnect from Wi-Fi networks
when your tablet is sleeping (see “Set a Wi-Fi disconnect policy” on page 64).
The Status bar displays icons that indicate Wi-Fi status.
Network status icons turn blue if you have a Google Account added to your tablet
and the tablet is connected to Google services, for syncing your Gmail, Calendar
events, contacts, for backing up your settings, and so on. If you don’t have a
Google Account or if, for example, you’re connected to a Wi-Fi network that is not
connected to the Internet, the network icons are gray.
Connected to a Wi-Fi network (waves indicate connection strength)
Notification that an open Wi-Fi network is in range
Turn Wi-Fi on and
connect to a Wi-Fi
If you’re adding a Wi-Fi network when first setting up your tablet, Wi-Fi is turned
on automatically, so you can skip to step 4.
network
AUG-3.1-CC-100 Android User’s Guide
Page 61

Connecting to networks and devices 61
1 Open the Settings app.
See “Opening Settings” on page 268.
2 Touch Wireless & networks > Wi-Fi settings.
3 Check Wi-Fi to turn it on.
The tablet scans for available Wi-Fi networks and displays the names of those it
finds. Secured networks are indicated with a Lock icon.
If the tablet finds a network that you connected to previously, it connects to it.
4 Touch a network to connect to it.
If the network is open, you are prompted to confirm that you want to connect to
that network by touching Connect.
If the network is secured, you’re prompted to enter a password or other
credentials. (Ask your network administrator for details.)
By default, you obtain an address on the network from the network itself, using
the DHCP protocol.
You can touch DHCP to change the IP settings to Static, so you can enter an
address and other network details manually, if you or your network
administrator require it. If you do, you must enter:
G An IP address for your tablet that is valid and unique for your Wi-Fi network
G The Gateway for the network
G The network prefix length (a number between 0 and 32, such as 24 for a
Class C network, 16 for a Class B network, or 8 for a Class A network)
G At least one DNS server for the network
When you’re connected to a network, you can touch its name in the Wi-Fi
settings screen for details about the speed, security, address, and related
settings.
Modify how you connect
to a Wi-Fi network
AUG-3.1-CC-100 Android User’s Guide
You can change the password and network settings for a Wi-Fi network listed in the
Wi-Fi settings.
Page 62

Connecting to networks and devices 62
1 Touch & hold a network in the list
2 Touch Modify network in the dialog that opens.
3 Change the settings you want.
See “Turn Wi-Fi on and connect to a Wi-Fi network” on page 60 and “Configure
proxy settings for a Wi-Fi network” on page 62.
4 Touch Save.
Configure proxy settings
for a Wi-Fi network
Receive notifications
when open networks are
in range
Some network administrators require you to connect to internal or external network
resources via a proxy server. By default, the Wi-Fi networks you add are not
configured to connect via a proxy, but you can change that for each Wi-Fi network
you’ve added.
Proxy settings are used by Browser but may not be used by other apps.
1 Touch & hold a network in the list of Wi-Fi networks you’ve added.
2 Touch Modify network in the dialog that opens.
3 If the network has no proxy settings, touch the None proxy setting and in the
menu that opens, touch Manual.
Enter the proxy settings required for your network:
G The hostname of the proxy server
G The port on which the proxy server listens for connections
G Any domains you want to connect to directly, bypassing the proxy server
You may need to refer to your network administrator for details about these
settings.
4 Touch Save.
The proxy settings apply only to the Wi-Fi network you modified. To change the
proxy settings for other Wi-Fi networks, modify them individually.
By default, when Wi-Fi is on, you receive notifications in the Status bar when your
tablet detects an open Wi-Fi network.
AUG-3.1-CC-100 Android User’s Guide
Page 63

Connecting to networks and devices 63
1 Turn on Wi-Fi, if it’s not already on.
2 In the Wi-Fi settings screen, check Network notification.
You can uncheck this option to stop receiving notifications.
Add a Wi-Fi network You can add a Wi-Fi network so the tablet will remember it, along with any security
credentials, and connect to it automatically when it is in range. You must also add
a Wi-Fi network to connect to it, if the network does not broadcast its name (SSID),
or to add a Wi-Fi network when you are out of range of it.
To join a secured network, you need to contact the network’s administrator to learn
what security scheme is deployed on it and to obtain the password or other
required security credentials. For more information about installing secure
certificates, see “Working with secure certificates” on page 81.
1 Turn on Wi-Fi, if it’s not already on.
If you’re adding a Wi-Fi network when first setting up your tablet, Wi-Fi is
turned on automatically.
2 In the Wi-Fi settings screen, touch Add Wi-Fi network (at the bottom of the
list of discovered networks).
3 Enter the SSID (name) of the network.
If necessary, enter security or other network configuration details.
See “Turn Wi-Fi on and connect to a Wi-Fi network” on page 60.
4 Touch Save.
The information about the network is saved, so you are connected automatically
the next time you come within range of this network.
Forget a Wi-Fi network You can make the tablet forget about the details of a Wi-Fi network that you
added— for example, if you don’t want the tablet to connect to it automatically or
if it is a network that you no longer use.
1 Turn on Wi-Fi, if it’s not already on.
2 In the Wi-Fi settings screen, touch the name of the network.
3 Touch Forget in the dialog that opens.
AUG-3.1-CC-100 Android User’s Guide
Page 64

Connecting to networks and devices 64
Set a Wi-Fi disconnect
policy
By default, the tablet disconnects from Wi-Fi when the screen turns off and
connects to a mobile data network instead. It does this to conserve battery power,
and reconnects to Wi-Fi again when you wake it.
You can change this policy to stay connected to Wi-Fi when the tablet is connected
to a charger (when battery life isn’t a problem), or never to disconnect from Wi-Fi,
which trades battery life for reduced mobile network data use.
1 On the Wi-Fi settings screen, touch Wi-Fi disconnect policy.
2 Touch the policy you want.
AUG-3.1-CC-100 Android User’s Guide
Page 65

Connecting to networks and devices 65
Connecting to Bluetooth devices
Bluetooth is a short-range wireless communications technology that devices can
use to exchange information over a distance of about 8 meters. The most common
Bluetooth devices are headsets for making calls or listening to music, hands-free
kits for cars, and other portable devices, including laptops.
There are several Bluetooth profiles that define the features and communications
standards for Bluetooth devices. For a list of the profiles supported by your tablet,
refer to your tablet’s owner’s guide.
To connect to a Bluetooth device, you must turn on your tablet’s Bluetooth radio.
The first time you use a new device with your tablet, you must “pair” the device
with your tablet, so that both devices know how to connect securely to each other.
After that, you can simply connect to a paired device.
Turn off Bluetooth when you’re not using it, to extend the life of your battery
between charges. You may also be required to turn Bluetooth off in some locations.
Bluetooth is turned off when you switch to Airplane mode.
System bar icons indicate Bluetooth status.
Turn Bluetooth on or off 1 Open the Settings application.
See “Opening Settings” on page 268.
2 Touch Wireless & networks.
3 Check or uncheck Bluetooth.
Change your tablet’s
Bluetooth name
AUG-3.1-CC-100 Android User’s Guide
Your tablet has a generic Bluetooth name by default, which is visible to other
devices when you connect them. You can change the name so that it is more
recognizable.
Page 66

Connecting to networks and devices 66
1 Open the Settings application.
See “Opening Settings” on page 268.
2 Touch Wireless & networks > Bluetooth settings.
3 Check Bluetooth to turn it on.
4 Touch Device name, enter a name, and touch OK.
Pair your tablet with a
Bluetooth device
You must pair your tablet with a device before you can connect to it. Once you pair
your tablet with a device, they stay paired unless you unpair them.
1 Open the Settings application.
See “Opening Settings” on page 268.
2 Touch Wireless & networks > Bluetooth settings.
3 Check Bluetooth to turn it on.
Your tablet scans for and displays the IDs of all available Bluetooth devices in
range.
4 If the device you want to pair with isn’t in the list, ensure that the other device
is turned on and set to be discoverable.
See the documentation that came with your device to learn how to make it
discoverable by your tablet, and for other instructions for pairing.
5 If your tablet stops scanning before your other device is ready, touch Find
nearby devices and then Scan for devices.
6 Touch the ID of the other device in the list in the Found list to pair them.
The devices pair with each other. If you’re prompted to enter a passcode, try
entering 0000 or 1234 (the most common passcodes), or consult the
documentation that came with the device to learn its passcode, or what other
procedures it requires for pairing.
If the pairing is successful, your tablet connects to the device.
Connect to a Bluetooth
device
AUG-3.1-CC-100 Android User’s Guide
Once paired, you can connect to a Bluetooth device—for example, to switch
devices or to reconnect after the tablet and the device come back into range.
Page 67

Connecting to networks and devices 67
1 Open the Settings application.
See “Opening Settings” on page 268.
2 Touch Wireless & networks > Bluetooth settings.
3 Check Bluetooth to turn it on.
4 In the list of devices, touch a paired but unconnected device in the list.
If the device you expected isn’t displayed, touch Scan for devices.
When the tablet and the device are connected, the device is displayed as
connected in the list.
Configure the Bluetooth
features you want to use
Disconnect from a
Bluetooth device
Unpair a Bluetooth
device
Some Bluetooth devices have multiple profiles. Profiles can includes the ability to
transmit your tablet conversations, to play music in stereo, or to transfer files or
other data. You can select which profiles you want to use with your tablet. You can
also change the name of the Bluetooth device as it appears on your tablet.
1 In the Bluetooth settings, touch the Wrench icon for the Bluetooth device you
want to configure.
A screen opens with information about the device, including its profiles.
2 Touch rename device to change the name of the device as it appears on your
tablet.
3 Touch the More icon to open options for that profile, then check or uncheck the
features of that profile to use them or not.
4 When you’re done, touch Back .
1 Touch the device in the Bluetooth settings screen.
2 Touch OK to confirm that you want to disconnect.
You can unpair a Bluetooth device to erase all pairing information about it.
1 In the Bluetooth settings, touch the Wrench icon for the Bluetooth device you
want to unpair.
2 Touch Unpair.
AUG-3.1-CC-100 Android User’s Guide
Page 68

Connecting to networks and devices 68
Obtain a network
connection via Bluetooth
tethering
If you have a computer or other device that can share its network connection via
Bluetooth, you can configure your tablet to obtain a network connection by
Bluetooth tethering (sometimes called reverse tethering).
For details about sharing your tablet’s Internet connection with a computer or other
device, see “Sharing your mobile data connection” on page 75.
1 Configure your computer to share it’s network connection via Bluetooth.
See your computer’s documentation for details on how to do this, but it
typically means making your computer discoverable via Bluetooth and allowing
incoming PAN connections.
2 Pair and connect your tablet to your computer via Bluetooth.
See “Pair your tablet with a Bluetooth device” on page 66 and “Connect to a
Bluetooth device” on page 66.
3 Touch the Wrench icon for the Bluetooth connection and in the screen that
opens, touch the Internet access profile.
Your tablet connects to the Internet via Bluetooth and your computer and a
Bluetooth icon appears in place of the mobile or Wi-Fi network indicator in the
System bar, to the right of the time and the Status Details panel displays
Bluetooth tethering.
AUG-3.1-CC-100 Android User’s Guide
Page 69

Connecting to networks and devices 69
Connecting to keyboards, mice, and other input devices
You can connect a keyboard, mouse, or even a joystick or other input device to your
tablet via USB or Bluetooth and use it with your tablet just as you would with a PC.
Depending on your model of tablet and USB input device, you may need an
adapter to connect your device to the tablet’s USB port: See your tablet’s owner’s
guide for more information. To connect more than one USB device at a time, use a
USB hub: use a powered hub to reduce the drain on your tablet’s battery.
You pair and connect Bluetooth input devices to your tablet in the same way as any
other Bluetooth device: see “Connecting to Bluetooth devices” on page 65.
Keyboards In addition to entering text, you can use your keyboard to navigate your tablet’s
features:
G Use the arrow keys to select items on screen
G Pressing Return when an item is selected is equivalent to touching that item
G Pressing Escape is equivalent to touching Back
G Press Tab or Shift-Tab to move from field to field in a form or other screen with
multiple text fields
Mice When you connect a mouse to your tablet and move the mouse, an arrow-shaped
cursor appears: just like on a PC:
G Use the mouse to move the cursor.
G Clicking, pressing, and dragging with the mouse button is equivalent to touch-
ing, touching & holding, and dragging with your finger.
G Only one mouse button is supported.
G If your muse has a trackball or scroll wheel, you can use it to scroll both verti-
cally and horizontally.
AUG-3.1-CC-100 Android User’s Guide
Page 70

Connecting to networks and devices 70
Other input devices You can connect joysticks, gamepads, and other input devices to your tablet: if
they work without special drivers or adapters on your PC, they will likely work with
your tablet. However, games and other apps must be designed to support any
special features of an input device, such as dedicated buttons or other controls, to
take full advantage of them.
AUG-3.1-CC-100 Android User’s Guide
Page 71

Connecting to networks and devices 71
Connecting to cameras
If you have a camera or other device that supports the PTP protocol, you can
connect it to your tablet’s USB port and import the pictures on the camera into
Gallery your tablet.
Be sure to read the owner’s guide for your camera to learn what protocols it
supports and whether it can use PTP over USB. You may need an adapter cable to
connect your camera’s USB cable to your tablet: see your tablet’s owner’s guide.
1 Connect your camera to your tablet using your camera’s USB cable and, if
necessary, an adapter from your tablet’s manufacturer for its USB port.
Gallery opens, with your cameras’ photos added as an album, labeled Touch to
import.
2 Touch the album of your camera’s photos.
The album opens with all of your camera’s photos selected for importing to
Gallery on your tablet.
3 Select the photos you want to import.
The number of photos selected (initially, all) is displayed as the title of a menu
in the Application bar.
You can touch the menu and touch Deselect all if you want to select just the
photos you want to import. If all photos aren’t selected, Deselect all changes
to Select all in the menu.
You can also touch individual photos to select or deselect them.
4 Touch Import at the top-right of the Application bar.
A dialog displays the progress of importing the photos you selected.
5 Touch Done in the Application bar and disconnect your camera.
AUG-3.1-CC-100 Android User’s Guide
Page 72

Connecting to networks and devices 72
Connecting to a Windows computer via USB
You can use the USB cable that came with your tablet to connect it to a Windows
computer, to transfer music, pictures, and other files between your tablet and the
computer. This connection uses the MTP protocol, which is supported by most
recent versions of Windows.
Depending on the version of Windows you are using and your model of tablet, you
may need may need to obtain and install a Windows driver to work with your tablet
on your computer. For more information, speak with your tablet’s vendor.
For information on connecting your tablet to a Macintosh computer, see
“Connecting to a Macintosh computer via USB” on page 73.
If you are using USB tethering, you must turn that off before you can use USB to
transfer files between your tablet and computer. See “Sharing your mobile data
connection” on page 75.
Connect your tablet to a
computer via USB
AUG-3.1-CC-100 Android User’s Guide
S Use the USB cable that came with your tablet to connect the tablet to a USB
port on your computer.
Your tablet’s USB storage or SD card is mounted as a drive on your computer.
You can now copy files back and forth as you would using any other external
device. For more information, see the documentation for your computer.
S When you’re done, simply disconnect the tablet from your computer by
unplugging the USB cable.
Page 73

Connecting to networks and devices 73
Connecting to a Macintosh computer via USB
You can connect your tablet to a computer running Mac OS X with a USB cable, to
transfer music, pictures, and other files between your tablet and the computer.
This connection uses the MTP protocol, which is not supported by Mac OS X
natively, so you first need to install the free Android File Transfer application on
your Macintosh. It’s available from http://www.android.com/filetransfer, along with
instructions on how to install it.
You don’t need to install the Android File Transfer application to connect to a
Windows computer; see “Connecting to a Windows computer via USB” on page 72.
Transfer files to or from
a Macintosh computer
Once you have installed Android File Transfer on your Macintosh, you can connect
your tablet to your computer using the USB cable that came with your tablet, so
you can view and copy files.
1 If you are using Android File Transfer for the first time, double-click it to open
it.
After you start Android File Transfer once, it opens automatically whenever you
connect your tablet to your computer.
2 Connect your tablet to your computer using its USB cable.
Android File Transfer starts, if it’s not already running, and opens a window that
displays the contents of your tablet. Details about the amount of space on your
tablet are at the bottom of the window.
You work with this window much as if it were a Finder window: opening and
closing folders, creating new folders, and dragging files to or from it and other
Finder windows.
You can copy files up to 4GB onto the tablet.
AUG-3.1-CC-100 Android User’s Guide
Page 74

Connecting to networks and devices 74
Touch to add a new folder in
the current folder.
Drag items to or from this
window and Finder windows.
S Click or Shift-click on files or folders to select them, just as you do in the
Finder.
S Double-click folders or touch their arrow icons to view their contents.
S Use the commands in the Go menu open and close folders and to navigate back
and forth among the folders you’ve opened.
AUG-3.1-CC-100 Android User’s Guide
S Touch the New folder button or choose New Folder from the File menu to
create a folder in the current folder.
S Select one or more files or folders and choose Delete from the File menu to
delete the selected files or folders from your tablet.
S Drag one or more files to a folder in Android File Transfer or in the Finder to
copy files back and forth.
S Disconnect your tablet’s USB cable from the Macintosh when you’re done.
It’s best to wait until any file transfers or deletions are complete before
disconnecting, but you can simply disconnect your tablet at any time (any tasks
in progress are simply abandoned).
Page 75

Connecting to networks and devices 75
Sharing your mobile data connection
You can share your tablet’s mobile data connection with a single computer via a
USB cable or via Bluetooth: USB tethering or Bluetooth tethering. You can also
share your tablet’s data connection with up to eight devices at once, by turning
your tablet into a portable Wi-Fi hotspot. (Not all carriers and tablets support these
features.)
When your tablet is sharing its data connection, an icon appears in the Status bar
and as an ongoing notification in the Notifications panel (see “Managing
notifications” on page 26).
You can also obtain a network connection for your tablet from a computer via
Bluetooth: see “Obtain a network connection via Bluetooth tethering” on page 68.
USB tethering is active
Bluetooth tethering is active
Portable Wi-Fi hotspot is active
Multiple tethering or hotspot connections are active
For the latest information about tethering and portable hotspots, including
supported operating systems and other details, visit android.com/tether.
Share your tablet’s data
connection via USB
AUG-3.1-CC-100 Android User’s Guide
If your computer is running Windows 7 or a recent distribution of some flavors of
Linux (such as Ubuntu), you typically don’t need to prepare your computer for
tethering. But if you’re running an earlier version of Windows or another operating
system, you may need to prepare your computer to establish a network connection
via USB. For the most current information about which operating systems support
USB tethering and how to configure them, visit android.com/tether.
Page 76

Connecting to networks and devices 76
1 Use the USB cable that came with your tablet to connect your tablet to your
computer.
2 Open the Settings application.
See “Opening Settings” on page 268.
3 Touch Wireless & networks > Tethering & portable hotspot.
4 Check USB tethering.
The tablet starts sharing its mobile network data connection with your
computer, via USB connection. An ongoing notification icon is added to the
System bar, to the left of the time.
5 Uncheck USB tethering to stop sharing your data connection. Or just
disconnect the USB cable.
Share your tablet’s data
connection via Bluetooth
AUG-3.1-CC-100 Android User’s Guide
If your computer can obtain an Internet connection via Bluetooth, you can
configure your tablet to share it’s mobile data connection with your computer.
1 Pair your tablet with your computer.
See “Connecting to Bluetooth devices” on page 65.
2 Configure your computer to obtain its network connection via Bluetooth.
For more information, see your computer’s documentation.
3 Open the Settings application.
See “Opening Settings” on page 268.
4 Touch Wireless & networks > Tethering & portable hotspot.
5 Check Bluetooth tethering.
Page 77

Connecting to networks and devices 77
Share your tablet’s data
connection as a portable
Wi-Fi hotspot
Rename or secure your
portable hotspot
1 Open the Settings application.
See “Opening Settings” on page 268.
2 Touch Wireless & networks > Tethering & portable hotspot.
3 Check Portable Wi-Fi hotspot.
After a moment, the tablet starts broadcasting its Wi-Fi network name (SSID),
so you can connect to it with up to 8 computers or other devices. An ongoing
notification is added to the System bar, to the left of the time.
When Portable Wi-Fi hotspot is checked, you can change its network name or
secure it. See “Rename or secure your portable hotspot” on page 77.
4 Uncheck Portable Wi-Fi hotspot to stop sharing your data connection via Wi-
Fi.
You can change the name of your tablet’s Wi-Fi network name (SSID) and secure
its Wi-Fi network.
1 Open the Settings application.
See “Opening Settings” on page 268.
2 Touch Wireless & networks > Tethering & portable hotspot.
3 Ensure Portable Wi-Fi hotspot is checked.
4 Touch Portable Wi-Fi hotspot settings.
5 Touch Configure Wi-Fi hotspot.
The Configure Wi-Fi hotspot dialog opens.
You can change the network SSID (name) that other computers see when
scanning for Wi-Fi networks.
You can also touch the Security menu to configure the network with Wi-Fi
Protected Access 2 (WPA2) security, with a preshared key (PSK).
If you touch the WPA2 PSK security option, a password field is added to the
Configure Wi-Fi hotspot dialog. If you enter a password, you will need to enter
that password when you connect to the tablet’s hotspot with a computer or
AUG-3.1-CC-100 Android User’s Guide
Page 78

Connecting to networks and devices 78
other device. Or touch Open in the Security menu to remove security from your
Wi-Fi network.
6 Touch Save.
AUG-3.1-CC-100 Android User’s Guide
Page 79

Connecting to networks and devices 79
Connecting to virtual private networks (VPNs)
Virtual private networks (VPNs) allow you to connect to the resources inside a
secured local network, from outside that network. VPNs are commonly deployed by
corporations, schools, and other institutions so that their users can access local
network resources when not on campus, or when connected to a wireless network.
There are numerous systems for securing VPN connections, including some that
rely on secure certificates or other schemes to ensure that only authorized users
can connect. For information about installing secure certificates, see “Working
with secure certificates” on page 81.
To configure VPN access from your tablet, you must obtain the details from your
network administrator.
Add a VPN 1 Open the Settings application.
See “Opening Settings” on page 268.
2 Touch Wireless & networks > VPN settings.
3 Touch Add VPN.
4 Touch the type of VPN to add.
5 In the screen that opens, follow the instructions from your network
administrator to configure each component of the VPN settings.
6 Touch the Menu button in the top-right of the Application bar and touch
Save.
The VPN is added to the list on the VPN settings screen.
AUG-3.1-CC-100 Android User’s Guide
Page 80

Connecting to networks and devices 80
Connect to a VPN 1 Open the Settings application.
2 Touch Wireless & networks > VPN settings.
The VPNs you’ve added are listed on the VPN settings screen.
3 Touch the VPN to which you want to connect.
4 In the dialog that opens, enter any requested credentials and touch Connect.
When you’re connected to a VPN, you receive an ongoing notification in the
System bar, to the left of the time. If you are disconnected, you receive a
notification that you can use to return to the VPN settings screen so that you
can reconnect to it. See “Managing notifications” on page 26.
Disconnect from a VPN S Touch the notification for the VPN connection in the System bar.
Edit a VPN 1 Open the Settings application.
2 Touch Wireless & networks > VPN settings.
The VPNs you’ve added are listed on the VPN settings screen.
3 Touch & hold the VPN whose settings you want to edit.
4 In the dialog that opens, touch Edit network.
5 Edit the VPN settings you want.
6 Touch the Menu button in the top-right of the Application bar and touch
Save.
Delete a VPN 1 Open the Settings application.
2 Touch Wireless & networks > VPN settings.
The VPNs you’ve added are listed on the VPN settings screen.
3 Touch & hold the VPN you want to delete.
4 In the dialog that opens, touch Delete network.
5 Touch OK in the dialog that asks you to confirm you want to delete the VPN.
AUG-3.1-CC-100 Android User’s Guide
Page 81

Connecting to networks and devices 81
Working with secure certificates
If your organization’s VPN or Wi-Fi networks rely on secure certificates, you must
obtain the certificates and store them in your tablet’s secure credential storage,
before you can configure access to those VPN or Wi-Fi networks on your tablet.
If your network administrator instructs you to download the certificates from a
website, you’re prompted to set a password for the credential storage when you
download the certificates. For more information about working with credential
storage, see “Location & security settings” on page 275.
Android supports DER-encoded X.509 certificates, saved in files with a .crt file
extension (if your certificate file has a .cer, .der, or other extension, you must
change it to .crt or you won’t be able to install it).
Android also supports X.509 certificates saved in PKCS#12 key store files with a
.p12 extension (if your key store has a .pfx or other extension, you much change it
to .p12 or you won’t be able to install it). When you install a certificate from a
PKCS#12 key store, Android also installs any accompanying private key or
certificate authority certificates contained in the key store.
AUG-3.1-CC-100 Android User’s Guide
Page 82

Connecting to networks and devices 82
Install a secure
certificate from your
tablet’s internal storage
1 Copy the certificate or keystore from your computer to the root of its internal
storage (that is, not in a folder).
See “Connecting to a Windows computer via USB” on page 72 or “Connecting
to a Macintosh computer via USB” on page 73 for information about
connecting your tablet to a computer and copying files.
2 Open the Settings application.
See “Opening Settings” on page 268.
3 Touch Location & security.
4 Touch Install from tablet storage.
5 Touch the file name of the certificate or key store to install.
Only the names of certificates that you have not already installed on your tablet
are displayed.
6 If prompted, enter the certificate’s password and touch OK.
7 Enter a name for the certificate and touch OK.
If you have not already set a password for your tablet’s credential storage, you’re
prompted to enter a password for it twice and then touch OK. For more
information about credential storage, see “Location & security settings” on
page 275.
You can now use the certificate that you installed when connecting to a secure
network. For security, the certificate is deleted from the USB storage or SD
card.
AUG-3.1-CC-100 Android User’s Guide
Page 83

83
Google Search
You can search for information on your tablet and on the web using Google Search.
You can also search the web by speaking, instead of typing: see “Voice Search and
Voice Actions” on page 91.
In this section
AUG-3.1-CC-100 Android User’s Guide
“Searching your tablet and the web” on
page 84
“Using Google Search tips and tricks” on
page 88
“Changing Google Search settings” on
page 90
Page 84

Google Search 84
Searching your tablet and the web
You can use Google Search to find information on your tablet and the web.
AUG-3.1-CC-100 Android User’s Guide
Page 85

Google Search 85
Touch to search the web. Or just touch
the Return key.
As you type, search results from your
tablet, previously chosen search results
and Voice Actions, and web search
suggestions appear. Touch one to search
for it again or to open a result or voice
action.
Touch to enter the text of a suggestion in
the Search box, to quickly refine your
search.
Search your tablet and
the web by typing
1 Return Home .
2 Touch the Google Search button at the top-left of the screen.
3 Start typing what you want to search for.
As you type, suggestions from Google web search appear below the Search box,
and results from your tablet and local searches appear to the right.
You can touch a suggestion’s arrow icon to enter it in the Search box. If you do,
new suggestions appear and you can enter more text or touch the arrow icon
next subsequent suggestions to quickly refine your search.
Business listings are indicated by a Maps marker icon . Touch one to open a
business listing panel, with icons you can touch to call, map, get details about,
or add the business to your contacts.
In applications such as Gmail and Contacts, the application’s own search box
opens when you touch the Search button . These search boxes are identified
AUG-3.1-CC-100 Android User’s Guide
Page 86

Google Search 86
by the application’s own icon in the search box. See the documentation for
those applications for information about searching in them.
You can use the Search settings to configure some aspects of Google web
search (for example, whether it personalizes search results for you), and what
tablet features you want to include in searches. See “Changing Google Search
settings” on page 90.
4 If what you’re searching for is in the list of suggestions, tablet search results, or
previously chosen search results, touch it in the list.
The item opens in the appropriate application, such as Contacts or the Browser.
5 If what you’re searching for is not in the list, touch the arrow icon in the Search
box or touch the Return key on the onscreen keyboard to search the web.
The Browser opens, displaying results of a Google Search on the web. See
“Browser” on page 207.
Change what you target
when searching the
tablet
Manage your search
privacy
AUG-3.1-CC-100 Android User’s Guide
Many applications can make some or all of their information searchable from the
Google Search box. Search results are displayed below and to the right of the
Search box as you enter text.
You can change which applications are targetable by Google Search.
1 Open Google Search.
2 Touch the Menu button at the top right and touch Search settings.
3 Touch Searchable items.
The Searchable Items settings list the applications you can target when
searching, along with a description of information they make searchable.
4 Check or uncheck the applications whose information you want to be able to
search.
You can control how your search history is stored and used on your tablet and the
web in a number of ways.
Page 87

Google Search 87
1 Open Google Search.
2 Touch the Menu button at the top right and touch Search settings.
3 Touch Google Search.
4 Check or uncheck
Google of your location when using Google Search, to see local results.
5 Check or uncheck Personalized search depending on whether you want
Google servers to make search suggestions based on your interests and previous
searches.
Use My Location depending on whether you want to inform
6 Touch
Manage search history to open Browser with a web-based interface for
viewing and managing the web search history associated with your Google
Account.
AUG-3.1-CC-100 Android User’s Guide
Page 88

Google Search 88
Using Google Search tips and tricks
The following techniques are examples of shortcuts to getting the most out of
Google Search and Voice Search. For the latest list of tips and tricks, visit the
Google Help Center.
What you want What to type or say Examples
Sports information [team’s name] San Francisco Giants
Pictures Pictures of [topic]
images of [topic]
Convert measurements [original measurement] in
[new measurement]
Movie showtimes Movie”
Movie [location]
[movie name]
Word definition Define [word] Define campanile
Weather forecast Weather
Weather [location]
Identify an area code Area code [###] Area code 215
Identify a Zip code Zip code [#####] Zip code 46202
Tim e Tim e
Time [location]
Flight information [Airline] [flight number] American airlines flight
Translation Translate to [language]
[phrase]
Pictures of San Francisco
Images of cats
30 degrees Celsius in Fahrenheit
Movie
Movie Chicago
The Horse’s Mouth
Weather
Weather Detroit
Time
Time in London
390
Translate to Spanish,
Where is the Palace Hotel?’
Calculator [A math phrase] 75 divided by 6
AUG-3.1-CC-100 Android User’s Guide
Page 89

Google Search 89
What you want What to type or say Examples
Food [Type of food]
[Type of food] in [location]
Mexican food
Mexican food in Urbana,
Illinois
AUG-3.1-CC-100 Android User’s Guide
Page 90

Google Search 90
Changing Google Search settings
You use the Google Search settings to configure which data on your tablet you want
to be able to search, manage your privacy, and to configure a number of other
settings.
S To change Google Search settings, touch in the Google Search box on the Home
screen to open Google Search, touch the Menu button at the top right, and
touch Search settings.
Searchable items settings
Google Search settings
The Searchable items settings list the applications on your tablet whose data you
can search when using Google Search. You can check and uncheck the kinds of
data you can search for on your tablet. See “Change what you target when
searching the tablet” on page 86.
Use My Location Check to include your location when using Google Search and
other Google services. When you check this option, you’re asked whether you
consent to allowing Google to use your location when providing these services.
Personalized search Check to use information Google stores about your past
searches to see search results personalized for you.
Google Account The Google Account used for personalized search results and
other Google Search settings. Touch to switch to another Google Account.
Manage search history Opens Browser with a web-based interface for viewing
and managing the web search history and other information associated with your
Google Account.
Always use google.com Check to view web search results on http://
www.google.com, instead of your country’s local Google Search web site.
Terms of Service Opens Browser with the Google Search terms of service.
AUG-3.1-CC-100 Android User’s Guide
Page 91

Voice Search and Voice
Actions
You can search for information on the web and control your tablet by speaking,
with Voice Search. You can also use Voice Actions to control your tablet in a
number of ways, such as sending messages or setting Clock alarms.
91
In this section
AUG-3.1-CC-100 Android User’s Guide
“Searching the web by speaking” on
page 92
“Using Voice Actions” on page 94
“Changing Voice Search settings” on
page 97
Page 92

Voice Search and Voice Actions 92
Searching the web by speaking
You can use Voice Search to search the web by speaking, instead of by typing.
To learn about searching the web and your tablet by typing, see “Google Search”
on page 83.
Search the web by
speaking
1 Return Home.
2 Touch the Microphone button at the top-left of the screen.
The first few times you open Voice Search, it offers hints about how to use it
and offers to play an introductory video. You can touch Speak now to start
using Voice Search at any time.
Subsequently, a dialog opens, prompting you to speak now. You can touch Help
to open the hints screen again.
AUG-3.1-CC-100 Android User’s Guide
Page 93

Voice Search and Voice Actions 93
3 Speak the words you want to search for on the web.
You can simply say words you want to search for, or you can use the techniques
described in “Using Google Search tips and tricks” on page 88.
You can also speak Voice Actions, which are detailed in “Using Voice Actions”
on page 94.
When you’re finished speaking, Voice Search analyzes your speech and Browser
opens, displaying results of a Google Search on the web. See “Browser” on
page 207.
If you have the Use My Location setting checked in the Google Search
settings, local results are featured in your search results (see “Changing Google
Search settings” on page 90).
If Google Search didn’t understand what you said, it presents a list of similarsounding search terms and actions, which you can touch to continue with that
action.
Some Voice Actions open another application, where you’re prompted to
confirm and complete the action, for example, sending messages opens Gmail
and setting an alarm opens Clock.
AUG-3.1-CC-100 Android User’s Guide
Page 94

Voice Search and Voice Actions 94
Using Voice Actions
You can use Voice Actions in Voice Search to text your contacts, get directions,
send email, and to perform a number of other common tasks, in addition to
searching the web.
For example, you can say:
G “Set alarm for 8:30am”
G “Send email to Marcus Foster. Subject: Coming tonight? Message: Hope to see
you later.”
G “Navigate to Mike's bikes in Palo Alto”
For the current list of languages and locations supported by Voice Actions, visit the
Google Mobile Help Center at http://www.google.com/support/mobile
You can search and control your tablet with the following Voice Action commands.
Say
Words you want to search
for
“Map of” followed by an
address, name, business
name, type of business, or
other location
“Directions to” followed
by an address, name,
business name, type of
business, or other destination
AUG-3.1-CC-100 Android User’s Guide
Followed by one or more
optional words
Results Examples
Browser opens with the
result of your search.
Maps opens with the
result of a Maps search
for the words you spoke.
Maps opens with directions to your destination,
or a list of possible
matching destinations.
“bike shoes”
“Map of Golden Gate
Park, San Francisco.”
“Directions to 1299
Colusa Avenue, Berkeley,
California.”
Page 95

Voice Search and Voice Actions 95
Say
Followed by one or more
optional words
“Navigate to,” followed by
an address, name, business name, type of business, or other destination
The name of one of your
contacts.
“Go to” followed by a
search string or URL
“Send email” “To” one or more contacts
“Cc” one or more contacts
“Bcc” one or more contacts
“Subject” followed by a
subject
“Message” followed by
the message you want to
send (speak any punctuation you want to include)
Results Examples
Maps opens with spoken,
turn-by-turn directions to
“Navigate to Union
Square, San Francisco.”
your destination, or a list
of possible matching destinations.
If there is a single match,
“Mike LeBeau”
Contacts opens with
details about your contact. Or if there is more
than one match, you’re
prompted to pick a contact.
Voice Search searches for
“Go to Google.com”
a matching web site and
if it finds one, opens its
URL in Browser. Otherwise, it opens the result of
a Google search in the
Browser.
Gmail opens where you
can complete the message before sending it.
“Send email to Hugh
Briss, subject, new shoes,
message, I can’t wait to
show you my new shoes,
period.”
AUG-3.1-CC-100 Android User’s Guide
Page 96
Voice Search and Voice Actions 96
Say
Followed by one or more
optional words
“Note to self” followed by
the message you want to
send to yourself
“Set alarm” “Time” or “for” followed
by a time, such as
“10:45am” or “20 minutes from now”
“Label” followed by a
label for the alarm
“Listen to” followed by
words for music you want
to search for, such as the
name of a song, artist, or
album
Results Examples
Gmail opens where you
can complete a message
“Note to self: remember
the milk”
to yourself before sending it.
Clock opens, prompting
you to confirm the details
“Set alarm for 7:45pm,
label, switch the laundry”
before setting the alarm.
YouTube opens with the
results of your search for
“Listen to: smells like
teen spirit”
music. If you install
another application that
works with the “Listen to”
Voice Action, you’re
prompted to pick which
application you want to
open.
AUG-3.1-CC-100 Android User’s Guide
Page 97

Voice Search and Voice Actions 97
Changing Voice Search settings
You use the Voice Search settings to configure which data on your tablet you want
to be able to search, manage your privacy, and to configure a number of other
settings.
S To change Voice Search settings, touch the Voice Search icon on the Home
screen to open Voice Search, touch the Menu button at the top right, and
touch Settings.
Language Displays the language you want Voice Search to recognize. Touch to
change languages.
SafeSearch Opens a dialog where you can set whether you want Google
SafeSearch filtering to block some results when you search: Block no search
results (off), only explicit or offensive content (moderate), or both explicit or
offensive content (strict).
Block offensive words Check to replace offensive words that Voice Search
correctly or incorrectly recognizes with symbols in place of text.
Personalized recognition Check to have Voice Search tailor results to your
voice, by recording and then learning from your searches and results over time,
storing the results with your Google Account. Uncheck to stop Google from
recording and learning from your searches.
Google Account dashboard Touch to open Browser with a page that you can
use to review and manage the details about what information Google stores about
you and your activities with your Google Account.
AUG-3.1-CC-100 Android User’s Guide
Page 98

Voice Search and Voice Actions 98
AUG-3.1-CC-100 Android User’s Guide
Page 99

99
Accounts
You can sync contacts, email, calendar events, and other information with your
tablet from multiple Google Accounts or other kinds of accounts, depending on the
applications installed on your tablet.
For example, you could start by adding your personal Google Account, so your
personal email, contacts, and calendar are always available. Then you could add an
account from work, so you can read your work email and have your work contacts
handy.
You configure how your account interacts with the applications on your tablet using
the Account & Sync settings and the setting s in Gmail, Calendar, Email, and other
applications. Use a web browser to change your password and other general
account settings.
In this section
AUG-3.1-CC-100 Android User’s Guide
“Adding and removing accounts” on
page 100
“Configuring account sync and display
options” on page 103
Page 100

Accounts 100
Adding and removing accounts
You can add multiple Google Accounts. You may also be able to add other kinds of
accounts, depending on your applications. Some you can add in the Accounts &
Sync settings, as described in this section. Others you add using an application
that works with those kinds of accounts; for example, you can add IMAP and POP3
email accounts with the Email application (see “Adding and changing email
accounts” on page 200).
Add an account To add some accounts, you may need to obtain details from an IT support
representative about the service to which the account connects. For example, you
may need to know the account’s domain or server address.
1 Open the Accounts & Sync settings.
You can do this by opening the Settings application and touching Accounts &
sync. Many applications also have an Accounts button or menu item on the
screens where you work with accounts. For example, in the Contacts application
you can touch the Menu button in the top-right of the Application bar and
then touch Accounts.
The Accounts & Sync Settings screen displays your current sync settings and a
list of your current accounts.
See “Configuring account sync and display options” on page 103.
AUG-3.1-CC-100 Android User’s Guide
 Loading...