

Page 1
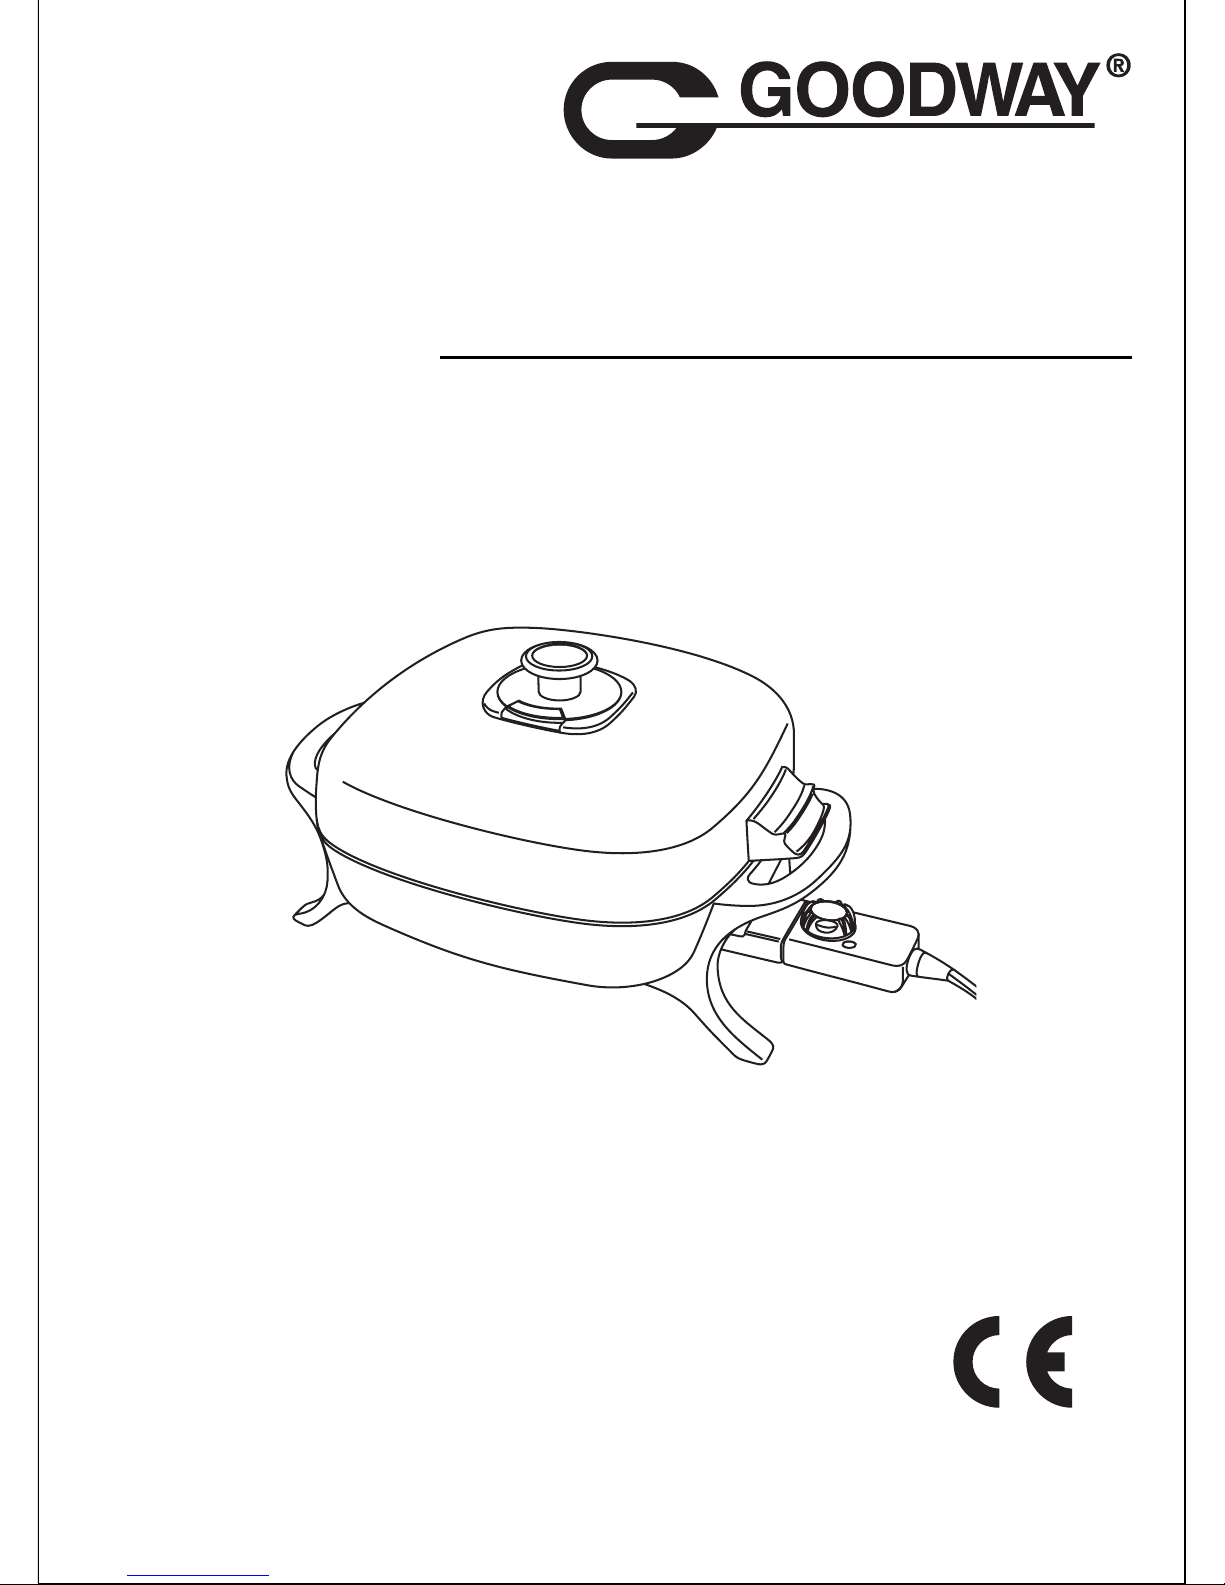
Electric Frypan
MODEL: GR-331N
Instruction Manual
Page 2

IMPORTANT SAFEGUARDS
To reduce the risk of personal injury or property damage when using electrical
appliances, basic safety precautions should always be followed, including the
following:
READ ALL INSTRUCTION
BEFORE USING
1. Read all instructions.
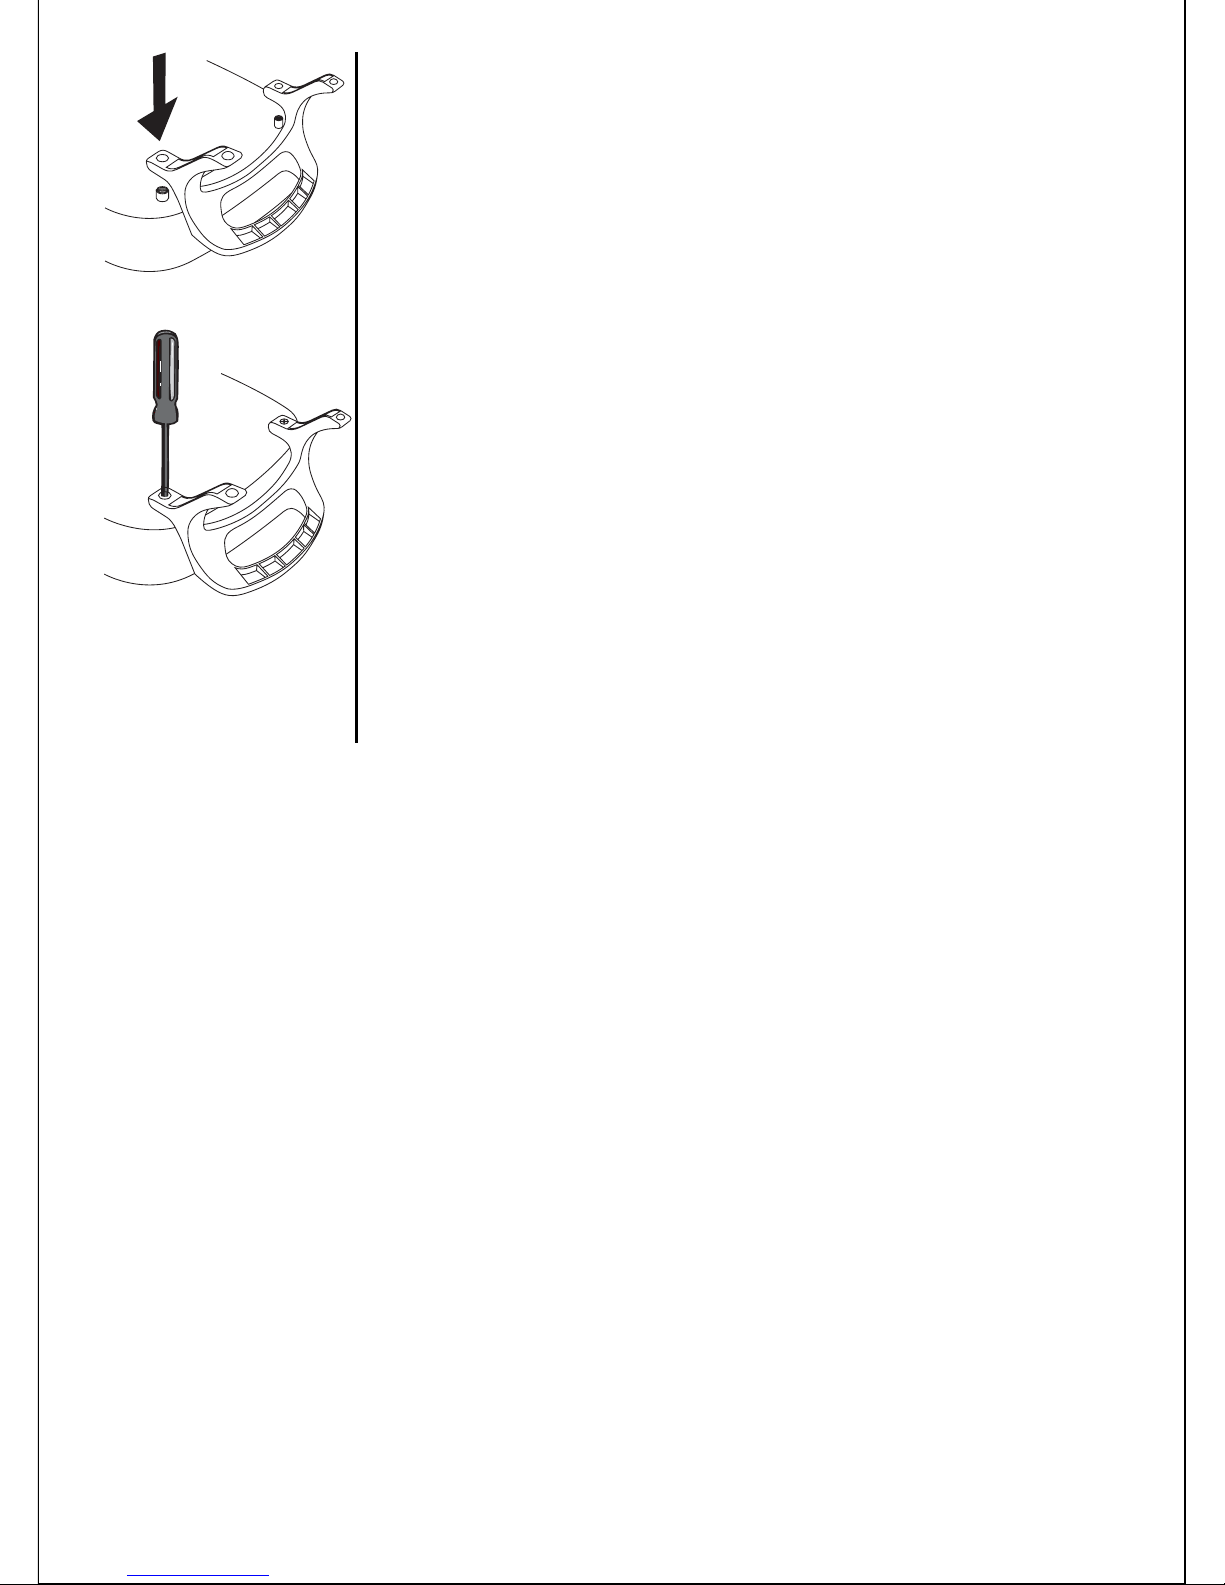
2. Be sure that handles are assembled and fastened properly before
using this appliance. (see Fig. A & B).
3. Do not touch hot surfaces. Use handles or knobs.
4. To protect against electrical shock, do not immerse control, cord or plug
in water or other liquid.
5. Close supervision is necessary when any appliance is used by or near
children.
6. Unplug from outlet when not in use and before cleaning. Allow to cool
before putting on or taking off parts, and before cleaning the appliance.
7. Do not operate any appliance with a damaged cord or plug or in the
event the appliance malfunctions or has been damaged in any manner.
Do not operate if the legs become cracked or damaged. Return the
appliance to the authorized service center for examination, repair or
electrical or mechanical adjustment.
8. The use of accessory attachments not recommended by the appliance
manufacturer may cause injuries.
9. Do not use outdoors.
10. Do not let cord hang over edge of table or counter or touch hot surfaces.
11. Do not place on or near a hot gas or electric burner or in a heated oven.
12. It is recommended that this appliance not be moved when it contains
hot oil or other hot liquid. If it must be moved when it contains hot oil or
other hot liquid, use extreme caution.
Page 3

13. Always attach heat control to appliance first, then plug cord into wall
outlet. To disconnect, turn control to OFF then remove plug from wall
outlet.
14. Do not use appliance for other than intended use.
15. The appropriate connector must be used.
16. The connector must be removed before the appliance is cleaned and that
the appliance inlet must be dried before the appliance is used again.
17. This appliance is not intended for use by persons (including children) with
reduced physical, sensory or mental capabilities, or lack of experience and
knowledge, unless they have been given supervision or instruction
concerning use of the appliance by a person responsible for their safety.
18. Children should be supervised to ensure that they do not play with the
appliance.
SAVE THESE INSTRUCTION MANUAL
FOR HOUSEHOLD USE ONLY
Page 4
HOW TO ASSEMBLE
1. Place frypan upside down on table or counter.
2. Position handles on the frypan, lining up holes in the
handles with mounting projections on the frypan.
(Fig. A)
3. Replace screws and fasten securely. (Fig. B) Caution:
Overtightening can result in stripping of screws or
cracking of handles and legs.
4. To assure proper installation of frypan handles, place
assembled unit on a flat surface. It should sit level
with no leg rock.
Fig.A
Fig.B
Page 5
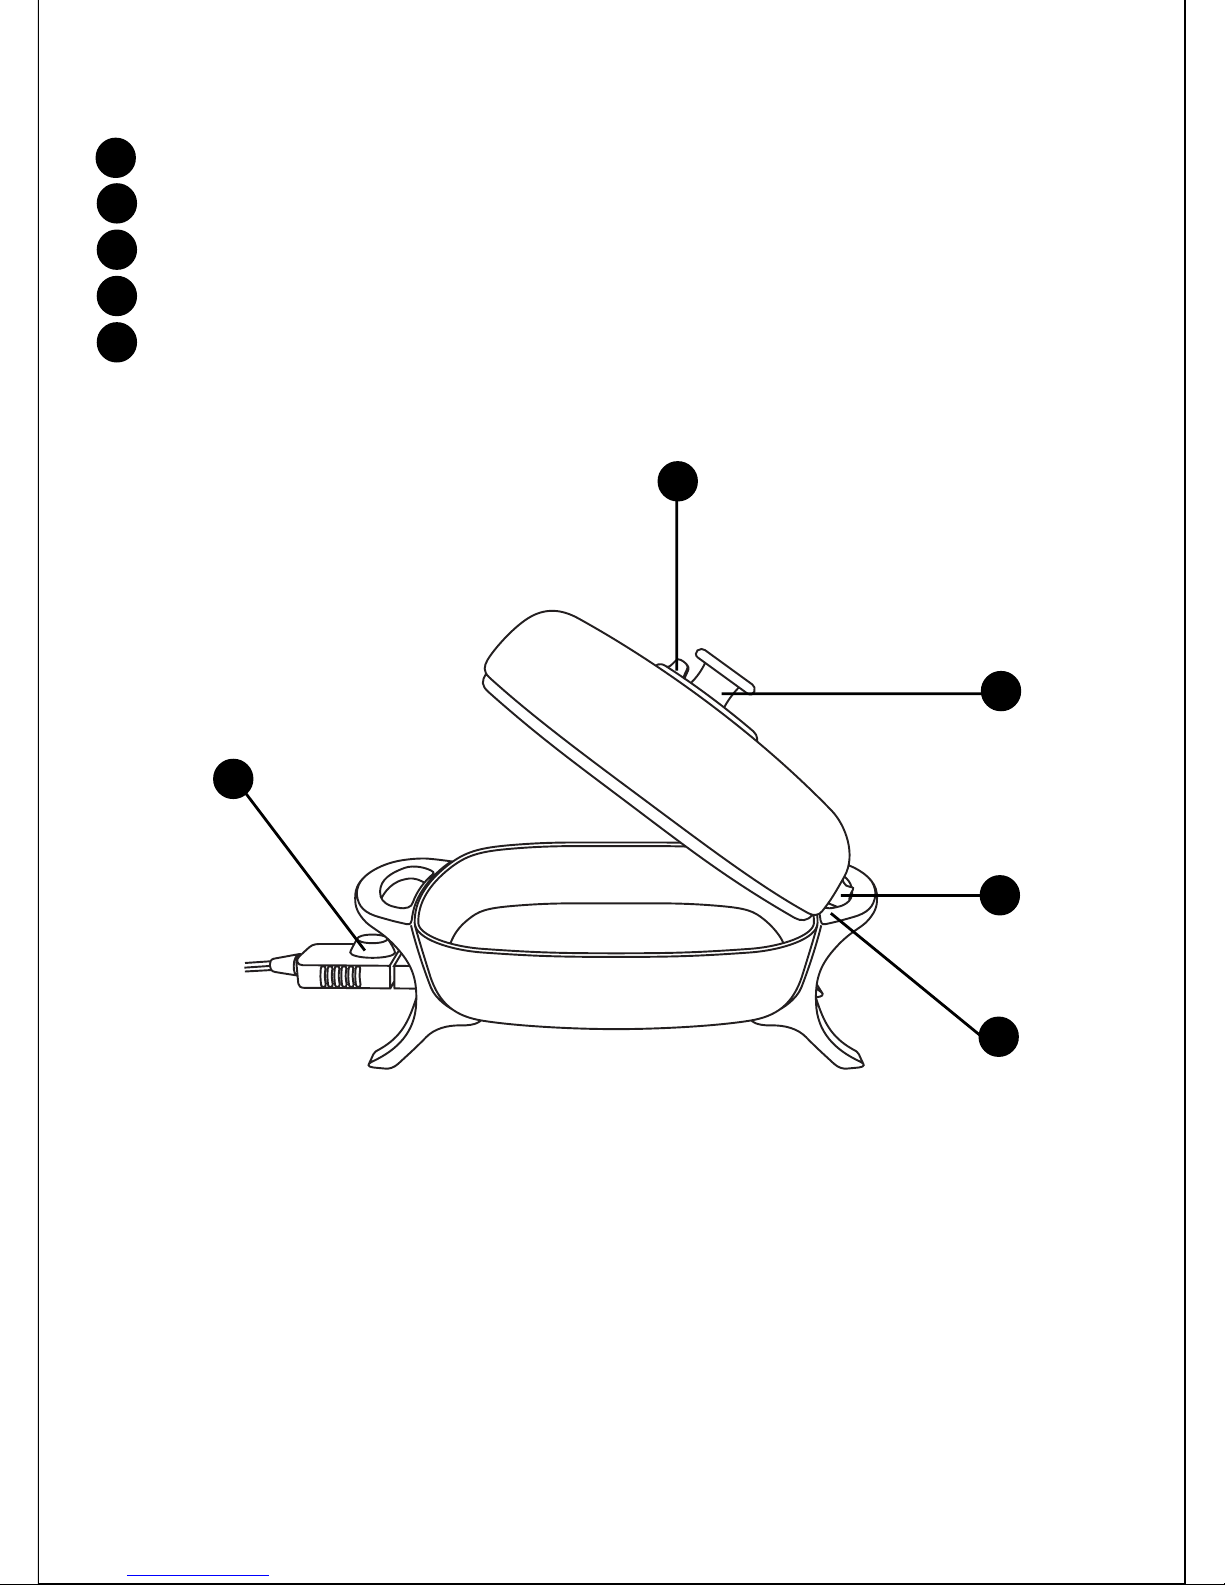
GETTING TO KNOW YOUR FRYPAN
Steam Vent
Lid Knob
Tilt Lid
Cool Touch Handles
Temperature Control
1
2
3
4
5
2
3
4
5
1
Page 6
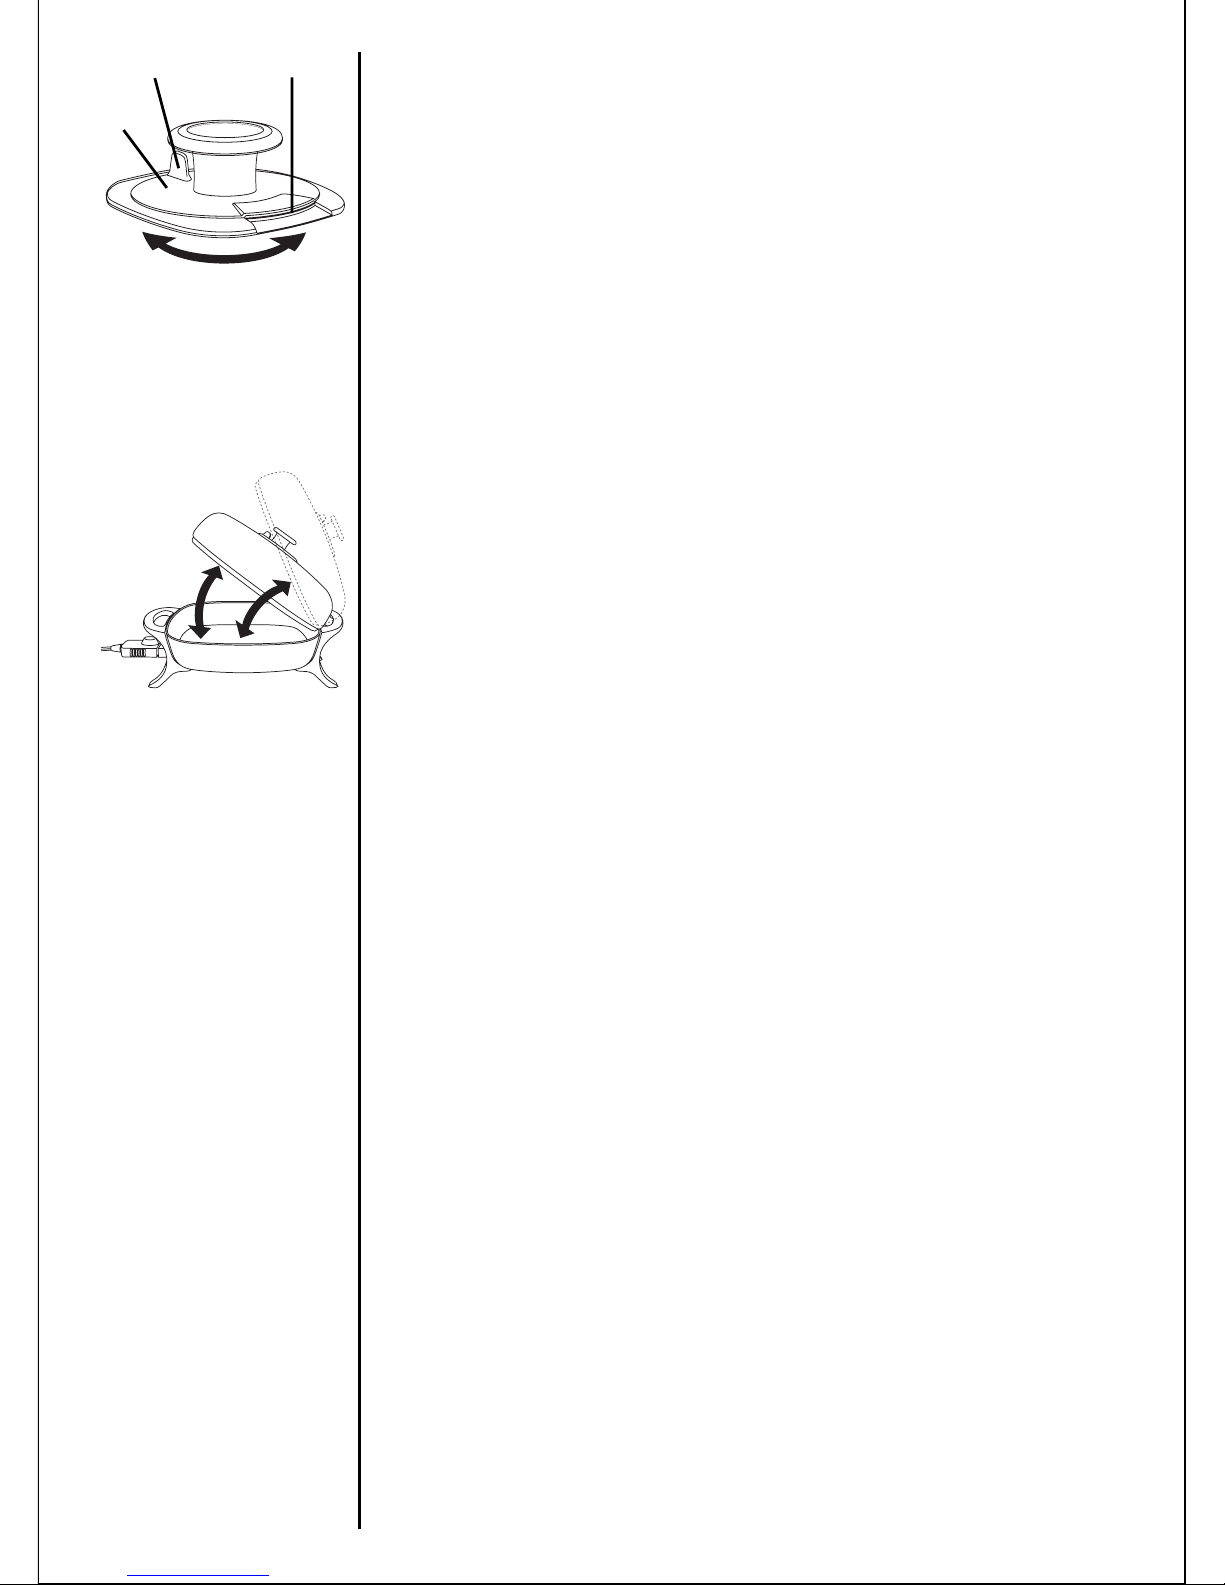
Steam Vent
The lid is fitted with a steam vent located within the lid
knob. The amount of venting can be adjusted as required
by the recipe. (Fig. 1)
Tilt lid
The side handle on the lid has been designed to “slot” into
the top opening of the body handle, saving valuable bench
space while you tend to the cooking. It also helps to
reduce spattering. (Fig. 2) You can select 2 tilt angles.
Open
Close
Knob
Skirt
Vent
Fig.1
Fig.2
Page 7

HOW TO USE
Before using for the first time, become familiar with the frypan features. Wash
frypan in dishwasher or in warm, sudsy water, rinse and dry. Do not immerse
the temperature control or let the control come in contact with any liquid. To
“season” the nonstick properties of the surface coating, rub the cooking surface
of the frypan lightly with cooking oil. Repeat periodically to maintain the
nonstick properties.
1. Insert the temperature control into the frypan so the two electrical pins
on the frypan are fully inserted into the heat control.
2. Turn the temperature control to desired temperature (see table for
cooking temperatures). Remove cover and preheat frypan. Pilot light
goes off when selected temperature is reached (this takes approxi
mately 10 to 15 minutes).
3. Prepare food for cooking.
4. Because the frypan features a nonstick finish, food may be perpared
with or without shortening, according to taste.
5. Place food in frypan and cook according to temperature-timetable. Heat
should be adjusted according to personal perference and particular
food being cooked. During cooking, pilot light will go on and off
indicating desired temperature is being maintained.
6. Turn heat control to OFF when cooking is completed. Unplug heat
control from wall outlet then from appliance.
Note: The cooking temperature listed in this temperature-timetable are
estimates. Adjust the cooking temperature up or down to achieve the
results you prefer. Exact cooking time will vary with the specific
cooking temperature you select, the degree of doneness you prefer
and other variable such as shape of meat and starting cooking
temperature of food.
Page 8

CARE AND CLEANING
1. Before initial use and after each subsequent use, wash frypan in
dishwasher or in warm sudsy water, rinse and dry. Do not immerse the
temperature control in water or let it come in contact with any liquid.
Periodically “season” the cooking surface by rubbing with cooking oil to
maintain the nonstick properties.
2. For best results use nylon, plastic, wooden or rubber utensils. Do not
use metal utensils as they may scratch the nonstick surface. Do not cut
foods on the cooking surface.
3. If there is any food residue remaining on the cooking surface or cover, it
should be removed after each use. To do so, scrub gently with a mild
abrasive or a fine cleansing pad-nylon mesh or other ordinary cleansing
pad. Do not use steel wool or abrasive kitchen cleaners. Soaking the
frypan to loosen food residue is not necessary. If, however, soaking the
frypan is desired, do not soak for more than two hours. Soaking for
more than two hours may damage the nonstick finish.
4. In time, the nonstick finish may darken over the heating element. This is
normal and will not seriously alter the release properties of the surface.
To remove this discoloration, use a commercial cleaner designed for
cleaning surfaces.
5. After treating the frypan with a commercial cleaner. It is recommended
that the cooking surface be wiped lightly with a cooking oil before using.
The outside finish of the frypan is easy to keep attractive and looking
new. Simply wipe away spills or drips as they occur. If food should
happen to burn on, it is easily removed with warm, sudsy water and a
dish cloth. Any food residue remaining can be whisked away with a
gentle stroke of a nylon mesh pad. Rinse and wipe dry.
IMPORTANT: To ensure continued accuracy of the temperature control,
avoid rough handling in use and storage. The connector must be
removed before the appliance is cleaned and that the appliance
inlet muat be dried before the appliance is used again.
Page 9

TEMPERATURE - TIMETABLE
Approximate Cooking
(Time in Minutes)
Food
Temperature(˚C)
150˚ - 160˚
135˚ - 150˚
160˚ - 175˚
120˚ - 135˚
120˚ - 135˚
160˚ - 190˚
150˚ - 160˚
160˚ - 175˚
160˚ - 175˚
160˚ - 190˚
160˚ - 175˚
190˚ - 205˚
160˚ - 190˚
160˚ - 190˚
150˚ - 175˚
150˚ - 160˚
160˚ - 175˚
150˚ - 160˚
175˚ - 205˚
175˚ - 205˚
175˚ - 205˚
175˚ - 205˚
FRYING
BACON
Canadian Bacon
Chicken
Eggs, Fried
Eggs, Scrambled
Fish
French Toast
Ham 1/2” thick
3/4” thick
Hamburgers 1/2” thick
Liver
Minute Steak
Pork Chops, 1/2” thick
3/4” thick
Potatoes, cottage fried
Sausage, link
Precooked
Sandwiches, grilled
Steak, Beef 1” thick
Rare
Medium
Steak, Beef 1 1/2” thick
Rare
Medium
8
3
25
3
3
5
4
10
14
8
5
4
15
20
10
20
10
5
6
10
8
18
10
4
40
5
5
10
6
12
16
12
10
5
20
25
12
30
12
10
7
12
10
20
-
-
-
-
-
-
-
-
-
-
-
-
-
-
-
-
-
-
-
-
-
-
Page 10
BRAISING &
ROASTING
Browning
Braising*
Roasting (on rack)
STEWING
Browning
Stewing*
CASSEROLE
DISHES
Pancakes
BAKING
Pancakes
Upside Down cake
HOLDING TEMPERATURE
(after cooking period)
160˚ - 205˚
95˚ - 105˚
160˚ - 175˚
5
45
60
10
60
90
-
-
-
160˚ - 205˚
95˚ - 205˚
10
30
15
90
-
-
Warm - 205˚
30 60-
175˚ - 205˚
105˚ - 150˚
2
25
3
35
-
-
Warm
• Add additional liquid during cooking, if necessary, to obtain desired
consistency.
Approximate Cooking
(Time in Minutes)
Food Temperature(˚C)
 Loading...