

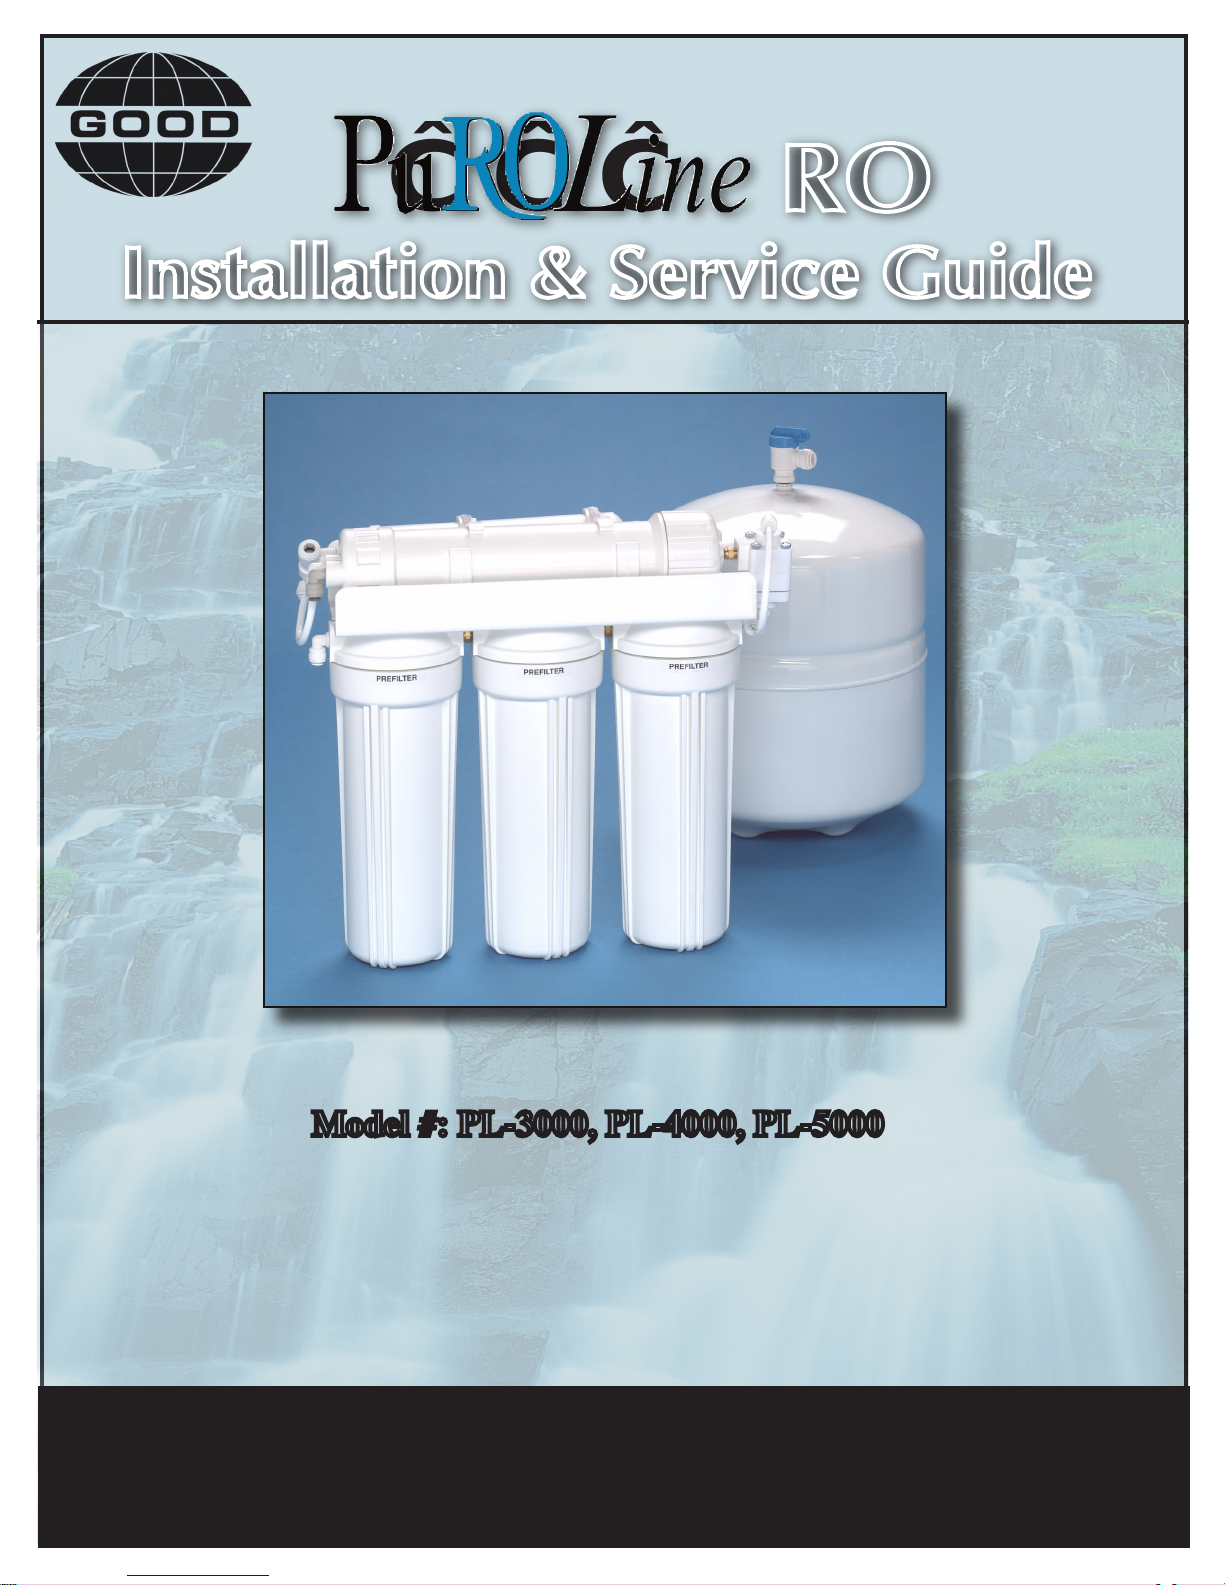
Good Water Warehouse PL-3000, PL-4000, PL-5000 Installation & Service Manual
ÊÊÊÊККККККККККККК,"К
ÃÌ>>ÌÊEÊ-iÀÛViÊÕ`i
Model #: PL-3000, PL-4000, PL-5000
Please read this manual carefully
Please Read This Manual Carefully Before Installation.
before attempting installation.
Introduction
ATC-sretemirePlacimehC
ssendraH )gpg02<(L/gm053<
)eF(norI L/gm1.0<
)NM(esenagnaM L/gm50.0<
H(edifluSnegordyH
2
)S L/gm00.0
LC(enirolhC
2
) L/gm0.01-1.0
CFT-ylppuSretaWecruoS
etavirp/ytinummoC detanirolhC-noN
erusserpmetsyS isp001-03
erutarepmeT 4o83-
o
04(C
o
001-
o
)F
egnarHp 0.11ot0.3
levelSDTylppusmumixaM L/gm0002
ytidibruT )UTN(ytidibrutten0.1<
CFT-sretemirePlacimehC
ssendraH )gpg02<(L/gm053<
)eF(norI L/gm1.0<
)NM(esenagnaM L/gm50.0<
H(edifluSnegordyH
2
)S L/gm00.0
LC(enirolhC
2
) L/gm00.0
ATC-ylppuSretaWecruoS
etavirp/ytinummoC detanirolhC
erusserpmetsyS isp001-03
erutarepmeT 4o83-
o
04(C
o
09-
o
)F
egnarHp 0.8-0.4
levelSDTylppusmumixaM L/gm0051
ytidibruT )UTN(ytidibrutten0.1<
Read this entire service guide before beginning installation.
This Reverse Osmosis Drinking Water System has been designed for quick and simple installation and maintenance
. By carefully reading this instruction manual and following the operational guidelines you will insure a successful
installation and reliable operation. Routine maintenance is essential to the longevity and performance of the system.
Filters should be changed every six to twelve months depending on the quality of the feed water supply.
" /" -Ê",Ê"*,/"
TFC - Thin Film Composite
CTA - Cellulose Tri-Acetate
1/"
DO NOT USE THIS SYSTEM WHERE THE WATER IS MICROBIOLOGICALLY UNSAFE OR OF UNKNOWN
QUALITY. THIS SYSTEM IS FOR USE ON POTABLE WATER ONLY. SOURCE WATER EXCEEDING CHEMICAL
PARAMETERS REQUIRES PRETREATMENT.
Preparation
Starting Your Installation
Check the following list of components to ensure that all
parts are packed with your system.
1 - Storage Tank
1 - RO System
1 - Faucet
1 - Installation Kit
Determine the location for the installation of the RO
system. Avoid locations where the system might come
in contact with hot water pipes or other hazards.
Determine the location for the faucet. Check to see that
drilling the faucet hole will not damage pipes or wires
running underneath the sink.
Determine the location for the storage tank. A maximum
distance from tank to faucet of 15 feet is possible. The
system will produce a faster flow at the faucet with the
shortest tubing run from tank to faucet.
All tubing is individually labeled and color coded for ease of installation.
1/4” Black - Connects the feed water valve to the RO pre-filter
3/8” White - Connects the RO membrane product port to the storage tank
1/4” Orange - Connects the membrane brine port to the drain connector
3/8” Blue - Connects the postfilter to the faucet
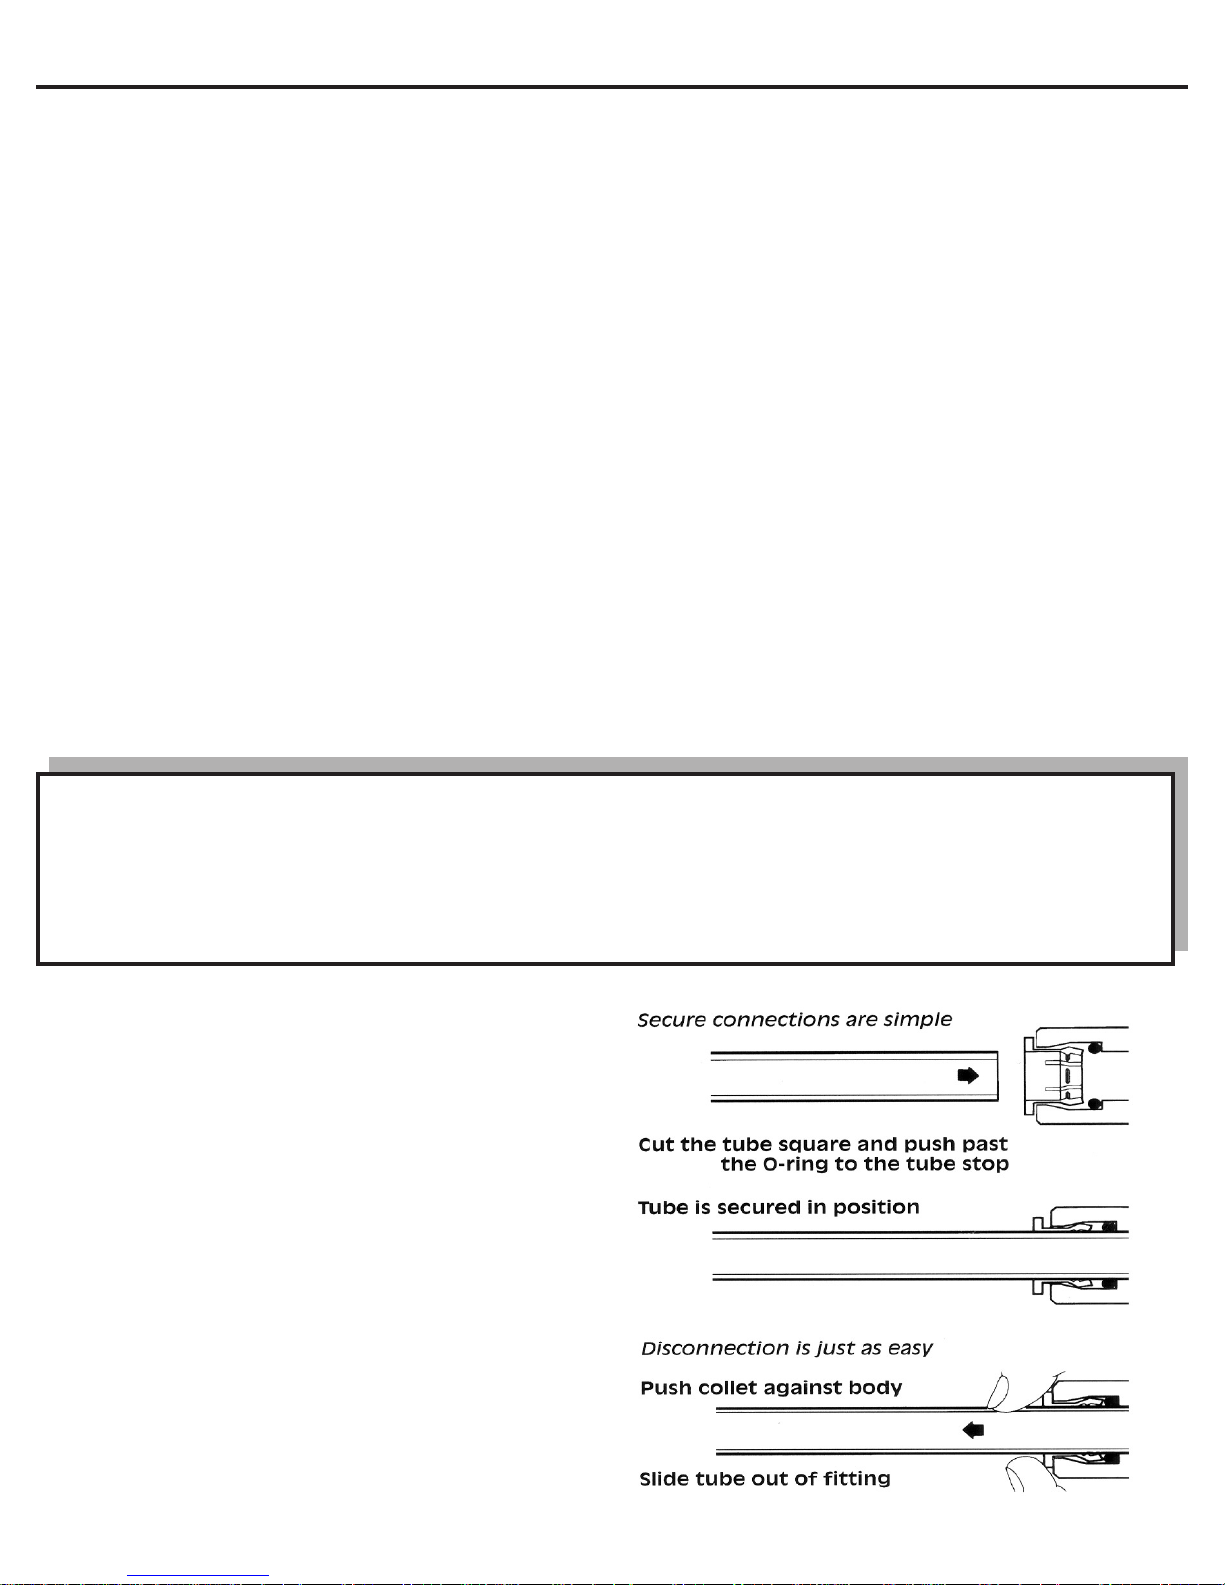
Fittings and Tubing
John Guest™ fittings are used throughout the system.
To insure a optimal seal, tubing should be cut with the end
square. An angled cut or distortion of the tubing will not
provide an efficient seal and may cause leaks.
To Install a tube, push in the collet until it seats firmly. To
remove a tube, push in the collet and pull out the tube.
 Loading...