

Page 1
USER GUIDE
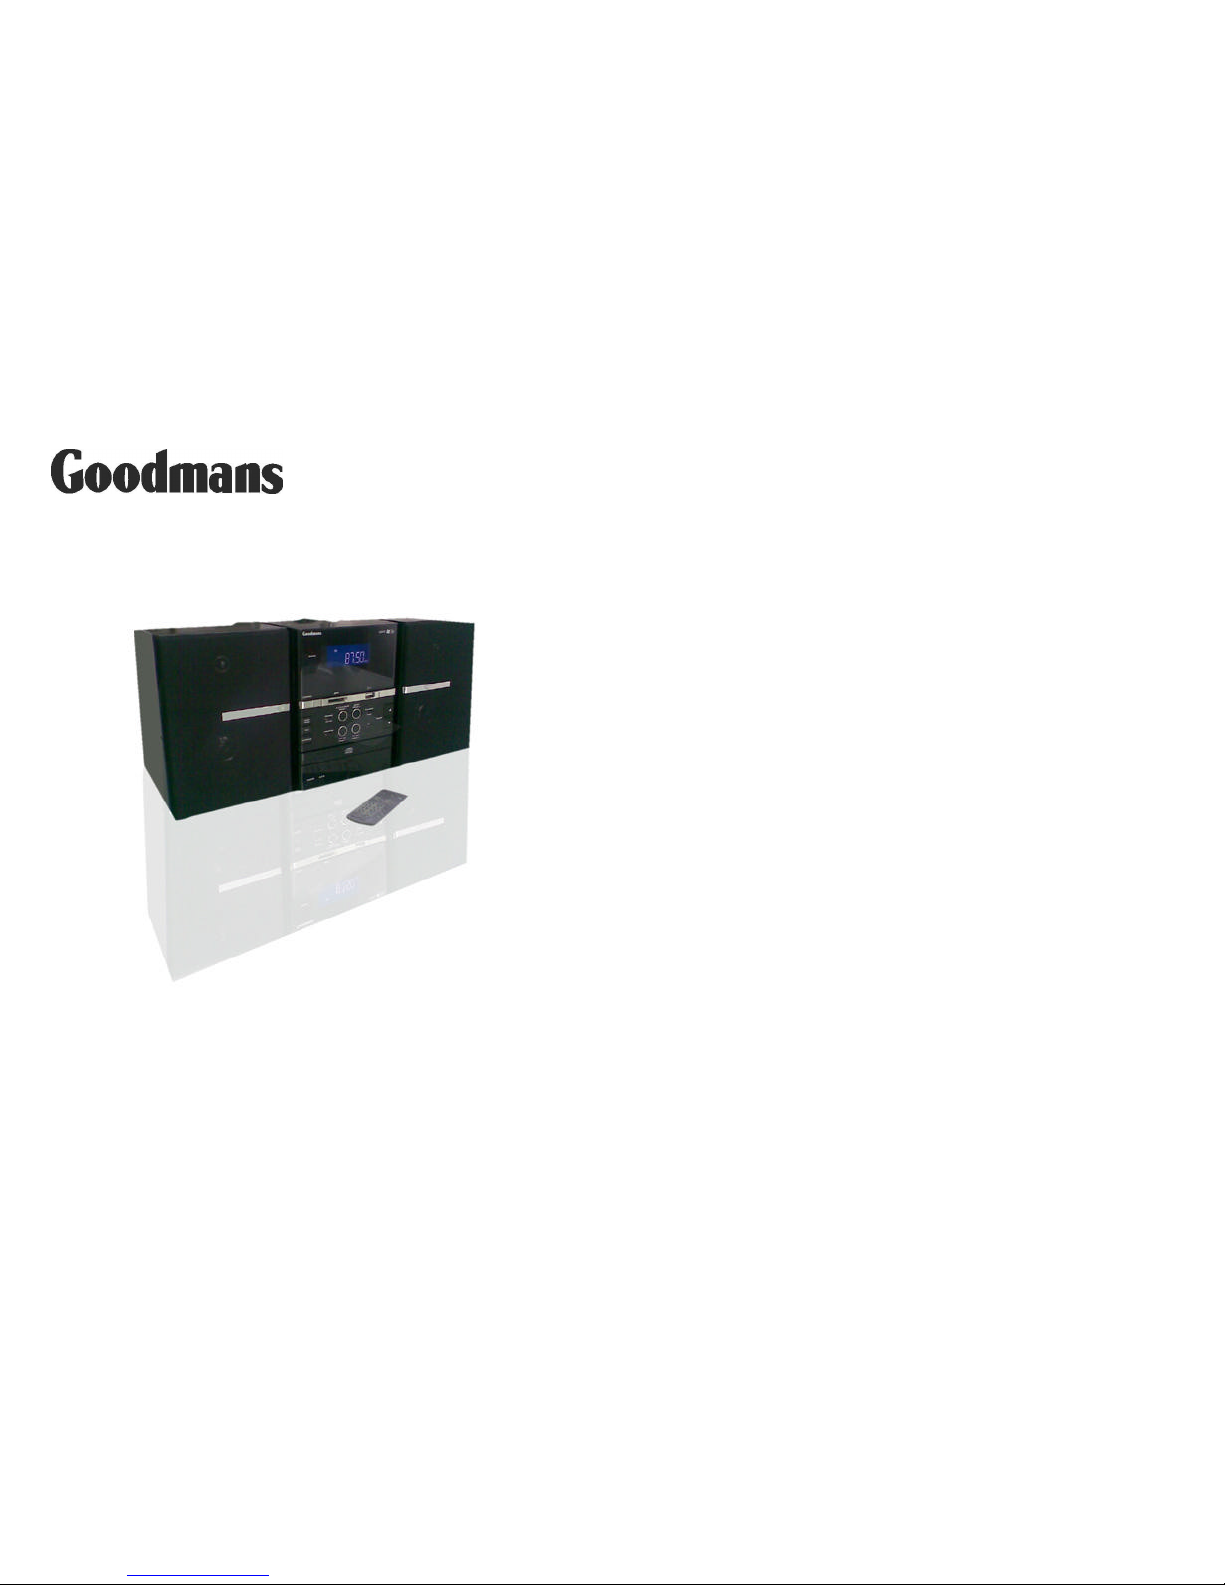
MICRO 1465i
CD MICRO SYSTEM WITH USB/SD AND iPod DOCKING
Please read these instructions before operating and keep for future reference
- 1 -
Table of Contents Page No
INTRODUCTION............................................................................................................... 2
IMPORTANT NOTES ........................................................................................................2
ELECTRICAL INFORMATION ............................................................................................3
IMPORTANT SAFETY INFORMATION...............................................................................4
LOCATION OF CONTROLS AND FUNCTIONS ..................................................................5
SETTING UP AND CONNECTING .....................................................................................6
CLOCK AND TIMER..........................................................................................................8
BASIC OPERATION.......................................................................................................... 9
TUNER OPERATION ........................................................................................................9
IMPORTANT NOTES ON PLAYING CDS.........................................................................10
COMPACT DISC OPERATION........................................................................................11
MP3 or WMA DISC OPERATION...................................................................................... 12
iPod® OPERATION .........................................................................................................13
PLAYING MP3/WMA MUSIC FILES FROM A USB DEVICE...............................................15
PLAYING MP3/WMA MUSIC FILES FROM A SD/MMC CARD ........................................... 15
CARE AND MAINTENANCE ............................................................................................15
TROUBLESHOOTING GUIDE ......................................................................................... 16
SPECIFICATIONS...........................................................................................................17
Page 2

- 2 -
INTRODUCTION
This instruction manual is important to you. Please read it. In a short time it shows exactly how to
connect, operate and adjust this unit for best performance.
It can save you money. It shows simple things to do and check before you call for help and save the
cost of unnecessary service or call out charges.
Please save the carton and packing material – they may be useful if you ever need to transport the unit
In the box:
The following items are packed with the unit:
Remote control unit (complete with “button cell” battery)
2 x Speaker unit
5 x dock adaptor
1 x dock dust cover
IMPORTANT NOTES
Your hearing is important to you and to us so please take care when operating this equipment. It is
strongly recommended that you follow the listed guidelines in order to prevent possible damage to, or
loss of hearing.
Establish a safe sound level
Over time your hearing will adapt to continuous load sounds and will give the impression that the
volume has in fact been reduced. What seems normal to you may in fact be harmful. To guard against
this, set the initial volume of the equipment to a low level.
Once you have established a comfortable listening level do not increase the sound level further. The
following list of typical sound levels may assist you in recognizing just how loud you have set the volume
level.
Decibel
Level dB Example
30 db Quiet library, soft whisper
40 dB Living room, fridge freezer, bedroom away from traffic
50 dB Normal conversation, quiet office, light traffic
60 dB Electric sewing machine
70 dB Vacuum cleaner, hair dryer, noisy restaurant
The following noise can be harmful under constant exposure:
80 dB Average city traffic, alarm clock buzzer at 2 feet, food mixer
90 dB Motor cycle, heavy goods vehicle, petrol lawn mower
100 dB Pneumatic drill, chain saw, discothèque/night club
120 dB Rock concert, thunderclap
Permanent loss of hearing:
140 dB Threshold of pain, gunshot 2 feet away
180 dB Rocket launching pad
- 3 -
ELECTRICAL INFORMATION
This appliance is fitted with BS1363/A 13 amp plug .If is not suitable for your supply sockets it must be
removed and replaced, please follow the wiring instruction below. The plug removed must be disposed
of immediately. It must not be plugged into a supply socket as this will be an electrical hazard .If the fuse
needs to be replaced it must be of the same rating and ASTA approved to BS1362.If the plug is
changed, a fuse of the appropriate rating must be fitted in the plug adapter or at the distribution board. If
the fuse in a moulded plug is replaced the fuse cover must be refitted before the appliance can be used.
Wiring Instructions
The supply cable will be either 2-core or 3-core. Follow the appropriate wiring instructions given below.
In both cases ensure that the outer sheath of the cable is firmly held by cable clamp.
WARNING! DO NOT CONNECT either wire to the earth
terminal.
This symbol indicates that this 2-core appliance is Class
II and does not require an earth connection.
The wire coloured blue must be connected to the
terminal marked with the letter N or coloured black.
The wire coloured brown must be connected to the terminal
marked with the letter L or coloured red.
WARNING This appliance must be earthed.
The wire coloured green and yellow must be connected
to the terminal marked with the letter E, or by the earth
symbol , or coloured green or green and yellow.
The wire coloured blue must be connected to the terminal marked
with the letter N or coloured black.
The wire coloured brown must be connected to the terminal
marked with the letter L or coloured red.
Note: In case of malfunction due to electrostatic discharge or fast transient (Burst), just reset the
product (reconnect of power source may be required) to resume normal operation.
Page 3

- 4 -
IMPORTANT SAFETY INFORMATION
CAUTION
CLASS 1 LASER PRODUCT
Use of contents, adjustments to the performance or procedures other than those specified herein may
result in hazardous radiation exposure.
LASER SAFETY
This unit employs a laser. Only qualified service personnel should attempt repair.
DANGER: INVISIBLE LASER RADIATION WHEN OPEN AND INTERLOCK FAILED OR DEFEATED.
AVOID
DIRECT EXPOSURE TO BEAM.
CAUTION: HAZARDOUS LASER RADIATION WHEN OPEN AND INTERLOCK DEFEATED.
Some dos and don’ts on the safe use of equipment
This equipment has been designed and manufactured to meet European safety standards, but like any
electrical equipment, care must be taken if you are to obtain the best results and safety is to be assured.
Do read these operating instructions before you attempt to use the equipment. Do ensure that all
electrical connections (including the mains plug, extension leads and interconnections between pieces
of equipment) are properly made in accordance with the manufacturer’s instructions.
Switch off and remove the mains plug when making or changing any connections.
Do consult your dealer if you are ever in doubt about the installation, operation or safety of your
equipment.
Don’t continue to operate the equipment if you are ever in doubt about it working normally, or if it is
damaged in any way. Switch it off, withdraw the mains plug and consult your dealer.
Don’t remove any fixed covers as this may expose you to dangerous voltages.
Don’t leave the equipment switched on when it is unattended, unless it is specifically stated that it is
designed for unattended operation or has a standby mode.
Switch off using the switch on the equipment and make sure that other people in your household are
conversant with the equipment. Special arrangements may need to be made for infirm or handicapped
people.
Don’t listen to headphones at high volume; as such use may permanently damage your hearing.
Don’t obstruct the ventilation vents on the equipment, for example with curtains or soft furnishings.
Overheating will cause damage and shorten the life of the product.
Don’t allow electrical equipment to be exposed to rain or moisture.
Above all
- Never let anyone, especially children, push anything into holes, slots or any other opening, as this
could result in a fatal electric shock.
- Never guess or take chances with electrical equipment of any kind.
- It is better to be safe than sorry.
WARNING: TO REDUCE THE RISK OF FIRE OR ELECTRIC SHOCK, DO NOT EXPOSE THIS
APPLIANCE TO RAIN OR MOISTURE. DANGEROUS HIGH VOLTAGES ARE PRESENT INSIDE
THE ENCLOSURE. DO NOT OPEN THE CABINET.
REFER ALL SERVICING TO QUALIFIED PERSONNEL
- 5 -
LOCATION OF CONTROLS AND FUNCTIONS
Main Unit
1. Socket
2. REMOTE SENSOR
3. Front Lens
4. SD/MMC CARD SLOT
5. STANDBY Button
6. PROG/CLK ADJ Button
7. TUNER/BAND Button
8. Button
9. CD/USB/SD Button
10. OPEN/CLOSE Button
11. AUX IN Socket
12. Earphone Socket
13. DISPLAY
14. PLAY/PAUSE/PRESET- Button
15. STOP/PRESET+ Button
16. USB Port
17. PLAY MODE/ST/MO Button
18. VOLUME Buttons
19. EQ Button
20. /TUNING and /TUNING Buttons
21. CD Door
22. STANDBY Indicator
23. FM Wire Antenna
24. VIDEO OUT Socket
25. AUDIO OUT Sockets
26. SUBWOOFER Output Socket
27. RIGHT Speaker Terminal
28. LEFT Speaker Terminal
29. AC Power Cord
Y. RESET Switch
Page 4

- 6 -
Remote Control
30. Button
31.
Button
32. STOP/PS+ Button
33. PLAY MODE/ST/MO Button
34. SLEEP/12/24HR Button
35. /TUNING - and /TUNING+ Buttons
36. ID3 Button
37. TIMER Button
38. PROG/CLK ADJ Button
39. OPEN/CLOSE Button
40. MODE/REMAIN Button
41. FOLDER+ Button
42. Infrared Transmitter
43. AUX Button
44.
MUTE Button
45. TUNER/BAND Button
46. CD/SD/USB Button
47. / PS- Button
48. VOL +/- Button
49. Numerical 0 - 9 Buttons
- “2” button with roll up, “8” button with roll down
- “4” button with Repeat, “5” button with ENTER, “6” button with MENU
50. EQ Button
51. FOLDER - Button
Display segment
SETTING UP AND CONNECTING
Replacing battery for the Remote Control
The remote control battery is already installed at the factory. If the
remote control stops operating, replace the battery with a new one.
1. Squeeze the notched tab A while pulling the battery door latch B
out to take the battery holder out.
2. Insert a “CR2025” 3V lithium battery. Make sure the polarity (the
+ and – side of the battery) is correct.
3. Replace the battery holder back in the remote control.
BATTERY PRECAUTIONS
Follow these precautions when using battery in this device.
1. Use only the size and type of battery specified.
2. Be sure to follow the correct polarity when installing the battery as indicated in the battery
compartment. Reversed polarity may cause damage to the device.
3. If the device is not to be used for a long period of time, remove the battery to prevent damage
or injury from possible battery leakage.
4. Do not try to recharge battery, it is not intended to be recharged and doing so may cause the
battery to rupture or leak.
- 7 -
Speaker connection
1. To insert the speaker cable, push down the terminal lever of the RIGHT
Speaker Terminal (27) and LEFT Speaker Terminal (28).
2. Please ensure the cables are connected into the speaker terminals with
the correct polarities. Connect the left speaker to the terminals L and
the right speaker to the terminals R.
Headphone connection
You can use headphones (not included) to listen in privacy. Insert the
headphones 3.5mm plug into Phones Socket (12). Use corresponding
adaptors (specialist shops) if you have different plugs. The speakers will cut off
automatically when the headphones are being used.
Subwoofer connection
An external Subwoofer speaker can be connected to the socket marker "Subwoofer" (26) on the rear of
the main unit.
VIDEO OUTPUT connection
The video output from certain s can be output to a TV using the VIDEO
OUT socket (24). The accompanying audio signal can be output using the AUDIO
OUT sockets (25).
A standard AV lead with yellow, red and white coloured plugs (not supplied) can
be used for this purpose.
Please note that the sockets on your TV must be configured to accept input rather
than output signals to enable this feature to work correctly.
AUX connection
1) Connect a 3.5mm stereo jack lead to the AUX IN socket (11) and the other end to your preferred
device.
2) Press the AUX button on the remote control (43) "AUX" will show in the display.
3) Select the play function on the auxiliary device and the sound output can then be heard from the
Micro 1465i.
Mains connection
1. Unwind the AC Power Cord (29) completely.
2. Insert the plug into any convenient AC outlet.
3. As soon as the unit has been connected with the mains voltage, parts
of the unit are in operation due to the standby function. Turn off the unit
completely before pulling the mains plug out of the AC outlet.
Black
Red
Red
Page 5

- 8 -
CLOCK AND TIMER
Current time setting
When used for the first time, or if the mains plug has been removed for any time,
the clock display will flash "AM 12:00"
1. In standby mode, press the PROG/CLK ADJ button (6/38) the hour digits will
flash in the display.
2. Press SLEEP/12/24HR (34) button to change 12hour or 24hour time format.
3. Press /TUNING or /TUNING (20, 35) button
repeatedly to select the correct hour.
4. Press the PROG / CLK ADJ (6, 38) button again, then press
/TUNING or /TUNING (20, 35) button repeatedly to
select the correct minute.
5. Press PROG / CLK ADJ (6, 38) button again to complete setting the current
time.
TIMER ON and OFF setting (Automatically turn on and off the unit)
1. In standby mode, press the MODE/REMAIN (40) button. “TMR-ON”
indicates and “ ” flashes in the display. Press the PROG / CLK ADJ (6, 38)
button and the hour digit will flash.
2. Press the /TUNING or /TUNING (20, 35) buttons
repeatedly to set the desired hour. For example “2:00”.
3. Press the PROG / CLK ADJ (6, 38) button and the minute digit will flash.
4. Press the /TUNING or /TUNING (20, 35) buttons
repeatedly set to the desired minute. For example “2.08”
5. Press the PROG / CLK ADJ (6, 38) button again to confirm the setting.
6. Press the MODE/REMAIN (40) button again. “TMR-OFF” indicates and “ ”
will flash in the display. Press the PROG / CLK ADJ (6, 38) button and the
hour digit will flash.
7. Press the /TUNING or /TUNING (20, 35) buttons
repeatedly to set the desired hour. For example “4 :00”.
8. Press the PROG / CLK ADJ (6, 38) button again and the minutes digit will
flash.
9. Press the /TUNING or /TUNING (20, 35) buttons
repeatedly set to the desired minute. For example “4.08”.
10. Press the PROG / CLK ADJ (6, 38) button again to confirm the setting.
11. Press the MODE/REMAIN (40) button to return the display to the current
time.
12. Press the TIMER (37) button until “ ” indicates in the Display. The unit will
automatically turn on and off at the appropriate time.
13. Press the TIMER (37) button again until “ ” disappears and the timer
function will be cancelled.
Note:
- Please ensure the correct time is set before setting the Timer on/off function.
- The On/Off timer can only operate if the unit is switched to standby mode when not in use. In timer
mode, the unit will switch on in the last mode that was in use.
If you wish to wake to music from your , ensure that the is connected.
If you wish to wake to music from a CD, ensure that a CD is loaded.
If you wish to wake to radio, ensure that a radio station is tuned.
If you wish to wake to music from USB or SD/MMC, please ensure that a USB device or SD/MMC card
is inserted.
- 9 -
SLEEP setting (Automatically turn off)
The unit can be programmed to switch off after a set time during use, for example
if you wish to go to sleep whilst listening.
The Sleep time can be set at 10, 20, 30, 40, 50, 60, 70, 80 or 90 minutes.
Press the SLEEP/12/24HR button repeatedly until the desired sleep time is shown
in the display.
The unit will automatically switch off at the selected sleep time.
Note: If the CD playing time is shorter than your selected sleep time, the music will stop at the end of
disc.
BASIC OPERATION
Turn on the unit
Press the STANDBY (5, 30) button to turn on or turn off the unit.
Operating mode selection
Press the TUNER/BAND (7, 45) button, (8, 31) button, CD/USB/SD (9, 46) button or AUX (43)
button to select the different operating modes.
PLAY / PAUSE / PRESET- (14, 47) button:
Press this button to begin playback or pause a CD. In Tuner mode, press this button to skip to a
previous preset radio station.
STOP / PRESET+ (15, 32) button:
Press this button to stop the playback of a CD. In Tuner mode, press this button to skip to the next
preset radio station.
VOLUME (18, 48) button:
Press repeatedly to adjust sound level output from 00 (minimum) to 40
(maximum).
MUTE (44) button:
Press this button to mute the sound output from the unit "VOL-OFF" will show in
the display. To restore sound output, press the button again "VOL -ON" will show
in the display.
EQ (19, 50) button:
Press this button to select one of the 5 preset sound equaliser settings. These are
FLAT, ROCK, JAZZ, POP and CLASSIC.
TUNER OPERATION
Manual operation
1. Press the STANDBY (5, 30) button to turn on the unit
2. Press TUNER/BAND button repeatedly to select MW or FM.
3. Press / TUNING or / TUNING (20, 35) buttons to
manually tune up or down the current waveband in 0.05MHz increments.
Automatic search operation
1. Press and hold the / TUNING or / TUNING (20, 35) buttons to
automatically search for the next or previous radio station with a strong signal. Stations with a
weak signal can be tuned manually.
2. Press and hold / TUNING or / TUNING (20, 35) button approx 1
second, to start the station search again.
Note: During the search operation the sound level will be muted automatically.
Page 6

- 10 -
Preset memory
This unit is able to store 24 FM and 16 MW radio stations in the preset memory.
1. In TUNER mode, select FM or MW waveband.
2. Tune to a radio station either manually or by automatic search.
3. Press the PROG / CLK ADJ (6, 38) button, “PROGRAM” indicates in the
Display, and “- -“will flash, to indicate that a radio station can be preset.
4. Press the PRESET – (14, 47) or PRESET+ (15, 32) button repeatedly until
the desired memory position number appears in the Display.
5. Press the PROG / CLK ADJ (6, 38) button again save programmed station.
6. In order to store the remaining stations, repeat steps 2 - 5 accordingly.
ST/MO button (17, 33)
Press this button repeatedly to switch between stereo and mono reception.
² When the unit is tuned into a stereo broadcast with a good signal, "ST" will show in the display.
² If a stereo broadcast is received, but with interference, it is recommended to switch to mono mode .
Selecting the tuner preset station memories
Press the PRESET – (14, 47) or PRESET+ (15, 32) buttons to select preset stations that are stored in
the memory.
Note: To access preset stations1-9, you must press “0” first.
Reception tips
FM: Extend FM Wire Antenna (23) completely for best reception. If a stereo
broadcast received, “ST” will indicate in the Display.
MW: This unit is equipped with a built-in directional ferrite antenna, move and
rotate the unit for best reception.
IMPORTANT NOTES ON PLAYING CDS
Notes when operating the CD player
² The disc loader may only be opened or closed by pressing the OPEN/CLOSE (10, 39) button.
² To remove the disc, hold it by the edges and remove from the holder.
Loading discs
1. Press the STANDBY (5, 30) button to turn “ON” the unit.
2. Press the CD/USB/SD (9, 46) button repeatedly until “CD” indicates in the
Display to select CD mode.
3. Press the OPEN CLOSE (10, 39) button to open CD tray (21).
4. Place the CD into the tray with the label side uppermost.
5. Press the OPEN/CLOSE (10, 39) button again to close CD tray (21). The CD
player will automatically scan the disc. The total number of tracks and the
playback time will show in the display. If the scanned disc is a MP3 or WMA
disc, the total number of tracks and total folder number show in the display.
If there is no disc in the unit, the display will show “DISC”
Notes on MP3, WMA, CD-R / RW discs
² Because of non-standardized format definition / production of MP3, WMA and CD-R/RW discs,
playback quality & performance are not guaranteed.
² Playback of MP3, WMA, CD-R / CD-RW discs may depend on recording conditions.
² Do not attach labels to either surface of the disc. This may cause the unit to malfunction.
² Do not use scratched or dirty discs as this may cause the unit to malfuncti on.
Track No. Playback time
Folder No. Total track No.
- 11 -
COMPACT DISC OPERATION
Normal Playback
After loading a CD, press the PLAY/PAUSE (14, 47) button to start playback.
The track number and playing time are indicated in the display.
Pause control
To pause temporarily during CD playback press the PLAY/PAUSE (14, 47)
button. The disc playback will pause and the elapsed track time will flash in the
display. Press the PLAY/PAUSE (14, 47) button again to resume playback.
Skip track and high-speed music search
During playback, press the / TUNING or / TUNING (20, 35) buttons to skip
to the next or previous tracks.
During playback, press and hold the / TUNING or / TUNING (20, 35) buttons
to search forwards or backwards through the current track.
When the desired part of the track is located, release the button and playback will resume.
Using numerical buttons
You can use the Numerical 0-9 (49) buttons to directly select a track to play. Note that to select tracks
between 1-9, the 0 button must be pressed first, for example:
Track no. 2 - Press “0” first, then press “2”.
Track no. 12 - Press “1” first, then press “2”.
PLAY MODE CONTROL
1. Repeat the entire track
Select the track to be repeated and begin playback. Press the PLAY MODE
(17, 33) button once. The RPT indicator will show in the display and the
selected track will be repeated continuously.
2. Repeat all
Press the PLAY MODE (17, 33) button twice. The RPT indicator will show in
the display and all the tracks on the disc will be repeated continuously.
3. Random playback
The Random playback feature allows you play all the tracks on the current
disc in a random order. This function can be selected when the disc is
playing or when in stop mode. Press the PLAY MODE (17, 33) button third
times to random playback mode. The RDM indicator is shown in the display.
If necessary, press the PLAY/PAUSE (14, 47) button to begin playback. The player will
randomly select a track to play from the disc.
4. Intro playback
Press PLAY MODE (17, 33) button four times to play a brief intro of each
track for 10 seconds and the INTRO indicator is shown in the display.
To cancel INTRO mode, press the PLAY MODE (17, 33) button again and normal
playback will resume.
Programmed Playback
It is possible to program a selection of up to 32 tracks for playback. Individual
tracks can be programmed more than once.
1. After loading a disc, Press the PROG / CLK ADJ (6, 38) button in stop mode.
PROGRAM and - - PR01 will show in the display.
2. Press the / TUNING or / TUNING (20, 35)
buttons repeatedly to select the desired track number.
3. Press PROG / CLK ADJ (6, 38) button to confirm the first programmed track.
- - PR02 now shows in the display and waiting for next programming.
4. Repeat steps 2 and 3 to store further tracks.
5. When programming is complete, press the PLAY/PAUSE (14, 47)
button to begin playback of the selected tracks.
Page 7

- 12 -
Clear Program (Resume Normal Playback)
Press
the
STOP (15, 32) button twice in the program mode, or open the CD door (21), or change to
another mode to erase the programmed tracks.
MP3 or WMA DISC OPERATION
Normal Playback
After loading a MP3 or WMA disc, press the PLAY/PAUSE (14, 47) button to
start playback. The folder number, MP3 or WMA , and current track number
indicate in the display.
Pause control
To pause temporarily during CD playback press the PLAY/PAUSE (14, 47)
button the disc playback will pause and the elapsed track time will flash in the
display. Press the PLAY/PAUSE (14, 47) button again to resume playback.
Skip track and high-speed music search
The procedure for skipping and searching through tracks is the same as previously described in the CD
operation section of this manual.
Using numerical buttons
You can use the Numerical 0-9 (49) buttons to directly select folders and tracks to play.
1. In stop mode
Press “0” first, the display indicates as Fig. A. Then input the desired folder number. For the
folders number 1-9, you must press “0” first. After selecting the folder number “02”, for example,
the display indicates as Fig. B. Press “0” again, the display indicates as Fig. C. Then input the
desired file number of the selected folder. For file numbers 1-9, you must press “0” first. After
selecting the file number “18” the display indicates as Fig. D. After 2-3 seconds, the selected file
18 in folder 2 will be played automatically.
Fig. A Fig. B Fig. C Fig. D
2. In play mode
You can directly input the file number in the currently playing folder to allow direct access to that
particular file. Pr ess “0”, the display indicates as Fig. C. Then input the desired file (track) number.
For file (track) number 1-9, you must press “0” first. After selecting the file number “18” the
display indicates as Fig. D. the player will skip to the selected file and play it automatically.
Skip Folder
In stop mode or during playback, press FOLDER- (51) or FOLDER+ (41) on the remote control to skip
to next or previous folder. Playback will begin at the first track in the selected folder.
ID3 FUNCTION
During MP3 disc playback, press the ID3 (36) button to display any ID3 tagging
information that may be encoded onto the disc.
Information such as album, title and artist will scroll across the display when this
function is selected.
PLAY MODE CONTROL
1. Repeat the entire track
Select the track to be repeated and begin playback. Press the PLAY MODE
(17, 33) button once. The RPT indicator will flash in the display and the
selected track will be repeated continuously.
- 13 -
2. One Folder Repeat
Select the folder to be repeated and begin playback. Press the PLAY MODE
(17, 33) button twice. The RPT and FOLDER indicator will show in the
display and the selected folder will be repeated continuously.
3. Repeat all
Press the PLAY MODE (17, 33) button three times. The RPT indicator alights
in the display and all the tracks of the disc will be repeated continuously.
4. Random playback
The Random playback feature allows you play all the tracks in a random
order of the current disc. You can select random playback while the discs are
playing or when the player is stopped. Press the PLAY MODE (17, 33) button
third times to random playback mode, The RDM indicator is shown in the
display. If necessary, press the PLAY/PAUSE (14, 47) button to begin playback. The player
will randomly select a track to play from the disc.
Programmed Playback
It is possible to program a selection of up to 32 files for playback. Individual tracks
can be programmed more than once.
1. In stop mode, after a CD containing MP3 or WMA tracks is loaded, Press the
PROG / CLK ADJ (6, 38) button. In stop mode, PROGRAM and - - PR01 will
show in the display.
2. Press the FOLDER- (51) or FOLDER+ (41) repeatedly to select the desired
folder number.
3. Press the / TUNING or / TUNING (20, 35) buttons
repeatedly to select the desired file number in the selected folder.
4. Press the PROG / CLK ADJ (6, 38) button to confirm the file in the first
program location. - - PR02 will show in the display and ready for the next file
to be programmed.
5. In order to store remaining program repeat above step 2~ 3 until memory full.
6. When programming is complete, press the PLAY/PAUSE (14, 47) button begin playback of
the selected folders/files.
Clear Program (Resume Normal Playback)
Press the
STOP (15, 32) button twice in the program mode, open the CD door (21) , or change to
another mode to erase the programmed tracks.
iPod® OPERATION
This unit is equipped with an dock system to allow you to connect your and enjoy the sound via
the speakers. The dock system is able to adapt to fit most types of currently available , by using
one of 5 different sized dock adaptors supplied. Please note that as new models become
available, new dock adaptors may be required. This unit can also charge the battery when
connected via the dock.
To fit a dock adapter
Select the appropriate dock adaptor for your . Take care to use the correct one, as this will
ensure that the is held securely in place.
1. Gently press the dock adapter into the dock at the top of the
unit.
2. Carefully place your into the dock. (The must not be in
a case or “Skin”)
To remove/replace a dock adapter
First remove your , and then grip the dock adapter and pull gently
upwards.
Folder No. Track No.
Page 8

- 14 -
Operating with the main unit
1. Press (8, 31) buttons. The display indicates .
2. Select your desired music, photos or videos, etc and play the connected
as usual.
3. You can select the next or previous music tracks by pressing /
TUNING or / TUNING (20, 35) buttons repeatedly. Press
PLAY/PAUSE (14, 47) to play or pause.
4. The numerical buttons 2,4,5,6 and 8 on the remote control can be used to operate the menu and
other functions of the . Press MENU/6 button to show the menu screen of the , then
use /2 or /8 button to highlight the item you want to operate, then press ENTER/5 button to
confirm. Press /4 buttons once to repeat one track, press twice to repeat all. (Available in
play only)
5. Press VOLUME (18,48) button to adjust to desired sound level.
Note: If want to watch photos and videos from the , please connect the VIDEO and AUDIO
sockets on the rear of the unit as described in the "Setting up and Connecting" section of this
user guide.
Charging your
Note: Please make sure you are using the correct dock adaptor for your and that it is properly
into dock on the top of the unit. Failure to do so may cause damage to your .
While your is docked in the system, it recharges until fully charged. Note that other non-docking
types of will NOT charge.
Adapter Information
This system includes 5 different adapters designed to allow you to securely connect any “dockable”
model to the docking station. Refer to the chart below to select the proper adapter for your
particular model and insert that adapter into the docking station before connecting your .
*
No adapters are provided for the 5G (fifth generation) 30GB and 60GB s with video capability.
Please use the adapters that were included these s at time of purchase. They will fit properly into
the docking station of this system.
We have also included one flat adapter with no opening at all. This serves, as a dust cover that can be
inserted in the docking station, if no will be connected to the system for an extended period of
time.
is a registered trademark of Apple Computer Corporation.
- 15 -
PLAYING MP3/WMA MUSIC FILES FROM A USB DEVICE
Music files in MP3 or WMA format can be played by connecting a suitable USB device containing such
files into the USB port on the front of the unit.
1. Press the CD/USB/SD (9, 46) button to select USB mode. The display will
show USB.
2. Connect the USB device to the USB port (16) on the front panel of the unit.
After a few seconds, the unit detects the USB devise automatically and
starts to play the first MP3 or WMA music file.
3. Press FOLDER- (51) or FOLDER+ (41) repeatedly to select the desired
folder number.
4. Press the / TUNING or / TUNING (20, 35)
buttons repeatedly to select the desired file number in the selected folder.
Direct folder and file access can be made by using the numerical buttons on the remote control.
Note: Before removing a USB device from the unit, make sure that the current file is stopped. Do not
remove the USB device whilst music files are playing.
PLAYING MP3/WMA MUSIC FILES FROM A SD/MMC CARD
Music files in MP3 or WMA format can be played by connecting a suitable SD/MMC card containing
such files into the card slot on the front of the unit.
1. Press the CD/USB/SD (9, 46) button repeatedly to select SD/MMC mode.
The display will show SD.
2. Insert SD or MMC card into SD slot (4) on the front panel of the unit. After a
few seconds, the unit detects the SD or MMC card automatically and starts
to play the first MP3 or WMA music file.
3. Press the FOLDER- (51) or FOLDER+ (41) button repeatedly to select the
desired folder numb er.
4. Press the / TUNING or / TUNING (20, 35)
buttons repeatedly to select the desired file number in the selected folder.
Note: Before removing a SD/MMC card from the unit, make sure that the current file is stopped. Do
not remove the SD/MMC card whilst music files are playing.
CARE AND MAINTENANCE
COMPACT DISCS
² Treat the disc carefully. Handle the disc only by its edges. Never allow your fingers to contact with the
shiny, unprinted side of the disc.
² Do not attach adhesive tape, stickers etc., to the disc label.
² Clean the disc periodically with a soft, lint-free, dry cloth. Never use detergents or adhesive cleaners to
clean the disc. If necessary, use a CD cleaning kit.
² If a disc skips or gets stuck on a section of the disc, it is probably dirty or damaged (scratched).
² When cleaning the disc, wipe in straight lines from the center of the disc to the edge of the disc. Never
wipe in circular motions.
² To remove a disc from its storage case, press down on the center of the case and lift the disc out,
holding it carefully by the edges.
Page 9

- 16 -
² Fingerprints and dust should be carefully wiped off the disc’s recorded surface with a soft cloth. Unlike
conventional records, compact discs have no groove to collect dust and microscopic debris, so gently
wiping with a piece of soft cloth should remove most particles.
CLEANING THE UNIT
² To prevent fire or shock hazard, disconnect your unit from the AC power source when cleaning.
² If the cabinet becomes dusty, wipe it with a soft dry dust cloth. Do not use any wax or polish sprays
on the cabinet.
² If the cabinet becomes dirty or smudged with fingerprints it may be cleaned with a soft cloth slightly
dampened with a mild soap and water solution. Never use abrasive cloths or polishes, as these
will mar the finish of your unit.
CAUTION: Never allow any water or other liquids to get inside the unit while cleaning.
TROUBLESHOOTING GUIDE
If you experience any difficulties in operating this unit, please take the time to read the hints and tips
shown in the troubleshooting guide below. If you require any further assistance, please call our
Customer Help-line on 0871 230 1777.
Symptom Possible Cause Solution
Radio
Station not tuned properly for
MW or FM
Fine tune MW or FM broadcast station
FM: The FM antenna wire is not
extended
Extend FM Wire Antenna
Noise or sound distorted on
MW or FM broadcasting
MW: The built-in ferrite bar
antenna is not positioned
correctly
Reposition the until the best reception
is obtained
Mono mode is selected Press ST/MO button to STEREO mode
You have tuned to a mono
station
Retune another FM station
FM STEREO indicator
does not light up
The signal is too weak Retune another FM station
Unit not in TUNER mode Press TUNER / BAND button to select
TUNER mode
MW or FM no sound
Volume at minimum position Adjust Volume level
CD / MP3 Player
Unit not in CD mode Press CD button to select CD mode CD Player will not play
CD is not installed or installed
incorrectly
Load a CD; check that the CD is placed
in the tray with the label side
uppermost.
CD skips while playing Disc is dirty or scratched Wipe disc with doth or use another disc
Function inoperative and
jammed
Built-in microcomputer hangs up Use the end of a pencil etc to press the
reset button located on the underside
of the unit (see the below figure).
Display no indication or
abnormal indication
Built-in microcomputer hangs up Use the end of a pencil etc to press the
reset button located on the underside
of the unit (see the below figure).
- 17 -
RESET THE UNIT
l
If the unit exhibits abnormal operation, or fails to respond to button presses, use a pointed
non-metallic object such as a pencil tip to press the RESET button located on the underside of the
unit (see below) .
l
Disconnect the AC power from AC outlet and wait a few seconds for the built-in microcomputer to
reset.
SPECIFICATIONS
GENERAL
Power source ---------------------------------- AC ~230V-240V 50Hz
DC 3V - 1 pc of “CR2025” lithium battery (included)
or equivalent for remote handset
Power Consumption ------------------------ 80 Watts
Dimension ------------------------------------- Main Unit: 149(W) x 214(H) x 243(D) mm (without
dock adaptor)
Speaker Box: 145(W) x 214(H) x 167(D) mm
TUNER SECTION
Frequency range ----------------------------- FM: 88 – 108 MHz
MW: 531 – 1602 kHz
CD / MP3 /WMA SECTION
Playback System ---------------------------- Draw type CD mechanism
USB support ---------------------------------- Version 1.0, 1.1 and 2.0
AUDIO SECTION
Power Output --------------------------------- 2 x 10 Watts RMS @ 10% THD
Speaker impedance ------------------------- 4 ohms
Headphone Impedance --------------------- 8 – 32 ohms
AUX input sensitivity ------------------------- 300 mV
How do I dispose of this product?
When your Micro 1456i has reached the end of its life, contact your local Council
regarding available recycling or disposal options.
Do not dispose of electrical products in the general waste.
Design and specification subject to change are without notice.
172-G401783AU0-0GM
Page 10

Helpline: 0871 230 1777
- 18 -
07-09-2007
www.goodmans.co.uk
 Loading...