

Page 1
STEREO CD RADIO CASSETTE RECORDER
MICRO 1411S
GOODMANS HELPLINE NUMBER 08708 730 080
OPERATING INSTRUCTIONS
Page 2

TABLE OF CONTENTS
INTRODUCTION
This instruction manual is important to you. Please read it. In a short time it shows exactly
how to connect, operate, and adjust this unit for best performance. It can save you money.
It shows simple things to do and check before you call for help and save the cost of
unnecessary service or call out charge.
Table of controls......................................................................................... ..1
Important Safeguards....................................................................................................2
Important Notes............................................................................................................ 3
Important Notes............................................................................................................4
Identification of Controls................................................................................................5
Features and Controls, Remote Control.................................................................. ......6
Putting the Batteries into the Remote Control Unit................................................... ... ...6
Installing The Speaker Wire to the Speaker Terminals........................................... ..........7
Operating The Unit and
Clock & Timer Setting....................................................................................................7
Snooze Setting and
Radio Operation...........................................................................................................8
Listening To Compact Disc (CD).....................................................................................9
Listening To Compact Disc (CD)...................................................................................10
Cassette Operation................................................ ...........11
Cassette Operation and Beat Cut.................................................................................12
Reset, Mode / Remain Setting.......................................................................................13
Preset EQ Setting, Mute................................................................................................13
Listen To The Music By Using Headphone.....................................................................13
Memory Back-up.........................................................................................................13
Compact Disc.............................................................................................................14
CD Display Window......................................................................................................15
Specification.............................................................................................................. 15
Save the carton and packing material; they will be useful if you ever have to transport the
unit.
Power / Standby.
To Set Sleep Function ......................................................................8
........................................................................7
..........................................
.................
..
.. .
..
Pack contents:
1 x Goodmans Micro 1411S Stereo CD Radio Cassette Recorder
1 x remote control
2 x loudspeakers
1 x owner's manual
Please retain all packaging material for future transportation of the unit or in the unlikely
event that the unit needs to be returned for service.
1
Page 3
IMPORTANT SAFEGUARDS
For your own safety read following instructions carefully before attempting to connect this
clock radio to the mains.
Mains Supply: 230V ~ 50Hz - AC only
This unit is designed to operate on a 230V~50Hz supply only. Connecting it to other power
sources may damage it. Ensure that the supply corresponds to the information on the rating
label on the bottom of the unit.
This clock radio may be fitted with a non-rewireable plug. If it is necessary to change the fuse
in a non-rewireable plug the fuse cover must be refitted. If the fuse cover becomes
lost or damaged, the plug must not be used until a replacement, available from the
manufacturer, is obtained. It is important that the colour of the replacement fuse cover
corresponds with the colour marking on the base of the plug.
If the plug needs to be changed because it is not suitable for your socket, or becomes damaged,
it should be cut off and an appropriate plug fitted following the wiring instructions below. The
plug must then be disposed of safely, as insertion into a 13A socket is likely to cause an
electrical hazard.
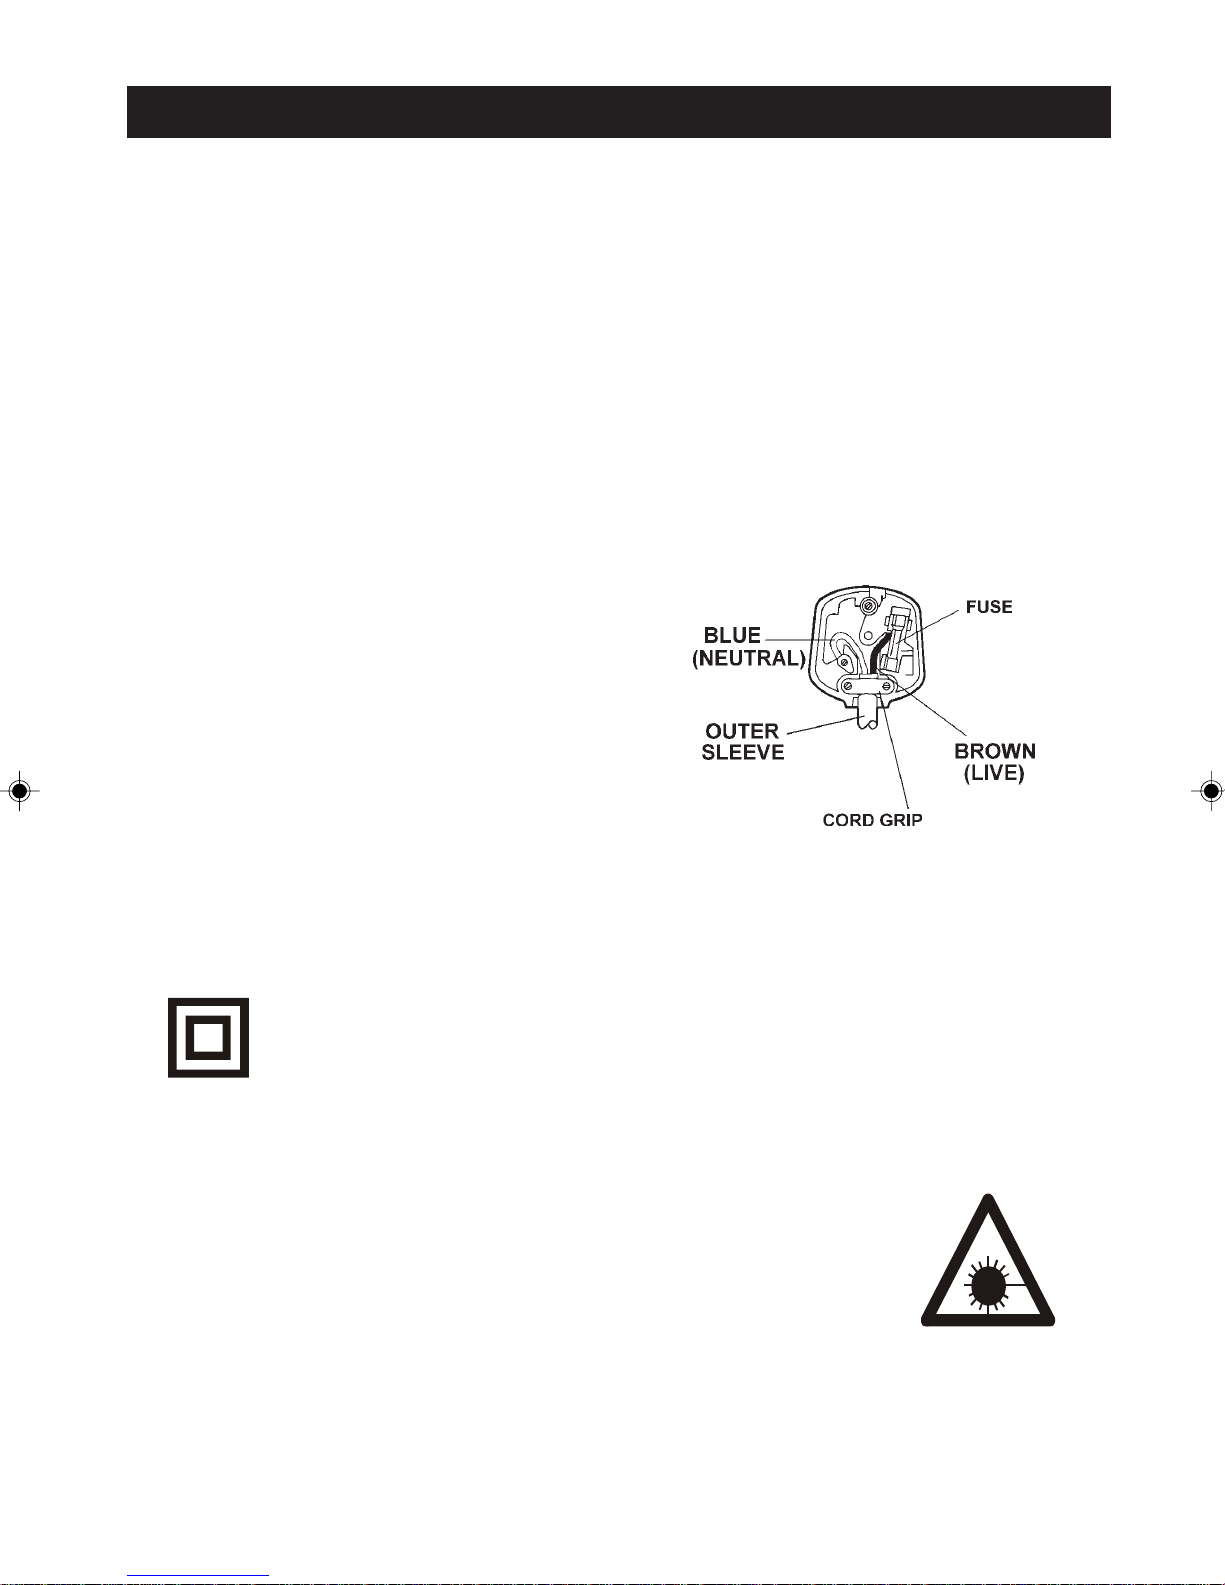
IMPORTANT
The wires in the mains plug should be connected
as shown in the diagram.
The colours of the wires in the mains lead of the unit
may not correspond with the coloured markings
identifying the terminals in your plug. Connect them
as follows:-
The wire which is coloured blue must be connected
to the terminal which is marked with the letter ‘N’ or
coloured black.
The wire which is coloured brown must be
connected to the terminal which is marked with the
letter ‘L’ or coloured red.
There should be no connection to the earth terminal of your plug.
If a 13 Amp (BS 1363) Plug is used, a 3 Amp Fuse must be fitted, or if any other type of Plug
is used a 3 Amp or 5 Amp Fuse must be fitted, either in the Plug or Adaptor, or on the Distribution
Board.
This symbol means that this unit is double insulated. An earth connection is not
required.
DANGER
LASER SAFETY
CAUTION : USE OF CONTROLS , ADJUSTMENTS OR PERFORMANCE
OF PROCEDURES OTHER THAN SPECIFIED HEREIN MAY RESULT IN
HAZARDOUS RADIATION EXPOSURE.
INVISIBLE LASER RADIATION WHEN OPEN AND INTERLOCK FAILED OR
DEFEATED. AVOID DIRECT EXPOSURE TO
This unit employs a laser. Only a qualified service person should remove
the cover or attempt to service
CAUTION
To prevent electric shock, disconnect from the mains before removing cover.No user
serviceable parts inside. Refer servicing to qualified service personnel.
When cleaning the unit use only a damp cloth and ensure the plug has been removed
from the mains socket.
2
Page 4
To achieve the utmost in enjoyment and perfor mance, please read this manually carefully before
attempting to operate the unit in order to became familiar with its features, and assure you years of
faithful, trouble free performance and listening pleasure.
Important Notes
* Keep instructions the safety and operating instructions should be retained for future reference.
* Avoid installing the unit in locations described below:
Please exposed to direct sunlight or close to heat radiating appliances such as electric heaters.
On top of other stereo equipment that radiate too much heat.
Places locking ventilation or dusty places.
Places subject to constant vibration.
Humid or moist places.
* Make sure not to obstruct the ventilation opening.
Operate turning controls and switches as instructed in the manual.
* Before turning on the power for the first time, make certain the power cord is properly installed.
* Store your tapes or CD in a cool area to avoid damage from heat.
For safety reasons, do not remove any covers or attempt to gain access to the inside of the product.
Refer any servicing to qualified personal.
Do not attempt to remove any screws, or open the casing of the unit; there are no user serviceable
parts inside, refer all servicing to qualified service personal.
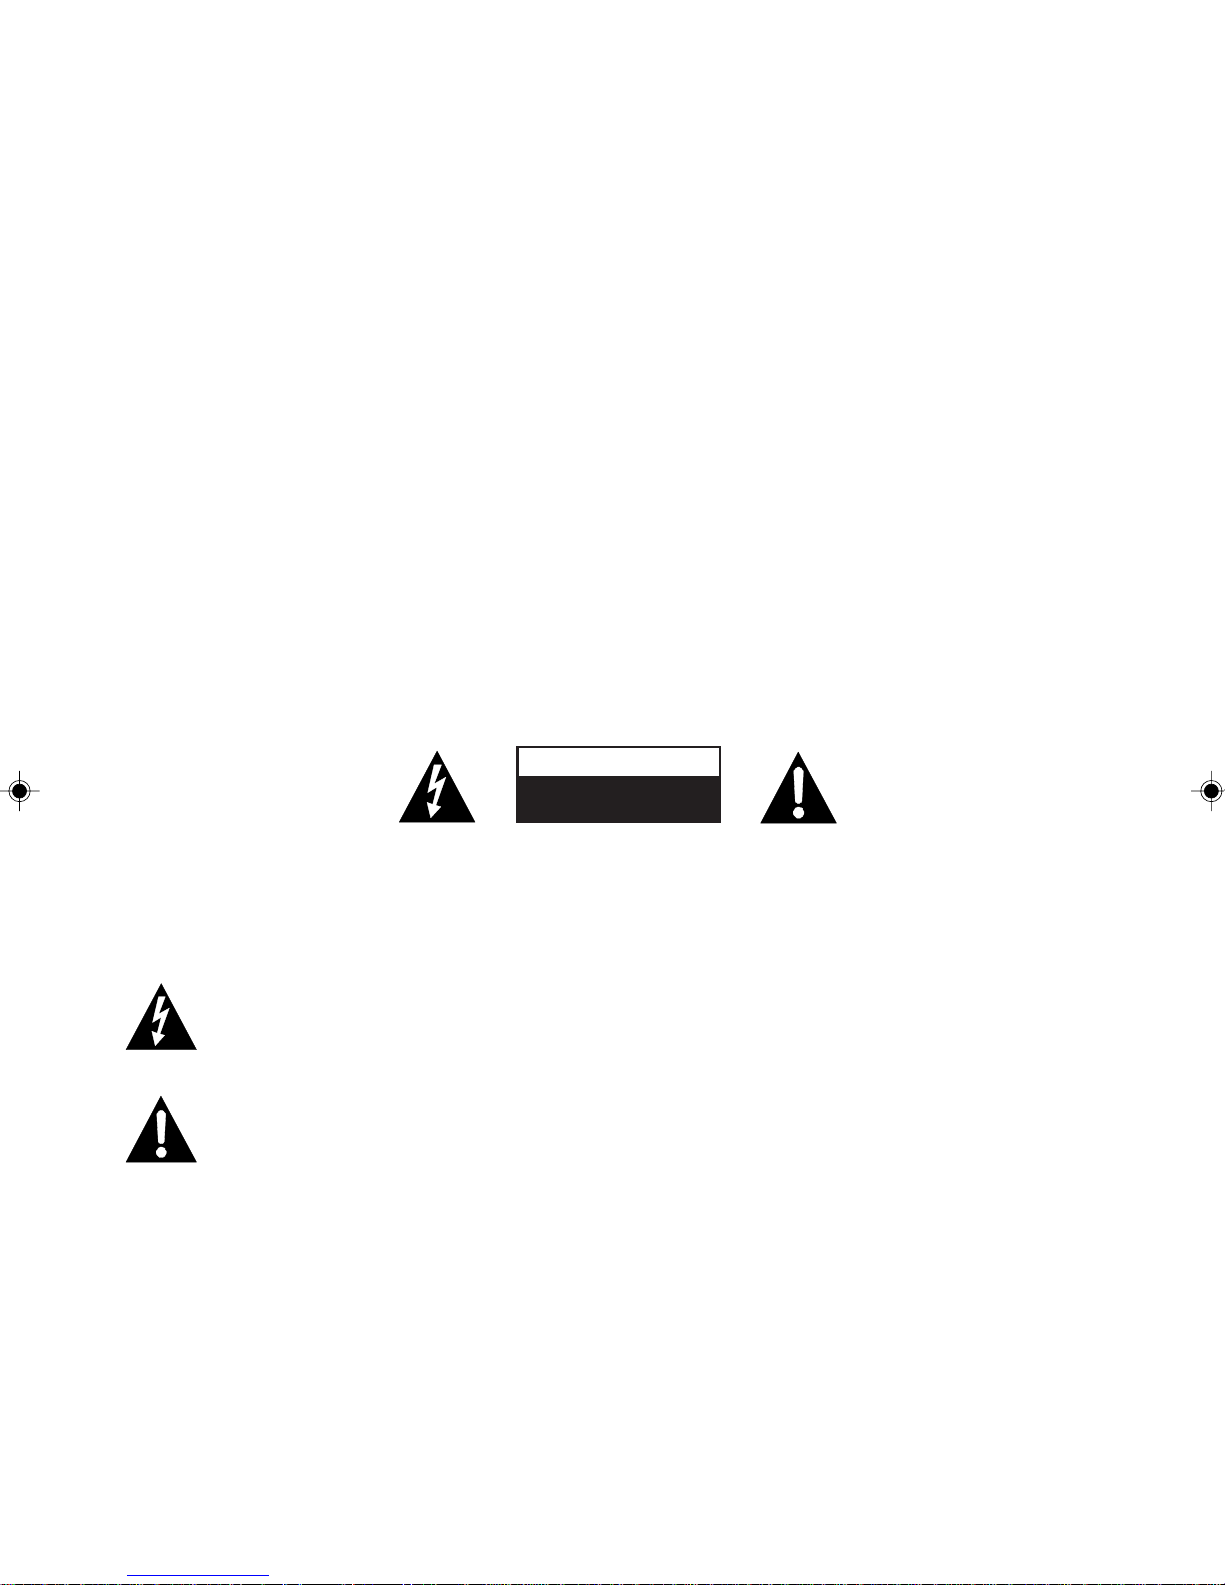
CAUTION
RISK OF ELECTRIC SHOCK
DO NOT OPEN
CAUTION : TO REDUCE THE RISK OF ELECTRIC SHOCK DO NOT REMOVE COVER(OR BACK),
NO USER SERVICEABLE PARTS INSIDE, REFER SERVICING TO QUALIFIED SERVICE
PERSONAL.
DANGEROUS VOLTAGE
Dangerous voltages, that may be of sufficient magnitude to constitute a risk of
electric shock to persons is present within this product’s enclosure.
ATTENTION
The owner’ s manual contains important operating and maintenance instructions, for your
safety, it is necessary to refer to the manual.
WARNING :TO PREVENT FIRE OR SHOCK HAZARD, DO NOT EXPOSE THIS APPLIANCE TO
DRIPPING OR SPLASHING.
Note:
This unit will become warm when used for a long period of time. This is normal and does not indicate a
problem with the unit.
This CD player includes micro-processors which may malfunction as s result of external electrical
interference or noise. If the CD player is not working properly, press the reset button located on
the back panel of the CD player.
3
Page 5

IMPORTANT NOTES
Hearing is very important to you and to us so please take care when operation this
equipment. It is strongly recommended that you follow the listed guidelines in order to
prevent possible damage or loss of hearing.
ESTABLISH A SAFE SOUND LEVEL
z Over time your hearing will adapt to continuous loud sounds and will give the
impression that the volume has in fact been reduced. What seems normal to you may
in fact be harmful. To guard against this
the volume at a low level.
z Slowly increase the level until you can hear comfortably and clearly and without
distortion.
z Damage to your hearing is accumulative and is irreversible.
z Any ringing or discomfort in the ears indicates that the volume is too loud.
BEFORE YOUR HEARING ADAPTSBEFORE YOUR HEARING ADAPTS
BEFORE YOUR HEARING ADAPTS set
BEFORE YOUR HEARING ADAPTSBEFORE YOUR HEARING ADAPTS
Once you have established a comfortable listening level, DO NOT INCREASE
THE SOUND LEVEL FURTHER.
The following list of typical sound levels may assist you in recognising just how loud you
have set the volume level.
DECIBEL
Level dB Example
30dB
40
50
60
70
Quiet library, soft whisper.
Living room, fridge freezer bedroom away from traffic.
Normal conversation, quiet office, light traffic.
Electric sewing machine.
Vacuum cleaner, hair dryer, noisy restaurant.
THE FOLLOWING NOISE CAN BE HARMFUL UNDER CONSTANT EXPOSURE
80dB
90
100
120
Average city traffic, alarm clock buzzer at 1 Metre, food mixer.
Motorcycle, heavy goods vehicle, petrol lawn mower.
Pneumatic drill, chain saw, garbage truck, discotec/night-club.
Rock band concert, thunderclap.
PERMANENT LOSS OF HEARING
140
180
THRESHOLD OF PTHRESHOLD OF P
THRESHOLD OF P
THRESHOLD OF PTHRESHOLD OF P
Rocket Launching pad.
AINAIN
AIN Gunshot 2 feet away.
AINAIN
4
Page 6
IDENTIFICATION OF CONTROLS
1 1
32
2
3
4
5
6
7
8
9101112131415 16
17
18
19
20
21
22
23
24 25 262728 29
34
38
35
36
30
31
33
37
5
Page 7

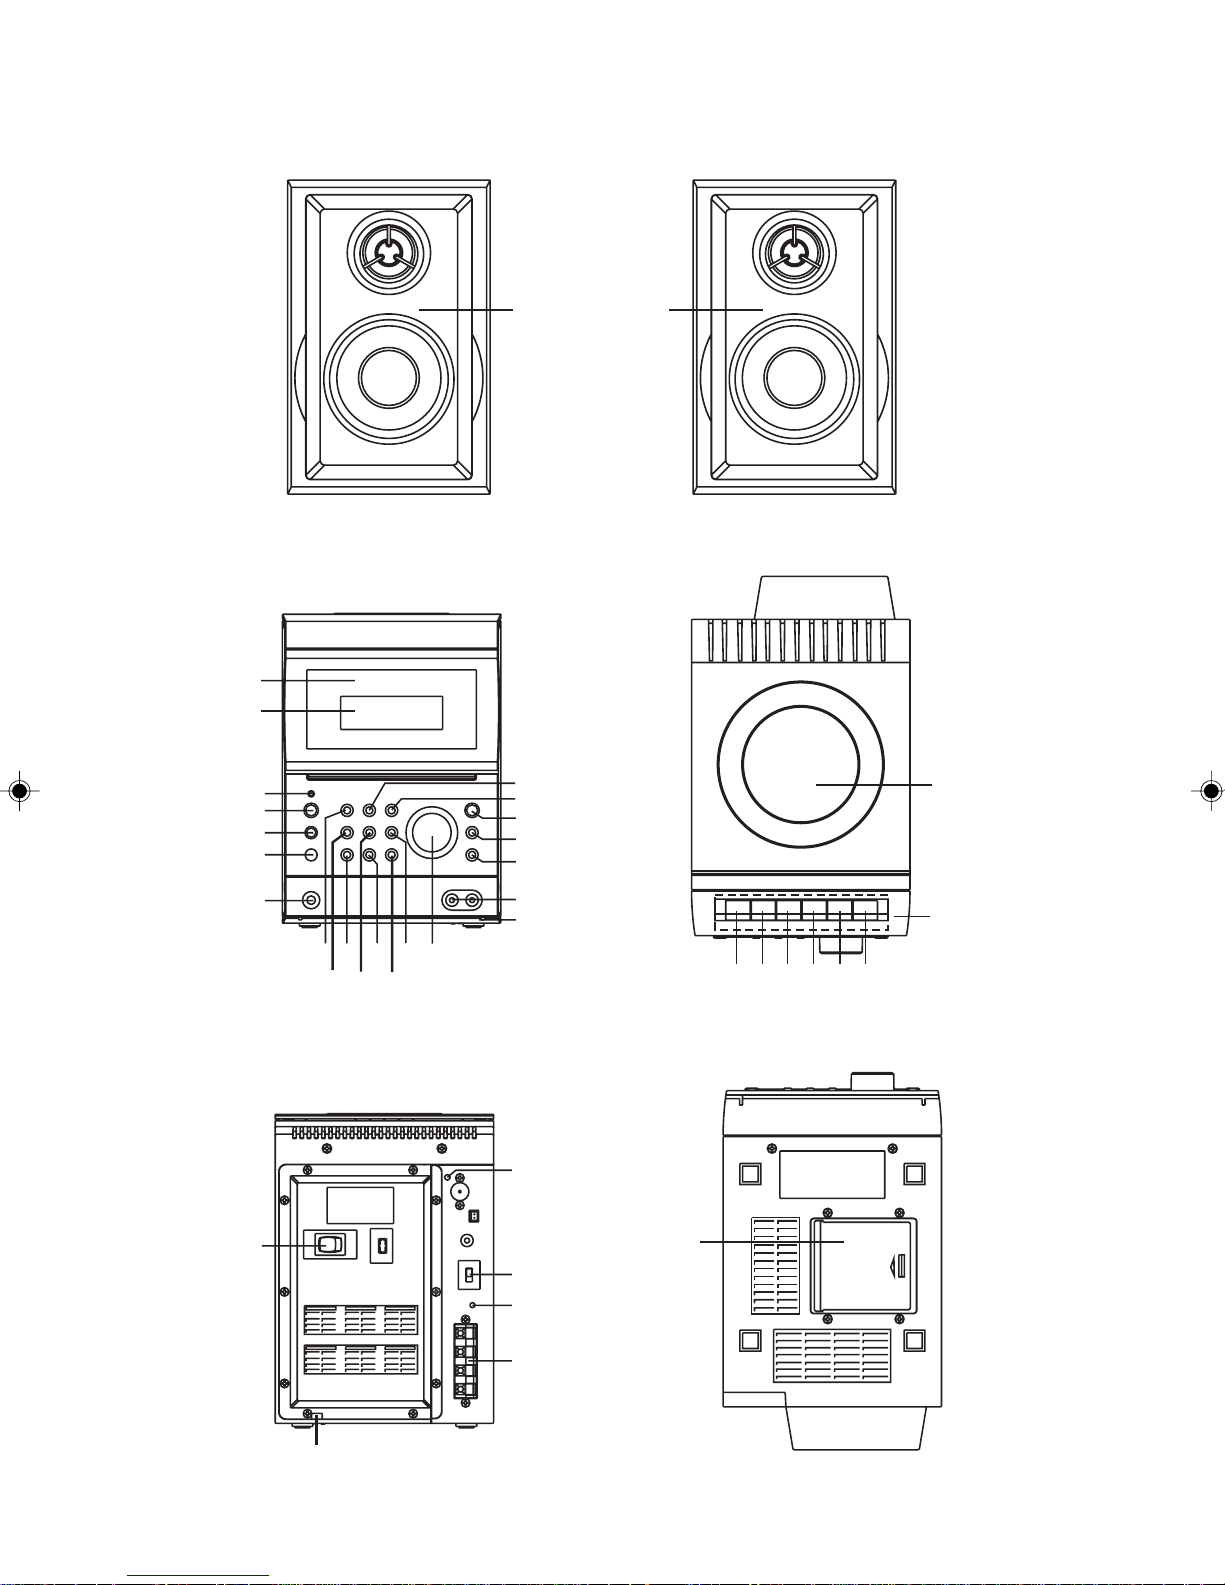
FEATURES AND CONTROLS
1. SPEAKER
2. CASSETTE DOOR
3. LCD DISPLAY
4. POWER/STANDBY INDICATOR
5. STANDBY BUTTON
6. MEMORY/ C.ADJ BUTTON
7. IR SENSOR
8. HEADPHONES SOCKET
(BEHIND FLAP)
9. CD PLAY/PAUSE BUTTON
10. SKIP/SEARCH/TUNING DOWN BUTTON
11.TIMER/SLEEP BUTTON
12.SKIP/SEARCH/TUNING UP BUTTON
13.MODE/REMAIN BUTTON
14.TAPE BUTTON
15.AUX BUTTON
16.VOLUME KNOB
17.CD STOP/BAND BUTTON
18.REPEAT/M-UP BUTTON
19.CD DOOR OPEN/CLOSE BUTTON
20.TUNER BUTTON
REMOTE CONTROL
1. POWER/STANDBY BUTTON
2. PLAY/PAUSE BUTTON
3. TUNING / SKIP / SEARCH REW. BUTTON
4. TIMER BUTTON
5. SLEEP BUTTON
6. RANDOM BUTTON
7. MUTE BUTTON
8. VOLUME DOWN BUTTON
9. STOP/BAND BUTTON
10. TUNING / SKIP / SEARCH F.F. BUTTON
11. FUNCTION (CD/TUNER/TAPE) BUTTON
12. PRESET EQ BUTTON
13. REPEAT/ M-UP BUTTON
14. SNOOZE BUTTON
15. VOLUME UP BUTTON
16. BATTERY DOOR
21.CD BUTTON
22.AUX IN
SOCKET(BEHIND FLAP)
23.FLAP COVERING HEADPHONES &
AUX IN SOCKETS
CASSETTE PAUSE BUTTON
24.
25.
CASSETTE STOP/ELECT BUTTON
26.
CASSETTE FAST FORWARD BUTTON
FLAP)
CASSETTE REWIND BUTTON
27.
CASSETTE PLAY BUTTON
28.
29.
CASSETTE RECORD BUTTON
(UNDERNEATH FLAP)
(UNDERNEATH FLAP)
(UNDERNEATH
(UNDERNEATH FLAP)
(UNDERNEATH FLAP)
(UNDERNEATH FLAP)
30.CD DOOR
31.CASSETTE BUTTON DOOR
32.AC POWER MAIN SWITCH
33.AC CORD
34.FM AERIAL
35.BEAT CUT/FM MODE(MONO/STEREO) SWITCH
36.RESET BUTTON
37.SPEAKER TERMINALS
38.BACKUP BATTERY DOOR
1
2
3
4
5
6
7
8
9
10
11
12
13
14
15
16
PUTTING THE BATTERIES INTO
THE REMOTE CONTROL UNIT
Press down on the compartment cover, and slide
the cover off to open the compartment. Place the
two (UM3), (AA), (R6) batteries in the remote
control according to the polarity markings ("+" and
" - ") inside the compartment and on the batteries.
Place the cover over the compartment, press down
lightly, and push it upward until it snaps on.
NOTE :
control if not in use for long period of the time.
Do not mix normal batteries with rechargeable
batteries, when the batteries become weak,
remote control will not function and replace with
new batteries.
Remove the batteries from the remote
**BATTERIES NOT INCLUDED**
6
Page 8

INSTALLING THE SPEAKER WIRE
TO THE SPEAKER TERMINALS
AC MAIN POWER SWITCH
1.
Speakers Connection
Extend the SPEAKER WIRES and con nect them
to the SPEAKER TERMINALS.
2.
Power Cord Connection
Before using , connect the AC Power Cord to
the AC outlet , then turn on the main switch
of the unit.
AC CORD
L
R
OPERATING THE UNIT
When you first plug the unit into the AC outlet , the unit will be in standby mode , You can
press the POWER button on the unit ( or on the remote control ) to switch the unit ON and OFF.
Pull the AC plug out of the wall socket if you want to switch off completely.
POWER/STANDBY
1. Press the POWER/STANDBY button on the unit (or remote) to switch the unit on.
2. Select the sound source ( CD , RADIO or TAPE ) by pressing corresponding function key.
The corresponding display will light up.
3. Adjust the volume with the VOLUME ( UP or DOWN ) button.
4. Set the present equalizer ( classic , rock pop) with the PRESET EQ button on the
remote.
5. Press the POWER/STANDBY button to switch off the unit.
or
CLOCK SETTING
Please note clock can only be set in standby.
1. Press & hold MEMORY / C-ADJ. button until time display 24-hour digit flash.
2. Press TUNING / SKIP / SEARCH (FORWARD or BACKWARD) button to adjust 24-hour or
12-hour digit.
3. Press MEMORY / C-ADJ. button again , and the hour digit will flash , press
TUNING / SKIP / SEARCH button to adjust hour digit.
4. Press MEMORY/C-ADJ. button and the minute digit will flash, press
(FORWARD or BACKWARD) button to adjust minute digit
5. Press MEMORY/C-ADJ. once more and the clock will be set.
(FORWARD or BACKWARD)
TUNING / SKIP / SEARCH
.
TIMER SETTING
1. After setting clock, press and hold TIMER button for
display and flashing.
2. In the 24-hour mode, "0:00" will show .
3. Press and hold MEMOR
timer on time is set using the same method described above for .
4. Press the REPEA
5. At the preset time
" TIMER " will flash.
6. After one hour the unit will be switched of
T / MEMORY UP button to set TIMER ON time.
Y / C-ADJ button for 3 seconds, the hour digit will start flashing. The
, the system will be switched on automatically and start playing , and
f automatically.
3 seconds, "TIMER " appears on the
"Clock Setting"
7
Page 9

SNOOZE SETTING
After the unit has turned on using the timer function, press the snooze button to turn the unit
off for 5 minutes. After this time, the unit will turn on.
TO SET SLEEP FUNCTION
1. If you want to fall asleep to music, press TIMER/SLEEP button on the unit (or remote) .
2. Press the sleep button repeatedly to cycle through the time until the unit turns off as
follows.
RADIO OPERATION
1. Press the TUNER button on the unit(or function on the remote until TUNER is displayed)
to select the Radio.
2.
Press the TUNER button (or STOP/BAND on the remote) to select wave
band you wish to listen to.
Manual tuning
1. To tune for weak stations, use manual tuning by pressing TUNING / SKIP / SEARCH
( FORWARD or BACKWARD) button continuously until you read the correct frequency or the
reception is at its best.
2. If you are listening to MW/FM station using stereo mode and there is a large amount of
background noise (hiss) , Please slide the FM STEREO/MONO selector switch to the
MONO position.
.
Automatic tuning
1. Press the TUNING / SKIP / SEARCH button for a second or
more, then release the button. The tuner will automatically find the first station of
sufficient signal strength.
2. Press above procedure if you wish to select another station.
Programming preset stations
You can also preset stations of your choice and store up to 10 MW and 10 FM stations
in memory. To store your selected broadcasting stations:
1. Press theTUNER button on the unit(or STOP/BAND button on the remote) to toggle
between MWand FM to make
2. Tune to the required station.
3. Press the MEMORY / C-ADJ button.
4. Press the REPEAT / M-UP button for your desired station number.
5. Press the MEMORY / C-ADJ again to confirm your selection.
6. To program more stations into memory, repeat the above steps 2 to 5.
7. To change the stored preset stations, repeat the above steps 2 to 5.
Notes:
1. Storing a new station into a preset location will erase the previously stored station in
that location.
2. Power off / failure or power cord disconnection will clear the memory of all preset
stations. Perform the above procedures again to store the stations.
Selecting the Preset Stations
1. Press the STOP/BAND button to select the desired band.
2. Press REPEAT/M-UP button to select the desired preset station number.
3. The numeric location of that preset station is displayed along with the corresponding
frequency.
your selection.
( FORWARD or BACKWARD)
8
Page 10
LISTENING TO COMPACT DISC (CD)
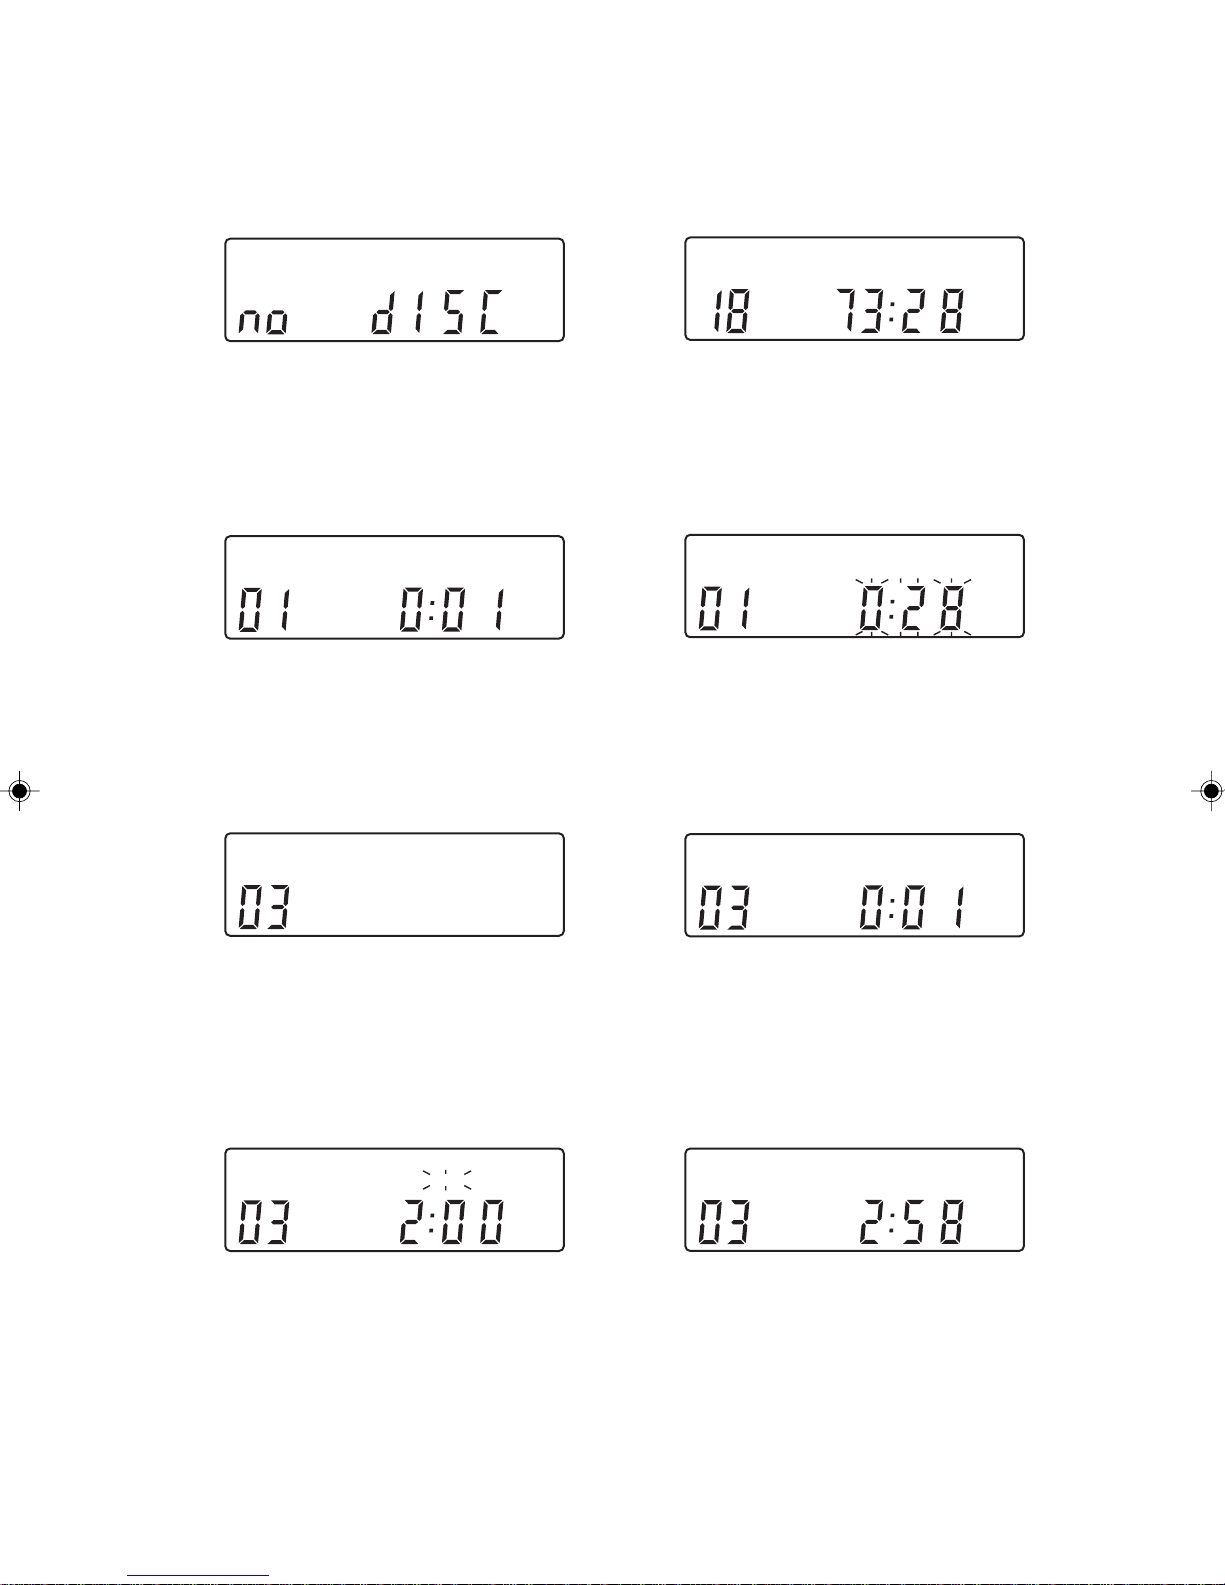
Press the CD button to select the CD operation.(Fig.1)
Press the OPEN/CLOSE button to open the CD door, insert the CD disc into the CD compartment,
press the CD door, and then the CD door will close and the number of tracks and total time of CD
will be displayed.(Fig
.2)
Fig. 1
CD
Fig. 2
CD
Playing The Entire CD
1. Start playback by pressing PLAY / PAUSE , the indicator then appears. Playback starts with
the first track , The display shows the current track number and its elapsed time.(Fig.3)
2. To interrupt playback , press PLAY/PAUSE . The time elapse indicator will flash.(Fig.4)
3. To resume playback, press PLAY/PAUSE again.
4. To stop playback, press STOP/BAND.
Fig. 3
CD
Fig. 4
CD
Selecting A Different Track During Play
1. Press TUNING / SKIP / SEARCH ( FORWARD or BACKWARD ) button on the unit (or
remote), until the required track number appears on the display. (Fig.5)
2. Press PLAY / PAUSE button to start playing.
(Fig.6)
3. The selected track will start from the begining.
Fig. 5
CD
Fig. 6
CD
Repeat play
1. When playing CD, if you desire to repeat the same track only, press REPEAT / M-UP button
on the unit(or remote) once and the "REPEAT" indicator will light up and flash .(Fig.7)
2. If you desire to repeat all tracks , press the REPEAT / M-UP button twice and the
" REPEAT " indicator will
3. To cancel repeat play , press the REPEAT / M-UP button
light up and not flash.(Fig.8)
until the " REPEAT " indicator
has disappeared.
Fig. 7
CD
REPEAT
Fig. 8
CD
REPEAT
Random play
1. Press the RANDOM button (on remote) once, and the "RANDOM" indicator will light up.
and playback will commence in a random order.(Fig.9)
2. Press STOP/ BAND button to clear the random mode.
9
Page 11
Stopping play
1. Press STOP/BAND button if you wish to stop play. The total tracks and time will now appear
on the display.(Fig.10)
2. Open the CD door on the unit to remove the CD .
Fig. 9
CD
RANDOM
Fig.10
CD
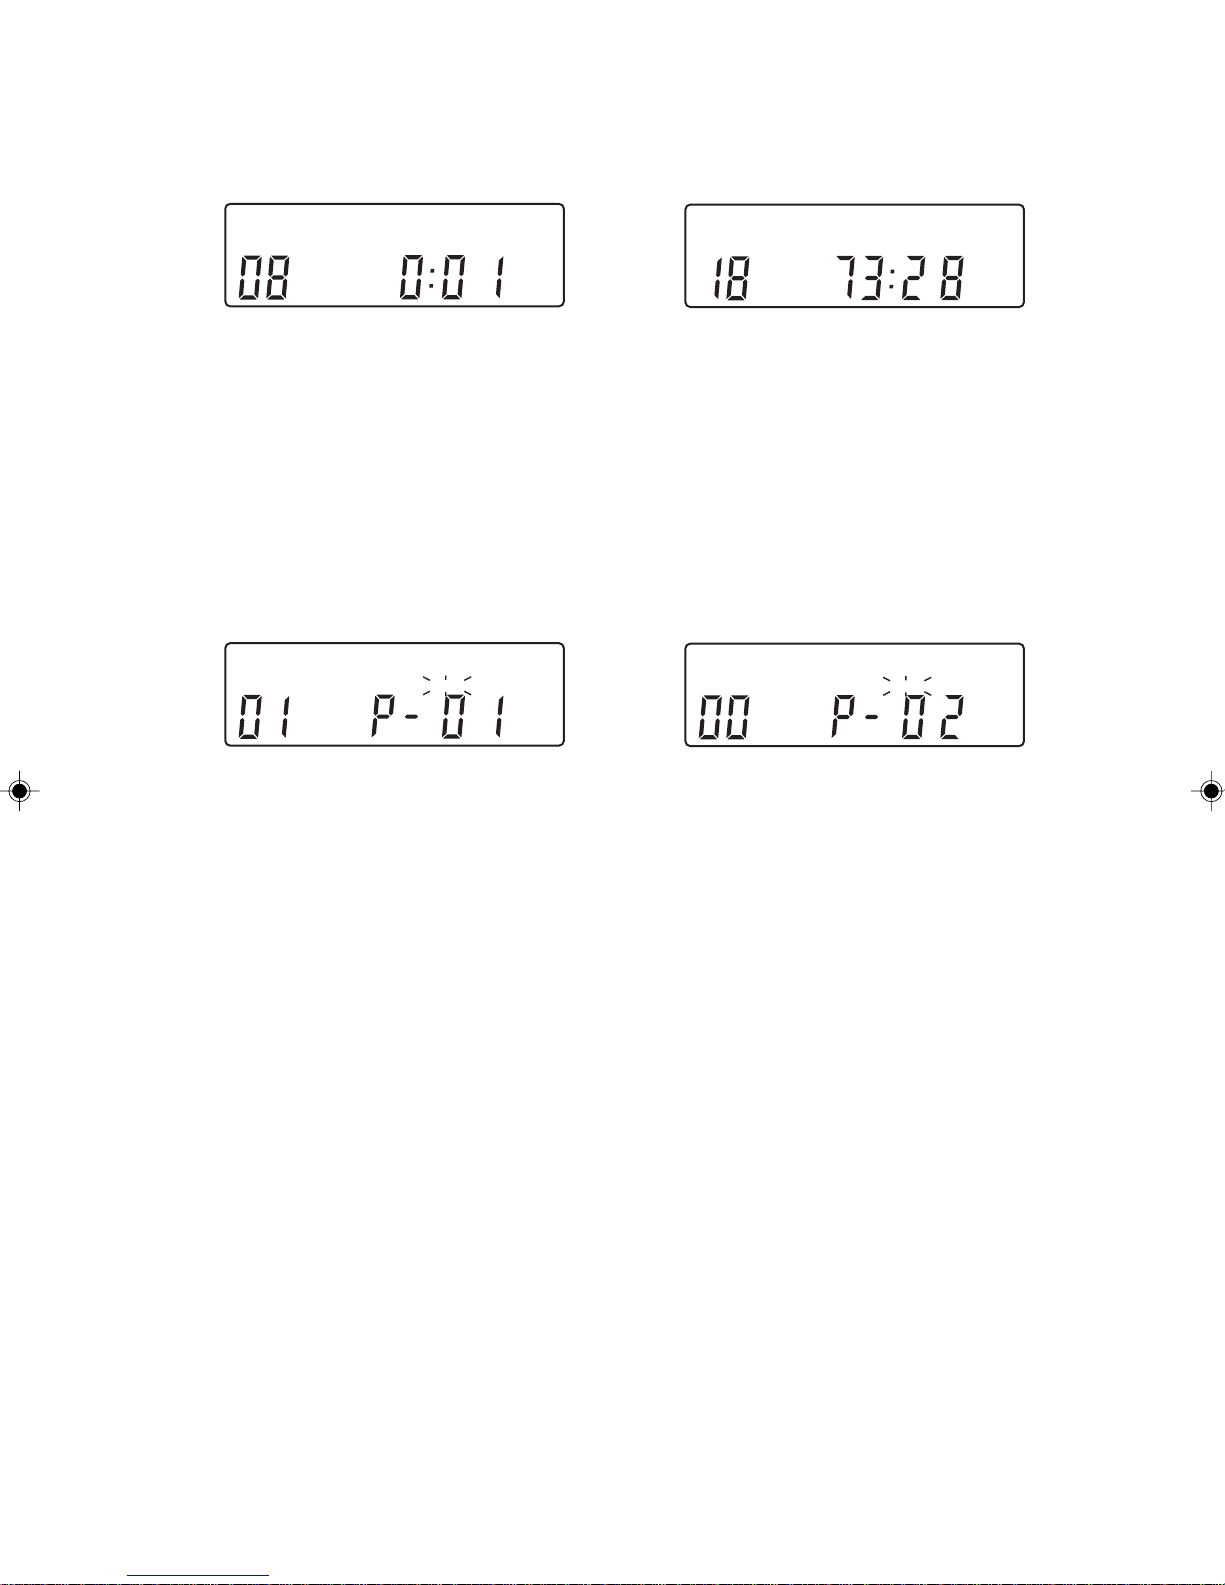
Programming the CD player
By programming the CD player, you can play up to 20 tracks in any desired order.
(Programming is only possible when the CD has stopped.)
1. Place the disc to be programmed in the tray. Press MEMORY / C-ADJ. button.
2. The display will show MEMORY TRACK and P-01. (Fig.11)
3. Use TUNING / SKIP / SEARCH (FORWARD or BACKWARD) button to select the first track
to be programmed.
4. When the desired track appears on the display, press MEMORY / C-ADJ. button again.
5. The display will show MEMORY TRACK and P-02.(Fig.12)
6. Repeat this procedure to select other tracks that you wish to program from the disc into
the memory.
Fig.11
CD
MEMORY
Fig.12
CD
MEMORY
Erasing a program
A program is erased if you :
Press MEMORY / C-ADJ. button, then STOP /BAND button in stop mode, switch the unit
OFF or opening the CD door.
Note :
In setting a new program , the existing one will be cleared.
10
Page 12
CASSETTE OPERATION
Playing Of Cassette
When playing a cassette, open the cover of the CASSETTE BUTTON DOOR first.
Be sure to tighten any slack tape in the cassette before use. Using either a pencil or a ball-point
pen, simply insert the pen or pencil into the centre of the spool and rotate to remove slackness.
Depress the CASS. STOP / EJECT button to open the cassette door.
Insert the cassette into the compartment with the open end facing upwards and full reel on the
righthand side, push the cassette well down and close the door. Be sure not to touch the tape
surface. Select "TAPE" on the FUNCTION button and press the PLAY button. To stop playback,
press the CASS. STOP / EJECT button once. To release the cassette, press the CASS. STOP /
EJECT button again.
Recording From Radio
Select radio station using the same method as described in radio operation section.
Insert a cassette into the deck and press the
Press the CASS. STOP / EJECT button to stop recording. The CASS. PAUSE button can be used to
stop recording for short intervals. Press the CASSETTE F.FWD to fast forword the tape, press the
CASSETTE REWIND button to fast rewind the tape.
Recording From CD
Set the FUNCTION to CD. Select the required tracks to be recorded. Insert a cassette into the
cassette deck and press the CASS. RECORD button.
Press the CASS. STOP / EJECT button to stop recording.
RECORD button.
Auto Stop
When the tape reaches the end in PLAY or RECORD, the built-in AUTO STOP system functions
to release the depressed PLAY, RECORD keys. The AUTO STOP system operates while recording
from the built-in RADIO or CD player. Only the cassette function is brought automatically to a
stop , the RADIO or CD PLAYER will continue to play.
Type Of Cassettes
Use only good quality cassettes (IEC TYPE1) for making recordings. be
used to replay
use of C120 cassettes is not recommended in this machine.
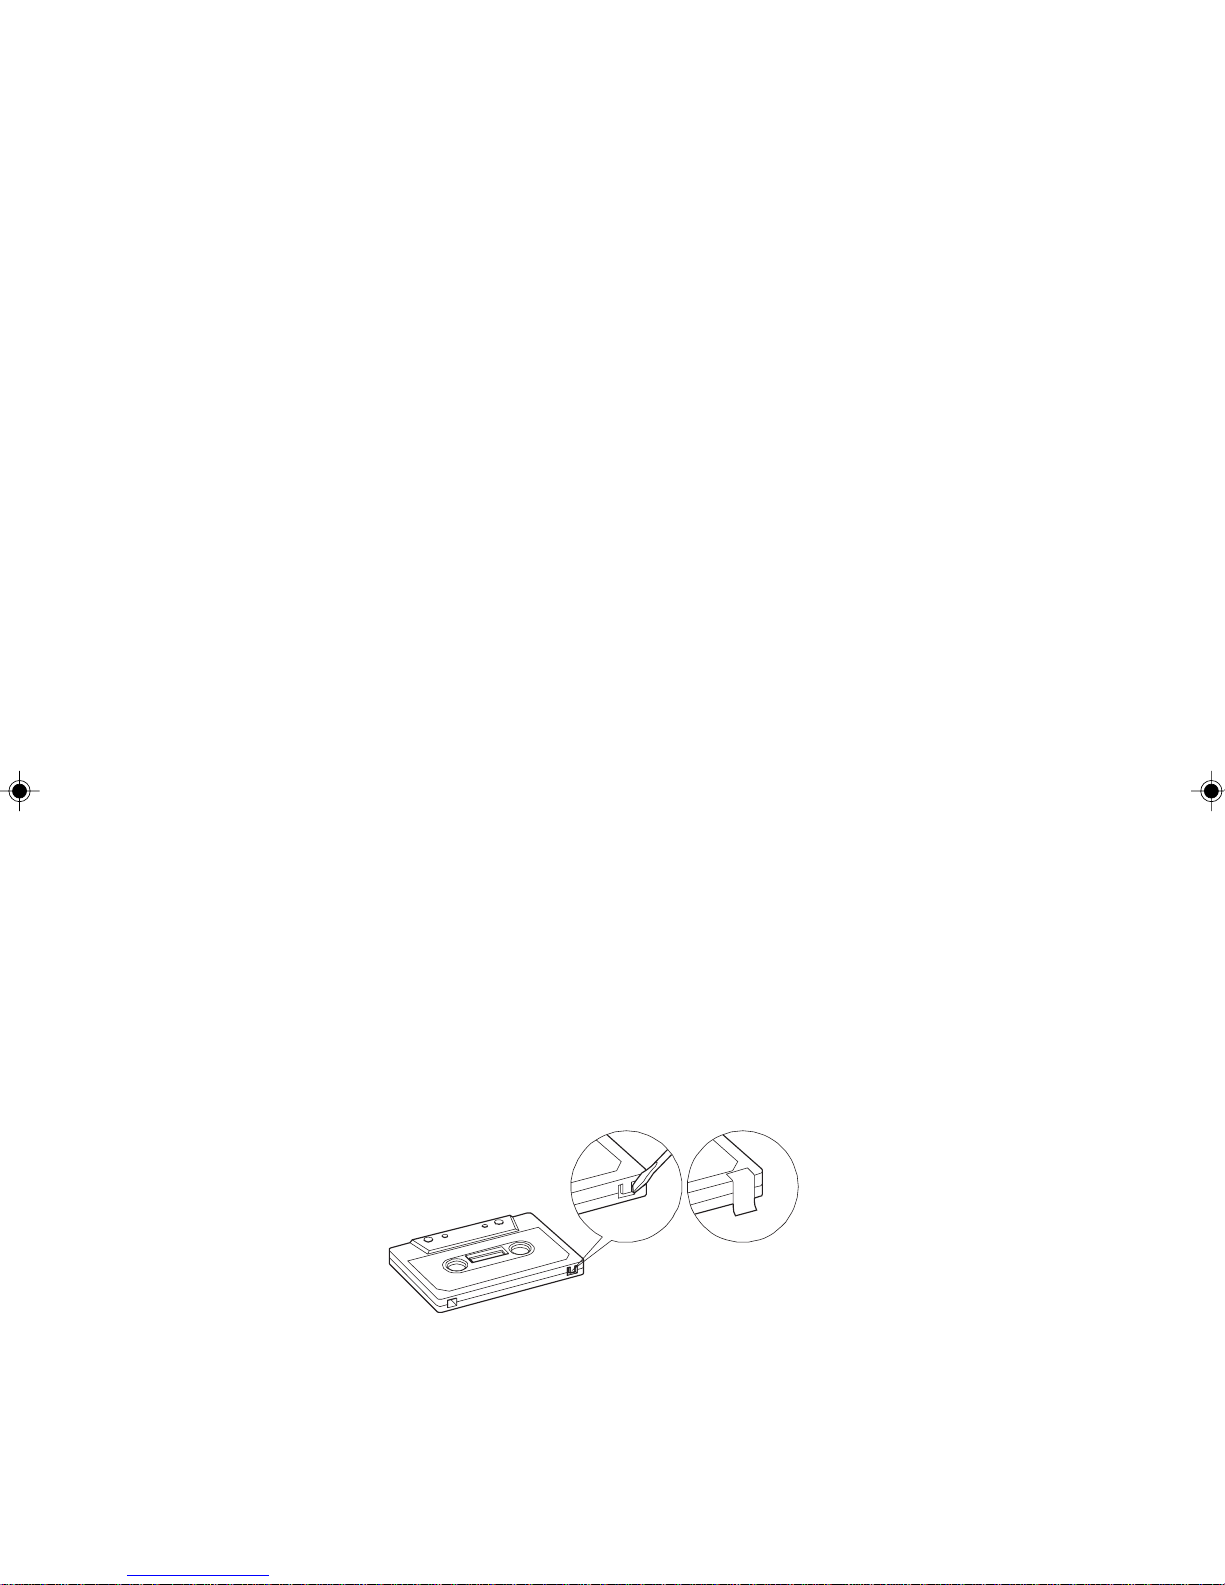
Protecting Recordings
Normally, anything recorded on the tape is automatically erased when new recording is made.
It is possible to protect your recordings from accidental erasure by removing the tabs found on
the rear of the cassette.
but is unable to make proper recordings on these more specialized tapes. The
types of cassette
other
11
Page 13

When the cassette is held with the recorded side upper-most and exposed tape facing the front,
the protective tab will be found on the right rear of the cassette.
All pre-recorded cassette are protected in this way to prevent accidental erasure of the
commercial recordings. "Protected" cassettes will prevent the record button from being operated.
If at any time you attempt to record and find that this button will not depress, never force the
mechanism or it may be damaged. Check that a cassette has been loaded and that tab has not
been removed. Recording on a cassette from which the tabs have been removed can be done by
covering the tab openings with a piece of adhesive tape.
Care Of Cassette Mechanism
Gently clean the tape head and pinch-wheel / capstan assemblies after every 10 hours of use
until all traces of oxide deposit have been removed. A range of cassette care products are
available from all good audio stores.
WARNING
Disconnect from the mains at the wall socket when not in use for a long time. Do not expose the
set to rain or
moisture.
BEAT CUT
If beat noise is present when recording, adjust the position of the BEAT CUT switch on the rear
of the unit .(For MW only)
12
Page 14
RESET
In the unit appears not to function correctly or create characters appear in display, Press the
reset button on
the back cabinet of the unit.
MODE/REMAIN SETTING
Press MODE/REMAIN button changing the display as shown below.
1. In the radio mode : Frequency display >> Clock display >> Timer ON time .
2. In the CD mode :
(During play) Elapsed time >> Remaining time >> Clock display >>
Timer ON time.
(During stop) Total time of CD >> Clock display >> Timer ON time.
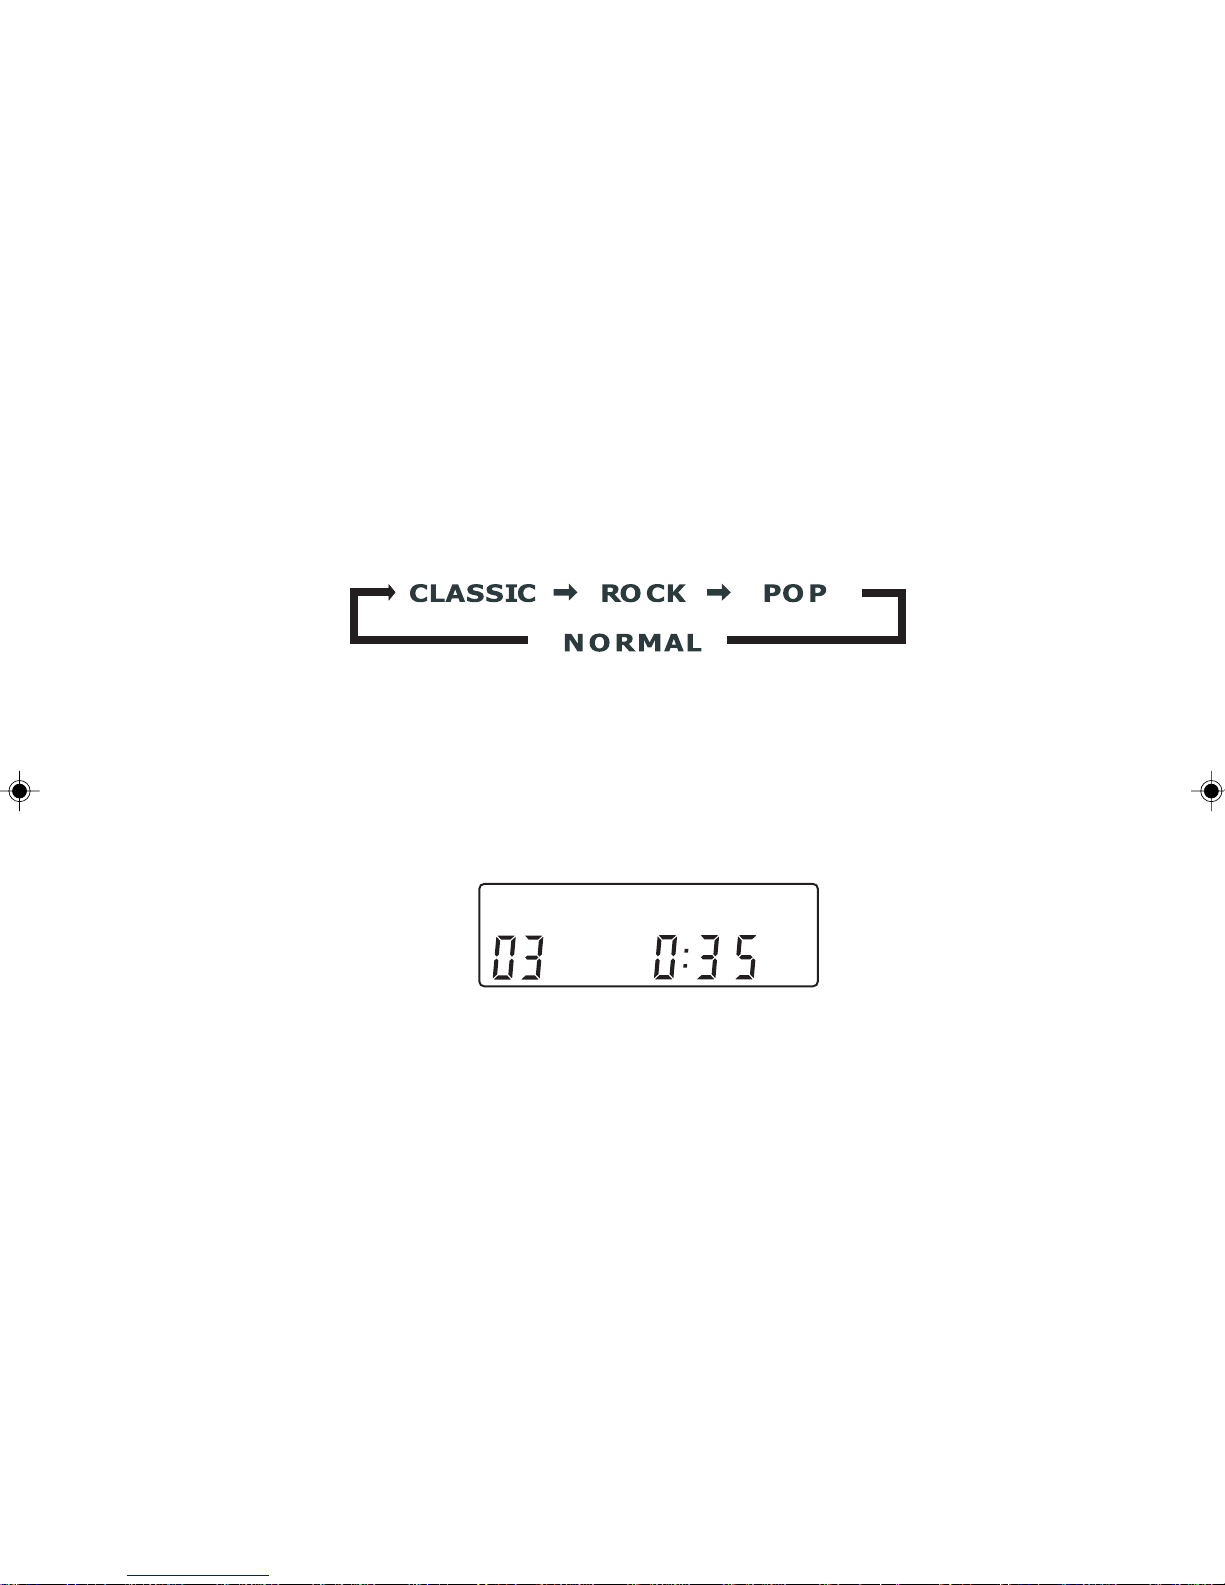
PRESET EQ SETTING
Press the PRESET EQ button on the remote, and LCD indicator will display CLASSIC,
ROCK or POP setting.
MUTE
1. If you press the MUTE button on the remote , the indicator will light on & the audio
output will be temporary muted.(Fig.13)
2. Press MUTE button again, the indicator will turn off & the audio output will resume
as normal.
Fig.13
MUTE
CD
LISTEN TO THE MUSIC BY USING HEADPHONE
A stereo headphone jack is provided for private listening . To listen to the unit with headphones
(not included ) insert the 3.5mm mini-stereo plug from the headphones into the PHONES
jack on the front panel. The external speakers are automatically turned off when
headphones are in use.
MEMORY BACK-UP
To insert 3 x AA or equivalent batteries in the battery compartment of the unit. It is
back-up the memory of the unit.
used to
13
Page 15
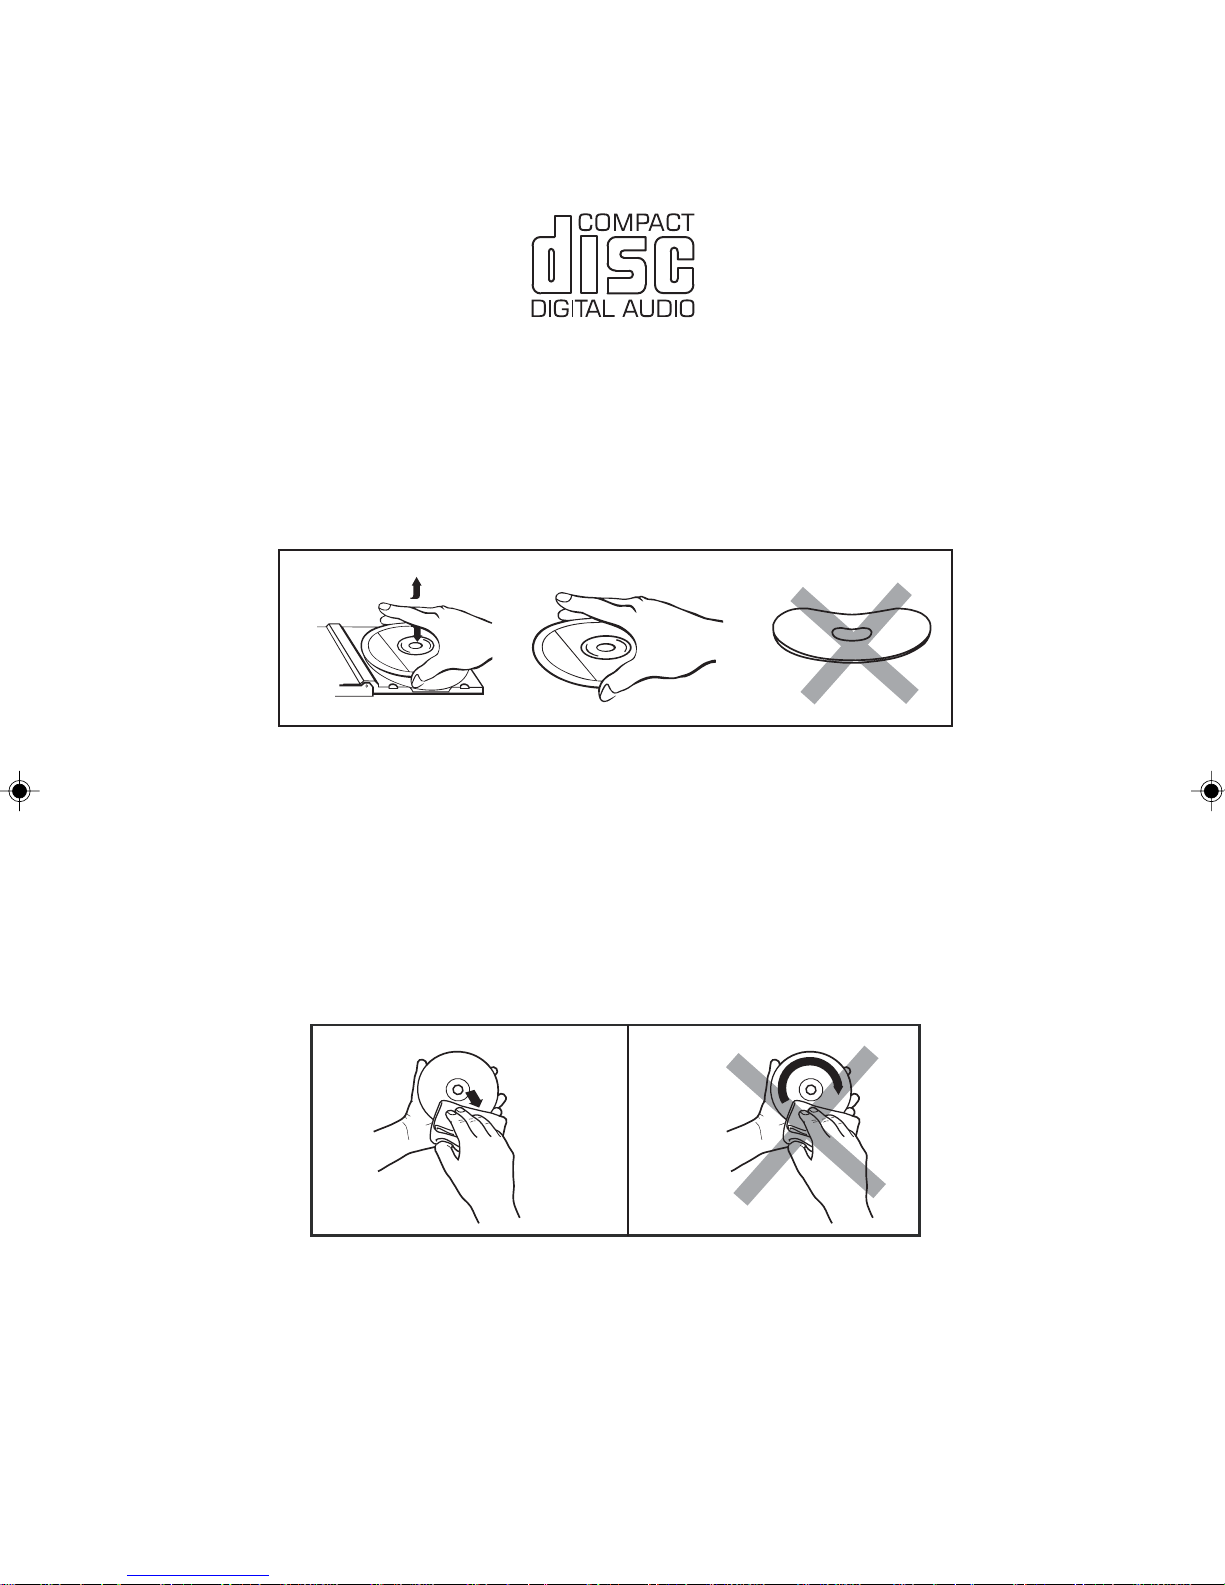
COMPACT DISC
1. Always use a compact discs bearing the mark as shown.
2. Notes on handling discs
Removing the disc from its storage case and loading it.
* Do not touch the reflective recorded surface.
* Do not stick paper or write anything on the surface.
* Do not bend the disc.
3. Storage
* Store the disc in its case.
* Do not expose discs to direct sunlight or high temperatures, high humidity or dusty
places.
4. Cleaning a disc
* Should the disc become soiled, wipe off dust, dirt and fingerprints with a soft cloth.
* The disc should be cleaned from the centre to the edge.
FROM THE CENTRE TO THE EDGE
CORRECT
INCORRECT
* Never use benzene, thinners, record cleaner fluid or anti static spray.
* Be sure to close the CD door so the lens is not contaminated by dust.
* Do not touch the lens.
14
Page 16

CD DISPLAY WINDOW
CLASSIC ROCK POP SLEEP
REMAIN SNOOZE TIMER REPEAT
MUTE RANDOM MEMORY
AUX TAPE CD TUNER
STEREO
FM
MW
AM PM
MHz
KHz
AB C D
A. TRACK NUMBER INDICATOR
B. BAND INDICATOR
C. TRACK/TIME
. STEREO INDICATOR
D
INDICATOR
SPECIFICATION
POWER SUPPLY : 230V~50Hz
OUTPUT POWER : 12.5 Watts x 2
UNIT DIMENSION : 152(W) X 267.5(D) X 218.5(H) mm
SPEAKER BOX DIMENSION : 140(W) X 215(D) X 218.5(H) mm
N. W. : 6.92 kg
RADIO SECTION
FREQUENCY RANGE : FM 87.5 - 108 MHz
MW 522 - 1620 kHz
CASSETTE SECTION
TAPE SPEED : 4.75 CM/SEC
FREQUENCY RESPONSE : 125Hz-8KHz
COMPACT DISC SECTION
OPTICAL PICKUP : 3 - BEAM LASER
FREQUENCY RESPONSE : 100Hz - 16kHz
SPECIFICATION SUBJECT TO CHANGE WITHOUT FURTHER NOTICE.
15
 Loading...