

Page 1

MICRO 1001
MICRO SYSTEM
CD FM/MW RADIO
INSTRUCTION MANUAL
Before operating this unit,
please read this owners manual carefully.
Goodmans product information helpline:
0870 873 0080
HELPLINE PHONE NUMBER 0870 873 0080 HELPLINE PHONE NUMBER 0870 873 0080
Page 2

INTRODUCTION
This instruction manual is important to you. Please read it. In a short time it shows exactly
how to connect, operate, and adjust this unit for best performance.
It can save you money. It shows simple things to do and check before you call for help
and save the cost of unnecessary service or call out charge.
Table of contents................................................................................................................1
Important Notes.................................................................................................................2
Important Safeguards................................................................................................ 3-4
Location of Controls...................................................................................................5-6
Display..............................................................................................................................7
Remote Control..................................................................................................................8
Speaker Cord Connection...................................................................................................9
Switching the unit on and off.................................................................................................9
Setting the Clock/To Remove the Speaker Grilles...............................................................10
Compact Discs................................................................................................................11
Compact Disc Operation...................................................................................................11
Operation/Remain Function...............................................................................................13
Tuner Operation................................................................................................................14
Timer Operation................................................................................................................15
Connecting an External Audio Source................................................................................16
Troubleshooting Guide.......................................................................................................17
Technical Specifications....................................................................................................18
Save the carton and packing material; they will be useful if you ever have to transport the
unit.
Pack contents:
1 x main unit
1 x remote control
2 x loudspeakers
1 x owner's manual
Please retain all packaging material for future transportation of the unit or in the unlikely
event that the unit needs to be returned for service.
IMPORTANT NOTES
Your hearing is very important to you and to us so please take care when operating this
equipment. It is strongly recommended that you follow the listed guidelines in order to prevent
possible damage or loss of hearing.
Establish a safe sound level
Over time your hearing will adapt to continuous loud sounds and will give the impression that
the volume has in fact been reduced. What seems normal to you may in fact be harmful. To
guard against this before your hearing adapts set the volume at a low level.
Once you have established a comfortable listening level do not increase the sound level further. The following list of typical sound levels may assist you in recognizing just how loud you
have set the volume level.
Decibel
Level dB example
30dB quiet library, soft whisper.
40dB Living room, fridge freezer bedroom away from traffic.
50dB normal conversation, quiet office, light traffic.
60dB Electric sewing machine.
70dB Vacuum cleaner, hair dryer, noisy restaurant.
The following noise can be harmful under constant exposure
80dB Average city traffic, alarm clock buzzer at 2 feet, food mixer.
90dB Motorcycle, heavy goods vehicle, petrol lawn mower.
100dB Pneumatic drill, chain saw, garbage truck, dlscotec/night-club.
120dB Rock band concert, thunderclap .
Permanent loss of hearing
140dB Threshold of pain gunshot 2 feet away.
180dB Rocket launching pad.
HELPLINE PHONE NUMBER 0870 873 0080 HELPLINE PHONE NUMBER 0870 873 0080
1
2
Page 3
IMPORTANT SAFEGUARDS
For your convenience a mains plug has been fitted to this appliance. For your safety please
observe the following information.
1. Should the fuse in the plug fail remove the plug from the wall socket and replace the fuse with
a 3 Amp ASTA approved to BS 1362 fuse.
2. Never use the plug without the fuse cover fitted. Replacement fuse covers are available from
your dealer or most electrical retail outlets.
3. If the mains plug is cut off the cable, rewire the replacement plug in accordance with instruction give in this manual.
4. CAUTION: Under no circumstances should the discarded plug be inserted into the mains
socket.To prevent a shock hazard carefully dispose of the discarded plug. Do not leave the
plug lying around where children might see it.
WARNING: To prevent fire or shock hazard do not expose this unit to rain or moisture.
CAUTION: DANGEROUS VOLTAGES EXIST INSIDE THIS UNIT. DO NOT
REMOVE COVER (OR BACK).
NO USER SERVICEABLE PARTS INSIDE REFER SERVICING TO
QUALIFIED SERVICE PERSONNEL. DISCONNECT FROM MAINS
SUPPLY WHEN NOT IN USE.
BLUE
WARNING: UNDER NO CIRCUMSTANCES MUST THE LIVE OR NEUTRAL WIRES
BE CONNECTED TO THE EARTH TERMINAL IN A 3- PIN MAINS PLUG.
This symbol means that this unit is double insulated.
An earth connection is not required.
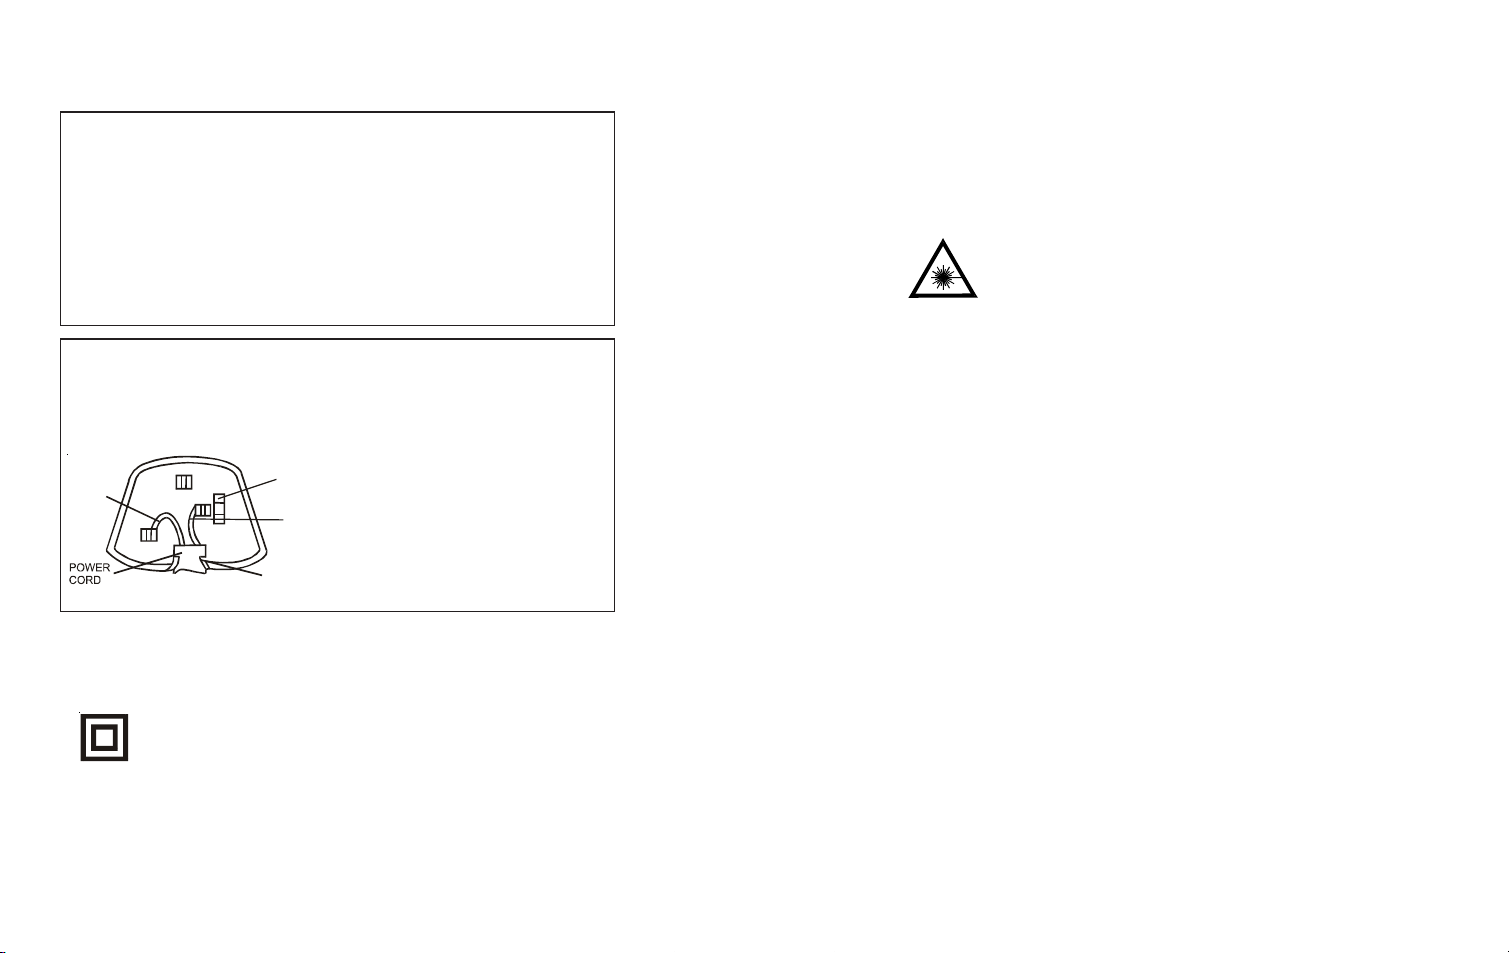
PRE FITTED MAINS PLUGS
This wires in this mains lead are coloured in
accordance with the following wiring codes:
FUSE
CORD GRIP
Blue..........................................................Neutral
Brown..................................................... ......Live
This wires in this mains lead must be connected
to the terminals in the plug as follows:
BROWN
Blue Wire............................................N or Black
Brown Wire..........................................L or Red
Only a 3 Amp fuse should be fitted in the plug
or a 5 Amp fuse at the distribution board.
CAUTION
CLASS 1 LASER PRODUCT
Use of contents or adjustments of performance of procedures other than those specified
Herein may result in hazardous radiation exposure.
LASER SAFETY
This unit employs a laser, only qualified service personnel should attempt repair.
DANGER: INVISIBLE LASER RADIATION WHEN OPEN AND INTERLOCK
FAILED OR DEFEATED. AVOID DIRECT EXPOSURE TO BEAM.
CAUTION: HAZARDOUS LASER RADIATION WHEN OPEN AND INTERLOCK DEFEATED.
SOME DO’ S AND DON’T’S ON THE SAFE USE OF EQUIPMENT
This equipment has been designed and manufactured to meet European safety standards but
like any electrical equipment, care must be taken if you are to obtain the best results and
safety is to be assured.
Do read the operating instruction before you attempt to use the equipment. Do ensure that all
electrical connections(including the mains plug, extension leads and interconnections between pieces of equipment ) are properly made in accordance with the manufacture’s instructions. Switch off and withdraw the main plug when making or changing connections.
Do consult your dealer if you are ever in doubt of the installation, operation, or safety of your
equipment.
Don’t continue to operate the equipment if you are in any doubt about it working normally, or if
it is damaged in any way-switch off, withdraw the mains plug and consult your dealer.
Don’t remove any fixed covers as this is may this is may expose DANGEROUS VOLTAGES.
Don’t leave equipment switched on when it is unattended unless it is specifically stated that it
is designed for unattended operation or has a standby mode, Switch off using the swich on the
equipment and made sure that your family knows how to do this, special arrangements may
need to be made for infirm of handicapped people.
Don't listen to headphones at high volume, as such use can permanently damage your hearing.
Don’t obstruct the ventilation of the equipment, for example with curtains or soft furnishings
overheating will cause damage and shorten the life of the equipment.
Don’t allow electrical equipment to be exposed to rain or moisture.
Above all
- Never let anyone, especially children, push anything into holes, slots or any other opening,
as this could result in a fatal electric shock.
- Never guess or take chances with electrical equipment of any kind.
- It is better to safe than sorry.
WARNING: TO REDUCE THE RISK OF FIRE OR ELECTRIC SHOCK. DO NOT EXPOSE
THIS APPLIANCE TO RAIN MOISRURE, DANGEROUS HIGH VOLTAGES ARE
PRESENT INSIDE THE ENCLOSURE, DO NOT OPEN THE CABINET REFER
SERVICING TO QUALIFIED PERSONNEL ONLY.
HELPLINE PHONE NUMBER 0870 873 0080 HELPLINE PHONE NUMBER 0870 873 0080
3
4
Page 4

LOCATION OF CONTROLS
R
CONNECT THE
LOUDSPEAKERS TO
THESE SOCKETS
16 14
17
15 13
1
2
3
4
5
6897
1. POWER Key
• Press to turn the power ON/Stand-by.
2. CD Key
• For compact disc.
3. TUNER Key
• To select the Tuner source.
4. MEMORY/CLOCK ADJUSTMENT
Key (MEM/CLK ADJ)
• In the Radio mode: the preset memory
is called in ascending order.
• In the CD mode: for setting program.
• In the clock mode: for setting of the
clock or timer adjustment.
5. PHONES JACK
• Connection for headphones.
6. SEARCH/CLK
7. SLEEP/TIMER
10
9. STOP/BAND Key
• In the CD mode: to stop the
compact disc or clear program.
• In the Radio mode: to select
the receiving band.
10. VOLUME Key
• To adjust the volume level.
11. PRESET EQUALIZER Key(EQ)
12
11
• For selecting Digital Sound
Control: CLASSIC, ROCK, POP
and FLAT.
12. OPEN/CLOSE Key
13. PLAY/PAUSE Key
• In the CD mode: to start or
interrupt play.
14. MEMORY-UP/REPEAT Key
(REPEAT/M-UP)
• In the Radio mode: for recalling
the preset memory in order.
• In the CD mode: for selecting
the all repeat or track repeat mode.
15. DISPLAY Key
• To indicate the functioning of the
unit.
16. AUX Key
17. REMOTE SENSOR
•To receive signals from the
remote control.
18. AC POWER CORD
19. FM AERIAL
20. POWER SWITCH
21. AUX INPUT SOCKET
22. SPEAKER SOCKET
23.STEREO/MONO SELECTOR
24. AM AERIAL
SPEAKER
24
L
18 22 23211920
8. MUTE Key
• To mute the sound output.
HELPLINE PHONE NUMBER 0870 873 0080 HELPLINE PHONE NUMBER 0870 873 0080
5
6
Page 5

18
17
16
14
15
12
11
13
3
9
DISPLAY
REMOTE CONTROL
CONNECTION
• Do not switch the power to the unit
1
2
4
5
6
7
8
10
on until all connections are made.
• Do not place the FM aerial lead (B)
on a metal desk or near a TV or
personal computer.
• Unravel and position the FM aerial
lead away from the power and speaker
cords as these could generate noise.
Do not position the FM aerial lead so
that it touches the rear of the unit.
REMOTE
1. POWER Key
2. PRESET EQUALIZER Key (EQ)
3. VOLUME Key
4. SNOOZE Key
5. INTRO Key
6. REPEAT Key
7. FF Key
8. STOP / BAND Key
9. MEMORY-UP Key
10. FUNCTION Key
11. DISPLAY Key
12. REW Key
13. PLAY/PAUSE Key
14. PROG/MEM Key
15. RAND Key
16. TIMER Key
17. SLEEP Key
18. MUTE Key
HELPLINE PHONE NUMBER 0870 873 0080 HELPLINE PHONE NUMBER 0870 873 0080
7
REPLACING THE BATTERY
If the remote control has erratic or no
operation.Replace the batteries (type
AAA. obtainable from most shops).
Remove the battery cover from the back
of the remote.Remove the batteries and
insert new once ensuring correct polarity. Replace the battery cover into the
remote.
8
INSERT
2 AAA Batteries
(Not Supplied)
Page 6

SPEAKER CORD
CONNECTION
TO LEFT SPEA KER
R
L
SPEAKER
TO RIGHT SPEAKER
Connect the cable from the speaker on the
left to the (L) terminal and the cable from
the speaker on the right to the (R) terminal.
DO NOT CONNECT
THE SPEAKERS TO
THE AUX SOCKETS
NOTE:
The speakers are not magnetically
shielded. If placed next to or on top of your
TV. The picture colour will be distorted.
Install the speaker at least 5 inches away
from your TV.
AC POWER CONNECTION
Connect the ac power lead after all other
connections have been made.
NOTE:
When there is a long power failure, or the
mains lead is disconnected for more than
3 hours, the clock and tuner preset stations may be erased from the memory.
Reset the clock and presets when power
is restored.
SWITCHING THE UNIT ON
AND OFF
Press the power button to turn the unit on.
POWER STANDBY
Power standby mode allows you to turn
the unit on and off (to standby mode)with
the power button on the remote control or
on the unit itself. If you want to turn off the
unit completely, remove the AC plug from
the household supply.
VOLUME CONTROL
To adjust the volume, press the VOLUME
and VOLUME button of front panel or press
the VOLUME DOWN/UP button of remote
control to the desired level.
STEREO HEADPHONE
Stereo headphone socket is provided on the
front panel of the main unit (headphones
not supplied). Connect a low impedance (432ohm) stereo headphone to the headphone
socket for private listening. Inserting the
3.5mm headphone jack plug automatically
disconnects the loudspeakers.
SETTING THE CLOCK
1. Press DISPLAY to change to
Clock display.
2. Press and hold MEMORY/CLK
ADJ, the first second digit of
"24H" will flash, press
SEARCH/CLK to set the
correct hour mode.
3. Press MEMORY/CLK ADJ to
select the hour setting, the first
second digit of "00" will flash,
press the SEARCH/CLK
to set the correct hours.
4. Press MEMORY/CLK ADJ
again to select the minutes
setting, the third fourth digit of
"00" will flash, press the
SEARCH/CLK to set the
correct minutes.
5. Press MEMORY/CLK ADJ again
to store in the memory.
TO REMOVE THE
SPEAKER GRILLES
1. Insert your fingers at the top
and bottom of the grille and pull
towards you.
Attaching the speaker grille.
speaker grille.
speaker
Match the fittings when attaching the grille.
HELPLINE PHONE NUMBER 0870 873 0080 HELPLINE PHONE NUMBER 0870 873 0080
9 10
Page 7

COMPACT DISCS
1. Always use compact discs bearing the
mark as shown:
2. Note: Home recorded discs (CDR) are
not guaranteed to work on this player.
3. Notes on handling discs. Removing the
disc from its storage case.
Press the claws at the
center of the case.
Lift out without touching
the recorded surface.
• Do not touch the reflective recorded
surface.
• Do not bend the disc.
• Do not stick or write anything on the
surface.
4. Storage
• Store the disc in its case.
• Do not expose the disc to direct
sunlight, high temperatures, high
humidity or dusty places.
5. Cleaning a disc
• Should the disc become soiled, wipe
off dust, dirt and fingerprints with a
soft cloth. The disc should be
cleaned from the centre to the edge.
• Never use benzene, thinners, record
cleaner fluid or antistatic spray.
8cm (3 3/16) “CD singles” can be
used (without using an adapter) in
this unit.
CLEANING THE LENS
If the lens in the CD pick-up is dirty, dusty,
etc., it could degrade the sound or prevent
disc play.
COMPACT
DIGITAL AUDIO
Incorrect
Correct Incorrect
• Use a blower (available from camera
stores) to blow dust off the lens.
• If there are fingerprints, etc., on the
lens, gently wipe clean with a cotton
swab.
NOTE:
Only the discs marked with the disc
logo are guaranteed to work on this
player. Home recorded discs (CDR)
recorded on home pc's may not play
or operate correctly. CDRW discs cannot be played.
COMPACT DISC OPERATION
1. Press CD Function Button.
2. Press OPEN/CLOSE Button to
open the CD door.
3. Insert a CD in the tray. Label
side uppermost.
4. Press OPEN/CLOSE Button to
close the CD door.
The CD-player starts and scans
the contents list of the CD. After
a few seconds,the total playing
time and number of tracks
appear on the display.
"NO DISC" will show if disc is inserted upside down.
PLAYING THE ENTIRE DISC
1. Press PLAY/PAUSE.
– Play starts with the first track.
– The display shows the current
track number and its elapsed
playing time.
– When all the tracks have been
stops and the total number of
tracks and total playing time
are shown on the display.
2. To stop play, press STOP
.
3. To interrupt play, press PLAY/
PAUSE.
4. To resume play, press PLAY/
PAUSE again.
SELECTING A DIFFERENT
TRACK DURING PLAY
1. Press SEARCH/CLK until
the required track number
appears in the display.
STARTING AGAIN WITH THE
TRACK THAT IS CURRENTLY
PLAYING by pressing
(SEARCH) once. The track will be
played again from the beginning.
SEARCHING FOR A PASSAGE
DURING PLAY by holding
(SEARCH) or (SEARCH)
pressed down to search for the
required passage. If you release
the button, play will continue. The
volume will automatically be reduced to a low level during search
operation and will return to its normal level when the search button
is released.
PROGRAMMING TRACKS
Up to 20 tracks can be programmed into memory.
1. Load a CD as described under
Inserting the disc.
2. Press MEMORY/CLK ADJ to
start programming.
3. Press
SEARCH/CLK to
locate a particular track. The
track number is shown on the
display.
4. When you have found the correct
track number, press MEMORY/
CLK ADJ to store it in the
memory. The display will shows
the programmed tracks.
5. To stop
programming, press
STOP
once.
6. The programming will automatically stop if no button is pressed
in a period of 10 seconds.
REVIEWING THE PROGRAMME
1. Press MEMORY/CLK ADJ
repeatedly to review of the tracks
currently programmed will begin.
The tracks will be displayed on
the LCD.
PLAYING A PROGRAMME
1. Press PLAY/PAUSE .
2. Play starts with the first track of
the programme.
3. When all tracks have been
played, the CD player stops.
CLEAR PROGRAMME TRACKS
Opening and closing the CD tray
will erase all programmed tracks.
RANDOM PLAY (Remore Control Only)
You can play all the tracks on a
disc in a random order.
1. Press CD Key.
2. Press RANDOM (RAND) Button
3. "RANDOM" shows in the display.
4. Press PLAY/PAUSE .
5. The tracks will be played in a
random order.
6. Press STOP or RANDOM to
cancel the random mode.
HELPLINE PHONE NUMBER 0870 873 0080 HELPLINE PHONE NUMBER 0870 873 0080
11
12
Page 8

INTRO PLAY(Remote control
only)
Press INTRO during STOP mode
the first 10 seconds of each track
on the disc will be played.
REPEAT PLAY
To listen to a track, disc or programme over and over again, Use
the "REPEAT" function.
1. Press REPEAT/M-UP once.
2. "REPEAT" will be displayed in
the Display and all tracks on the
disc will be repeated.
3. Press REPEAT/M-UP twice,
"REPEAT"will flash in the
Display and current track will be
repeatedly played.
4. Press REPEAT/M-UP again to
cancel the repeat function.
REMAIN FUNCTION
In Radio Mode:
Press DISPLAY to change display
information as follows:
Freq display > Clock display > Timer
> (Freq display)
In CD Mode:
Press DISPLAY to change display
information as follows:
CD normal display > Clock display
> Timer (CD normal display)
For 'NORMAL PLAY'
1. Track elapsed time
2. Remain time on disc
3. Clock time
4. Timer
5. Track time elapsed time
HELPLINE PHONE NUMBER 0870 873 0080 HELPLINE PHONE NUMBER 0870 873 0080
For 'RANDOM' & 'MEMORY'
1. Track elapsed time
2. Clock time
3. Timer
4. Track elapsed time
In Other Mode:
Press DISPLAY to change display
information as follows:
Clock display > Timer (Clock display)
Important note:
Please ensure that small children/babies do not operate this
appliance. keep them away from
the motorized CD tray as
trapped fingers may hurt.
13
TUNER OPERATION
TUNING
1. Press POWER to switch on the
unit.
2. Press TUNER button .
3. Select the tuning BAND with the
STOP/BAND button FM or MW.
4. Press SEARCH/CLK for
few seconds, then release the
button.
– The tuner will automatically
search for the first broadcast
of sufficient strength.
– Repeat this procedure if you
wish to select another station.
5. To tune to weak stations,briefly
depress SEARCH/CLK
continuously until you reach the
required frequency or the
reception is at its optimum.
6. Switch to MONO if there is
interference noise during FM
stereo reception. switch is
located at rear of player.
PROGRAMMING OF PRESET
STATIONS
1. Select the band with the STOP/
BAND button.
2. Tune to the desired station as
described under Tuning.
3. Press MEMORY/CLK ADJ.
"MEMORY" will start to flash.
4. Press REPEAT/M-UP to assign
a number (1-10) to the preset
station.
5. Press MEMORY/CLK ADJ
again. The frequency, preset
number and stereo setting are
now entered in the memory.
6. Repeat this procedure to store
other frequencies and preset in
the memory.
7. Upto 10 FM & 10 MW stations can be
stored.
TUNING TO PRESET STATIONS
Select a number between 1 and 20 by
pressing :
– REPEAT/M-UP button.
14
Page 9

TIMER OPERATION
Before setting the timer, make sure
the clock is correctly set. See page
10.
TIMER ON SETTING
Turn on the unit and Press CD,
TUNER to select the desired sound
source.
WAKE TO TUNER
1. If you select TUNER, press
REPEAT/M-UP to select a
preset station.
2. The display will show the
selected preset station and
frequency.
3. Press TIMER to confirm your
selection.
4. 'TIMER' segment will appear
on the display.
5. Press DISPLAY to change the
display to clock mode.
6. Press TIMER, start time and
TIMER segment will flash on
the display about 5 seconds.
7. Press and hold MEMORY/CLK
ADJ, the digit of hour segment
will flash on the display about
10 seconds.
8. Press SEARCH/CLK
to set the hour.
9. Press MEMORY/CLK ADJ
again, digit of minutes segment
will flash on the display about
10 seconds.
10. Press SEARCH/CLK to
set the minutes.
11. Press MEMORY/CLK ADJ again
to store the start time.
WAKE TO CD
Turn on the unit.
1. Insert a disc into the CD tray.
2. Press TIMER.
3. Repeat steps 5-11 under wake
to tuner for Timer ON setting.
To cancel the Timer press the
Timer Button on the Remote
Note: The TIMER will operate again
in 24 hours.
When waking to CD playback will
always start from track 1.
Note: When using the TIMER func-
tion the unit will turn off 60 minutes
after the unit has switched on.
For example: If the tuner is set to
turn on at 8 a.m. it will turn off again
at 9 a.m. Please note this period is
fixed and cannot be adjusted.
After the timer turns the unit on,
press the snooze button to turn the
unit off for a further 5 more minutes.
After this time the unit will turn on
again.
SLEEP
1. Press SLEEP, on the Remote 'SLEEP' appears in the display.
2. Press and hold the SLEEP Button to adjust the sleep time in the order of
90>80>70....10 minutes.
3. To cancel the SLEEP mode, press SLEEP again.
Note: The minimum sleep time is 10 minutes.
CONNECTING AN EXTERNAL AUDIO SOURCE
AUX input: connect external stereo audio source (e.g. TV or VCR audio output)
using RCA plugs.
HELPLINE PHONE NUMBER 0870 873 0080 HELPLINE PHONE NUMBER 0870 873 0080
15 16
Page 10

TROUBLESHOOTING GUIDE
TECHNICAL SPECIFICATIONS
Please make these simple checks before calling our helpline. These tips can save you time
and money.
NO POWER • Make sure the power cord is inserted fully into a
230V/50Hz outlet.
• Check to be sure that the outlet is not controlled
by a wall switch.
• Unplug the power cord, wait 1 minute, then reinsert
the plug and push the POWER button.
NO VOLUME • Check the VOLUME control setting.
• Make sure the correct feature has been selected.
(For instance, “CD” should be selected when
playing a CD.)
• Make sure the speakers are properly connected.
• Make sure the speaker wires are not shorted
together.
• If headphones are plugged in, disconnect them.
REMOTE CONTROL
DOES NOT WORK • Check and if necessary, replace the batteries.
• Make sure the remote is pointed head-first at the
micro system.
• Make sure the micro system is plugged into an
operating wall outlet.
• The remote may be too far away from micro system.
CAN’T TUNE RADIO STATIONS • Repeat channel selection.
• Mark sure the FM wire aerial is unravelled & fully
extended
NOTE: If operation of the unit or display is not normal, you should reset the unit by discon
necting it from the household wall outlet for 1 minute and then reinsert the plug.
WARNING: IF AN Y OF THE ABOVE HINTS DOES NOT SOLVE A PROBLEM YOU ARE
EXPERIENCING, PLEASE CALL OUR PRODUCT INFORMATION HELPLINE
FOR FURTHER ASSISTANCE.
Power Supply : AC 230V, 50Hz
Output Power (Per Channel) : 5 watts RMS into 4 ohm
Power Consumption : 28W
Radio Section
Frequency Range : FM 87.5 - 108 MHz
MW 522 - 1620 KHz
Compact Disc Section
Frequency Response (-6dB) : 20-15,000 Hz
Signal-to-noise Ratio : 50 dB
Harmonic Distortion : 0.4%
Channel Separation : 40 dB
CONTINUOUS IMPROVEMENTS ARE BEING MADE TO OUR EQUIPMENT
BOTH IN QUALITY AND PERFORMANCE, THUS WE RESERVE THE RIGHT
TO ALTER SPECIFICATIONS WITHOUT NOTICE.
HELPLINE PHONE NUMBER 0870 873 0080 HELPLINE PHONE NUMBER 0870 873 0080
17
18
820-353000050-G61
 Loading...