

Page 1

MINI SYSTEM WITH MP3 DECODER
6160
Page 2

Important Notes
Hearing is Very important to you and to us so please take care when operating this equipment. It is strongly recommended that you
follow the listed guidelines in order to prevent possible damage or loss of hearing:
ESTABLISH A SAFE SOUND LEVEL
Over time your hearing will adapt to continuous loud sounds and will give the impression that the volume has in fact been reduced.
What seems normal to you may in fact be harmful. To guard against this BEFORE YOUR HEARING ADAPTS set the volume at a
low level.
Slowly increase the level until you can hear comfortably and clearly and without distortion.
Damage to your hearing is accumulative and is irreversible.
Any ringing or discomfort in the ears indicates that the volume is too loud.
Once you have established a comfortable listening level, DO NOT INCREASE THE SOUND
LEVEL FURTHER.
The following list of typical sound levels may assist you in recognizing just how loud you have set the volume level.
DECIBEL
Level dB Example
30dB Quiet library, soft whisper.
40dB Living room, fridge freezer bedroom away from traffic.
50dB Normal conversation, quiet office, light traffic.
60dB Electric sewing machine.
70dB Vacuum cleaner, hair dryer, noisy restaurant.
THE FOLLOWING NOISE CAN BE HARMFUL UNDER CONSTANT
EXPOSURE
80dB Average city traffic. Alarm clock buzzer at 2 feet, food mixer.
90dB Motorcycle, heavy goods vehicle. Petrol lawn mower.
100dB Pneumatic drill, chain saw, garbage truck, discotec / night-club.
120dB Rock band concert, thunderclap.
PERMANENT LOSS OF HEARING
140dB TNRESHOLD OF PAIN Gunshot 2 feet away.
180dB Rocket Launching pad.
G-1
Page 3
IMPORTANT SAFEGUARDS
PRE FITTED MAINS PLUGS
For your convenience a mains plug has been fitted to this appliance. For your
safety please observe the following information.
1. Should the fuse in the plug remove the plug from the wall socket and replace the fuse with a 3 Amp ASTA approved to BS
1362 fuse.
2. Never use the plug without the fuse cover fitted. Replacement fuse covers are available from your dealer or most electrical
retail outlets.
3. If the cable of the mains plug is cut off the cable, rewire the replacement plug in accordance with instruction given in this
manual.
4. CAUTION: Under no circumstances should the discarded plug be inserted mains socket. To prevent a shock hazard
carefully dispose of the discarded plug. Do not leave the plug lying around where children might see it.
WARNING: To prevent fire or shock hazard do not expose this unit to rain or moisture.
CAUTION: DANGEROUS VOLTAGES EXIST INSIDE THIS UNIT. DO NOT REMOVE COVER (OR BACK), NO
USER SERVICEABLE PARTS INSIDE. REFER SERVICING TO QUALIFIED SERVICE PERSONNEL.
DISCONNECT FROM MAINS SUPPLY WHEN NOT IN USE.
PLUG WIRING DETAILS
The wires in this mains lead are coloured in accordance with the
following winng codes;
Blue ......................................................................................... Neutral
BROWN
LIVE
BLUE
NEUTRAL
E
BS 1362
FUSE
N
Brown .......................................................................................... Live
The wires in this mains lead must be connected to the terminates in
the plugs as follows:
Blue
......................................................................................
Nor Black
Brown Wire ........................................................................... Lor Red
CORD CLAMP
Only a 3 Amp fuse should be fitted in the plug or a 5 Amp fuse at the
distribution board.
WARNING: UNDER NO CIRCUMSTANCES MUST THE LIVE OR NEUTRAL WIRES BE CONNECTED TO THE EARTH
TERMINAL IN A 3 -PIN MAINS PLUG.
This symbol means that this unit is double insulated.
An earth connection is not required.
G-2
Page 4

CAUTION
CLASS 1 LASER PRODUCT
Use of Controls or adjustments or pertormance of procedures other than those specified herein may result in hazardous radiation
exposure.
LASER SAFETY
This unit employs a laser, only qualified service personnel should attempt repair.
DANGER: INVISIBLE LASER RADIATION WHEN OPEN AND INTERLOCK FAILED OR
DEFEATED.AVOID DIRECT EXPOSURE TO BEAM.
CAUTION: HAZARDOUS LASER RADIATION WHEN OPEN AND INTERLOCK OR
DEFEATED.
CAUTION
CLEANING: Always disconnect unit from mains supply before attempting to clean it. Use soft cloth moistened with soapy water. Wipe
gently. Do not use solvents or abrasive materials.
SOME DO'S AND DON'T'S ON THE SAFE USE OF EQUIPMERT
This equipment has been designed and manufactured to meet European safety standards but like any electrical equipment, care must be
taken if you are to obtain the best results and safety is to be assured.
Do read the operating instructions before you attempt to use the equipment.
Do ensure that all electrical connections (Including the mains plug. Extension leads and interconnections between pieces of equipment)
are properly made in accordance with the manufacturer's instructions. Switch off and withdraw the mains plug when making or changing
connections.
Do consult your dealer if you are ever in doubt of the installation, operating, or safety of your equipment.
Don't continue to operate the equipment if you are in any doubt about it working normally, or if it is damaged in any way-switch off.
Withdraw the mains plug and consult your dealer.
Don't remove any fixed covers as this may expose dangerous voitages.
Don't leave equipment switched on when it is unattended unless it is specifically stated that it is designed for unattended operation or has
a standby mode. Switch off using the switch on the equipment and make sure that your family knows how to do this Special
arrangements may need to be made for infirm or handicapped people.
Don't listen to headphones at high volume, as such use can permanently damage your hearing.
Don't obstruct the ventilation of the equiment. For example with curtains or soft furnishings.
Overheating will cause damage and shorten the life of the equipment.
Don't allow electrical equipment to be exposed to rain or moisture.
Above all
-
Never let anyone, especially children, push anything into holes, slots or any other opening as this could result in a fatal electric shock.
-
Never guess or take chances with electrical equipment of any kind.
-
It is better to be safe than sorry!
WARNING: TO REDUCE THE RISK OF FIRE OR ELECTRIC SHOCK. DO NOT EXPOSE THIS APPLIANCE TO RAIN OR
MOISTURE. DANGEROUS HIGH VOLTAGES ARE PRESENT INSIDE THE ENCLOSURE. DO NOT OPEN THE
CABINET. REFER SERVICING TO QUALIFIED PERSONNEL ONLY.
HELPLINE PHONE NUMBER 0870 873 0080
1
Page 5

Table of Contents
Caution ..........................................................................................................................1
Table of Contents..........................................................................................................2
Getting Started ..............................................................................................................3
Accessories .............................................................................................................................................. 3
How To Put Batteries In the Remote Control.......................................................................................... 3
Using the Remote Control....................................................................................................................... 3
Connecting the FM Aerial........................................................................................................................ 4
Connecting the MW Aerial...................................................................................................................... 5
Connecting the Speakers ......................................................................................................................... 5
Connecting External Equipment.............................................................................................................. 6
Connecting to the Wall Outlet................................................................................................................. 6
DEMO Mode........................................................................................................................................... 6
AUTO Playy........................................................................................................................................... 6
Basic Operations...........................................................................................................7
Turning the Power On and Off................................................................................................................ 7
ECO Mode (ECO) .................................................................................................................................. 7
Adjusting the Volume............................................................................................................................. 8
Fade-out Muting (FADE)...................................................................................................................... 8
Selecting the Preset EQ (SOUND MODE)............................................................................................. 8
Entering Numbers with the Remote Control (Numeric Keys)................................................................ 8
Using the CD Player.......................................................................................................9
To Load CDs .............................................................................................................................................. 10
To Eject CDs .......................................................................................................................................... 10
Changing the MP3 Playback Mode.......................................................................................................... 10
Normal Play............................................................................................................................................ 11
Programme Playback............................................................................................................................. 12
Random Play.......................................................................................................................................... 13
Repeat ................................................................................................................................................... 13
Tray Lock Function ............................................................................................................................... 13
Using the Tuner............................................................................................................14
Tuning In a Station .................................................................................................................................. 14
Presetting Stations .............................................................................................................................. 15
FM Reception Mode
Receiving FM Stations With RDS ........................................................................................................ 16
Using the Cassette Deck (Listening to a Tape) ........................................................18
Playing a Tape ....................................................................................................................................... 18
Using the Cassette Deck (Recording) ......................................................................19
Standard Recording ............................................................................................................................... 20
CD Synchro Recording.......................................................................................................................... 20
Tape to Tape Recording (DUBBING)................................................................................................... 20
Using an External Equipment ....................................................................................21
Listening to the External Equipment..................................................................................................... 21
Using the Timers .........................................................................................................22
Setting the Clock ................................................................................................................................... 22
Adjusting the Clock ............................................................................................................................... 22
Setting the Daily Timer ......................................................................................................................... 23
Setting the REC (Recording) Timer ...................................................................................................... 24
Setting the SLEEP Timer ...................................................................................................................... 26
Timer Priority ........................................................................................................................................ 26
Care And Maintenance................................................................................................27
Troubleshooting..........................................................................................................28
Specifications ...............................................................................................Back cover
.............................................................................................................................. 15
.
....
.
.
.....
2
Page 6
Getting Started
Accessories
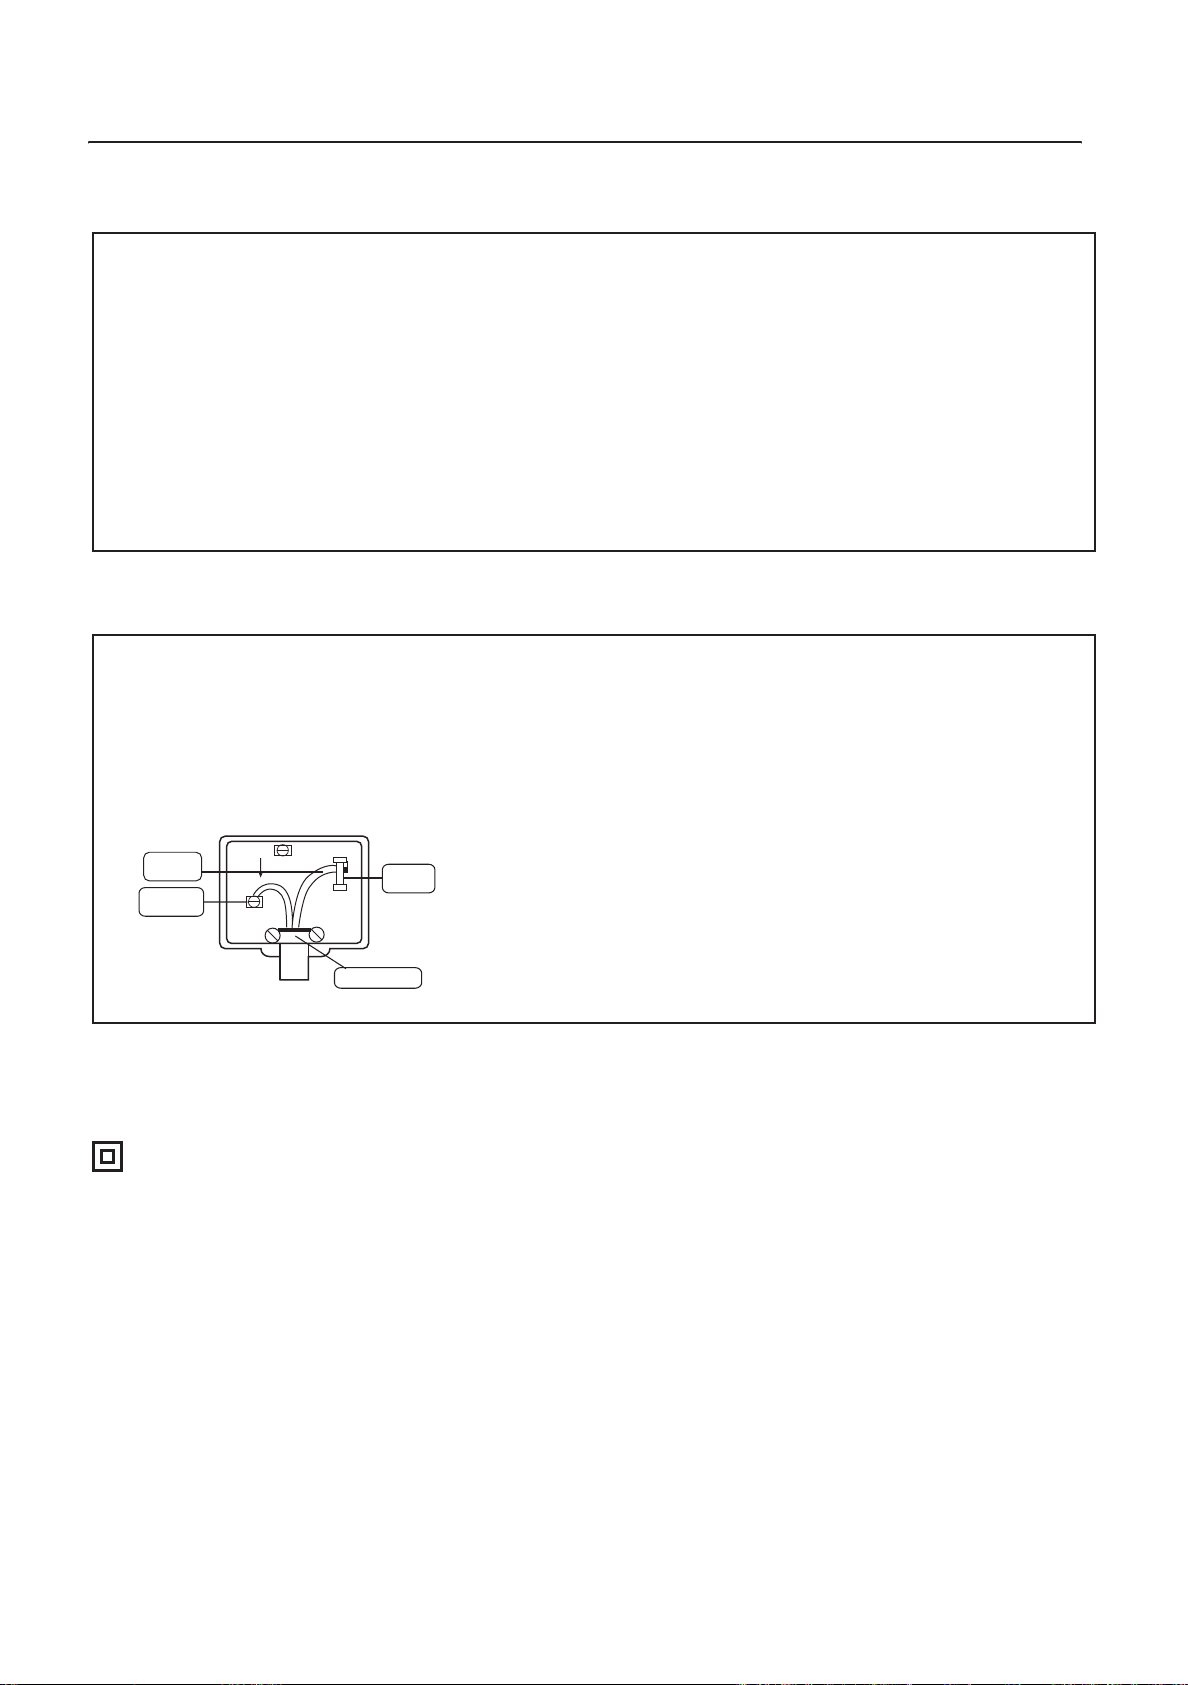
Make sure that you have all of the following items, which are supplied with the System.
MW Loop Aerial (1)
FM Wire Aerial (1)
Remote Control (1)
Batteries (2)
If any of these items are missing, contact your dealer immediately.
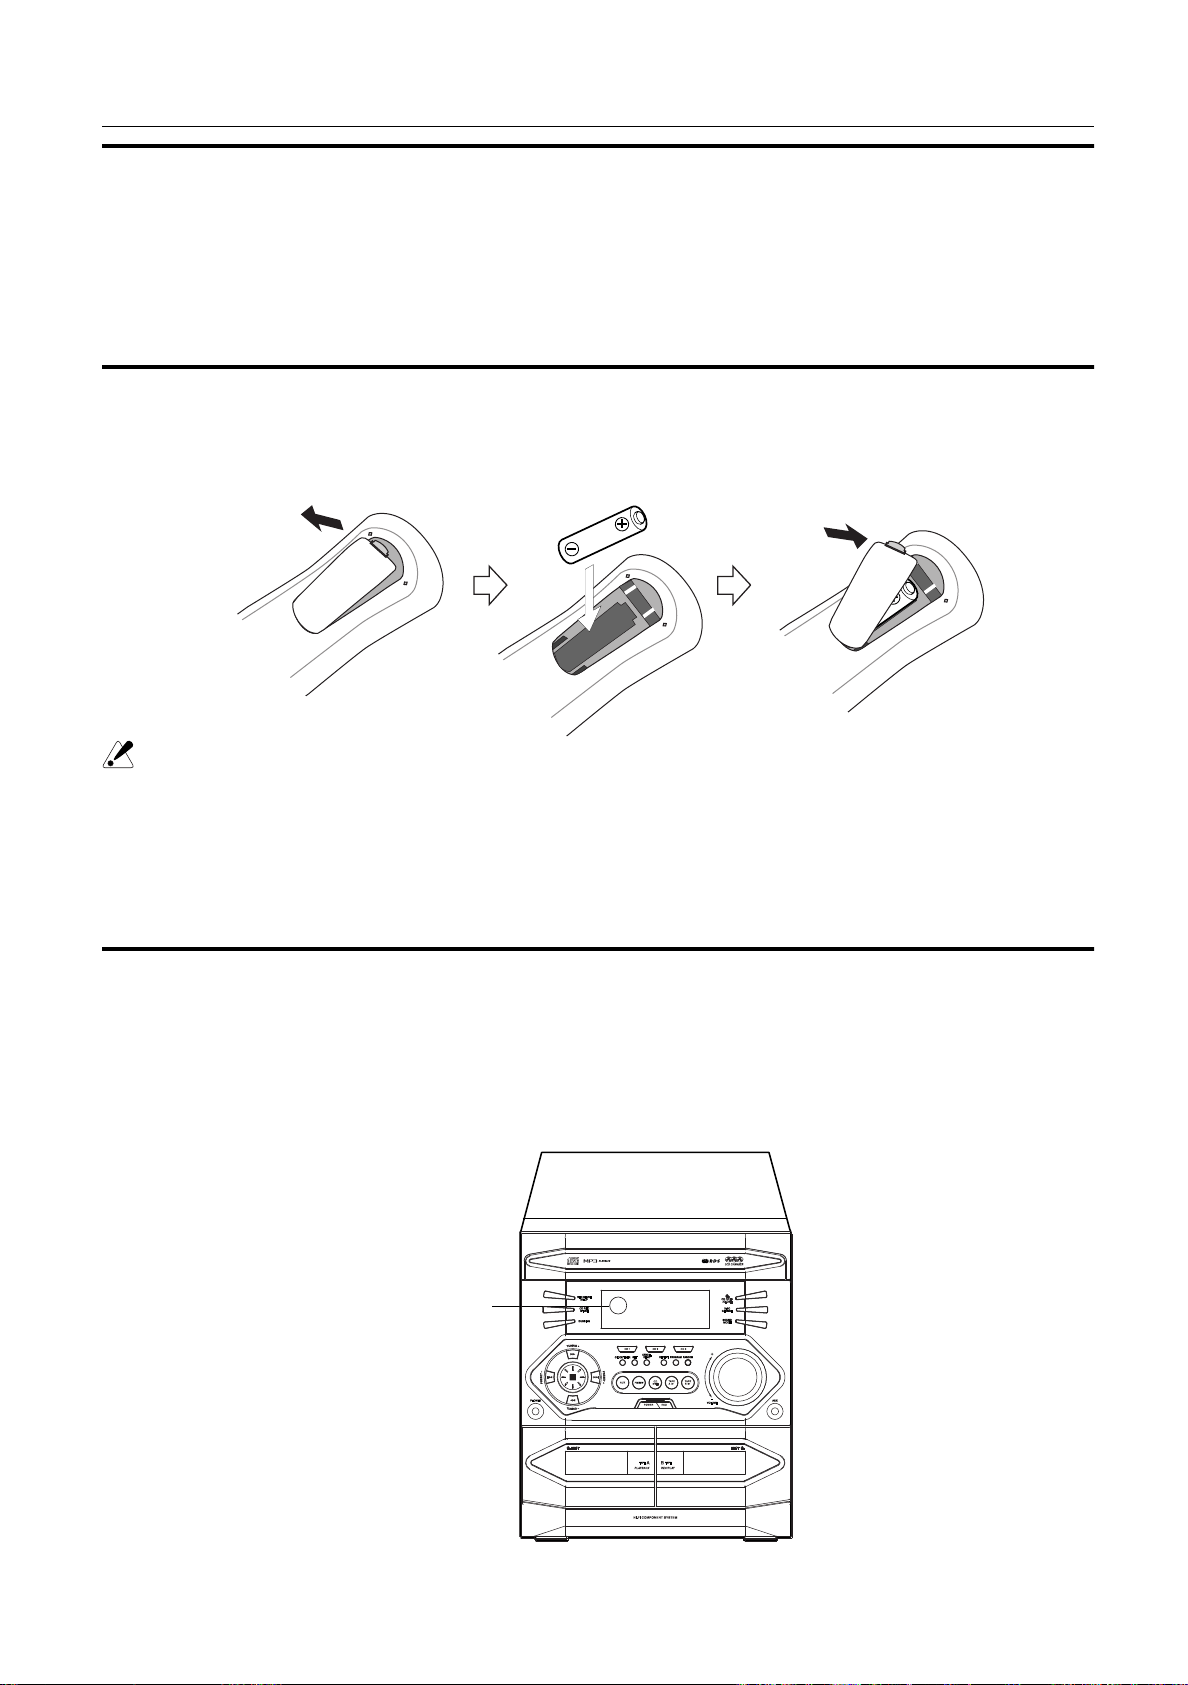
How To Put Batteries In the Remote Control
Match the polarity (+ and –) on the batteries with the + and – markings in the battery compartment.
R 6P( SU M-3)/AA(15F)
CAUTION:
• Handle batteries properly.
❏ To avoid battery leakage or explosion:
• Remove batteries when the Remote Control will not be used for a long time.
• When replace the batteries require replacing, replace both batteries at the same time with new ones.
• Do not use an old battery with a new one.
• Do not use different types of batteries together.
Using the Remote Control
The Remote Control makes it easy to use many of the functions of the System from a distance of up to 7m (23 feet) away.
Point the Remote Control at the remote sensor on the System’s front panel.
Remote sensor
3
Page 7
CAUTION:
• Make all connections before plugging the System into an AC power outlet.
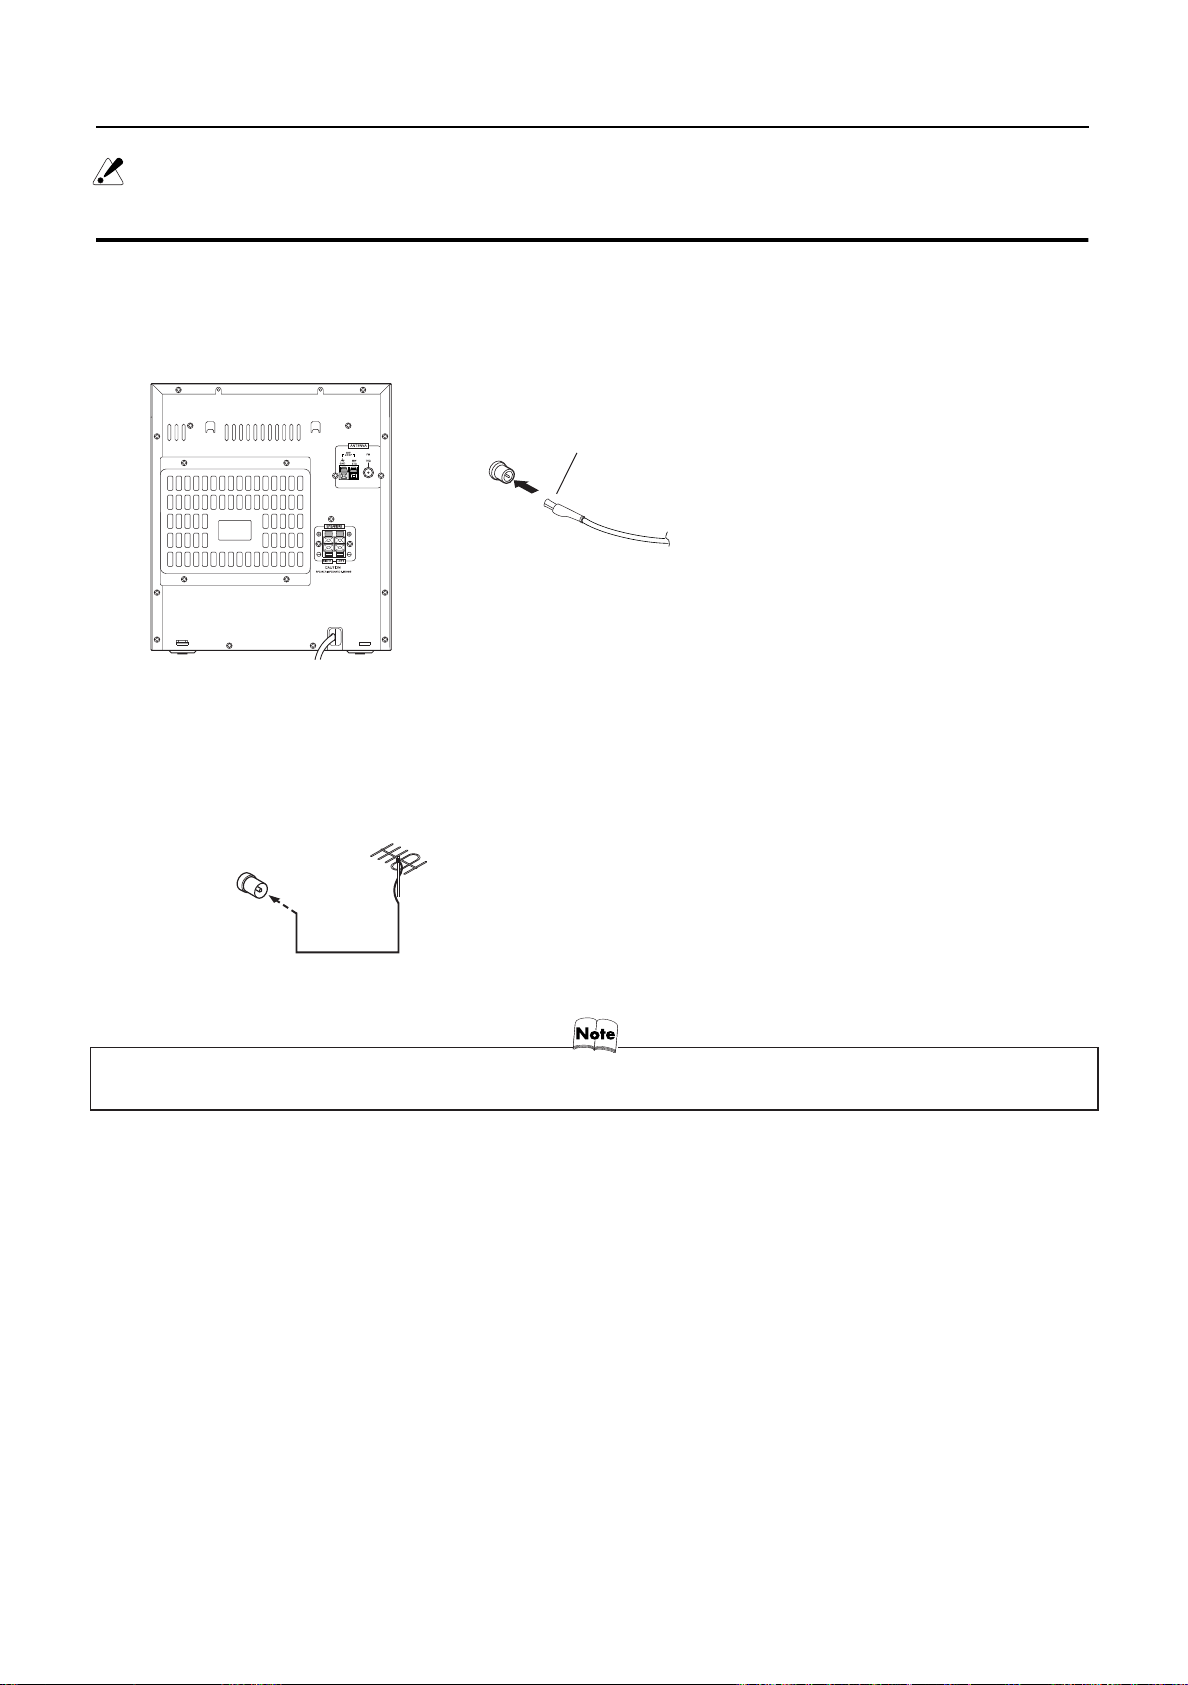
Connecting the FM Aerial
Using the Supplied Wire Aerial
FM wire aerial (supplied)
Getting Started
Using external Aerial (Not supplied)
If reception is poor when using the supplied wire aerial, connect an outdoor aerial.
FM outdoor aerial
(Not supplied)
Coaxial cable
• Before attaching a 75 ohm coaxial lead (the kind with a round wire going to an outdoor aerial), disconnect the supplied
FM Wire Aerial.
4
Page 8

Getting Started
Connecting the MW Aerial
Rear Panel of the Unit
MW aerial wire (not supplied)
If reception is poor, use an external aerial (not supplied).
Rotate the loop aerial until you have
the best reception.
MW loop aerial (Supplied)
Attach the MW loop
to its base by snapping
the tabs on the loop into
the slot in the base.
• Even when connecting an outside MW aerial , keep the indoor MW loop aerial connected.
CAUTION:
• To avoid noise, keep the aerials away from the System, the connecting cords and the AC power cord.
Connecting the Speakers
Connect the right speaker to the RIGHT speaker terminals and the left speaker to the LEFT speaker terminal.
1. Connect the speaker cords to the Speaker terminals of the Unit.
Connect the Grey (+) and with black line (–) cords of the right speaker to the red (+) and black (–) terminals marked RIGHT on the System.
Connect the
Grey (+) and with black line (–) cords of the left speaker to the red (+) and black (–) terminals marked LEFT on the System.
Right side (rear view) Left side (rear view)
Grey
Grey
with
black
Grey
Grey
with
black
CAUTIONS:
• Please note the speakers are not magnetically shielded and may cause distortion on the TV.
If this happens move the speakers away from the TV.
5
Page 9

Getting Started
Connecting External Equipment
Connect a signal cord with stereo mini 3.5mm plugs (not supplied) between the System’s AUX socket on the front panel and the audio
output socket or output terminals of the external portable CD, MD player, STB, etc.
Press AUX to listen to the external source.
Signal cord (not supplied)
White
Lch
Rch
Red
To audio output of
external equipment.
Connecting to the Wall Outlet
Plug the AC power cord into the wall outlet.
Now, your System is at your command!
DEMO Mode
When the System is connected to the wall outlet, a DEMO mode displaying some of the system’s features automatically starts.
To turn the DEMO display off, press any of the operation buttons. The DEMO display automatically stops.
To turn the DEMO display on, press the CANCEL DEMO button on the Unit for more than 2 seconds.
(For 2 seconds)
• While the System is turned on, the DEMO display will automatically starts if no operation is made for 2 minutes. To cancel
this auto DEMO display function, press the CANCEL button on the Unit during DEMO display.
AUTO Play
AUTO PLAY feature lets you control the most frequently used System functions with a single touch.
With One Touch Operation you can play a CD, a tape, turn on the radio, or listen to an external equipment with a single press of the
button for that function. One Touch Operation turns the power on for you, then starts the function you have specified. If the System is not
ready (no CD or tape in place), the System still powers on so you can insert a CD or tape.
How One Touch Operation works in each case is explained in the section dealing with that function.
The AUTO PLAY buttons are:
On the Unit
CD 6 button
FM/MW(AM) button
TAPE A 3, TAPE B 3 buttons
AUX button
CD1, CD2 and CD 3 buttons
CD Open/Close 0 button
On the Remote Control
CD 6 button
FM/MW(AM) button
TAPE A 3, TAPE B 3 buttons
AUX button
CD1, CD2 and CD 3 buttons
6
Page 10
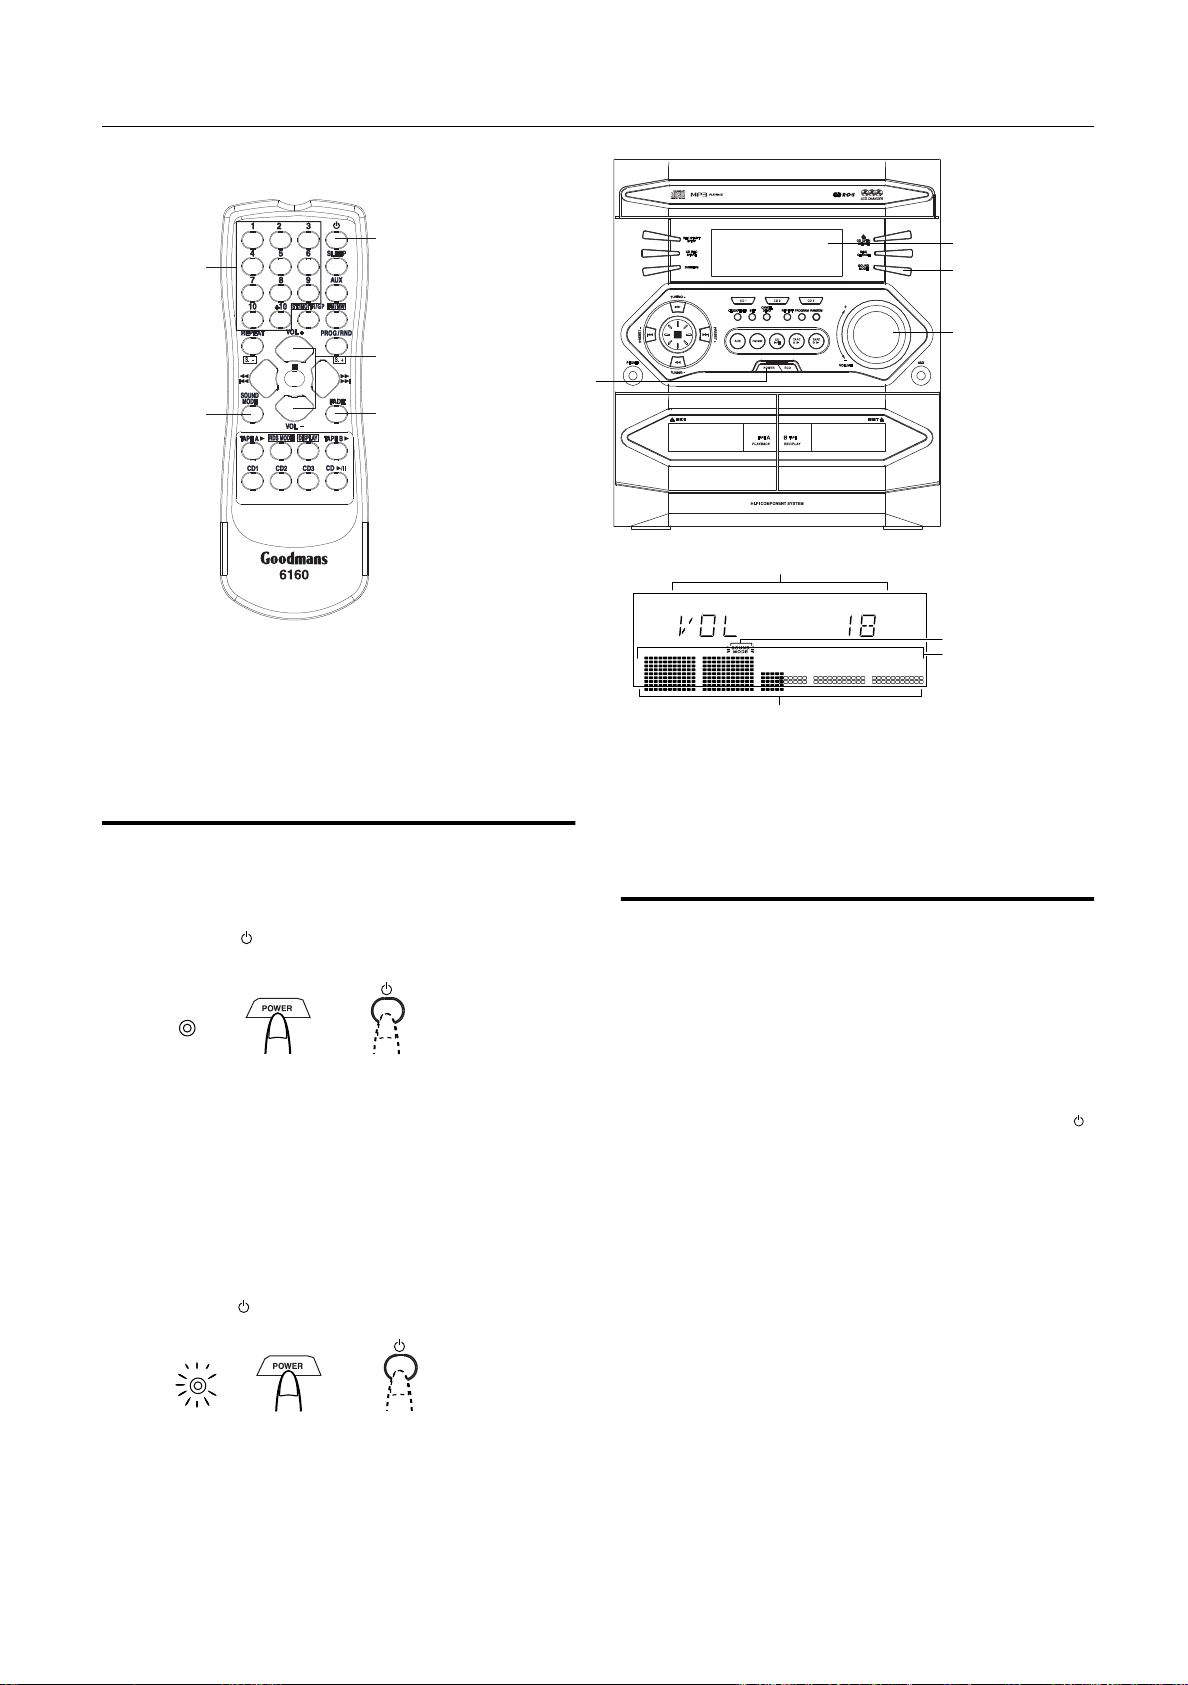
Basic Operations
)
Numeric
Keys
SOUND
MODE
POWER ON
VOLUME +,-
POWER ON
FADE
Various information
Status bar (Indicates various statuses.)
* When the S ys tem is in use, the d is play s hows other items a s well.
For simplic ity, we s how here only the items des cribe d in this section.
DISPLAY
SOUND
MODE
VOLUME
Sound Mode indicator
Level bar
Turning the Power On and Off
Turning the System On
Press the POWER ON button.
1
POWER ON
LED INDICATER
OFF
The display turns on and “POWER ON” is displayed in the
display.
The STANDBY indicator will turn off.
The last source listened to when the unit was turned off will
be selected.
• For example, if you were listening to the Tuner when you
turned off the unit, the Tuner will play the station it was
last set to.
Turning the System Off
Press the POWER ON button again.
1
LED INDICATER
ON
or
or
• To switch off the System completely, unplug the AC power
cord from the wall outlet. When you plug the AC power
cord back in, the clock will be reset to 0:00.
ECO Mode (ECO)
The System has three energy modes; power on, power off (Standby) and ECO. In ECO mode, the display goes off and the least
power is consumed.
To enter ECO mode,
Standby mode (while the STANDBY indicator lights up). "ECO
MODE" appears on the display, then the display goes off. The
STANDBY indicator remains lit.
To cancel ECO mode and turn on the power,
button on the Unit.
To cancel ECO mode and enter Standby mode,
ECO button again.
press the ECO button on the Unit in
press the
press the
/ I
“GOOD BYE” is displayed and the display turns off, except
for the clock display. The STANDBY indicator lights up. (The
display is dimmed.)
• Some power is always consumed even though power is
turned off (called Standby mode).
7
Page 11
Basic Operations
Adjusting the Volume
Turn the VOLUME control on the Unit clockwise to increase the
volume or turn it counterclockwise to decrease the volume.
Press the VOLUME + button on the Remote Control to increase
the volume or press the VOLUME – button on the Remote Control
to decrease the volume.
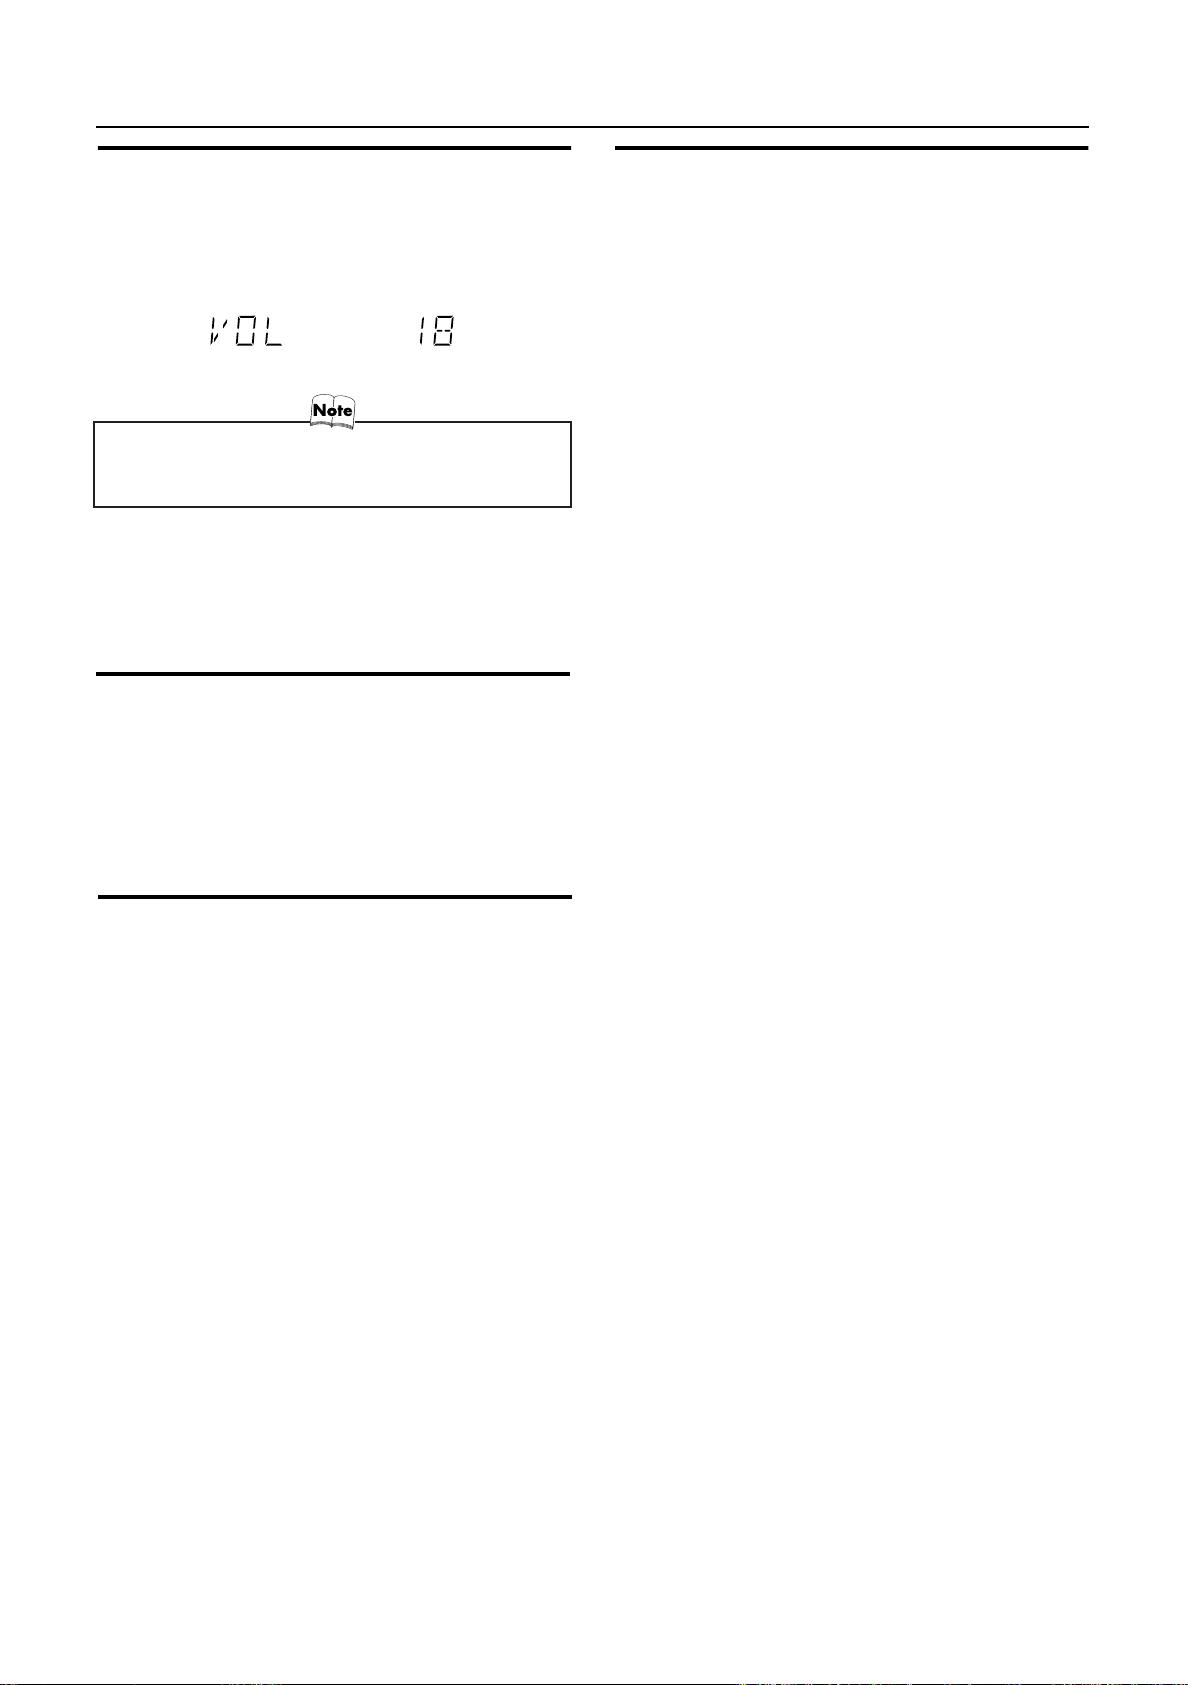
You can set the volume level to MIN, 1-31, or MAX.
• When you turn the power off at a volume level of over 19,
the volume level is automatically set to 18 when the power
is turned back on.
For private listening
Connect a set of headphones to the PHONES jack. The sound
from the speakers will be automatically turned off.
Be sure to turn down the volume before connecting or putting on
headphones.
Fade-out Muting (FADE)
To mute the output, press the FADE button on the Remote
Control. The output is reduced until the sound is muted.
To release muting, press the FADE button once again.
The output is increased to the previous level.
•
Turning the VOLUME control on the unit or pressing the VOLUME
button on the Remote Control will increase the volume from
the previous level.
Entering Numbers with the
Remote Control (Numeric Keys)
The numberical keys can be used to preset stations, recall the preset
stations, or to program CDs.
Examples:
• To enter number 5, press 5.
• To enter number 15, press +10, then 5.
• To enter number 20, press +10, then 10.
• To enter number 25, press +10, +10, then 5.
Selecting the Preset EQ
(SOUND MODE)
The sound mode can be used to add spacial effects to the audio output.
Please note: This effect will only apply to playback not recoredings.
Press the SOUND MODE button until the Sound Mode required
is shown on the display.
The “SOUND MODE” indicator lights up in the display.
Each time you press the button, the Sound Mode changes as follows:
FLAT = ROCK = POP = CLASSIC = (back to the beginning)
To cancel the effect, press the SOUND MODE button until
“FLAT” appears on the display.
The “SOUND MODE” indicator goes off.
FLAT No sound effect applied.
ROCK Boosts low and high frequencies. Good for
acoustic music.
POP Good for vocal music.
CLASSIC Set for wide and dynamic sound stereo
systems.
8
Page 12

Using the CD Player
Numeric
Keys
REPEAT
RDS MODE
TAPE A
CD1-CD3
PROGRAM
/RANDOM
DISPLAY
TAPE B
CD
CANCEL
DEMO
SET
Tra c k numbe r, Play ing time,
Progra m number, etc.
MP3 indicator
R a ndom
indic ator
CD OPEN/CLOSE
DISC CHANGE
REPEAT
PROGRAM
CD1-CD3
RANDOM
Progra m indic ator
Dis c indic ators
R epe at
indic ator
* When the S ystem is in us e, the dis play s hows other items as well.
For simplic ity, we s how here only the items d esc ribed in this s ection.
This unit has been designed to playback the following CDs:
• Audio CD
• CD-R (CD-Recordable)
• CD-RW (CD-ReWritable)
• MP3 disc (MP3 files recorded on a CD-R or CD-RW)*
When playing a CD-R or CD-RW
• User-edited CD-Rs (CD-Recordable) and CD-RWs (CD-ReWritable) can be played back when the discs are “finalised.”
*For MP3 discs
• This unit manages files and folders on MP3 discs as “tracks”
and “albums.”
• Playback order of the MP3 files (tracks) recorded on a disc are
determined by the writing (or encoding) application; therefore,
playback order may be different from the one you have
intended while recording the files and the folders.
• This unit shows the file (track) names and ID3v2 tags (only
“Title”, “Artist” and “Album”) on the display after playback starts;
however, there is a limitation on available characters and some
file names and ID3 tags may not be shown correctly.
More about MP3 discs
• MP3 discs (either CD-R or CD-RW) may take a longer time
to read after being insetted due to the characteristics of
MP3 discs.
• When making an MP3 disc, select ISO 9660 Level 1 or
Level 2 as the disc format.
• This unit does not support multisession recording.
• This unit can play MP3 files only with the following file extensions— “.MP3,” “.Mp3,” “.mP3,” and “.mp3.”
• Non-MP3 files are ignored. If non-MP3 files are recorded
together with MP3 files, this unit will take a longer time to
scan the disc. It may also cause the disc to not play.
• Some MP3 discs may not be played back because of
their disc characteristics or recorded conditions. This is
normal and is not an error written the system.
9
Page 13

Using the CD Player
About Disc Indicator:
Disc Rotation
indicator
The Disc indicator consists of the following three kinds of indicators:
Disc Number indicator: Lights all the time.
Selected Disc indicator:Lights for the currently selected
Disc Rotation indicator:
disc number.
Rotates when the selected CD is
playing or paused. This indicator
goes o
this slot.
Disc Number
indicator
Selected Disc
indicator
ut if a CD is not inserted in
One Touch Play
The power comes on, and operations are done automatically.
❏ By pressing the CD 6 button, the System will turn on, and if a
CD is loaded for the disc number that was last selected when
the unit was turned off, it will start playing from the first track.
❏ By pressing the CD1-CD3 button, the System will come on, and
if a CD is already loaded in the selected slot, it will start play
from the first track.
To Load CDs
Press the CD Open/Close 0 button on the
1
Unit to open the tray.
Place one or two CDs, with its label side up,
2
onto the tray.
Be sure that the CD is securely localed inside the recess on the
disc tray.
With the label side up
❏ When you useing an 8 cm (3'') CD, place it on the inner circle of
the tray.
❏ CDs can be loaded currently while listening to the other source
or while listening to the CD being played back.
❏ When power is turned off with the tray opened, the tray is auto-
matically closed.
❏ If the CD cannot be read correctly (because it is scratched, for
example), “ NO DISC” will be shown on the display.
To Eject CDs
Take out the CD as shown below.
While the CD Player is stopped, press the CD
1
Open/Close
0
button on the Unit to open the
tray.
Remove the CD, then press the DISC SKIP
2
button on the Unit.
The tray turns for the next CD.
Repeat step 2 to remove all the CDs.
3
Press the CD Open/Close 0 button on the
4
Unit to close the tray.
❏ You can remove CDs while listening to the other source.
Tips:
• Removing/changing the CDs during playback
While playing back a CD (e.g. CD1), you can remove or change
the other CDs (e.g. CD2 and CD3) by pressing the CD Open/Close
0 button. After removing or changing, press the same button to
close the tray.
Changing the MP3 Playback Mode
When playing an MP3 disc, you can choose the playback mode of
the MP3 disc as follows:
TRACK mode:
The unit
an Audio CD.
GROUP mode:
The unit recognizes tracks (files) and albums (folders) on an MP3
disc.
grouped
recognizes only tracks (files). The MP3 disc will play like
The MP3 disc will play according to the way how they are
in folders on the disc.
Press the DISC SKIP button on the Unit and
3
place the next CD.
When you press the button, the tray turns for the next CD.
Press the CD Open/Close 0 button on the
4
Unit.
The tray will close.
On the remote control ONLY:
Press before or during playing an MP3 disc.
GROUP indicator appears when the MP3
playback mode is the GROUP mode.
• Each time you press the button, the MP3 playback mode
changes between “GROUP” and “TRACK” alternately.
10
Page 14
Using the CD Player
Normal Play
To Play CDs
Load CDs.
1
Press one of the Disc button (CD1-CD3).
2
The selected disc number (e.g. “CD DISC 1” ) appears on the
display.
The first track of the selected CD begins playing. When the
first CD finishes playing, the second and the third CDs will
then be played.
When the last CD has finished playing, the CD Player automatically stops.
❏ You can start to play the currently selected disc by simply press-
ing the CD 6 button.
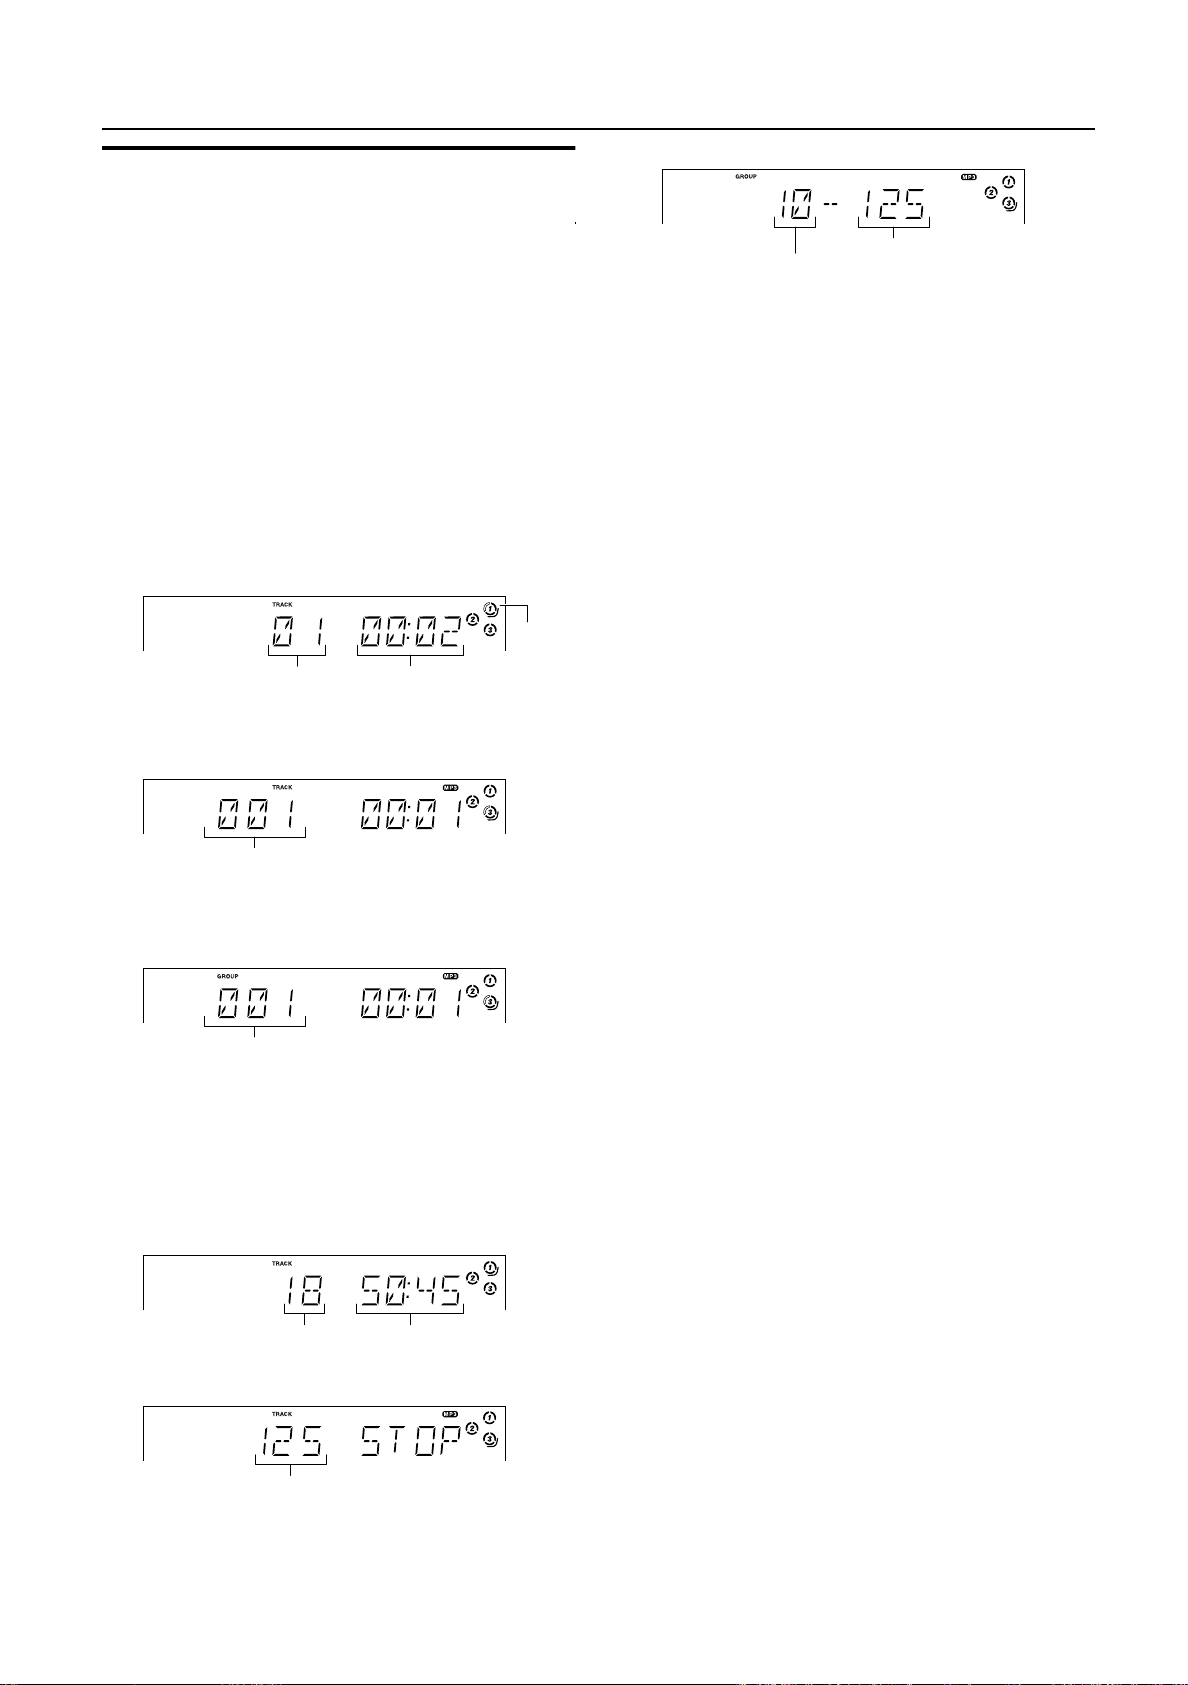
While playing the CD, the following will appear on the display.
For Audio CD
CD is
playing
Track number Elapsed playing time
For MP3 disc
TRACK mode
Track number
• After the display above is shown, if the tracks include ID3
tags, the display will scroll and show the file name, title, artist, and album, then will return to the original display.
GROUP mode
Track number of the current group
• After the display above is shown, if the tracks include ID3
tags, the display will scroll and show the file name, title, artist, and album, then will return to the original display.
When the Disc button (CD1-CD3) is pressed with the tray opened,
the tray is closed and the selected CD automatically begins playing.
To stop playing the CD, press the 7 button. The following in-
For Audio CD
Track number
For MP3 disc
TRACK mode
Total track number
Total playing time
GROUP mode
Total group number
To pause, press the CD 6 button. The elapsed playing time
indication will flash on the display.
To cancel pause, press the CD 6 button again. Play continues
from the point where it was paused.
Tips:
• Changing CD using the DISC SKIP button
The CDs can also be changed using the DISC SKIP button. During
playback, each time you press the button, the next CD is automatically played back. If the next disc tray is empty, the disc tray is
automatically skipped.
Total track number
To Select a Track
During playback (using the 4 or ¢ button):
Briefly press the 4 or ¢ button to select the track you want to
play, except for MP3 group mode.
By pressing the button, you can skip to the next track or skip back
to the previous track.
• The selected track starts playing.
• Press the ¢ button once to skip to the beginning of the next
track.
• Press the 4 button to skip to the beginning of the current
track. Press twice quickly to skip to the beginning of the previous track.
In Stop mode (using the
• Pressing the 4 button to skip to the previous track.
• Pressing the ¢ button to skip to the next track.
Using the numeric keys on the Remote Control:
Using the numeric keys, you can directly select the track on the
currently selected CD.
• The selected track starts playing.
For example, press +10, then 5 to play back the track number 15.
See “Entering the Number with the Remote Control” on page 8.
In MP3 group mode:
The selected track of the current group starts playing.
Tips:
• For MP3 discs
When the selected track starts playing, information of that track
scrolls on the display, in the order of file name, title, artist, and album.
In the TRACK mode, when the CD is stopped, the file name will scroll
on the display. In the GROUP mode, when the CD is stopped, the file
name, and then group (folder) name will scroll on the display.
4
or ¢ button):
To Select a Group (For MP3 GROUP mode only)
During playback (using the 4 or ¢ button):
Briefly press the 4 or ¢ button to select the group to be
played.
• The first track of the selected group starts playing.
4
In Stop mode (using the
Briefly press the 4 or ¢ button to select the group to be
played. The group number, the group name and the file name of the
first track scroll on the display.
or ¢ button):
Search Play
Holding down the following buttons, during playback, will search
the track forward/backwards so you so that find a particular passage
in the track can be found quickly.
• 22 or ¡ button on the Unit
• 4 or ¢ button on the Remote Control
11
Page 15

Programme Playback
The playing order of the tracks on all the CDs can be programmed. Note
that the unit can only be programmed when the CD Player is stopped.
❏ Up to 32 tracks can be programmed in any desired order includ-
ing the same tracks.
For MP3 discs
• Please note MP3 discs can not be programmed.
To Make a Program
Load CDs
1
In Stop mode
2
On the Unit
Press the PROGRAM button to light the “PRGM” indicator on the
display.
At the same time, “PROGRAM” appears on the display.
On the Remote Control
Press the PROGRAM/RANDOM button until “PROGRAM” appears on the display.
The “PRGM” indicator also lights up on the display.
Each time the button to pressed, the playback mode changes as follows:
PROGRAM = RANDOM = Normal display (Normal Play) =
(back to the beginning)
• If a program is already stored, the last step of the program will
be displayed.
Press one of the Disc buttons (CD1-CD3) to
3
s
elect the CD to be programmed.
The display will change to the Program Entry display.
CD
1
or
Using the CD Player
Using the Remote Control
Press the numeric keys to directly enter the track number. Then,
the program order number will be assigned from P-1.
• To delete the current program step, press the CANCEL DEMO
button on the Unit.
Repeat steps 3 and 4 to program other tracks
5
on the same CD or the other CD.
To play the program, Press the CD
6
6
but-
ton.
To check the programmed contents, while the CD player
is stopped, select Program mode by pressing the program button
and press the 4 or ¢ button on the Remote Control (or unit).
To delete all the tracks in the program, while the CD Player
is stopped, press the 7 button or open the tray by pressing the 0
button.
To Modify the Program, while the CD Player is stopped and the
program mode is selected, press the CANCEL button, the last track
in the program is deleted. To add new tracks to the end of the program, repeat above steps 3 and 4.
• If you try to program a track number that does not exists
on the CD, your entry will be ignored.
• If you try to program the 33rd track, “FULL” appears on
the display.
To Play the Program
Press the CD 6 button.
The System plays the tracks in the order you have programmed
them.
• To repeat the programme again and again, press the REPEAT
button to select “REPEAT” while in program mode before starting
playback. For details, see “Repeat” on page 13.
❏ You can skip to a particular program track by pressing the 4
or ¢ button during Program Play.
❏ To stop playing, press the 7 button once. If you press the 7 but-
ton, while the CD Player is stopped, the program is deleted.
Disc number Track number
Select the track you want to program.
4
Using the Unit
While the display is blinking, press the 4 or ¢ button on the
Unit to select the track, then press the SET button within 7 seconds.
The program order number will be assigned from P-1.
- PRESET+
Disc number Track number
Program order number
To Exit and Re-enter Program Play
The program you have made is stored in memory. So, you can exit
Program Play temporarily or re-enter Program Play unless you delete the program.
To exit the program mode once, press the 7 button to stop
playing. The “PROG” indicator goes off and the Program mode
will be canceled. But the program is still stored in the memory.
To re-enter Program Play mode, press the PROGRAM or
PROGRAM/RANDOM button until the “PRGM” indicator lights
up again.
12
Page 16

Using the CD Player
Random Play
The tracks of the selected CD will play in random order when this
mode is selected.
In Stop mode, set the CD Player in Random
1
Play mode.
On the Unit
Press the RANDOM button to light the “RNDM” and “1 DISC”
indicator.
At the same time, “RANDOM” appears on the display.
On the Remote Control
Press the PROGRAM/RANDOM button until the “RANDOM”
appears on the display.
The “RNDM” and “1 DISC” indicator also lights up on the display.
Each time the button is pressed, the playback mode changes as follows:
PROGRAM = RANDOM = Normal display (Normal Play) =
(back to the beginning)
Press the CD
2
The tracks on the CD are played in random order.
To stop playing, press the 7 button. The Random mode is can-
celed and the “RNDM” and “1 DISC” indicator goes off.
To skip a track during playback, press the ¢ button to
jump to the next track in the random sequence.
6
button.
Tray Lock Function
In order to safely keep the CD in the CD Player, the tray can be
electronically locked.
When the electronic lock is on, the tray cannot be opened even if
the CD Open/Close 0 button on the Unit is pressed.
Locking the Tray
Turn on the System and enter CD mode.
1
While pressing down the 7 button, press the
2
CD Open/Close
“LOCKED” appears on the display.
• If you try to open the tray by pressing the 0 button,
“LOCKED” appears on the display to let you know that the tray
has been locked.
Unlocking the Tray
Repeat above steps 1 and 2.
“UNLOCKED” appears on the display.
0
button on the Unit.
REPEAT
Press the REPEAT button.
The Repeat indicator changes with each press of the button, as follows:
REPEAT ALL= REPEAT 1DISC= REPEAT 1= Blank display(repeat off)
= (back to the beginning)
REPEAT ALL: In Normal Play mode, all the tracks on all the
CDs are repeated.
REPEAT 1DISC
REPEAT 1: Repeats one track.
In Program Play mode, the Repeat indicator changes with each
press of the REPEAT button, as follows:
REPEATÔ Blank display
Only the tracks in the program are repeated.
To stop playing, press the 7 button. Changing the source to a
different one (e.g. Tuner) will also stop playing. The Repeat mode
is canceled and the Repeat indicator goes off.
:Repeats all tracks on one CD. (Selectable in
Normal Play only)
Now, you can use the tray normally.
• Even after the System is unplugged, the tray lock condition will be retained for a few days. To unlock the tray after
powering up, you need to perform the unlocking operation.
13
Page 17

Using the Tuner
Numeric
Keys
FM/MW
S. -
RDS MODE
TAPE A
Stations can be tuned in manually, automatically, or from preset
memory storage.
❏ Before listening to the radio:
• Make sure that both the FM and MW aerials are correctly
connected. (See pages 4 and 5).
S. +
DISPLAY
TAPE B
* When the S ys tem is in use, the d is play s hows other items a s well.
For simplic ity, we s how here only the items des cribe d in this s ection.
One Touch Radio
Just press the FM/MW button to turn on the System and start playing the station that was listend to be when the system was tuned off.
❏ You can switch from any other sound source to the radio by
pressing the FM/MW button.
Tuning In a Station
Press the FM/MW button.
1
The Band and Frequency you were last tuned to appear on the
display.
(If the last station was selected using the preset number, the
preset number appears first.)
Each time you press the button, the band alternates between
FM and MW.
Select a station using one of the following
2
methods.
FM /MW
(on the Unit) (on the Remote Control)
FM /MW
or
SET
FM/MW
B and disp lay, Frequency displa y, Pres et c hannel
FM mode indic ators
• Manual Tuning
Briefly press the 22 or ¡ button repeatedly until you find
the station you want.
OR
• Auto Tuning
Press and hold down the 22 or ¡ button for 1 second
or more and then release it, the frequency is scanned, auto-
matically until a station is found.
OR
• Preset Tuning (Possible only after presetting stations)
Preset tuning using the Unit:
Select the preset number you want, using the 4 or ¢
button.
Example:
Press the ¢ button until the preset number “P12” appears
on the display. Then, the display will show the preset
number’s band and frequency.
Preset tuning using the Remote Control:
Enter the preset number you want to recall using the numeric keys. See “Entering Numbers with the Remote Control” on page 8.
14
Page 18

• MW reception can sometimes be improved by rotating
the MW loop aerial.
Using the Tuner
CAUTION:
• Even if the System is unplugged or if the power
failure occurs, the preset stations will be stored
for a few days. However, if the preset stations
are erased, you will need to preset the stations
again.
Presetting Stations
Up to 30 FM stations and up to 15 MW stations can be stored in presets.
• During presetting stations, if no button is pressed
for 5 seconds, the display returns to the band/frequency
display. In this case, repeat steps from the beginning.
TUNING PRESET
or
Using the Unit
Select a band by pressing the FM/MW button.
1
Press the
2
tion.
Press the SET button.
3
“SET” will flash for 5 seconds.
22
or
button to tune in a sta-
¡
or
FM Reception Mode
When you are tuned in to an FM stereo broadcast, the “ST (Stereo)” indicator lights up and you can hear stereo effects.
If an FM stereo broadcast is hard to receive or noisy, you can select
Monaural mode. Reception improves, but is lost stereo effect.
Press the FM MObutton on the Remote Control so that
the “ MONO” indicator lights up on the display.
ST MONO
To restore stereo, press the FM MObutton on the
Remote Control so that the “MONO” indicator goes off.
Selecting other station will also cancel the FM Mono mode and restore the stereo effect.
While “ SET” is flashing, press the
4
4
or
¢
button to select the preset number.
: Increases the preset number by 1.
¢
: Decreases the preset number by 1.
4
Press the SET button.
5
“STORED” appears, and after 2 seconds, the display returns to
the band/frequency display.
Repeat above steps 2 to 5 for each station
6
you want to store in memory with a preset
number.
To change the preset stations, repeat the same steps as
above.
• In step 4, you can select the preset number using the numeric keys on the Remote Control.
15
Page 19

Using the Tuner
Receiving FM Stations With
RDS
RDS allows FM stations to send additional signals with their
regular program signals. For example, the stations send their
station names, and information about what type of program they
broadcast, such as sports or music, etc, This Unit can receive the
following types of RDS signals:
PS (Program Service):
shows commonly known station names.
PTY (Program Type):
shows types of broadcast program.
RT (Radio Text):
Shows text messages the station sends.
What information can RDS signals provide?
The display shows RDS signal information that the station sends.
To show the RDS signals on the display
Press the DISPLAY MODE button while listening
to an FM station.
Each time the DISPLAY button to pressed, the display changes
to show information in the following order:
PS PTY RT Frequency
On the Remote Control
PS (Program Service):
"PS" will show on the display. Then, the RDS indicator lights up
and the station name appears. "NO PS" appears if no signal is
sent or received.
PTY (Program Type):
"PTY" will show on the display. Then, the RDS indicator lights up
and the broadcast program type appears. "NO PTY" appears if
no signal is sent or received.
RT (Radio Text):
"RT" will show on the display. Then, the RDS indicator lights up
and a text message sent by the station appears.
"NO RT" appears if no signal is sent or received.
Station Frequency:
Station frequency (non-RDS service).
l
If you press the DISPLAY MODE button while listening to
an MW station, the display only shows station freq-
uency.
l
RDS is not available for MW broadcasts.
l
Please note if reception is poor RDS information may not
be received.
When the display shows PS, PTY or RT signals:
l
The display shows upper case letters only.
To search for a program by PTY codes
One of the advantages of the RDS service is that you can locate a
particular kind of program by specifying the PTY codes.
To search for a program using PTY codes:
On the Remote Control
1
Press the RDS MODE button once while
listening to an FM station.
"P. SELECT" appears on the display.
2
Select the PTY code using the SELECT +
or - button within 10 seconds.
Each time the button is pressed, the display shows a category
in the following order:
NEWS AFFAIRS INFO SPORT EDUCATE
DRAMA CULTURE SCIENCE VARIED POP M
ROCK M MO.RM LIGHT M CLASSICS OTHER M
WEATHER FINANCE CHILDREN SOCIAL A
RELIGION PHONE IN TRAVEL LEISURE JAZZ
COUNTRY NATIONAL OLDIES FOLK M
DOCUMENT NEWS
3
Press the RD S M O DE bu tt on wi th in 10
seconds again.
While searching, "SEARCH" and the selected PTY type
flash alternately appear on the display.
The Unit searches and stops when it finds a station of the
category you have selected, then tunes into that station.
To continue searching after the first stop,
RDS MODE button again while the display indications blink.
If no program is found, "NOT" and "FOUND" flash alternately
appear on the display.
To stop searching at any time during the process,
press the RDS MODE button to stop search operation.
Descriptions of the PTY Codes
NEWS:
AFFAIRS:
INFO: Programs on medical service, weather
SPORT:
EDUCATE:
DRAMA:
CULTURE:
SCIENCE:
VARIED:
POP M:
ROCK M:
MO.RM: Middle-of-the road music (usually called
LIGHT M:
CLASSICS:
OTHER M:
WEATHER:
FINANCE: Reports on commerce, trading, the Stock
News
Topical programs expanding on the current
news or affairs
forecasts, etc.
Sports events
Educational programs
Radio plays
Programs on national or regional culture
Programs on natural sciences and technology
Other programs like comedies or ceremonies
Pop music
Rock music
"easy listening")
Light music
Classical music
Other music
Weather information
Market, etc.
press the
16
Page 20

Using the Tuner
CHILDREN:
SOCIAL A:
RELIGION: Programs dealing with any aspect of belief
PHONE IN: Programs where people can express their
TRAVEL: Programs about travel destinations, package
LEISUR E: Pr o grams c o ncern e d with r ecreat i onal
JAZZ:
COUNTRY:
NATIONAL:
OLDIES:
FOLK M:
DOCUMENT:
Entertainment programs for children
Programs on social activities
or faith, or the nature of existence or ethics
views either by phone or in a public form
tours, and travel ideas and opportunities
ac t i vities s u c h as gar d e n ing, coo k i ng,
fishing, etc.
Jazz music
Country music
Current popular music from another nation
region, in that country's language
Classic pop music
Folk music
Programs dealing with factual matters,
presented in an investigative style
To temporarily switch to a broadcast program
of your choice
RDS mode is another convenient RDS service that allows this
Unit to switch temporarily to a broadcast program of your choice
(NEWS, TA or INFO) from the currently selected station, except
if you are listening to a non-RDS station (all AM (MW) stations
or some FM stations).
l
The RDS function is only applicable to the preset stations.
l
If an FM station does not broadcast RDS mode information,
RDS mode cannot be activated.
To select a program type
On the Remote Control
(twice)
1
Press the RDS MODE button twice while
listening to an FM station.
"E. SELECT" appears on the display.
2
Select the program type using the SELECT
+ or - button within 10 seconds.
The display shows a program type in the following order:
TA NEWS INFO
OFF
TA: Traffic Announcement
NEWS: News
INFO: Programs on medical service, weather forecast, etc.
OFF: RDS mode off
Case 1: If there is no station broadcasting the
type of program you have selected
The broadcast station being currently heard will continue to be
heard.
When a statio n s t a r t s b ro a d c as t i ng t h e pr o g r am y o u ha v e
sele cted, thi s unit automa tically switches to th e station . The
program type (TA, NEWS or INFO) indicator starts blinking.
When the program i s over, this U nit goes back to the sta tio n
previously listened to, but still remains in RDS Standby mode.
Case 2: If there is a station broadcasting the type
of program you have selected
This Un it tun es to the station broadcasting the pro gram. The
program type (TA, NEWS or INFO) indicator starts blinking.
When the program i s over, this U nit goes back to the sta tio n
previously listened to, but still remains in RDS Standby mode.
To stop listening to the program selected by
RDS mode
Fllow the steps under "To select a program type" until "OFF" is
shown in the display.
l
In RDS standby mode, if you change the source or turn
off the power, RDS standby mode is canceled.
l
When the RDS is in standby mode and a radio broadcast
is being recorded, be careful because the RDS may be
activated and a different program than the intended one
may be recorded.
When the RDS mode is not re qui red , tur n off the RDS
mode.
3
Press the RD S M O DE bu tt on wi th in 10
seconds again to set the selected program
type.
The selected program type indicator lights up on the display,
and the Unit enters RDS Standby mode.
l
The RDS indicator lights up when tuned to a station which
provides RDS mode information.
17
Page 21

Using the Cassette Deck (Listening to a Tape)
Numeric
Keys
FM/MW
S. +
EJECT
RDS MODE
TAPE A
The Cassette Deck allows you to play, record, and dub audio tapes.
❏ Listening to type I tape is suitable for this Cassette Deck.
The use of tapes 120minutes or longer is not recommended, since characteristic deterioration may
occur and these tapes easily jam in the pinch-rollers
and the capstans.
DISPLAY
TAPE B
(TAPE B)
* When the S ys tem is in use, the dis pla y s hows other items as well.
For simplic ity, we s how here only the items des cribe d in this s ection.
One Touch Play
By pressing the TAPE A 3 or TAPE B 3 button, the System will
come on, and if a tape is in the deck, it will start to play. If no tape
is loaded, “NO TAPE” appears on the display, the System will
come on and wait for you to insert a tape, or select another function.
TAPE A
TAPE B
EJECT
(TAPE B)
De c k indic ators
Close the cassette holder gently.
3
When both Deck A and Deck B contain a tape, the last deck to
have a tape inserted is selected.
Press the TAPE A 3 or TAPE B 3 button.
4
The selected Deck appears (for example, TAPE-A) and the
Deck indicator “A” or “B” lights up on the display.
The Tape indicator (3) blinks on the display and the tape is
played back.
The Cassette Deck automatically stops when one side of the
tape has finished playing.
To stop playing, press the 7 button.
To remove the tape, stop the tape, and press the 0 PUSH
OPEN part to open the Cassette Holder.
: Ta pe indic ator
Playing a Tape
Either Deck A or Deck B can be used for playback.
Press the 0 PUSH OPEN part for the deck
1
to be opened.
Insert a cassette, with the exposed part of the
2
tape down, toward the base of the Unit.
The tape will travel from the left to right.
Tape travelling direction
• If the cassette holder does not open, turn the System off,
then back on and press the 0 PUSH OPEN part again.
To Fast-Wind a Tape
During playback or in Stop mode, press the ¡ (FF) button on the
Unit to fast forward the tape without playing. (You can also use the
¢ button on the Remote Control.)
During playback or in Stop mode, press the 22 (REW) button on
the Unit to rewind the tape.
(You can also use the 4 button on the Remote Control.)
During fast forward or rewind the tape, the Tape indicator
(3) goes out.
During fast forward, the status bar illumination at the bottom of
the display moves counterclockwise.
During rewinding, it moves clockwise.
• The Cassette Deck automatically stops when one side of the
tape has finished playing.
18
Page 22

Using the Cassette Deck (Recording)
REC START
/STOP
CD REC
START
DUBBING
PROGRAM
TAPE A
TAPE B
RDS MODE
TAPE A
DISPLAY
TAPE B
EJECT
(TAPE B)
* When the S ys tem is in use, the d is play s hows other items a s well.
For simplic ity, we s how here only the items des cribe d in this s ection.
Recording onto a cassette from any of the sound sources is simple.
Just place a tape in Deck B, have the source ready, make one or
two settings, and you’re ready to record. For each source, the procedure is a little bit different so each to explained separately. But
first, here are a few things to make your recordings better.
Things To Know Before You Start Recording
❏ It should be noted that it may be unlawful to re-record
pre-recorded tapes, records, or discs without the consent of the owner of copyright in the sound or video
recording, broadcast or cable program and in any literary, dramatic, musical, or artistic content embodied
therein.
❏ The recording level, which is the volume at which the new tape
is being made, is automatically set correctly, so it is not affected
by the VOLUME Control on the System. Also, it is not affected
by adjusting the sound effects. Thus, during recording, you can
adjust the sound you are actually listening to without affecting
the recording level.
❏ Two small tabs on the back of the cassette tape, one for side A
and one for side B, can be removed to prevent accidental erasure
or recording.
EJECT
(TAPE B)
: Tape indica tor
Dec k indic ators
R EC indic ator
• At the start and end of cassette tapes, there is leader tape
which cannot be recorded onto. Thus, when recording
CDs, radio broadcasts, etc., wind on the leader tape first
to ensure getting the beginning of the recording.
CAUTION:
• If a recording you make has excessive noise or
static, the Unit may have been too close to a TV
which was on during the recording. Either turn
off the TV or increase the distance between the
TV and the Unit.
Adhesive tape
❏ To record on a cassette with the tabs removed, you must cover
the holes with adhesive tape first.
❏ Type I tape can be used for recording.
19
Page 23

Standard Recording
This is the basic method for recording any source. The System also
has special ways for recording CD to tape, and tape to tape, which
save you time and effort, as well as give you some special features.
However, when you need to add a selection to a tape you have
made, or are combining selections from several sources on one
tape, use the method described below; just substitute the source
you want into this procedure, such as a tape in Deck A, a CD, or
the Tuner. You can also record from an external equipment with
this procedure.
To Record Any Sound Source to Tape
Follow these steps to record from any sound source onto a tape in
Deck B.
Insert a blank or erasable tape into the Deck
1
B and wind past the tape leader.
Using the Cassette Deck (Recording)
Insert a blank or erasable tape into the Deck
2
B and wind past the tape leader.
Press the CD REC START button on the Unit.
3
“CD REC” appears on the display and the “REC” indicator
lights up. Then, the System begins CD Synchro Recording and
the tracks on the CD are recorded on the tape.
When recording of the tracks of all CDs is finished, the CD
Player and Cassette Deck stop.
• If the tab of the cassette tape on the Deck B is removed to
prevent erasure or recording, "NO REC" will appear on the
display.
• After the CD Player has played the entire CD or all the programmed tracks, the tape automatically stops.
To stop at any time during the recording process, press
the 7 button. The CD Player and Cassette Deck stop.
• When setting SLEEP timer while CD Synchro recording,
set enough time to allow for the CD to finish playing,
otherwise the power will go off before recording is
completed.
Tape travelling direction
Prepare the source, by, for example, tuning
2
in a radio station, loading CDs, or turning on
connected equipment.
• For CD recording, see “CD Synchro Recording” mentioned
below.
• For dubbing, see “Tape to Tape Recording (DUBBING)”
described below.
Press the REC START/STOP button on the
3
Unit.
The “REC” indicator lights up and the System begins recording.
The Tape indicator (3) blinks on the display.
• If the tab of the cassette tape on the Deck B is removed to
prevent erasure or recording, “NO REC” will appear on the
display.
To stop during recording, press the REC START/STOP button on the Unit, or press the 7 button.
Recording an M
When recording an MW broadcast, beats may be produced which are
not heard when listening to the broadcast. If this happens, press the
FM MODE button on the Remote Control to eliminate the beats.
Set to MW station and start recording.
1
Press the FM MODE button on the Remote
2
W
Station to Tape (Beat Cut)
Control to eliminate the beats.
Each time you press the button, the display changes as shown
below:
BEAT 1 Ô BEAT 2
Tape to Tape Recording (DUBBING)
Recording from one tape to another is called dubbing.
You can dub tapes simply, with just a single button.
Press the TAPE A 3 button, and then press
1
2
3
4
To stop dubbing, press the REC START/STOP button on the
Unit or the 7 button.
• During dubbing, you can hear sound effects through the
speakers or headphones. However, the sound is dubbed
without sound effects.
the 7
button.
Insert the source cassette you want to copy
from into Deck A for playback.
Insert a blank or erasable cassette you want
to copy onto into Deck B for recording.
Press the DUBBING button on the Unit.
Deck A and Deck B will start simultaneously and the “REC”
indicator lights up.
During dubbing, the Deck indicators “A” and “B” light up alternately.
• If no tape is inserted into Deck A, “NO TAPE” will appear
on the display.
• If no tape is inserted into Deck B, “NO TAPE” will appear
on the display.
CD Synchro Recording
Everything on the CD will be recorded onto the tape in the order
it is on the CD, or according to the order you have set in a program.
Prepare CDs. (See page 10.)
1
Press the CD1-3 button (that you want to make recording from),
and then press the 7 button.
• If you want to record specific tracks only, you need to program the tracks beforehand. (See page 12.)
• If you want to record one CD only, you need to load one
CD only.
20
Page 24

Using an External Equipment
AUX
AUX
AUX socket
Listening to the External
Equipment
You can listen to the external equipment such as portable CD, MD
player, STB, or other auxiliary.
❏ First, make sure that the external equipment is properly connect-
ed to the System. (See page 6.)
Set the volume level to the minimum posi-
1
tion.
Press the AUX button.
2
“AUX IN” appears on the display.
Start playing the external equipment.
3
Adjust the volume level to the level you want
4
listen to.
• For operation of the external equipment, refer to its Instructions.
21
Page 25

Using the Timers
SLEEP
SLEEP indicator
REC (Recording) Timer indicator
Timer indicator
DAILY Timer indicator
* When the System is in use, the display shows other items as well.
For simplicity, we show here only the items described in this section.
Three types of timers are available:
DAILY Timer
Use this timer to wake up everyday to music from any source,
instead of an alarm clock.
REC (Recording) Timer
Unattended recording of radio broadcasts. You can set the
starting time and ending time.
SLEEP Timer
Fall asleep and have your System turn off automatically after
a certain length of time.
Setting the Clock
When you plug the AC power cord into the wall outlet, the time indication “0:00” blinks on the display.
You can set the clock whether the System is on or off.
Using the Unit
Press the CLOCK/TIMER button.
1
The hour digit of the time indication will flash on the display.
Press the
2
Pressing the ¢ button moves the time forwards and pressing
the 4 button moves it backwards. Holding down the button
moves the hour rapidly.
Press the SET button.
3
The minute digits of the time indication will flash on the display.
• To return to the hour setting, press the CANCEL button.
Press the
4
Press the SET button.
5
“CLOCK OK” appears on the display. Then, the selected time
is set and the seconds start counting from 0.
4
4
or
or
¢
button to set the hour.
¢
button to set the minute.
Adjusting the Clock
Using the Unit
Press the STANDBY/ON button to turn
1
on the System.
Press the CLOCK/TIMER button repeatedly
2
until clock setting display (time indication)
appears on the display.
Each time you press the button, display changes as follows:
DAILY = ON TIME = REC = ON TIME = Clock Setting
display (time indicator) = Normal operation = (back to the beginning)
Press the SET button
3
The hour digits of the current clock will flash on the display.
Follow steps 2 to 5 of “Setting the Clock” men-
4
tioned above.
• The clock must be correctly set for the timers to work.
• Each setting step must be completed within. 30
seconds. Otherwise, the setting is cleared and must be
repeated from the beginning.
• The clock may gain or lose one to two minutes per month.
• If there is a power failure, the clock loses its setting
immediately. "0:00” blinks on the display and the clock
must be reset.
22
Page 26

Using the Timers
Setting the Daily Timer
Once you have set the Daily Timer, the timer will be activated at
the same time every day.
The Timer indicator ( ) and “DAILY” indicator on the display
shows that the Daily Timer you have set is in effect.
You can set the Daily Timer whether the System is turned on or
off.
• Perform each setting within. 30 seconds. Otherwise, sett-
ing will be cleared and the procedure must be repeated
from the beginning.
• If you have made a mistake while setting the timer, press
the CANCEL button on the Unit. However, this does not always cancel the current setting. If the CANCEL button
does not work, press the CLOCK/TIMER button on the
Unit repeatedly until the display returns to the original display, and start from the first step.
Press the CLOCK/TIMER button until “ON
1
TIME” immediately after “DAILY” appears on
the display.
At this time, “DAILY” indicator flashes and the Timer indicator ( ) lights up on the display.
Each time you press the button, the display changes as follows:
DAILY = ON TIME* = REC = ON TIME = Clock setting
display = Canceled = (back to the beginning)
*: This item should be selected for the Daily Timer setting.
2. Press the ¢ or 4 button to set the minute, then press the
SET button.
“OFF TIME” appears and then the System enters OFF-time
setting mode. The current OFF time appears on the display,
and the hour digits flash.
Setting the OFF time (Example: 15:20).
3
1. Press the ¢ or 4 button to set the hour you want the
System to be turned off, then press the SET button.
The minute digits of the ON time flash on the display.
2. Press the ¢ or 4 button to set the minute, then press the
SET button.
Then, the System enters ON-time setting mode, and the current
ON time appears on the display and the hour digits flash.
Setting the ON time (Example: AM 10:15).
2
1. Press the ¢ or 4 button to set the hour you want the
System to come on, then press the SET button.
The minute digits of the ON time flash on the display.
Pressing the ¢ button moves the time forwards and pressing the 4 button moves it backwards.
Holding down the button moves the time rapidly.
The System enters Music Source Selecting mode and
“TUNER FM” appears on the display.
Selecting the music source.
4
Press the ¢ or 4 button to select the music source you
want to listen to, then press the SET button.
Each time you press the ¢ or 4 button, the display changes as shown below:
TUNER FM = TUNER AM = CD = TAPE = AUX
IN = (back to the beginning)
According to the music source you have selected, the next operation differs.
TUNER FM: Tunes in to the specified preset FM station.
TUNER AM: Tunes in to the specified preset AM(MW) station.
CD: Plays the specified track on the specified CD.
TAPE: Plays a tape in Deck A.
AUX IN: Plays an external source.
23
Page 27

Using the Timers
Preparation for each music source:
Perform the following operation according to the music source
you have selected. Then, the System enters Volume Setting
mode.
When selecting TUNER FM or TUNER AM:
Press the ¢ or 4 button to select the preset station
number, then press the SET button.
When selecting CD :
Press the ¢ or 4 button to select the disc number, then
press the SET button.
Each time you press the button the disc number changes as follows:
DISC – = DISC 1 = DISC 2 = DISC 3 = (back to the beginning)
• If no disc number is specified, playback will start from the
first track of the currently selected disc.
When selecting TAPE:
Insert a cassette tape you want to play into Deck A.
When selecting AUX:
Prepare the external equipment so that it will turn on at the ON
time set by the System.
To allow this, the equipment should have the timer function.
Setting the volume level.
5
Press the ¢ or 4 button to select the volume level.
VOL – – :
under 18: The current volume level will be used.
If the volume level (when the unit is turned off) is over 19:
The volume level is automatically set to 18.
MIN, 1-31, or MAX: When the timer is turned on, the Volume
will be automatically set to the selected level.
If the volume level (when the unit is turned off ) is
Turning the Daily Timer On and Off
Once you have set the Daily Timer, it is stored in memory. So, the
Daily Timer will be activated at the same time every day until it is
canceled.
To cancel the Daily Timer temporarily:
Press the CLOCK/TIMER button on the Unit
1
repeatedly until the “DAILY” appears on the
display.
Press the CANCEL button on the Unit.
2
“OFF” appears and both the Timer indicator ( ) and the
“DAILY” indicator go out.
To activate the cancelled Daily Timer:
Press the CLOCK/TIMER button on the Unit
1
repeatedly until the “DAILY” appears on the
display.
The “DAILY” indicator blinks and the Timer indicator ( )
lights up on the dispaly.
Press the SET button on the Unit.
2
“ON” appears on the display. The Timer indicator ( ) and
the “DAILY” indicator remain lit, and the display returns to
the original display.
• If the System is unplugged, or a power failure occurs, the
timer setting will be lost in a few days. You will need to
reset the clock first, then the timer.
Press the SET button.
6
The timer setting is completed and the display returns to the
display before you set the Timer.
Press the STANDBY/ON button to turn
7
off the System, if necessary.
The Timer indicator ( ) and “DAILY” indicator are lit on the
display, showing that the Daily Timer is set to on.
To confirm / change the timer setting, repeat the setting procedure from the beginning.
When the timer ON-time comes:
The following operation will be automatically repeated every day.
• When the timer ON-time comes, the System automatically
turns on. The music source you have set is played. The Timer
indicator ( ) flashes and “DAILY” indicator lights during
timer operation.
• When the timer OFF-time comes, the System automatically
turns off. Then, the Timer indicator ( ) and “DAILY” indica-
tor remain lit on the display.
• If the System is already on when the timer ON-time
comes, the Daily Timer will not work.
Setting the REC (Recording)
Timer
With the Recording Timer, you can make a tape of a radio broadcast automatically whether or not you are home.
• You can set the REC Timer whether the System is on or
off.
• Perform each setting within 30 seconds. Otherwise, sett-
ing will be cleared and the procedure must be repeated
from the beginning.
• If you have made a mistake while setting the timer, press
the CANCEL button on the Unit. However, this does not always cancel the current setting. If the CANCEL button
does not work, press the CLOCK/TIMER button on the
Unit repeatedly until the display returns to the original display, and start from the first step.
24
Page 28
Using the Timers
Using the Unit
You can set the time in the same way as for setting the Daily Timer.
Insert a blank or erasable tape into the Deck
1
B and wind past the tape leader.
Press the CLOCK/TIMER button until “ON
2
TIME” immediately after “REC” appears on
the display.
The Timer indicator ( ) lights and the “REC” indicator
blinks.
Each time you press the button, the display changes as follows:
DAILY = ON TIME = REC = ON TIME* = Clock setting
display = Canceled = (back to the beginning)
*: This item should be selected for the REC Timer setting.
Then, the System enters ON-time setting mode. The current
ON time appears on the display and the hour digits flash.
Setting the ON time you want the System to
3
turn on.
1. Press the 4 or ¢ button to set the hour, then press the
SET button.
2. Press the 4 or ¢ button to set the minute, then press the
SET button.
“OFF TIME” appears and then the System enters OFF-time
setting mode. The current OFF time appears on the display,
and the hour digits flash.
Setting the OFF time you want the System to
4
turn off.
1. Press the 4 or ¢ button to set the hour, then press the
SET button.
2. Press the 4 or ¢ button to set the minute, then press the
SET button.
The System enters Preset Station Entering mode.
Select the preset station for recording.
5
1. Press the 4 or ¢ button to set the band (TUNER FM or
TUNER AM), then press the SET button.
2. Press the 4 or ¢ button to set the preset number, then
press the SET button.
Setting the volume level.
6
Press the ¢ or 4 button to select the volume level.
VOL – – : The current volume level will be used.
MIN, 1-31, or MAX: When the timer is turned on, the Volume
will be automatically set to the selected level.
Please note: This is the Volume of the system not of the recording.
Press the STANDBY/ON button to turn
8
off the System, if necessary.
The Timer indicator ( ) and “REC” indicator are lit on the
display, showing that the Rec Timer is set to on.
To confirm / change the timer setting, repeat the setting procedure from the beginning.
When the timer ON-time comes:
• When the timer ON-time comes, the System automatically
turns on. The station you have set is played. The Timer indica-
tor ( ) blinks during timer operation.
To stop timer recording, press the 7 button.
• When the timer OFF-time comes, the System automatically turns
off.
• If the System is already on when the timer ON-time
comes, the REC Timer does not work.
Turning the REC (Recording) Timer On and Off
Once you have set the REC Timer to record a source, the timer setting is stored in memory. So, though the REC Timer turns off once
it is used, you can recall it at any time.
To cancel the REC Timer temporarily:
Press the CLOCK/TIMER button on the Unit
1
repeatedly until “REC” appears on the display.
Press the CANCEL button on the Unit.
2
“OFF” appears and both the Timer indicator ( ) and the
“REC” indicator go out.
To activate the cancelled REC Timer:
Press the CLOCK/TIMER button on the Unit
1
repeatedly until “REC” appears on the display.
The Timer indicator ( ) lights and the “REC” indicator
blinks on the display.
Press the SET button on the Unit.
2
“ON” appears on the display. The Timer indicator ( ) and
the “REC” indicator remain lit, and the display returns to the
original display.
• If the System is unplugged, or a power failure occurs, the
timer setting will be lost in a few days. You will need to
reset the clock first, then the timer.
Press the SET button.
7
The timer setting is completed and the display returns to the
display before you set the Timer.
25
Page 29

Using the Timers
Setting the SLEEP Timer
Use the Sleep Timer to turn the System off after a certain number
of minutes . By setting the Sleep Timer, you can fall asleep to music
and know that your System will turn off by itself rather than play
all night.
• You can only set the Sleep Timer when the System is on.
During playback a source, press the SLEEP
1
button.
The “SLEEP” indicator will flash on the display.
Set the length of time you want the source to
2
play before shutting off.
Each time you press the SLEEP button, the time untill turn off
changes as follows:
10 = 20 = 30 = 60 = 90 = 120 = OFF = (back to the
beginning)
Wait for 5 seconds.
3
The “SLEEP” indicator stops blinking and remains lit, and
the display returns to normal before setting the Sleep
Timer.
The System is now set to turn off after the number of minutes
you have set.
Timer Priority
Since REC Timer and DAILY Timer can be set independently, you
may wonder what happens if the settings overlap. Here are the priorities for REC Timer and DAILY Timer:
• Timer with the earlier time setting will have the priority.
Timer will not operate when other Timer is operating.
• If other Timer is set to an exact same time as the REC Timer,
the REC Timer will have the priority.
❏ REC Timer and DAILY Timer will not operate when SLEEP
Timer is operating.
Example
Setting
REC Timer
DAILY Timer
REC Timer
DAILY Timer
ON
ON
9:30PM 11:00PM10:30PM10:00PM
Operation
ON OFF
OFF
OFF
To Confirm the Sleep Time:
When the SLEEP button on the Remote Control is pressed, the remaining sleep time is displayed. Wait until the display returns to
the original display.
To Cancel the SLEEP Timer Setting:
Press the SLEEP button on the Remote Control until the “SLEEP”
indicator goes out on the display.
• Turning off the System also cancels the SLEEP Timer.
• When the REC Timer or the DAILY Timer has turned
the system on, SLEEP Timer can not be set.
9:30PM 10:30PM
Operates only in REC Timer mode.
26
Page 30

Care And Maintenance
Handle your CDs and tapes carefully, and they will last a long
time.
Compact Discs
• Only CDs bearing these marks can be
used with this System. However, continued use of irregular shape CDs (heartshape, octagonal, etc.) can damage the
Recordable
System.
• Remove the CD from its case by holding
it at the edges while pressing the case’s
center hole lightly.
• Do not touch the shiny surface of the
CD, or bend the CD.
• Put the CD back in its case after use to
prevent warping.
• Be careful not to scratch the surface of
the CD when placing it back in the case.
• Avoid exposure to direct sunlight, temperature extremes, and moisture.
• A dirty CD may not play correctly. If a
CD does become dirty, wipe it with a
soft cloth in a straight line from center to
edge.
Cassette Tapes
• If the tape is loose in its cassette, take up
the slack by inserting a pencil in one of
the reels and rotating.
• If the tape is loose, it may get stretched,
cut, or caught in the cassette.
• Do not touch the tape surface.
• Do not store the tape:
- In dusty places
- In direct sunlight or heat
- In moist areas
- On a TV or speaker
- Near a magnet
Cassette Deck
• If the heads, capstans, and pinch-rollers of the Cassette Deck
become dirty, the following will occur:
- Loss of sound quality
- Discontinuous sound
-Fading
- Incomplete erasure
- Difficulty recording
• To clean the tape deck use a tape cleaner available from
most audio retailers.
CAUTION:
• Do not use any solvent (for example, conventional record cleaner, spray thinner, benzine,
etc.) to clean a CD.
General Notes
In general, you will have the best performance by keeping your
CDs and the mechanism clean.
• Store CDs in their cases, and keep them in cabinets or on
shelves.
• Keep the System’s Top Cover closed when not in use.
Moisture Condensation
Moisture may condense on the lens inside the System in the
following cases:
• After turning on heating in the room.
• In a damp room.
• If the System is brought directly from a cold to a warm
place.
Should this occur, the System may malfunction. In this case,
leave the System turned on for a few hours until the moisture
evaporates, unplug the AC power cord, and then plug it in
again.
27
Page 31

Troubleshooting
• If you are having a problem with your System, check this list for a possible solution before calling for service.
• If you cannot solve the problem from the hints given here, or the System has been physically damaged, call the Goodmans product in-
formation helpline on 0870 873 0080.
Symptom Possible Cause Action
No sound is heard. • Connections are incorrect, or loose.
• Headphones are connected.
Poor radio reception • The aerial is disconnected.
• The MW Loop Aerial is too close
to the System.
• The FM Wire Aerial is not prop-
erly extended and positioned.
The disc tray does not open.
The CD skips. The CD is dirty or scratched. Clean or replace the CD. (See page 27.)
The CD does not play. The CD is upside down. Put the CD in with the label side up.
The MP3 disc does not play.
The readout time of the MP3 disc is too
long.
The cassette holder cannot be opened. During tape playing, the power cord
Unable to record. Cassette record protect tabs are re-
• The AC power cord is not plugged in.
• Tray is locked.
• No MP3 files are recorded on the disc.
• MP3 files do not have the file extension —.MP3, .Mp3, .mP3, or .mp3
in thier file names.
• MP3 files are not recorded in the format compliant with ISO 9660 Level
1 or Level 2.
The readout time varies with the complexity of the recording configuration.
was unplugged.
moved.
• Check all connections and make corrections. (See pages 4 to 6.)
• Disconnect the headphones.
• Reconnect the aerial securely.
• Change the position and direction of
the MW Loop Aerial.
• Extend FM Wire Aerial to the best
reception position.
• Plug the AC power cord.
• Unlock the tray. (See page 13.)
Replace the disc.
Do not use too many hierarchies and
folders when recording. Also, do not
record any other types of audio tracks
together with MP3 files. (See page 9.)
Plug in the power cord, and turn on the
System.
Cover holes on back edge of cassette
with tape.
Take out the CD as shown below.
Unable to operate the Remote Control. • The path between the Remote Con-
Operations are disabled. The built-in microprocessor has mal-
Can not open CD tray
Can not open CD tray until unlocked is shown in display.
trol and the sensor on the Unit is
blocked.
• The batteries have expired.
functioned due to external electrical interference.
• CD door has been locked. Press Stop n and CD Open/Close
• Remove the obstruction.
• Replace the batteries.
Unplug the System then plug it back in.
0
28
Page 32

Specifications
Input Sensitivity/Impedance (1 kHz)
Speaker terminals 6 - 16 Ω
Cassette Deck Section
Frequency Response
Type I (NORMAL) 63 Hz - 12 500 Hz
Wow And Flutter 0.15% (WRMS)
Dynamic Range 85 dB
Signal-To-Noise Ratio 85 dB
Wow And Flutter Unmeasurable
MW(AM) Tuner
Speaker Specifications (each unit)
Power Handling Capacity 180 W
Frequency Range 45 Hz - 22,000 Hz
Sound pressure level 87 dB/W·m
Amplifier
Output Power 160 W per channel, min. RMS, driven into 6 Ω at 1kHz, with no
more than 10% total harmonic distortion
AUX IN 400 mV/50 kΩ
Phones 32 Ω - 1 kΩ
CD Player
CD Capacity 3 CDs
Tuner
FM Tuner
Tuning Range 87.5 MHz - 108.0 MHz
Tuning Range 522 kHz - 1 629 kHz
Dimensions 270 mm
Weight Approx. 8.7 kg (19.2 lbs)
SP-6160
Speaker Unit Woofer: 20 cm (7-7/8") cone
Impedance 6 Ω
Dimensions 261 mm
15 mW/ch output into 32 Ω
Unit
Type 3-way bass-reflex type
Mid: 5cm (2") cone
Tweeter: 2 cm (13/16") dome
✕
306 mm ✕ 413 mm (W/H/D)
✕
318 mm ✕ 246 mm (W/H/D)
✕
1
✕
1
✕
1
Weight Approx. 4.3 kg (9.5 lbs)
Accessories
Power Specifications
Power Requirements AC 230 V , 5
Max Power Consumption 560 W (power on mode)
Design and specifications are subject to change without notice.
AM Loop Aerial (1)
Remote Control (1)
Batteries R6P (SUM-3)/AA (15F) (2)
FM Wire Aerial (1)
0 Hz
3 W (in ECO mode)
29
 Loading...