

Page 1
USER MANUAL
MODEL: 341882
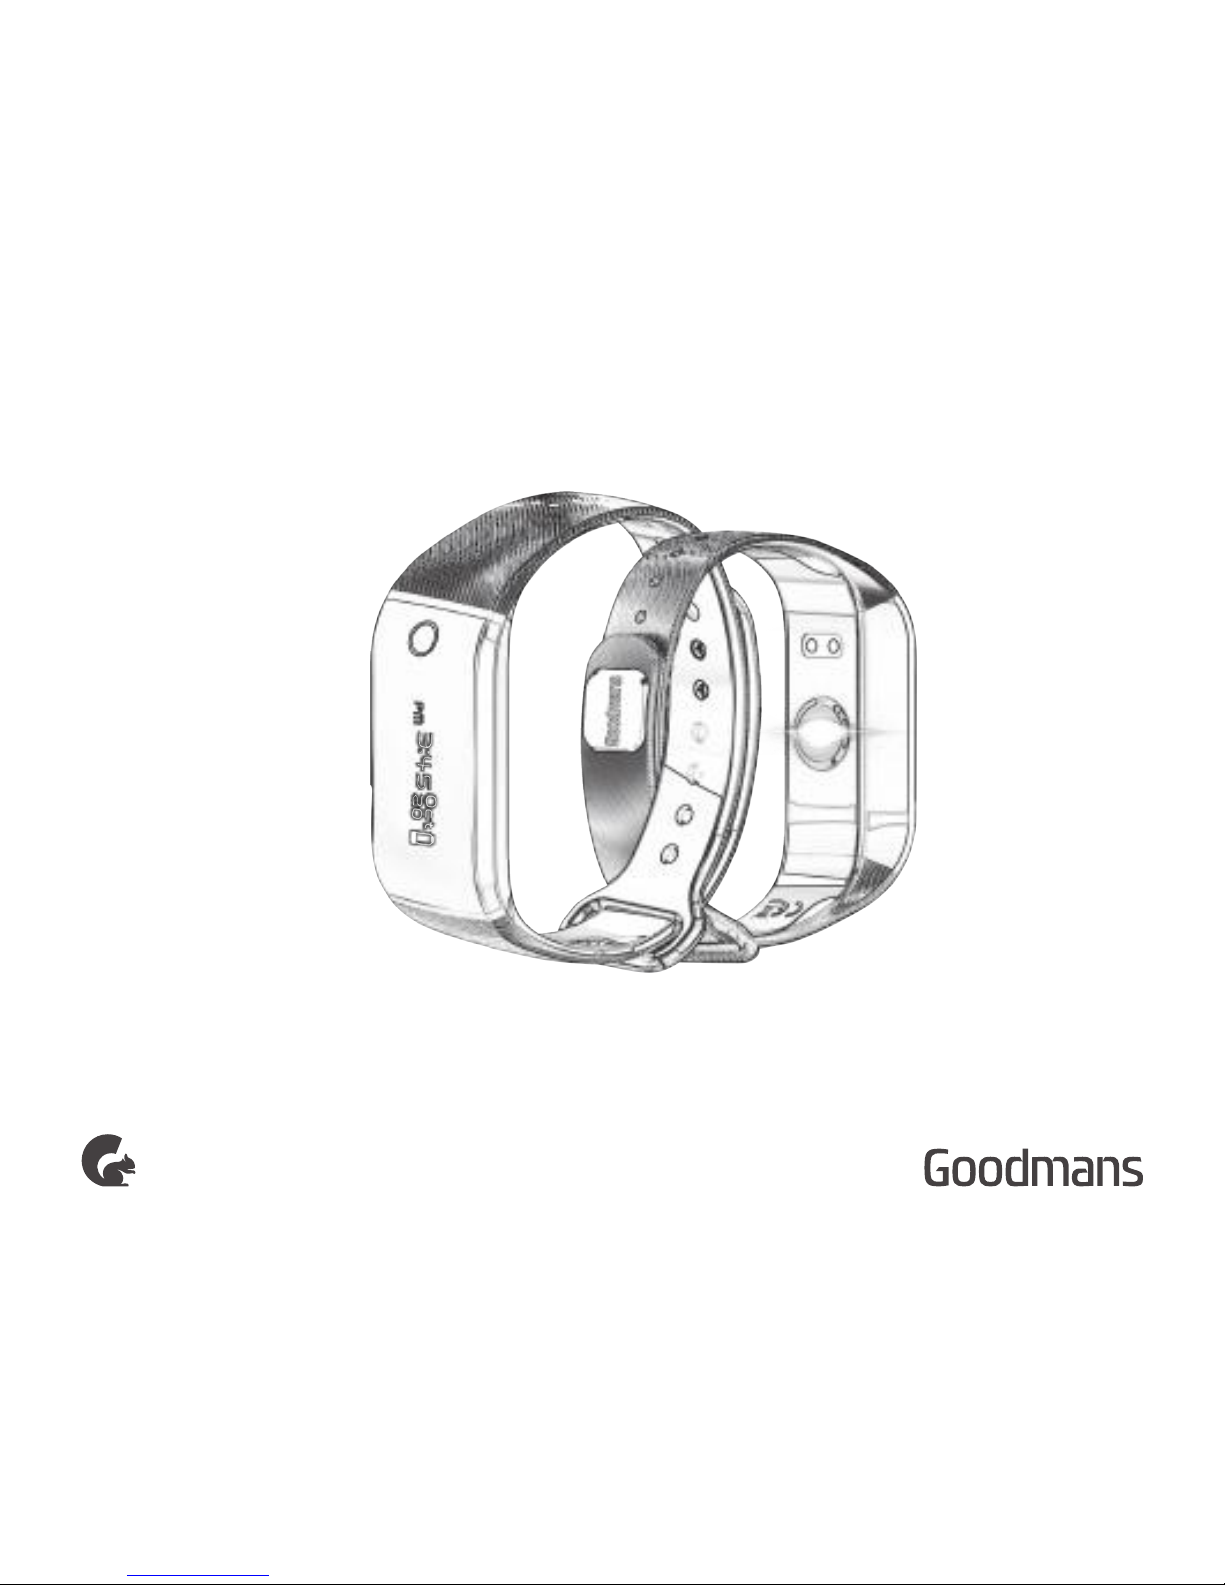
Fitness Tracker
Page 2
Welcome
Your Fitness Tracker
Quick Setup
1
2
3
2.1
2.2
In The Box
Front View
2.3 Back View
3.1
3.2
How to Wear Your Fitness Tracker
Turning On
3.3
3.4
Operation
Display Icons
3.5 Goodmans Fit APP
APP4
4.1
4.2
Bluetooth Pairing Android
APP Display
4.3 Fitness Tracker Setup
4.4 Google Fit - Android
Page 3
Storage and precaution
6
Troubleshooting
7
Technical Specifications8
Customer Support9
4.5 HealthKit - iOS
Heart Rate Detection5
5.1
5.2
Precautions
Operation
6.1
6.2
Storage
Precaution
Page 4

Welcome1
Your Fitness Tracker2
2.1 In The Box
Thank you for choosing this Goodmans product. We have been
making electrical products for the British people for over 90 years.
Each of our products have been carefully designed to be great at
what they do and this one is no exception. We hope you enjoy your
new Fitness Tracker.
Carefully remove your Fitness Tracker from the packaging.
Inside the box you will find:
If any of these items are missing, please email:
Goodmans@bmstores.co.uk
• Fitness Tracker
• Charging Cable
• Quick Start Guide
• Guarantee and Safety Book
• User Manual
Page 5
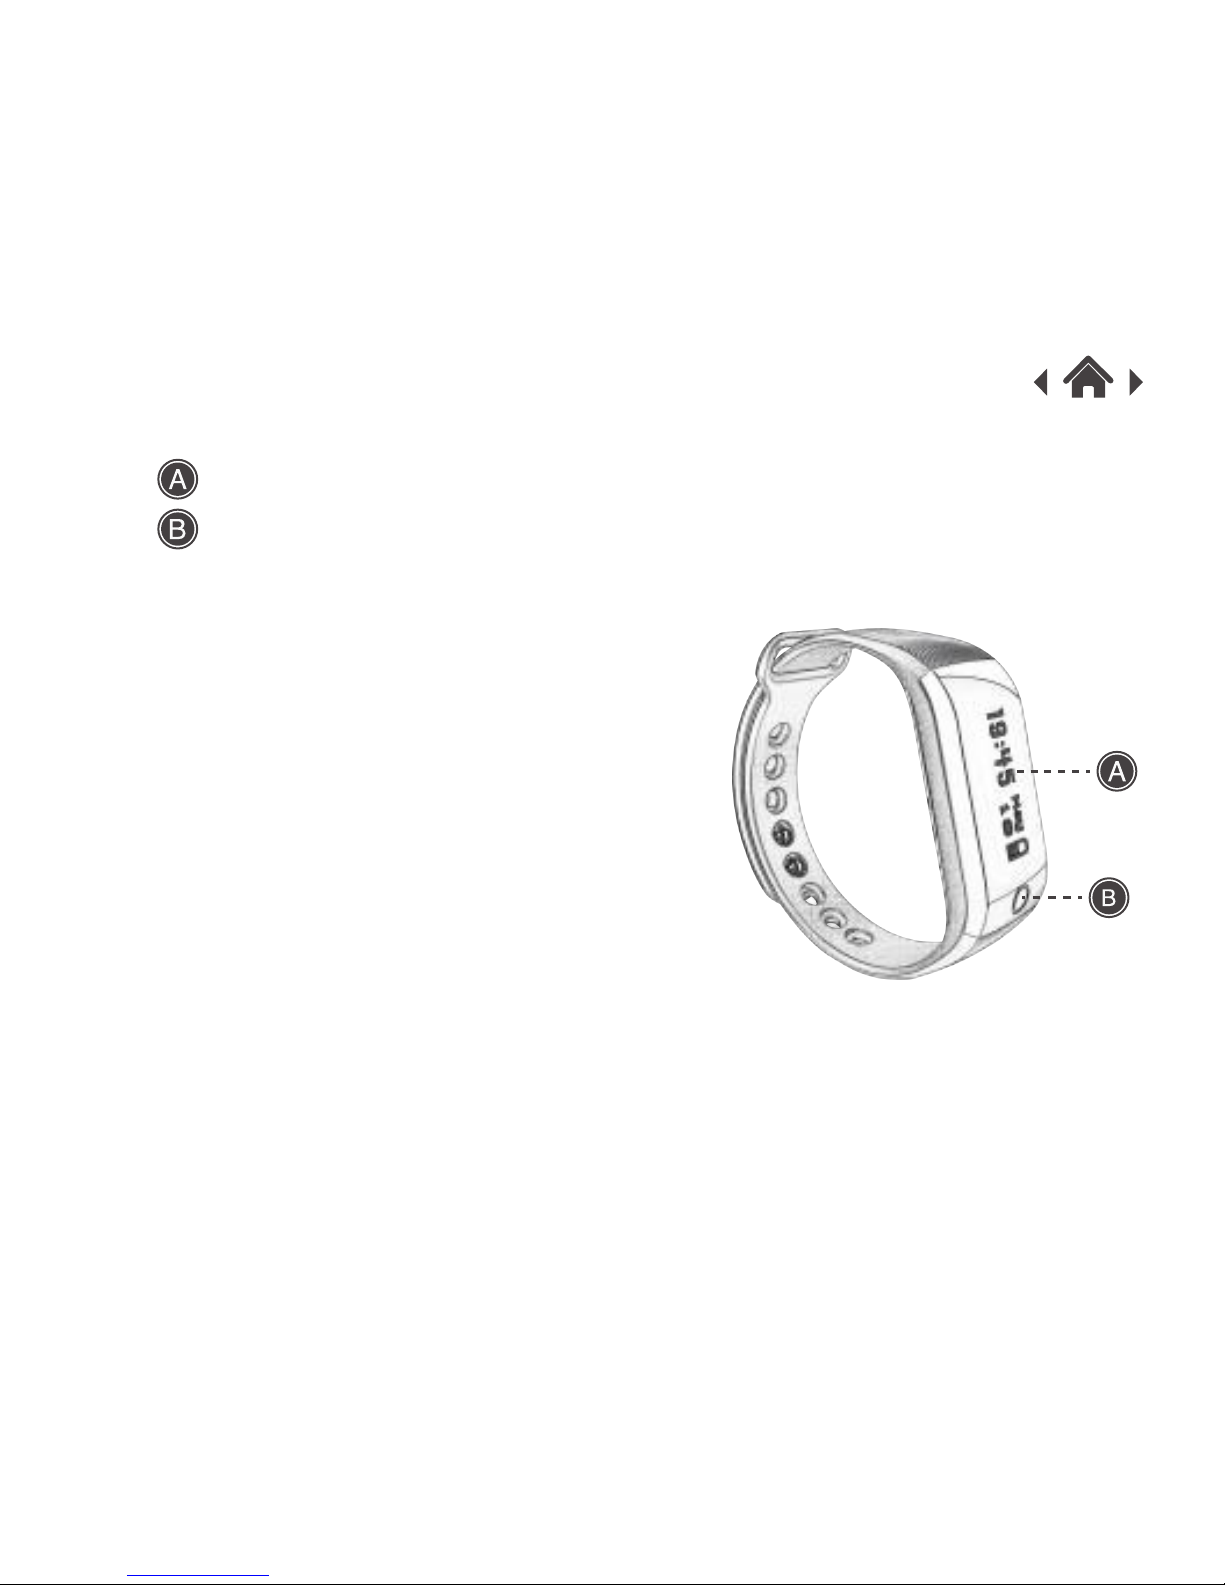
2.2 Front View
Screen
Touch Button
Long press the touch button to
power on.
Press touch button for 1s to
change the mode.
Press touch button for 3s to
access additional functionality
such as camera control and
music control.
Page 6
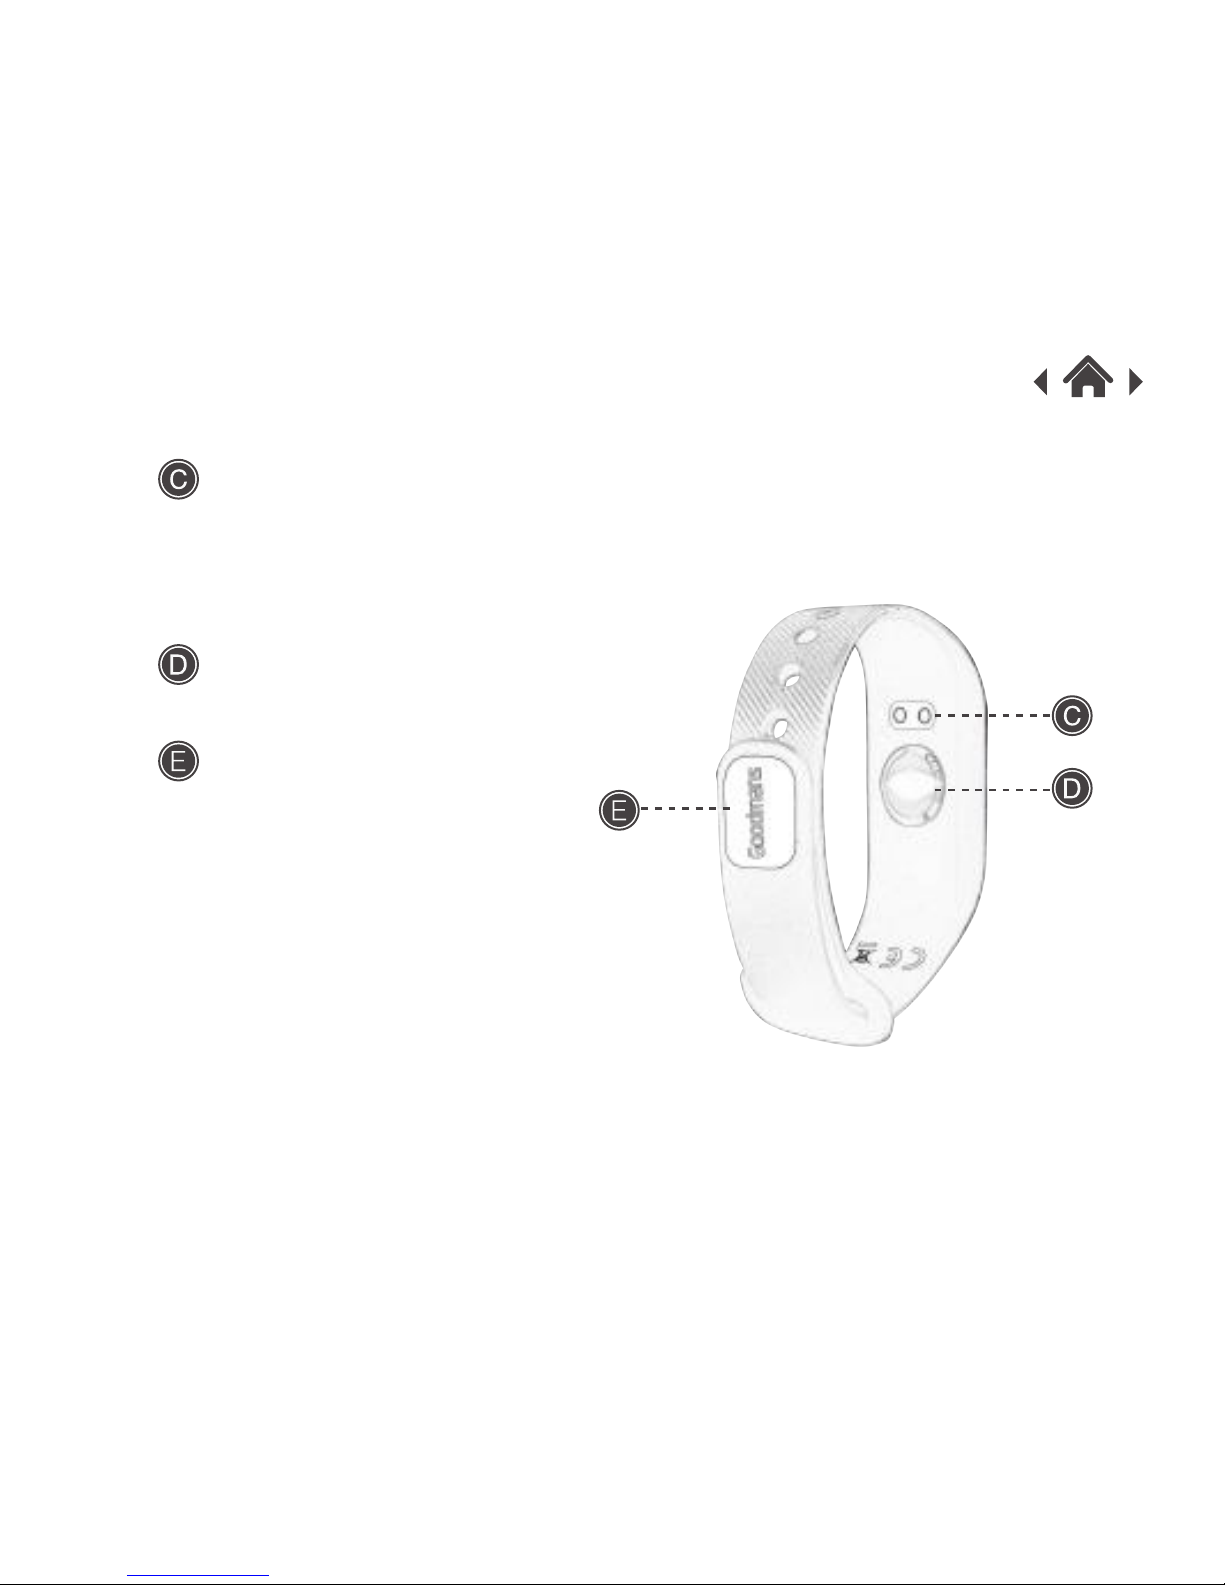
2.3 Back View
Charging Terminal
Only use the supplied charging
cable that has the magnetic
charging head.
Heart Rate Monitor.
Heart Rate
Bracelet Clasp
Page 7
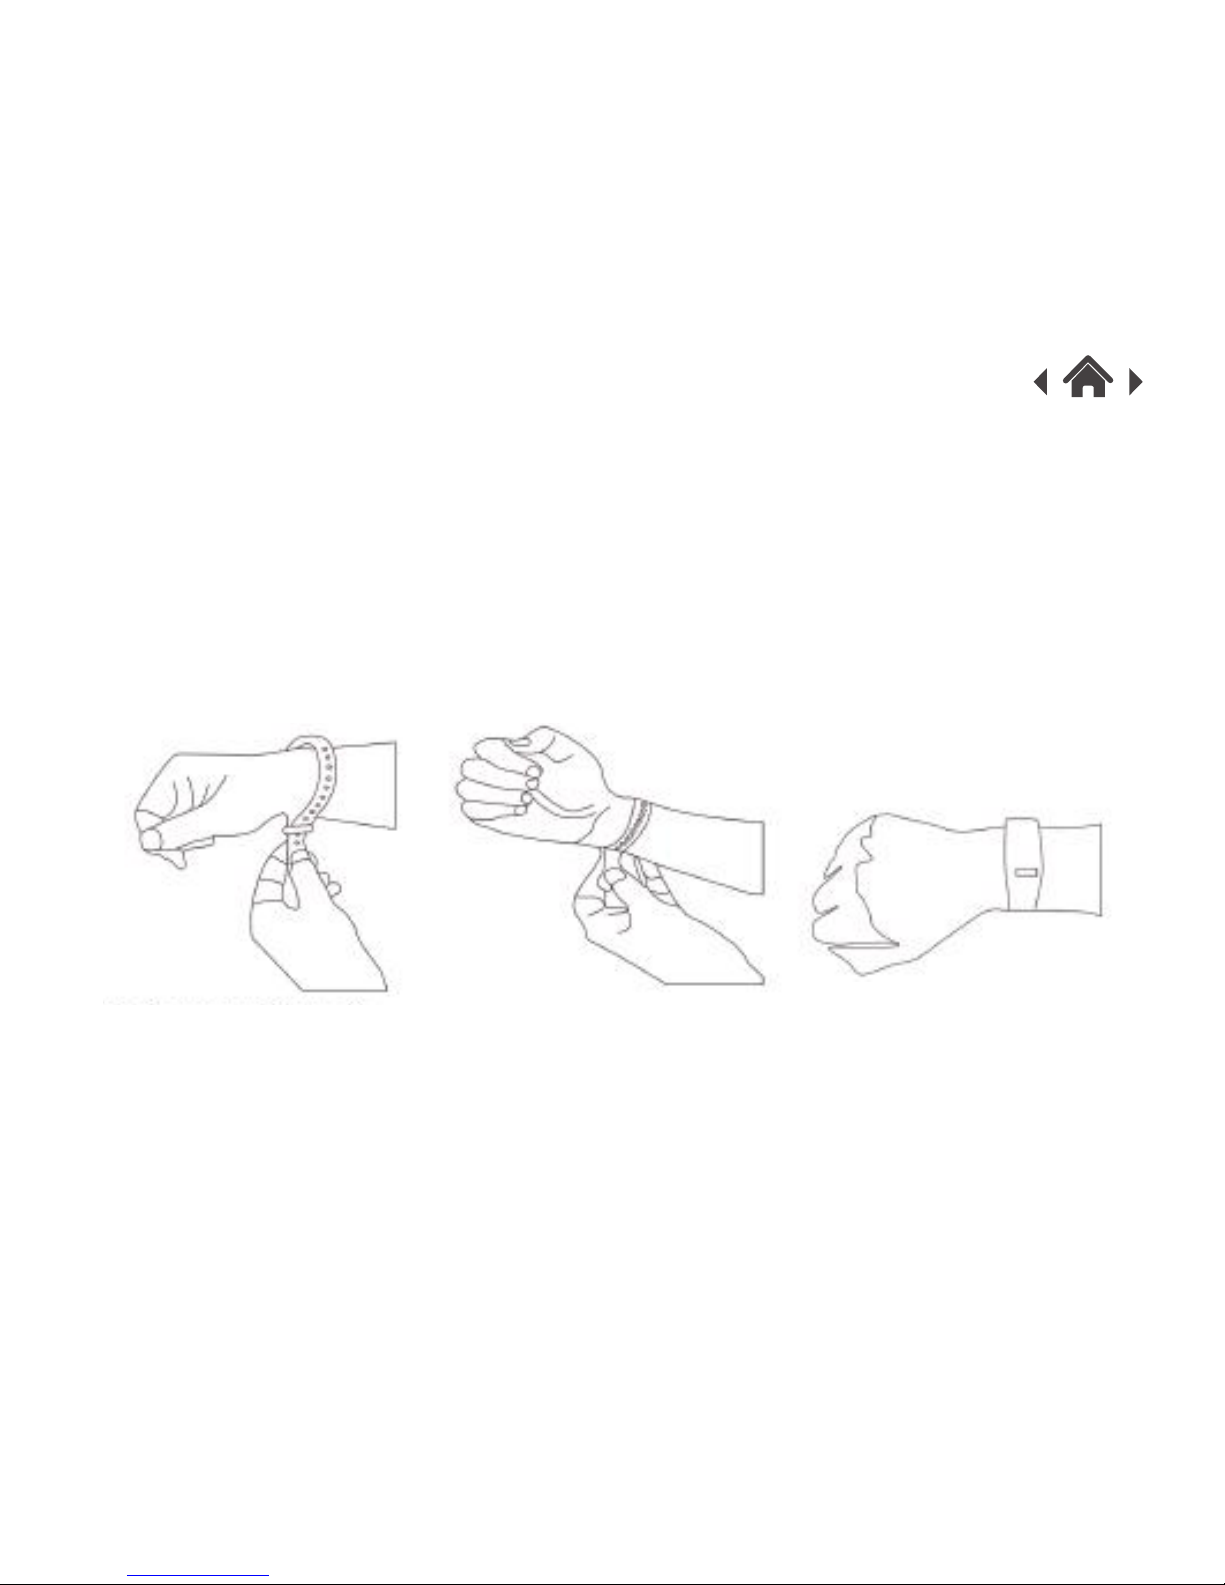
3.1 How to Wear Your Fitness Tracker
Quick Setup3
1. The Fitness Tracker can be worn on either your left or right wrist.
2. Make sure that the wristband is not too loose and is comfortable.
If the wristband is too loose the heart rate reading will not be
accurate.
3 Make sure that the bracelet clasp is securely fixed so that it does
not move or fall off during Fitness Tracker activities.
1 32
Page 8
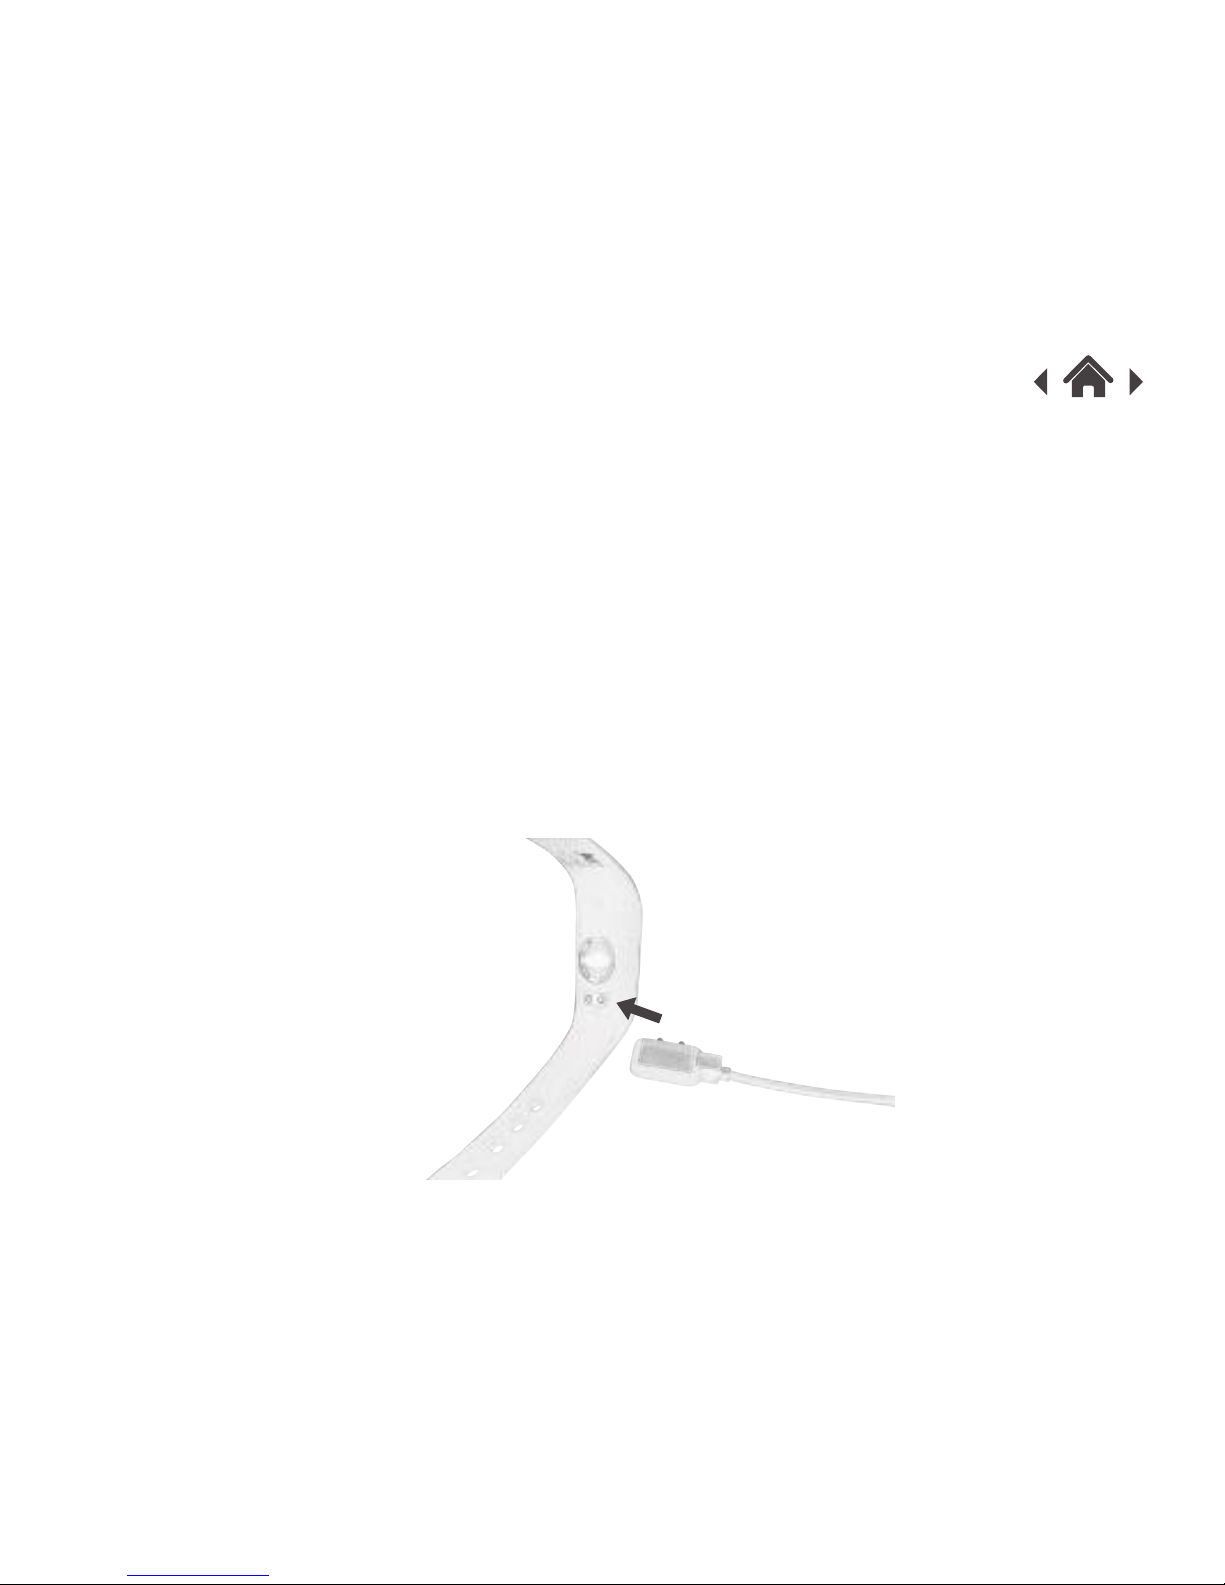
3.2 Turning On
1. Before using for the first time, make sure that the Fitness Tracker
is fully charged.
2. The Fitness Tracker will be fully charged within 2 hours.
3. Make sure that the charging cable is correctly positioned on the
magnetic points on the back of the Fitness Tracker. Note that the
cable can only be connected one way round.
4. Connect the other end of the USB cable into a suitable USB port
on your PC. Note that a charging adapter is not supplied with
this product.
Page 9
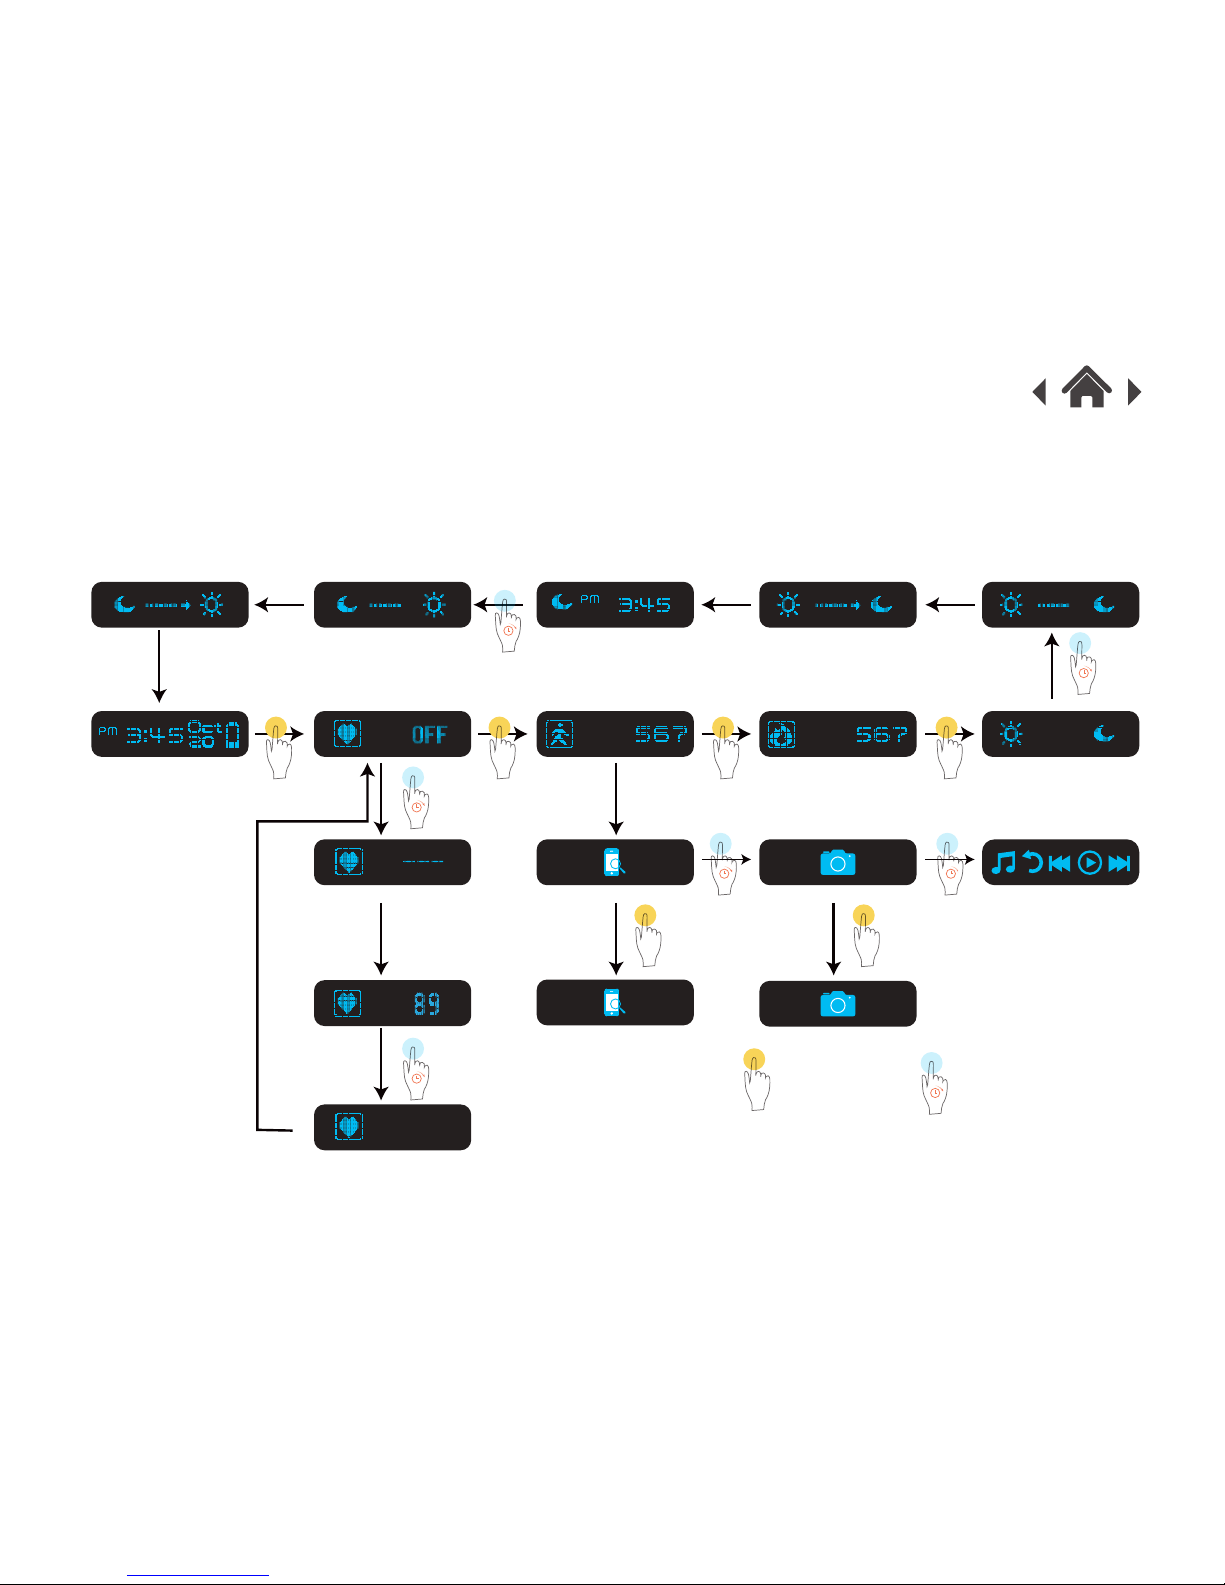
3.3 Operation
Touch the white circle on the Fitness Tracker to go through the menu
and select the available functions.
Touch for 1s Touch for 3s
Release finger
Release finger
Release finger
Release finger
Page 10
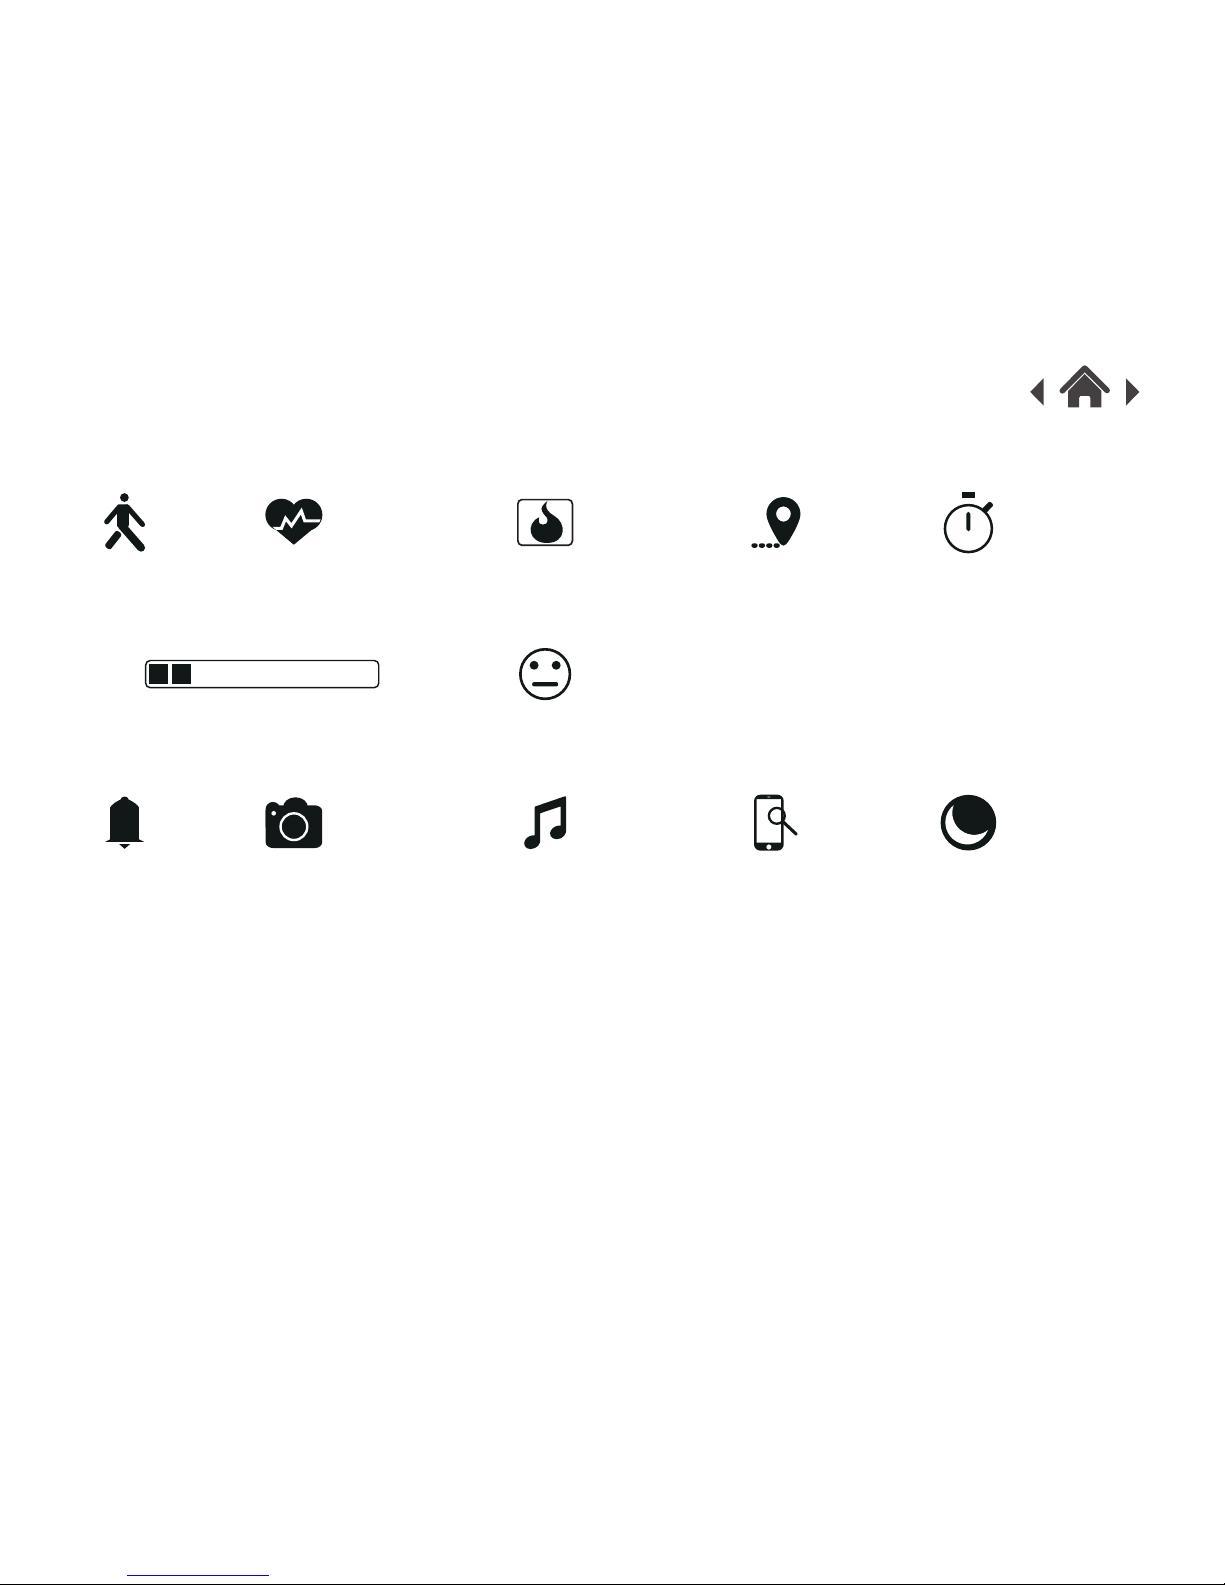
Step
Target percentage
Alarm Camera control Music player Phone finder Sleep mode
Target expression
Heart rate Calories Distance Exercise time
3.4 Display Icons
Page 11

3.5 Goodmans Fit APP
1. Before downloading the APP make sure that the “Goodmans Fit”
APP is compatible with your mobile device. The APP works with
iOS 8.0 or above and Android 4.4 or above.
2. Find “Goodmans Fit” in APP Store or Google Play Store.
3 Install the app. Note that you’ll need an account with the applicable
store before you can download it.
4 When the APP is installed, open it and follow the instructions to
complete the setup.
Note that the personal information you’re asked during setup is used
to calculate your calorie consumption and other exercise data. It is
not stored or used to identify the users data or their location.
QR Code for Android QR Code for iOS
Page 12

APP4
4.1 Bluetooth Pairing Android
Turn on Bluetooth
on mobile phone
Go to Setting - Permissions Authorize all permissions to
Goodmans Fit
Page 13

Bluetooth Setup & Pairing iOS
Open Goodmans Fit and
complete your personal
stats setup
Press “Tap to pair device” Press “ ” for
available devices
Page 14

Press Goodmans Fit and
Bind the device
Connecting Connection successful
Page 15

Only after pairing, phone call and message notifications will be
available on your Fitness Tracker screen.
iOS only
Page 16

4.2 APP Display
Swipe upwards to view steps
and activity data
Device connected and
data synced
Press Moon icon to
view sleep data
Page 17

Press Heart Icon to
check heart rate
Swipe upwards to view
additional sleep data
Press Start to record
heart rate
APP Display
Page 18

Press End to save heart
rate data
Press History to check record Setup section
APP Display
Page 19

4.3 Fitness Tracker Setup
Daily Goals:
Set your daily steps per day goal.
The default is 10,000 steps per day.
Stride:
Set up average distance per step.
Left/Right Hand:
Display direction will change.
Sedentary Reminder:
Remind you of activity.
Vibration Alarm:
5 sets of alarm can be set up.
Auto Sleep:
Device automatically enters Sleep Mode.
Display Setup:
The device only display mode you choose.
Page 20

Multi-media Controller:
Turn on or off Phone Finder, Camera
Control & Music Player.
Auto Heart Rate Detection:
Band will monitor heart rate at a set time.
Auto Heart Rate Data Saving:
Record heart rate data automatically.
Find Device:
If Find Device is activated, Fitness Tracker vibrates for 5S.
It will vibrate continuously.
Anti-lost:
If Fitness Tracker is over 10 meters away from the phone,
Fitness Tracker will vibrate for 5s. Phone vibrates for 10s.
After 10s period, phone vibrates again.
Phone vibration will continues 3 times.
Page 21

Notifications:
Notification Turn on notification access for
Goodmans Fit (Android Only)
Page 22

Notifications:
When Fitness Tracker is connected with your mobile phone, it can receive phone call notifications.
When tracker is connected with mobile phone, it can receive and display SMS.
12345678990
John Smith
SMS
12345678990
I had a great
day today
Page 23

Device setup
Input accurate personal information.
This information will be used to calculate
your calorie data.
Page 24

4.4
Tap Google Fit
Android only
Add Google Fit Account
Android only
Data uploads to Google Fit
Android only
Google Fit - Android
Page 25

Tap HealthKit
iOS only
Allow data to sync
iOS only
Press “Sources” and choose
“Goodmans Fit” iOS only
HealthKit - iOS4.5
Page 26

Heart Rate Detection5
5.1 Precautions
1. Don’t move the band after turning on heart rate detection.
2. Band needs to monitor the wrist closely to get an accurate heart
rate.
3 Make sure there is nothing between the device and skin.
4 It takes around 20 seconds for Fitness Tracker to get heart rate
data.
5.2 Operation
1. Touch button to scroll to heart rate mode.
2. Long press button for 3 seconds to activate heart rate detection.
3 Release finger when the display changes into “---”.
4 It takes around 20 seconds for Fitness Tracker to get heart rate
data.
Touch button Long press for 3s Long press for 3s
Page 27

6.1 Storage
1. The heart rate is a delicate component. Make sure Fitness
Tracker is stored in a good condition to ensure accurate heart
rate data.
2. The acitivty Fitness Tracker is only water resistant. It is not
suitable for swimming. Keep the product in dry place after usage.
3. Clean optical sensor shield and magnets charging port with a
cotton bud.
6.2 Precaution
1. Do not disassemble the Fitness Tracker.
2. Do not use or keep the product in high or low temperature.
Storage and precaution6
Page 28

Troubleshooting7
Problem What to do
How to set up time
The heart rate doesn’t
show after turning
on heart rate checking.
My activity Fitness
Tracker doesn’t show
the notifications.
When Fitness Tracker is connected
with phone, time will be synced at the
same time.
If you are using an iPhone make
sure you press Pair when the APP
pops up “Bluetooth Pairing Request”.
If your phone is Android, please
make sure you have turned
Notification feature.
Tighten the activity Fitness Tracker in
case of any light leakage. Then
activate heart rate detection, and
don’t move your hand for 20s.
Page 29

Problem
What to do
Can I use Fitness
Tracker while
swimming.
No the Fitness Tracker is water
resistant to IP56 rating only.
Page 30

Technical Specifications8
128*32 pixels
0.91 inch
6.2x5.2x2.5cm(Min)
24.76g
TPU
Zinc Alloy
IP56
40 - 240 bpm
Battery Type
Battery Capacity / Voltage
Lithium-ion polymer rechargeable
150mAh / 3.7V
Model Numbel
Bluetooth Mode
Screen Resolution
Screen Size
Wristband Materials
341882
Unit Size
Weight
Buckle
Heart Rate
Water Resistant
Bluetooth 4.0
Page 31

Customer Support
9
For all product support, please email:
Goodmans@bmstores.co.uk
This product is intended for use within UK
Declaration of Conformance
The full text of the EU declaration is available at the following
internet address:
http://www.bmstores.co.uk/technical-information
is a trademark on a registered trademark of
Bluetooth SIG Inc.
 Loading...