

Goodman TSTATG4271GT Owner's Manual

Model TSTAT G 4 2 7 1 G T
Air Condition ing & Heatin
g
Hig h Re so lu ti on , Fu l l Co l o r
Touch Screen Display
Dig i t al Ther m o st at
Simple as you want Operation
Switchable Programmable or
Non-Programmable
Up to 4 Heat & 2 Cool Stages
Gas Electric or Heat Pump Control
Adjustable Timers & Deadbands
Setpoint Limiting
Owner ’s Ma n u a l
&
In st all at io n In st ruc ti on s
Th a n k go od ness fo r Good m an .
Simple-Stat Operation
for ease of use
Programmable Fan
Outdoor Sensor Ready
Choice of English, Spanish or French
Customizable Screensaver*
Customizable Wallpaper*
*SD card required for set-up.
*SD card not included.
TM
CAUTION
Follow the Installation Instructions before proceeding.
Set the thermostat mode to “OFF” prior to changing
settings in setup or restoring Factory Defaults.
This device complies with Part 15 of the FCC Rules. Operation is
subject to the following two conditions: (1) this device may not cause
harmful interference, and (2) this device must accept any interference
received, including interference that may cause undesired operation.
Thermostat TSTATG4271GT
Tested to Comply
c
with FCC Standards
C
F
4Z95
FOR HOME OR OFFICE USE
Page i

Glossary of Terms
Auto-Changeover: A mode in which the thermostat will turn on the
heating or cooling based on room temperature demand.
Cool Setpoint: The warmest temperature that the space should rise
to before cooling is turned on (without regard to deadband).
Deadband: The number of degrees allowed past setpoint, before
energizing heating or cooling.
Differential: The forced temperature difference between the heat set-
point and the cool setpoint.
Heat Setpoint: The coolest temperature that the space should drop
to before heating is turned on (without regard to deadband).
Icon: The word or symbol that appears on the thermostat display.
Mode: The current operating condition of the thermostat (i.e. Off,
Heat, Cool, Auto, Program On).
Non-Programmable Thermostat: A thermostat that does not have
the capability of running Time Period Programming.
Programmable Thermostat: A thermostat that has the capability of
running Time Period Programming.
Temperature Swing: Same as Deadband.
Time Period Programming: A program that allows the thermostat to
automatically adjust the heat setpoint and/or the cool setpoint based
on the time of the day. Same as Schedule.
Page ii

Table of Contents
Get to Know Your Thermostat
Home Screen
1
1
Menu Screens
Care and use of your thermostat
2
Quick Start
Selecting your desired temperature and mode
3
Using the Fan button
3
Setting the time
5
Setting the date
6
6
8
Daylight Savings setup
The Main Menu Buttons
Schedule
7
Time Period Schedule On/Off
8
View My Schedule
Edit My Schedule
8
Smart Fan
10
Smart Fan On/Off
11
Smart Fan Minimum Runtime
11
Start/Stop Times
11
Days to allow Smart Fan operation.
11
Screensaver
12
Screensaver On/Off
13
Screensaver Setup
13
Screensaver Preview
13
Alerts
14
View Current Alerts
15
Reset Alerts
15
Set/Edit Reminders
15
Service Information (Who To Call For Service)
15
Page iii

Table of Contents
Display
16
Active Brightness
17
Idle Brightness
17
Night Dimmer
17
Maintenance
18
Preferences
19
User Interface Themes
20
Custom Wallpaper
20
Heat/Cool Indicator
20
Backdrop On/Off
20
Sound Options
20
Vacation
21
Vacation Mode On/Off
22
Schedule
22
Modes & Setpoints
23
24
Security
Auto Screenlock
25
Setpoint Limits
25
Mode Restrictions
25
Information
26
Who To Call For Service
27
View Runtime Graphs
27
Settings
28
Thermostat Name
31
Available Modes
31
SD Card (Import and Export)
31
General Setup
31
31
32
32
32
33
33
33
33
33
Units (F or C)
Language
Smart Recovery ON/OFF
Simple Thermostat ON/OFF
Installation Settings
Heat & Cool Stages
Heat & Cool Stages
Compressor Stages
Aux Heat Stages
Page iv

Table of Contents
Installation Settings (continued)
33
35
36
36
36
36
36
36
36
36
36
37
37
37
38
38
38
39
40
40
41
42
42
43
44
45
46
49
50
56
Timers & Deadbands
Free Cooling
Heat Pump Settings
Heat Pump Lockout - Enabled/Disabled
Heat Pump Lockout Outdoor Temp
Aux Heat Lockout Enabled/Disabled
Aux Heat Lockout Temp
Dual Fuel Settings
Dual Fuel On/Off
Changeover With Outdoor Temp On/Off
Adjust Balance Point
Fan Off Delay
Calibrate Sensors
Test Outputs
Dealer Information
Reset To Factory Default Settings
Upgrade Firmware
Emergency Heat
TouchScreen Assistant
Installing the TouchScreen Assistant Software
Uploading Photos
Installation Instructions
Remove & Replace the Old Thermostat
Wire Connections
The TouchScreen Thermostat Backplate
Explanation Of the Thermostat Dip Switches
Sample Wiring Diagrams
Troubleshooting
Index
Warranty
Page v
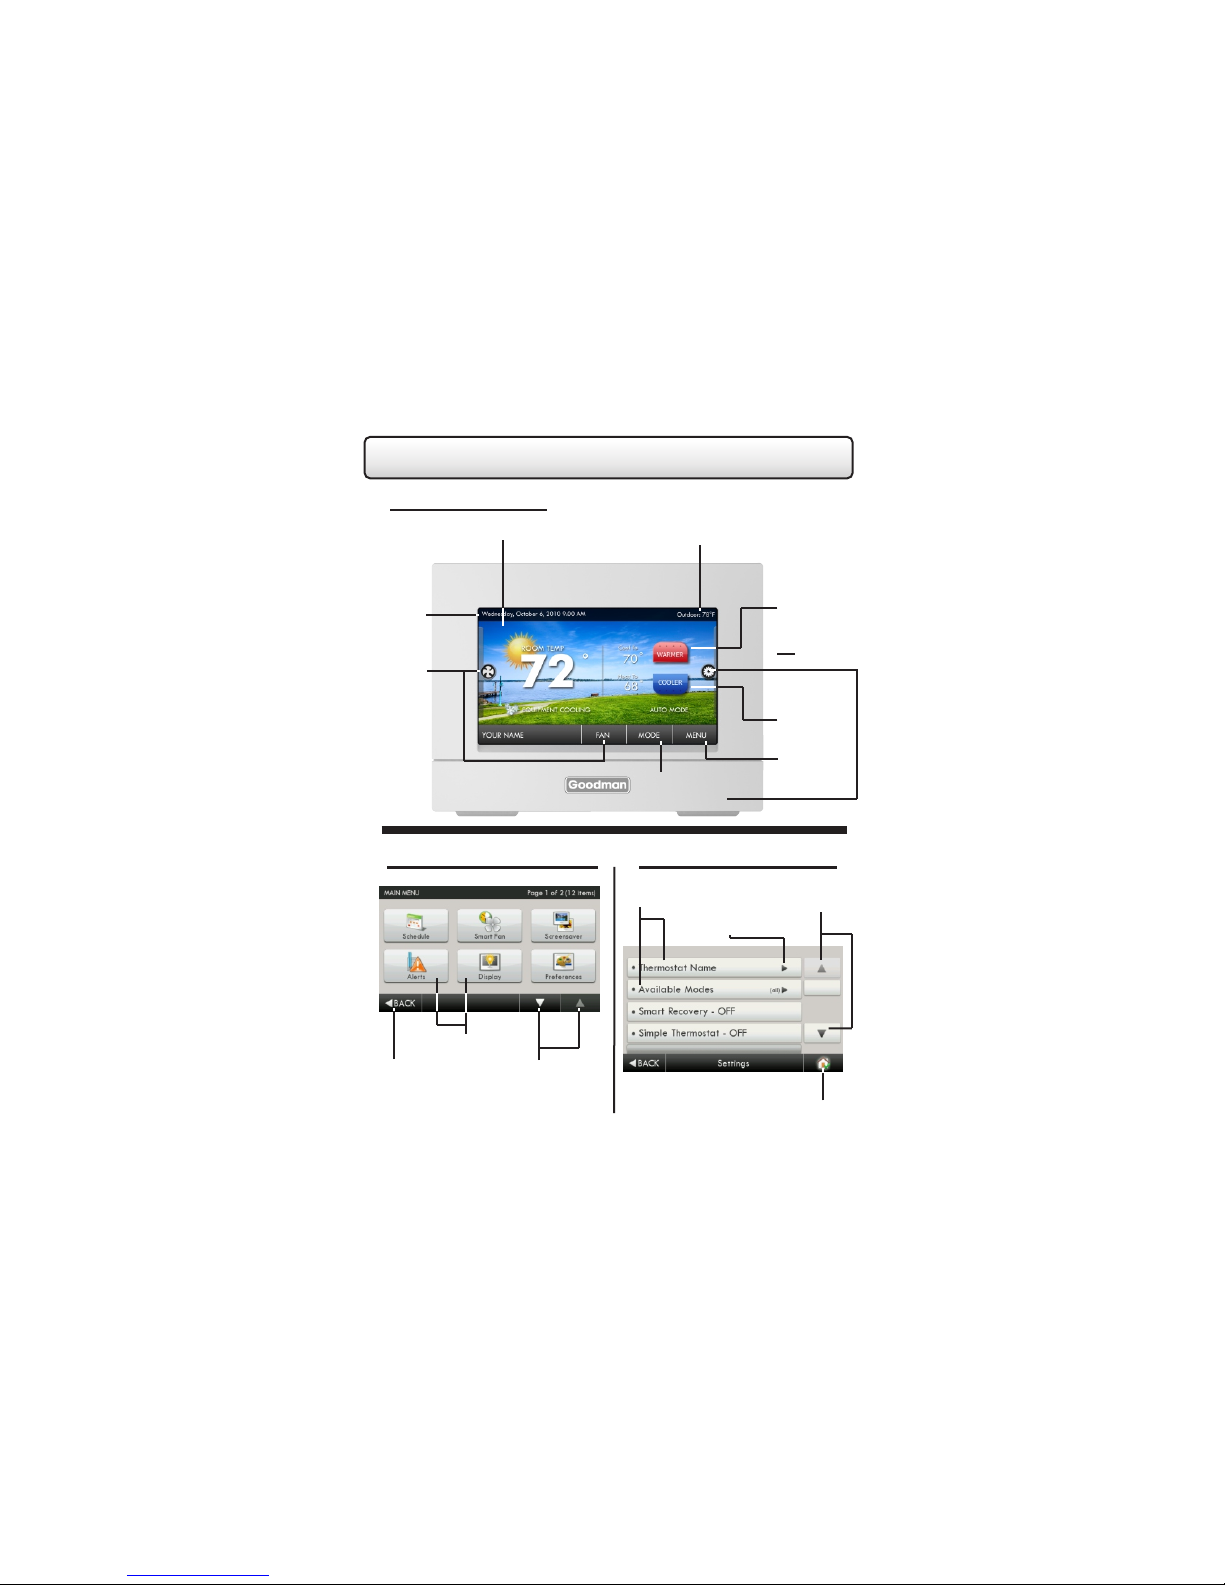
Get To Know Your Thermostat
Home Screen
Backlit Color Touchscreen Display
Date
&
Time
Fan
Buttons
Buttons
Main Menu Screen
Menu
Back
Button
Buttons
Scrolling
Buttons
Page 1
Sub Menu Screen
Sub Menu
Buttons
Outdoor Temperature
With high & low temps for the day
(If optional sensor is installed)
Warmer
Button
SD Card
Slot
Cooler
Button
Menu
Mode
Indicates Options
Available
Button
Scrolling
Buttons
Home
Button
Get To Know Your Thermostat
Care and Use of Your Thermostat
Pencils, pens and other sharp objects should never be used on your TouchScreen
thermostat; these may damage your touchscreen. Only use your finger tip to press
the touchscreen buttons.
Use a soft, damp cloth to clean the screen.
DO NOT USE ABRASIVE CLEANERS OR CLEANERS THAT CONTAIN
SOLVENTS. DO NOT SPRAY ANYTHING DIRECTLY ONTO THE
THERMOSTAT.
Page 2

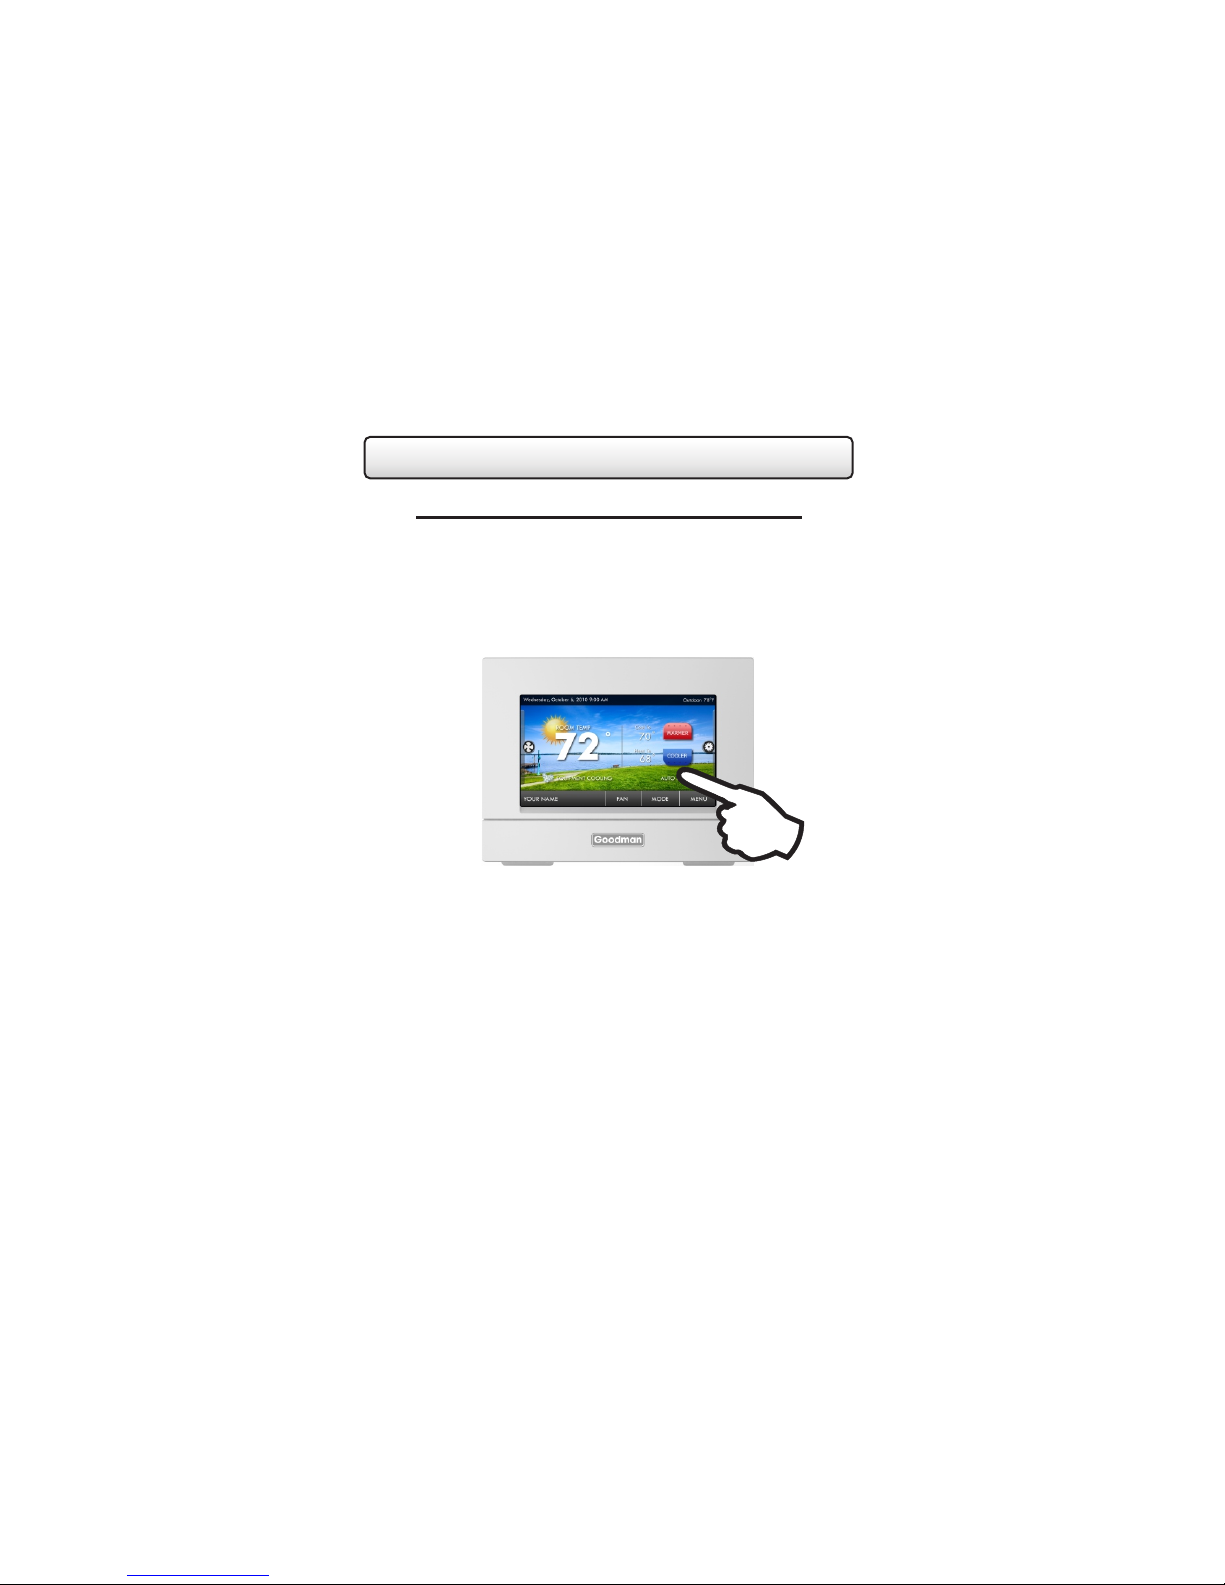
Quick Start
Temperature, Modes & Fan
Selecting Your Desired Temperature and Mode
Press
The Heat or Cool Setpoint is the
temperature the room has to
reach before heating or cooling
will turn on.
(Without regard to deadband)
Press
HEAT will allow only heat operation.
COOL will allow only cool operation.
or
MODE
or the MODE Icon
to adjust temperature
Fan
Cool Setpoint
Heat Setpoint
Warmer
Button
Cooler
Button
AUTO will allow both Heat and Cool operation.
OFF - heating and cooling systems are turned off.
AUTO-CHANGEOVER MODE - Pressing the WARMER or COOLER buttons in Auto
mode will adjust both the heat and cool setpoints simultaneously. To adjust heat and
cool setpoints individually, choose HEAT mode to adjust the heat setpoint and COOL
mode to adjust the cool setpoint, then return to AUTO mode.
HEAT OR COOL MODE - Pressing the WARMER or COOLER buttons in Heat or
Cool mode will adjust only the heat or cool setpoints.
Using the Fan Button
Press
FAN ON fan runs constantly even in OFF Mode.
FAN AUTO fan only runs with a heating or cooling demand.
FAN
or the FAN Icon
Page 3
Quick Start
Set Time & Date
Set Current Time
Use AM/PM - ON
Set Current Date
Daylight Savings Setup
Daylight Savings Time - OFF
Start Schedule
Starts On
Day
Month
Stop Schedule
Ends On
Day
Month
Set Time & Date
(2nd)
(Sun)
(March)
(1st)
(Sun)
(November)
Page 4
Quick Start
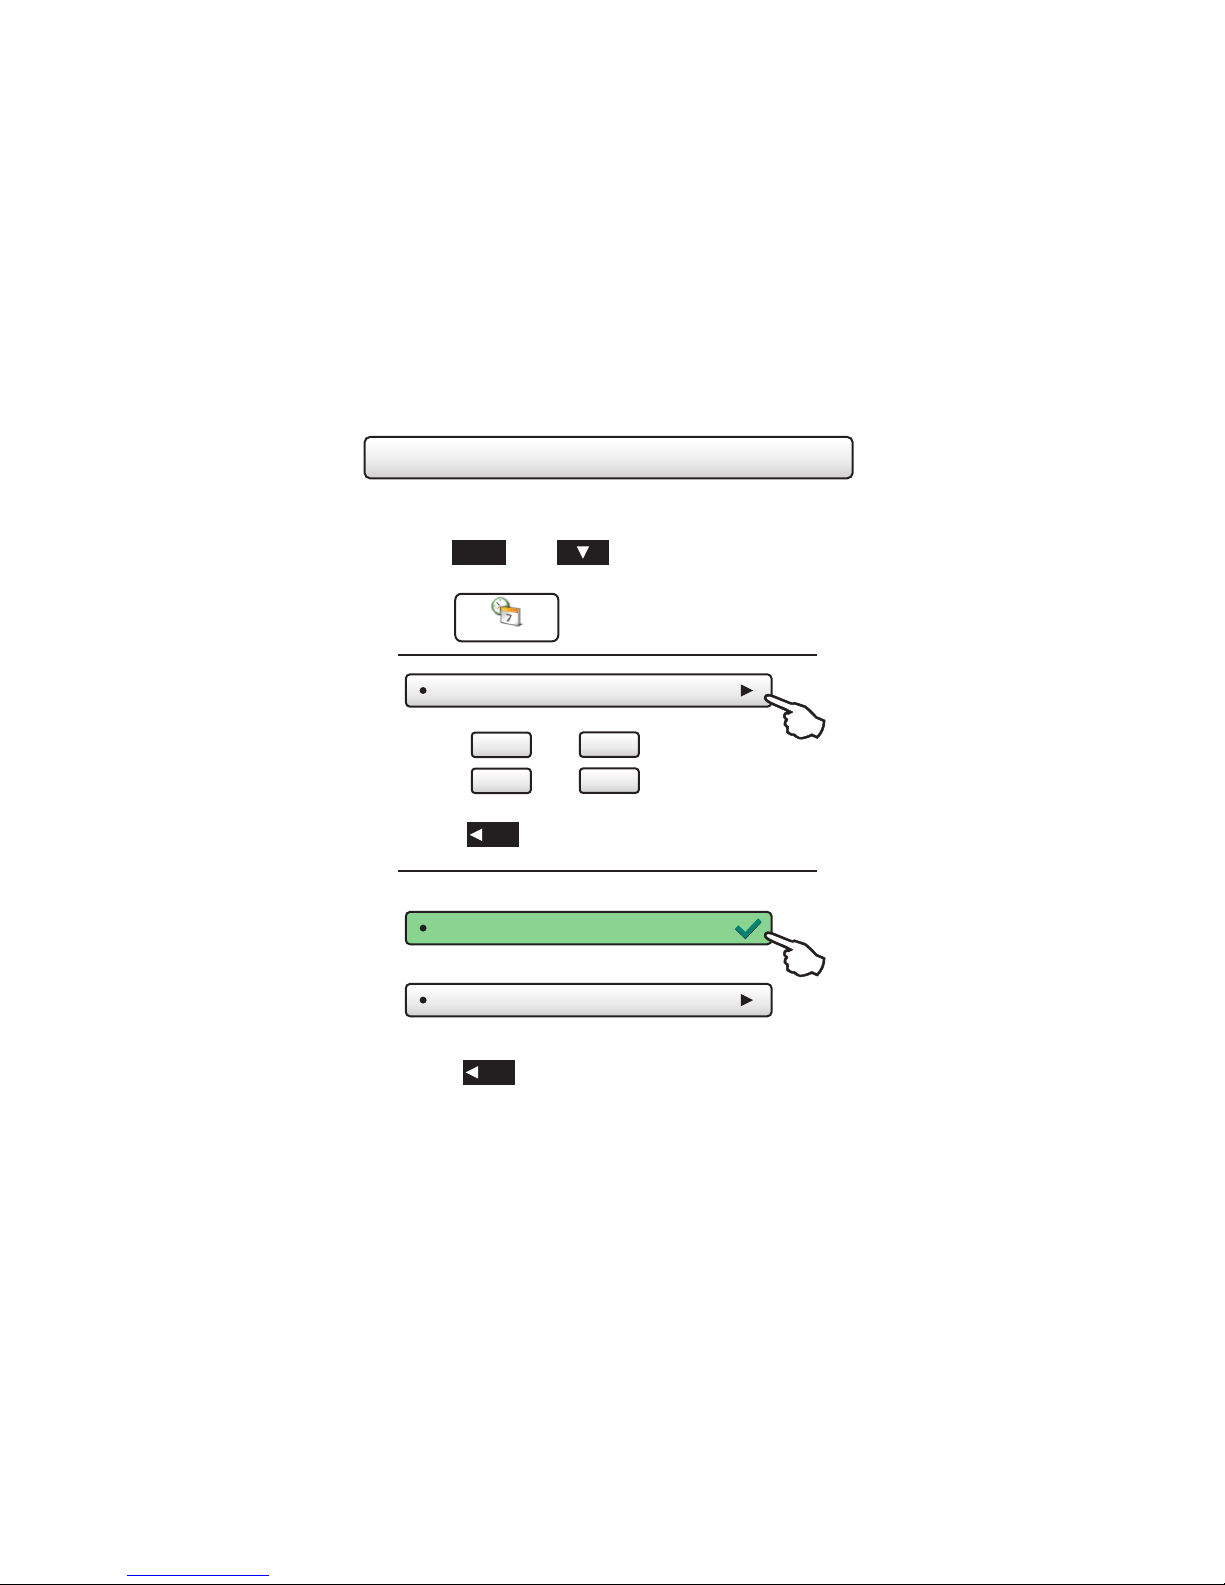
Setting the Time
MENU
Press
Press
Set Current Time
then
Set Time & Date
to scroll down.
(12:00 AM)
Set Time & Date
Press
Press
Press
Choose
For 12 hour AM/PM clock
For 24 hour clock
Press
hr +
and
hr -
BACK
when finished.
Use AM/PM - ON
Use AM/PM - OFF
BACK
when finished.
min +
min -
Page 5
to set the current time.
Quick Start
Set Time & Date
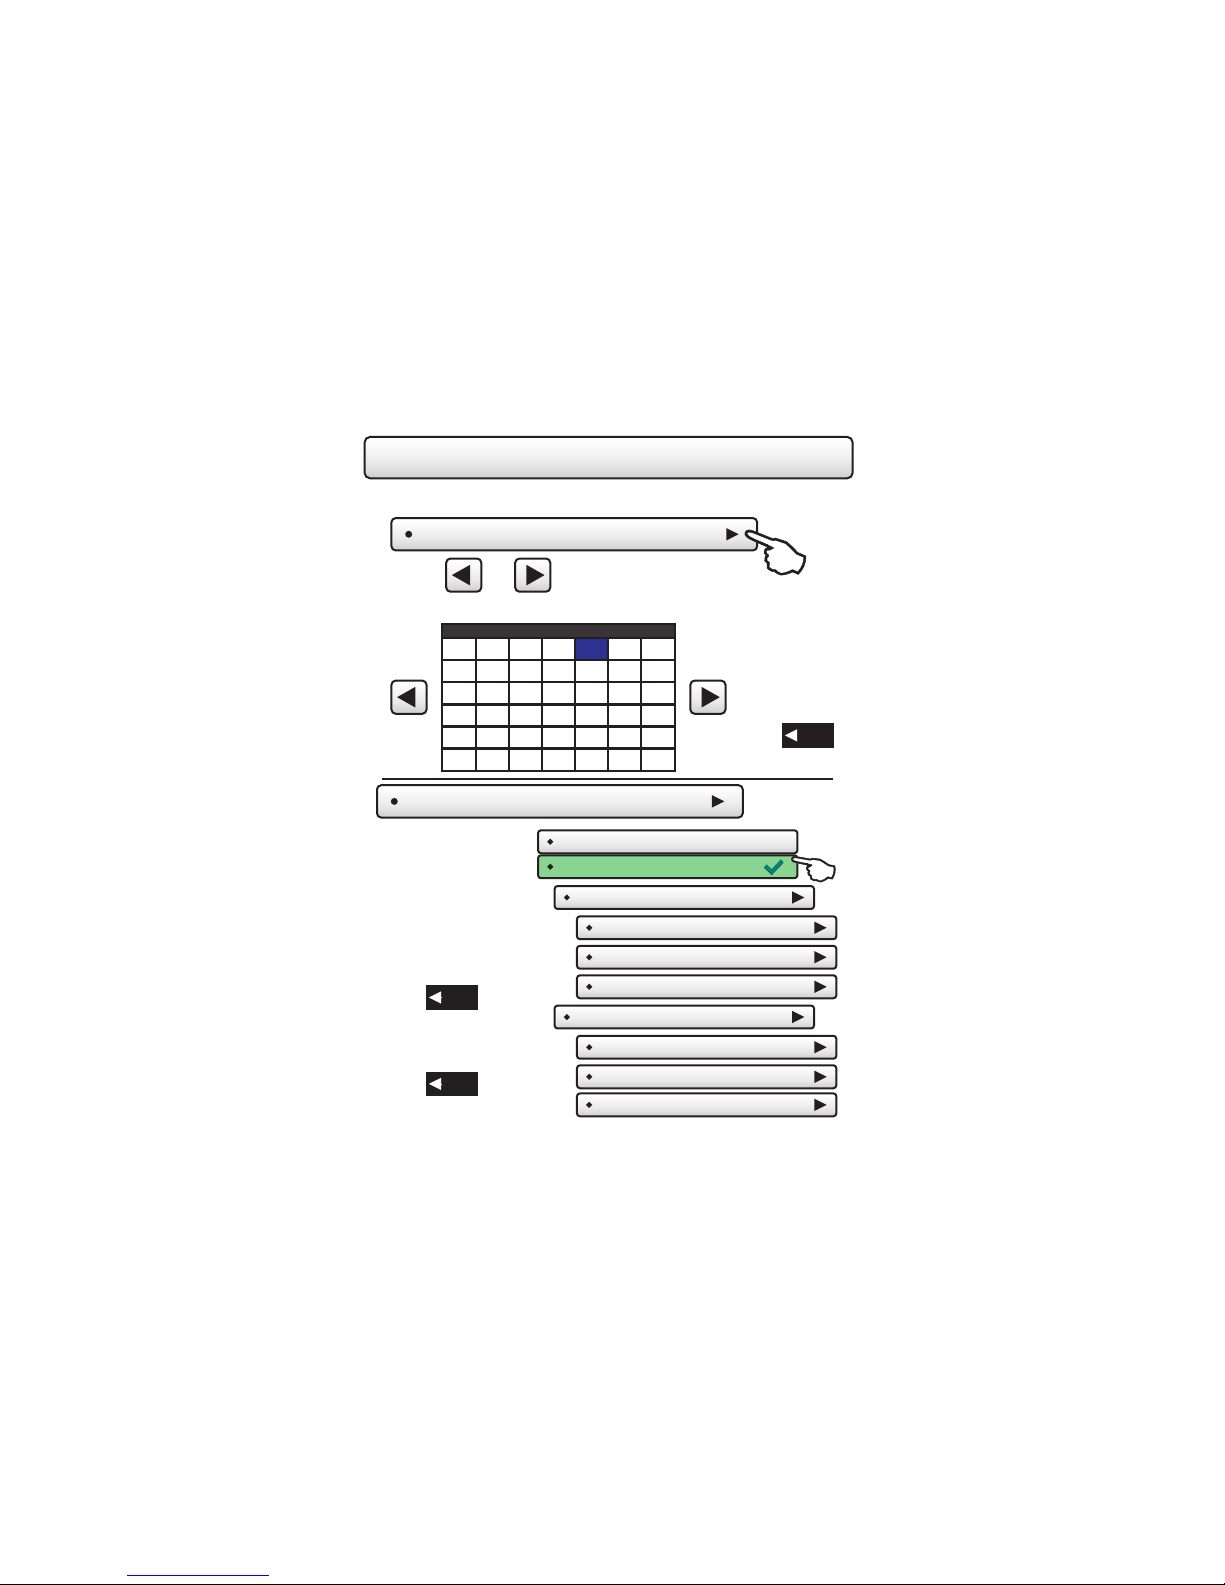
Setting the Date
Set Current Date
Press
Daylight Savings Setup
Turn Daylight Savings
Time on or off.
Adjust when Daylight
Savings Time begins.
Adjust when Daylight
Savings Time ends.
Press
after making a change
to a selection.
Press
or the Home button
when finished.
or
Press the day on the calendar
Su Mo Tu We Th Fr Sa
27 28 29 30 1 2 3
4 5 6 7 8 9 10
1211
13
18 19 20 21 22 23 24
1 2 3 4 5 6 7
BACK
BACK
7/8/2010
to set the current month and year.
17161514
31302928272625
Daylight Savings Time - OFF
Daylight Savings Time - ON
Start Schedule
Starts On
Day
Month
Stop Schedule
Ends On
Day
Month
Press
when finished.
Page 6
Press
(2nd)
(Sun)
(March)
(1st)
(Sun)
(November)
BACK
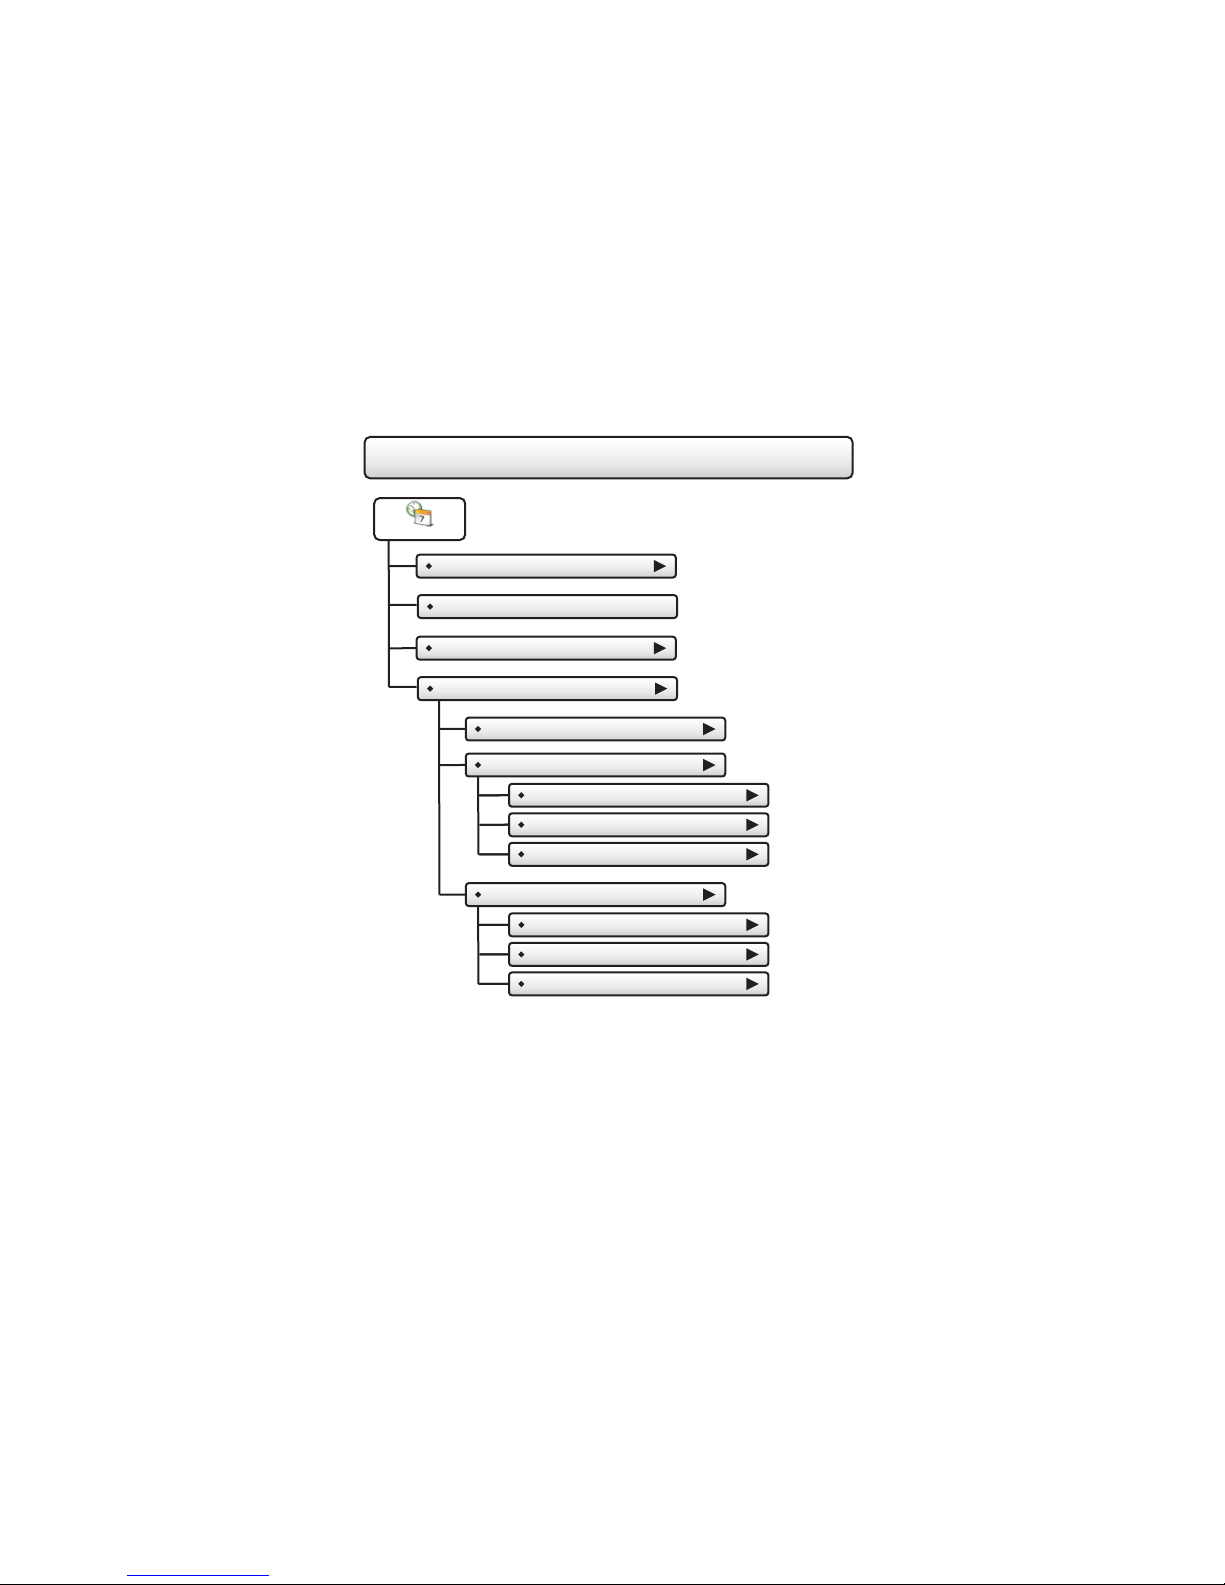
The Main Menu Buttons
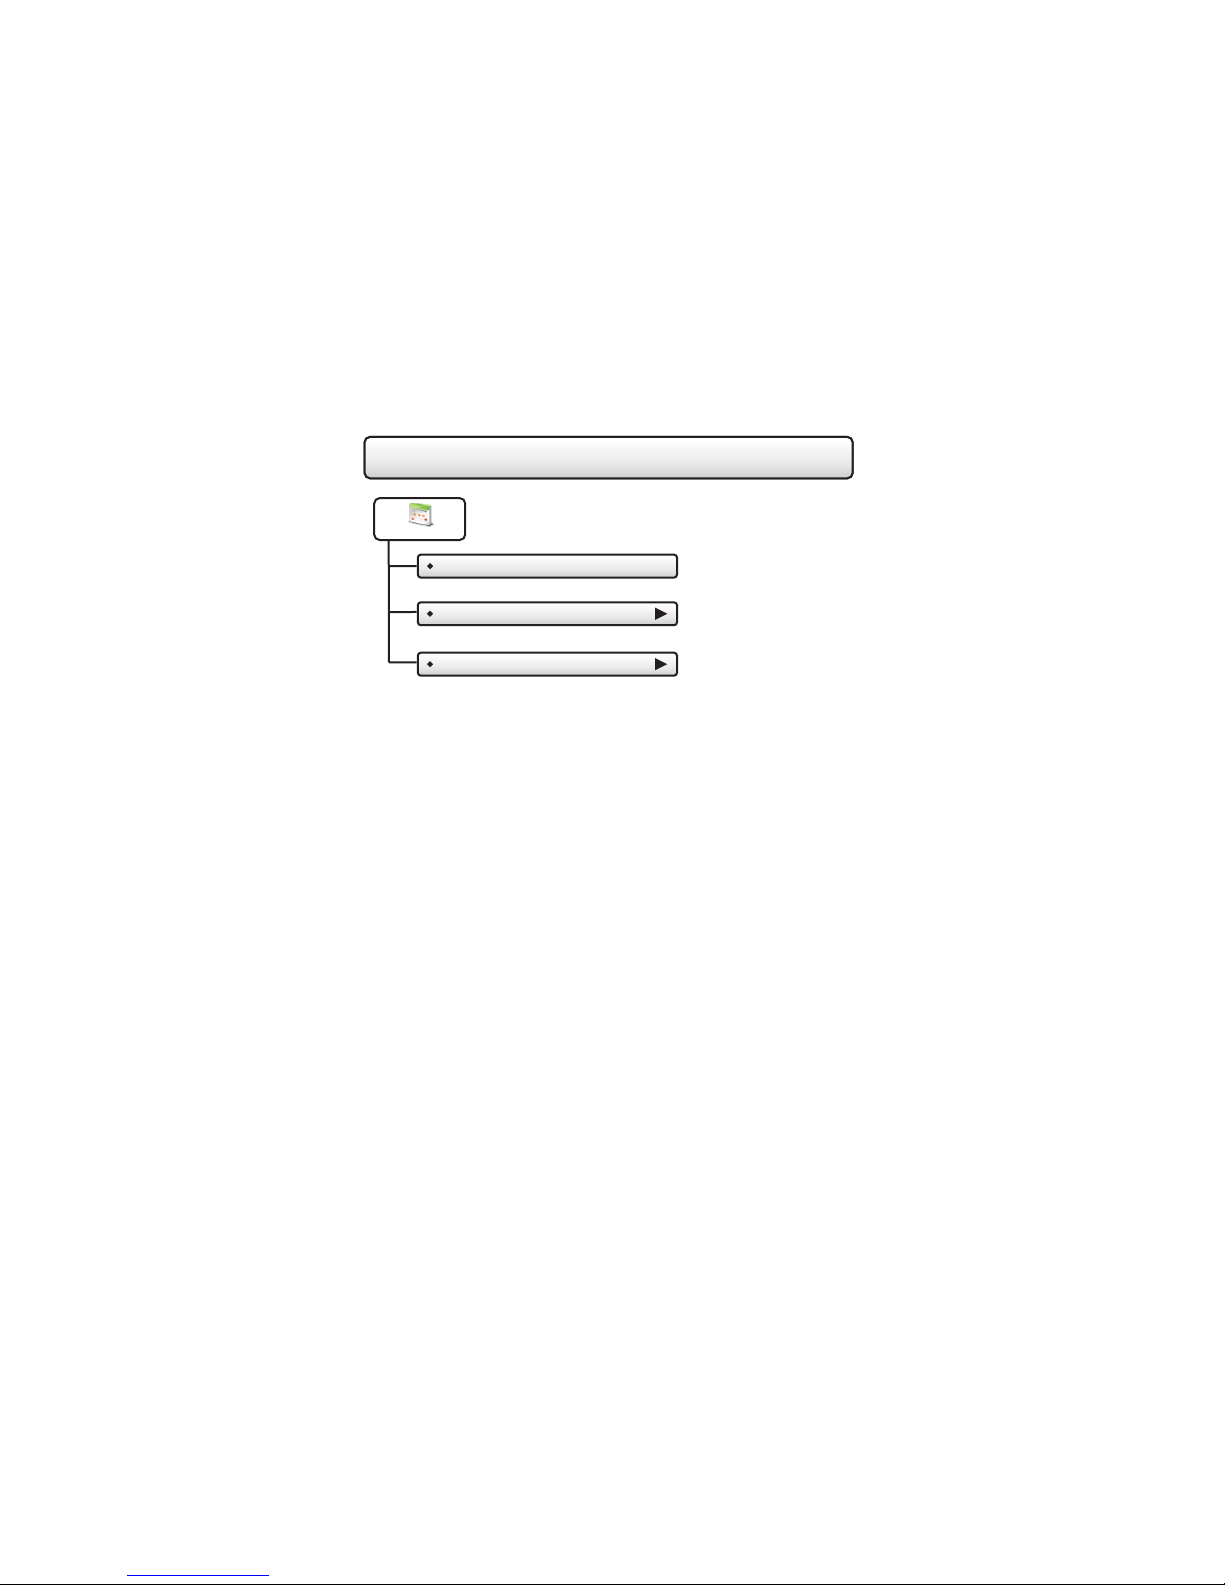
The Main Menu Buttons
Schedule
Time Period Schedule - OFF
View My Schedule
Edit My Schedule
Information
Schedule
Page 7
The Main Menu Buttons
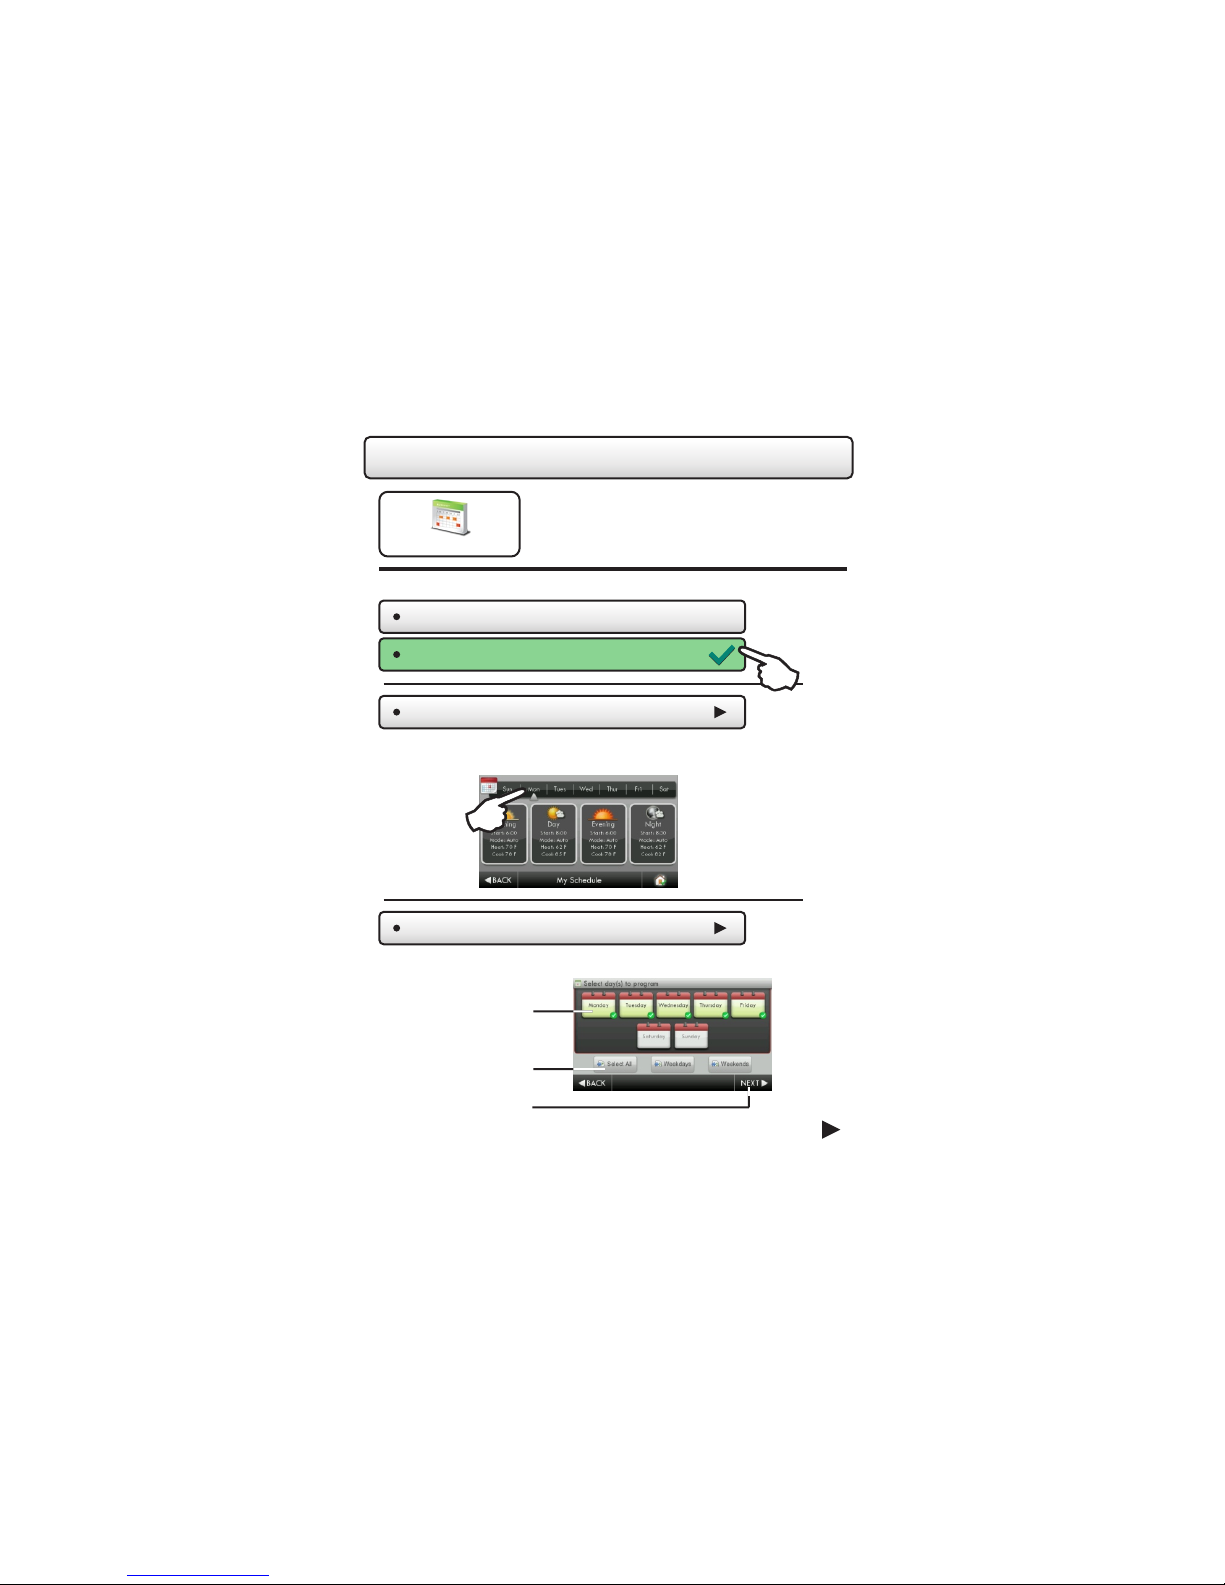
This thermostat features up to four programmable
time periods per 24 hour day: Morning, Day, Evening,
and Night. The start time for each time period is
Schedule
Press to turn Schedule On or Off
Time Period Schedule - OFF
adjustable. The stop time for each time period is
the start time for the next period.
Schedule
Time Period Schedule - ON
View My Schedule
Press a day of the week to view its settings. This may be repeated for each day.
Edit My Schedule
Press and select day(s) to program
Select individual day(s)
Select groups of day(s)
Then press NEXT
or
Page 8
Continued
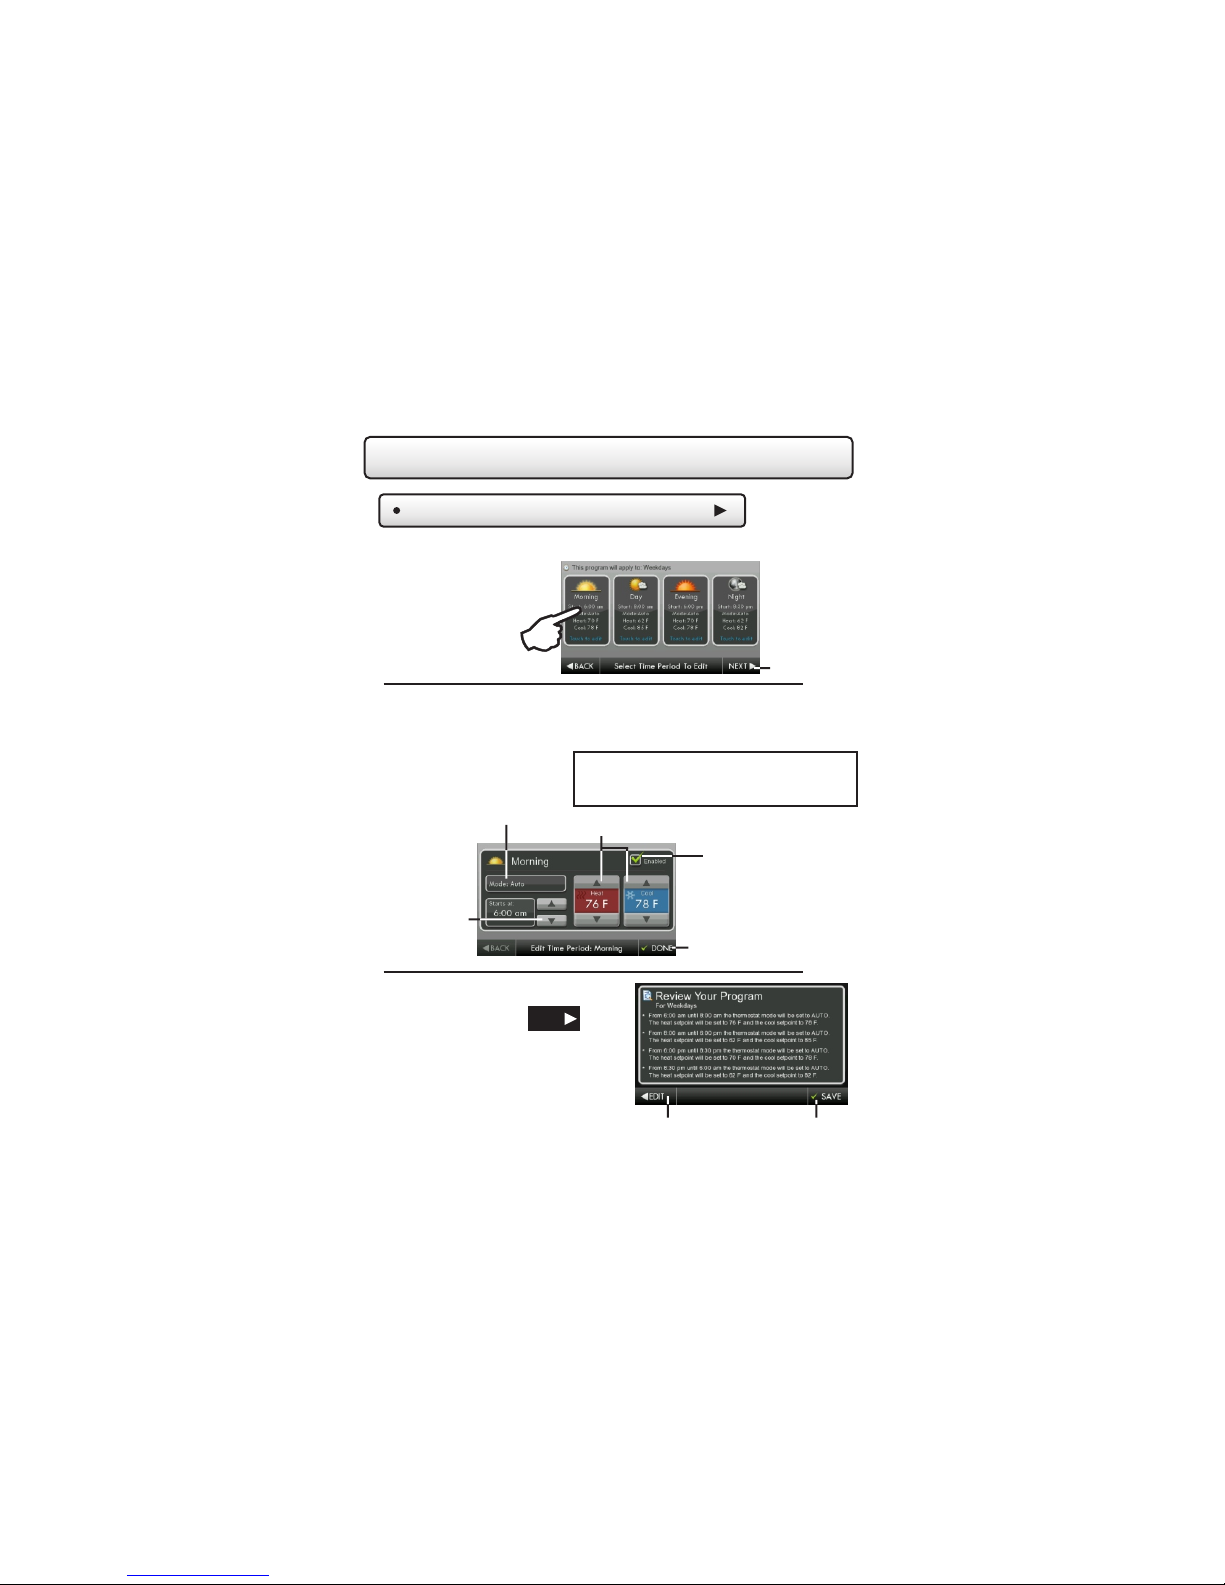
The Main Menu Buttons
Schedule
Edit My Schedule
Press and select a Time Period (Morning, Day, Evening, or Night) to edit.
(Continued)
Next
Adjust Mode, Start Time, and Heat and Cool Setpoints to desired settings.
The Time Period may also be Enabled or Disabled. Un-check the Enabled
box for Time Periods you don’t want to use. Press DONE when finished.
Mode
TIP:
For a simpler schedule that only uses 2
time periods, un-check Enabled for Day
and Evening Time Periods.
Heat and Cool Setpoints
Enable/Disable
Start Time
When you are finished editing the
four time periods press
Review your program. Press SAVE to
keep your program. Press EDIT to
make further changes.
NEXT
Page 9
Done
Edit
Time Period
Save

The Main Menu Buttons
The Main Menu Buttons
Smart Fan
Who To Call For Service
Smart Fan - OFF
View Runtime Graphs
Smart Fan Min Runtime
Who To Call For Service
Start/Stop Times
View Runtime Graphs
Days To Run Fan
Information
Smart Fan
Page 10
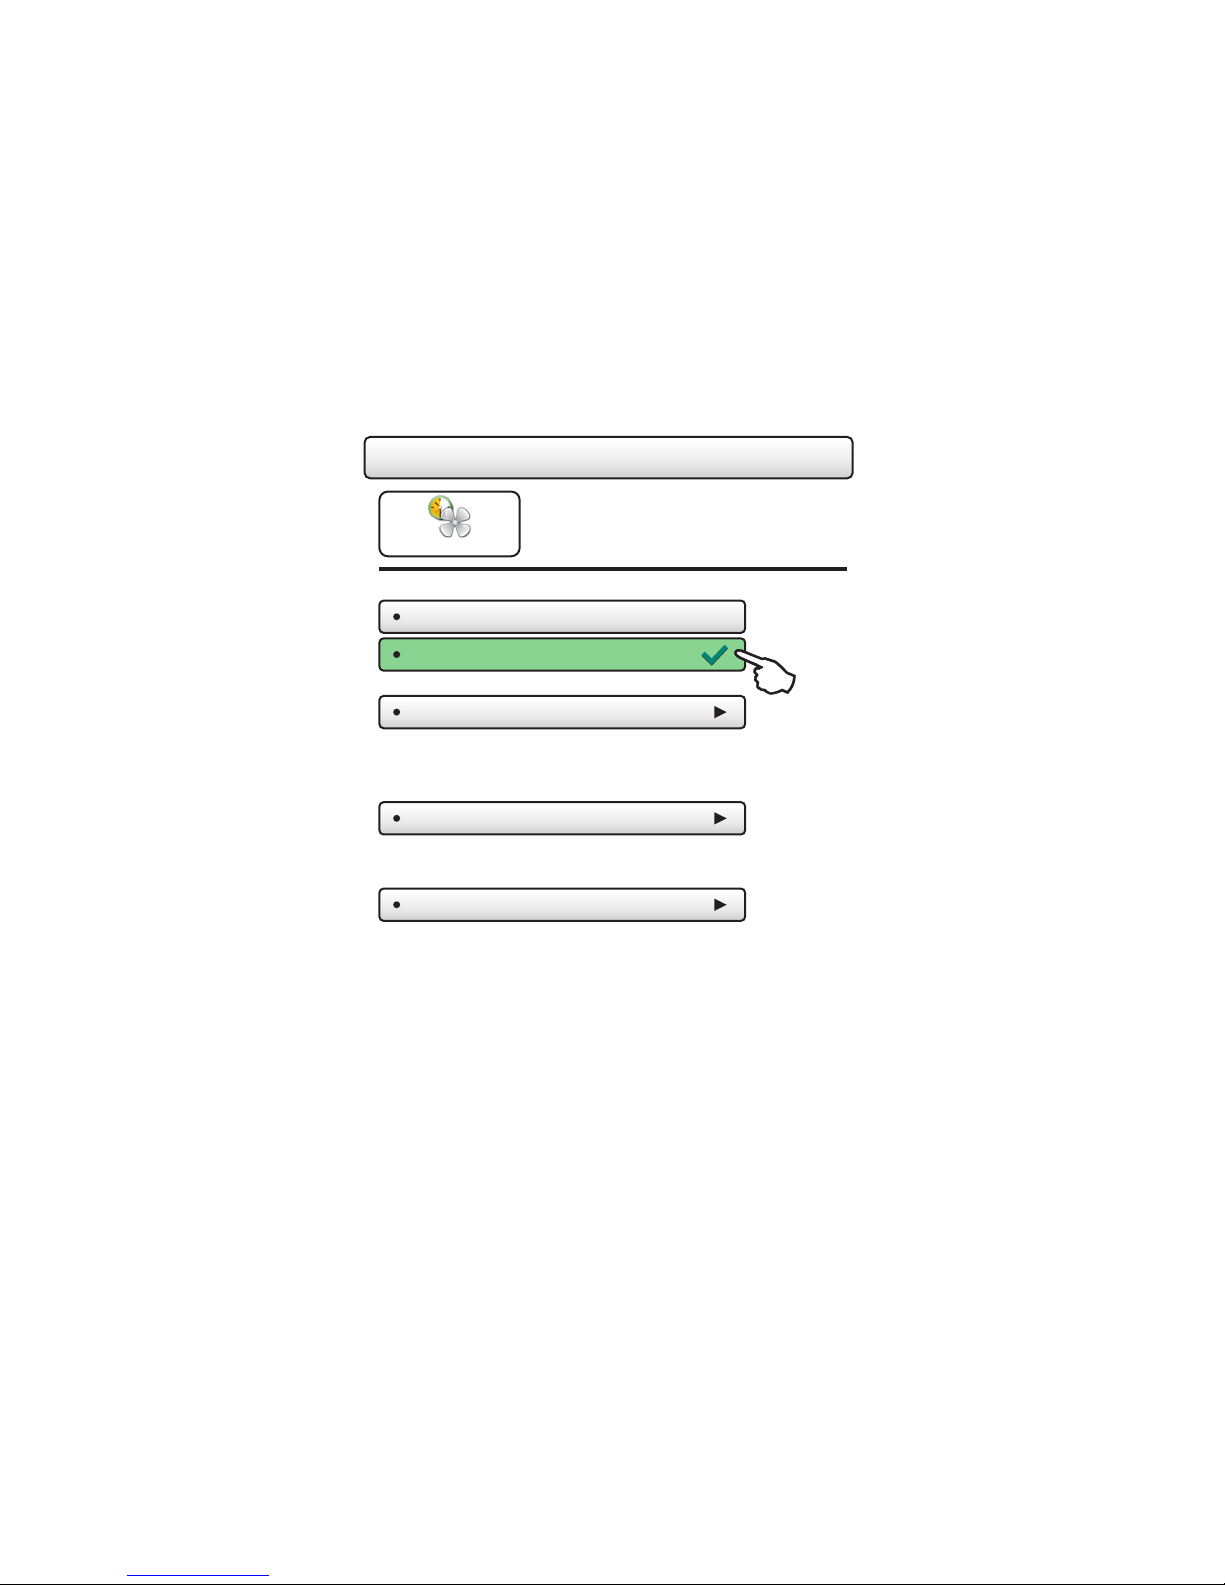
The Main Menu Buttons
The fan may be programmed to turn on
automatically for a specified period
Smart Fan
Press to turn fan schedule on or off
Smart Fan - OFF
Smart Fan - ON
during the day.
Smart Fan
Smart Fan Min Runtime
Set the minimum number of minutes the fan will run from the top
of each hour. Set runtime to 60 minutes to be on continuously
from Start Time to Stop time. (5 - 60 mins.)
Start/Stop Times
Set when the Smart Fan schedule will start and stop. For example,
you may not want Smart Fan to run during sleeping hours.
Days To Run Fan
Choose which days of the week Smart Fan will run.
(7:00AM - 9:00PM)
(10m)
Page 11
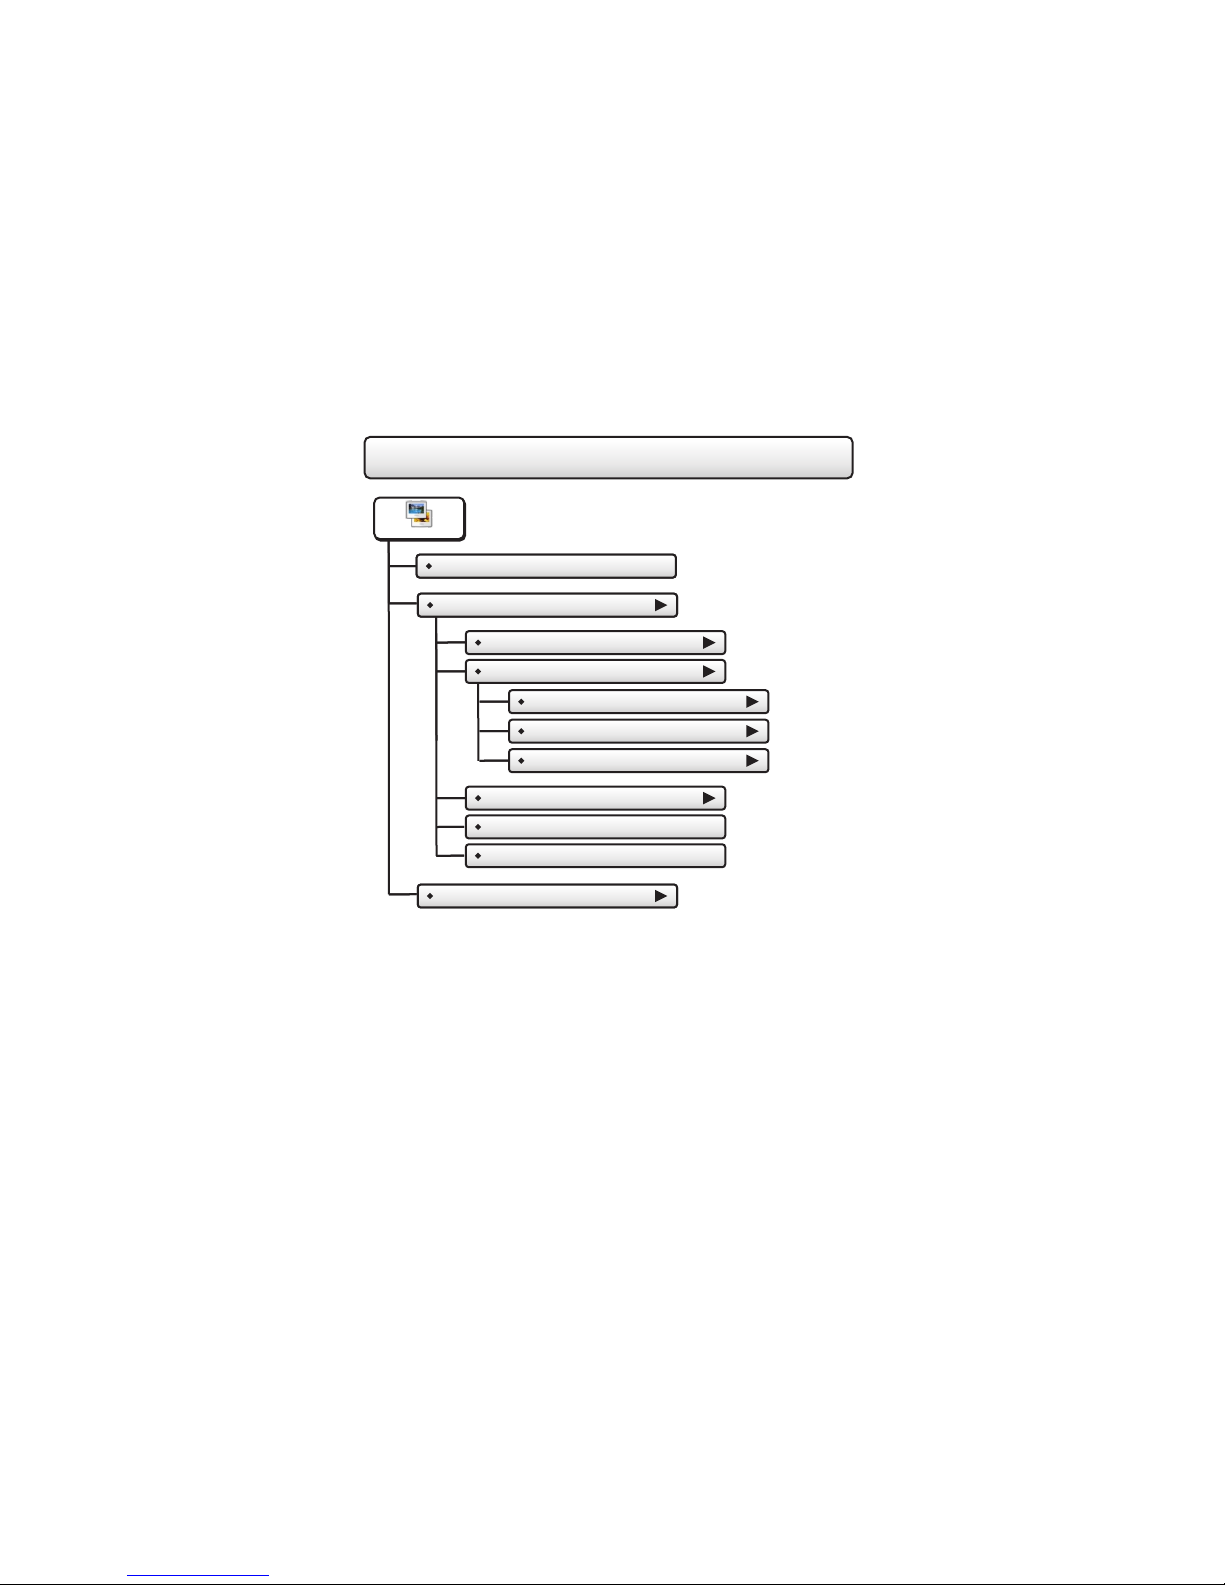
The Main Menu Buttons
Screensaver
Who To Call For Service
Screensaver - OFF
View Runtime Graphs
Screensaver Setup
Screensaver Turn On Delay
Screensaver Type
Slideshow
Digital Clock
Analog Clock
Change Image After...
Show Clock - OFF
Home Screen Info - OFF
View Runtime GraphsScreensaver Preview
Screensaver
Page 12
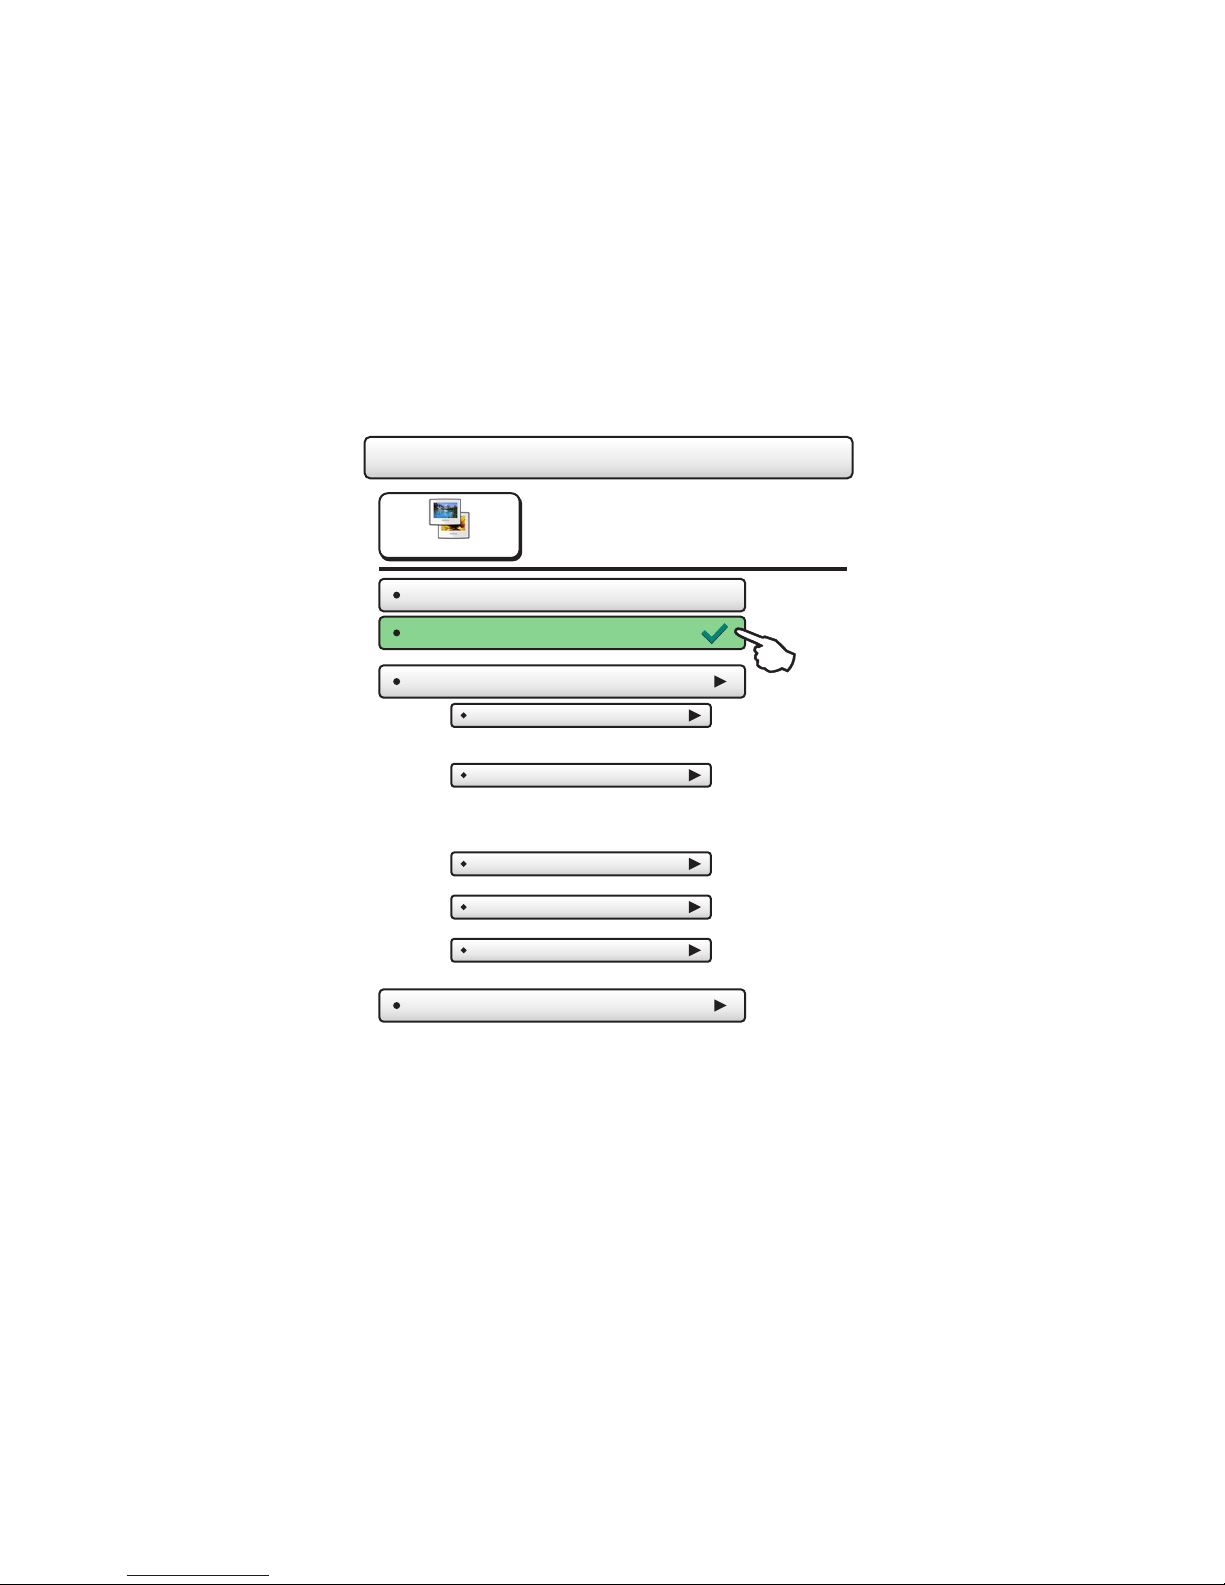
The Main Menu Buttons
The Screensaver allows you to create custom
slideshows.
Screensaver
Screensaver
Screensaver - OFF
Screensaver - ON
Screensaver Setup
Screensaver Turn On Delay
How long after a button press for the Screensaver to appear.
1, 3, 5, or 30 minutes
Screensaver Type
Slideshow
Digital Clock
Analog Clock
Change Image After...
15, 30 seconds - 1, 5, or 10 minutes
Show Clock - OFF
Shows the time and date every 5 photos. Off or On
Home Screen Info - OFF
Shows the mode, setpoints, and temperature after every 10 photos. Off or On.
(5m)
(Slideshow )
Screensaver Preview
Press this button to preview your screensaver operation before
returning to the Home Screen.
After the preview, press anywhere on the screen to return to the sub menu.
Page 13
 Loading...