

GOOD LIFE Dog Silencer Pro, UP1730, Bark Control Pro Instruction Manual
Dog Silencer Pro™ Instruction Manual
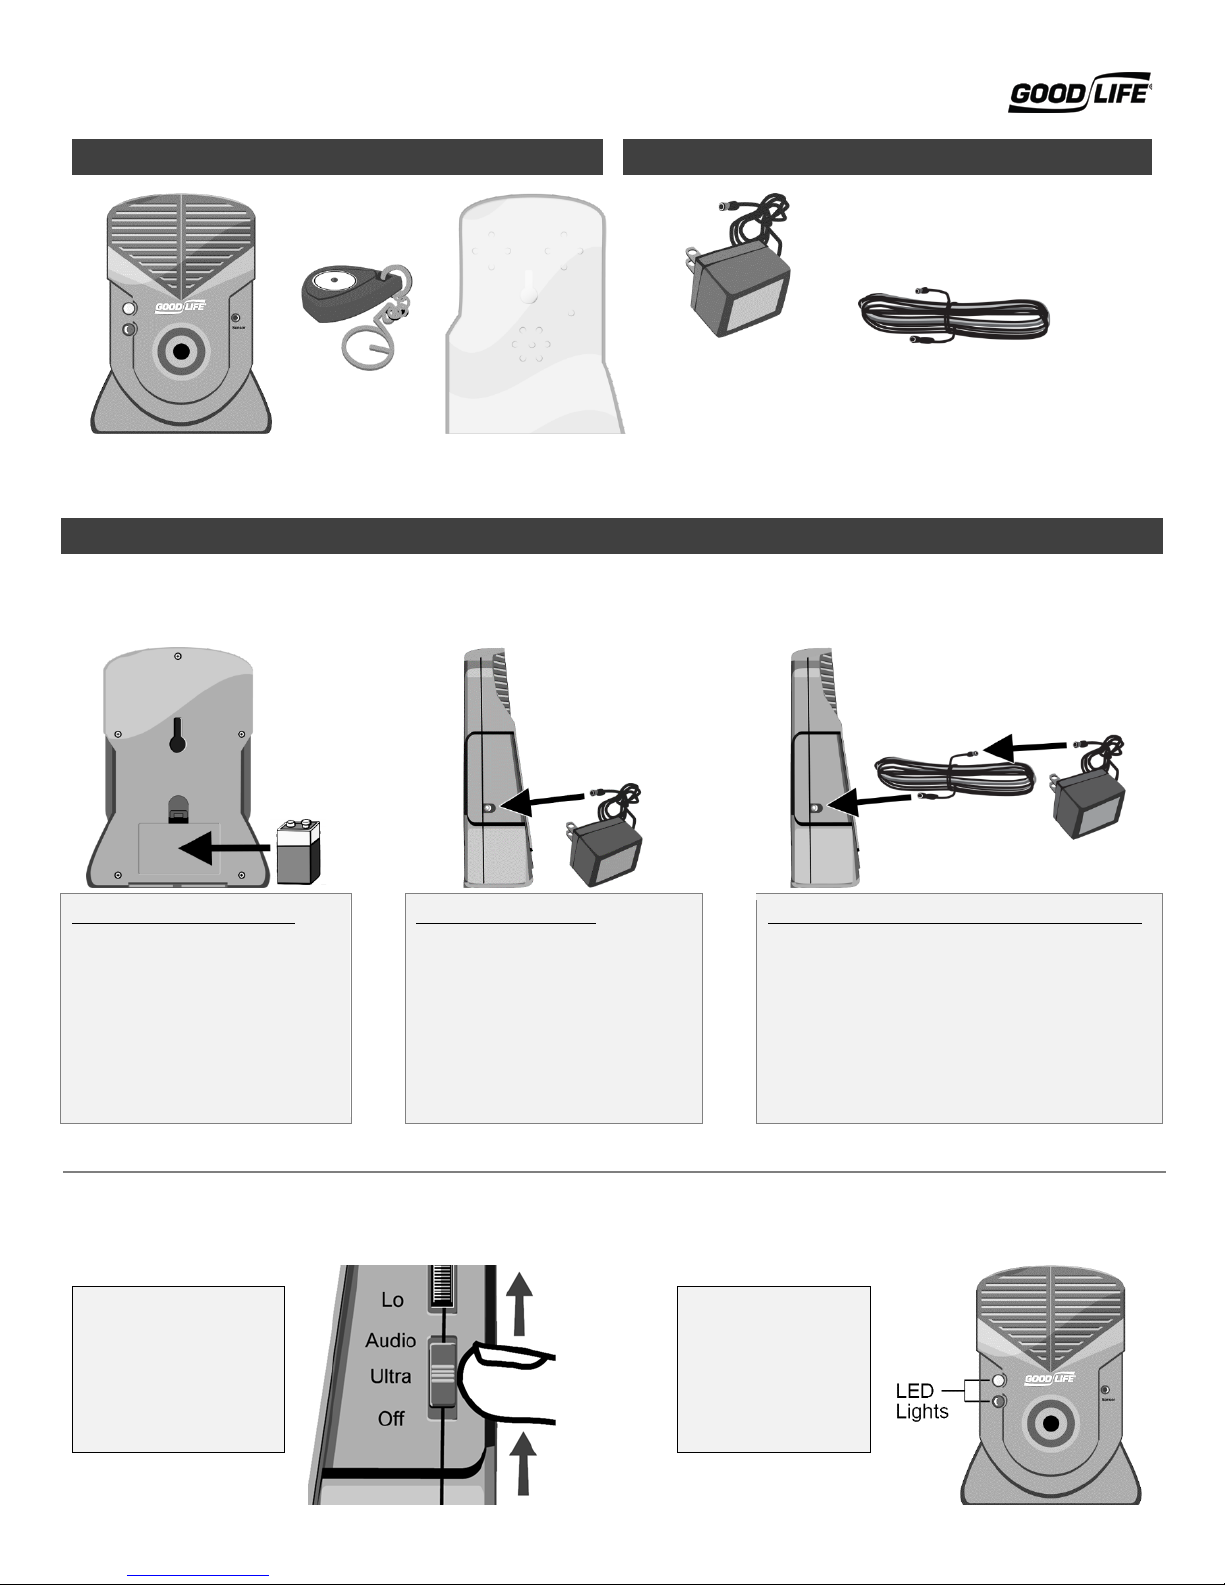
Option 1: Insert Battery
improve as the dog is trained.
Option 2: Plug It In
use the official AC Adapt er.
Option 3: Use the Extension & Plug It In
the official AC Adapter .
Included In Your Package
Sold Separately
Remote
Control
Dog Silencer Pro
Getting Started
1. Choose Power Source
(sold separately)
AC Adapter
60ft. (23m) Extension
(sold separately)
Rain Jacket
Insert a 9v battery (not included)
into the battery compartment.
Note: The battery may last 1
week or less during the initial
training period. Battery life should
OR
2. Turn It On
Turn the Dog Silencer
Pro on by pushing the
Power Switch upwards.
Stop when you get to
the Audio setting.
Insert the AC Adapter (sold
separately) into the DC Jack and
plug into a wall outlet.
Note: To prevent damage or
voiding your warranty, please only
Insert one end of the 60ft Extension (sold
OR
separately) into the AC Adapter and the other
end into the DC Jack and plug into an outlet.
Note: To prevent damage to the Dog Silencer
Pro or voiding your warranty, please only use
If the unit has turned
on successfully, the
LED Lights will blink
and the unit will
sound off for 3-5
seconds.
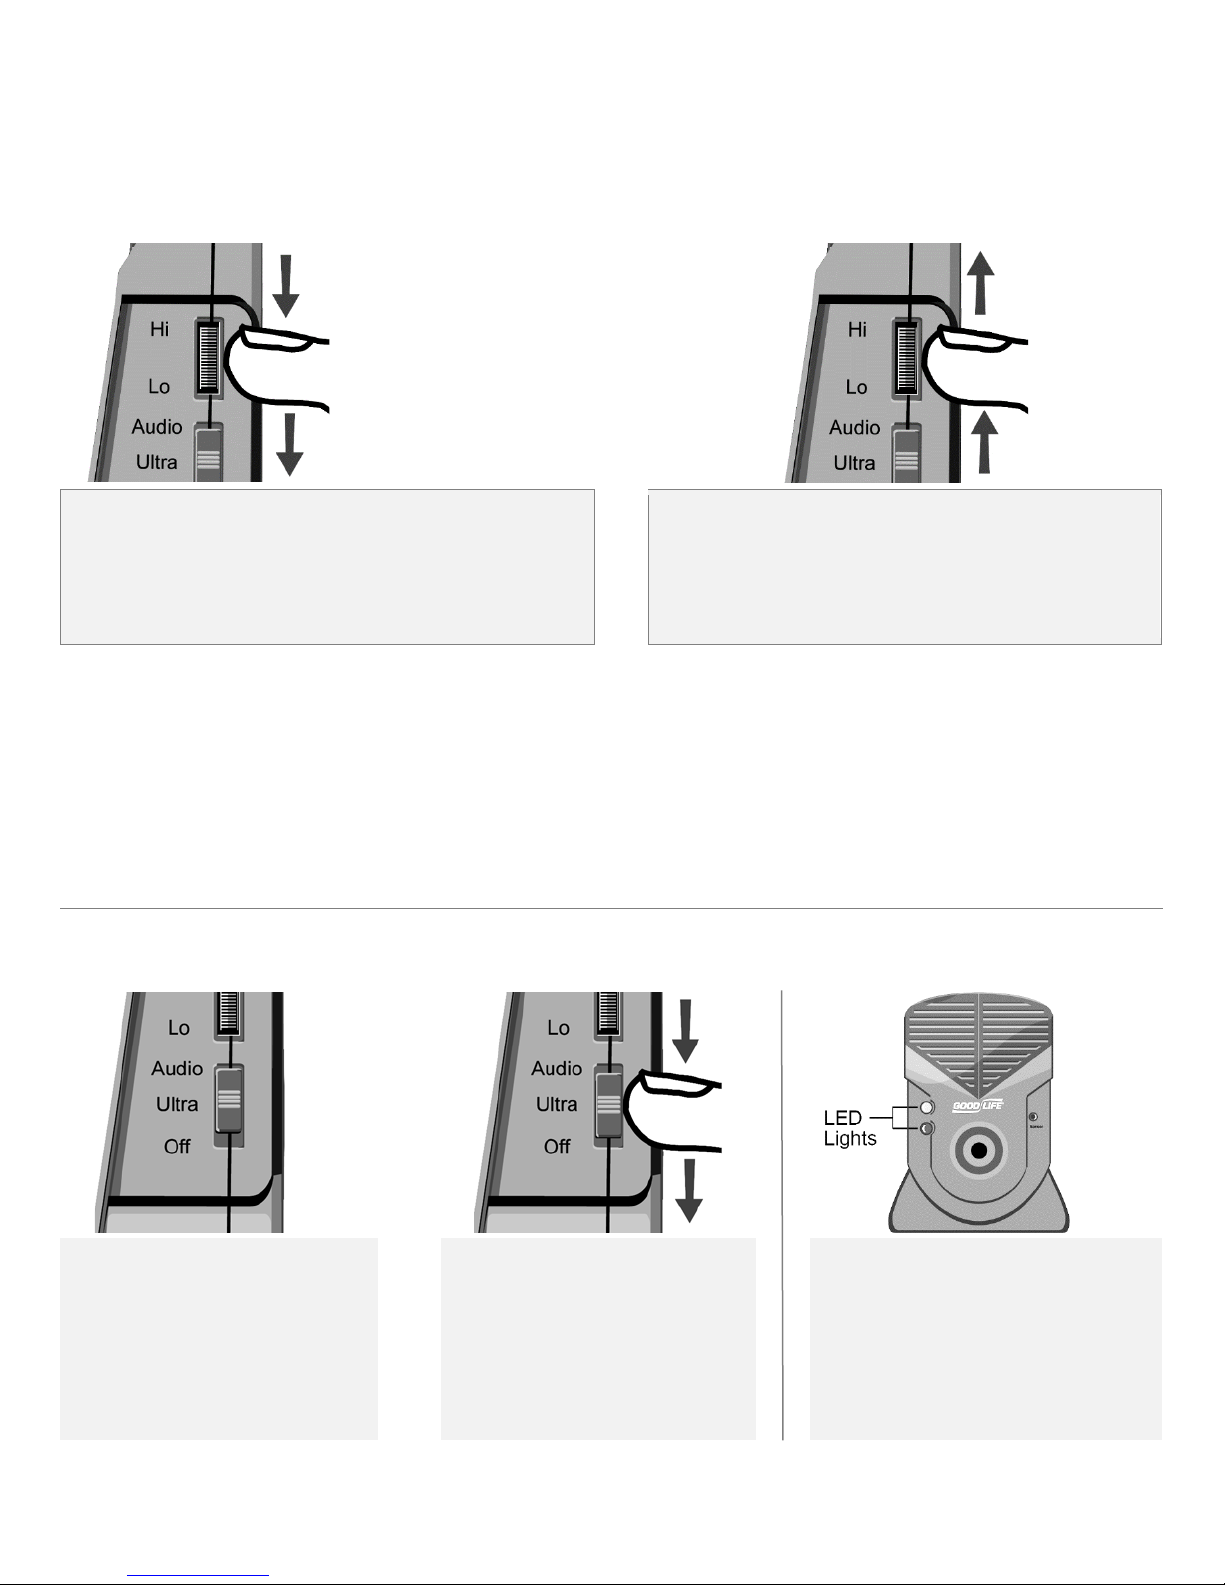
3. Adjust the Bark Sensitivity Dial
Turn the dial until it is a quarter turn above “Lo”. Please do not
Move the switch to Ultra if you only
When the unit has been activated by
Note: Try to find a relatively q uiet env iron ment to perform this step so that sounds other than barking won’t ac tivate the unit.
The sounds emitted by the Dog Silencer Pro will not penetrate solid barriers such as walls, ceilings, windows or solid fences. Make sure
to place the unit so that it isn’t obstructed by any solid barriers.
This is not a volume dial.
Instead it adjusts the unit’s
sensitivity to dog barking.
Do not turn it “Hi” unless the
dog is very far away or if you
want the unit to activate to
almost any sound!
turn the dial the way to “Lo” – at that setting, it will not detect
barking at all.
Wait for the dog to bark naturally (do not force it to bark) and
observe whether the unit has activated.
Optimal Bark Sensitivity: The optimal sensitivity setting depends on many factors, including how close the Dog Silencer Pro is to the
dog. The farther away the device is from the barking, the higher the sensitivity will likely need to be and vice versa.
Large Dogs: Some larger dogs m ay respond better to the Audio frequency while smaller dogs may respond better to the Ultra setting.
Responses vary greatly between dogs. We recommend always starting with the Ultra mode and adjusting from there.
Dogs with Hearing Loss: Dogs that are deaf will not be able to hear the Dog Silencer Pro. Dogs with high frequency hearing loss may
be able to hear the “Audio” setting.
If the unit didn’t activate, turn the dial upwards by a quarter
turn and try again.
Repeat this process until the Dog Silencer Pro produces
sound every time the dog barks.
4. Choose the Sound Setting
If you want to hear the sounds
produced by the Dog Silencer Pro,
leave the switch set to Audio.
When a dog barks, the unit will emit
sound in both audible and ultrasonic
(not audible to human ears).
OR
want the dog to hear the s ound.
When a dog barks, the unit will emit
ultrasonic sound.
This setting is recomm ended for
neighbor’s dogs or indoor
installations.
barking, the LED Lights will blink to
indicate the type of sound emitted.
Both lights (red and green) will turn on
when the unit is set to Audio, while only
the green LED Light will blink when set
to Ultra.
 Loading...