

GWD 900
Wireless Microphone Owner’s Manual
GWD910 Waterproof Wireless Microphone System
GWD-910T & GWD-910R
Owner’s Manual
Taiwan Gomet Technology Co., Ltd.
No. 8-1, Lane 212, Sec. 1, Chang-Shang N. Rd,
Tamsui, Taipei Shien 25157, Taiwan
Tel: +886-2-2621-8029
Fax: +886-2-2623-7605
E-mail sales@gomet.com.tw
Website www.gomet.com.tw
Wireless Microphone General Specification
THIS DEVICE COMPLIES WITH PART 15 OF THE FCC RULES. OPERATION IS
SUBJECT TO THE CONDITION THAT THIS DEVICE DOES NOT CAUSE HARMFUL
INTERFERENCE. ( FCC ID :QS6-GWD910T & QS6-GWD910R )
Modulation Mode: Bi-Directional DSS (Digital Spread Spectrum)
Frequency: 902 ~ 925MHz
Handset RF Power Output
Base Station RF Power
Operating Range: 1000 ft.(300M)
Battery: 3.7V Rechargeable Li-Ion battery (Handset)
5V DC (Base Station)
Air Time: 9~10 hours of continuous operation
Standby Time: 4 days
Microphone: Internal microphone without lavalier
Channels: 8 Channels with Automatic Synchronization
• This GWD910 is protected against water splashes and dust.
• GWD910 Wireless Microphone will automatically turns ON and shut OFF when
recording is activated or deactivated through In-Car Video System.
• GWD910 Wireless Microphone is also able to trigger IN-CAR VIDEO SYSTEM to
activate digital video recording.
• Any GWD910 Wireless Microphone will work with any IN-CAR VIDEO SYSTEM
that is equipped with GWD910 receivers. - Automatic Synchronization
• Build-in Programmable Function Button, Panic Button & Mute Button
• LED indicators are used for status on mute, ON/OFF, signal, battery and panic
functions.
• GWD910 will automatically detect radio frequency noises, channel conflicts and cross
talks with as many as 20 units in close proximity, and perform auto switch to ensure
clear communication and recording.
21.69dBm / GWD-910T
Output 20.14dBm / GWD-910R
2
P
S
GWD 900 Wireless Microphone Owner’s Manual
GWD 900 Wireless Microphone Owner’s Manual
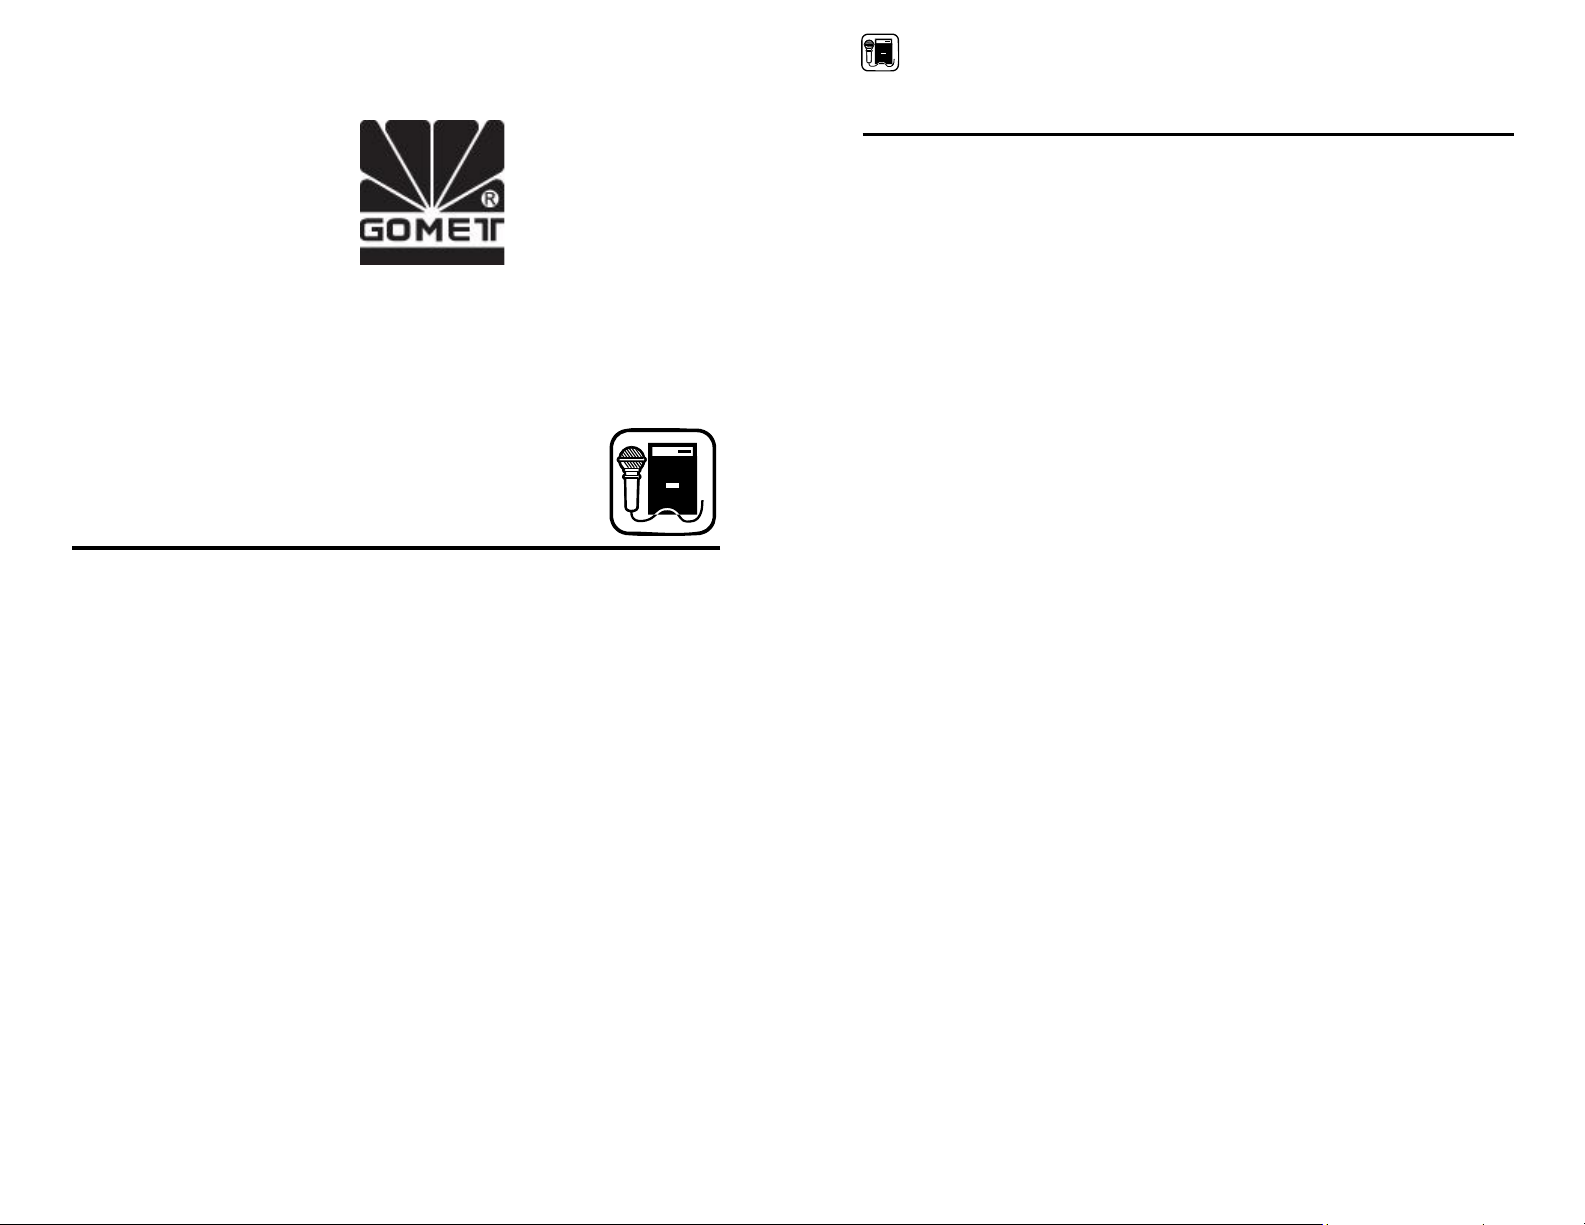
Hardware Overview
Wireless Microphone Wireless Microphone Receiver
GWD910T (-2400T) GWD910R (-2400R)
Charger, AC Wall Charger Cable & DC In-Car Charger Cable
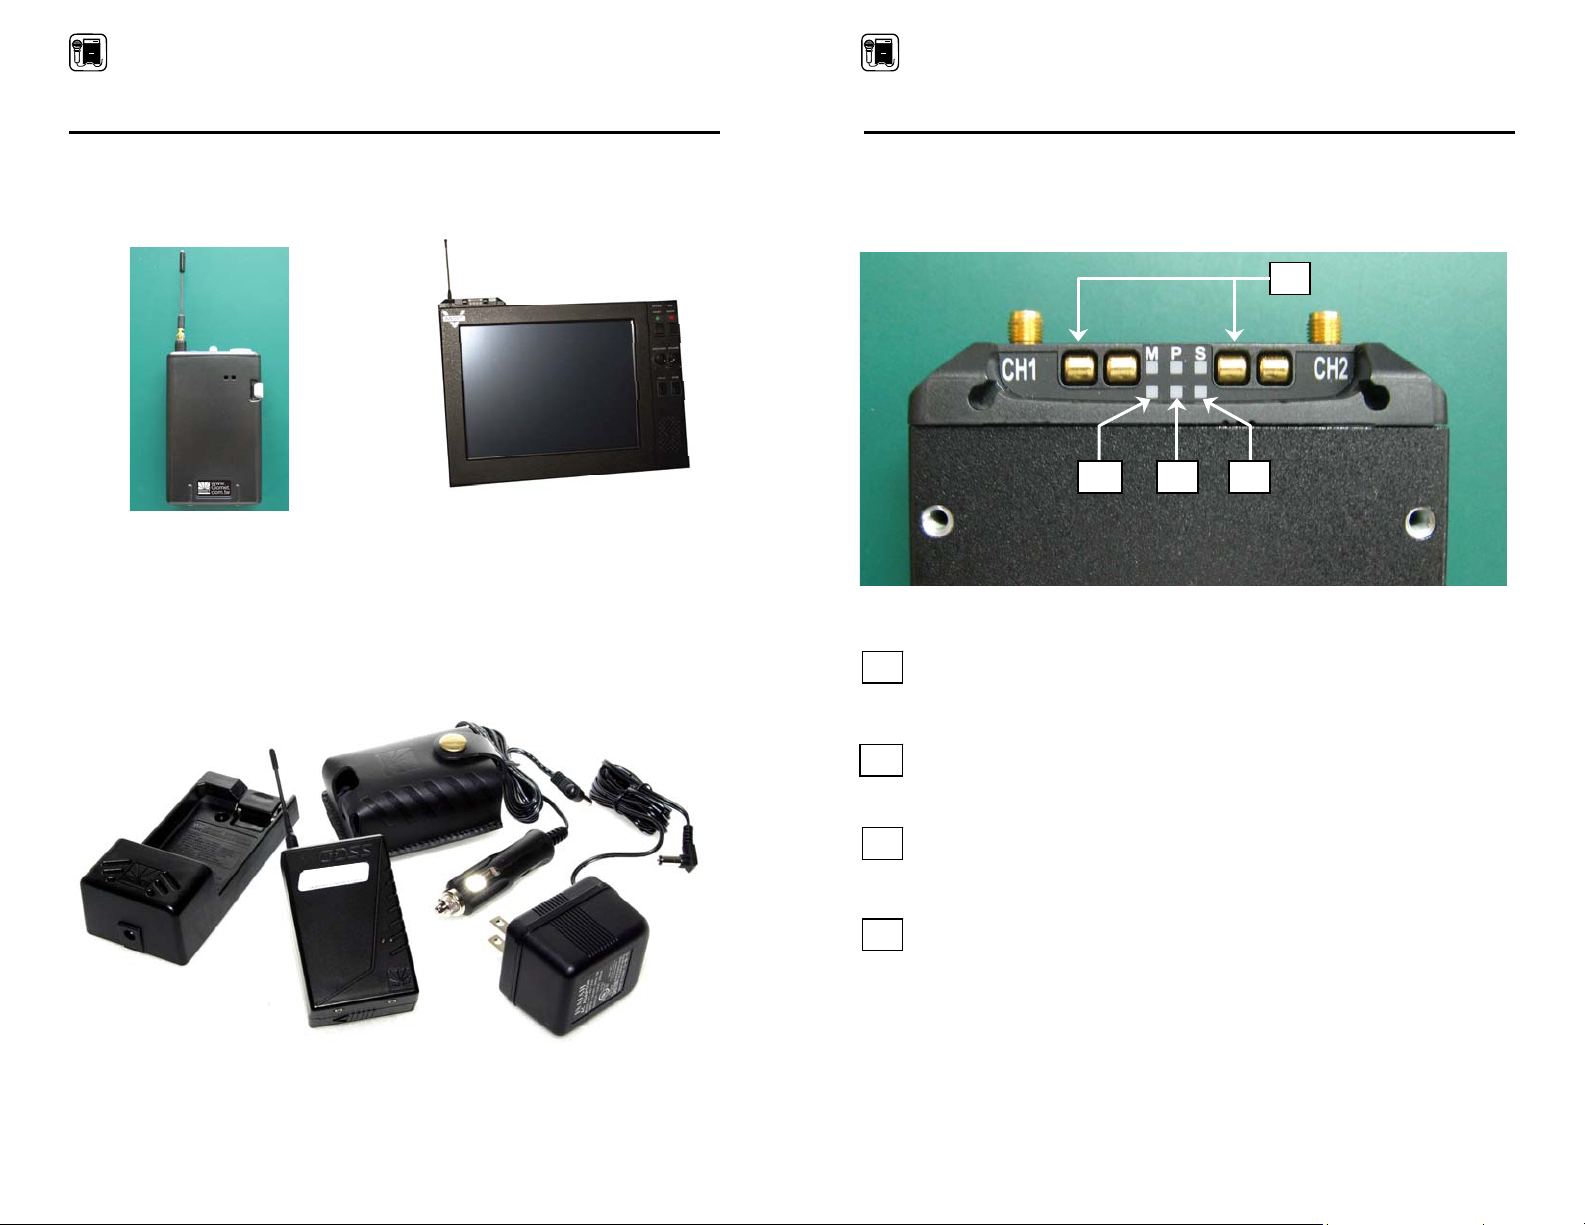
System Overview
Wireless Microphone Receiver
1
SPM
1
Receiver’s Register Contact (CH1)
M
Green LED
The register contact is used to synchronize the frequency of the receiver and the
wireless microphone.
Green LED OFF for Microphone on Standby Mode
Green LED ON for Microphone on Recording Mode
Red LED
Red LED ON for Panic Mode ON
Red LED Blinking for Wireless Microphone Low Battery
Yellow LED
Red LED OFF for Panic Mode OFF
Yellow LED OFF for Strong Signal
Yellow LED ON for Signal is Marginal or Weak
3
4

GWD 900 Wireless Microphone Owner’s Manual
GWD 900 Wireless Microphone Owner’s Manual
System Overview
Wireless Microphone Receiver SCMIC-PKC/GWD910R
Installation
No installation is required from the user. The
GWD910 wireless microphone receiver is located
in the touch screen monitor module of the IN-CAR
VIDEO SYSTEM.
Power Connection
The wireless microphone receiver has no ON /
OFF switch. The receiver will become energized
in standby mode whenever the IN-CAR VIDEO
SYSTEM system is ON.
Receiver’s Antennas
To prevent damage, antenna for the receiver is
package separately. Remove the antenna from
the package and tighten the titanium antenna to
the receiver. Do not try to lengthen, shorten, or
temper with the antennas, which might result in
damage of the audio system and may violate FCC
regulation.
Receiver’s Register Contact
The register contact is used to synchronize the
frequency of the receiver and the wireless
microphone.
5
System Overview
Wireless Microphone /GWD910T
LED Indicators (Within the REC & Button 1 & 2)
REC Button
Green / Blue LED OFF for Standby Mode
Green / Blue LED ON for Recording Mode
Green / Blue LED Fast Blink for Mute Recording
Red LED Slow Blink for Low Battery
Red LED ON for Panic Mode ON
Red LED OFF for Panic Mode OFF
Programmable Button 1
Blue LED ON for Programmable 1 Function ON
Yellow LED OFF for Strong Signal
Yellow LED ON for Signal is Marginal or Weak
3 42 51 6
1
REC Button: Audio / Video Recording ON (Press REC Button once)
2
Buzzer Produce Warning Tone
3
PB 1: Programmable Button 1
4
PB 2: Programmable Button 2
5
Microphone Audio Input.
6
Antenna External Antenna base for long distance used.
REC+PB1 Hold both Button 3 Seconds for Covert Mode:
Switching Warning Features between Vibration and (LED + Buzzer
This action will initiate the IN-CAR VIDEO SYSTEM to record both
audio and video data. To stop recording, press the stop button on
the IN-CAR VIDEO SYSTEM monitor module.
Panic ON (Press and hold REC Button for 3 second)
Wireless microphone will automatically send a panic signal to the
IN-CAR VIDEO SYSTEM ; the signal will be relayed back to the
station for process. (This function is only available if the wireless
communication is established) The Panic Mode may be deactivated
by holding down the REC button for another 3 seconds.
Programmable Button 2
Green LED ON for Programmable 2 Function ON
+ Vibration )
6

GWD 900 Wireless Microphone Owner’s Manual
GWD 900 Wireless Microphone Owner’s Manual
System Overview
Wireless Microphone SCMIC-TRAN2/GWD910T
Battery Selection and Installation
The GWD910 wireless microphone is powered by
a rechargeable lithium-ion battery. The wireless
microphone housing is designed to prevent
incorrect installation of the battery. Do not force
the battery in to the housing. Reversed batteries
may cause damage to the wireless microphone.
The battery compartment is located at the bottom
of the wireless microphone. Slide off the battery
cover and remove the silicon seal, at this point the
battery is free to slide out.
Transmitting Antenna
The GWD910 Wireless Microphone includes a
flexible antenna, which is package separately to
prevent damage. Remove the antenna from the
package and tighten the antenna to the wireless
microphone. For best result, allow the antenna to
extent fully. If the signal is marginal, please
experiment with different wireless microphone
position on your body. Do not attempt to remove,
replace or change the length of the transmitting
antenna, which might result in damage of the
audio system and may violate FCC regulation
Wireless Microphone Contact
The wireless microphone contact is used to
synchronize the frequency of the wireless
microphone and the receiver. It is also the contact
for the battery charger.
7
Operating Procedure
The GWD910 is designed to eliminate unnecessary hassle of pairing a receiver with a
particular wireless microphone. With the latest technologies, the GWD910 is able to
synchronize the frequency of any GWD910T Wireless Microphone with any GWD910R
Receiver.
Just follow these few simple instructions to ensure maximum performance:
1. Check out any GWD910T Wireless Microphone and make sure it is fully charged
before operation.
2. Please be sure the IN-CAR VIDEO SYSTEM is ON before proceeds any further.
3. Slide the wireless microphone
contact directly on top of the
receiver’s register contact (located on
the top of the IN-CAR VIDEO
SYSTEM monitor module) until a
confirmation tone has sound. This
indicates the receiver’s register
contact has synchronized the
frequency of the receiver and the
wireless microphone. Wireless
microphone is now on standby mode
and is ready for use.
4. Please only synchronize one wireless microphone to one receiver.
5. There are three methods to activate recording on the wireless microphone:
a. Press the ON or Panic Button once on the wireless microphone for
recording.
b. Activate video recording at the IN-CAR VIDEO SYSTEM. This action
will automatically trigger wireless microphone recording.
c. Turn on the light bar or siren in the patrol car. This action will also
automatically trigger wireless microphone and video recording.
6. To prevent accidental audio shut off. The only way to return wireless
microphone to standby mode from recording mode is to stop the video recording
from the IN-CAR VIDEO SYSTEM.
7. During recording mode, if the warning sounds and the yellow LED flash, this
means the signal is marginal or weak. At this time, please step closer to the
receiver or reposition the wireless microphone until the warning stops. However,
if the warning persists and exceeds 30 seconds, the wireless microphone will
automatically shut off and return to standby mode. If user returns within the
signal range again while the video is still recording, the receiver will re-initiate the
wireless microphone automatically.
8. For charging, simply place the wireless microphone to the charger and leave it
charging for at lease 6 (six) to maximize battery capacity.
8

GWD 900 Wireless Microphone Owner’s Manual
GWD 900 Wireless Microphone Owner’s Manual
Federal Communications Commission (FCC) Statement
You are cautioned that changes or modifications not expressly
approved by the part responsible for compliance could void the
user’s authority to operate the equipment.
This equipment has been tested and found to comply with the limits
for a Class B digital device, pursuant to part 15 of the FCC rules.
These limits are designed to provide reasonable protection against
harmful interference in a residential installation. This equipment
generates, uses and can radiate radio frequency energy and, if not
installed and used in accordance with the instructions, may cause
harmful interference to radio communications. However, there is no
guarantee that interference will not occur in a particular installation. If
this equipment does cause harmful interference to radio or television
reception, which can be determined by turning the equipment off and
on, the user is encouraged to try to correct the interference by one or
more of the following measures:
-Reorient or relocate the receiving antenna.
-Increase the separation between the equipment and receiver.
-Connect the equipment into an outlet on a circuit different
from that to which the receiver is connected.
-Consult the dealer or an experienced radio/TV technician for help.
You are cautioned that changes or modifications not expressly
approved by the party responsible for compliance could void your
authority to operate the equipment. .
FCC RF Radiation Exposure Statement:
1. This Transmitter must not be co-located or operating in
conjunction with any other antenna or transmitter.
2. This equipment (Base Station)complies with FCC RF radiation
exposure limits set forth for an uncontrolled environment. This
equipment should be installed and operated with a minimum
distance of 20 centimeters between the radiator and your body.
9
http://www.gomet.com.tw
© Copyright 1993 Taiwan Gomet Technology Co., Ltd.
10
 Loading...