

Golight Profiler II Instruction Manual
Product Specifications
Lamp 55w Phillips® Halogen H-7 Blue Vision
Browsing Lamp 1 watt LED
Battery Pack High performance Lithium-Ion
Unit Construction ABS plus carbon fiber, aircraft aluminum
and Thermo Plastic Rubber (TPR)
Main Lamp Burn Up to 60 minutes of continuous use per charge
Charge Rate Full charge in 2 hours or less.
Charges from 120v AC or 12v DC sources
Included Accessories
12v DC Power Supply In Docking Station
120v AC Power Supply
Shoulder Strap
Docking Station
12v Direct run cord
Optional Accessories
Replacement 55w Lamp
Extra Battery Packs
Dock Extension / Remote Charging Station
Amber / Red Filter for Main Beam
Covert Infrared Lens System
Do not charge in wet environment. Always use the charging
equipment inside a vehicle or indoors.
Congratulations
You are now the owner of one of the finest hand-held searchlights
available today. Thank you for letting Golight® assist you in your
lighting application needs. We're proud of our products and the
technology that we've developed to ensure our customers the most
durable, versatile and powerful searchlights in the lighting industry.
Please read these instructions before using
your new Golight® Profiler™ II.
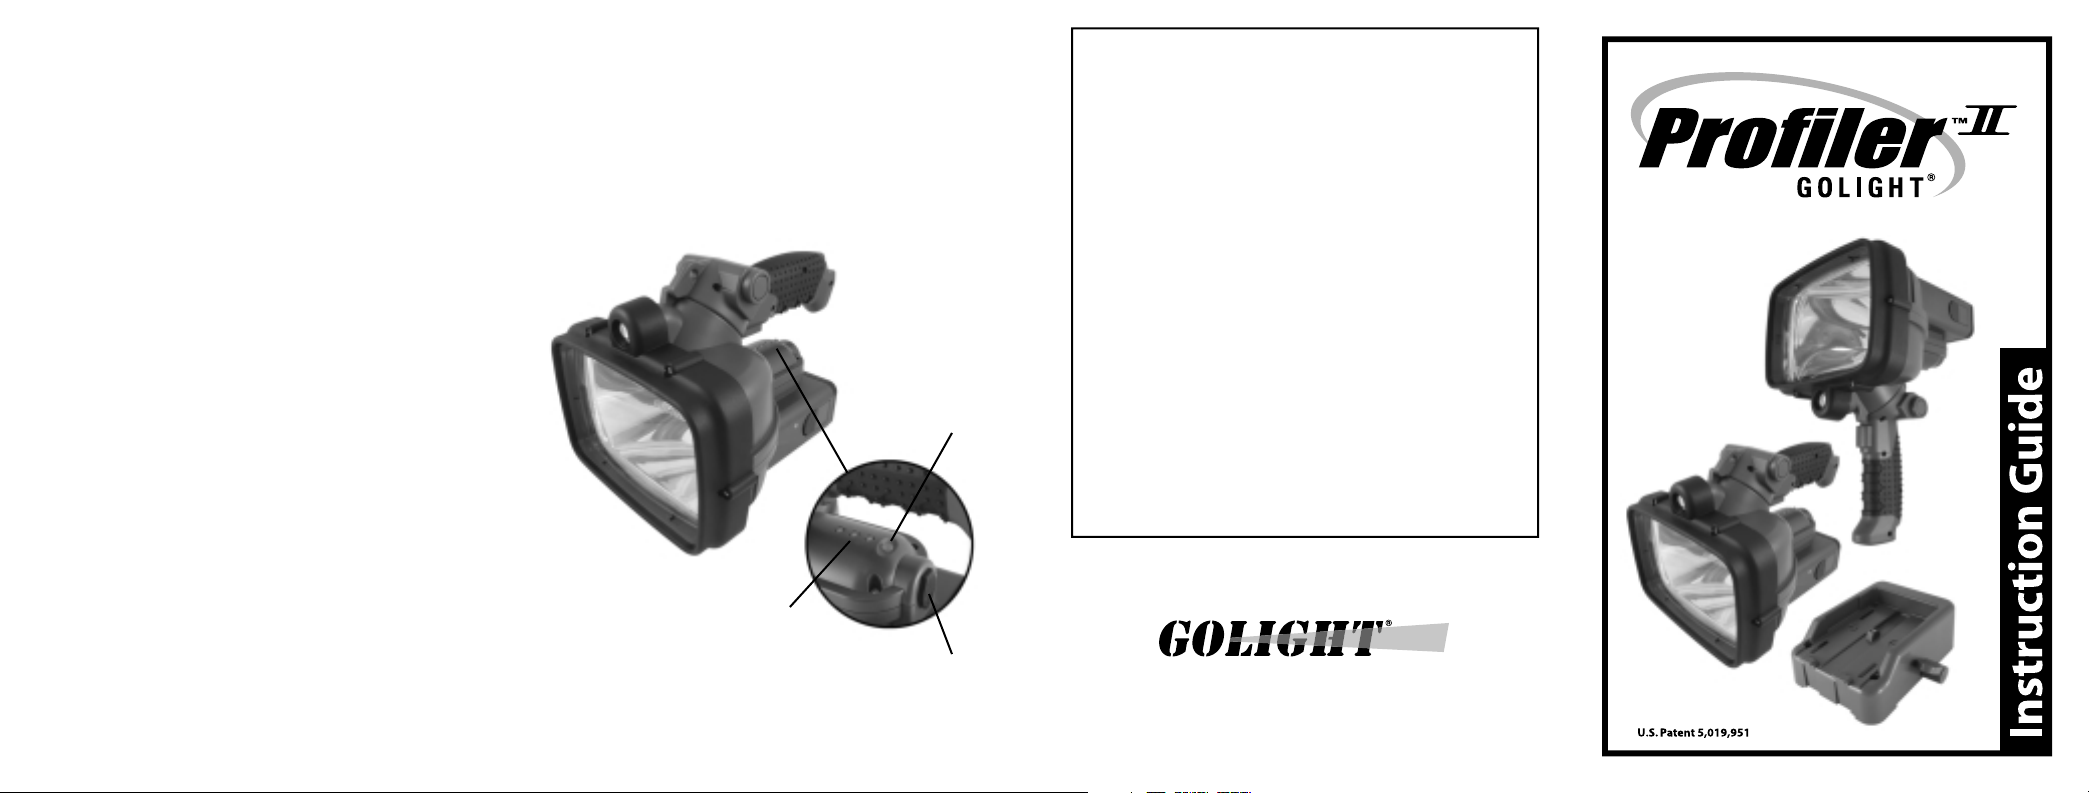
LED Convenience
Beam Power Switch
One Year Limited Warranty
Golight, Inc. warrants the Profiler™ II against any deemed defects
that are due to workmanship for parts or faulty materials, except
lamps, for one year from the date of the original purchase. This
warranty does not cover damage resulting from unreasonable
use or misuse and unreasonable maintenance or loss.
Warranty cards must be filled out and sent in within 30 days of
purchase to Golight, Inc. • 37146 Old Hwy 17 • Culbertson, NE
69024, for warranty protection.
If the Profiler™ II does fail to operate under warranted
specifications, send the light postage paid, plus $9.95 for
shipping and handling to: Golight, Inc. • Service Department •
37146 Old Hwy 17 • Culbertson, NE 69024. No C.O.D.'s accepted.
Only the above manufacturer is authorized to perform warranty
repair or replace product.
Any consequential damages to person or property are excluded
from this warranty. Some states do not allow the exclusion and
limitation of incidental or consequential damages, so the above
limitations or exclusions may not apply to you. This warranty
gives you specific legal rights and you may also have other
rights.
For best performance, do not subject battery pack to extreme
cold or extreme hot conditions.
Do not immerse the Profiler™ II – it is not intended for use as an
underwater light.
LED Battery Power Level
Indicator Gauge
Charge/Power Jack
© 2006 Golight, Inc. - All Rights Reserved
Golight® and Profiler™ are registered trademarks of Golight, Inc.
37146 Old Hwy 17 • Culbertson, NE 69024
Golight, Inc.
800.557.0098 • 308.278.3131 • www.golight.com

The Golight® Profiler II™ is a revolutionary product that for the first
time, combines in a high-intensity light, a high-performance battery,
rugged construction, and a high tech charging system in one package.
Product Description
The lightweight Profiler™ II is constructed of engineering grade ABS
reinforced with carbon fiber and aircraft aluminum for heavy duty use.
It utilizes thermoplastic rubber on the comfort grip and the shock
absorbing lens surround. Rubber seals are provided to protect
internal components during wet conditions.
The following important features include:
1-Special Handle System that allows instant conversion from utility
lantern to "pistol" type spot light.
2-Two Beam Options. A super bright halogen main beam and a
power conserving "browsing" light.
3-Revolutionary Removable Battery Pack that has the capacity to
burn the main lamp for up to 60 minutes on a single charge. Extra
battery packs can be used for instant power for extended hours of use.
4-Advanced Charging System that will bring the battery to full
capacity in only two hours.
5-Versatile Charging and Operation choices.
•12v DC charging system (included) for use in any vehicle or boat.
System charges the battery pack in the light or can be used with the
accessory remote battery charging station for charging spare packs.
•120v AC charging system (included) for use wherever AC power is
available. System charges the battery pack in the light or can be used
with the accessory remote battery charging station (optional) for
charging spare packs.
•12v DC direct power system (included) that allows the light to
operate independent of its battery pack directly from external 12v DC
sources.
•Accessory remote charging station (optional) for use with above
AC/DC charging systems to keep extra battery packs at the ready.
General Use
The Profiler™ II is designed for a wide variety of utility, military,
outdoors, fire, rescue, and personal uses. With reasonable care, it is
designed to provide many years of satisfactory performance.
The Profiler™ II has the ability to be a lantern type light or a hand held
"pistol" spotlight. The change between styles is accomplished by
depressing the black handle release and rotating the handle 90
degrees.
The high-intensity searchlight is powered by the squeeze-button
trigger switch on the handle. The LED convenience beam is powered
by the red button near the rear of the unit.
The battery pack is released by depressing both retaining clamps
located on the sides of the Profiler™ II adjacent to the battery pack.
Before use, remove battery and peel off red protective strip.
The threaded adaptor on the base of the unit is for the attachment of
clamping and stand accessories.
The included webbed shoulder strap may be attached to the rings
near the grip for added convenience.
Battery Power Level Indicator Gauge
The Profiler™ II is equipped with a series of 3 led’s which serve as
battery power level indicators when the main lamp is “on”. When the
battery is fully charged, all 3 led’s will glow. As the battery power level
diminishes, the number of led’s remaining will decrease accordingly.
Please reference the below graph for expected performance:
3 led’s on: o o o 100% - 50% battery power level;
60 min – 30 min burn time remaining.
2 led’s on: o o o 50% -17% battery power level;
30 min – 10 min burn time remaining.
1 led on: o o o 17% - 0% battery power level;
10 min – 0 min burn time remaining.
Please note that the above expected performance can vary +/- 10%.
Charging Options
Charging in the 12vDC Docking Station Charging System (Included)
The Docking Station is designed to be installed on the floor or wall of
any vehicle or boat with included mounting hardware. The 12vDC
power supply is housed in the docking station and is designed to be
connected to a 12vDC power source, via cigarette plug adapter or
hardwired directly into a 5 amp fused circuit. If hardwired, we
recommend wiring into a switched or ignition based circuit. After a
complete discharge, charging the battery pack completely will
consume 4.5 Ah (ampere-hours).
1. Make sure the trigger switch is in the off position.
2. Load Profiler™ II (battery installed) into Docking Station by
engaging the 2 ports on its bottom plate onto the 2 front
hooks of the Docking Station.
3. Push the Profiler™ II down until the spring loaded hook on the
Docking Station catches securely.
4. Depending on the charge condition of the battery pack, it will be
fully charged in two hours or less. The charge indicator lamp on
the side of the Profiler™ II glows red during the charging cycle.
When the battery is fully charged, it will glow green. A blinking
red light indicates charging problems.
5. To remove the Profiler™ II from the Docking Station, locate the
release lever on the side of the Docking Station. Push the release
lever down and lift the Profiler™ II from the Docking Station.
*The Expansion Dock / Remote Charger (optional) can also be interfaced
with the main Docking Station. When used in tandem with the
Docking Station, the battery inside the Profiler™ II will charge first,
then the charging current will be directed to the spare battery in the
Expansion Dock / Remote Charger.
*Main lamp trigger switch should be in off position prior to charging.
Charging with Power Adaptors (included)
1. Insert a battery pack into the Profiler™ II and make sure it is
securely locked in position.
2. Make sure the trigger switch is in the off position.
3. Choose either the 12vDC (in the docking station) or the 120vAC
power supply.
4. Lift the rubber closure on the back of the Profiler™ II to reveal the
charger input receptacle and input plug from power supply.
5. Plug the power end of the power supply into the appropriate
power source (12v DC or 120v AC).
6. Depending on the charge condition of the battery pack, it will be
fully charged in two hours or less. The charge indicator lamp on
the side of the Profiler II glows red during the charging cycle.
When the battery is fully charged, it will glow green. A blinking
red light indicates a charging problem.
7. When the charge cycle is complete, remove the power supply and
close the rubber closure on the Profiler™ II charging receptacle.
Charging Battery in Remote Charging Station (Optional – Not Included)
A remote charging station is available as an optional accessory for use
with the included AC and DC power supply for added convenience.
This station allows for the charging of batteries outside the Profiler™ II
unit. This is especially useful when a supply of spare battery packs are
needed to provide instant reserve power to the Profiler™ II for
extended use situations.
1. Place the station on a level surface indoors or inside a vehicle.
Insert a battery pack into the remote charging station.
2. Choose either the 12v DC or the 120v AC power supply.
3. Insert the low voltage plug from the power supply into the
receptacle on the back of the remote charging station.
4. Plug the power end of the charging system into the appropriate
power source(12v DC or 120v AV).
5. Depending on the charge condition of the battery pack, it will be
fully charged in two hours or less. The charge indicator lamps on
the top of the station indicate the status of the charge cycle.
Green will illuminate during the charge. When the battery is to full
capacity, the green light will turn off.
6. When charge cycle is complete, remove the power supply and the
battery from the station. Store the charged battery and charging
equipment in a dry secure temperature controlled location.
 Loading...