

Page 1

1
사작하기
User Manual
Page 2

CONTENTS
1. GETTING STARTED
2. BASIC OPERATION
3. ADVANCE OPERATION
Page 3
Thank you for choosing Golf Buddy.
The GolfBuddy WT3 will provide you with the most
accurate course information to ensure you the very best
golf experience.
Page 4
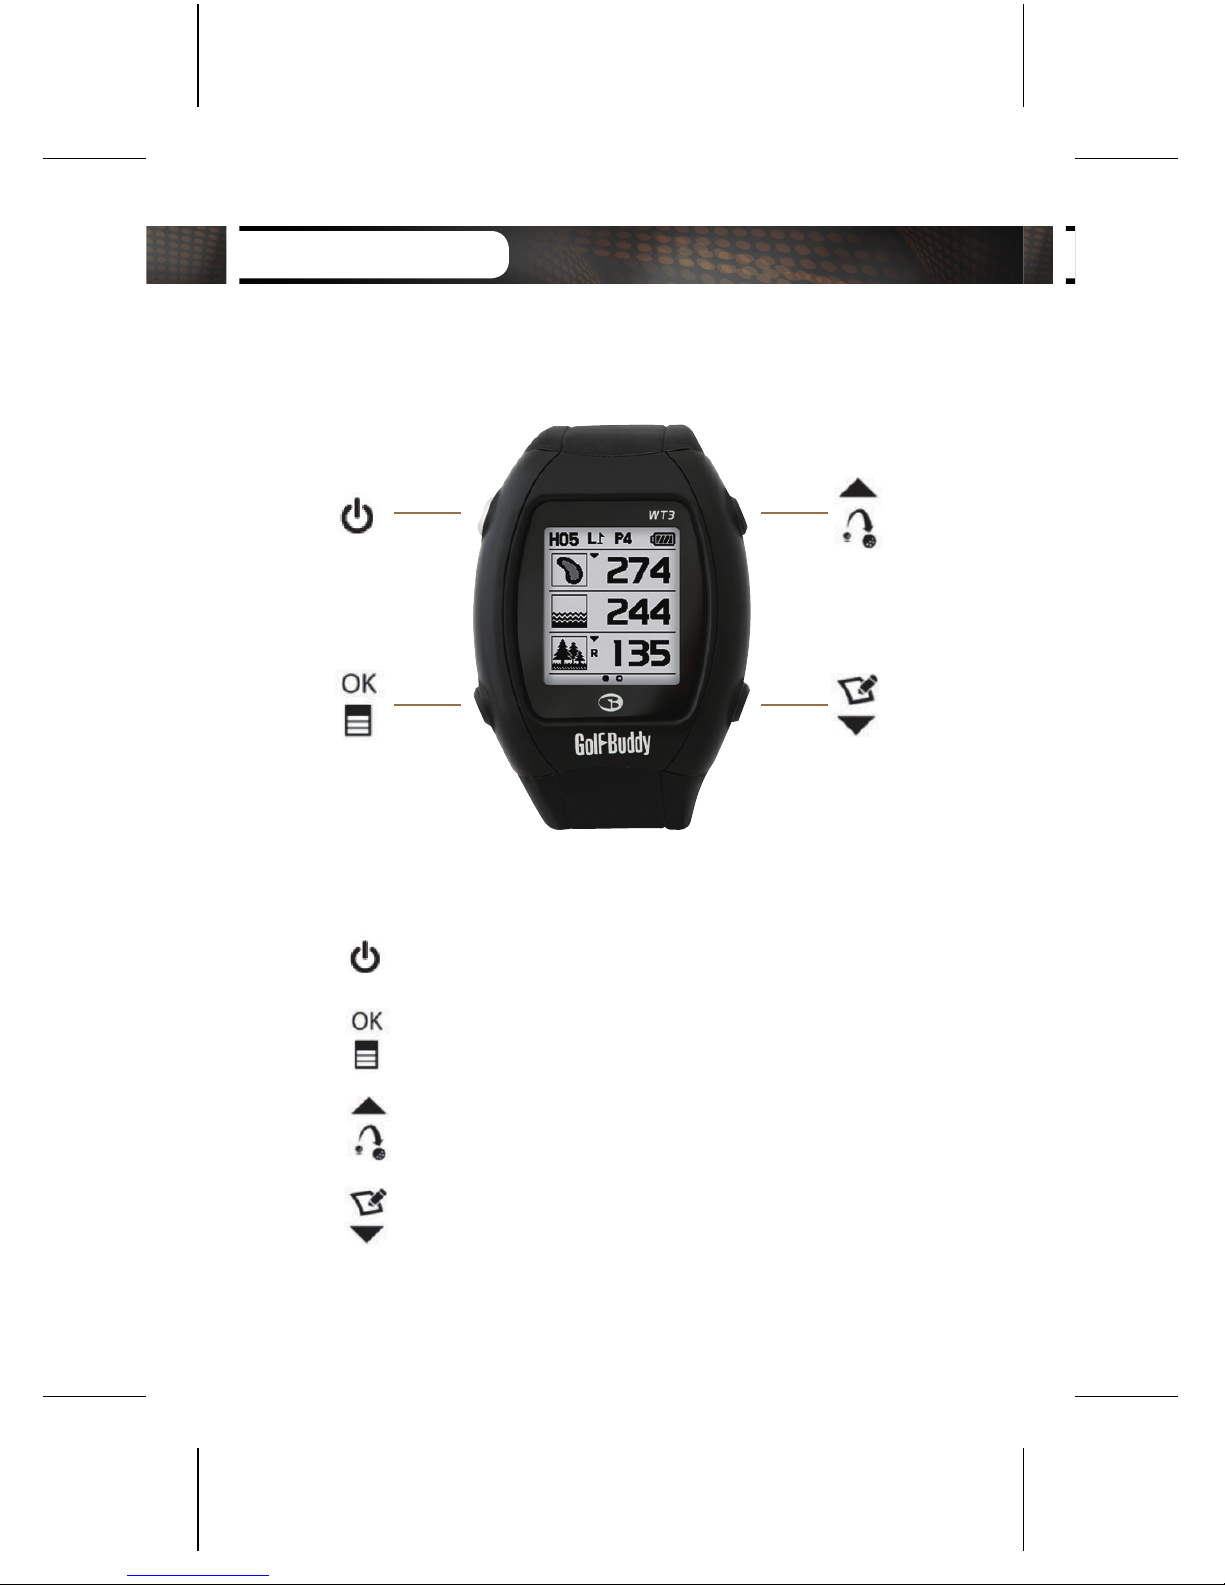
Up / Mark
Power / ESC
Menu / Select
Down / Score card
Button Overview
Page 5
1.
2.
3.
4.
5.
6.
7.
8.
9.
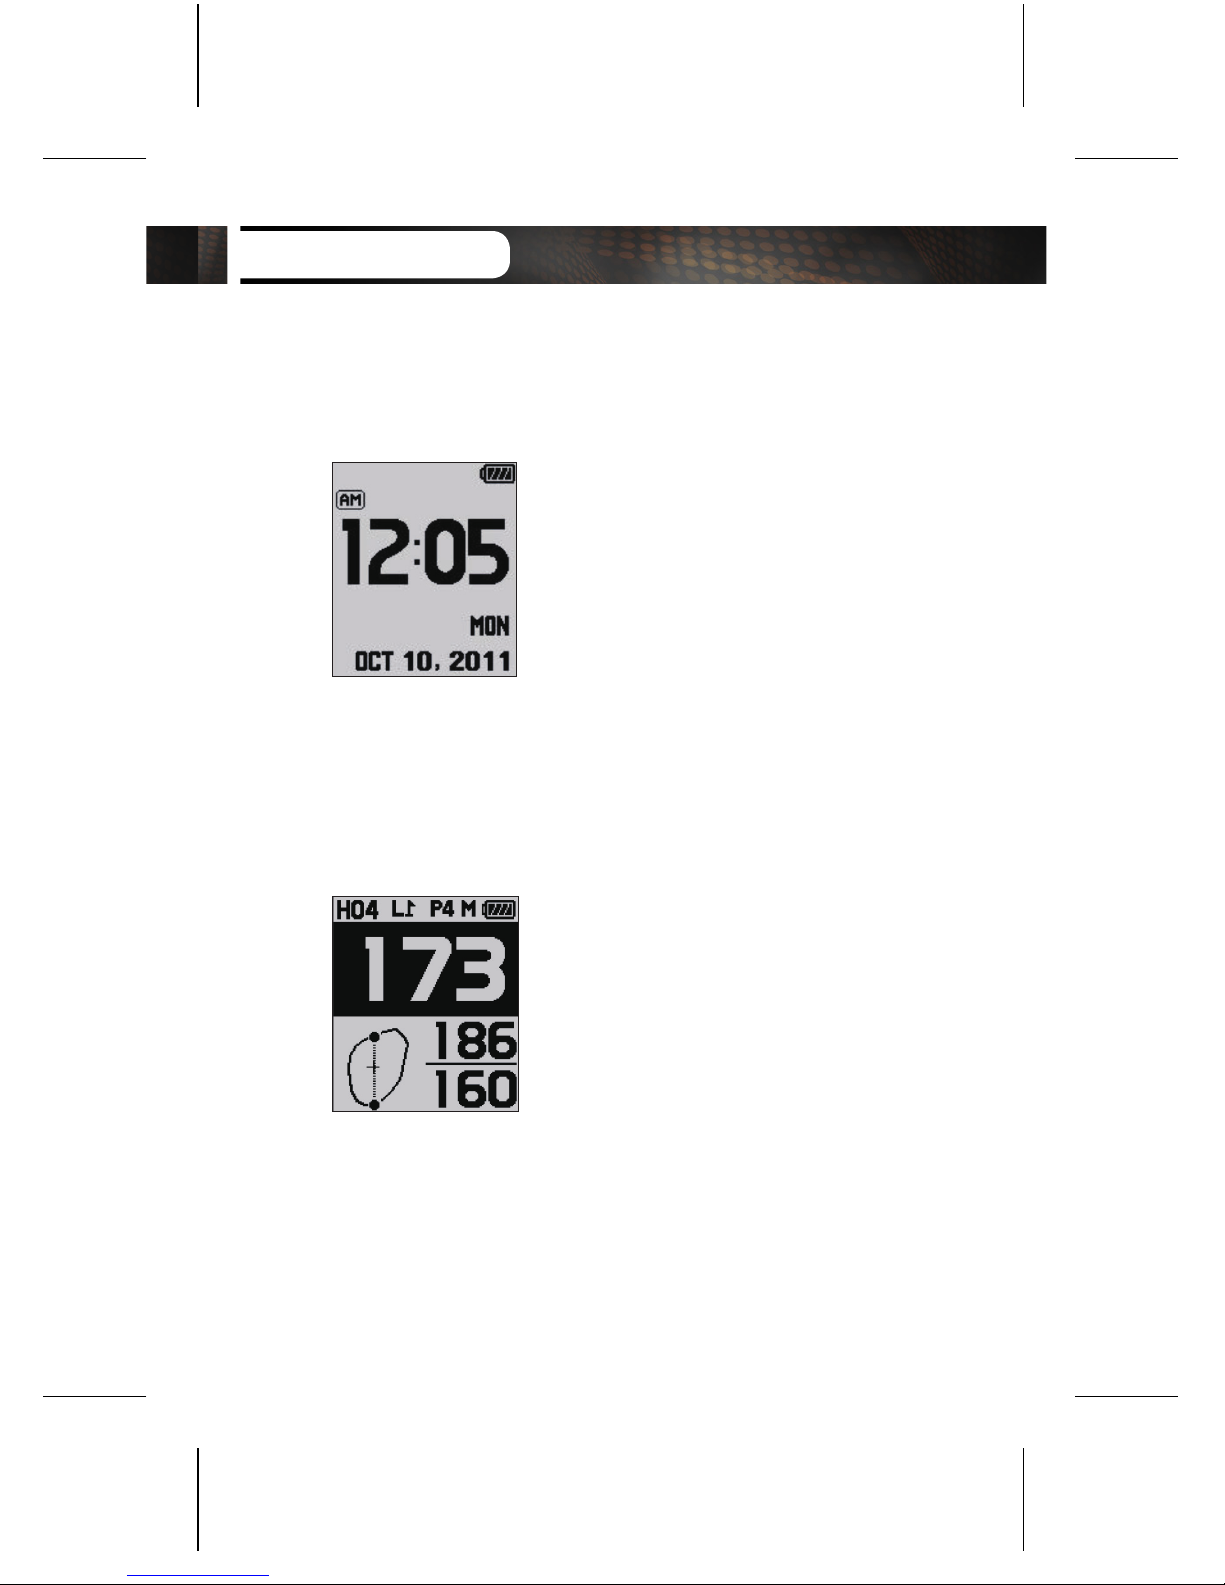
Hole Number
Left/ Right Green
Par info
Meter (In Yards if not indicated)
Battery Indicator
Dynamic Green View
Distance to the center of the Green.
Distance to the back of the Green.
Distance to the front of the Green.
1.
2.
3.
4.
Time
Day
Date
Battery Indicator
⦾
Play Mode Screen
⦾
Watch Mode Screen
Screen Overview
5
6
7
9
8
3 421
1
4
2
3
Page 6
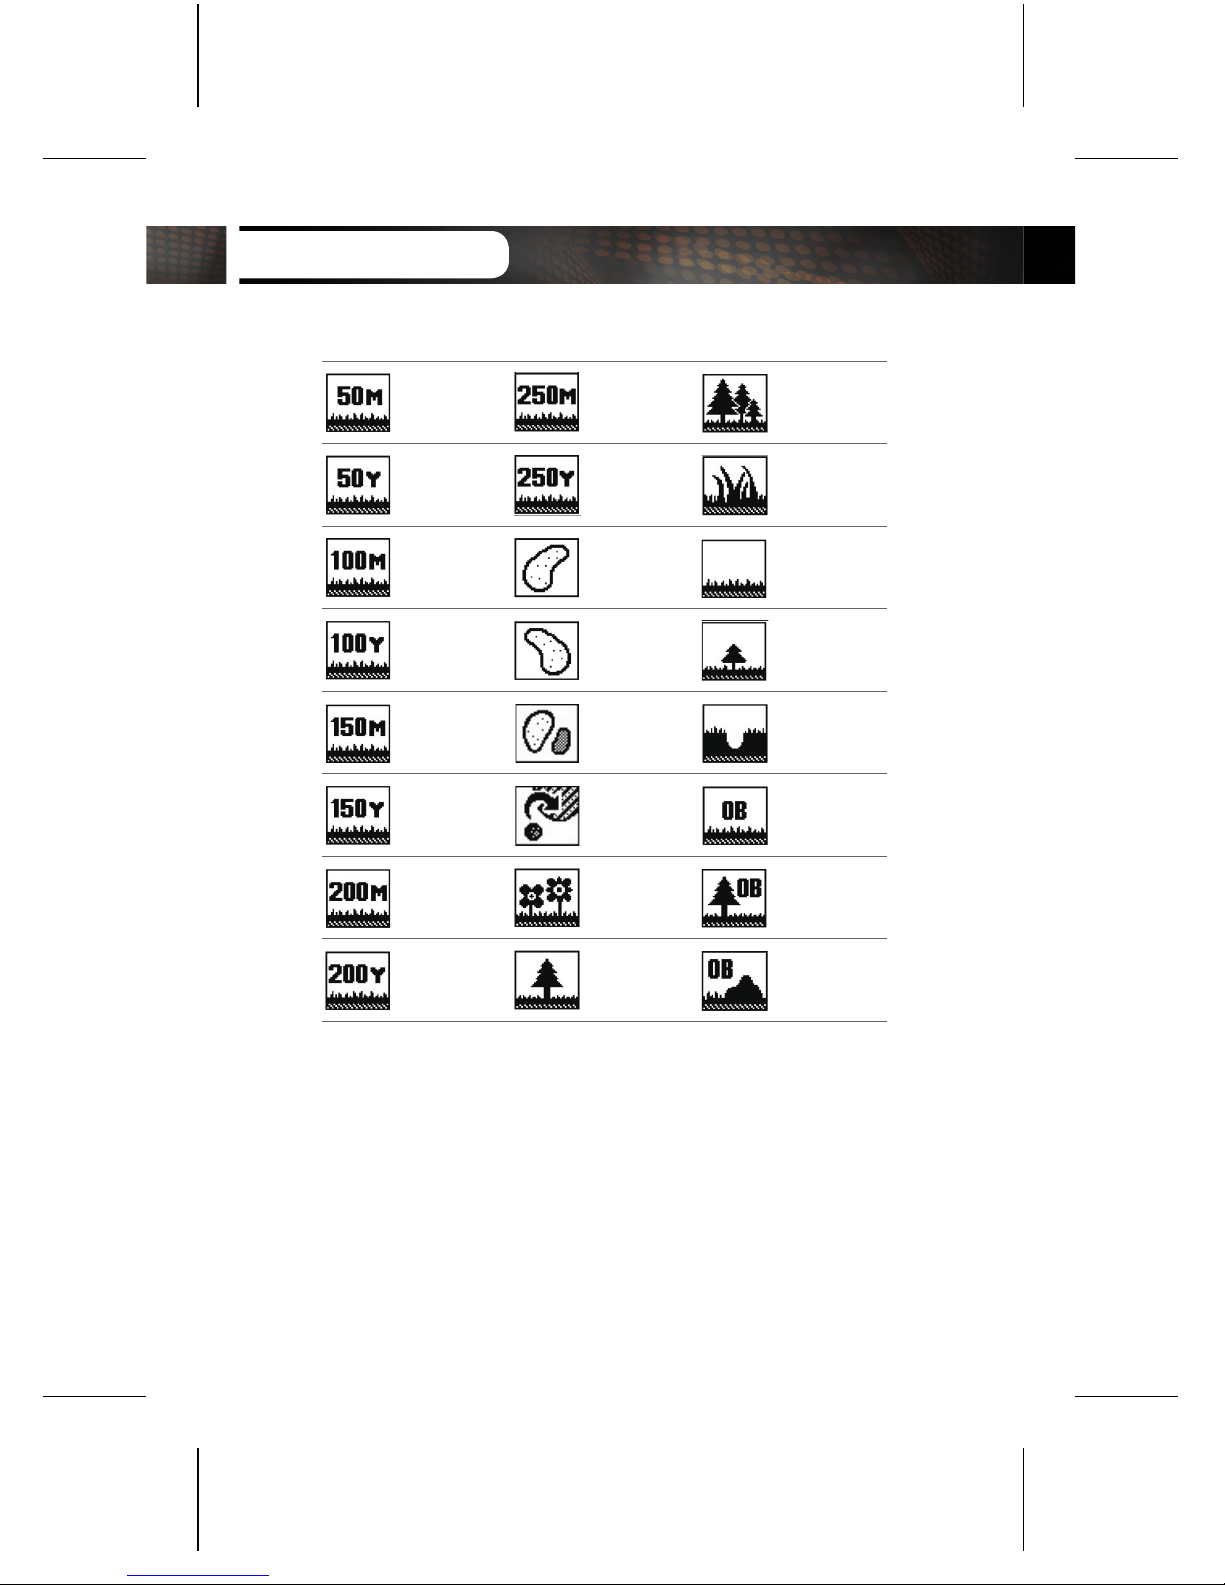
50Yardpost
50Meterpost
250Yardpost
250Meterpost
Bush
Trees
100Meterpost
Left Bunker Rough
100Yardpost
Right Bunker Short Tree
150Meterpost
Bunkers Hole
150Yardpost
Fairway
Out of Bound
200Meterpost
200Yardpost
Garden
Tree
OB + Tree
OB + Rock
Target Icon Information
Page 7
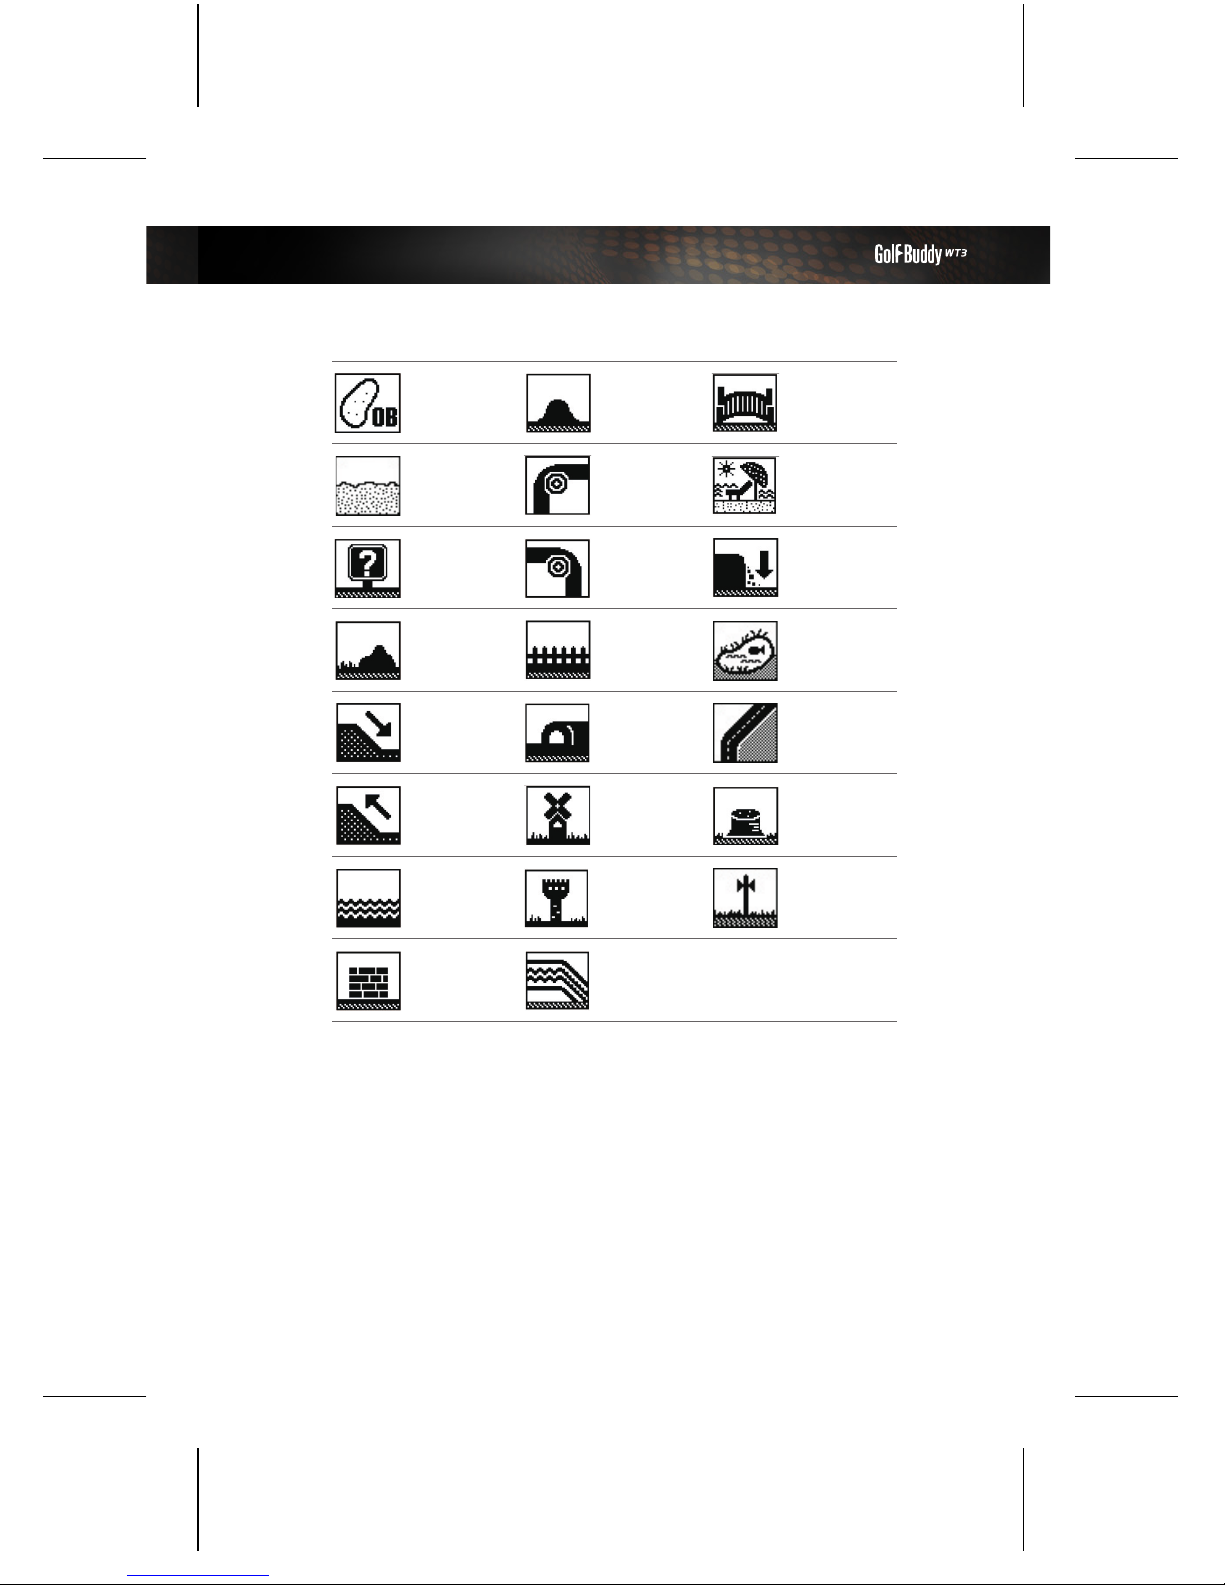
Sand Box
OB + Bunker
Right Dogleg
Hill
Beach
Bridge
Target
Left Dogleg
Cliff
Rock Fence Pond
Downhill Cave Cart Path
Uphill
Windmill
Stump
Water
Wall
Tower
Creek
Pole
Page 8
1. GETTING STARTED
Page 9
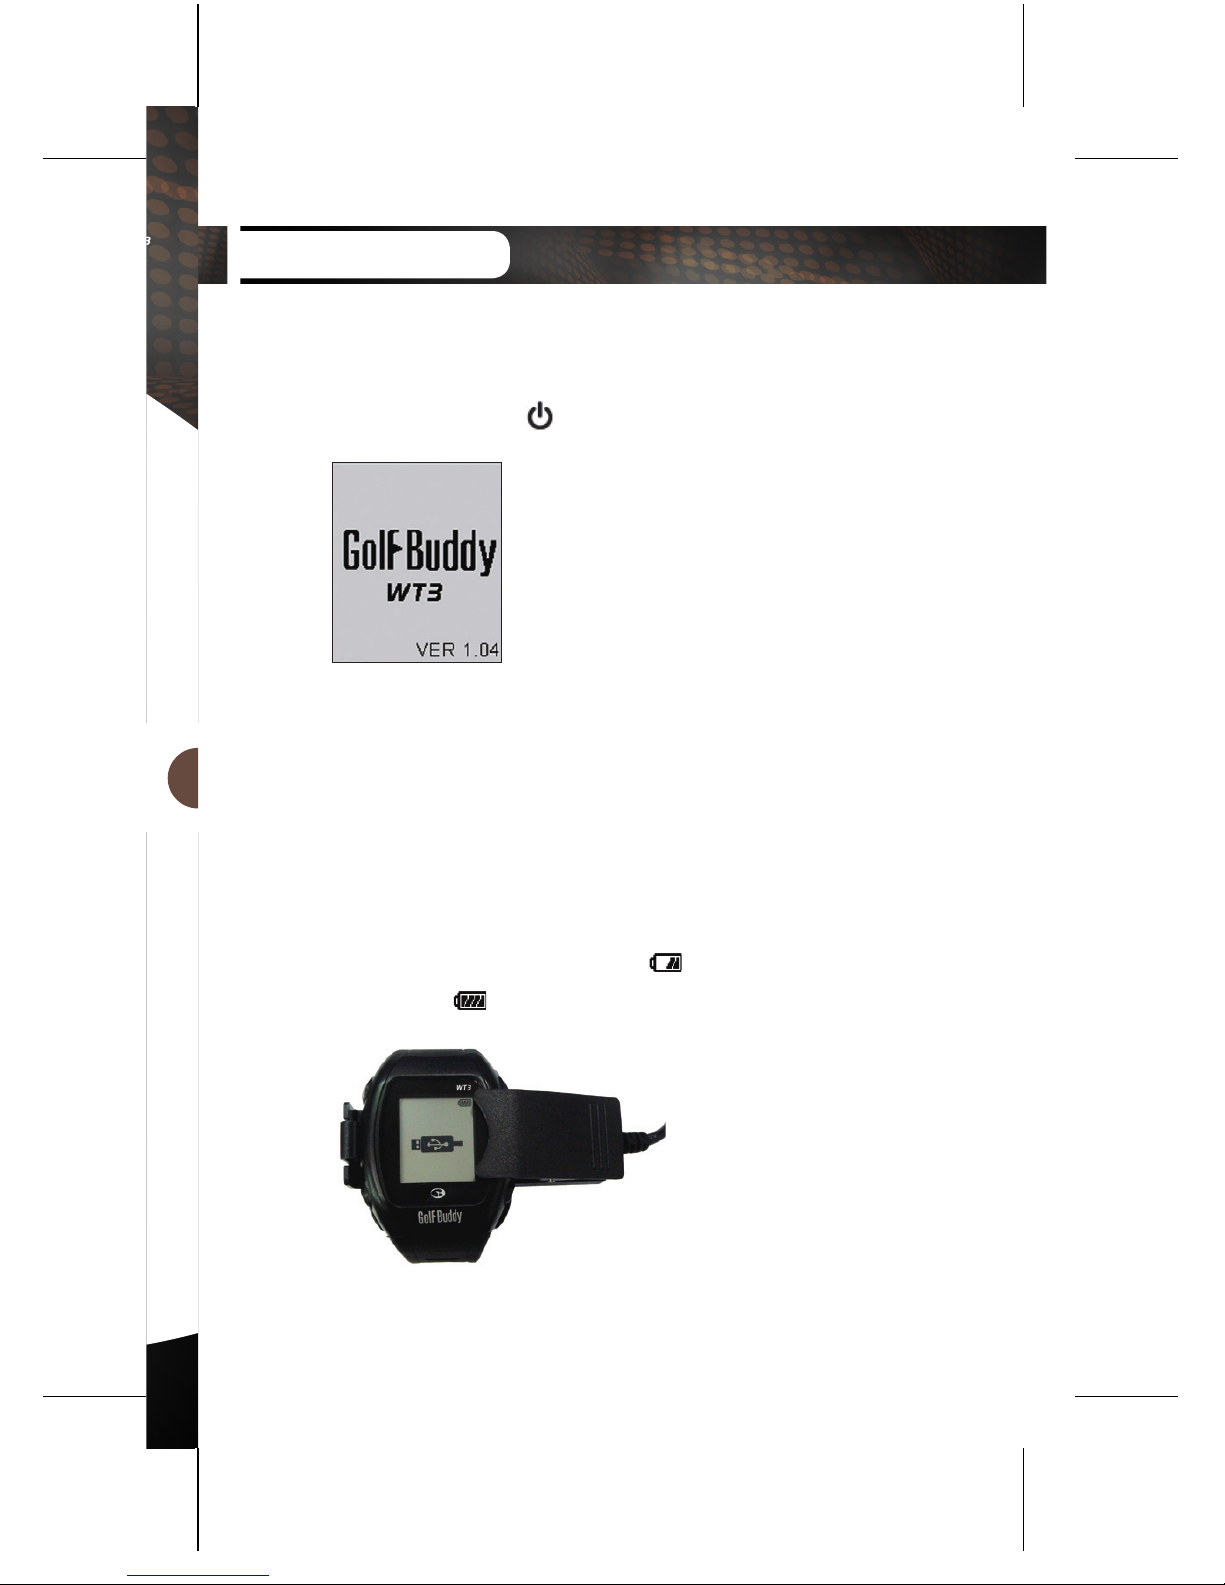
1.1. Power On/Off
Press and hold the button to turn on/off the device.
1.2 Charging
You can charge the device by inserting the device into
the charging dock as depicted in the picture below. The
battery indicator will display while charging and
will display when fully charged.
GETTING STARTED
Page 10
GETTING STARTED
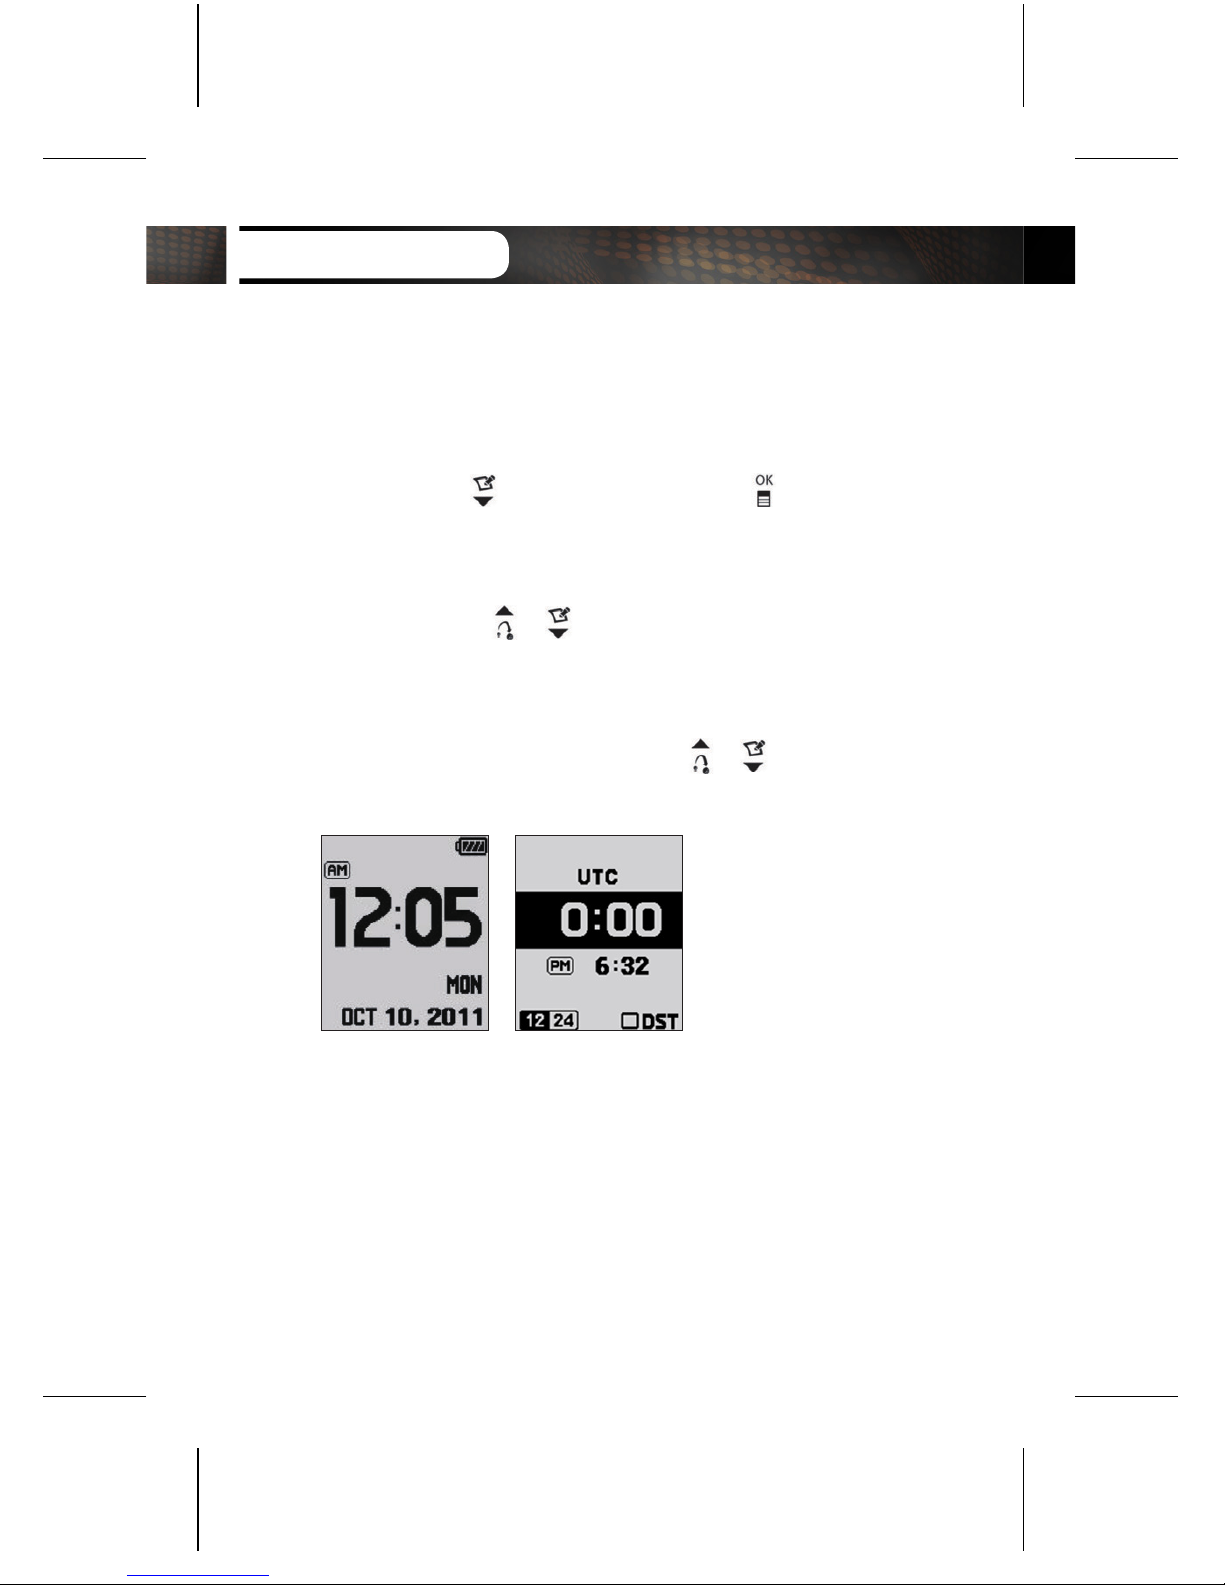
1.3. Time Setting
Time will set automatically after WT3 successfully
connects to the satellite. To set the clock manually, press
and hold the button then press the button to
confirm.
* DST : Daylight Savings Time can be applied by
pressing the / button in the Time Setting
Menu.
* 12/24 Hour Time Format : 12/24 Hour Time Format
can be applied by pressing the / buttons in
the Time Setting Menu.
Page 11
■
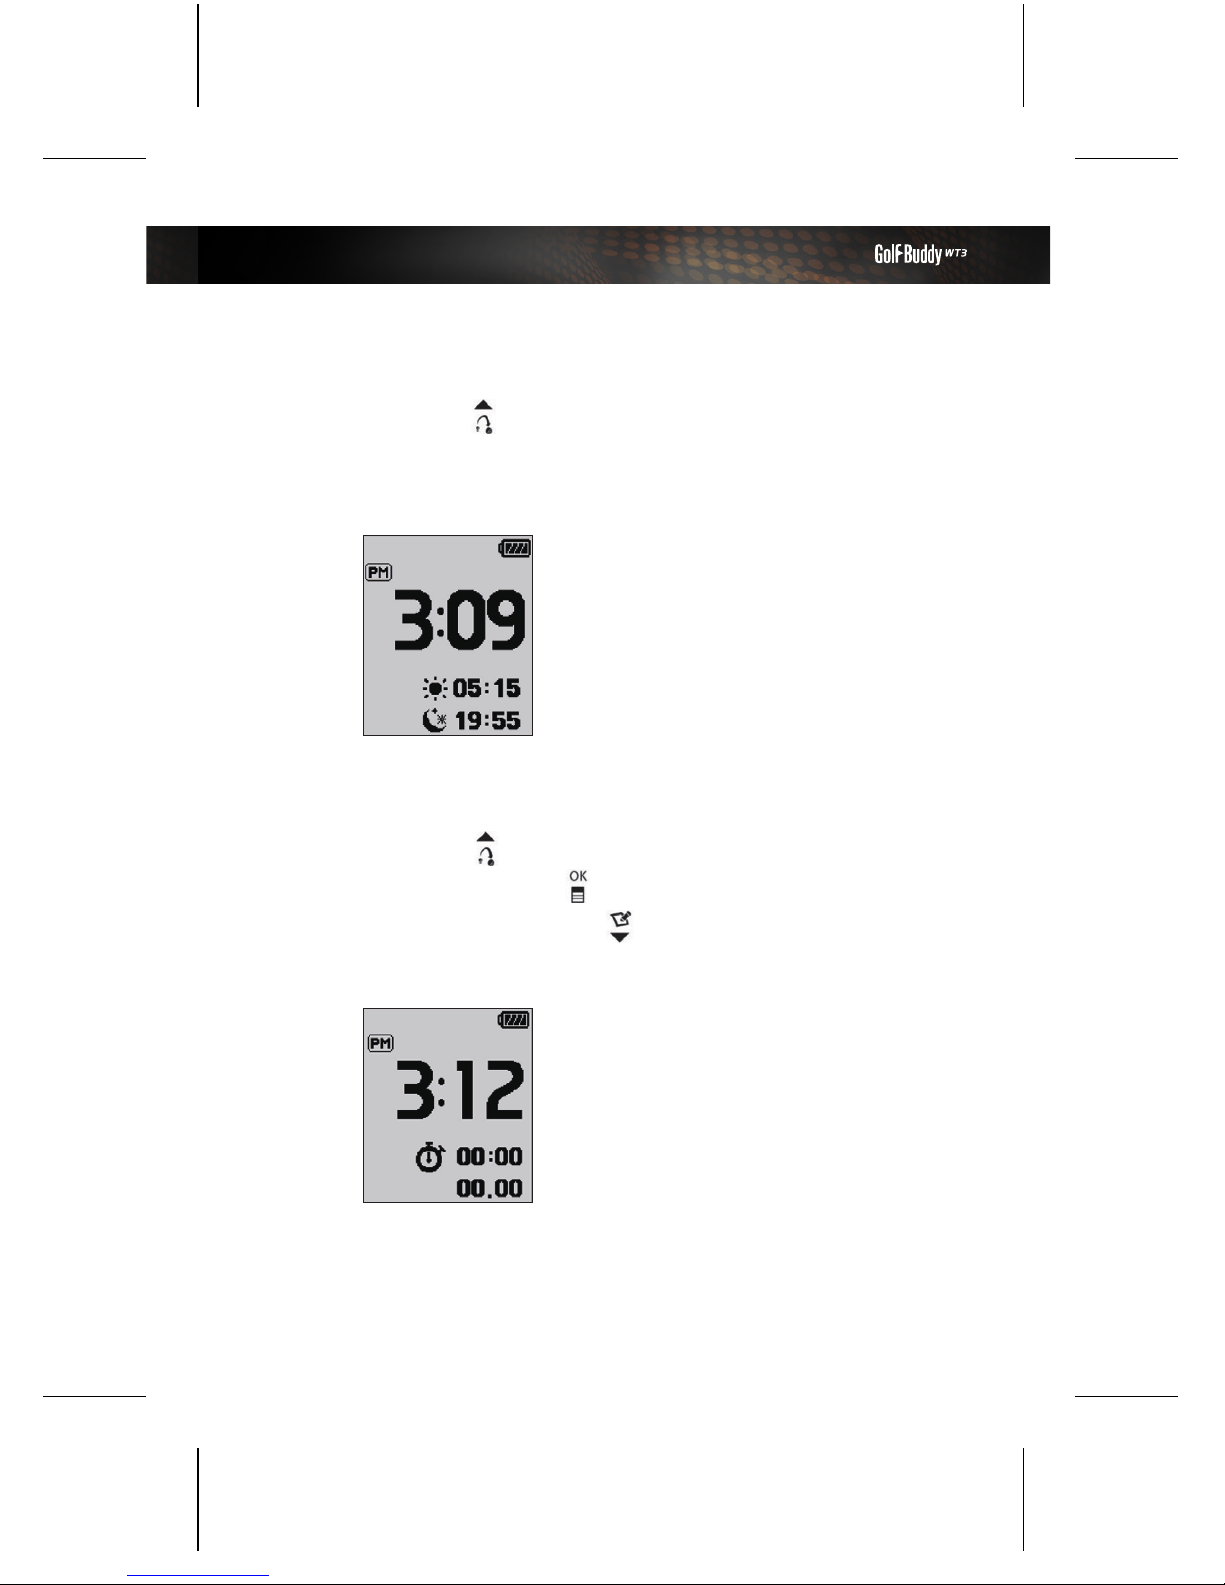
Sun Rise/ Sun Set Time
Press the button to view the Sun Rise/ Sun Set
Time. (only applicable when WT3 is connected to
the satellite)
■
Stop Watch
Press the
button twice to use the Stop Watch
Function. Press the button to start/ stop the Stop
Watch, and press the button to reset the the
record.
Page 12
1.4. Main Menu
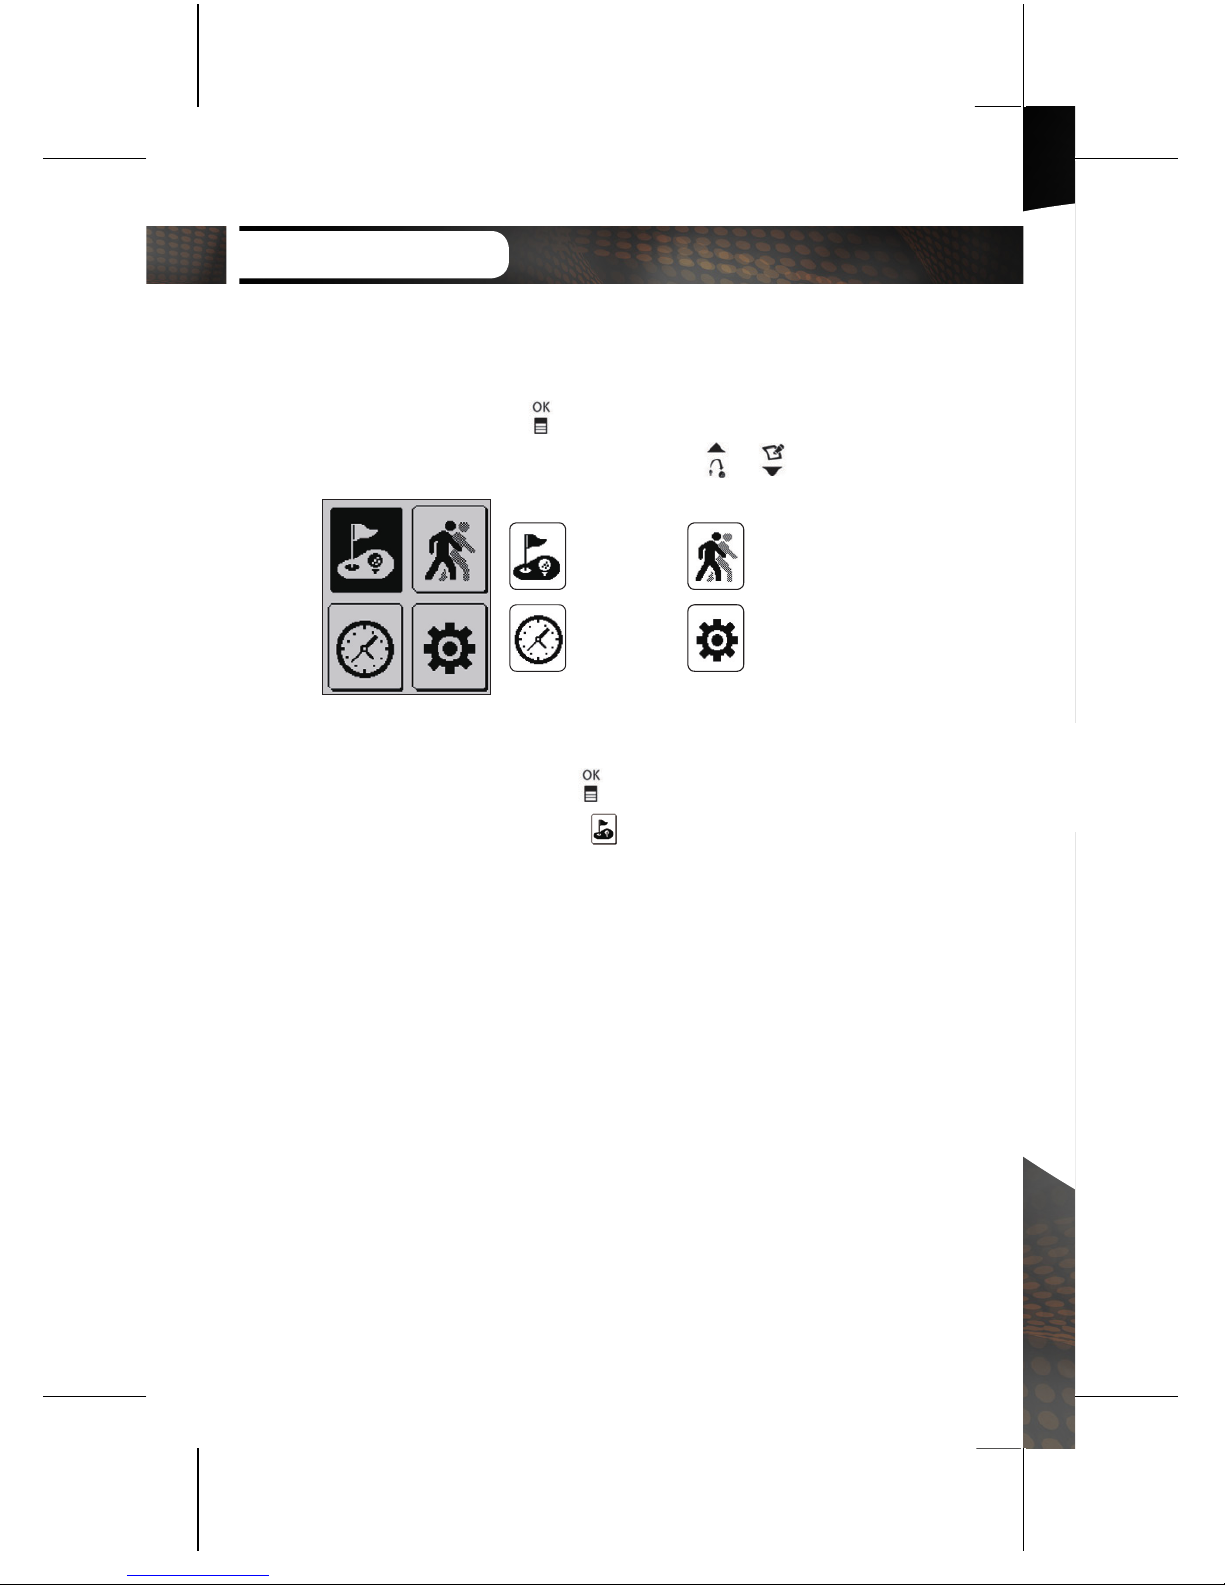
Press and hold the button to view the Main Menu
and it can be navigated by using the / button.
PLAY GOLF GPS TRACKING
TIME SETTING
■
Switching to Play Screen
Press and hold the button from the default
screen then select the icon to switch to the play
screen. After WT3 connects to the satellite, it will
recognize the nearest Golf Course and provide the
Course/Hole information.
GETTING STARTED
Page 13
2. BASIC OPERATION
Page 14
BASIC OPERATION
2.1. Play Screen Information
■
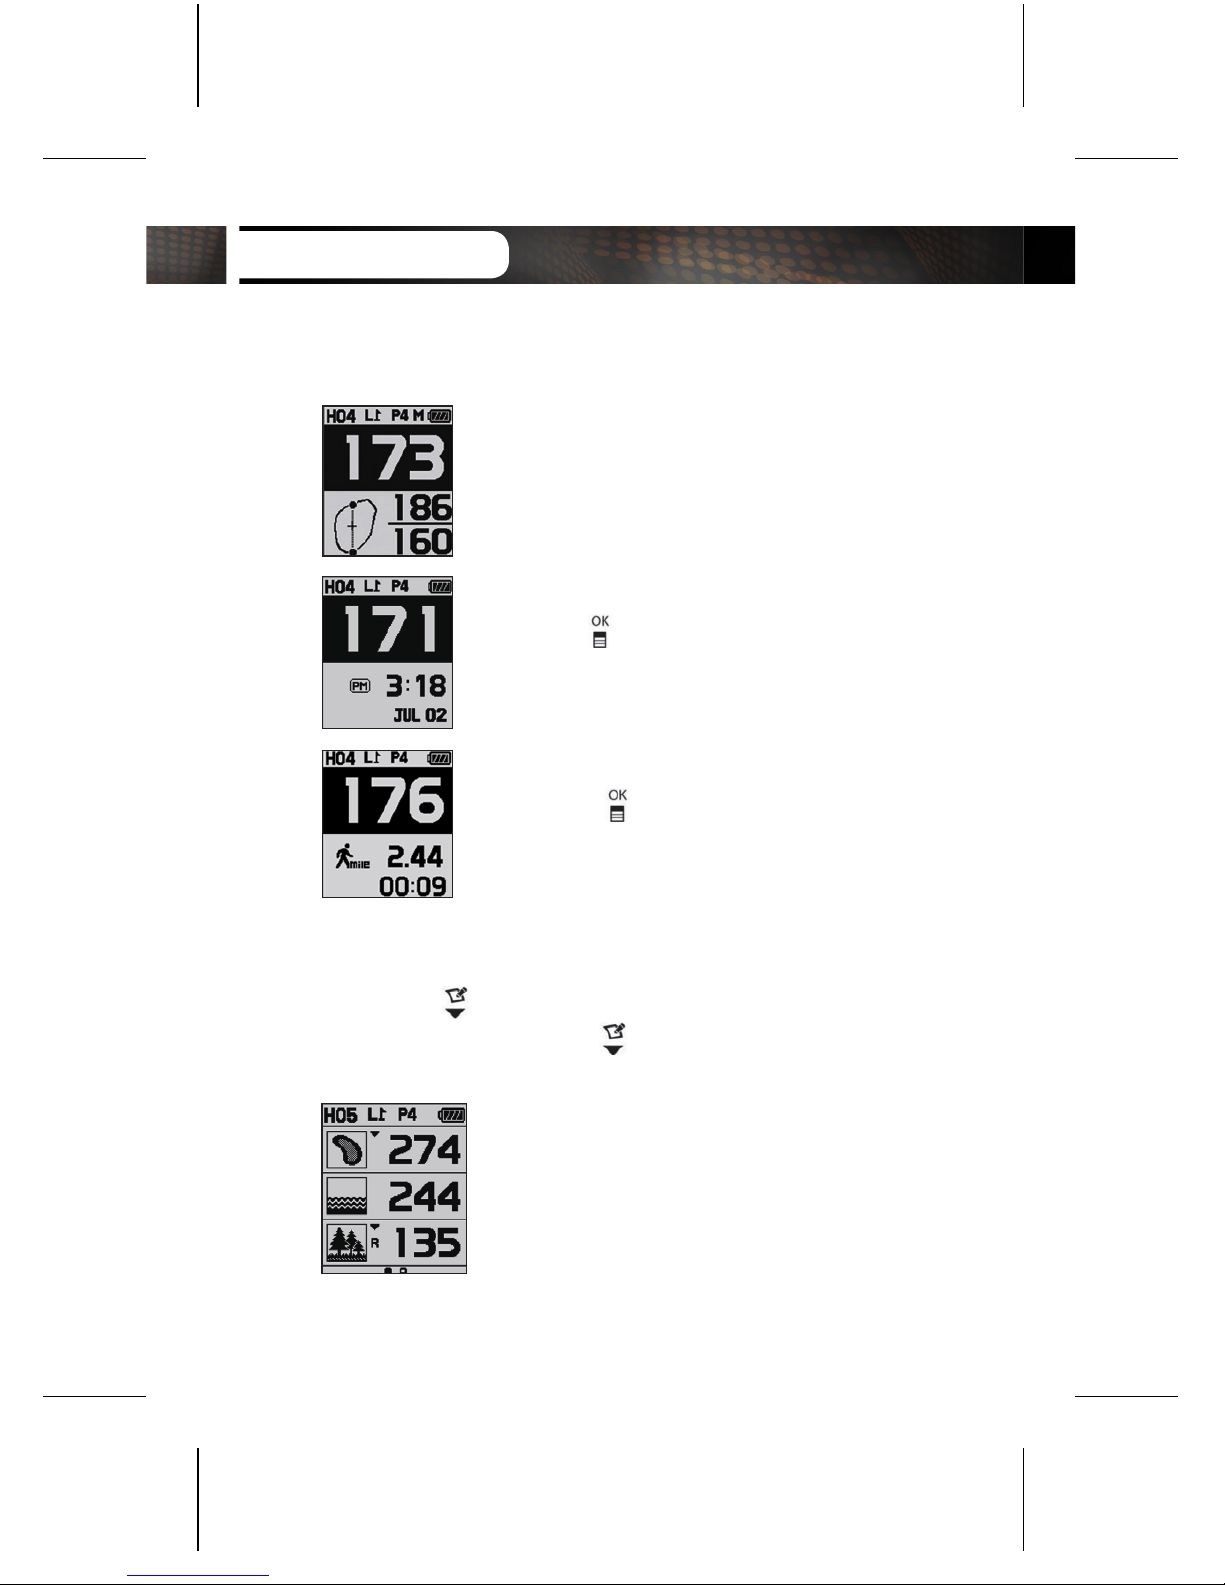
Distance to the Green
Play Screen provides the distance to
the center, back, and front of the green.
■
Time
Press the button to view the current
time while displaying the distance to
the center of the green.
■
GPS Tracking
Press the button twice to view
the GPS tracking while displaying the
distance to the center of the green.
2.2. Target/Hazard Information
Press the button to view the Target/Hazard
information and press the button again to go back
to the Play Screen.
Page 15
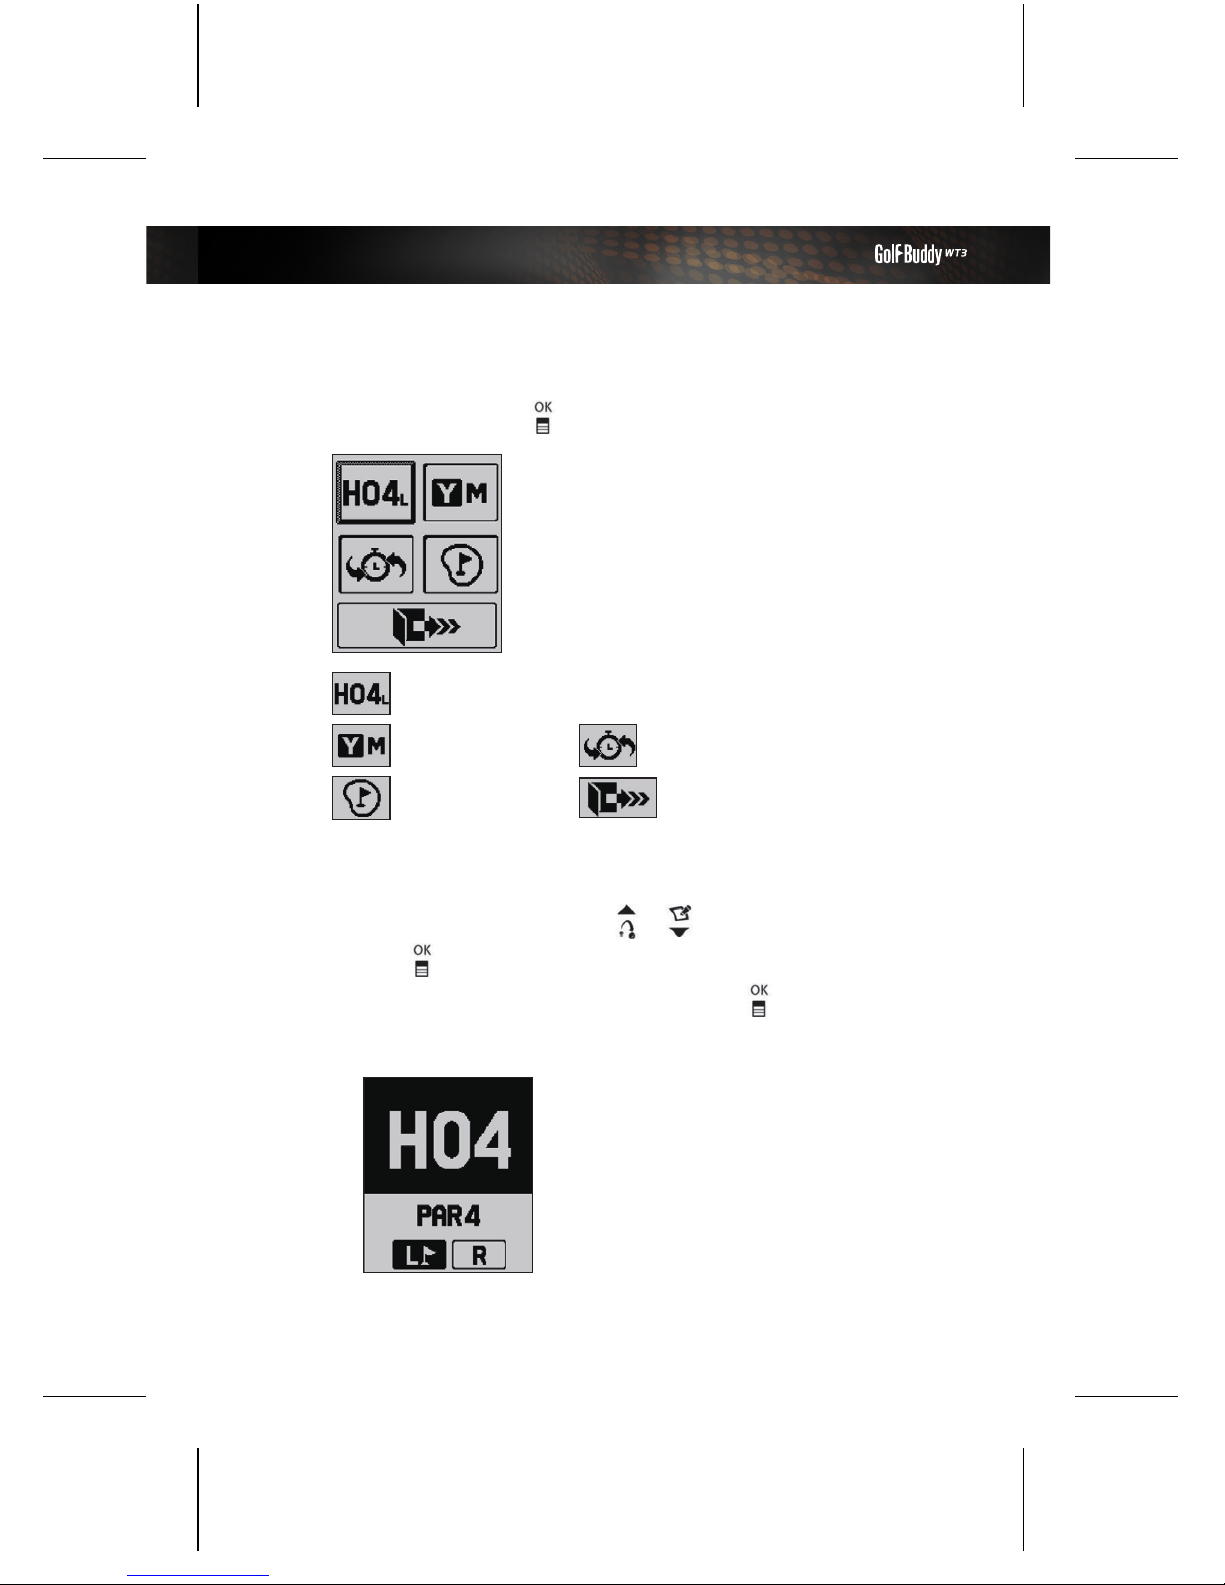
2.3. Setting
Press and hold the button for the menu.
Hole Selection/ Left & Right Green Selection
Pin Placement
Exit
Yard / Meter
Previous Hole Selection
■
Hole Selection/ Left & Right Green Selection
Navigate by using the
/
buttons and press
the button to select the Hole. Select between
left/right green then press the button to
complete the selection.
Page 16
BASIC OPERATION
■
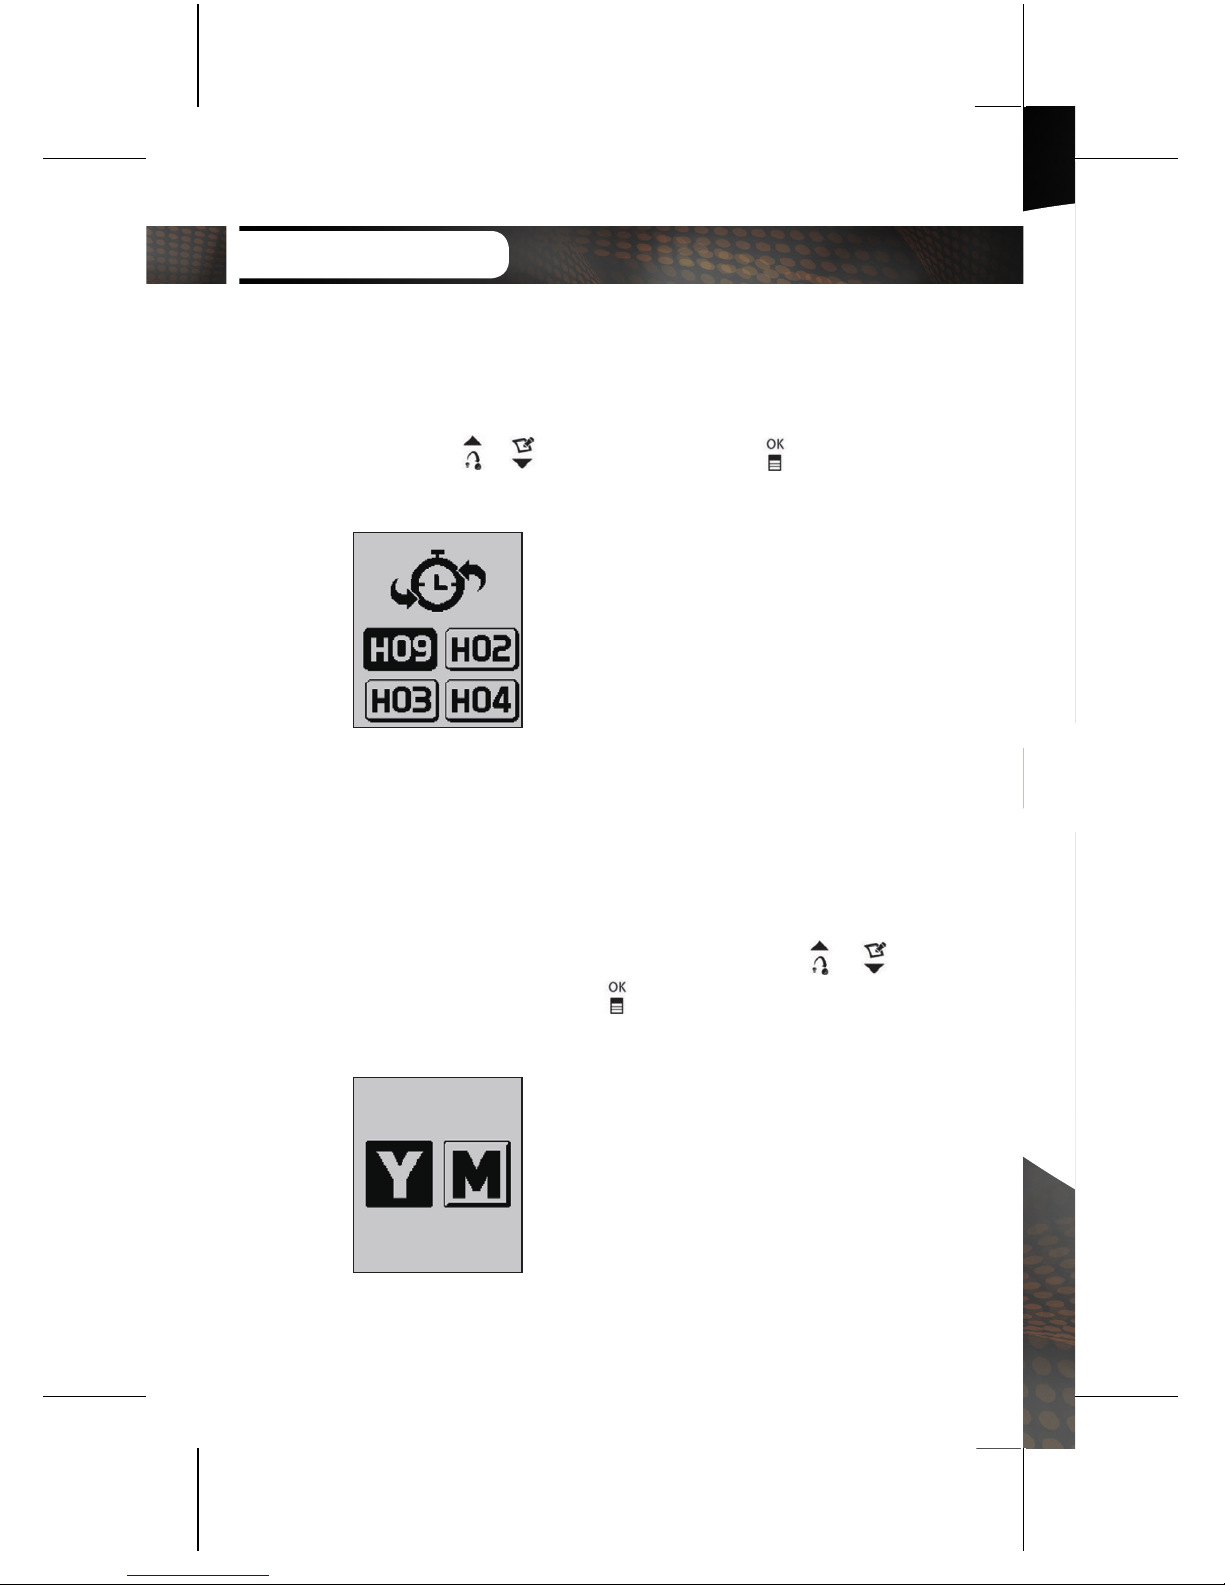
Previously Recognized Hole Selection
Previously recognized hole can be selected by
using the
/
button then press the button to
complete the selection.
■
Switching between Yard / Meter
Yard/ Meter can be selected by using
/
buttons then press the button to complete the
select.
Page 17
3. ADVANCE OPERATION
Page 18
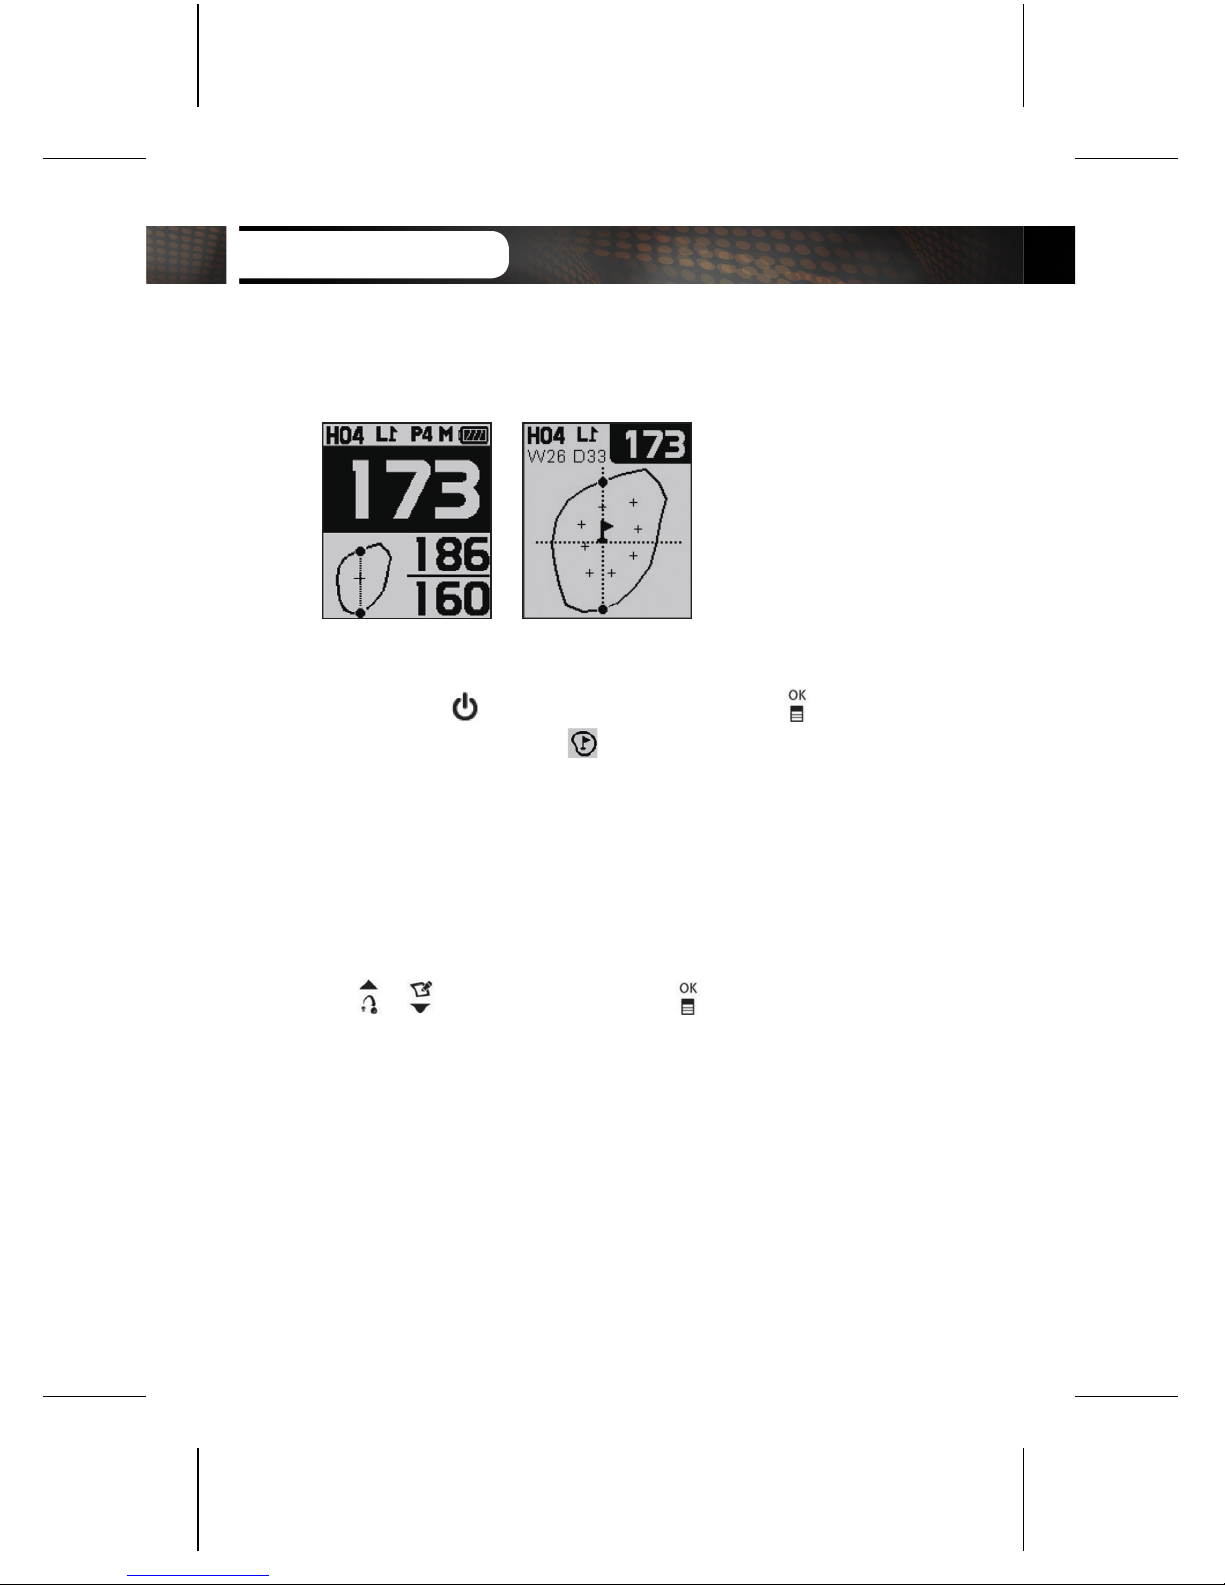
3.1 Dynamic Green View / Pin Placement
■
Dynamic Green View
Press the button or press and hold the button
then select the icon to proceed to the Dynamic
Green View. Dynamic Green View will allow you to
always get the Front/ Center/ Back distance to the
green from your angle of approach.
■
Pin Placement
You may also change the Pin placement by using the
/
buttons then press the button to go back
to the Play Screen.
ADVANCE OPERATION
Page 19
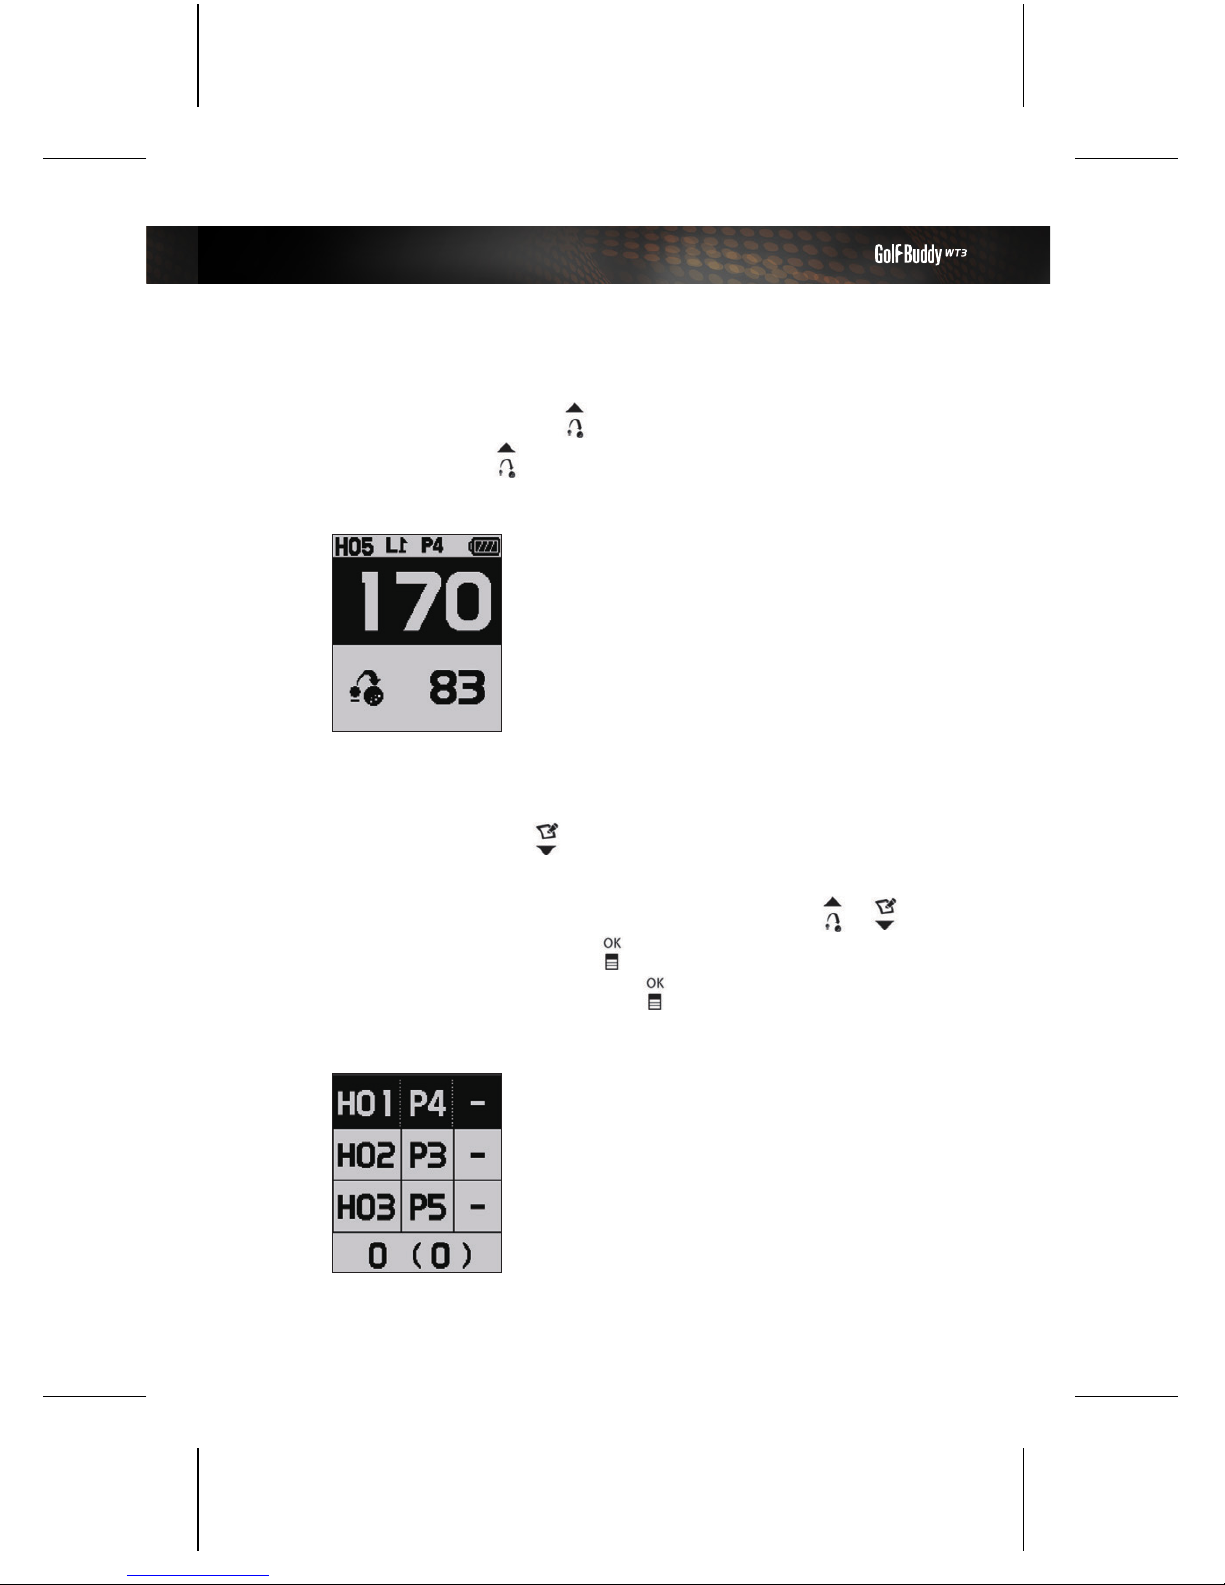
3.2. Measuring Distance
Press and hold the button to start measuring
then press the button again to finish and view the
measured distance.
3.3. Recording Scores
Press and hold the button while on the Play Screen
to start access the Score Tracking Module. You can
navigate and record your scores by using the /
buttons then press the button to complete the
recording. Press and hold the button anytime to go
back to the Play Screen.
Page 20
ADVANCE OPERATION
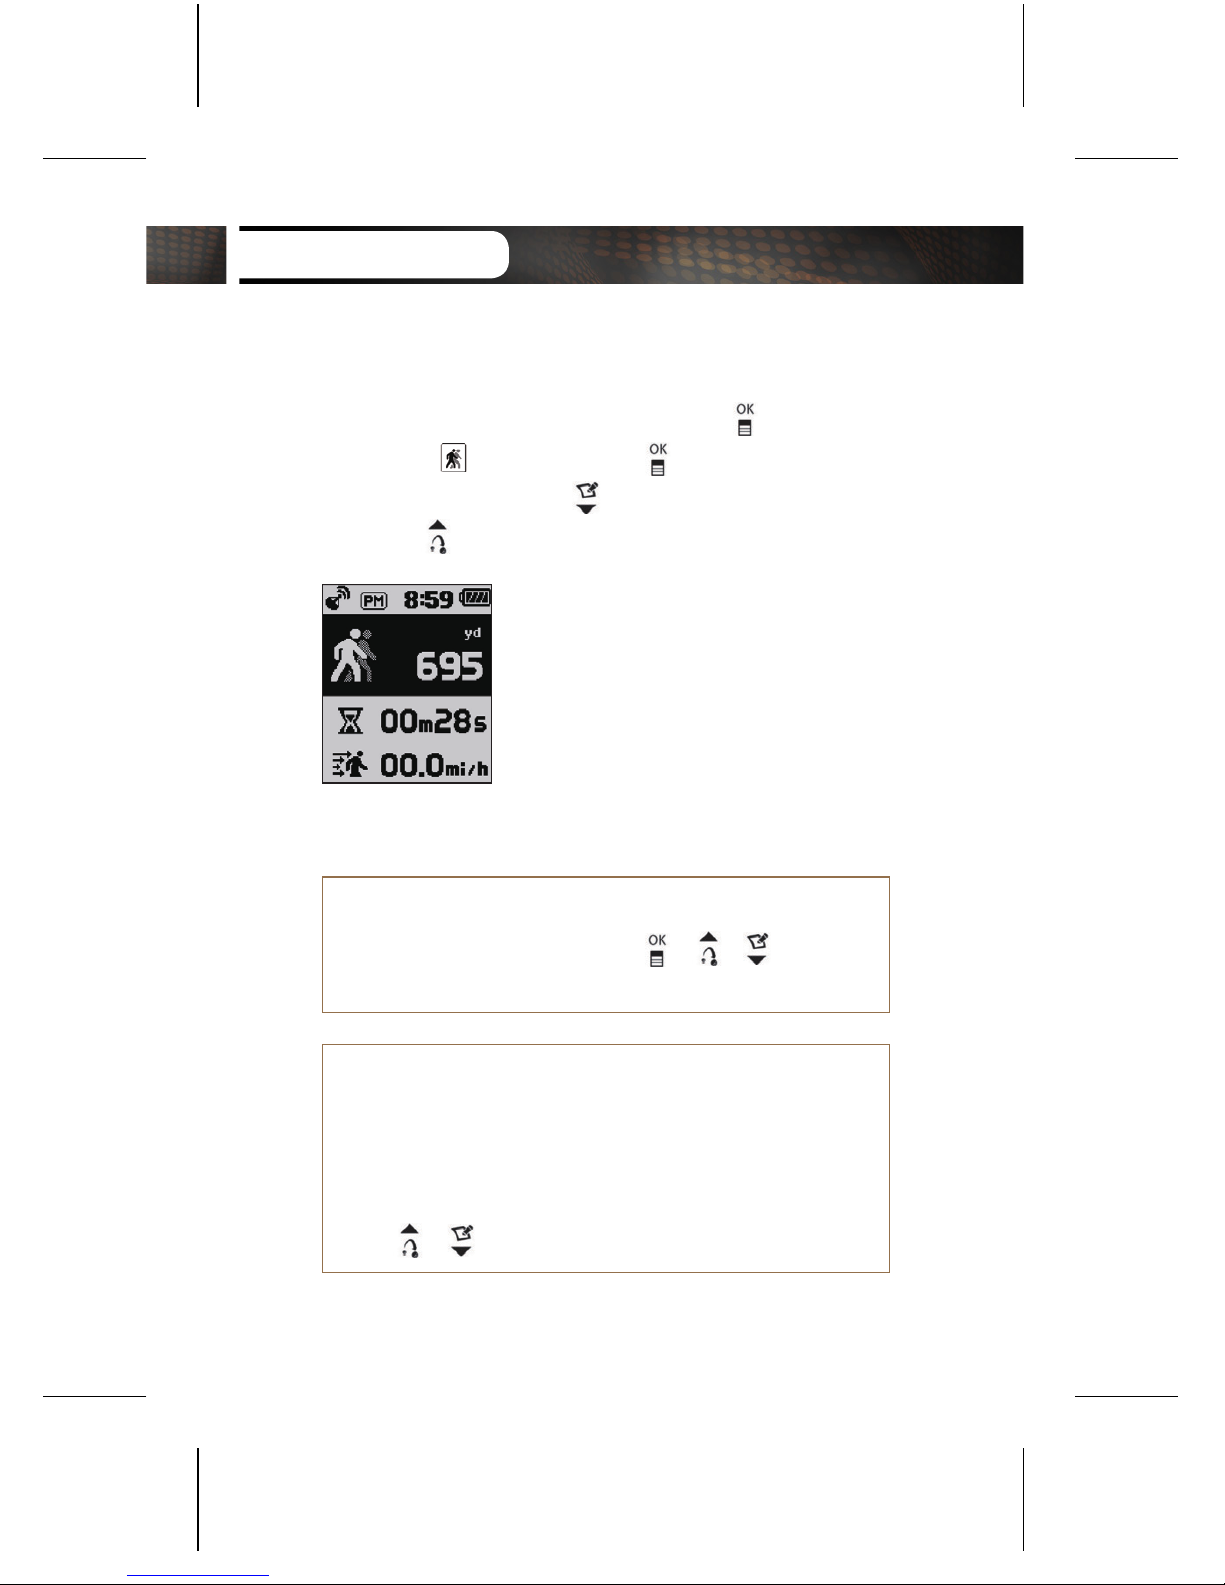
3.4. GPS Tracking
While on Watch mode screen, press the button then
select the icon. Press the button to start the
recording and press the button to delete the record.
Press the button to switch between Yard / Meter.
※
HOW TO RESET
To reset the device, press the / / buttons
at once to restart the system
.
※
HOW TO VIEW DEMO
To view demo when the GPS satellite signal cannot
be reached indoors, select Play mode and the
satellite reception screen will appear. Press and
hold
/ buttons at once
.
 Loading...