

Gold Standard Games HOME PRO, HOME PRO ELITE, MSG-LB-WW1-NG, MGS-LB-WW1, KGS-LB-EW1 Assembly Instructions Manual
...
HOME PRO/ HOME PRO ELITE
Assembly Instructions
Thank you for purchasing a Gold Standard Games product. All of us at Gold Standard Games want you to be
completely satisfied with your Home Pro Air Hockey game, so feel free to contact us for help with the
assembly of your product, Gold Standard Games parts, or other information you may require.
Tools Required:
1/2” Wrench or Socket
Phillips Head Screw Driver
Level
Step #1
Lift air hockey table out of the box and flip it upside down on a carpeted or smooth surface.
Remove and open both the leg box and the accessory box.
Contents Part Number Quantity
Air Hockey Cabinet
Legs & Mounting Hardware
HOME PRO
Model # MGS-LB-WW1 /MSG-LB-WW1-NG
Leg Assembly (Universal) MS-LEG-O 4
5 ½ ” x 5/16” Carriage Bolt 301-0002-0 16
5/16” Hex Nut 302-0002-0 16
5/16”USS Flat Washer 303-0002-0 16
HOME PRO ELITE
Model # KGS-LB-EW1/KGS-LB-EW1-NG
Leg Assembly (Left) AS-SSL-0 2
Right Assembly (Right) AS-SSR-0 2
5/16” Hex Nut 302-0002-0 8
5/16 USS Flat Washer 303-0002-0 8
Blower Motor 210-0112-0 1
Gasket – For Blower Motor 203-0038-0 1
¼ -20x1” Hex Head Bolt 301-0009-0 3
¼” AE Flat Washer 303-0004-0 3
¼” Split Lock Washer 303-0007-0 3
Electronic Scoring Unit 401-0023-0 1
8/32 x ½” Phillips Pan Head Screw 301-0021-0 2
#8 SAE Flat Washer 303-0015-0 2
Power Supply Adapter 401-0024-0 1
Nylon Cable Tie 205-0968-0 8
3 ¼” Puck 201-0093-0 2
Mallet 201-0293-0 2
Sand Disk 6” x 180 Grit 210-0351-0 1
Assembly Instructions
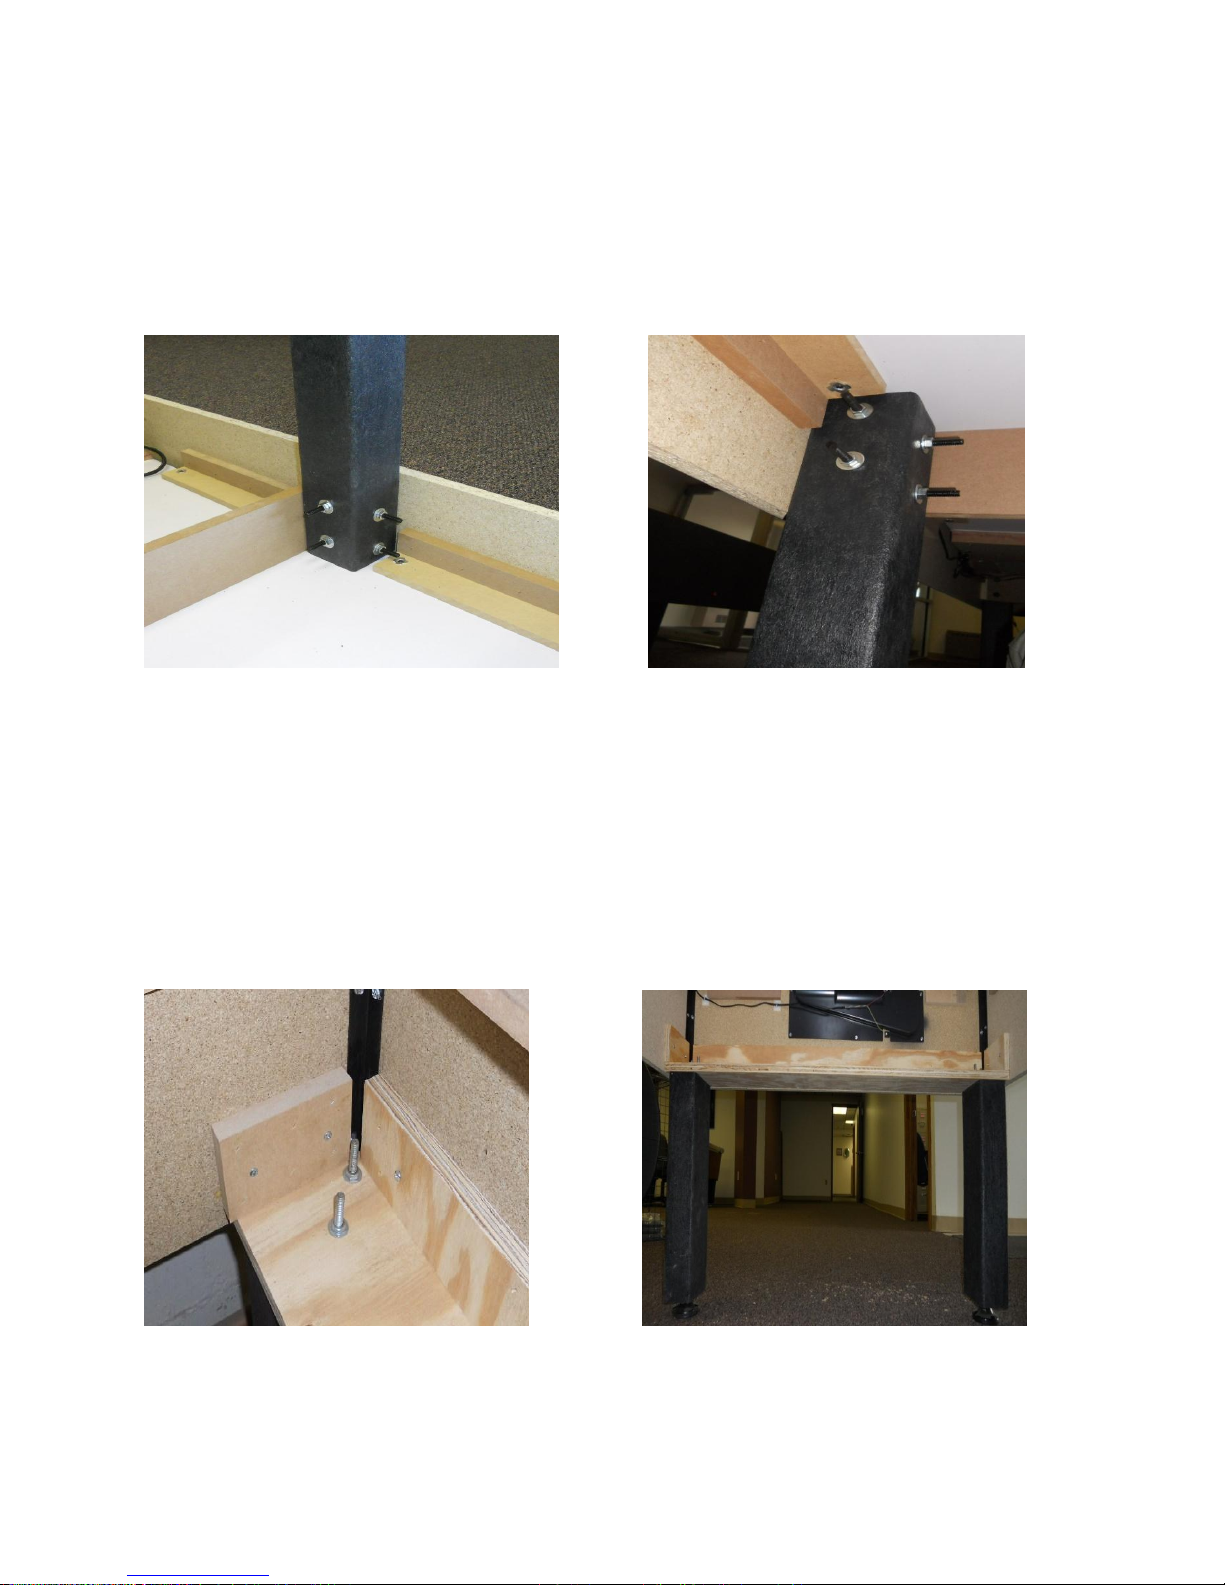
Step # 2 – Attach the Legs
Attach the legs using the enclosed carriage bolts, washers and nuts as seen below with a ½” wrench or
socket. For each leg attach two carriage bolts through the outside of the side apron and two through the
inside support frame. Tighten until bolt heads are snug with the table surface. Over tightening could
damage the side walls
(Note that the wide side of each leg should face the longest side of the table) Place Legs marked
(A) in position marked (A) and Legs marked (B) in position marked (B) then insert each leg‘s
threaded studs into and through the mounting pad holes. Then secure with a flat washer/splitlock washer/hex nut (as shown).
(Model # MGS-LB-WW1)
(Model # KGS-LB-EW1)
 Loading...