

Page 1

Gay 90’ s Whiz Bang
a
Instruction Manual
Model #2014
Part No. 47700
Revised June 1996
Cincinnati, OH 45241-4807 USA
Page 2
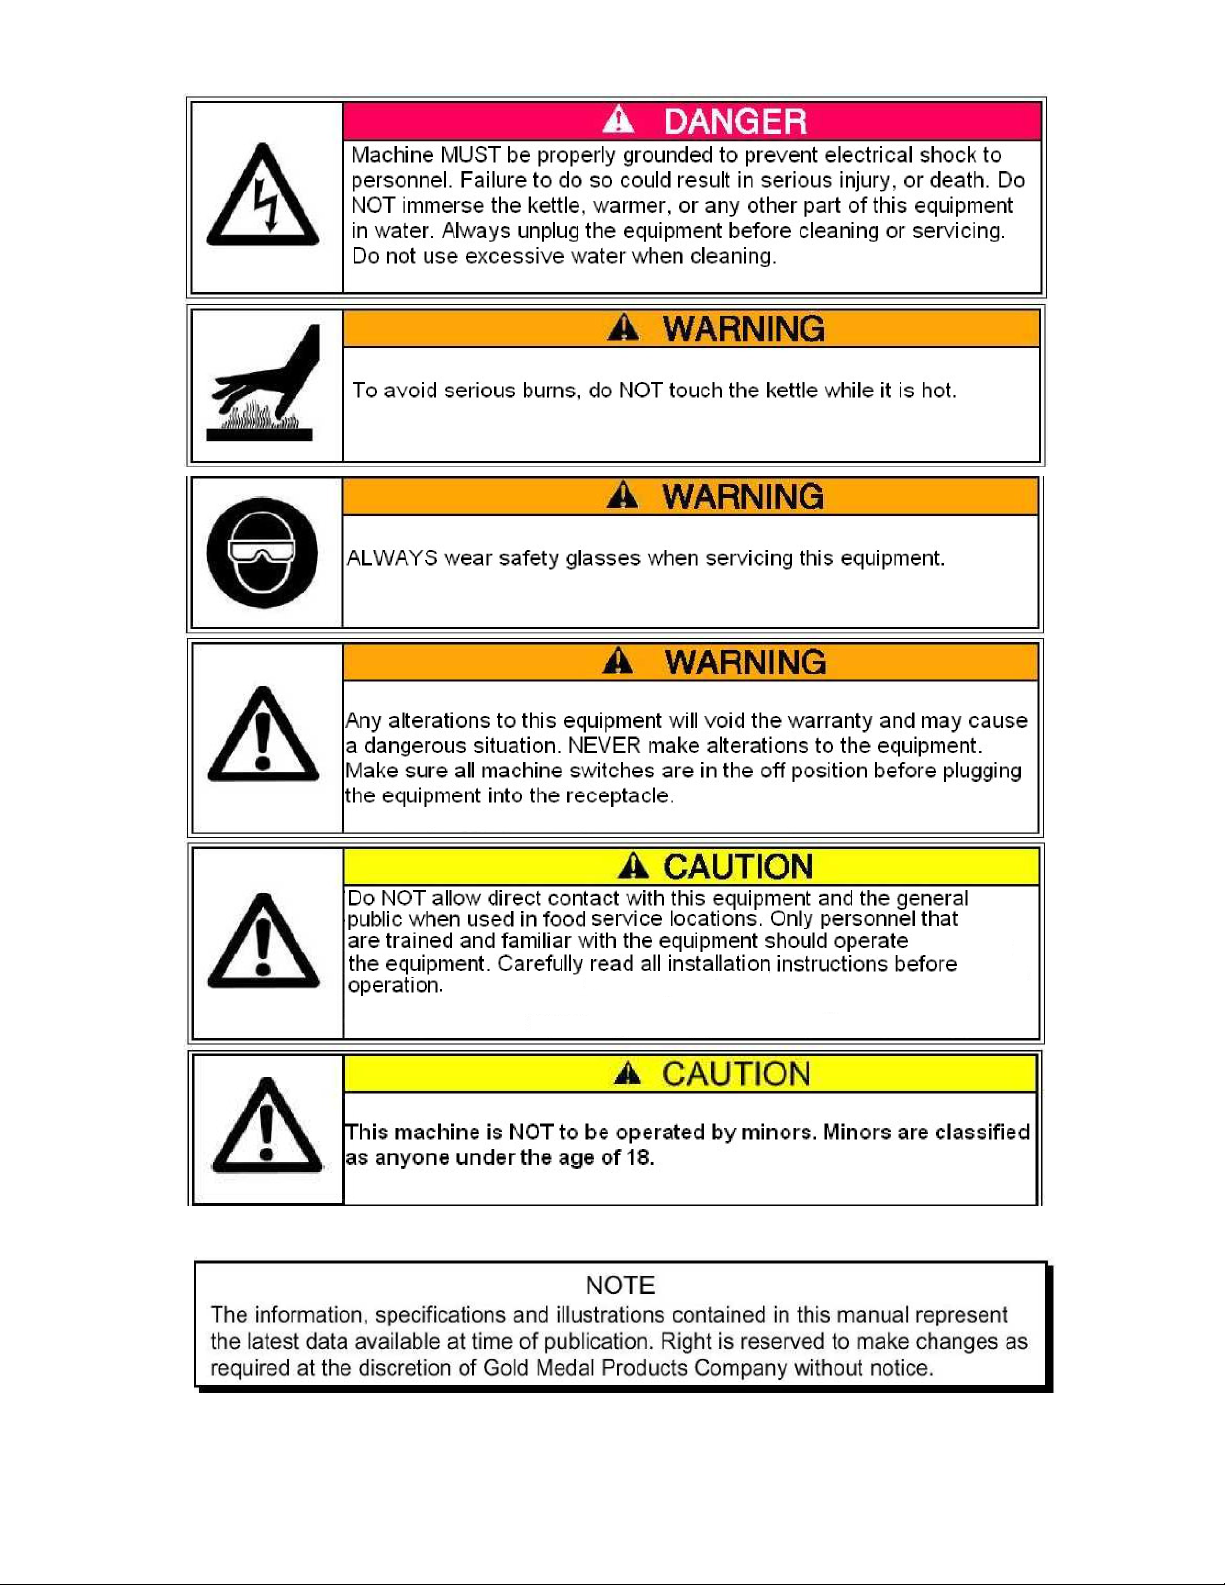
SAFETY PRECAUTIONS
a
Page 3

Gay 90's Whiz Bang
a
INST ALLA TION
Your new Antique Popcorn Machine is completely assembled. Remove all packing material and
tape before starting operations. If you have ordered a popcorn wagon, it is shipped in two sections.
After unpacking, set the top section onto a base or wagon.
ELECTRICAL REQUIREMENTS
Standard voltage for all domestic machines covered by this manual is 120 volt, 60 cycle, single
phase, A.C. current.
OPERA TING INSTRUCTIONS
CONTROLS AND THEIR FUNCTIONS
There are three switches on the popper.
LIGHT AND WARMER SWITCH
Turns on heat lamp and strip heater under the corn pan.
KETTLE MOTOR SWITCH
Turns on motor which drives the kettle agitator shaft.
KETTLE HEA T SWITCH
Turns on heat elements inside the kettle.
AMOUNT OF POPCORN AND OIL
The Gay 90's Antique Whiz Bang is equipped with a 12 oz. corn measure cup and a 4 oz. oil
measure cup.
We recommend flavored and colored coconut oil. Popcorn popped in coconut oil stays fresh
longer. Coconut oil does not leave the black deposits in your kettle like other oils.
CORN CHARGE - 12 ounces
OIL CHARGE - 4 ounches
FLAVACOL (Seasoning Salt) - 1½ to 2 teaspoons
POPPING INSTRUCTIONS
1. Turn KETTLE HEAT and KETTLE MOTOR switches "ON".
2. Make test pop with 3 kernels of corn and 1 oz. of popping corn. When kernels pop,
you are ready.
3. Load full corn and oil charge, plus Flavacol seasoning salt into the kettle.
4. When corn has popped, dump the kettle.
5. Repeat the cycle - start with #3. Always pop 3 to 5 batches for the best popcorn.
On the final kettle of corn, it is a good idea to turn the KETTLE HEAT switch "OFF", just as the
lids are forced open by the popping corn. This saves electricity, since there is plenty of heat in
the kettle, and also helps eliminate smoke and odor after you have stopped popping.
1
MODEL #2014
Page 4
Gay 90's Whiz Bang
a
CARE AND CLEANING
Disconnect main electrical power supply cord before cleaning to
eliminate the possibility of electrical shock.
Each time you finish a series of poppings, wipe the outside of the kettle with a soft cloth to remove
any oil drippage on the outside of the kettle. Don't let it BURN ON. After you finish popping for the
day , let the kettle cool until it is not too hot to handle, but still warm. Unplug the kettle and remove it
from the machine. With a cloth, wipe out the inside of the kettle, the kettle lids, the kettle crossbar,
and the outside of the kettle and underneath.
Cleaning the cabinet of your machine is easy - take a clean cloth and first wipe excess grease from
the glass. Wipe the outside of the machine too. Use any glass cleaner that is recommended for
cutting grease (NO ammonia). We find a wax cleaner to be good for cleaning the aluminum exterior
of your machine. Remove the old maid pan, empty and wipe clean.
2
MODEL #2014
Page 5
Gay 90's Whiz Bang
a
MAINTENANCE INSTRUCTIONS
THE FOLLOWING SECTIONS OF THIS MANUAL ARE INTENDED ONLY FOR QUALIFIED SERVICE PERSONNEL WHO
ARE FAMILIAR WITH ELECTRICAL EQUIPMENT. THESE ARE
NOT INTENDED FOR THE OPERATOR.
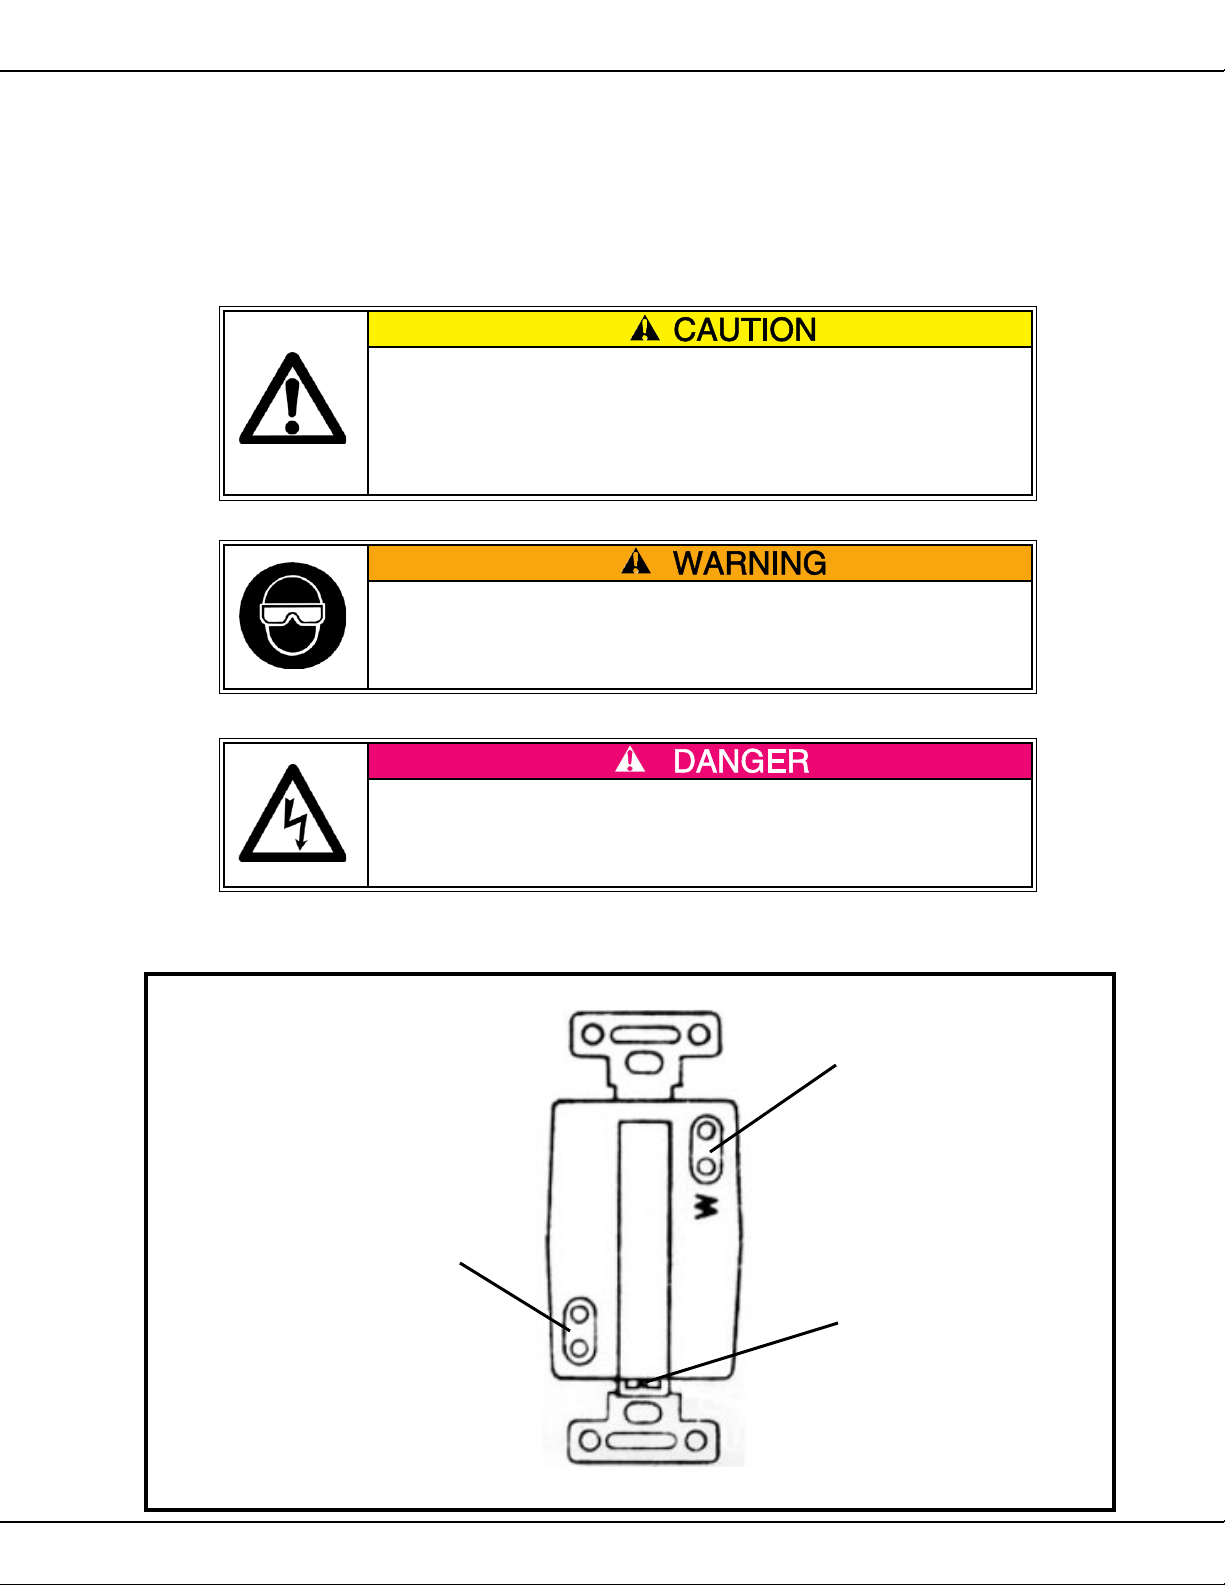
Adequate eye protection must be used when servicing this equipment to prevent the possibility of injury.
Do NOT immerse the kettle, warmer, or any other part of this
equipment in water.
Unplug your machine before servicing.
WIRING THE 20 AMP RECEPTACLE
Red or Black Wire
(Hot Line)
White Wire
Green Wire
(Ground)
REAR VIEW
3
MODEL #2014
Page 6
Gay 90's Whiz Bang
a
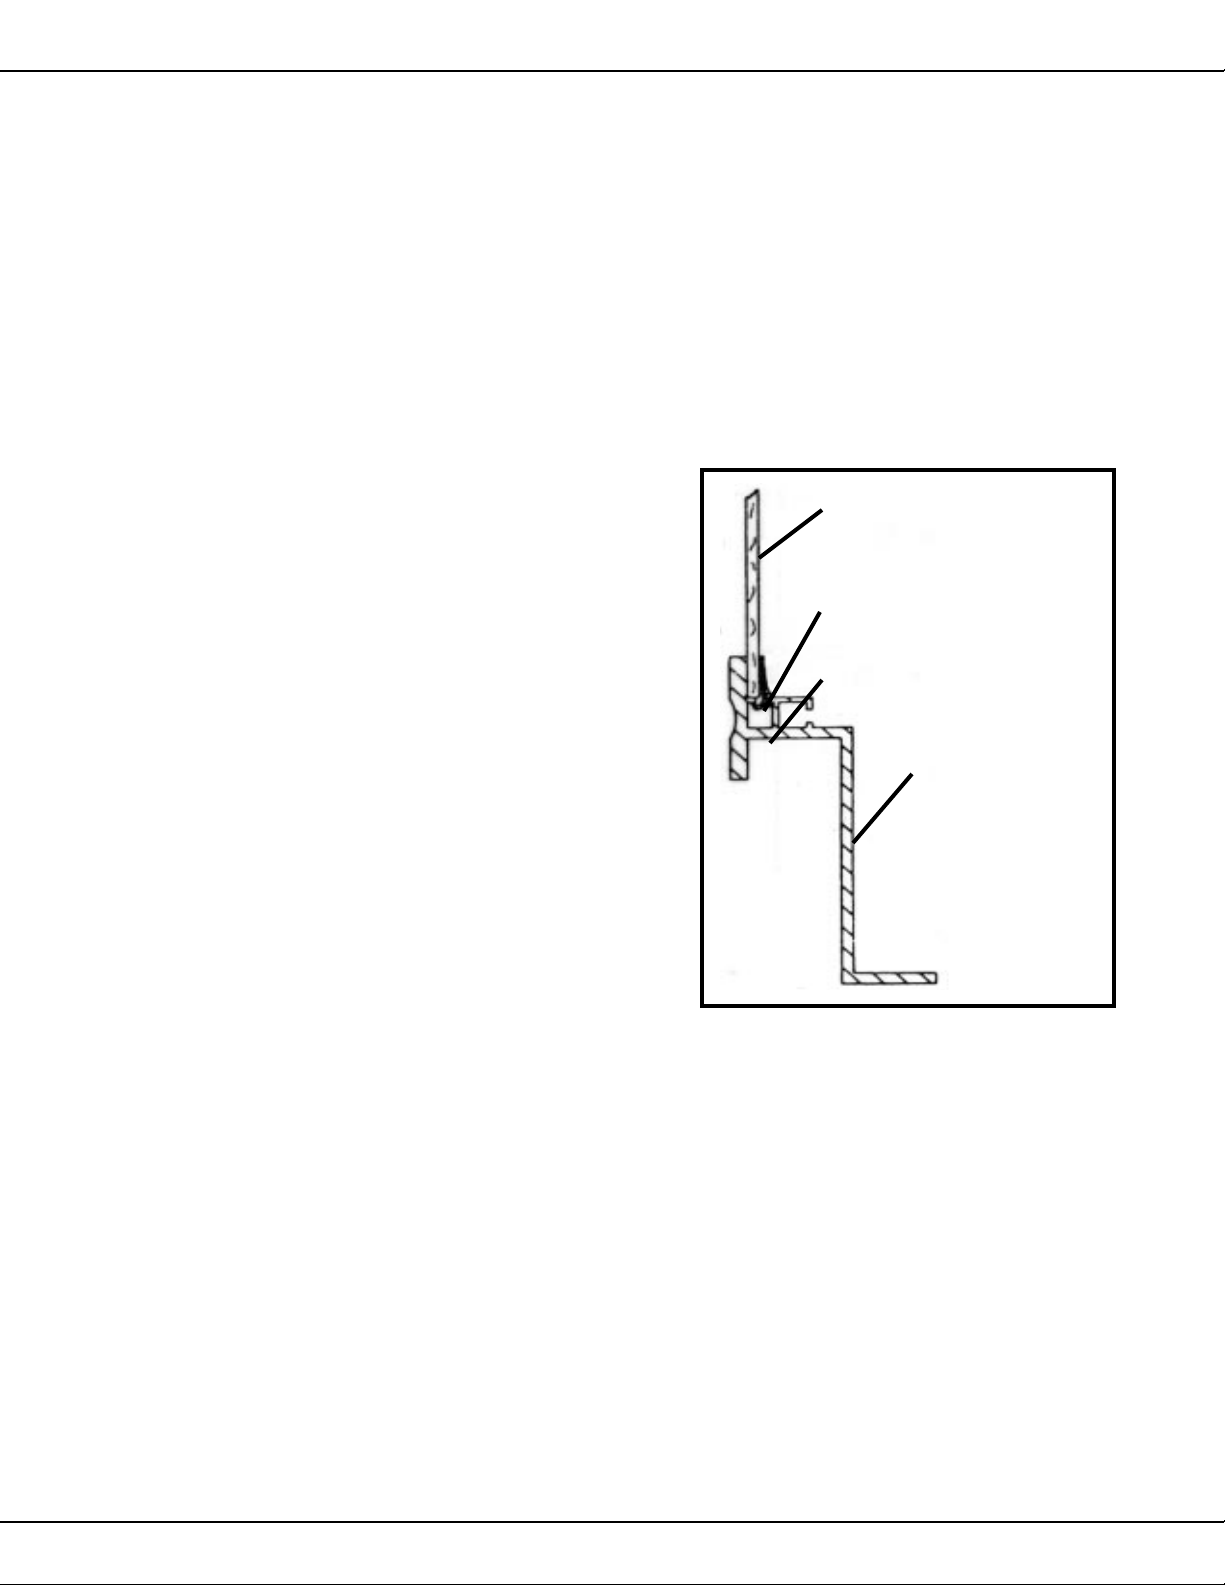
REPLACING BROKEN GLASS
Should you accidentally break a panel of glass, it can be replaced very easily without
dissassembling the popper.
1.Remove all loose pieces of glass.
2.Remove all vinyl strips from around the glass to be replaced. To do this, start the vinyl strips
out of the channels with a knife point or similar tool. Always start at a corner. When enough
vinyl protrudes, grasp it with the fingers and carefully pull it out. Set it aside as it must be
reused.
3.Carefully remove the rest of the broken glass.
4.Apply decals to the new glass panel.
5.Maneuver the new glass into position. Try not to
let the glass slip down into the opening
in the extrusion from which the vinyl was re
moved. The glass should set on the small
ledge as shown in the illustration below. If the
glass does slip down into the opening, it will
be necessary to raise the glass. Use suction
cups, or a similar device.
6.Replace the vinyl, starting at the bottom edge of
the glass. The vinyl is easily installed by
starting at one corner and working it into the
channel inch by inch. Apply pressure on the
vinyl at point "A" as shown in the illustration to
force it into the channel. A dull blunt object
such as the eraser end of a pencil or a small
round piece of wood are excellent tools.
Glass
Vinyl (retain)
Point "A"
Bottom
Frame
Assembly
HOW TO ORDER REPAIR PARTS
1. Identify the worn or broken part by checking it with the illustrations and parts list.
2. When ordering parts, include part number, part name, and quantity required.
3. Include you model name and machine serial number (found on nameplate) with your order.
4. Address orders to:
PARTS DEPARTMENT
GOLD MEDAL PRODUCTS CO.
10700 Medallion Drive
CINCINNATI, OHIO 45214
or, place orders at:
( 513 ) 769-7676
Fax: (513) 769-8500
E-mail: goldme19@eos.net
4
MODEL #2014
Page 7

FRONT VIEW
a
1-3 1-4 1-5 1-6
Gay 90's Whiz Bang
1-7
1-2
1-1
1-8
1-9
1-10
1-111-121-14 1-13
5
MODEL #2014
Page 8

PARTS LIST - FRONT VIEW
a
Item No. Part No. Description
1-1 47309 Front Corner Post (2 Required)
1-2 47483 Lower Top Frame
47429 U-Clip (6 Required)
1-3 47487 Upper Top Frame
1-4 47401 Top Left Ornament
1-5 47494 Top Inspection Cover
1-6 47439 T op Right Ornament
1-7 47047 Receptacle, Heat Lamp
1-8 41671 Reflector Flood
49098 Lamp Shield (Not Shown)
41452 Warning, Max Lamp
1-9 47592 Glass Retainer, Rear
1-10 47598 Bottom Corn Pan Assembly 120V
47653 Cover, Corn Pan Conduit
47562 Molded Wire Harness, Warmer
47565 Corner Cover
1-11 47328 Glide, Delrin Foot (4 Required)
1-12 47490 Bottom Frame
1-13 47026 Grommet, Power Supply Cord
1-14 47580 Power Supply Cord with Plug
47603 Power Supply (Model 2014C Only)
47564 Decal, Front Glass
47145 A-Scoop
47148 Corn Measure Cup
47149 Oil Measure Cup
47679 14.7 cc Measure
49219 Receptacle Assembly
Gay 90's Whiz Bang
6
MODEL #2014
Page 9

Gay 90's Whiz Bang
a
REAR VIEW
2-1 2-2 2-3 2-4 2-5 2-6 2-7 2-8 2-9
2-10 2-11 2-12 2-13 2-14 2-15 2-16 2-17 2-18
7
MODEL #2014
Page 10

PARTS LIST - REAR VIEW
a
Item No. Part No. Description
2-1 47262 Hanger Arm, Front
2-2 47559 Magnetic Catch Mount Bracket
2-3 47561 Magnetic Catch
2-4 47480 Name / Instruction Plate
47249 Nameplate (Model 2014 Only)
2-5 47263 Hanger Arm, Rear
2-6 77641 Switch Plate
2-7 47600 Plexiglass Door
2-8 41013 Knob, Door
2-9 47237 Striker, Door
2-10 47056 Gear Box
47059 Spur Gear
47058 Flange Bushing
2-11 47311 Corner Post, Left Rear
2-12 47593 Glass Retainer, Front
2-13 47336 Old Maid Pan
2-14 47386 Bottom Cover Assembly
2-15 47322 Hinge, Male Section
2-16 47337 Drop Panel Assembly
2-17 41349 Male Hinge, Short Right
41350 Male Hinge, Short Left
41351 Female Hinge, Long Right
41352 Female Hinge, Long Left
Gay 90's Whiz Bang
8
MODEL #2014
Page 11

TOP VIEW
a
Item No. Part No. Description
3-1 47777 Half Roof Weld Assembly
3-2 47873 Motor Plate
3-3 47057 Kettle Drive Motor
3-4 49219 Receptacle Assembly
3-5 41741 Pilot Light
3-6 47201 Switch, Kettle Heat
3-7 41672 Switch, Light and Kettle Motor
47364 Circuit Breaker (Not Shown)
3-8 47208 Terminal Block
47282 Snap Bushing #UB-625
3-9 47236 Snap Bushing #SB-500-6
47343 Exhaust Blower
47397 Elbow, Exhaust Blower
Gay 90's Whiz Bang
3-1 3-2 3-3 3-4 3-5
3-6
3-7
3-8
3-9
9
MODEL #2014
Page 12

PARTS LIST - KETTLE TOP VIEW
a
Item No. Part No. Description
4-1 47107 "C" Ring, Needle Bearing
4-2 47106 Needle Bearing
4-3 47098 Agitator Assembly
4-4 47326 Set Collar, Agitator Shaft
4-5 47097 Bushing, Cross Bar
4-6 4 711 1 Lid Lifter, Kettle
4-7 47120 Knob, Lid Lifter
4-8 47059 Spur Gear
4-9 4 7 113 Kettle Lid, Rear
4-10 47095 Kettle Crossbar with Bushing
4-11 47154 Warning Plate, "Do Not Immerse"
4-12 47325 Set Collar, Dump Handle
4-13 47247 Kettle Lid, Front with Lifter
4-14 47109 Dump Handle w/ Knob & Collar
4-15 47110 Knob, Dump Handle
Gay 90's Whiz Bang
4-1
4-2
4-3
4-4
4-5
4-6
4-8
4-9
4-10
4-11
4-12
4-13
4-14
4-15
4-7
10
MODEL #2014
Page 13

PARTS LIST - KETTLE BOTTOM VIEW
a
Item No. Part No. Description
5-1 47393 Junction Box, Kettle
5-2 47394 Cover, Junction Box
5-3 47867 Kettle Lead Assembly
47876 Plug Assembly
5-4 47087 Thermostat Retainer
5-5 47085 Heat Element Retainer
5-6 47082 Thermostat
5-7 47216 Shunt Bar (2 Required)
5-8 47375 Kettle Shell
5-9 47752 Kettle Casting
5-10 47089 Heat Element, 660 Watt
5-11 47051 Kettle Stud with Nuts (4 Required)
5-12 47285 Solid Kettle Wire
5-13 47090 Heat Element, 1050 Watt
47882 Kettle Bottom Only
47883 Kettle Complete
Gay 90's Whiz Bang
5-1 5-2 5-3 5-4 5-5 5-6 5-7
5-8 5-9 5-10 5-11 5-12 5-13
11
MODEL #2014
Page 14

PARTS LIST - 28" POPCORN CART
a
Manufactured Manufactured
before 8/88 after 8/88
Part No. Part No. Description
13170 13170 Fastener Pack
47530 47530 Handle
47532 47532 Leg Support Bracket, Red
47534 47534 Leg, Red
47537 47537 Leg Tie Strip, Red
47538 47538 Bracket, Handle Bar
47533 52032 Axle
47540 54063 Front Axle Mount Bracket, Red
47541 54064 Rear Axle Mount Bracket, Red
37033 37033 Strip Grommet
47000 47000 Warranty Registration Card
47535 47535 Base Assembly, Red
47539 47539 Shipping Carton
47552 47552 Nameplate
47713 47713 Instruction Sheet
47748 47748 Label, N.S.F.
47527 52030 Wheel, 24" Yellow
76242 76242 M.E.A. Dataplate
Gay 90's Whiz Bang
12
MODEL #2014
Page 15

PARTS LIST - 4 WHEEL WAGON
a
Manufactured Manufactured
before 8/88 after 8/88
Part No. Part No. Description
13136 13136 Shipping Carton
13171 13171 Fastener Pack
47530 47530 Handle
47538 47538 Bracket, Handle Bar
47579 47579 Tie Plate, Red
47533 52032 Axle
47540 54063 Front Axle Mount Bracket, Red
47541 54064 Rear Axle Mount Bracket, Red
47000 47000 Warranty Registration Card
47573 47573 Base Assembly, Red
47648 47648 Packing Inserts
47686 47686 Counter Top, Formica
47713 47713 Instructon Sheet, Carts
47527 52030 Wheel, 24" Yellow
76242 76242 M.E.A. Dataplate
Gay 90's Whiz Bang
13
MODEL #2014
Page 16

ELECTRICAL SCHEMATIC
a
Gay 90's Whiz Bang
14
MODEL #2014
Page 17

WARRANTY
WE WARRANT to the original purchaser the Gold Medal equipment sold by us to
be free from defects in material or workmanship under normal use and service. Our
obligation under this warranty shall be limited to the repair or replacement of any
defective part for a period of six (6) months from the date of sale to the Original
Purchaser with regard to labor and two (2) years with regard to parts and does not
cover damage to the equipment caused by accident, alteration, improper use, voltage,
abuse, or failure to follow instructions.
THIS WARRANTY IS IN LIEU OF ALL OTHER WARRAN TIES EXPRESSED
OR IMPLIED, AND OF ALL OTHER OBLIGATIONS OR LIABILITIES ON OUR
PART, INCLUDING THE IMPLIED WARRANTY OF MERCHANTIBILITY.
THERE ARE NO WARRANTIES WHICH EXTEND BEYOND THE DESCRIPTION
ON THE FACE HEREOF. We neither assume, nor authorize any other person
to assume for us, any other obligation or liability in connection with the sale of said
GOLD MEDAL equipment or any part thereof.
The term “Original Purchaser” as used in this warranty shall be deemed to mean that
person, firm, association, or corporation who was billed by the GOLD MEDAL
PRODUCTS COMPANY, or their authorized distributor for the equipment.
THIS WARRANTY HAS NO EFFECT AND IS VOID UNLESS THE ORIGINAL
PURCHASER FIRST CALLS GOLD MEDAL PRODUCTS COMPANY AT 1-800543-0862 TO DISCUSS WITH OUR SERVICE REPRESENTATIVE THE
EQUIPMENT PROBLEM, AND, IF NECESSARY, FOR INSTRUCTIONS
CONCERNING THE REPAIR OR REPLACEMENT OF PARTS.
GOLD MEDAL PRODUCTS COMPANY
10700 Medallion Drive
Cincinnati, Ohio 45241-4807 USA
www.gmpopcorn.com
Phone: 1-800-543-0862
Fax: 1-800-542-1496
© The text, descriptions, graphics and other material in this publication are the proprietary
and exclusive property of Gold Medal Products Company and shall not be used, copied,
reproduced, reprinted or published in any fashion, including website display, without its
express written consent.
 Loading...