

Page 1
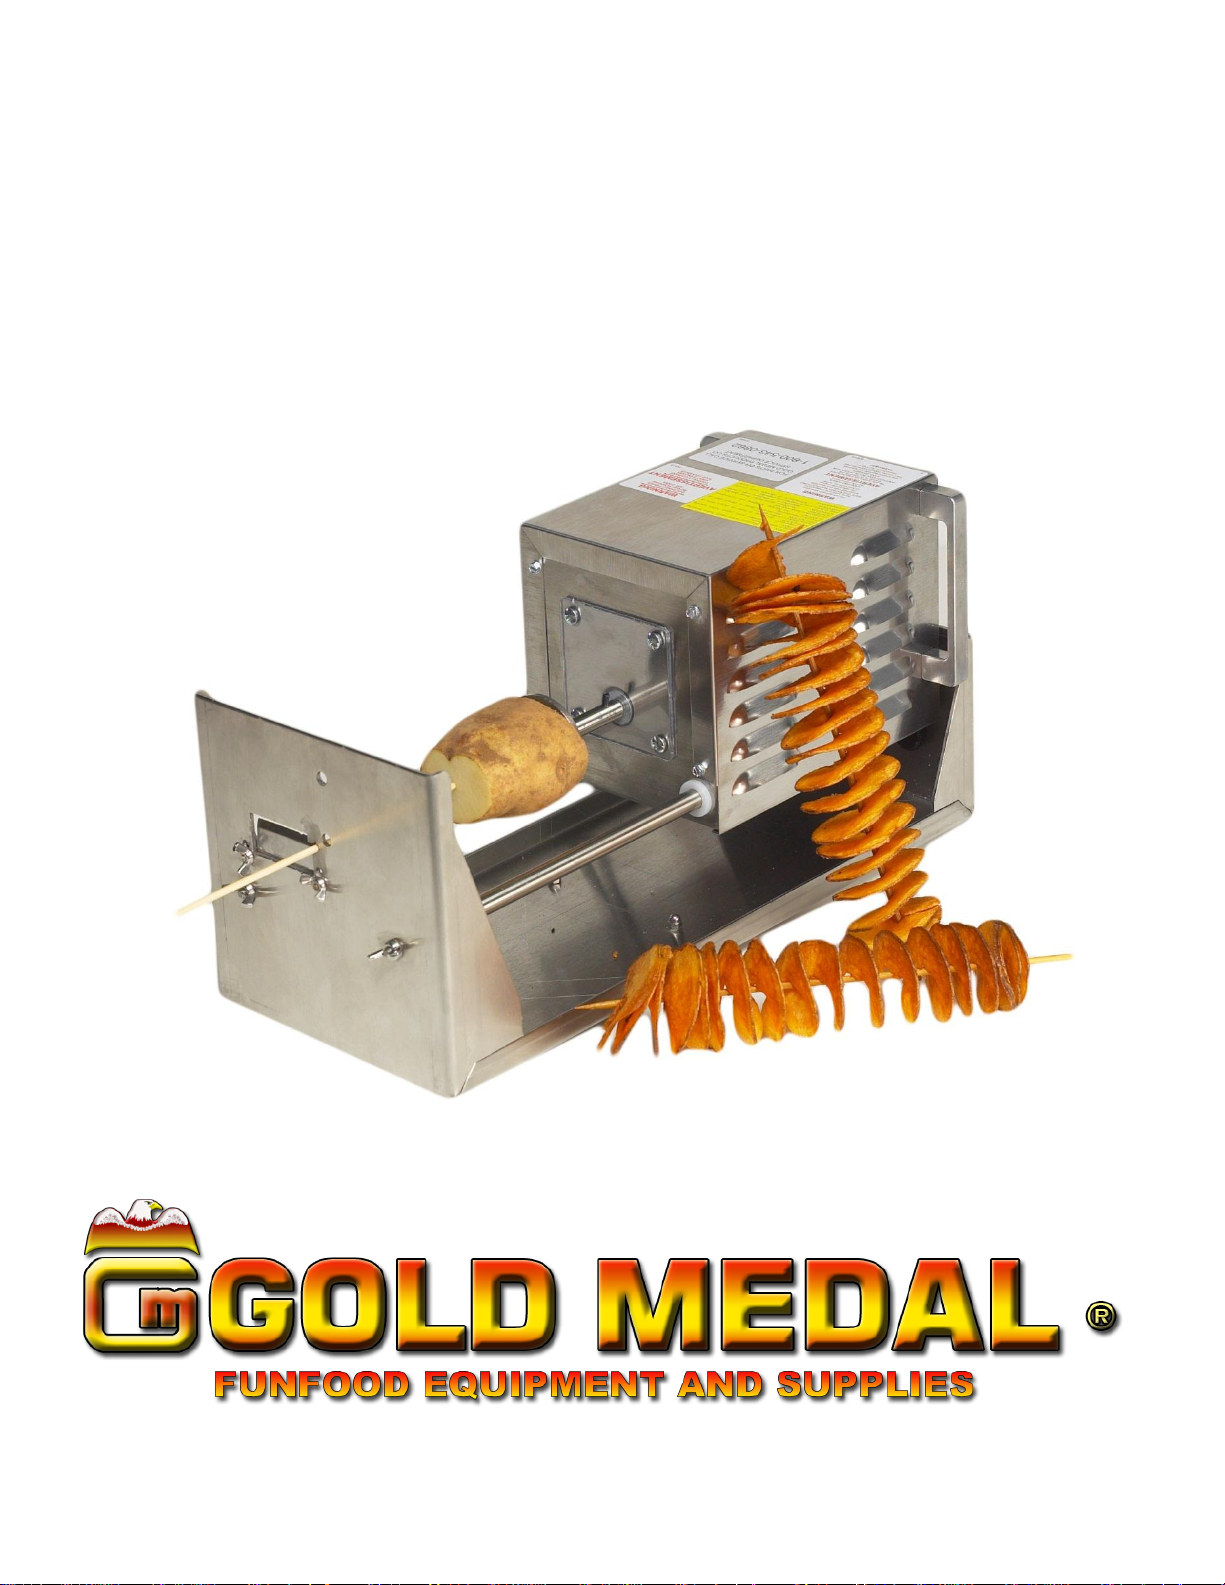
SPIRAL SLICER
Instruction Manual
Model No. 5280, 5280M, 5280MX
Part No.82876
Cincinnati, OH 45241-4807 USA
Page 2
Spiral Slicer Model No. 5280, 5280M, 5280MX
SAFETY PRECAUTIONS
http://www.gmpopcorn.com Page 2
Page 3
Spiral Slicer Model No. 5280, 5280M, 5280MX
INSTALLATION INSTRUCTIONS
INSPECTION OF SHIPMENT
Unpack all cartons and check thoroughly for any damage that may have occurred during transit. Damage
claims should be filed immediately with the transportation company.
SETUP
Your new Spiral Slicer is completely assembled and tested at the factory. Remove all packing material and
tape before starting operation.
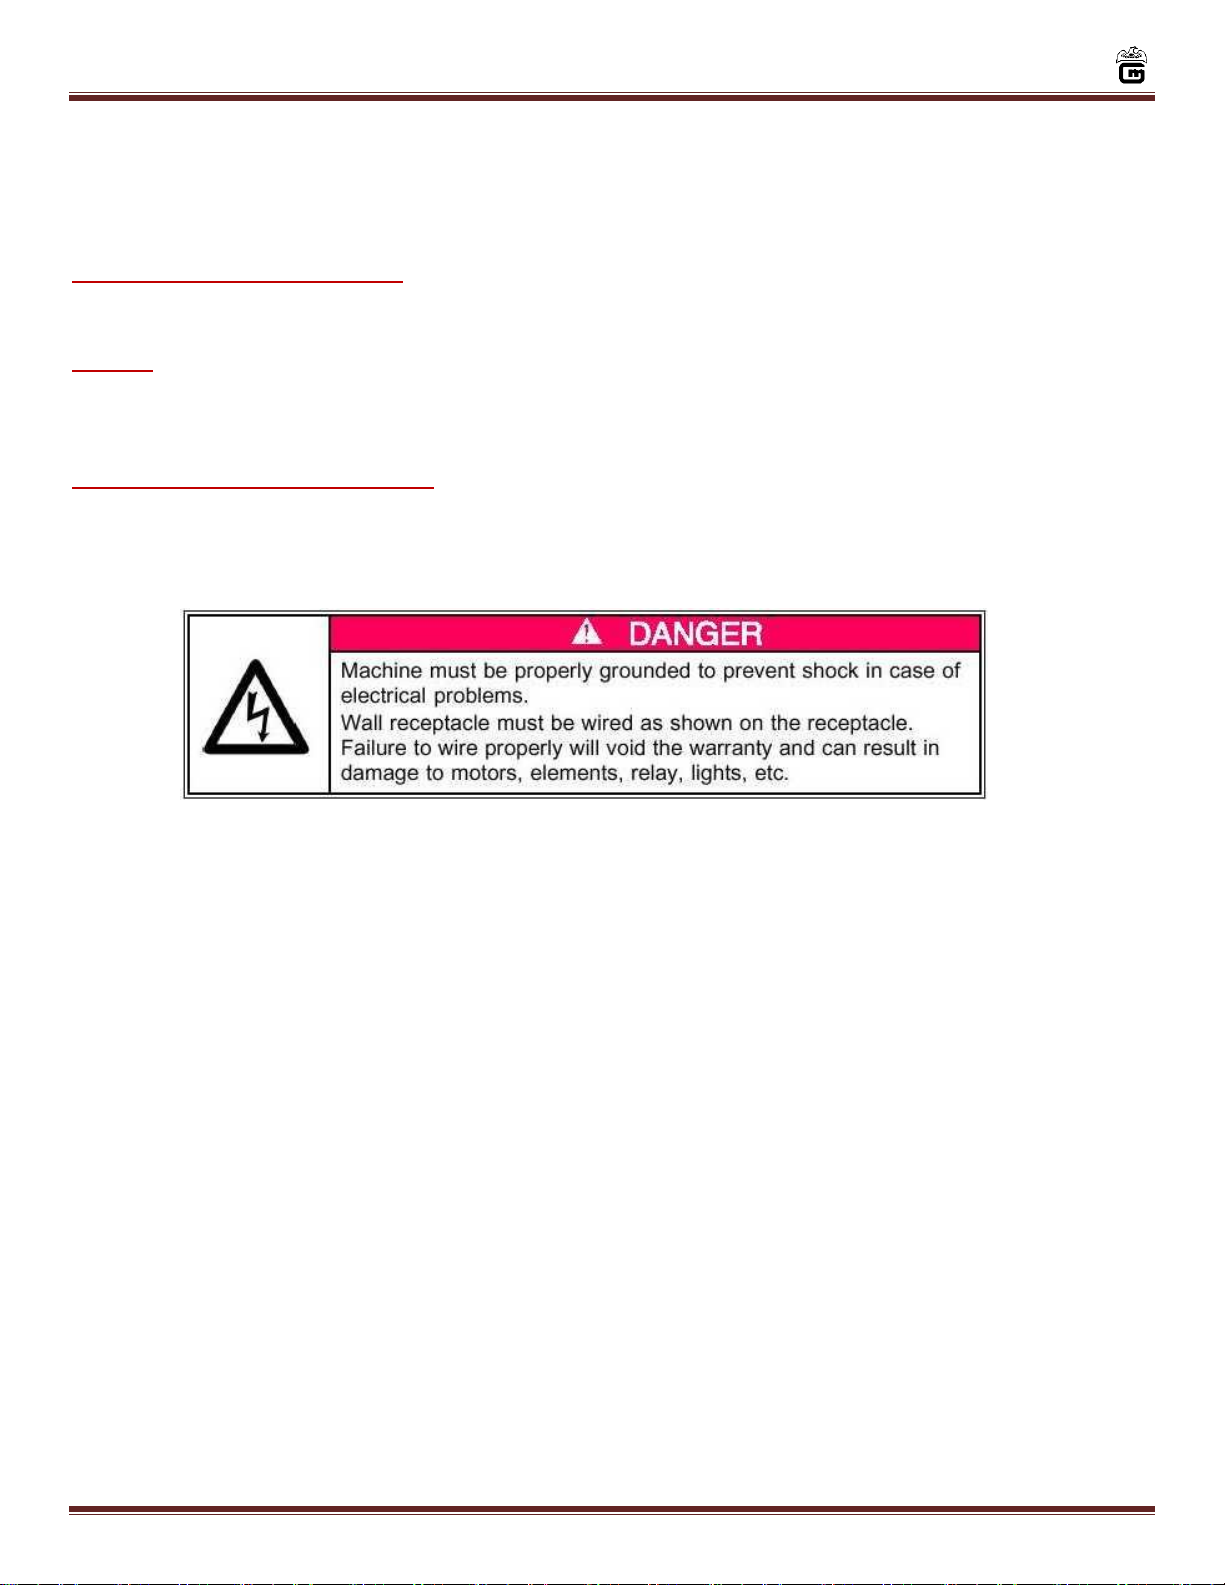
ELECTRICAL REQUIREMENTS
5280M – 120V 60Hz
5280MX – 230V 50Hz
Your electrician must furnish sufficient power for proper machine operation. We recommend this slicer
be on a dedicated and protected circuit. Failure to wire properly will void the warranty and may result in
damage to the machine.
It is Gold Medal® Products Company’s recommendation that this machine be plugged directly into a wall
outlet. The use of extension cords is not recommended due to safety concerns, and may cause sacrificed
and/or reduced performance.
http://www.gmpopcorn.com Page 3
Page 4

Spiral Slicer Model No. 5280, 5280M, 5280MX
OPERATING INSTRUCTIONS
(Pg. 4-5)
SLICING BLADES
Blade ‘T’ – A thin slicing blade for ribbon fries stamped ‘T’ (Part No. 82827).
This blade has a slight bend in it and will make slices approximately 1/8” inch thick. Use this blade with
the slicer pin to make ribbon fries.
Blade ‘S’ – A thin slicing blade for Saratoga swirls stamped ‘S’ (Part No. 63640).
This blade has a slight bend in it and will make slices approximately 1/8” inch thick. Use this blade to
make Saratoga swirls.
Blade ‘M’ – A medium slicing blade, stamped ‘M’ (Part No. 82826).
This blade has a slight bend in it and will make slices approximately 3/16” inch thick. Use this blade with
the medium shredding blade and slicer pin to make hash brown type continuous strands for hash browns
or spider web potato pancakes.
Blade ‘C’ – A coarse slicing blade, stamped ‘C’ (Part No. 82825).
This blade has a 12 degree bend and will make 1/4” inch slices. This blade has already been installed in
the unit. This blade along with the coarse shredding blade (also installed) and slicer pin (also installed)
are used to make spiral fries. Or use this blade and slicer pin alone to make the exploding onion.
SHREDDING BLADES
Medium Shredding Blade (Part No.82818)
The 10 cutting teeth identify this blade. Use with medium slicing blade to make items listed in 1b.
Coarse Shredding Blade (Part No. 82819)
The 5 cutting teeth identify this blade. This blade is installed in the unit and is used with the coarse
slicing blade to make spiral fries.
NOTE: The shredding blades must be used with a slicing blade. The slicer pin weldment is always used
except for making Saratoga swirls
CHANGING SLICER BLADES.
The slicing blade is secured with flange or hex nuts and the shredding blade is secured by wing nuts. To
change the blades, simply remove the nuts, remove the previously used blade, install the next blade and
secure with the wing nuts.
NOTE: The slicing blade is always the horizontal blade and the shredding blade is always vertical.
Installation of the blades in any other manner will result in the unit being non-functional.
http://www.gmpopcorn.com Page 4
Page 5

Spiral Slicer Model No. 5280, 5280M, 5280MX
OPERATING INSTRUCTIONS
(Continued)
USING THE SPIRAL SLICER
Adjust the stop collar to allow the drive plate pins to come close but not touch the cutting blades.
FOR SARATOGA SWRILS
Remove the shredding blade and slicer pin weldment. The slicing blade must be positioned to the high
side of the blade mounting holes for proper cutting of Saratoga swirls. If the Saratoga swirls are not
loading onto the skewer properly, check the slicing blade mounting and adjust it to its maximum height.
Use the “S” blade when making Saratoga swirls.
NOTE: Be sure the adjustable set collar is positioned to prevent the drive plate from engaging the cutting
blade.
1. Cut about a 1/2" piece of the potato from one or both ends.
2. Insert wood skewer (Part No. 4159) into potato until it protrudes from opposite end of potato
about 1/2". Use the Potato Pierce (Part No. 63530) to create a hole through the potato.
3. Feed the long, empty portion of the skewer through the open slot next to the cutting blade.
4. Place the short, half-inch end of the skewer protruding from the potato into the hole in the drive
plate and firmly seat the potato onto the spikes of the drive plate.
5. Move the potato and drive assembly toward the blades.
6. Determined by your model, start rotating the crank arm of the manual slicer in a clockwise
manner or press the two red buttons on the motorized slicer.
7. Advance the potato towards the blade until it is fully engaged with the slicing blade.
8. Firmly push and/or crank until the drive assembly reaches the set collar. This should leave a
small slice of potato on the drive plate.
FOR ALL OTHER APPLICATIONS
1. Cut about a 1/2" piece of the potato from each end.
2. Firmly seat the potato or vegetable of choice on the drive plate.
3. Move the potato and drive assembly toward the blades.
4. Insert the center pin into the potato.
NOTE: Do not bury the center pin, shredding blade or cutting blade into the potato. This will
result in poor performance!!
5. Start rotating the crank arm in a clockwise manner or start the motor.
6. Slowly advance the crank arm, or power unit until the potato is fully engaged in the blade system
being used.
7. Firmly push and crank until potato is fully used.
TIPS FOR OPTIMAL PREFORMANCE
1. Always make sure the blades are firmly seated on the machine.
2. Make sure any wing nuts that hold on the slicing blades are vertical.
3. Do not push too hard. Push with a steady motion letting the machine and blades do the work.
http://www.gmpopcorn.com Page 5
Page 6

Spiral Slicer Model No. 5280, 5280M, 5280MX
MOUNTING INSTRUCTIONS
SUCTION CUP MOUNTING
ALL models 5280, 5280M and 5280MX are supplied with suction cups. This enables the units to be
mounted to any smooth unpolished surface.
SEMI_PERMANENT MOUNTING
The semi-permanent mounting angle comes attached to your slicer with two clamping knobs. To use this
mounting system first remove the suction cups from the bottom of the unit. Next bolt the mounting angle
to the unit it will be used on; and finally reattach the unit to the mounting angle with the clamping knobs.
PERMANENT MOUNTING
All models 5280, 5280M and 5280MX can be permanently mounted to any surface.
NOTE: Permanent mounting of this machine may be in violation of health codes in your area and is not
recommended. Check with your local health department before mounting.
CLEANING INSTRUCTIONS
DAILY CLEANING
Wipe all components down with warm soapy water. Make sure to remove all excess food from the blade
and crank. DO NOT submerge 5280M or 5280MX in water. This can cause electrical shock and damage to
your electrical components.
http://www.gmpopcorn.com Page 6
Page 7

Spiral Slicer Model No. 5280, 5280M, 5280MX
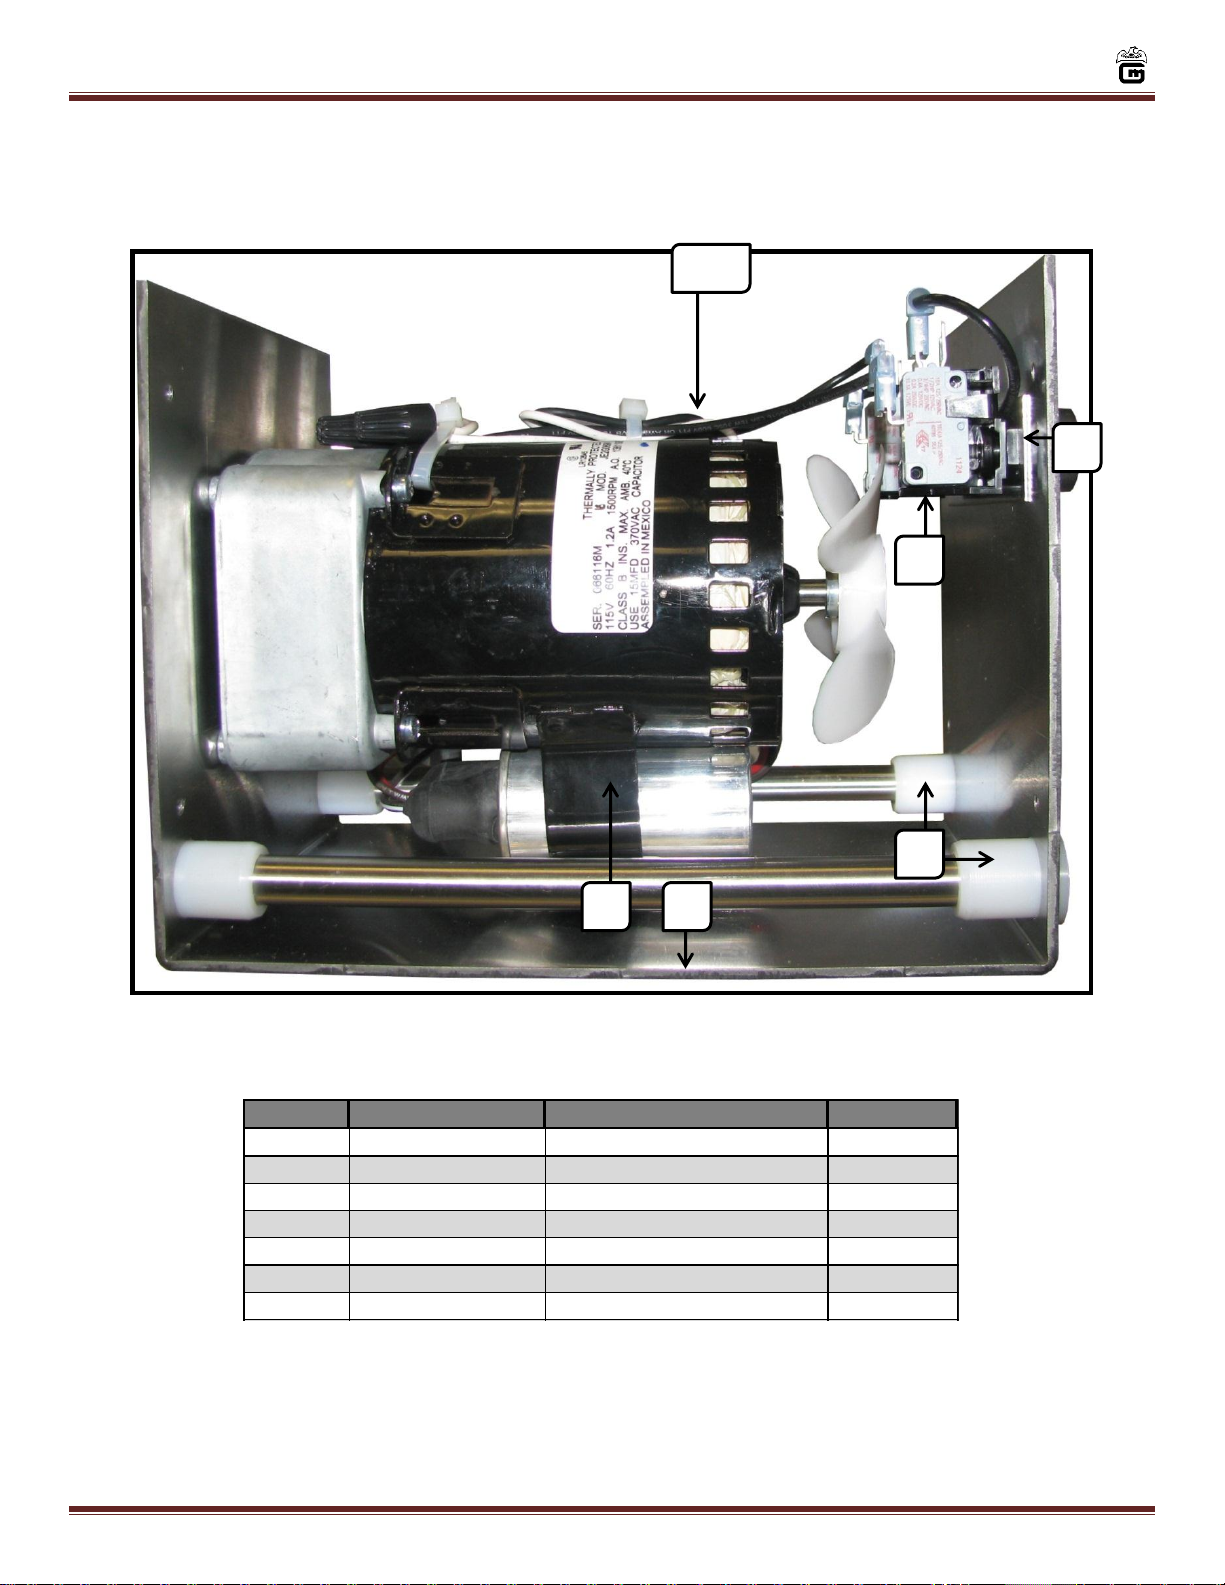
MAINTENANCE INSTRUCTIONS
http://www.gmpopcorn.com Page 7
Page 8

Spiral Slicer Model No. 5280, 5280M, 5280MX
ORDERING SPARE PARTS
1. Identify the worn or broken part by checking it with the illustrations and parts list.
2. When ordering parts, include part number, part name, and quantity required.
3. Include your model name and machine serial number (found on nameplate) with your order.
4. Address orders to:
Parts Department
Gold Medal® Products Co.
10700 Medallion Drive
Cincinnati, Ohio 45241-4807
Or place orders at:
(800) 543-0862
(513) 769-7676
Fax: (513) 769-8500
E-mail: info@gmpopcorn.com
www.gmpopcorn.com
http://www.gmpopcorn.com Page 8
Page 9

Spiral Slicer Model No. 5280, 5280M, 5280MX
1, 2, 3
4 5 6 7 8 9 10
11
12
13
14
15, 16
17, 18, 19, 20
21
PARTS BREAKDOWN (Pg. 9-10)
Model 5280
http://www.gmpopcorn.com Page 9
Page 10

Spiral Slicer Model No. 5280, 5280M, 5280MX
Number Part No. Description Quantity
1 12368 Knob, Handwheel 1
2 12369 Tube Hand Wheel Pivot 1
3 12384 1/4-20 x 2 PAN HD PH M/S 1
4 82803 Crank Arm 1
5 82810 Support Stand Weldment 1
6 82859 Stop Angle 1
7 82864 Clamping Knob 2
8 12385 8-32 Acorn Nut SS 4
9 12466 1/4-20 Wing Nut 4
10 82805 Front Support Rod 2
11 82811 Driver 1
12 82816 Drive Plate 1
13 82808 Assembly Plate Weldment 1
14 44017 Rubber Suction Feet 4
15 82818 Medium Shred Blade 1
16 82819 Coarse Shred Blade 1
17 82827 Thin Slicing Blade "T" 1
18 63640 Saratoga Blade "S" 1
19 82826 Medium Slicing Blade "M" 1
20 82825 Coarse Slicing Blade "C" 1
21 82814 Slicer Pin Weldment 1
22 63530 Potato Pierce 1
23 89126 8-32 Wing Nut 2
21
20
16
15
17
18
19
22
23
PARTS BREAKDOWN (Continued)
Model 5280
http://www.gmpopcorn.com Page 10
Page 11

Spiral Slicer Model No. 5280, 5280M, 5280MX
Number Part No. Description Quantity
1 82859 (ALL) Stop Angle 1
2 82864 (ALL) Clamping Knob 4
3 82862 (ALL) Base Pan 1
4 82877 (ALL) Dirt Seal (Front Face) 1
5 82861 (ALL) Slide 2
6 44017 (ALL) Suction Cup Feet 6
7 12385 (ALL) Acorn Nut 6
8 67069 (ALL) Handle 2
9 82857 (ALL) Motor Cover 1
10 42369 (5280MX) Export Power Supply Cord 1
11 22038 (5280M) Lead-In Cord, 15A Plug 1
12 76026 (ALL) Strain Relief 1
Number Part No. Description Quantity
13 38971 (ALL) Momentary Switch 2
14 82816 (ALL) Drive Plate 1
15 82818 (ALL) Medium Shred Blade 1
16 82819 (ALL) Coarse Shred Blade 1
17 82827 (ALL) Thin Slicing Blade "T" 1
18 63640 (ALL) Saratoga Blade "S" 1
19 82826 (ALL) Medium Slicing Blade "M" 1
20 82825 (ALL) Coarse Slicing Blade "C" 1
21 82814 (ALL) Slicer Pin Weldment 1
22 69815 (ALL) 1/2 IN I.D. Split Collar 2
23 89126 (ALL) 8-32 Wing Nut (Not Shown) 2
24 12466 (ALL) 1/4-20 Wing Nut (Not Shown) 2
25 82860 (ALL) Motor Coupling (Not Shown) 1
1 2 3 5 6
7 8 9
10, 11
12
13
14
15, 16
17, 18, 19, 20
21
22
4
25
PARTS BREAKDOWN (Pg. 11-12)
Model 5280M, 5280MX
http://www.gmpopcorn.com Page 11
Page 12
Spiral Slicer Model No. 5280, 5280M, 5280MX
Number Part No. Description Quantity
1 82804 (5280M) Motor 1
2 82804EX (5280MX) Export Motor 1
3 55466 (ALL) Motor Capacitor 1
4 82863 (ALL) Bushing 4
5 82856 (ALL) Sliding Pan 1
6 38971 (ALL) Momentary Switch 2
7 83042 (ALL) Switch Plate 1
1, 2
3 4 5
6
7
PARTS BREAKDOWN (Continued)
Model 5280M, 5280MX
http://www.gmpopcorn.com Page 12
Page 13

Spiral Slicer Model No. 5280, 5280M, 5280MX
WIRING DIAGRAM
5280M
http://www.gmpopcorn.com Page 13
Page 14

Spiral Slicer Model No. 5280, 5280M, 5280MX
WIRING DIAGRAM
5280MX
http://www.gmpopcorn.com Page 14
Page 15

Spiral Slicer Model No. 5280, 5280M, 5280MX
WARRANTY
WE WARRANT to the original purchaser the Gold Medal equipment sold by us to
be free from defects in material or workmanship under normal use and service. Our
obligation under this warranty shall be limited to the repair or replacement of any
defective part for a period of six (6) months from the date of sale to the Original
Purchaser with regard to labor and two (2) years with regard to parts and does not
cover damage to the equipment caused by accident, alteration, improper use, voltage,
abuse, or failure to follow instructions.
THIS WARRANTY IS IN LIEU OF ALL OTHER WARRANTIES EXPRESSED
OR IMPLIED, AND OF ALL OTHER OBLIGATIONS OR LIABILITIES ON OUR
PART, INCLUDING THE IMPLIED WARRANTY OF MERCHANTIBILITY.
THERE ARE NO WARRANTIES WHICH EXTEND BEYOND THE DESCRIPTION
ON THE FACE HEREOF. We neither assume, nor authorize any other person
to assume for us, any other obligation or liability in connection with the sale of said
GOLD MEDAL equipment or any part thereof.
The term “Original Purchaser” as used in this warranty shall be deemed to mean that
person, firm, association, or corporation who was billed by the GOLD MEDAL
PRODUCTS COMPANY, or their authorized distributor for the equipment.
THIS WARRANTY HAS NO EFFECT AND IS VOID UNLESS THE ORIGINAL
PURCHASER FIRST CALLS GOLD MEDAL PRODUCTS COMPANY AT 1-800543-0862 TO DISCUSS WITH OUR SERVICE REPRESENTATIVE THE
EQUIPMENT
PROBLEM, AND, IF NECESSARY, FOR INSTRUCTIONS CONCERNING
THE REPAIR OR REPLACEMENT OF PARTS.
NOTE: This equipment is manufactured and sold for commercial use only.
GOLD MEDAL PRODUCTS COMPANY
10700 Medallion Drive
Cincinnati, Ohio 45241-4807 USA
http://www.gmpopcorn.com Page 15
 Loading...