

Goldmaster Gold Star 3D Scanner User Manual

USER MANUAL
GOLD STAR
3 SYSTEMS
Overview
Dear customer, thank you for choosing GOLD STAR Device.
This product contains 3 systems which will allow you to detect the presence of
underground gold & Treasures & cavities.
GOLD STAR Device designed to help you discover GOLD, SILVER, BRONZ, and
CVITY…
In addition, it can confirm your target and identify the type underground .

USER MANUAL
Warnings!
Please be sure that all precautions taken against all risks.
Do not use your device while it is raining or on extremely wet ground.
Turn on your device after you make sure that all parts are in place.
Make sure that battery of your device is fully charged before working on it.
If the device shows you empty battery sign on the screen you should
disconnect the battery and recharge it.
We recommend reading the user manual before start working on the device to
avoid mistakes doing the work on the device.
Main unit of the device is under warranty against all electronic breakdowns
for two (2) years.
Damages caused by user errors (like opening the main unit, hits, harms etc.)
are not within this warranty.
Battery and antenna are also not within this warranty.
The tablet which come with the device is not under the warranty
You should follow the instructions in this user manual strictly to minimize the
possible faults and to use your device correctly.
The device battery needs 4 hours charging to be fully charged.
The device battery can works for 8 to 10 Continuous hours.
You should use the charger which comes with the device only.
The red light on the charger means that the charger is working correctly.
The green light on the charger means that the battery is fully charged.
The Bluetooth will show on the tablet after you select the 3D SYSTEM.
THE BATTERY DETEAILS:
7.2 VOLTAGE– 2500 MAH
THE CHARGER DETAILS:
8.4 VOLTAGE– 1000 MAH
USER MANUAL
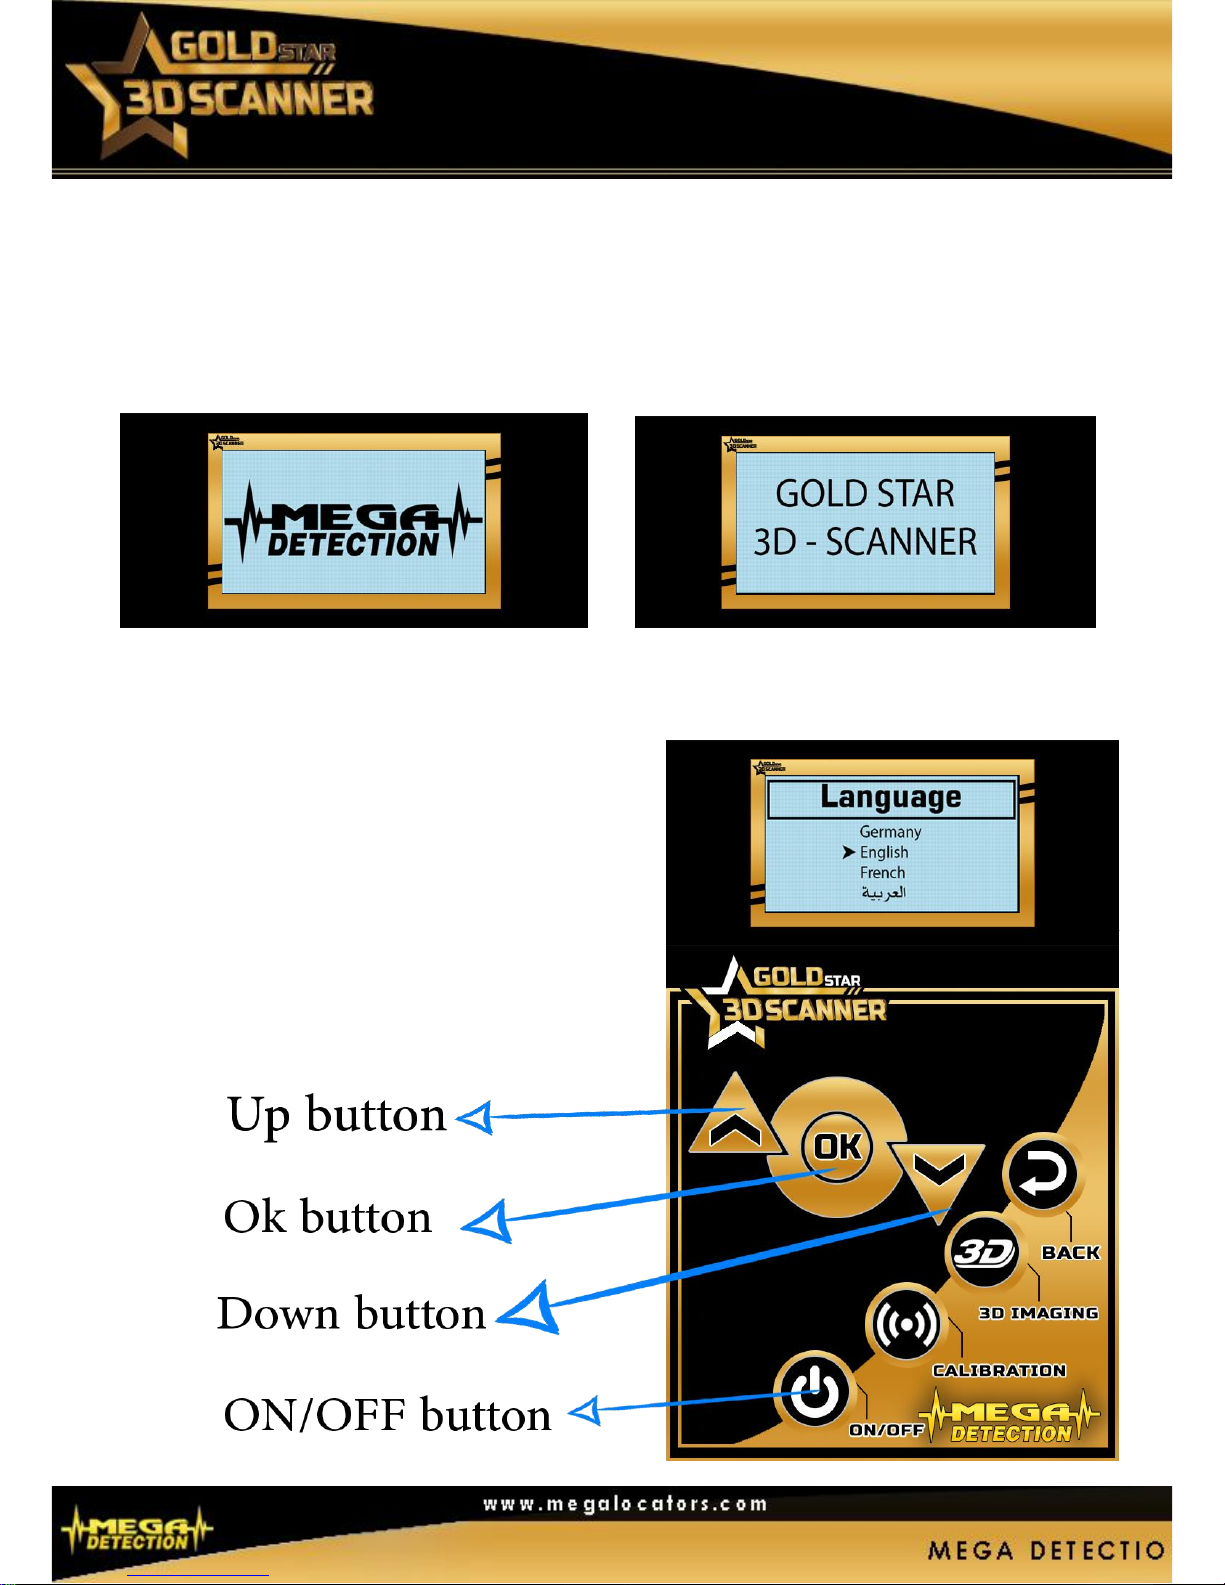
1- Open the device by the on off button after you connect all the parts of this system
and the device will start working immediately.
-1- -2-
2- Select the language that you wish
From the options by pressing on the
Up / down buttons to move between
The options and the OK button to
Conform your favorite language.
USER MANUAL
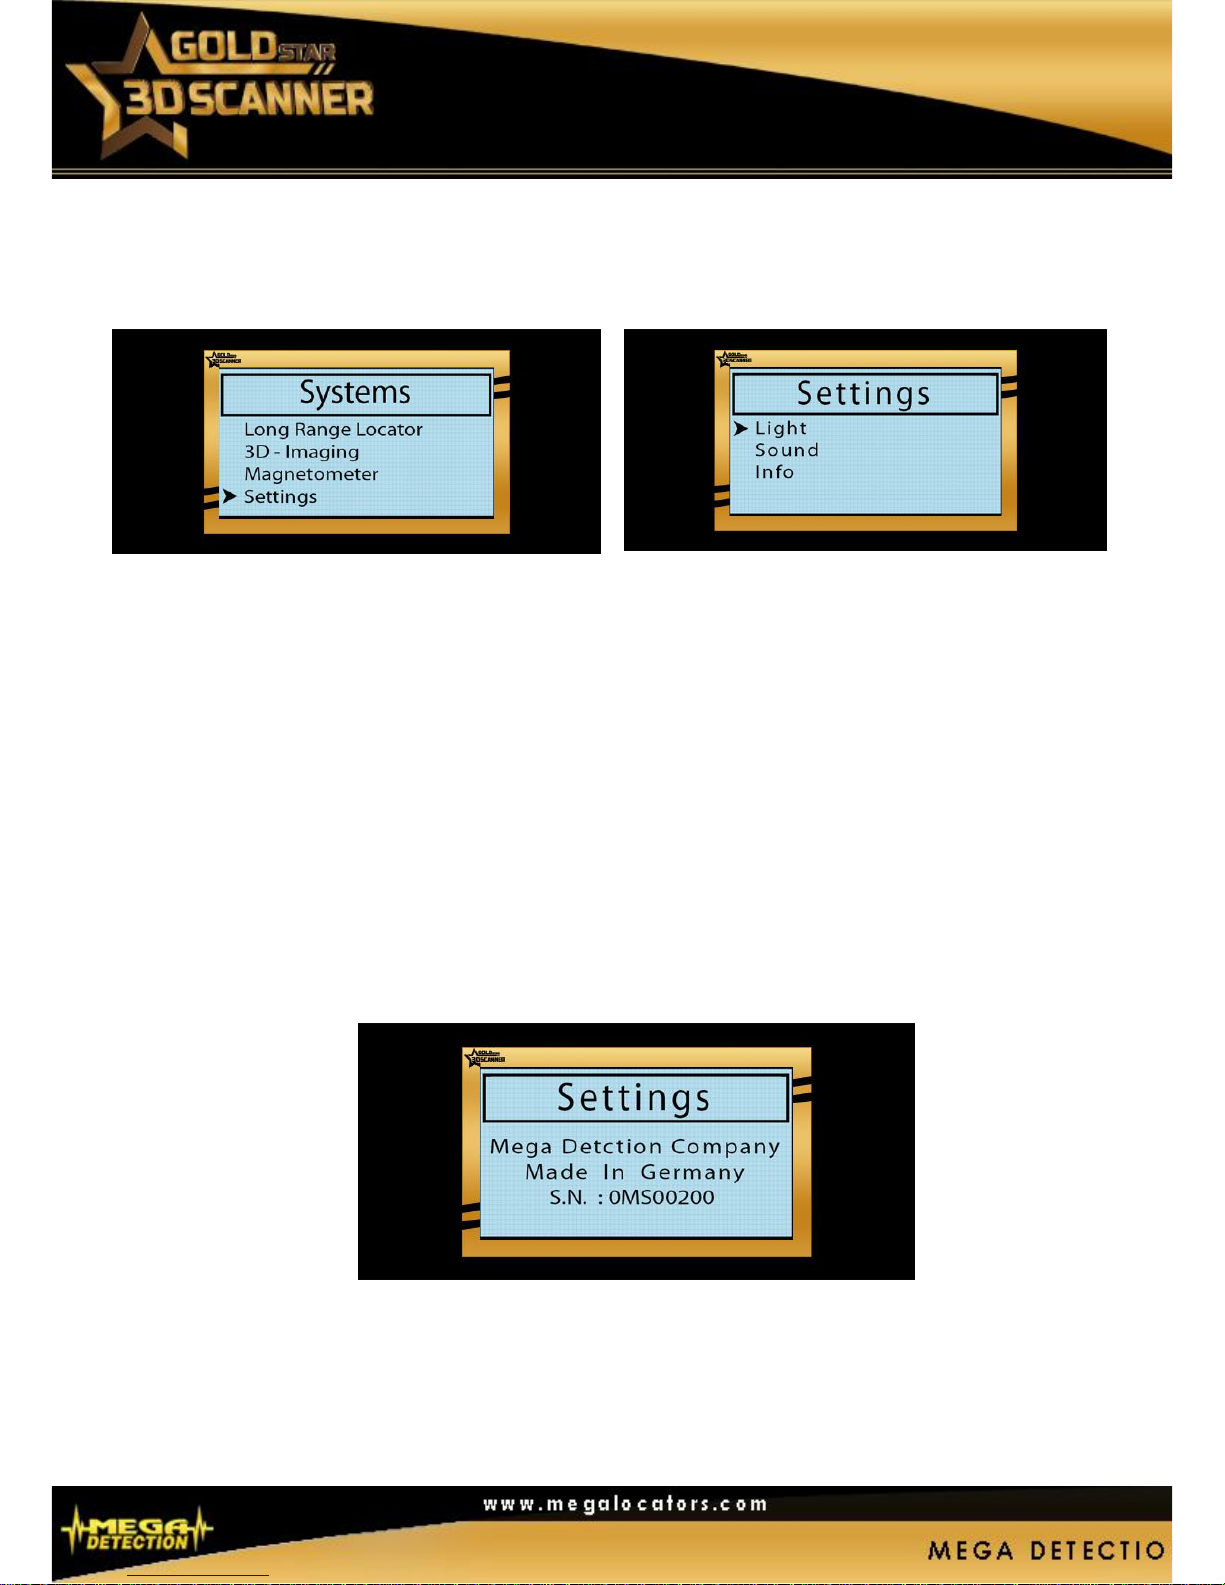
3- After selecting the language , you will get the systems menu which contain 3
systems and the settings option as below :
-1- -2-
3-1 presses on the down button to get to the settings option and after that press OK to enter
the settings
3-2 you will see the options available (light – sound – info)
You can adjust the light by pressing on the OK button
Also you can adjust the sound by pressing on the OK button
3-3 if you press on the (info) option you will see the details of the device
(Origin of the device – factory name – the serial number of the device as in the following)
After you adjust the settings you can return to the systems menu by pressing on the back
button and your setting will be saved automatically
NOTE: EVERY TIME YOU CLOSE THE DEVICE THE SETTINGS WILL RESET
 Loading...