

Page 1
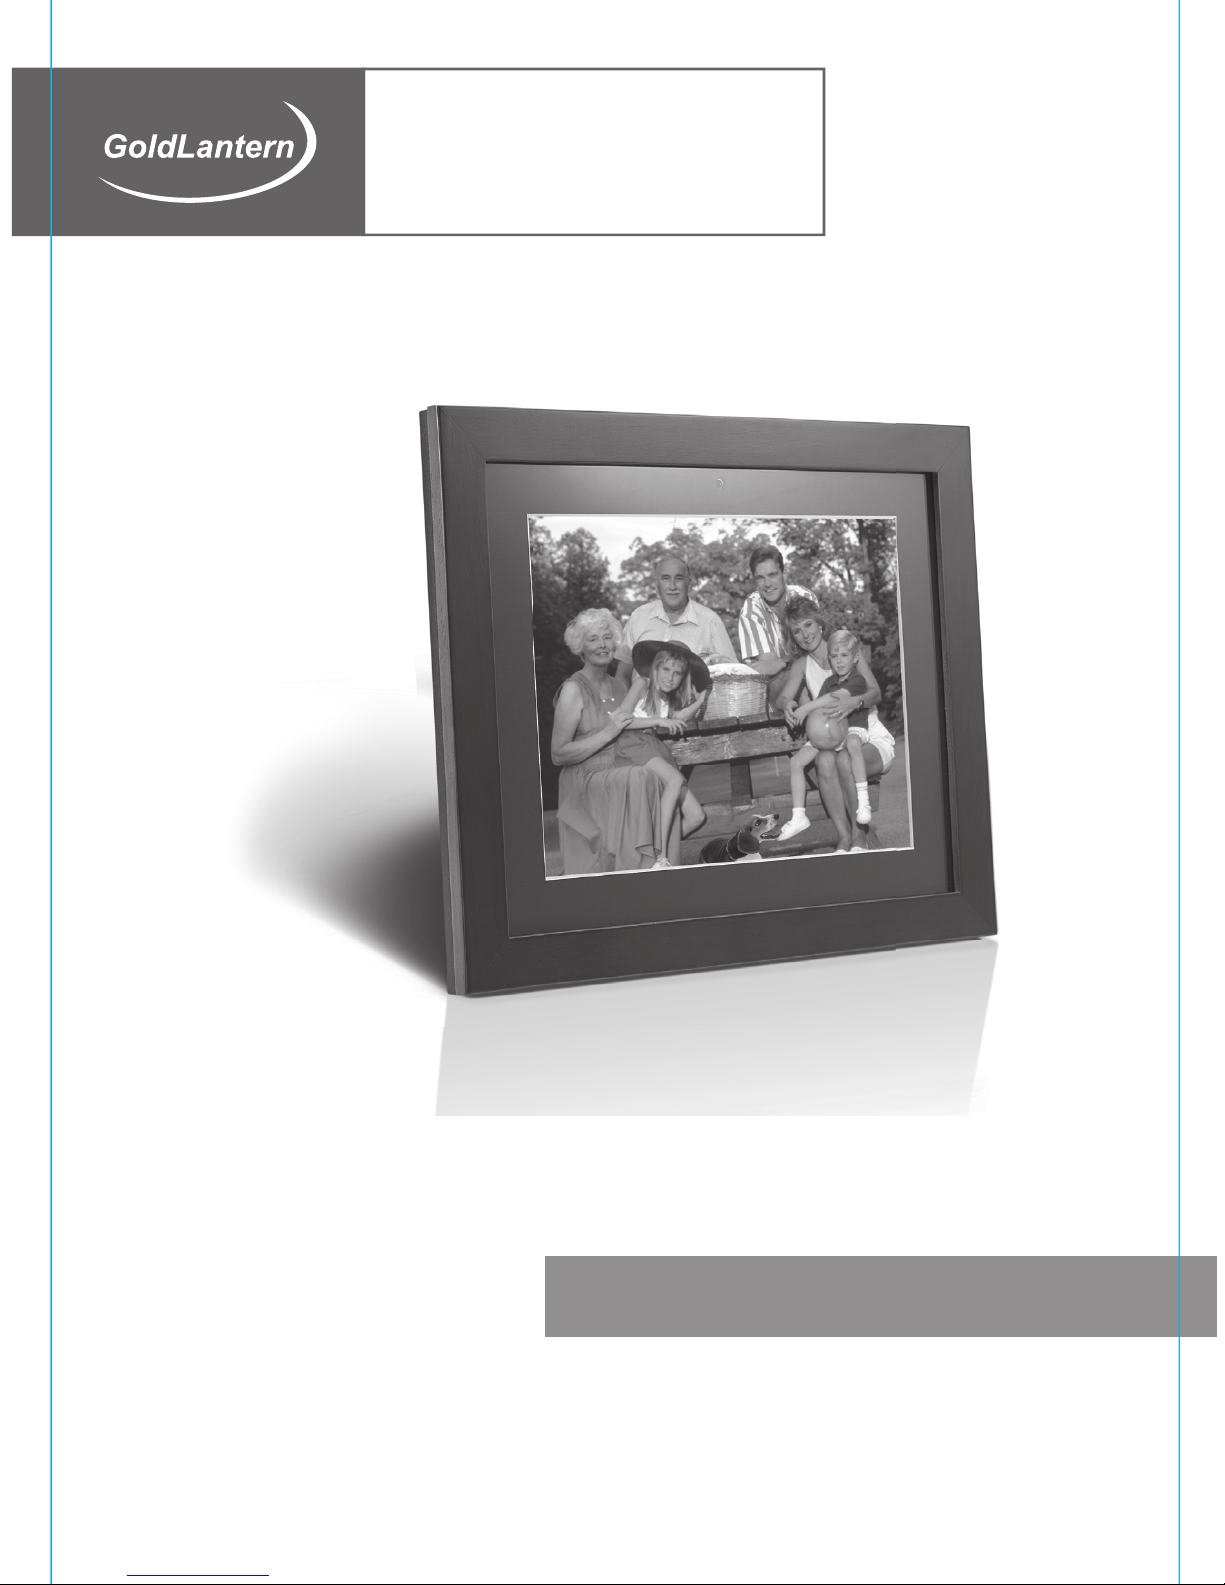
10.4 INCH DIGITAL
PICTURE FRAME
BRING DIGITAL PICTURES TO LIFE
©2006 GoldLantern Inc. All rights reserved.
MODEL DPF-10400 - QUICK GUIDE
1
Page 2
10.4 INCH DIGITAL
PICTURE FRAME
Table of Contents
1. Product Introduction
2. Package Contents
3. Feature
4. Specification
5. Controls and Slots
6. Setting up the Digital Picture Frame
7. Remote Control
8. Playing an MP3 as Background to a Slideshow
9. Replacing Remote Control Battery
3
3
3
4
5
5
6
7
7
2
Page 3
10.4 INCH DIGITAL
PICTURE FRAME
1. Product Introduction
Congratulations on your purchase of GoldLantern Digital Picture Frame,
model DPF-10400. Boasting high-quality image resolution, the Digital Picture
Frame is the perfect product for displaying your favorite digital photos, music and
video files. You can arrange your display photos in a slide show or as a still
picture. With its ease of use, you can now display all your favorite digital pictures,
music or video files for everyone to see and hear!
2. Package Contents
Before using the Digital Picture Frame, be sure to check that all accessories
contained in the package are present:
A. Digital Picture Frame unit
B. AC Adapter x 1
C. Remote Control
D. User Manual
E. CD-ROM
3. Features
• Displays pictures, music and video
• Listen to MP3 audio while displaying photos
• Simple operation, insert the compact card into the Digital Picture Frame to
view the pictures, video, or listen to MP3’s
• Support: CF/ MD/ MS/ SD/ MMC/ SM/ XD
• TFT-LCD screen with high resolution, wide view angle and rich color
• Easy to use remote control for displaying and managing your files
• Built-in stereo speakers
• Connection with TV
3
Page 4
10.4 INCH DIGITAL
PICTURE FRAME
4. Specifications
Type
Unit Size
Display Area
Resolution
Colors
Brightness
Contrast angle
Viewing angle
Input voltage
Power
Working Temperature
Unit Weight
Media
Card
Auto Start Mode
External connections
Photo Playback Mode
Music Playback Mode
Video Playback Mode
Accessories
DPF-10400
314(L) X 257(W) X 40(H) mm, 12.36”(L) x 10.11”(W) x 1.57”(H)
211.2(L) x 158.4(W) mm, 8.31”(L) x 6.24”(W)
640 x 480
262,144
2
350cd/m
max.
300:1
70/70(I/r), 70/40(u/d)
AC110-240V (50HZ-60HZ)
VESA DPMS
0---50˚C
1.8KG
MPEG1/ MPEG2/ MPEG4, JPG/ JPEG, MP3
CF/ MD/ MS/ SD/ MMC/ SM/ XD
Auto Slide Show jpeg
TV
Loop, Zoom In
Auto Slide Show
Slide Show with background MP3 music
File name, File size, Resolution, Date Display
Interval Time Setup
Transition Setup
Play/ Stop/ Pause
Play/ Stop/ Pause
Volume Adjust
Mute Function
Repeat Model Setup
File Type, Total Time, Date, Display
Play/ Stop/ Pause
Volume Adjust
Mute Function
Zoom in
File information, Time and date Display
Remote Control
Decorative Frame
AC Adapter
Operation manual / CD-ROM
4
Page 5
10.4 INCH DIGITAL
PICTURE FRAME
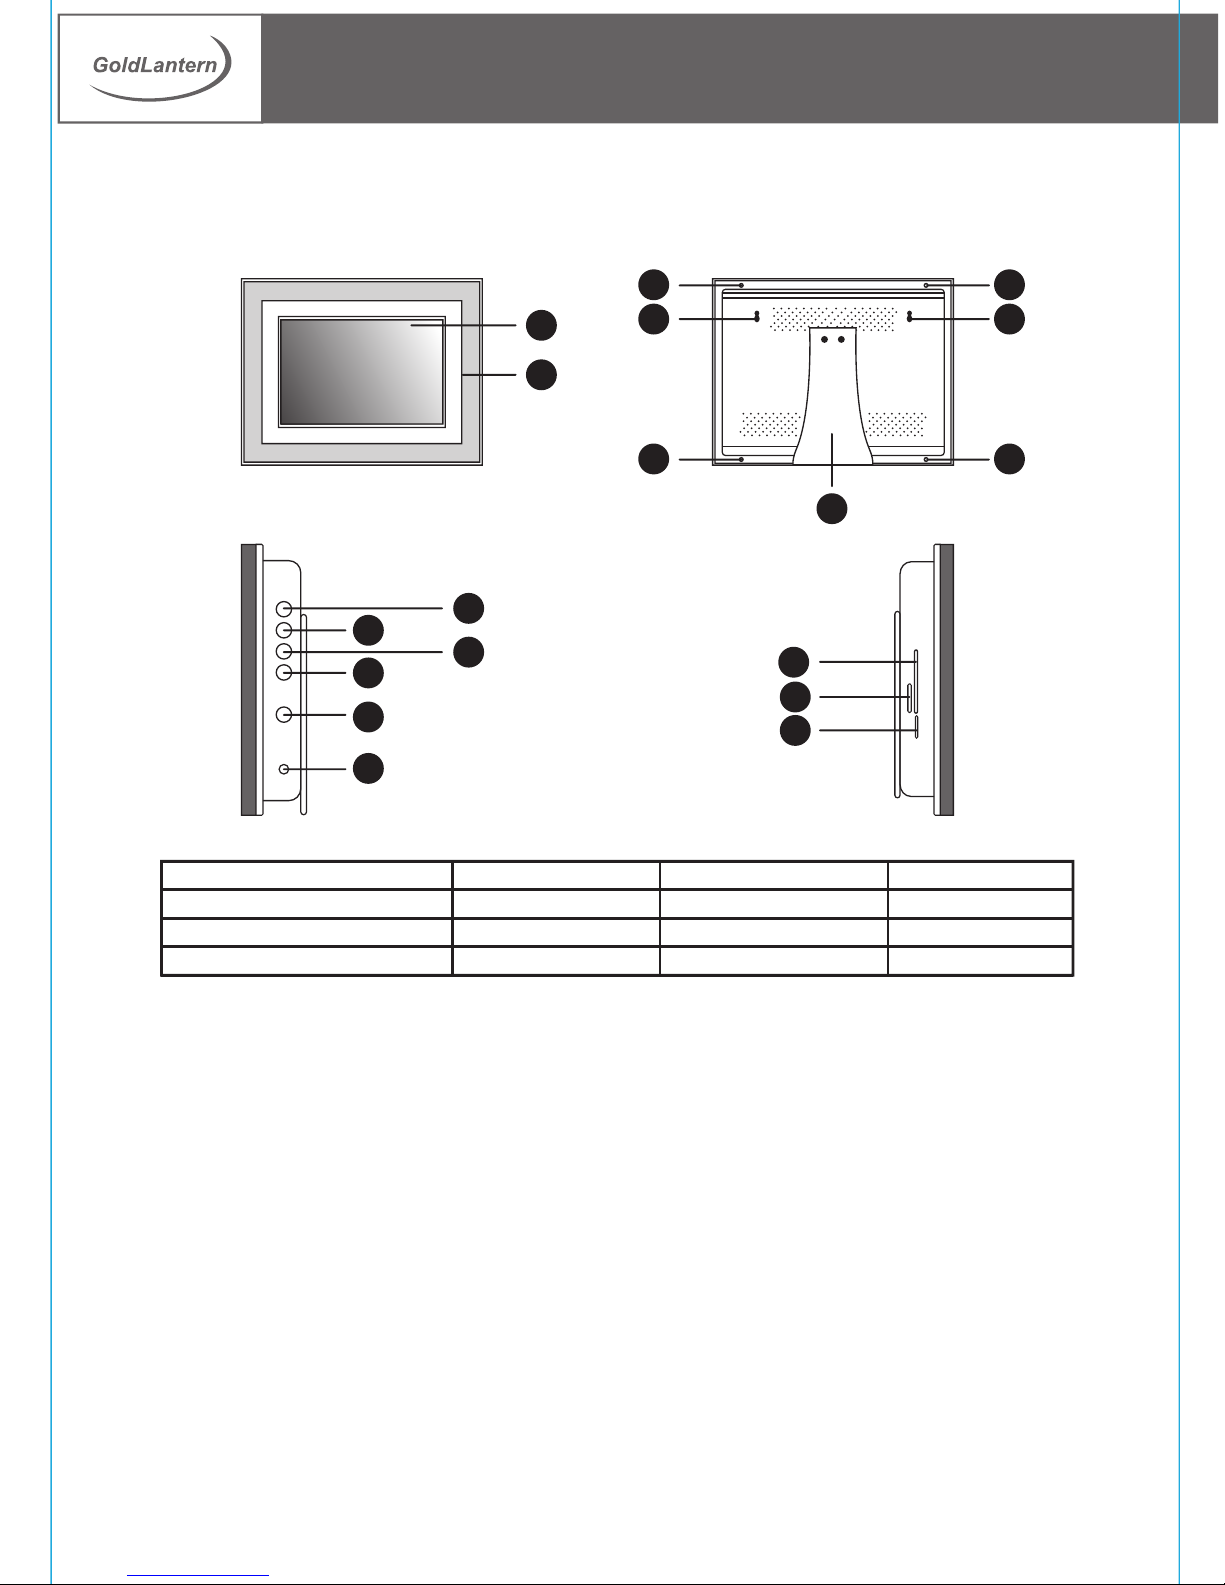
5. Controls and Slots
7
9
10
3 3
1
2
6
8
4 4
3 3
5
12
13
14
11
1. Display
2. Decorative Frame
3. Decorative Frame Mount
4. Wall Mount slots
5. Desktop Stand
6. Auto
7. Menu
8. Volume Up
9. Volume Down
10. ON/OFF
11. Power Receptacle
12. CF/ MD
13. SM/ XD
14. MS/ SD/ MMC
6. Setting up the Digital Picture Frame
A. Open the package and remove the protective foam. Remove the protective
sleeve from the unit.
B. Plug in the AC adapter into power outlet. Plug the other end into the unit.
C. After the content is stored on the target flash media, insert the media into the
proper slot.
D. Turn power to on position via the On/Off switch. The power switch is on the
right side of the Digital Picture Frame.
E. As default, the first file in the card will be displayed first. The play sequence is
sorted by the file name alphabetically automatically, regardless of file type.
Therefore, an MP3 could be played first, followed by a second MP3 or an
image, or a video.
5
Page 6
10.4 INCH DIGITAL
PICTURE FRAME
IBM
MicrodriveMicrodrive
MultiMedia CardMultiMedia Card
TM
CF
R
CompactFlashCompactFlash
R
SmartMediaSmartMedia
AC Adapter
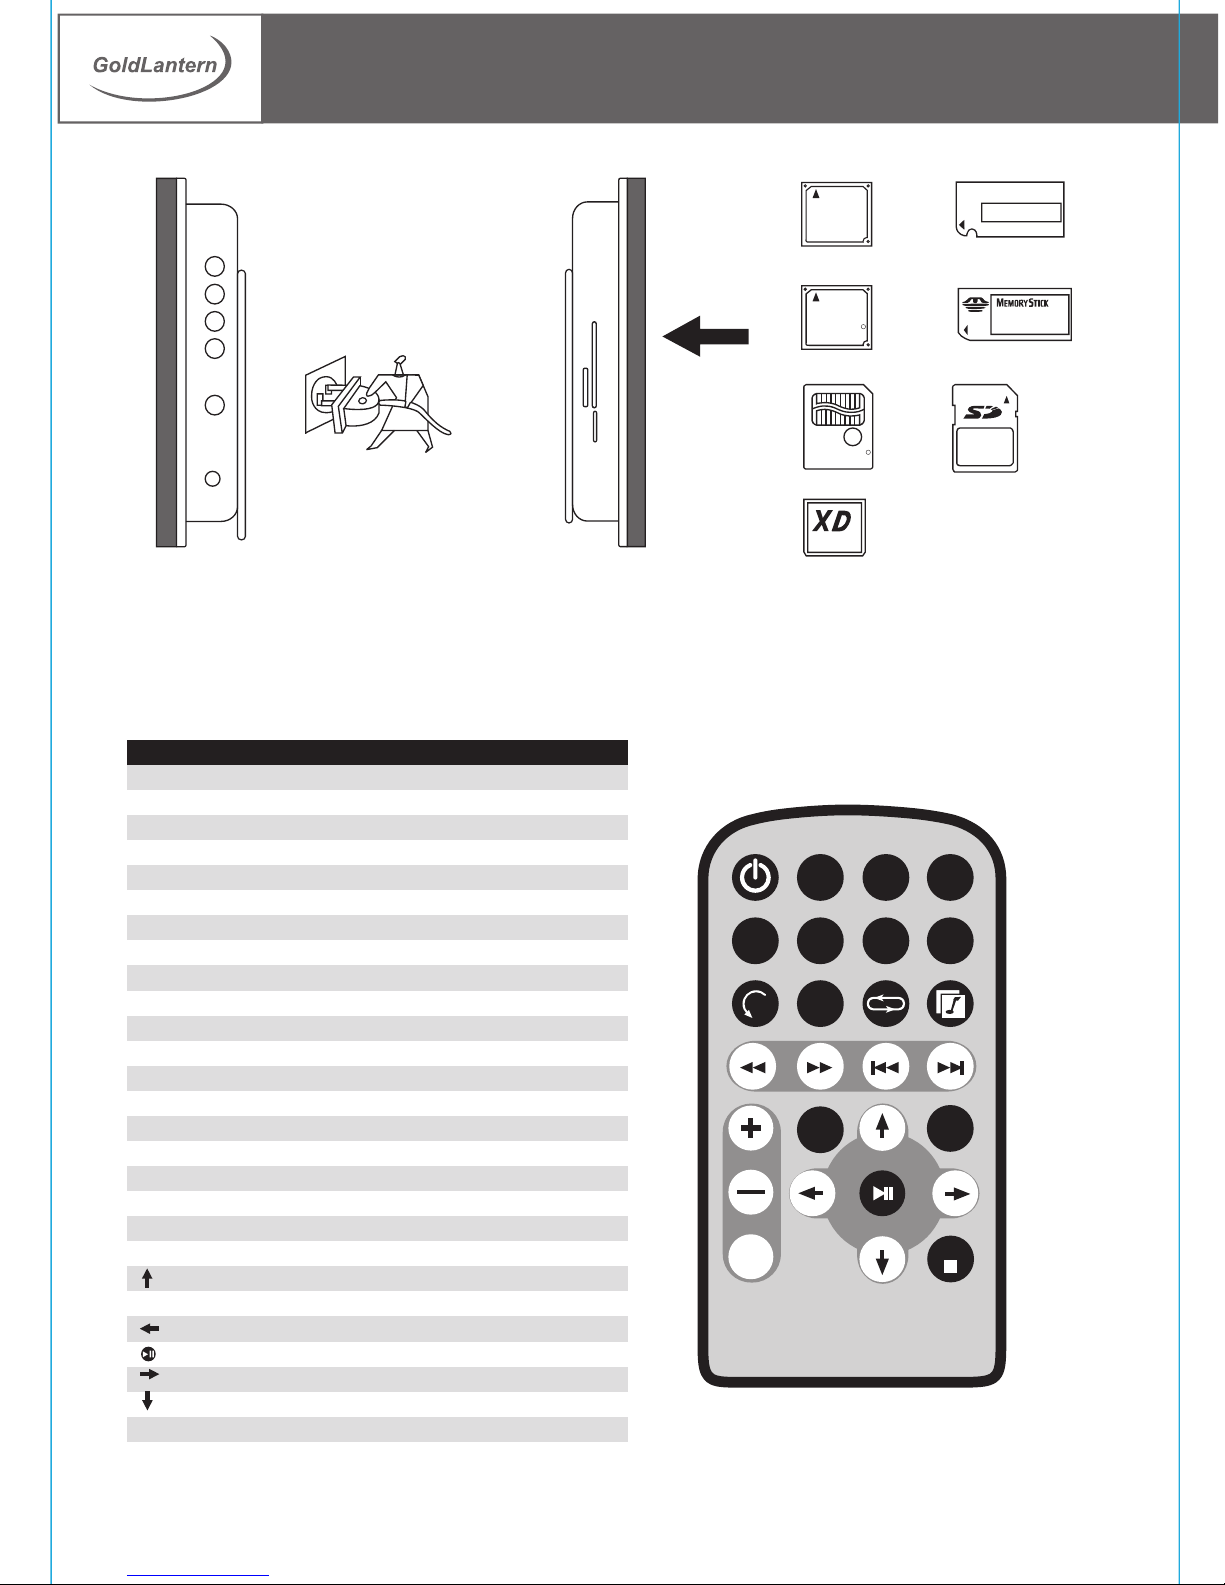
7. Remote Control
The following table briefly describes the remote control functions
BUTTON
POWER
SETUP
DISPLAY
CARD SELECTION
MUSIC
PHOTO
MOVIE
FILE
RO TATE
ZOOM
REPEAT
SLIDESHOW
REW
FF
PREV
NEXT
+(VOLUME)
-(VOLUME)
MUTE
EFFECT
SLIDE INTERVAL
PLAY/PAUSE
STOP
DESCRIPTION
Turn FlashPlayer on or off
Open menu for changing settings
Display file information of selected file
Choose a different memory card
Go to and display music files
Go to and display photo files
Go to and display movie files
Go to file library (all files)
Rotate photo 90 degrees clockwise on screen
Zoom x 4 (photos only)
Play file repeatedly until stopped
Start\stop photo slideshow
Rewind movies
Forward movies
Go to previous file
Go to next file
Raise volume
Lower volume
Mute volume
Change slideshow effects
Move up when selecting on your TV screen
Change slideshow delay: 1; 3; 5; 10 seconds
Move left when selecting on your TV screen
Play/pause, confirm selections on your TV screen
Move right when selecting on your TV screen
Move down when selecting on your TV screen
Stop the selected file action
POWER
MUSIC
RO TATE
REW
VOLUME
MUTE
SETUP DISPLAY
PHOTO MOVIE FILE
REPEAT
ZOOM
FF PREV NEXT
EFFECT
PLAY/PAUSE
CARD
SELECTION
SLIDESHOW
SLIDE
INTERVAL
STOP
TM
TM
6
Page 7
10.4 INCH DIGITAL
PICTURE FRAME
8. Playing an MP3 as Background to a Slideshow
A. First press “Music” key to enter the music database. Use the arrow keys to select
the desired music file.
B. Press “Slideshow” key. This will play the selected MP3 while playing the
slideshow.
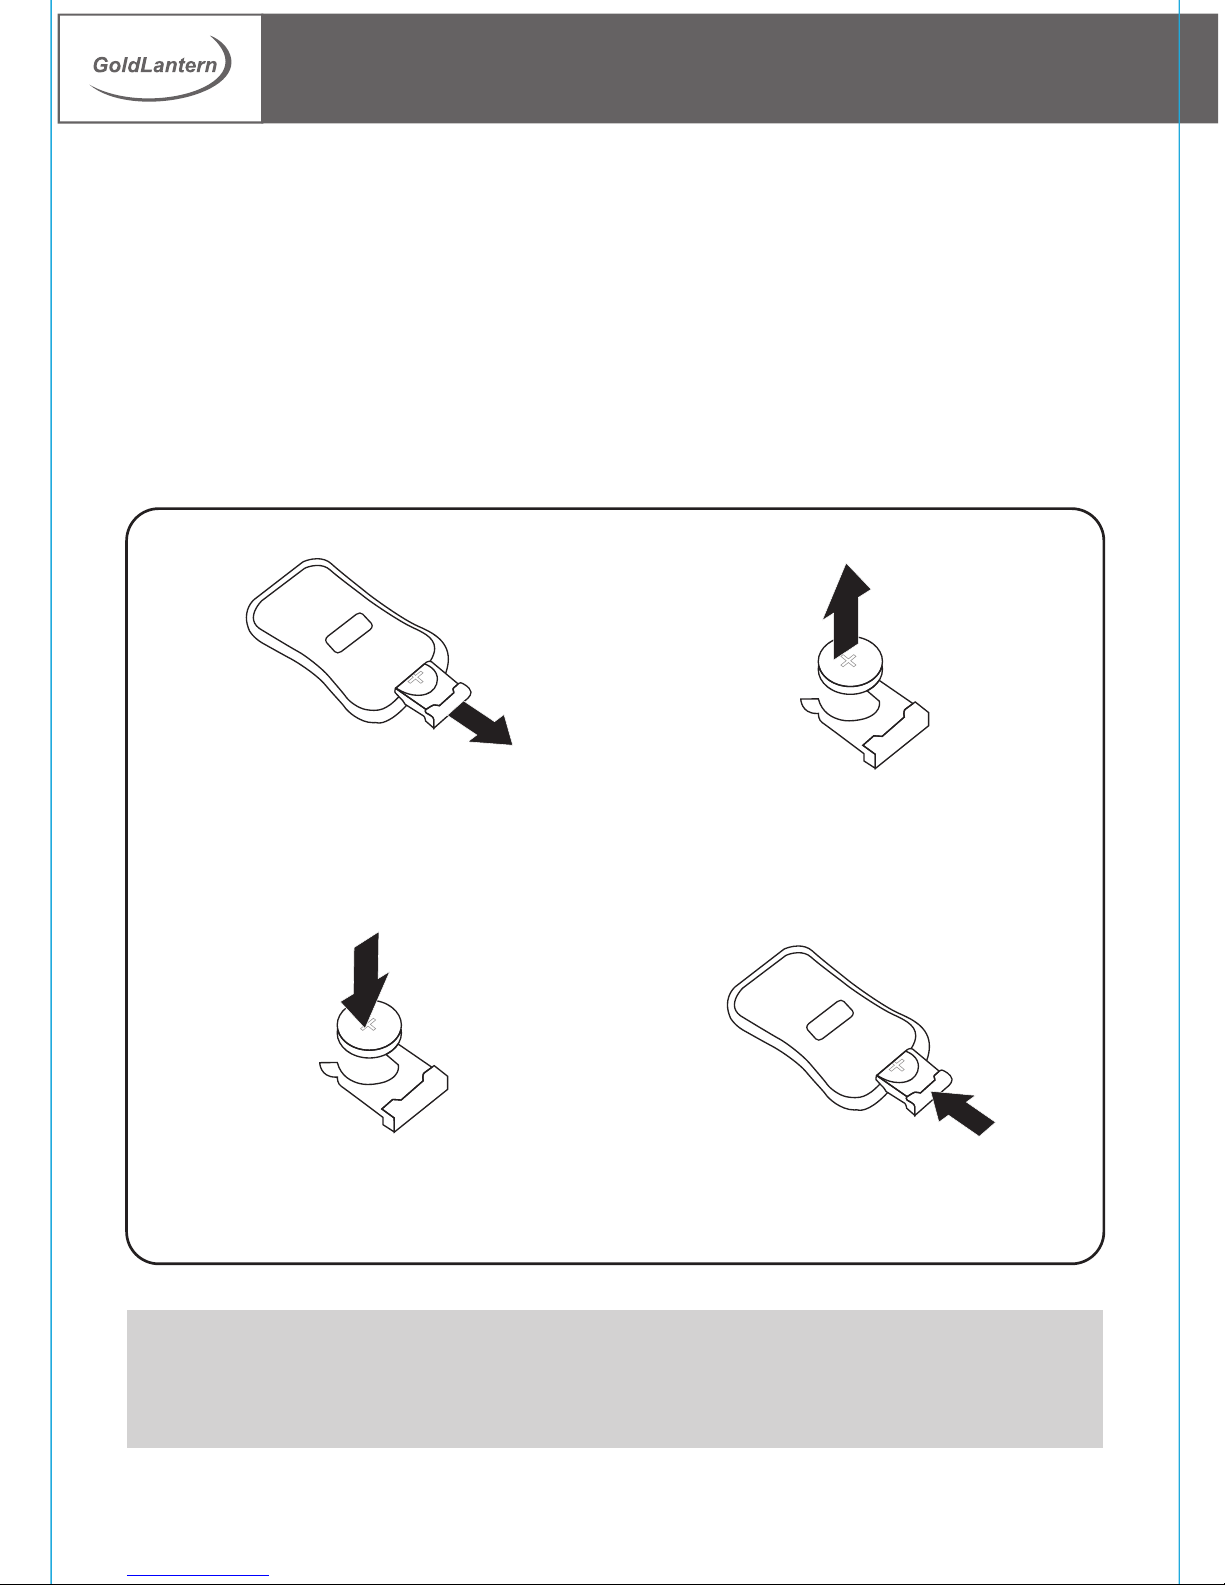
9. Replacing Remote Control Battery
1. Remove the battery compartment
cover by pulling the cover in the
direction of the arrow.
3. Insert the replacement battery taking
note of the correct polarity (+/-).
2. Remove the battery.
4. Replace the cover.
Caution:
1. Only use a 3V CR2025 battery.
2. Dispose of used batteries according to local ordinance regulations.
3. Remove the battery when not using the remote control for prolonged periods.
7
 Loading...