

ELECTRIC ADJUSTABLE BED
OWNERS MANUAL
MODEL #
SERIAL #
✓ Please list MODEL and SERIAL NUMBERS
for future REFERENCE
✓ Use these Numbers in all correspondence
and calls for Service
YOUR LIFE IN MOTION

CONGRATULATIONS!
You are now the proud owner of the best in adjustable beds. You will find
this ownership will bring years of restful and healthy sleep. We would like
to take this opportunity to thank you for your smart and prudent choice.
WAYS TO ENJOY YOUR
NEW ADJUSTABLE BED
Watching television
Reading
Writing
Sewing or knitting
Snacking or dining in luxury
or just plain fancy resting
2

IMPORTANT!
READ THIS MANUAL FIRST BEFORE INSTALLING OR
OPERATING YOUR ADJUSTABLE BED
Your motorized adjustable bed has been engineered from the casters up
to provide the ultimate in strength and reliability.
Great care has been taken to provide you with total comfort and safety.
Golden Technologies thoroughly inspects and tests each unit prior to
shipment.
WARNING
Care should be taken in the unpacking of this unit, so as not to cause
injury to persons or damage to the unit. Dispose of all plastic bags and
covers, as they can be a smothering hazard to small children.
To reduce risk of electrical shock, Do not immerse any of the electrical
components into a liquid, Do not open any of the electrical components
there are no serviceable parts.
Warranty will be void if any of the electrical components are opened by
other than a qualified service person.
This Bed is designed for indoor use only.
This Bed was not manufactured for hospital use, or designed to meet
hospital standards and regulations.
ELECTRICAL CONNECTION
Plug your motorized adjustable bed into a 120 Volt 60 Cycle indoor
outlet.
3
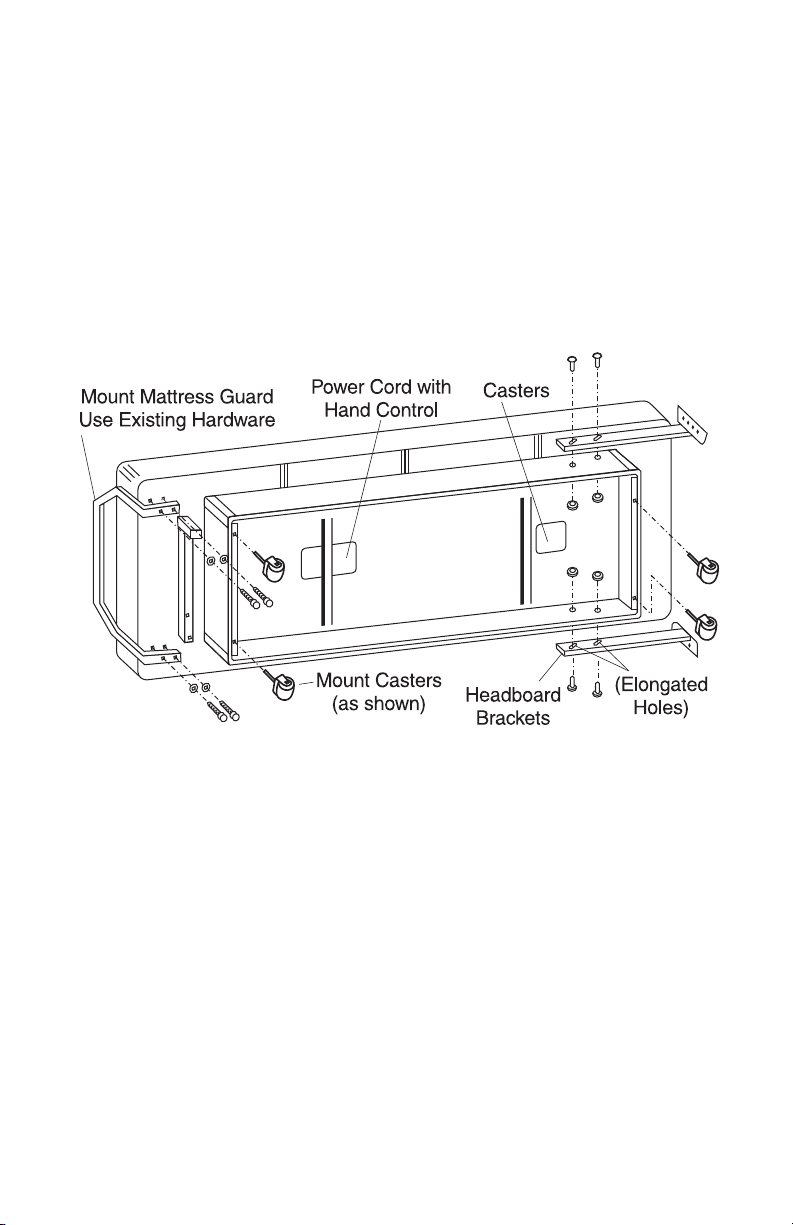
INSTALLATION
1. Remove the plastic bags containing the power cord, hand control
and casters. Dispose of bags properly since they can be a hazard to
small children.
2. Remove the headboard brackets.
3. Install the four casters as illustrated.
4. Lift the bed from the carton, position the bed on its side and install
the mattress guard as illustrated.
5. Install the headboard brackets as illustrated.
6. Position the bed with casters down on the floor.
7. Place the mattress in position. Note: the removal and disposal of the
plastic cover is necessary to insure proper ventilation and to avoid
the possibility of mildew. Discard the plastic since they can be a
hazard to small children.
8. Position the bed in the desired place in the room. Plug the power
cord into a 120 volt 60 cycle indoor outlet.
4
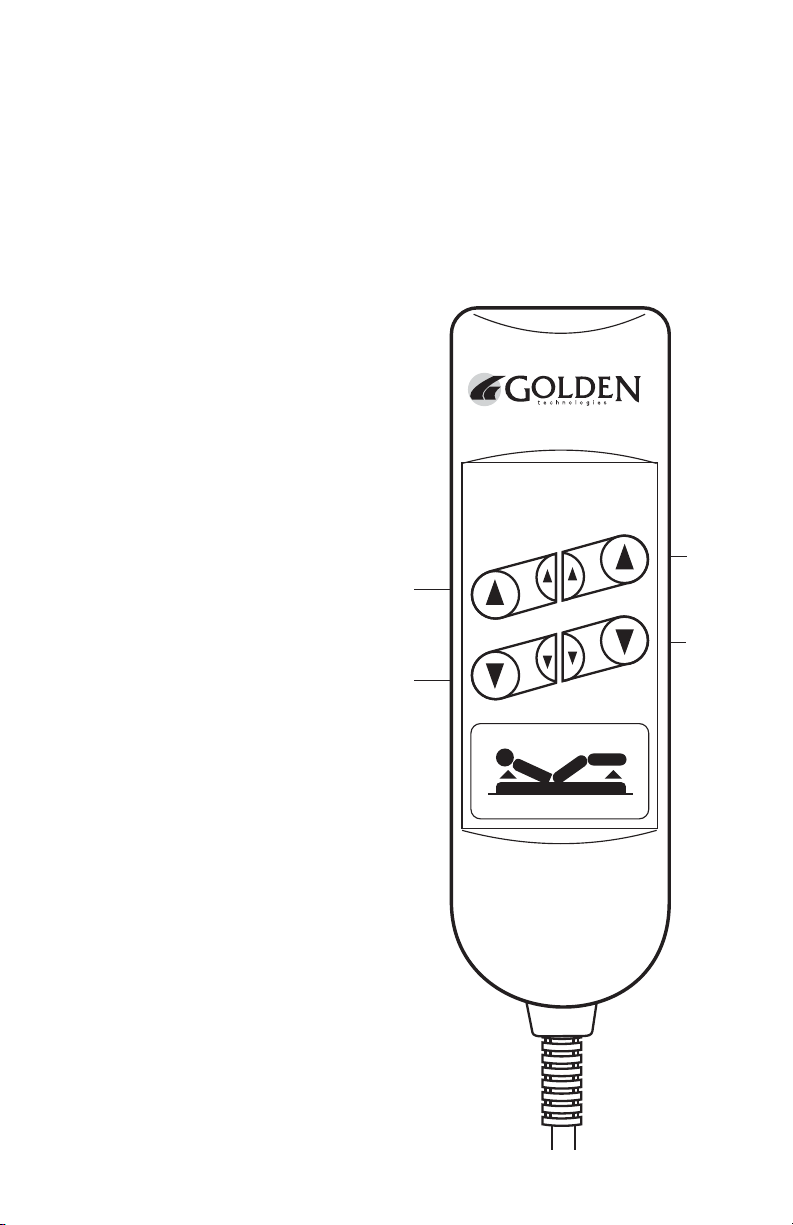
BED OPERATION MODEL 3101
1. To elevate the head section of the bed, press the head up button,
(S1) and hold until the head section of the bed reaches the desired
height. Then release the button.
2. To lower the head section of the bed, press the head down button,
(S2) and hold until the head section of the bed reaches a flat or any
position in between. Then release
the button.
3. To raise the foot section of the
bed, press the foot up button,
(S3) and hold until the foot section
reaches the desired height. Then
release the button.
4. To lower the foot section of the
bed, press the foot down button,
(S4) and hold until the foot
section of the bed reaches a
flat or any position in
between. Then release the
button.
5. To elevate the head and foot
section of the bed
simultaneously, press the head up
foot up button between S1 and S3
and hold until the head and foot
section of the bed reaches the
desired height. Then release the
button.
6. To lower the head and foot
section of the bed simultaneously,
press the head down foot down
button between S2 and S4 and
hold until the head and foot
section of the bed reaches a flat or
any position in between. Then
release the button.
S1
S2
S3
S4
5
 Loading...