

®
SuperCinema 3D Array
Left, Center, Right 3-Channel Ultra-High-Performance Soundbars with Interaural Crosstalk Cancellation
Owner’s Manual
®
Congratulations!
Congratulations and thank you for purchasing GoldenEar Technology’s® SuperCinema® 3D Array® speaker!
You are about to hear the spectacular difference this very special “front-stage” speaker will make in your
multi-channel music and/or home theater system! You will be amazed to hear left and right channel information
seeming to emanate from the far left and right of the room, as if you had separate left and right speakers!
Our engineers’ many years of experience in developing loudspeakers has led to this extraordinary product.
In order to ensure that you experience maximum performance, please take a moment to fully read this owner’s
manual and familiarize yourself with the unique installation, assembly and set-up procedures for your
SuperCinema 3D Array speaker.
Please visit our website at www.GoldenEar.com for more information on the technology behind your new speaker
®
system. If you have additional questions, contact your Authorized GoldenEar Technology
Dealer or visit the
Q&A page in the Tech Support section of our website.
Your New GoldenEar Speakers
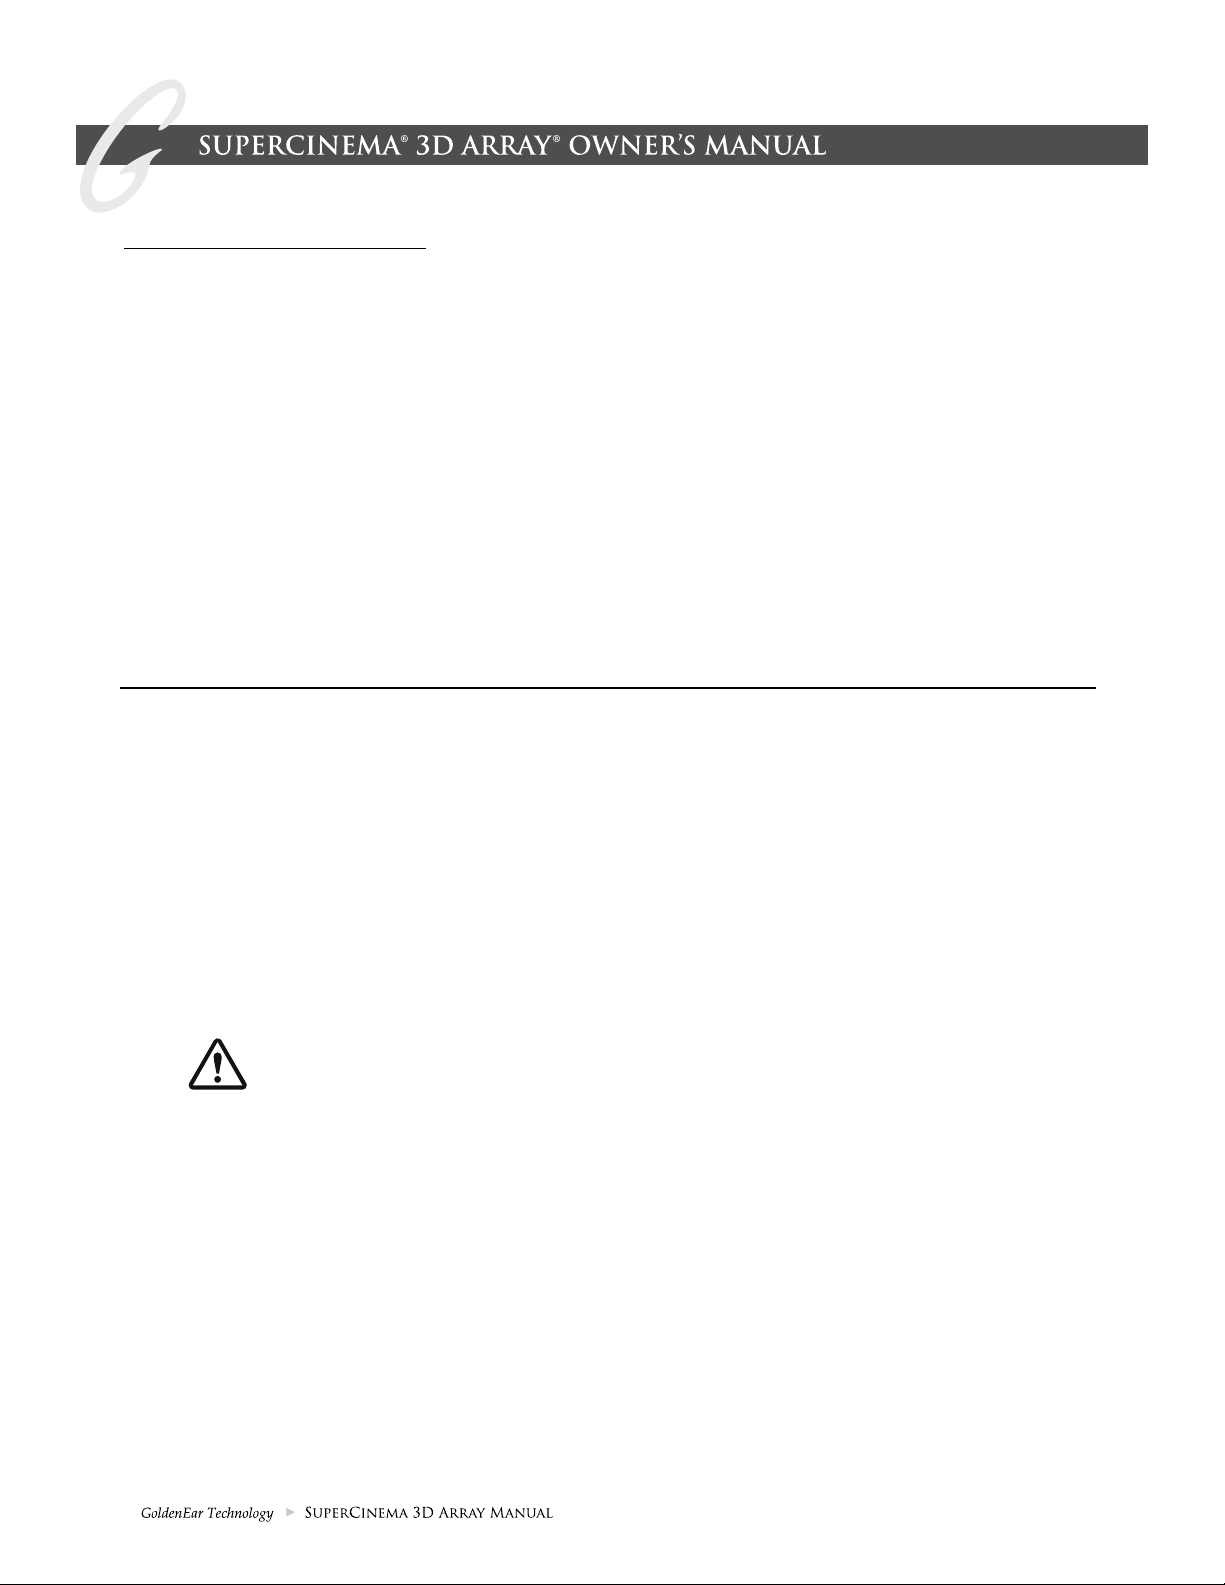
The GoldenEar SuperCinema 3D Array speaker is designed to fit beautifully in a wide variety of applications.
Its compact and narrow dimensions allow for easy installation in many locations within your home. To get
the best performance possible and for a product that lasts a lifetime, we strongly recommend that you follow
the placement and setup guidelines provided in this manual.
Cleaning
Do not use a strong or abrasive cleaner on your new speakers. Clean them only with a damp cloth, but do not
get them wet. Do not set wet objects on top of the speakers as they may damage the enclosure.
Wall Mounting
IMPORTANT: GoldenEar does NOT supply the
hardware for mounting speakers to the wall.
Your speaker has keyhole slots and a threaded insert to facilitate mounting on a wall. If you are wall
mounting speakers, take extra care in installation and the use of safety straps as a secondary restraint is
recommended. We suggest wall mounting installation be performed by a qualified contractor or your
authorized GoldenEar dealer.
2
Preventing Speaker Damage
USE AN APPROPRIATE AMPLIFIER. At high volumes a very powerful amplifier can overdrive your
speakers and damage them. And if the amplifier is not powerful enough, it can produce distortion
that can easily damage your speaker. (Consult your dealer for assistance.)
DON’T BE FOOLED BY YOUR RECEIVER’S VOLUME CONTROL. It only adjusts how loud, it is not an
indication of power output. If your speakers begin to sound harsh or grating or if you hear other forms
of distortion, turn down the volume immediately!
PROPER SETUP IS THE KEY. Please Note: Your SuperCinema 3D Array speakers are designed to
be used with a subwoofer and with a high-pass crossover (“SMALL” setting on an A/V receiver).
Also, avoid use of tone controls and loudness controls as they will demand even more power from
an amplifier.
GoldenEar Technology SuperCinema 3D Array speakers are efficient and can be driven to loud listening levels
with moderate amplifier power. They are also able to handle the output of very powerful amplifiers. To prevent
damage to your speakers, please read all of the following guidelines before hooking them up. Please also note,
that the SuperCinema 3D Array speaker is designed to be high-passed and used with a subwoofer. Attempting
to play them full range (no high-pass) at high volumes can damage the speaker.
Amplifier Distortion — #1 Threat to your New Speakers!
Amplifier distortion is the principal cause of speaker damage. When listening at loud levels your amplifier may run
out of clean power. It will then begin to produce speaker-damaging distorted power. This will damage any brand of
speaker very quickly! More powerful amplifiers are actually safer – For example: A 40 Watt/channel amplifier
will have substantial distortion above 40 Watts. If driven to 50 Watts, this amplifier will deliver speaker-damaging
distorted power! But a 100 Watt/channel amplifier will have very low distortion below 100 Watts. Therefore, when the
speaker requires 50 Watts, this more powerful amplifier will deliver clean power and speaker damage is less likely to
occur. (See your GoldenEar Technology dealer for amplifier recommendations.)
Volume Setting
Do not be fooled by the Volume setting of your receiver/preamplifier. It only adjusts listening level — it is not
a “power-output” dial. The amount of amplifier power actually used at a given Volume setting depends solely
on the nature of the source material you are listening to (at a given Volume setting a quiet section of music will
use less amplifier power than a loud section). With typical material, the rated output power of many receivers/
amplifiers is often reached when the Volume is set to around -10dB, or between the “11” and “1 o’clock”
settings with an analog control (with bass/ treble and loudness controls not used — otherwise rated power may
be reached at even lower Volume settings). Remember, all amplifiers produce distortion when operated beyond
their rated output power. The resulting distortion will damage all speakers! If you listen at loud levels, be careful to
listen for the point of audible distortion — if the speakers begin to sound distressed, turn the Volume down or your
speakers and/or amplifier(s) will be damaged! This type of damage constitutes abuse and is not covered by the
warranty. If louder volumes are desired, consider a more powerful amplifier.
There is Actually a Limit!
Even with these safer, more powerful amplifiers, there is a point at which you could have more power than the
speaker can handle. At that point you will overpower the speaker and damage it. At loud levels do not increase
bass/treble controls from zero and ensure that all loudness/contour/bass EQ buttons are off (otherwise rated
output power will be reached at even lower volume control settings).
3
The Right Amount of Power
A power-range rating is given in the specifications as a guide to indicate the approximate minimum and
maximum power input of your GoldenEar SuperCinema 3D Array speakers. Amplifiers that meet or even exceed
the speaker’s power-range rating are recommended as their greater power reserves provide better sound. But
always use the speakers within their power-range rating to prevent damage — that is, keep listening levels below
the point of obvious audible distortion.
Unpacking your SuperCinema 3D Array Loudspeaker
Please Inspect for Shipping Damage
Each loudspeaker leaves our plant in perfect condition. Any visible or concealed damage most likely occurred in
handling after it left our plant and should be reported at once to your GoldenEar Technology Dealer and/or the
delivery company that delivered your loudspeaker. Please unpack your system carefully.
Save all cartons and packing materials in case you move or need to ship your system. Record the serial number
found on the back of the SuperCinema 3D Array loudspeaker here:
_________________________________________________________________________
(Serial Number)
Please go to http://www.goldenear.com/support/registrationandwarranty and use the serial number(s) above to
complete your warranty registration.
4
Attaching Feet for Tabletop/Shelf Mounting
If you going to set your SuperCinema 3D Array Speaker on a table or bookshelf, install the included Adjustable
Center Stand Feet as follows:
Tools required: #2 Phillips Screwdriver
Small Flat Blade Screwdriver (for adjusting tilt back)
Parts included: Two Adjustable Feet with Rubber-Tipped Set Screws
Two Phillips head screws
Instructions:
1. Carefully lay the SuperCinema 3D Array on its face on a soft padded flat object, such as a table with
a towel or blanket, taking care not to damage the speaker or grille.
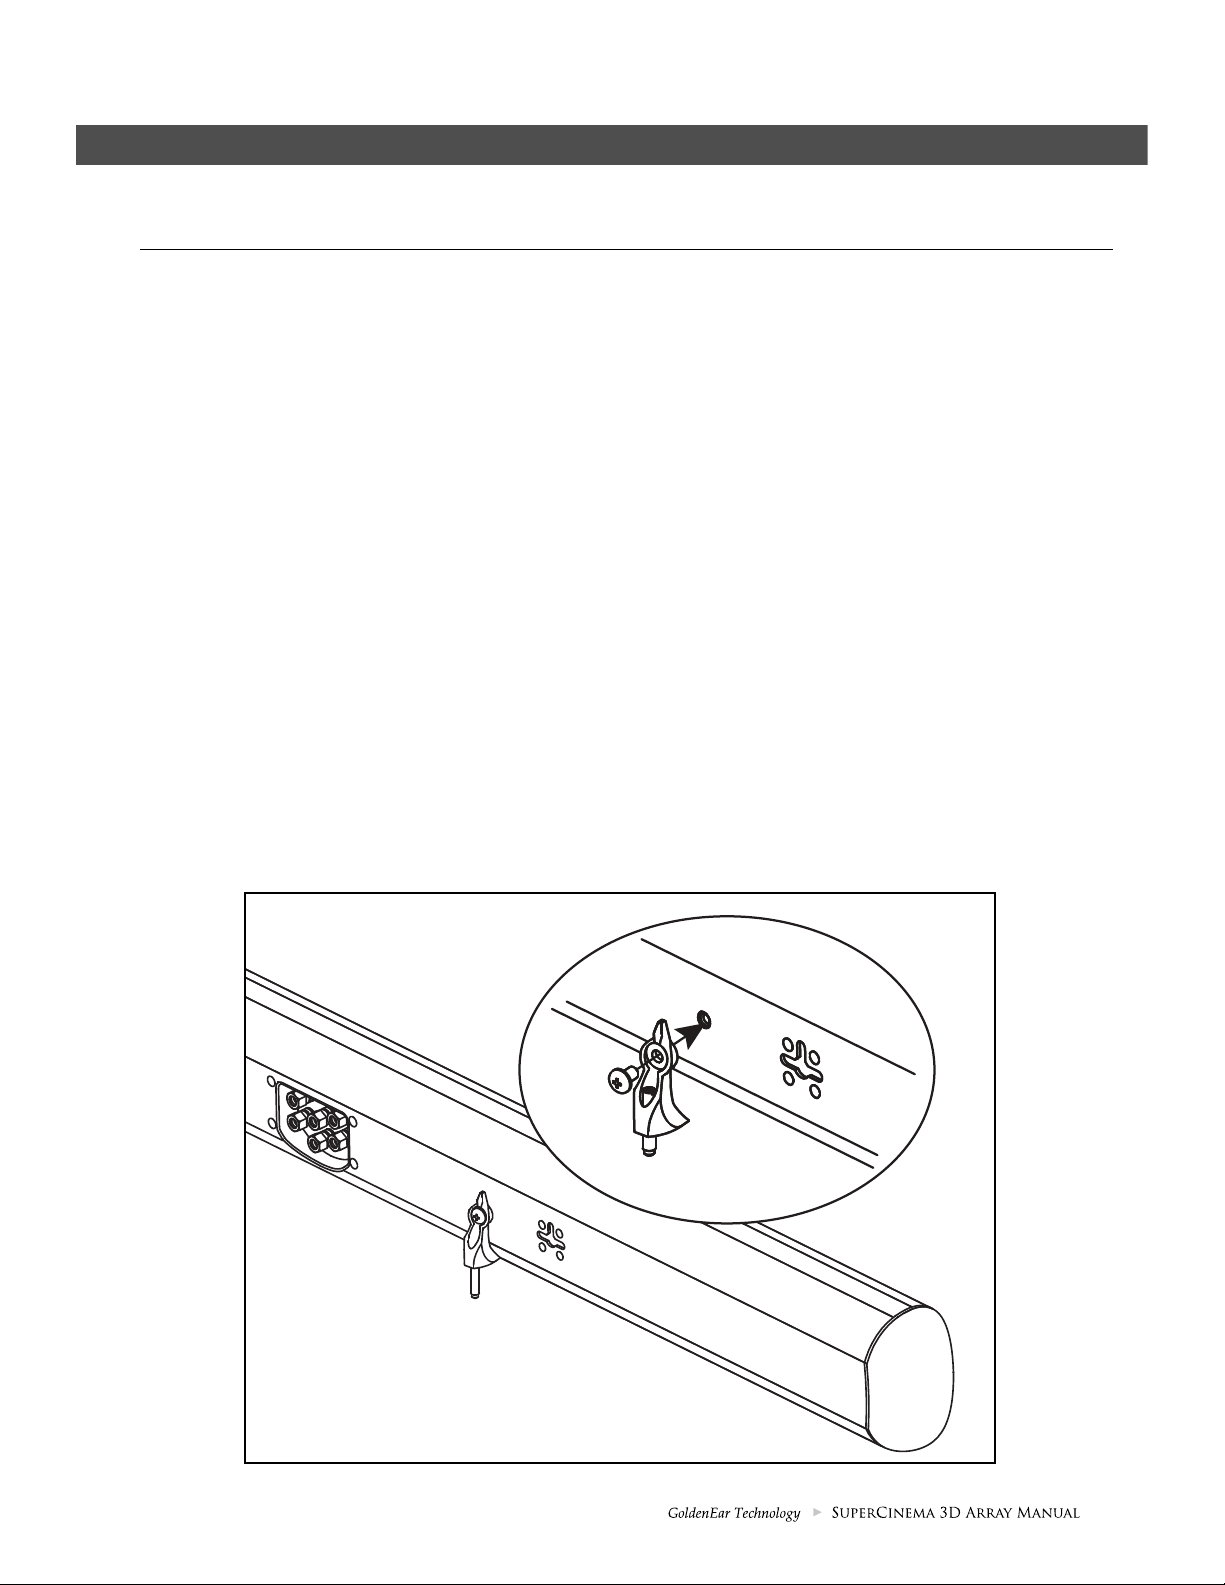
2. Align Foot with matching insert as shown below.
3. Insert the screw through the stand and into the inserts on the speaker’s back.
4. Tighten the screw into the insert in the back of the SuperCinema 3D Array, do not over tighten.
5. Repeat steps 2, 3 and 4 with the second Adjustable foot.
6. Adjust the height of the rubber-tipped set screws to achieve the desire angle. You can adjust the set
screw from above using the small flat blade screwdriver. Caution should be exercised to rotate the
speaker’s weight off the tip before adjusting to prevent damaging the rubber tip.
5
 Loading...