

Gold Century GC-1019 Owner's Manual

Gold Century
GC-1019 Metal Detector
Advanced Professional Digital LCD Display
Advanced Metal Detector
OWNER’S MANUAL
And
Warranty

2
MAIN FEATURES
The detector has two distinct systems:
1. ALL METAL No-Motion Mode: In this setting, detected targets will
cause the detector to sound off for as long as the target is under the
searchcoil—motion is not required to detect a target. When
operating in the ALL METAL Mode, adjust GND BAL(GROUND
BALANCE) to ensure proper mineral elimination. It is required to
push GND TRAC several times after adjusting GND BAL. All
targets will be detected with a medium tone.
2. Motion DISC (DISCRIMINATION), NOTCH and AUTO NOTCH
Modes: Operates with three tone audio target identification. GND
TRAC does not apply in these modes. User can adjust DISC and
NOTCH to reject any trash item. Motion is now required to make a
detection. Items will be tuned out if coil is not in motion.
Note: Do not attempt to test unit by placing a coin or metal objects onto
a floor. Most floors contain metal which interfere with the detector’s
operation.
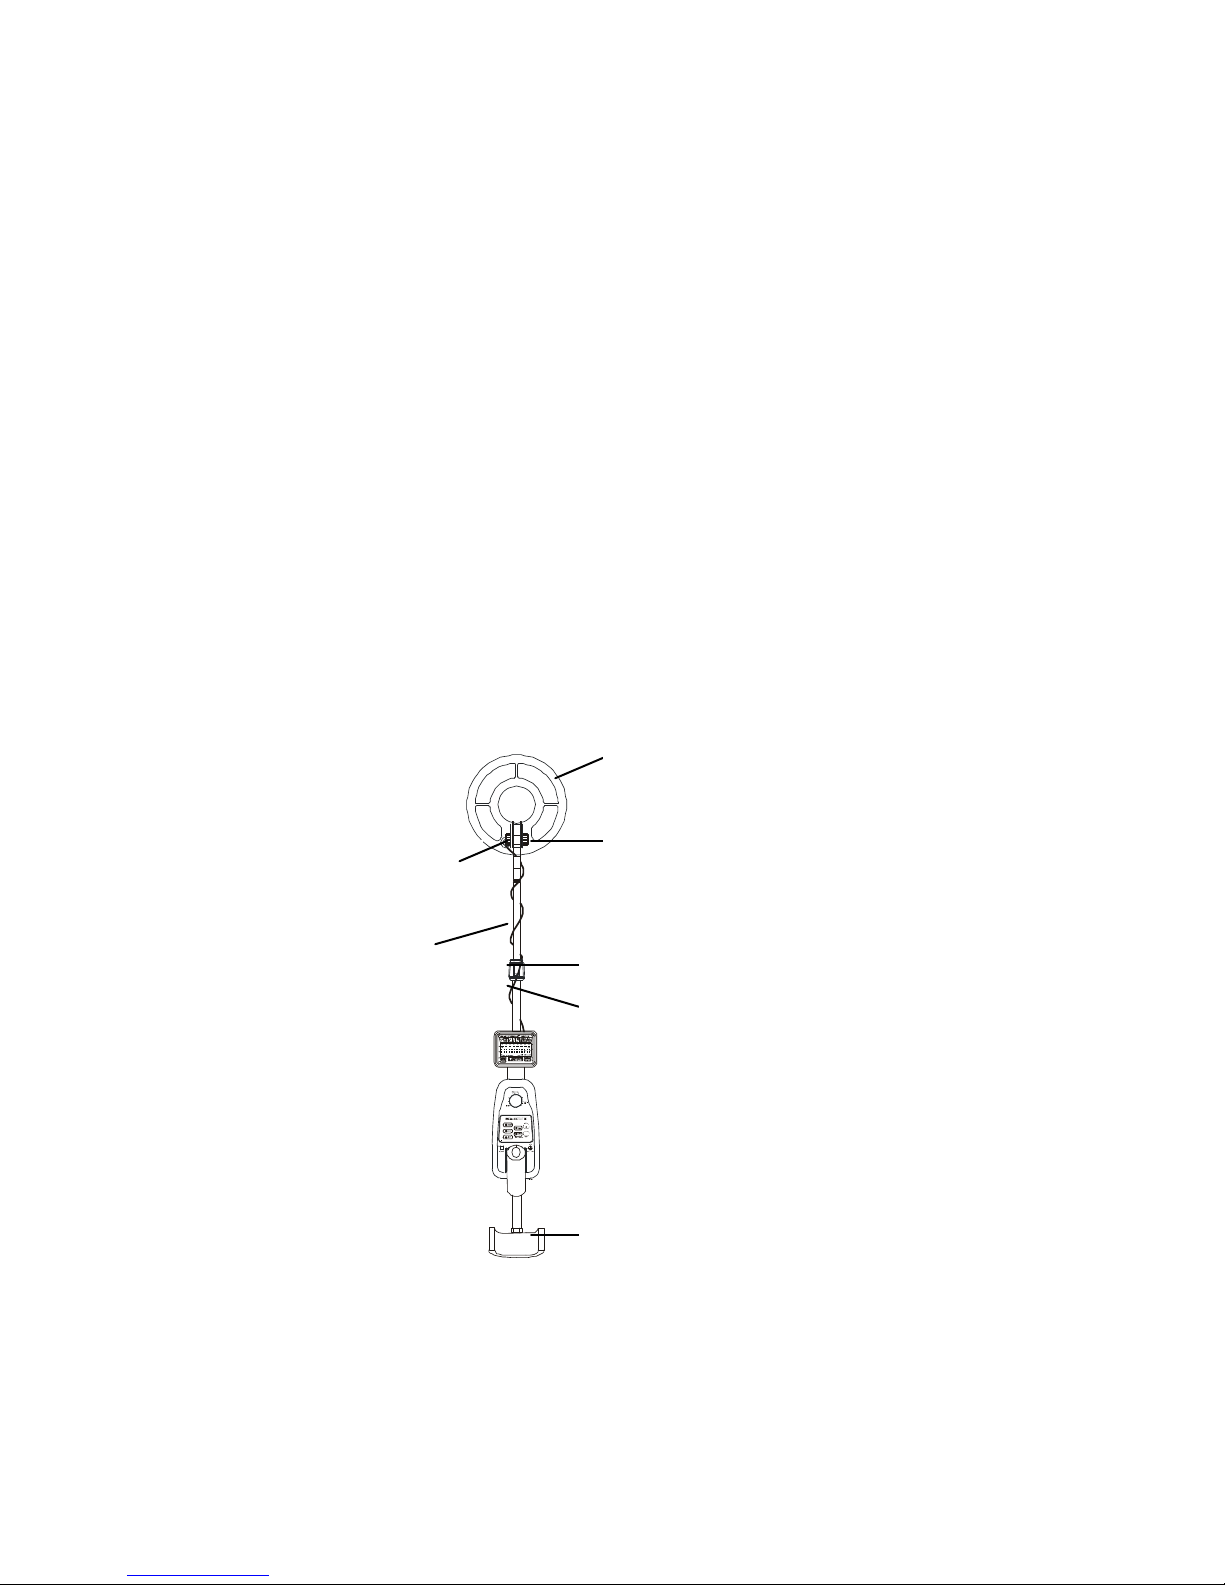
ASSEMBLY
Assembling your metal detector is easy and requires no special tools.
Just follow these steps:
1. Clockwise turn the stem’s locknut to loosen it.
2. Press and hold down the spring button at the back of the stem to
lengthen or shorten the stem. Then release the button. Make sure
the button is in proper hole.
Adjust the stem to a length that lets you maintain a comfortable
upright posture, with your arm relaxed at your side and the
searchcoil level to the ground about 1/2 to 2 inches (1~5cm) above
the ground.
3. Counter clockwise tighten the locknut.
3
4. Unscrew the knob on the search coil and remove the knob connector.
Insert the stem and align the holes on the search coil bracket and the stem.
Push the connector through the holes and tighten the knob.
5. Wind the search coil cable around the stem. Leave enough slack in the
cable.
6. Insert the search coil’s plug into the matching jack on the detector’s control
housing.
Caution:
The search coil’s plug fits into the jack only one way. Do not force the plug
or you could damage it.
To disconnect the cable, pull out the plug. Do not pull on the cable.
7. Adjust the coil by loosening then tightening the knob on the coil.
Note: Do not overtighten the knob, nor use tools to tighten it.
8. Insert the arm support into the end of the stem and tighten the fixing
screw.
INSTALLING BATTERIES
Your metal detector requires two 9V batteries (not supplied).
stem
knob connector
searchcoil
knob
locknut
cable
arm support
4
Use only fresh alkaline batteries of required size.
Do not mix the old and new batteries or different types of batteries.
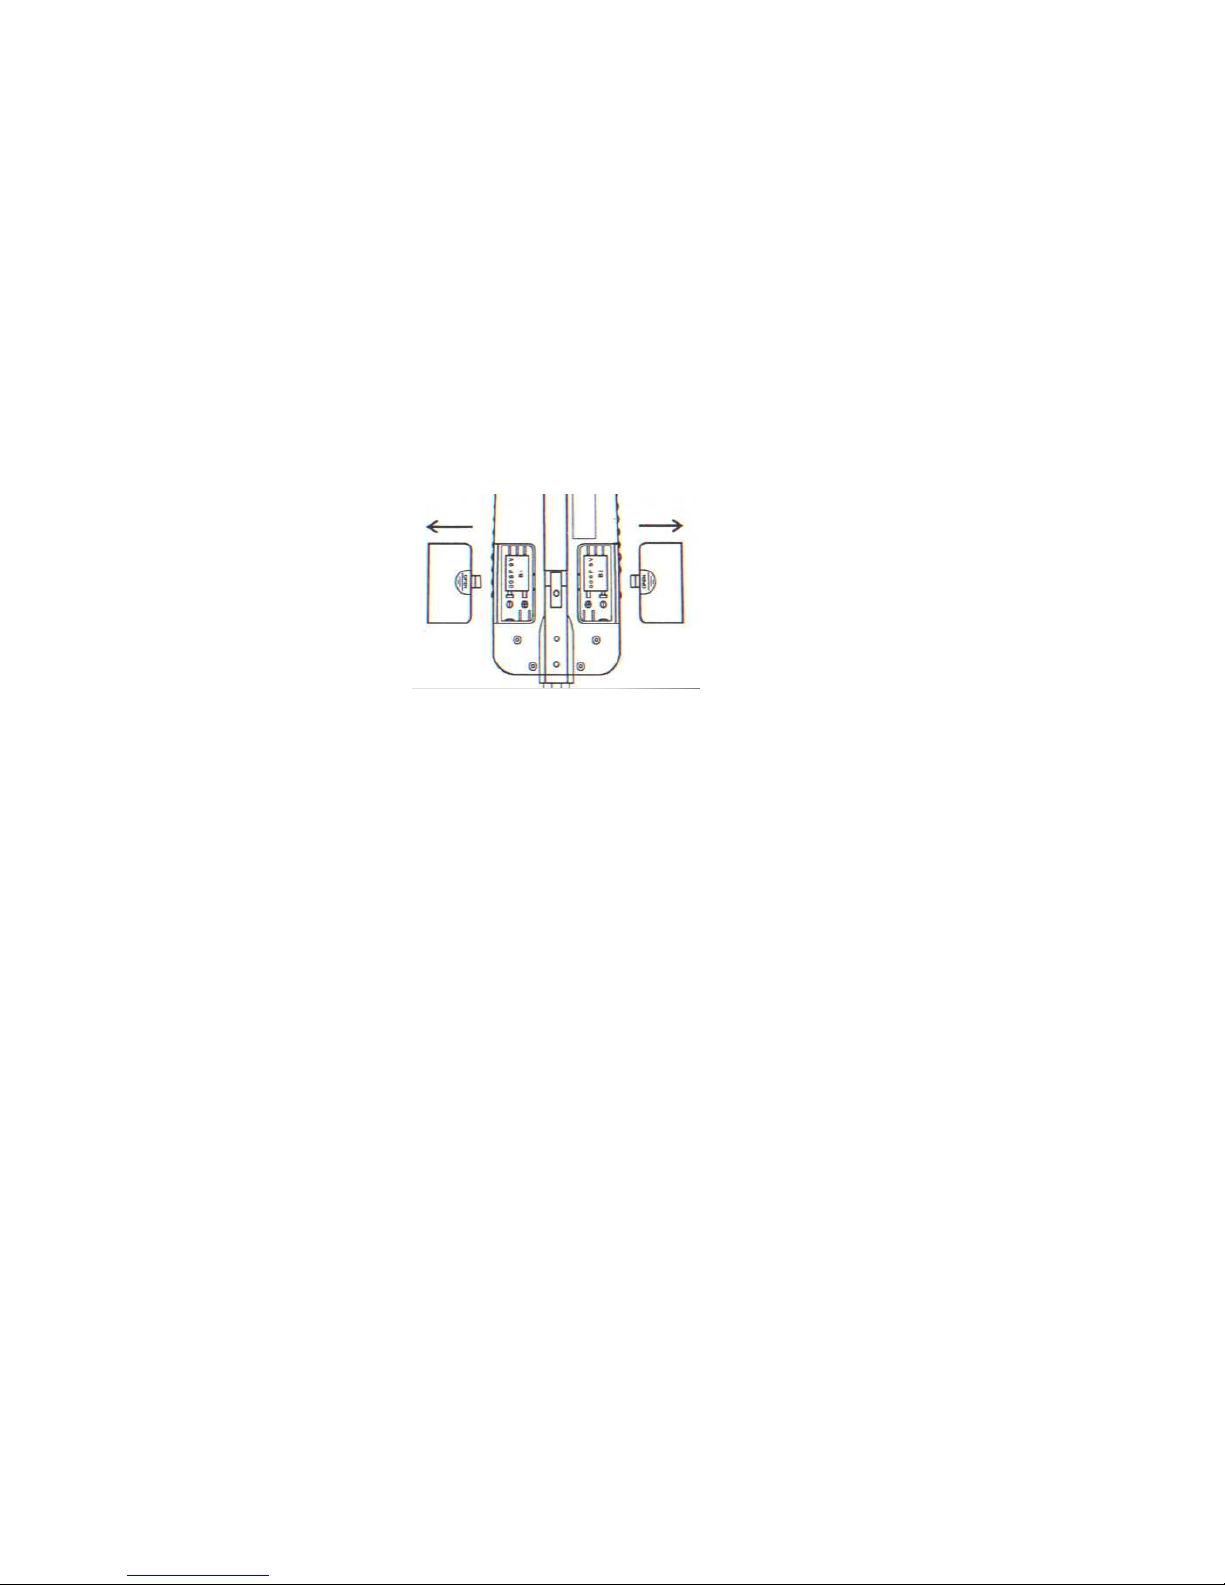
Follow these steps to install batteries.
1. Slide the POWER button to POWER, if the unit is powered on.
2. Slide the left and right battery covers off in the direction of the arrow.
3. Place a 9V battery into the battery compartment matching the polarity
symbols (+ and -) marked inside.
4. Replace the battery covers.
Warning:
Dispose of old batteries promptly and properly. Never bury or burn them.
Caution:
If you don’t plan to use the unit for a week or more time, remove the
batteries. Batteries can leak chemicals that can destroy electronic parts.
To extend the battery life, exchange the left and right battery after
3~4hours of operation.
The left and right battery covers can’t be exchanged. B1 and B2 are
marked at the back of the cover and in the compartment.
If LCD displays “LOW BATT” at the right lower corner, replace the
batteries.
USING HEADPHONES
1. Insert the stereo headphones’ 3.5mm plug into the PHONE jack. At this
time the internal speaker disconnects.
2. Set the VOLUME to the desired setting.
5
phone
Listening Safely
To protect your hearing, set the volume to the lowest setting before you
begin listening, adjust the volume to a comfortable level.
Do not listen at extremely high volume levels. Extended high volume
listening can lead to permanent hearing loss.
Do not wear headphones while operating your detector near high-traffic
areas. Pay attention to traffic safety.
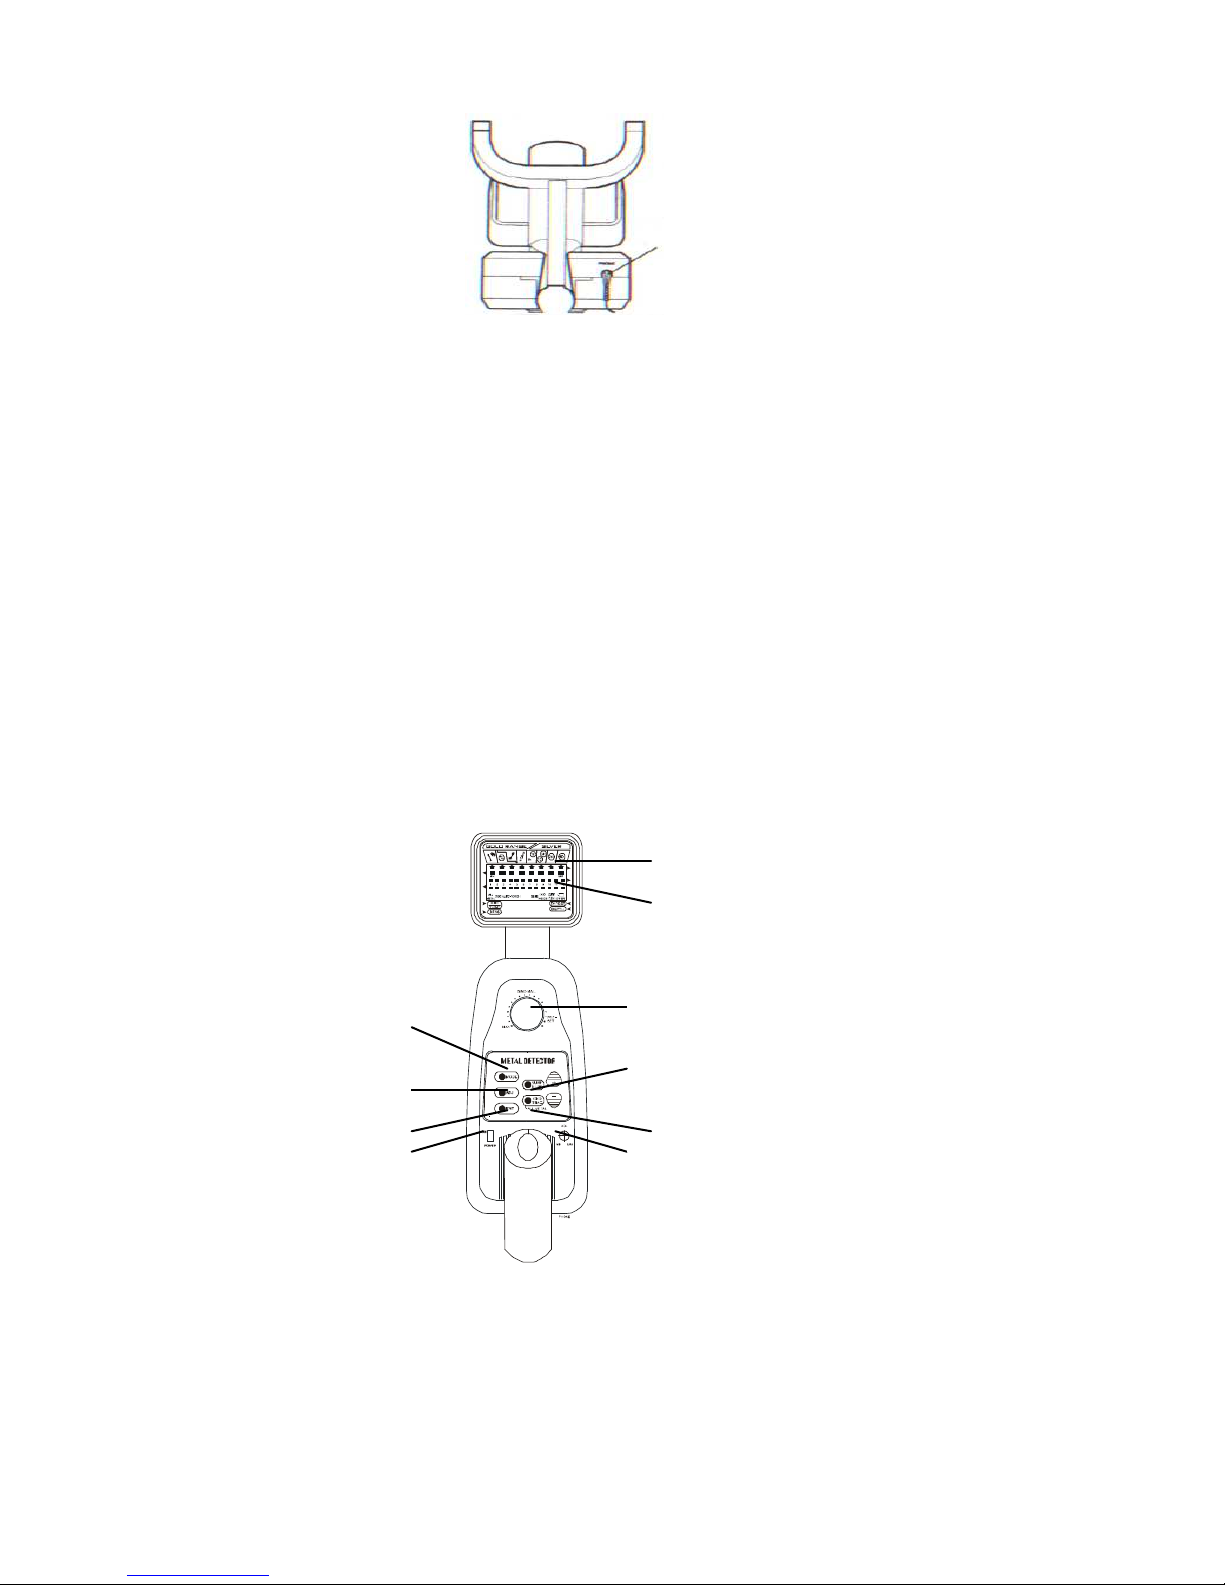
FUNCTIONS AND INDICATIONS
1. A QUICK LOOK AT THE DETECTOR
VOL
ENT
POWER
GND TRAC
MODE
Target indicator
LCD screen
ADJ
GND BAL
SURF ELIM
6
PANEL WITH TOUCHPADS
1. MODE—lets you choose detection modes.
2. ADJ—to adjust sensitivity and the range of discrimination
3. ENT—to confirm accepting or rejecting the target being detecting in
NOTCH mode.
4. SURF-ELIM: Applied in DISC, NOTCH, AUTO-NOTCH modes and is
used to eliminate metallic trash present on the surface or at shallow
depths.
5. GND TRAC—It is applied in ALL METAL mode and permits the unit
to maintain optimum ground balance at all times.
6. +, - --Used to increase or decrease the sensitivity and the range of
discrimination.
Please refer to the detailed instructions for above touchpads in
OPERATION.
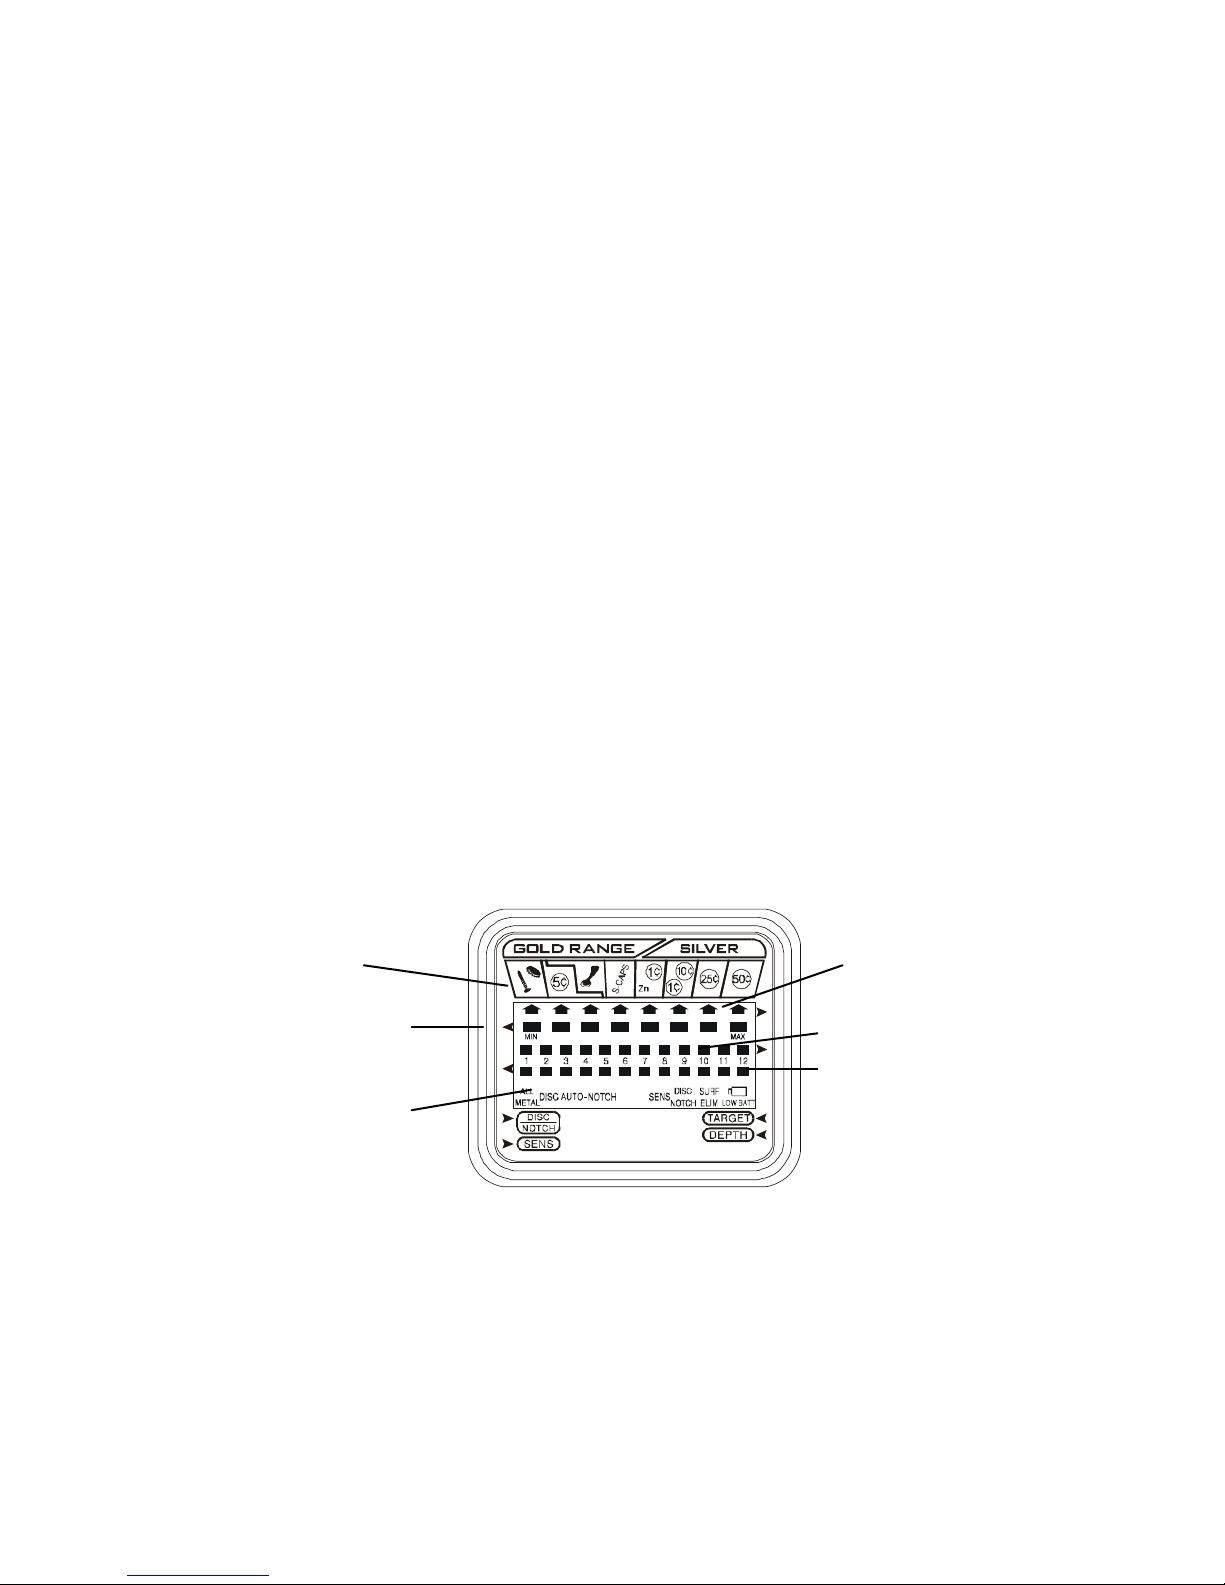
DISPLAY
The indicator of target includes target icons and LCD displays and is located
at the top of the detector. It can indicate coins of different type, gold, silver
etc. When the detector detects an object, an arrow appears below the target
icon of probable type of metal being detected. Also displays the depth of the
Target indicator
DISC/NOTCH range Depth indicator
Operating mode
Target icon
Sensitivity indicator
 Loading...