

Gold Century GC-1012 Operation Instruction Manual
Gold Century
Metal Detector
GC-1012
OPERATION INSTRUCTION

2
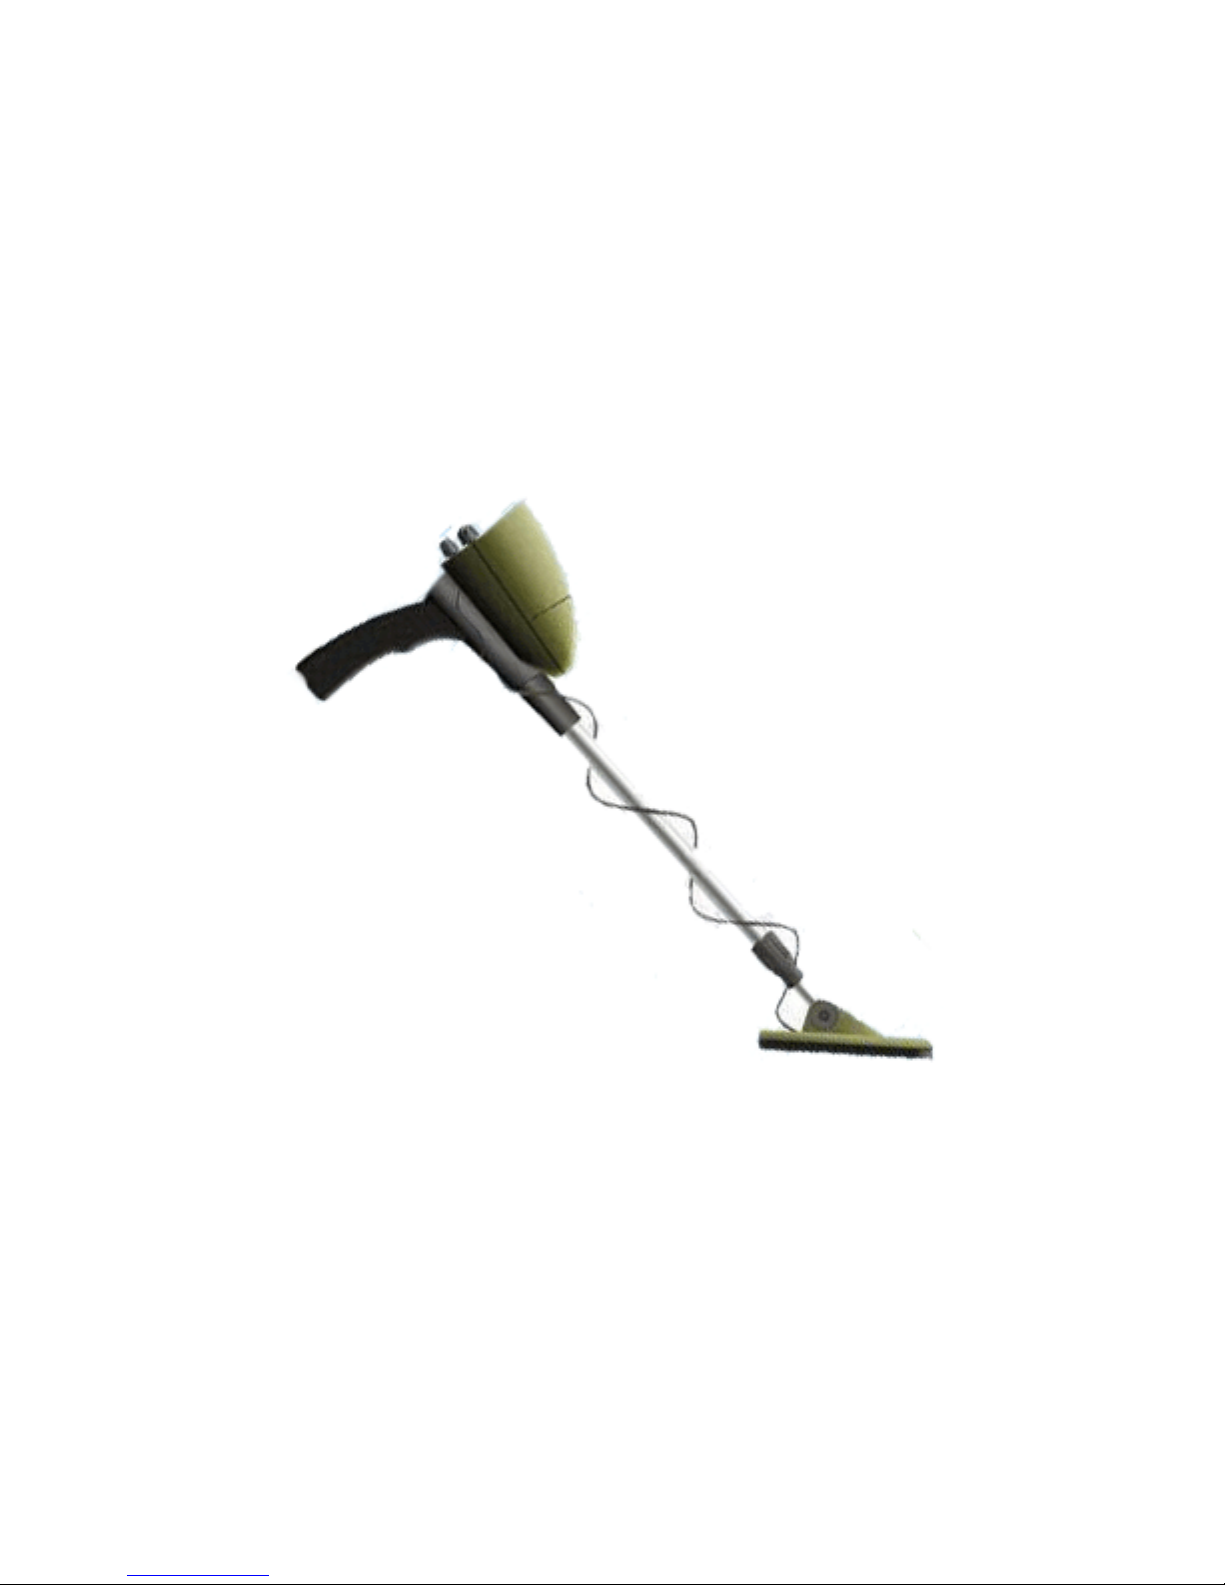
FEATURES
With your Metal Detector, you can hunt for coins, relics, jewelry, gold,
and silver just about anywhere. This metal detector is versatile and easy
to use.
The detector’s features include:
Earphone Jack – lets you connect earphones (not supplied) to the
detector in private.
View meter and Pointer – shows the probable type of metal being
detected and lets you know when it is time to replace the batteries.
Water proof Search Coil – lets you use the detector’s search coil even if
you must put it under water.
Note: The search coil is waterproof, but the control housing is not
waterproof.
Adjustable Stem – lets you adjust the detector’s length for comfortable
use.
Note: Your metal detector requires one 9 volt batterie (not supplied).

3
TREASURE HUNTER’S CODE OF ETHICS
All treasure hunters might be judged by the example you set. Here are a
few basic rules you should follow while using your detector.
Always get permission before searching any site.
Respect the rights and property of others.
Observe all national, state, and local laws while treasure hunting.
Never destroy historical or archaeological treasures. If you are not
sure about an object you
have found, contact a museum or historical society in your area.
Leave the land and vegetation as it was. Fill in any holes you dig.
Use your detector only in safe areas.
Dispose of any junk you find, only in approved areas. Do not leave it
for the next treasure hunter to find.
PREPARATION
ASSEMBLING THE DETECTOR
Assembling the detector is easy and requires no special tools. Just follow
these steps.
1. Loosen the stem’s lock nut in the direction of the arrow.
2. Lengthen or shorten the stem, so when you stand upright with the
detector in your hand, the search coil is level with and about 1/2 to 2
inches above the ground.

4
3. Turn the stem’s lock nut in the reverse direction of the arrow to lock
it in place.
4. Unscrew the knobs on the search coil and remove the knobs and
the connector. Insert the stem and align the holes on the search coil
bracket and the stem. Push the connector through the holes, then
replace and tighten the knobs.
5. Insert the latch on the top of the handle into the assembly hole on
the bottom of the control box. Then slightly pull the handle in the
direction of IN on the handle to fix the latch in place.
Assembly hole latch
6. Insert the search coil cable plug into the five pin jack on the front
control box’s housing.
Caution:
The search coil cable plug fits into the connector only one way. Do
not force the plug or you could damage it.
You don’t need to disassemble the stem lock nut. In case you
disassemble it carelessly, place the washer on the top of the stem
connected with the handle with the small head of the washer
upwards. Then hitch the stem lock nut on the washer then tighten it
to lock it in place.
OPEN
IN
OUT
5
ADJUSTING THE SEARCH COIL
Loosen the knobs at the search coil’s end, then adjust the search coil to
the desired angle. (The search coil should be parallel with the ground.)
Tighten the knobs just enough to keep the search coil from rotating or
wobbling.
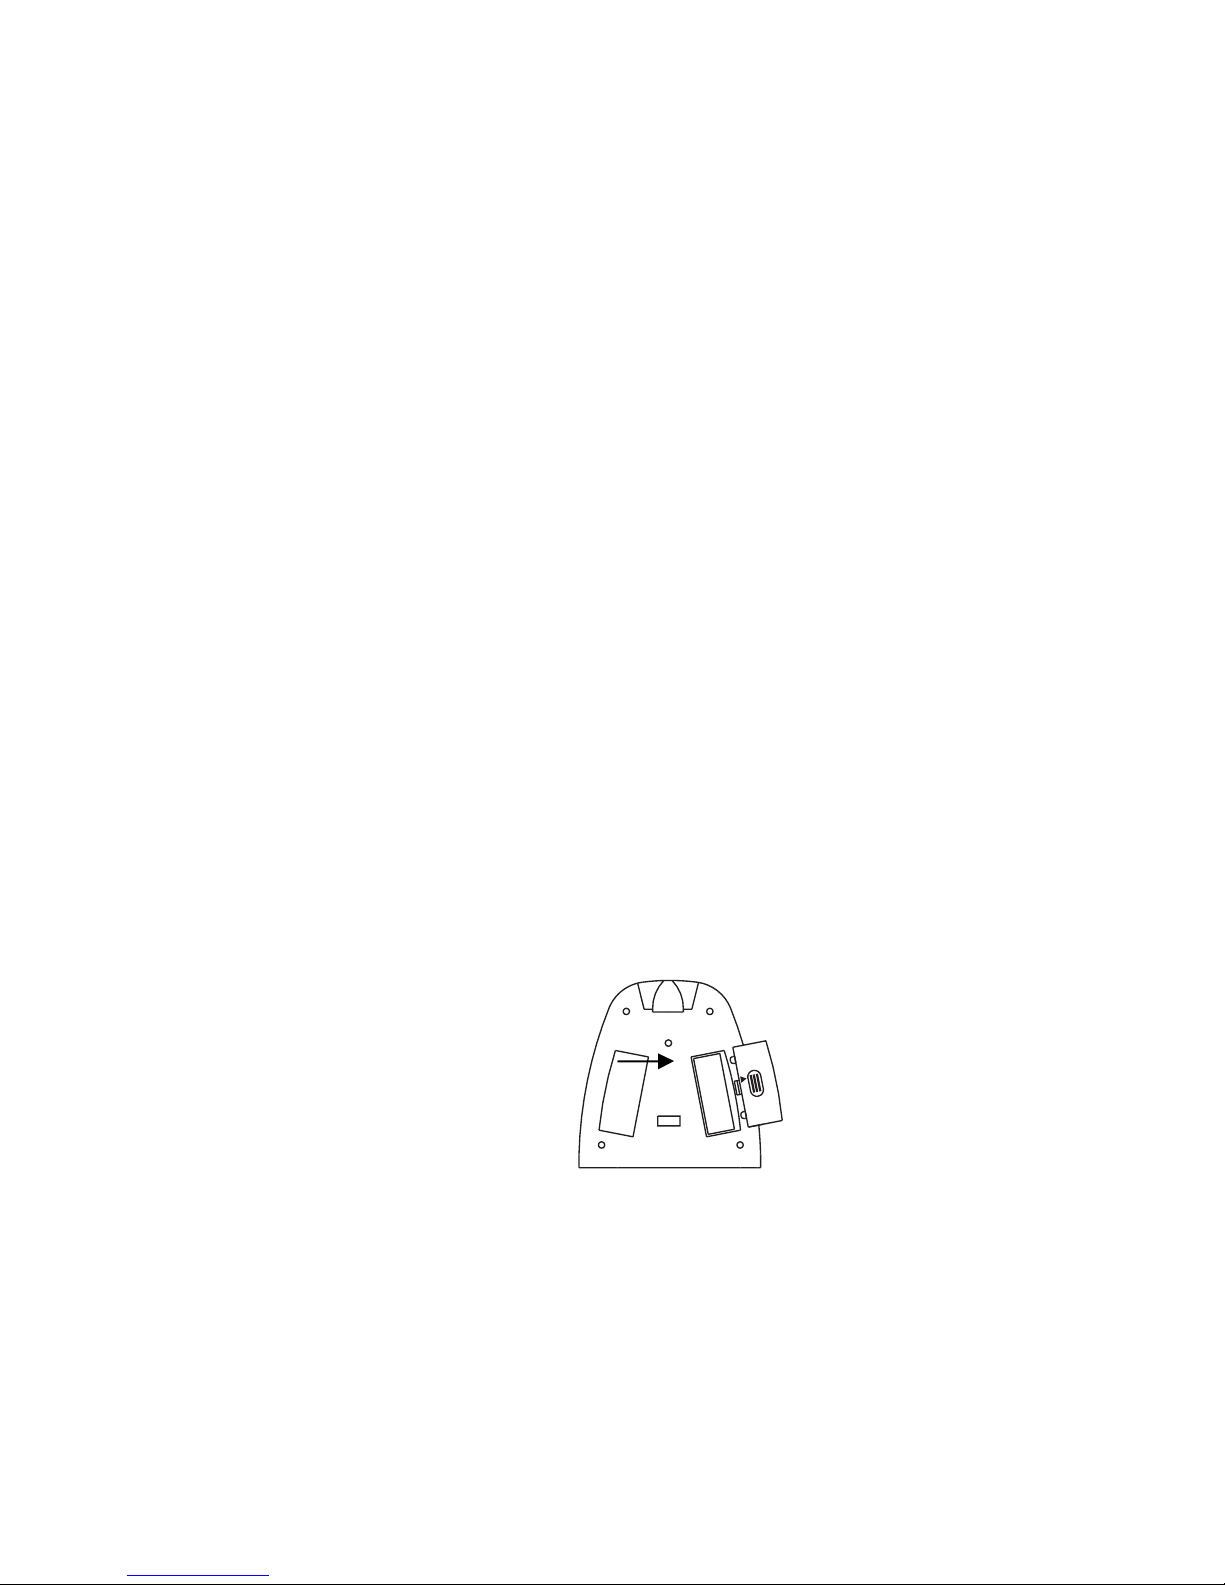
INSTALLING BATTERIES
You need one 9V alkaline battery to power your detector.
Cautions:
Use only fresh battery of the required size and recommended type.
1. If the detector is on, turn VOLUME (on the control housing) to OFF
(The control clicks.)
2. Press on the battery compartment cover and slide the cover off in
the
direction of the arrow.
3. Insert the battery into the compartment.
4. Replace the cover.
Cautions:
Always remove old or weak battery; battery can leak chemicals
OPEN
 Loading...