

Gold Century GC-1010 Owner's Manual
1
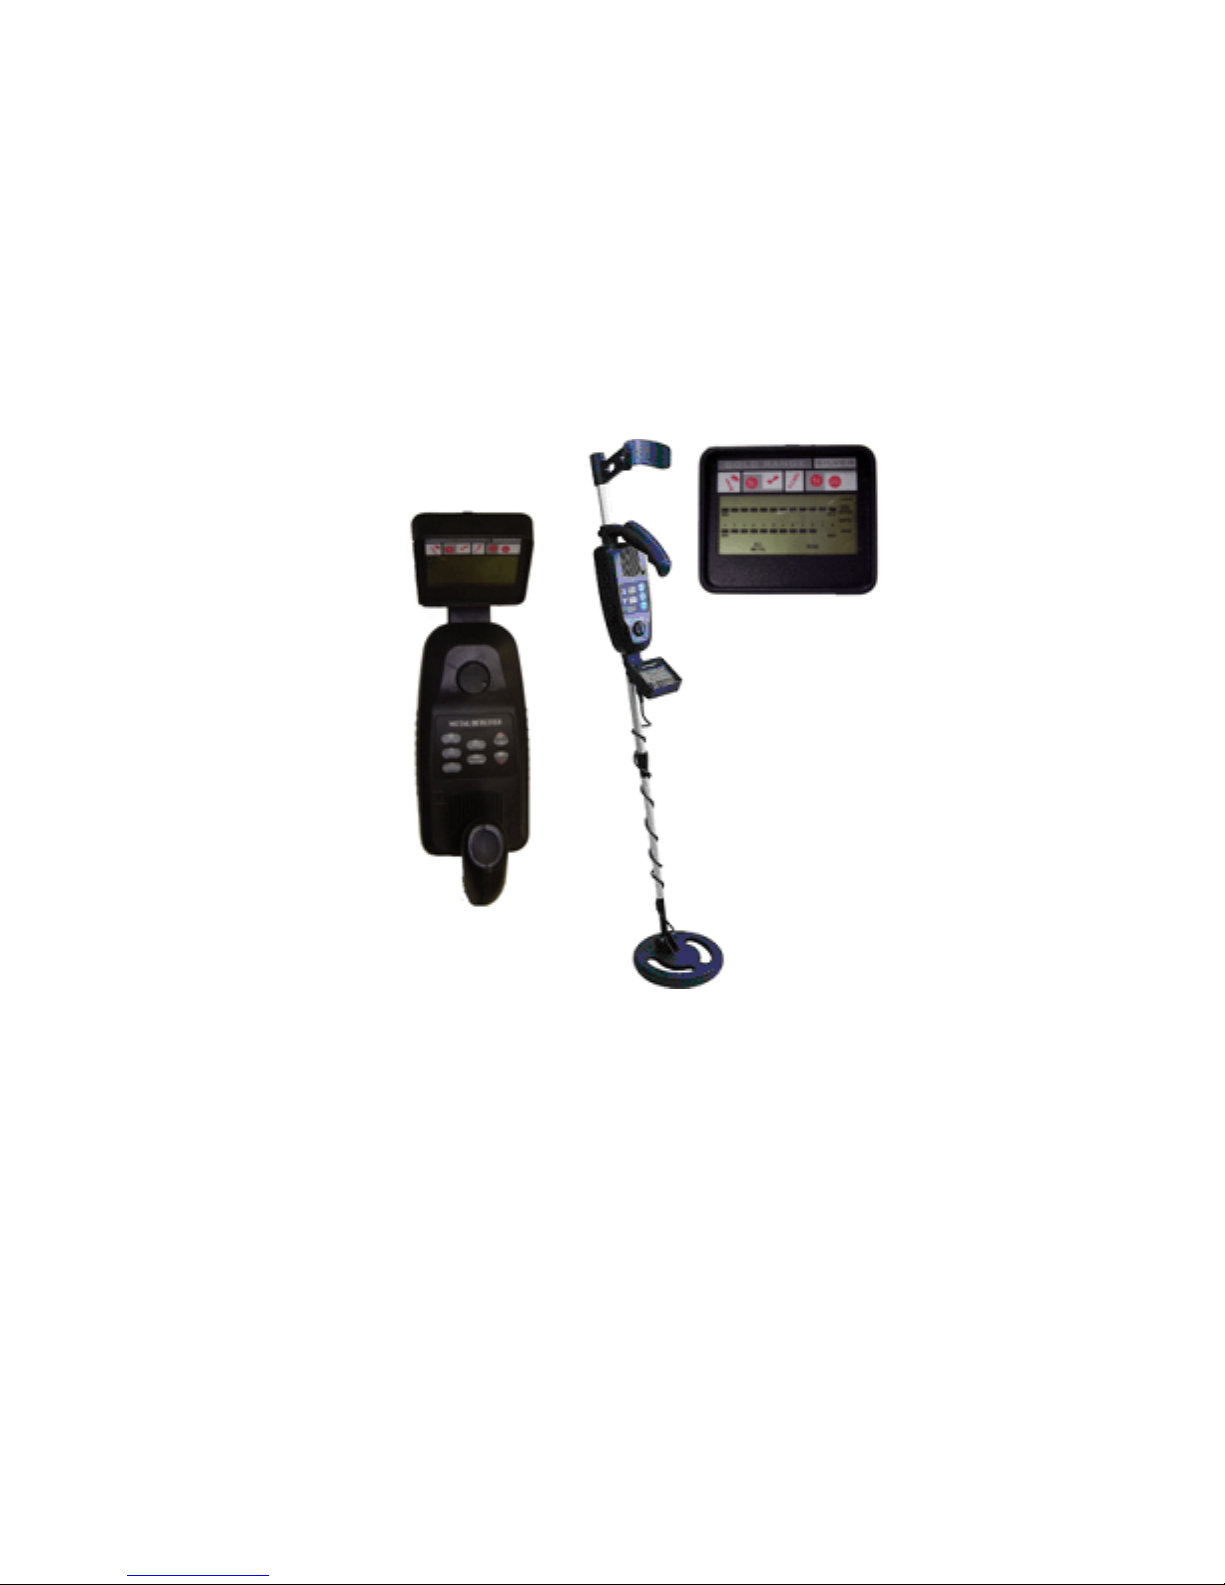
Gold Century
GC-1010 Metal Detector
Digital LCD Display Advanced Metal Detector
OWNER’S MANUAL
And
Warranty

2
CONTENTS
Features……………………………………………………………………... 3
Preparation………………………………………………………………….. 4
Assembling the detector………………………………………………… 4
Installing the batteries…………………………………………………… 5
Using headphones……………………………………………………….. 5
Listening safely…………………………………………………………… 6
Functions and indications………………………………………………….. 6
A quick look at the detector……………………………………………… 6
Displays…………………………………………………………………… 6
Tones……………………………………………………………………… 7
Operation……………………………………………………………………. 8
Turning on the detector………………………………………………… 8
Setting the operation mode……………………………………………… 9
Testing and using the detector………………………………………….. 9
Indoor testing and use………………………………………………… 10
Outdoor testing and use………………………………………………. 11
Searchcoil sweeping hints………………………………………………. 11
Adjusting sensitivity……………………………………………………… 12
Application Hints……………………………………………………………. 13
Pinpointing the target……………………………………………………. 13
Factors that affect the detecting………………………………………… 14
Care and maintenance……………………………………………………... 14

3
With your metal detector, you can hunt for coins, relics, jewelry, gold, and silver
just about anywhere. The detector is versatile and easy to use.
The detector’s features include:
LCD Display—shows the probable type of metal with an arrow, the depth of
the target, DISC/NOTCH range, the level of SENS with segment, the operating
mode, and low battery indication.
Three Tone Audio Discrimination—sounds distinctive tones for different
types of metal.
Notch—ignores junk metal and finds valuable items by setting the disc and
notch range.
Super Slow Sweep Identification—with a very slow sweep of the search coil
to discriminate different types of metal.
Headphone Jack—lets you connect headphones (not supplied) and operate
without trouble.
Waterproof Searchcoil—lets you use the detector even if you must put it
under water.
Note: Your metal detector requires two 9-volt alkaline batteries (not supplied).
4
PREPARATION
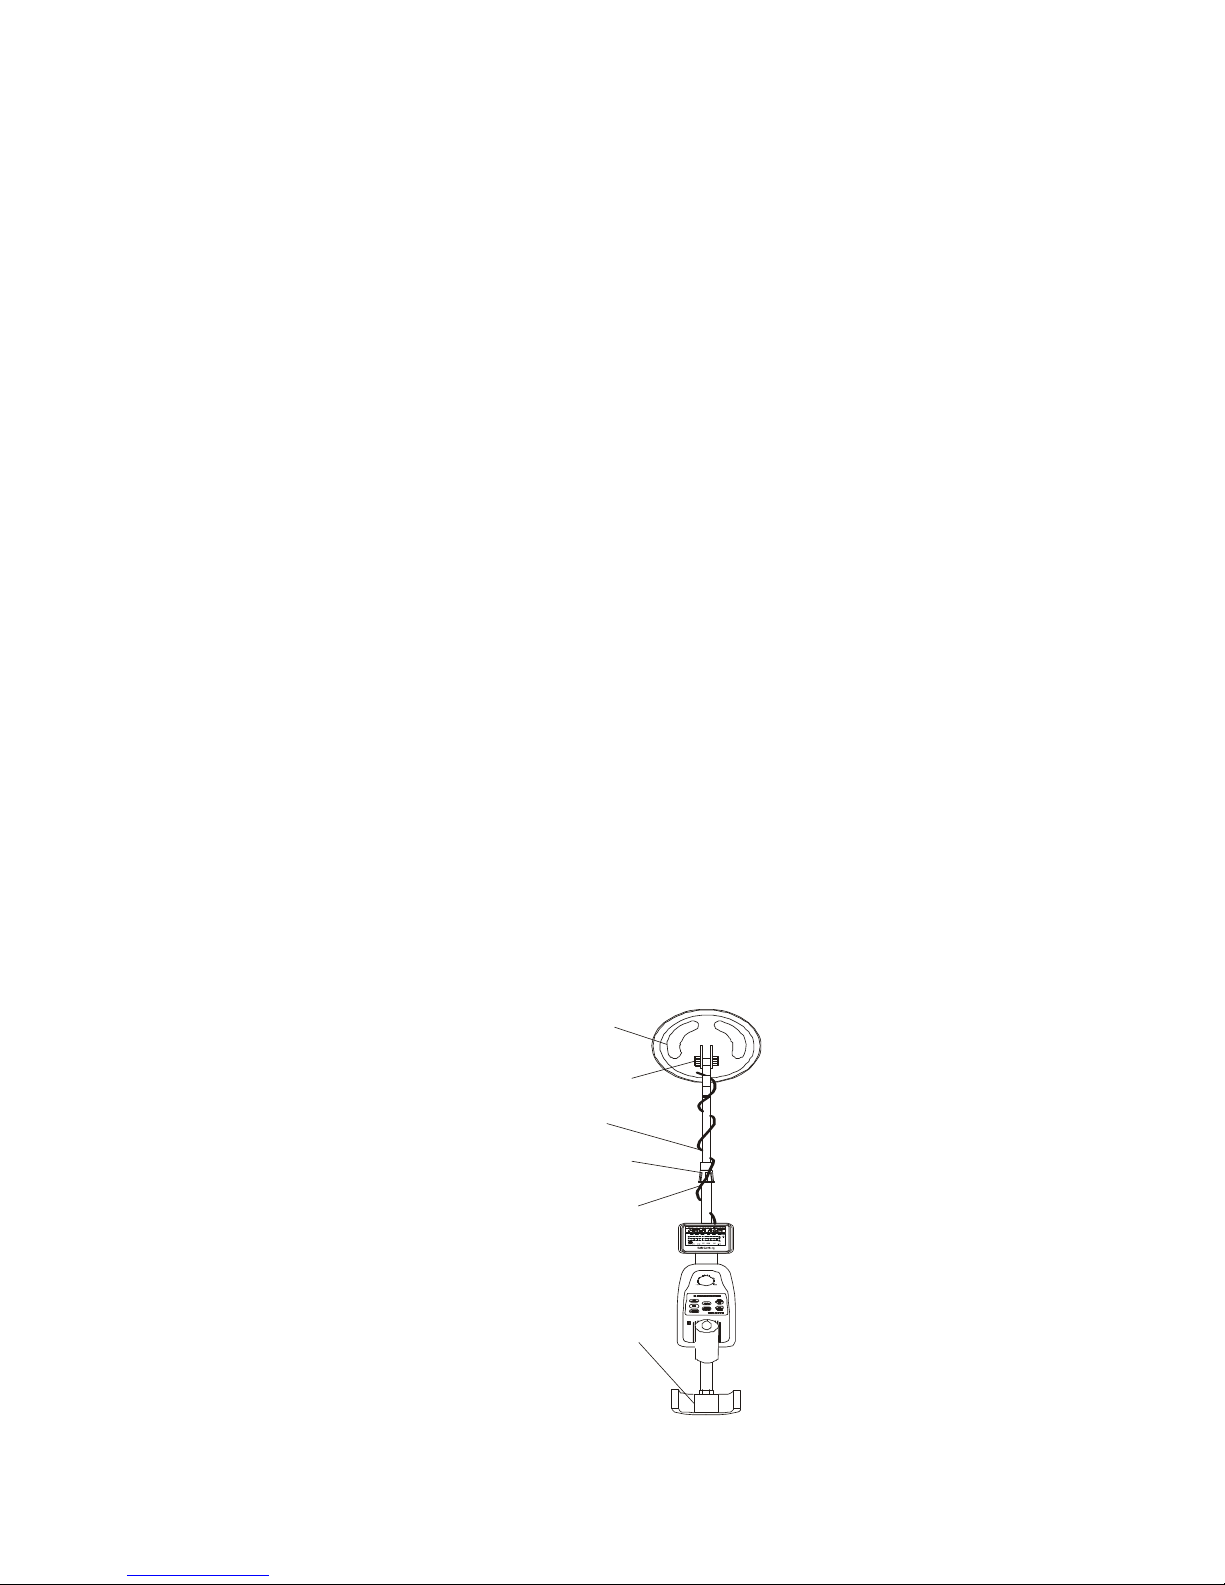
ASSEMBLING THE DETECTOR
Assembling your detector is easy and requires no special tools. Just follow
these steps.
1. Turn the stem’s lock nut clockwise until it loosens.
2. Lengthen or shorten so when you stand upright with the detector in your
hand, the search coil is level with and about 1/2 to 2 inches above the ground
with your arm relaxed at your side.
3. Turn the stem’s lock nut counter-clockwise to lock it in place.
4. Unscrew the knob on the search coil and remove the knob connector. Insert
the stem and align the holes on the search coil bracket and the stem. Push
the connector through the holes and tighten the knob.
5. Wind the search coil cable around the stem. Leave enough slack in the
cable.
6. Insert the search coil’s plug into the search coil jack on the detector’s control
housing.
Caution:
The search coil’s plug fits into the connector only one way. Do not force
the plug or you could damage it.
SEARCHCOIL
KNOB CONNECTOR
STEM
LOCK NUT
CABLE
ARM SUPPORT
5
7. Loosen the knob at the search coil’s end, then adjust the search coil to the
desired angle so that it is parallel with the ground. Then tighten the knob.
Caution:
Do not overtighten the search coil or use tools such as pliers to tighten it.
8. Insert the arm support into the end of the stem and tighten the lock screw.
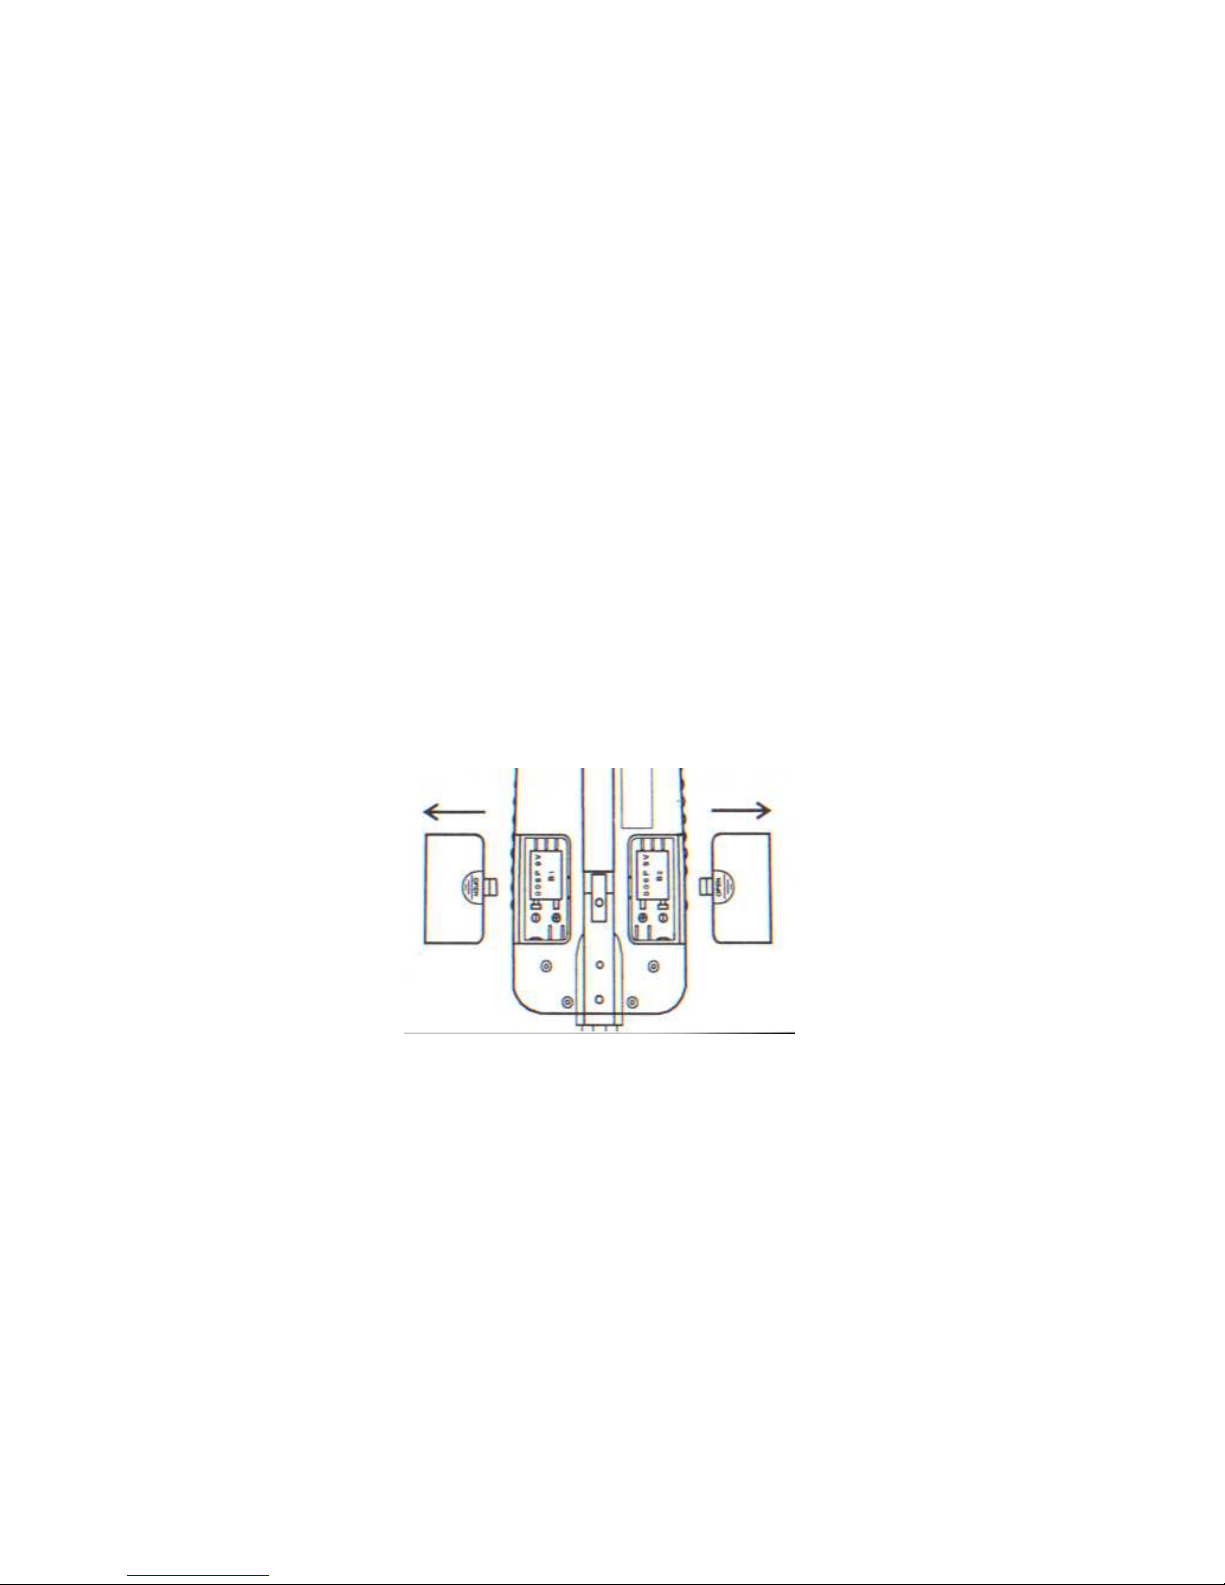
INSTALLING THE BATTERIES
Cautions:
Use only fresh alkaline batteries of required size.
Do not mix the old and new batteries or different types of batteries.
1. Slide the POWER button to turn on the power.
2. Slide the left and right battery covers off in the direction of the arrow.
3. Place a 9V battery into the battery compartment matching the polarity
symbols (+ and -) marked inside.
Warning:
Dispose of old batteries promptly and properly. Never bury or burn them.
Caution:
If you don’t plan to use the unit for a week or more time, remove the
batteries. Batteries can leak chemicals that can destroy electronic parts.
To extend the battery life, exchange the left and right battery after
3~4hours of operation.
 Loading...