

Page 1
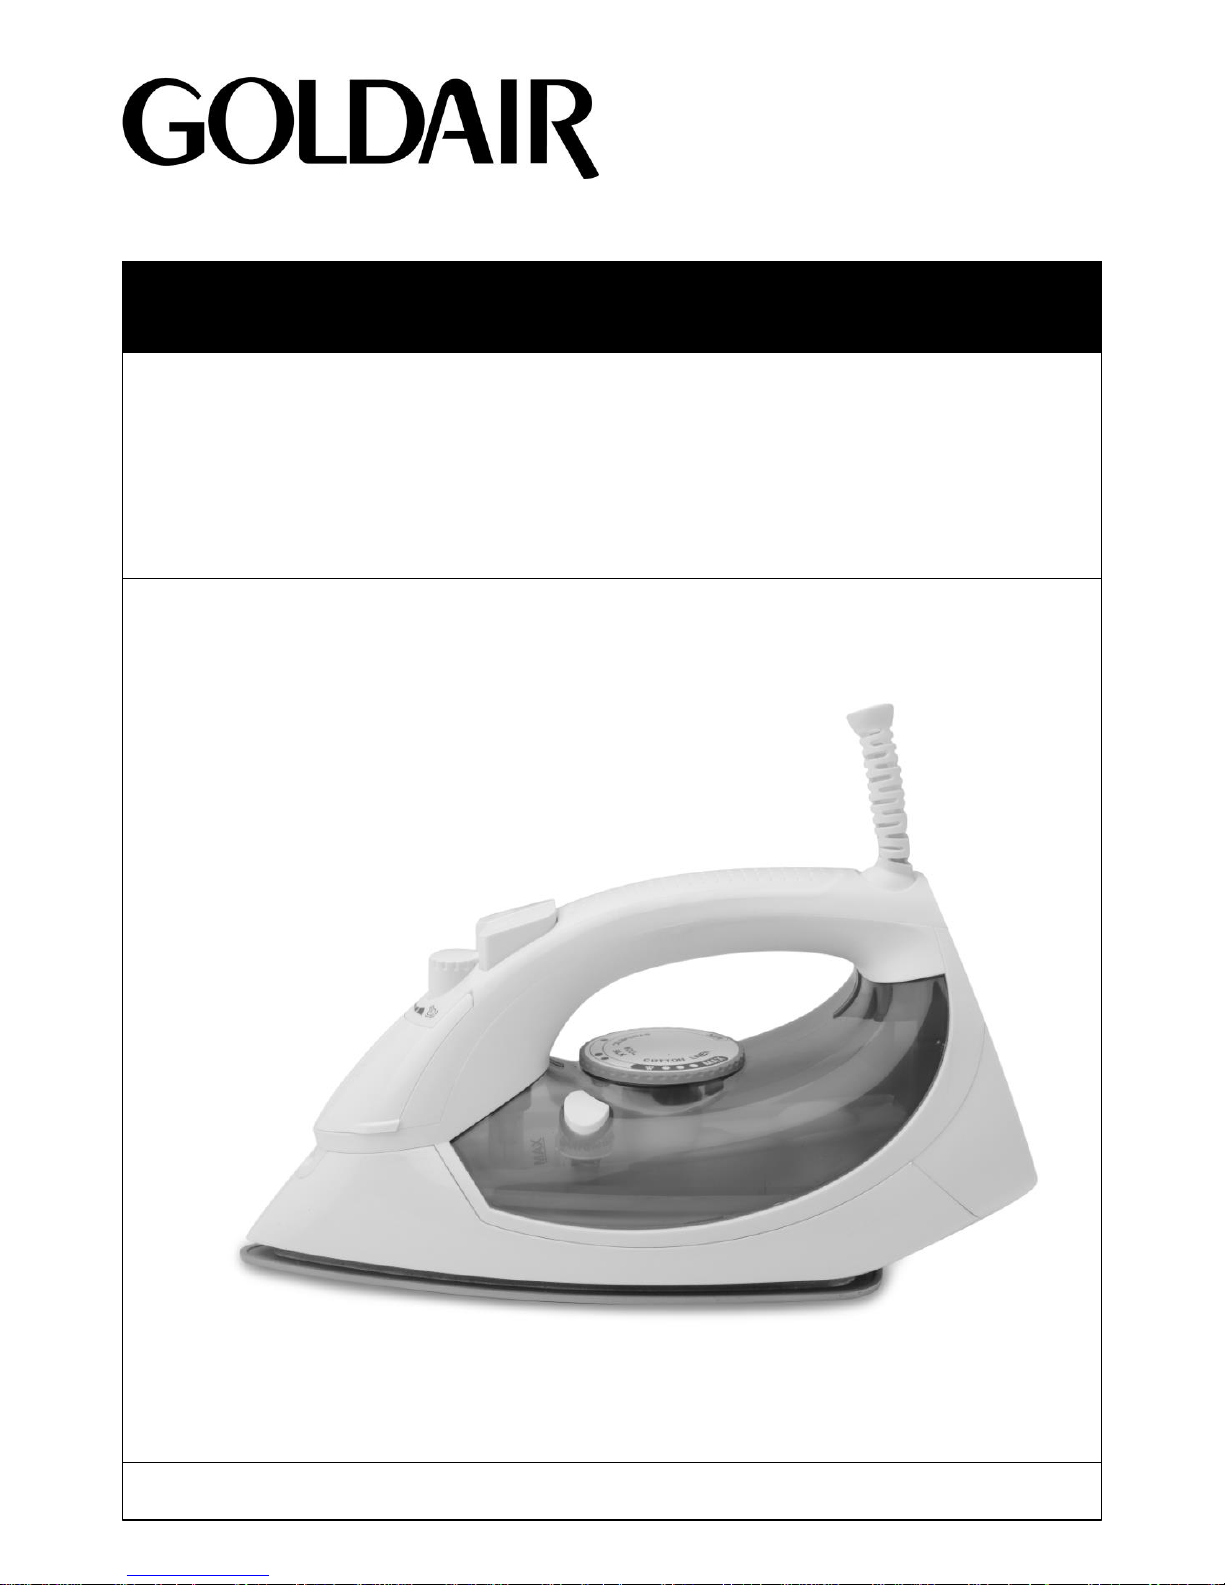
2400W Iron
Item: GI310
Operating Instructions
Page 2

NEVER
✘ Never touch hot surfaces.
✘ Never use this appliance outdoors.
✘ Never use this appliance for any purpose
other than its intended use. This appliance is
for household use only or in similar applications
such as:
• Staff kitchen areas in shops, offices and
other working environments;
• Farm houses
• By clients in hotels, motels and other
residential type environments;
• Bed and breakfast type environments.
✘ This appliance is not intended for use by
persons (including children) with reduced
physical, sensory or mental capabilities or lack
of experience and knowledge, unless they are
supervised or have been given instruction
concerning the use of the Iron by a person
responsible for their safety.
✘ Close supervision is necessary when the
appliance is near children.
✘ Never leave the appliance unattended when
in use as clothing and material can burn.
✘ Never place this appliance on or near a hot
gas or electric burner or where it could touch a
heated oven or microwave oven.
✘ Never immerse any part of the Iron, or cord
set and plug in water or any other liquid to
protect against electrical hazards.
✘ Never use harsh, abrasive or caustic
cleaners to clean this appliance.
✘ Never operate the appliance with a
damaged cord or plug, after it malfunctions, or
if it has been damaged in any manner.
✘ The Iron is not intended to be operated by
means of an external timer or separate remotecontrol system.
✘ The Iron must not be left unattended while it
is connected to the supply mains.
✘ The plug must be removed from the socketoutlet before the water reservoir is filled with
water.
✘ The Iron is not to be used if it has been
dropped, if there are visible signs of damage or
if it is leaking
CAUTION:
BURNS MAY OCCUR FROM TOUCHING HOT
METAL PARTS, HOT WATER OR STEAM.
USE CAUTION WHEN YOU TURN THE IRON
UPSDIE DOWN AS TEHRE MAYBE HOT
WATER IN THE TANK.
General care and safety guide
TECHNICAL SPECIFICATION
Item No: GI310
Power Supply: 220-240VAC, 50Hz
Power: 2000-2400W
Thank you for choosing a Goldair Iron. This Goldair appliance has been
designed and manufactured to high standards of engineering and with
proper use and care, as described in this leaflet, will give you years of
useful service. Please read these instructions carefully and retain for
future reference.
ALWAYS
✔ Always ensure hands are dry before
handling the plug or switching on the Iron.
✔ Always operate the Iron on a secure, dry,
level surface.
✔ Always operate the Iron on an ironing board
or similar surface.
✔ Always be sure to unplug from the socket
when not in use and before cleaning.
✔ Always allow the Iron to cool before cleaning
and storing.
✔ Carry out regular checks of the supply cord
to ensure no damage is evident.
✔ Return the Iron after a malfunction, or if it
has been damaged in any manner to an
authorised electrician for examination, repair or
adjustment as special purpose tools are
required.
✔ The Iron must be rested on a stable surface.
Page 3
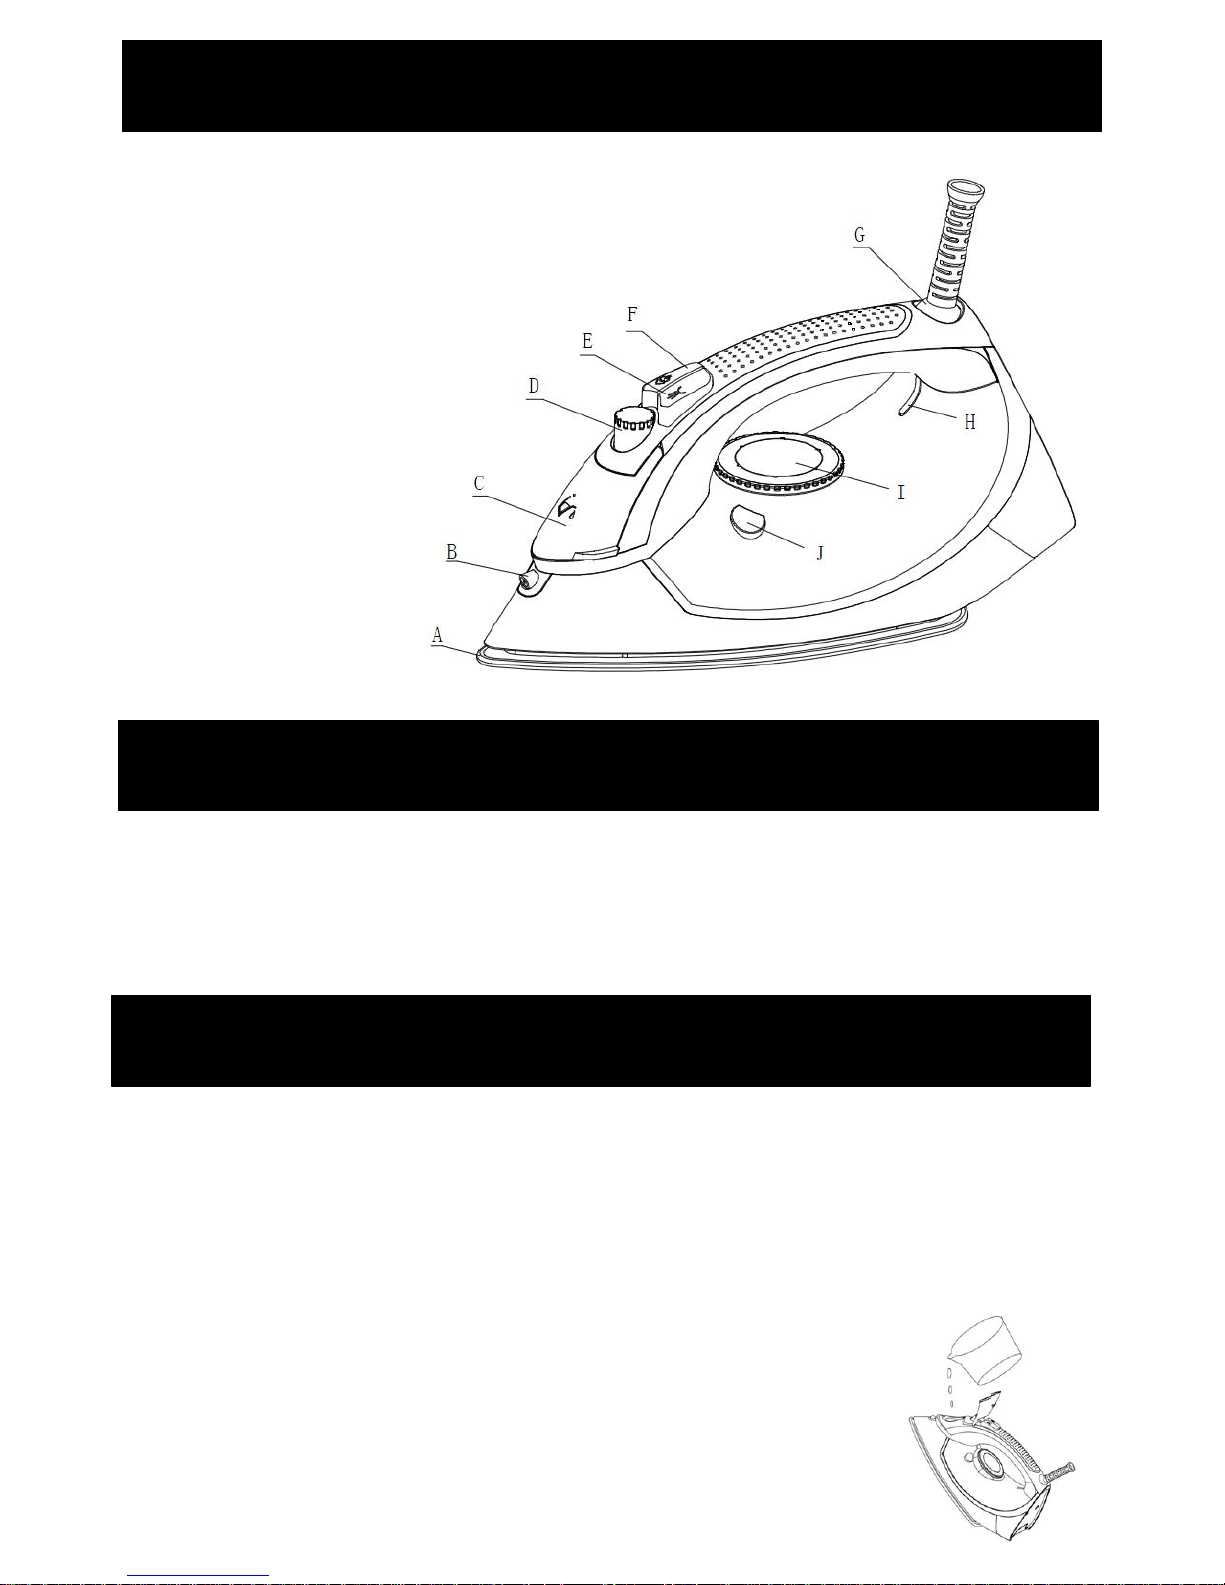
Components
Before first use
Ensure any labels, tags or stickers that may be
attached to the body or soleplate of the iron are
removed.
It is normal for a small amount of smoke and
odor to be produced the first time your iron is
used, this is due to the initial heating of the
materials used to make the iron. When using the
steam function for the first time do not direct the
steam toward your garments, as there could be
debris from the steam vents that may damage
the garment.
Filling with water
WARNING: UNPLUG IRON TO FILL
We recommend the use of distilled water.
Ensure that both the variable steam button and
temperature dial are set to the minimum/low
heat position when filling.
Fill your iron only with water, do not add fabric
conditioners, starches or any other solution as
these will damage the steam mechanism.
Hold the iron in a tilted position when filling.
Use a cup or spout with a spout to fill the iron.
Life water inlet cover and fill by directing water
though the water filling inlet until the water
reaches the MAX mark (250ml)indicated on the
water tank. Never fill above this mark.
Press water tank inlet cover down until it clicks
into place.
A Soleplate
B Spray nozzle
C Water fill inlet and inlet cover
D Variable steam button
E Spray button
F Steam shot button
G 360° swivel cord
H Power on indicator light
I Temperature dial
J Self clean button
Page 4

Getting to know your iron
SOLE PLATE
The sole plate is nonstick. It heats up and is
used to press/iron the garment.
While it is very durable, it does require care to
maintain its good looks. Please read the notes
below:
Before first use: wipe and thoroughly dry your
iron’s sole plate to remove any manufacturing
residue.
After every use: wipe and thoroughly dry.
Do not use steel wool, a wire brush, bleach or
abrasive cleaners. Steel wool can leave
particles of steel on the sole plate, damaging the
surface or your clothing.
Metal or hard plastics (for example buttons or
zips) may scratch the surface of the sole plate.
SPRAY BUTTON and SPRAY NOZZLE
Press the Spray Button to produce a fine mist of
water from the Spray Nozzle. This is useful if the
garment to be ironed is particularly creased.
Making the garment a little damp (not wet)
makes it easier to iron.
WATER TANK INLET
This is where you fill the water tank if you wish
to steam iron. Make sure the water does not
exceed the MAX level (250ml) as indicated on
water tank. Unplug iron to fill. We recommend
the use of distilled water. Please refer to filling
instructions on previous page of this user
manual.
VARIABLE STEAM BUTTON
Move the dial to select the desired steam output
for each garment. To iron with steam (DRY
IRON), the dial must be in OFF position.
Generally a thicker or heavier garment, or a
more creased garment, will require more steam.
STEAM SHOT BUTTON
Press this button for a shot of steam. This is
useful for eliminating stubborn creases. Steam
shot function is best used when iron is on MAX
temperature. Steam shot can be used when iron
is positioned vertically so is useful for removing
creased from hung clothes and curtains.
360° SWIVEL CORD
This allows free movement of the cord in any
direction for better manoeuvrability while ironing.
Also helps avoid tangles.
POWER ON INDICATOR LIGHT
When this light is on, it indicates that the iron is
heating. It will switch off when the selected
temperature is reached.
TEMPERATURE DIAL
Turn this dial to the correct position for the
garment you are ironing eg SYNTHETIC for
light, manmade fabrics.
DECALCIFICATION FEATURE
There is a decalcifation feature built into this
iron. It absorbs insoluble calcium ions and
converts them to soluble sodium ions. This
feature slows down the build up of calcium
deposits.
Getting started
1. Fill tank – refer to instructions on previous
page
2. Plus in iron and turn temperature dial to
your desired setting, depending on the
fabric of the garment you wish to iron.
Power indicator light will come on.
3. Ensure steam button is in DRY position.
4. Place iron vertically.
5. When selected temperature has been
reached, the indicator light will go out.
6. Set the steam button to your desired
setting and begin ironing.
SETTING TEMPERATURE
Follow instructions detailed on the label of the
garment you wish to iron. If there are no
instructions, use the indicative chart following.
If the garment consists of various fabric types,
select the temperature relevant tor the most
delicate of the fabrics that make up your
garment.
Page 5
Using your iron
Goldair – New Zealand
Monday – Friday 8am-5pm
Phone +64 (0)9 917 4000
Phone 0800 232 633
Goldair – Australia
Monday – Friday 8am-5pm
Phone +61 (0)3 9336 4423
Phone 1300 465 324
SUPPORT AND TECHNICAL ADVICE
SPRAYING
Press the spray button to spray water on your
garment, as often as required.
Note: When using the water spray function,
ensure that there is enough water in the water
tank.
Note: You may have to pump the spray button
several times at first use.
STEAM SHOT OR VERTICAL STEAM
IRONING
Press the shot of steam button to generate a
powerful burst of steam that can penetrate the
fabric and smooth the most difficult, tough
creases. Wait for a few seconds before pressing
again.
By pressing the burst of steam button at
intervals you can also iron vertically (i.e. curtains
and hanging garments).
Note: The burst of steam function can only be
used at high temperature. Stop using the Steam
Shot when the pilot light turns on as iron needs
to heat up again. Start ironing again only after
the pilot light has turned off.
DRY IRONING
For ironing without steam, follow the instructions
in the section “steam ironing”, however, the
steam control turning switch should be set to the
DRY position. (no steam).
HOW TO CLEAN & STORE YOUR IRON
After using, disconnect from power and tilt the
water filling hole downward over a sink to empty
the remaining water from the water tank.
Let the iron cool completely, then wipe flakes
and any other deposits on sole plate with a
damp cloth or non abrasive liquid cleaner.
Clean upper part of iron with damp cloth.
Always store the iron horizontally on a stable
surface with a cloth protecting the sole plate.
SELF CLEANING FUNCTION
The self-cleaning feature cleans inside the
soleplate, removing impurities. We recommend
using it regularly according to hardness of water
and frequency of use.
1. Fill water tank to MAX position and set
temperature dial to MAX position.
2. Connect to power supply, making sure
Steam button is in DRY position. Stand iron
up vertically.
3. When power indicator light goes out, hold
iron over sink and press SELF CLEAN
button. Steam and boiling water will come
out of soleplate, flushing out impurities and
calcium flakes.
4. Release button as soon as water in tank
has been used up
AUTO SHUT OFF FUNCTION
If the iron not used more than 30 seconds in
horizontal position or 8 minutes in vertical
position, it automatically turns off and the light
will flash.
As soon as you use the iron again, it will
automatically turn on and the light will stop
flashing.
Page 6
Name ………………………………………………
Address ……………………………………………
……………………………………………………….
Suburb ……………………………………………
Purchased from …………………………………
Date of purchase …………………………………
Name of product …………………………………
Model no ……………………………………………
IMPORTANT: Please complete and retain this warranty card
Two year warranty
Thank you for purchasing this Goldair product. Your product is warranted against faults and manufacture
when used in normal domestic use for a period of two years. In non-domestic use Goldair limits the
voluntary warranty to three months.
Goldair undertake to repair or replace this product at no charge if found to be defective due to a
manufacturing fault during the warranty period.
This warranty excludes damage caused by misuse, neglect, shipping accident, incorrect installation, or
work carried out by anyone other than a qualified electrical service technician.
PLEASE KEEP YOUR RECEIPT AS THIS WILL HELP VERIFY YOUR WARRANTY.
The benefits given to you by this warranty are in addition to other rights and remedies available to you
under law in relation to the goods or services to which this warranty relates.
In Australia, our goods come with guarantees that cannot be excluded under the Australian Consumer
Law. You are entitled to a replacement or refund for a major failure and compensation for any other
reasonably foreseeable loss or damage. You are also entitled to have the goods repaired or replaced if the
goods fail to be of acceptable quality and the failure does not amount to a major failure.
In New Zealand this warranty is additional to the conditions and guarantees of the Consumers Guarantee
Act (1993).
Attach a copy of the purchase receipt to this warranty card
Due to continual design improvements, the product illustrated in this User Manual may differ slightly from the actual product.
Goldair – New Zealand
CDB Goldair
PO Box 100-707
N.S.M.C
Auckland
Phone +64 (0)9 917 4000
Phone 0800 232 633
www.goldair.co.nz
Goldair – Australia
CDB Goldair Australia Pty
PO Box 574
South Morang
Victoria, 3752
Phone +61 (0)3 9336 4423
Phone 1300 GOLDAIR (1300 465 324)
www.goldair.com.au
 Loading...