

Golbong 4901, 2643-62, 2650-62, 2651-62, 4901-18 Operation And Installation Manual
...
1
en Operation and Installation Manual
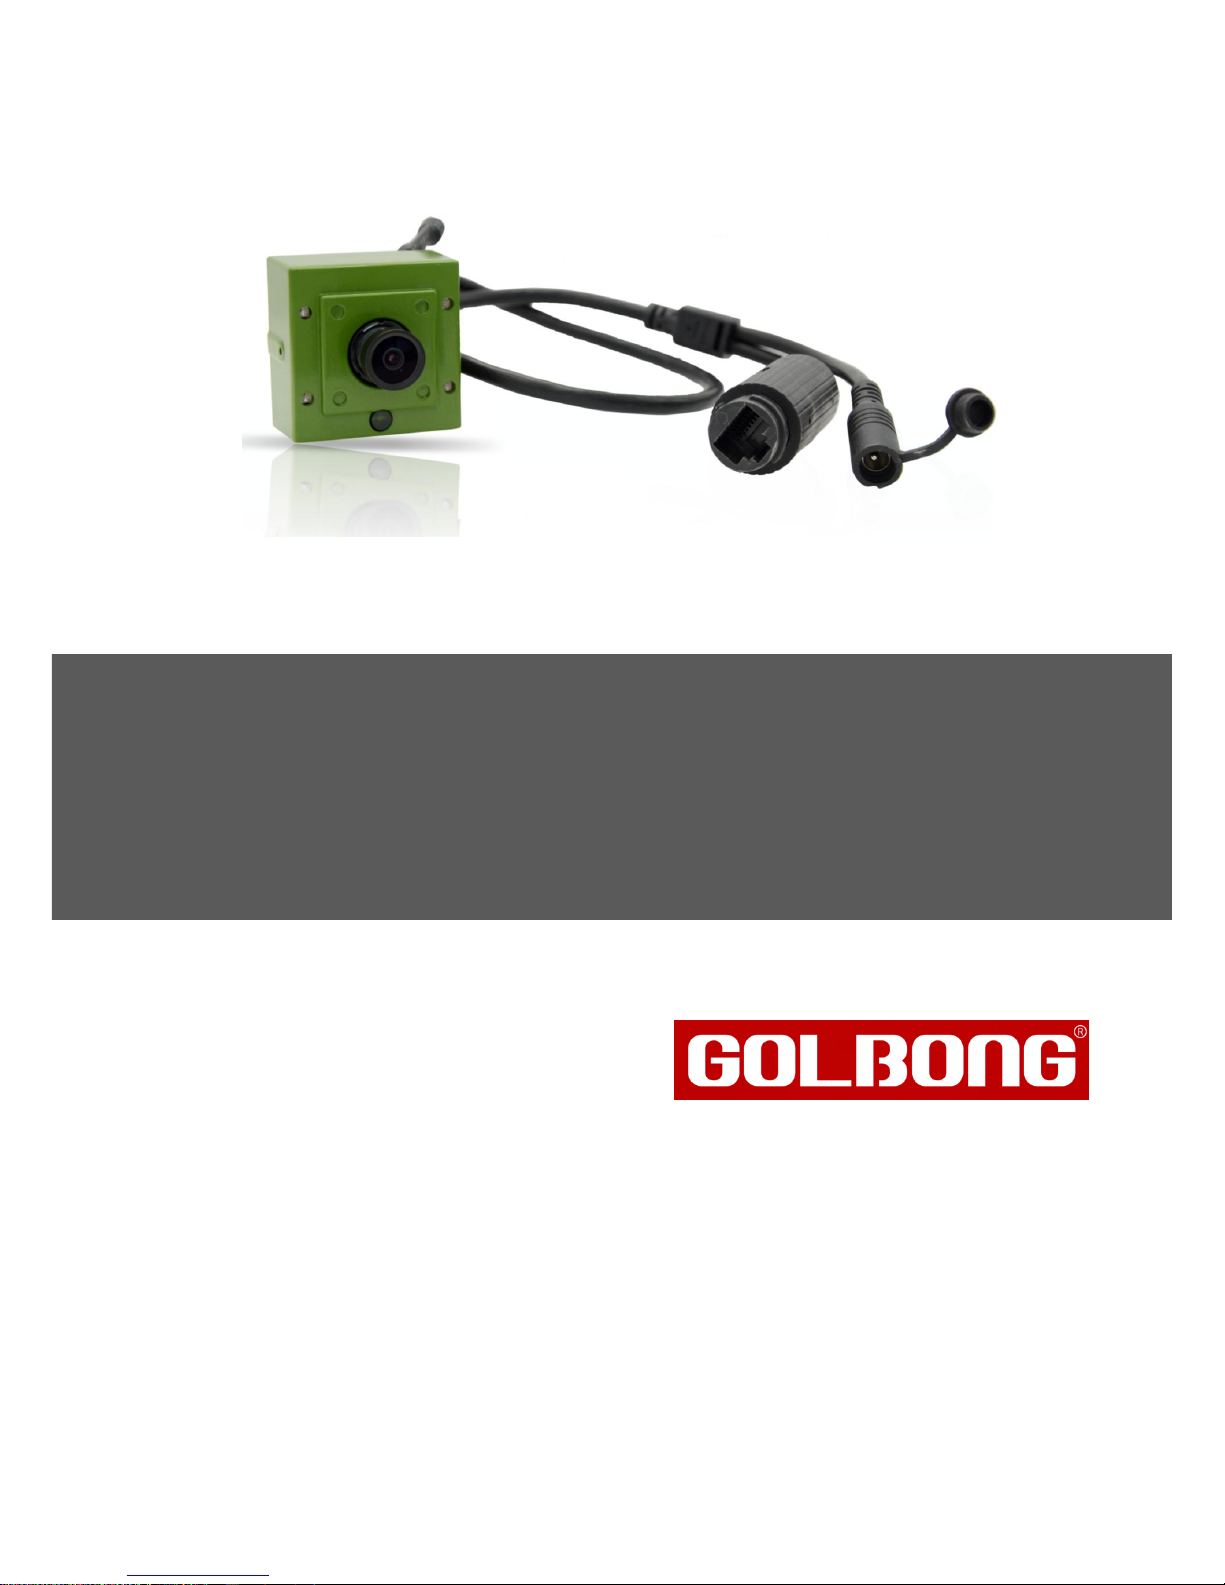
PoE IP Bird Box Camera
Model: 4901

2
WELCOME ................................................................................................................................................................ 3
PRODUCT OVERVIEW ............................................................................................................................................. 4
HARDWARE INSTALLATION .................................................................................................................................. 4
Attach the External Power Adapter.................................................................................................................... 4
SMARTPHONE OR TABLET APPS ......................................................................................................................... 5
DOWNLOAD APP ....................................................................................................................................................... 5
REGISTRATION ......................................................................................................................................................... 5
CONNECTING TO YOUR IP CAMERA ON AN SMART PHONE OR TABLET. .......................................................................... 6
LIVE VIEW INTERFACE ............................................................................................................................................... 8
OPTIONAL1: HOW TO CHANGE THE VIDEO QUALITY TO ADAPT TO LOW BANDWIDTH NETWORK. ...................................... 8
SET A PASSWORD FOR THE CAMERA. ........................................................................................................................ 9
SAVING LIVE STREAM TO YOUR SMART PHONE .......................................................................................................... 11
VIEW SNAPSHOT AT LOCAL FILES ............................................................................................................................. 12
PLAYBACK VIDEO ON TF MEMORY CARD (CAMERAS WITH MICROSD ONLY) ................................................................ 13
DOWNLOAD VIDEO FROM TF MEMORY CARD (CAMERAS WITH MICROSD ONLY) .......................................................... 14
OPTIONAL RECEIVE THE IP SETTING FROM YOUR LOCAL NETWORK (DHCP) .............................................................. 16
USING CMS5 FOR PC OR MAC ............................................................................................................................ 17
SYSTEM REQUIREMENTS ........................................................................................................................................ 17
INSTALLING SOFTWARE .......................................................................................................................................... 17
NETWORK CONNECTION AND SETTINGS ................................................................................................................... 17
Connect to IP Camera ..................................................................................................................................... 17
Optional 1: How to add the cameras to CMS5 outside of LAN ....................................................................... 19
Optional 2: How to Configure the network setting of the camera manually..................................................... 20
LIVE VIDEO ............................................................................................................................................................ 21
Watch the live .................................................................................................................................................. 21
Digital ZOOM ................................................................................................................................................... 22
Activate the audio ............................................................................................................................................ 22
CHANGE THE PASSWORD OF THE CAMERA .............................................................................................................. 23
RECORDING LIVE TO YOUR COMPUTER .................................................................................................................... 24
PLAYBACK THE VIDEO ON YOUR COMPUTER ............................................................................................................. 25
RECORDING LIVE TO TF MEMORY CARD (CAMERAS WITH MICROSD ONLY) ................................................................. 27
Format TF memory card .................................................................................................................................. 27
PLAYBACK THE VIDEO FROM TF MEMORY CARD (CAMERAS WITH MICROSD ONLY) ..................................................... 28
DOWNLOAD THE VIDEO TO YOUR COMPUTER HARD DRIVE (CAMERAS WITH MICROSD ONLY) ....................................... 30
SETTING CAMERA PARAMETERS ............................................................................................................................. 31
INSTALLING A NEW FIRMWARE ................................................................................................................................. 32
WEB BROWSER CONNECTION ........................................................................................................................... 33
CHECKING YOUR WEB BROWSER SECURITY LEVEL .................................................................................................... 33
ACCESS THE CAMERA OVER INTERNET ..................................................................................................................... 35
3
Welcome
Thank you for purchasing GOLBONG IP bird box camera!
This user manual is designed to be a reference tool for the installation and operation of your IP bix box
camera.
Here you can find information about the camera's features and functions, as well as information to aid in
troubleshooting.
Many of the setup and installation sections below have corresponding videos on YouTube
To access the setup videos, please go to https://www.youtube.com/golbongtoday
For access to the quick start guide and other support information, go to
http://www.golbong.com/support.asp
To contact GOLBONG support, please do one of the following:
a. Visit http://www.golbong.com/contact-us.asp and use the email form
b. or Email GOLBONG Customer Support: support@golbong.com
Important Security Warning
In order to keep your GOLBONG camera secure and prevent unauthorized access, please make sure to
follow the steps below: Never use the default password for your camera. Always ensure that your
password is at least 8-10 characters long and contains a combination of lowercase characters,
uppercase characters as well as numbers.
4
Product Overview
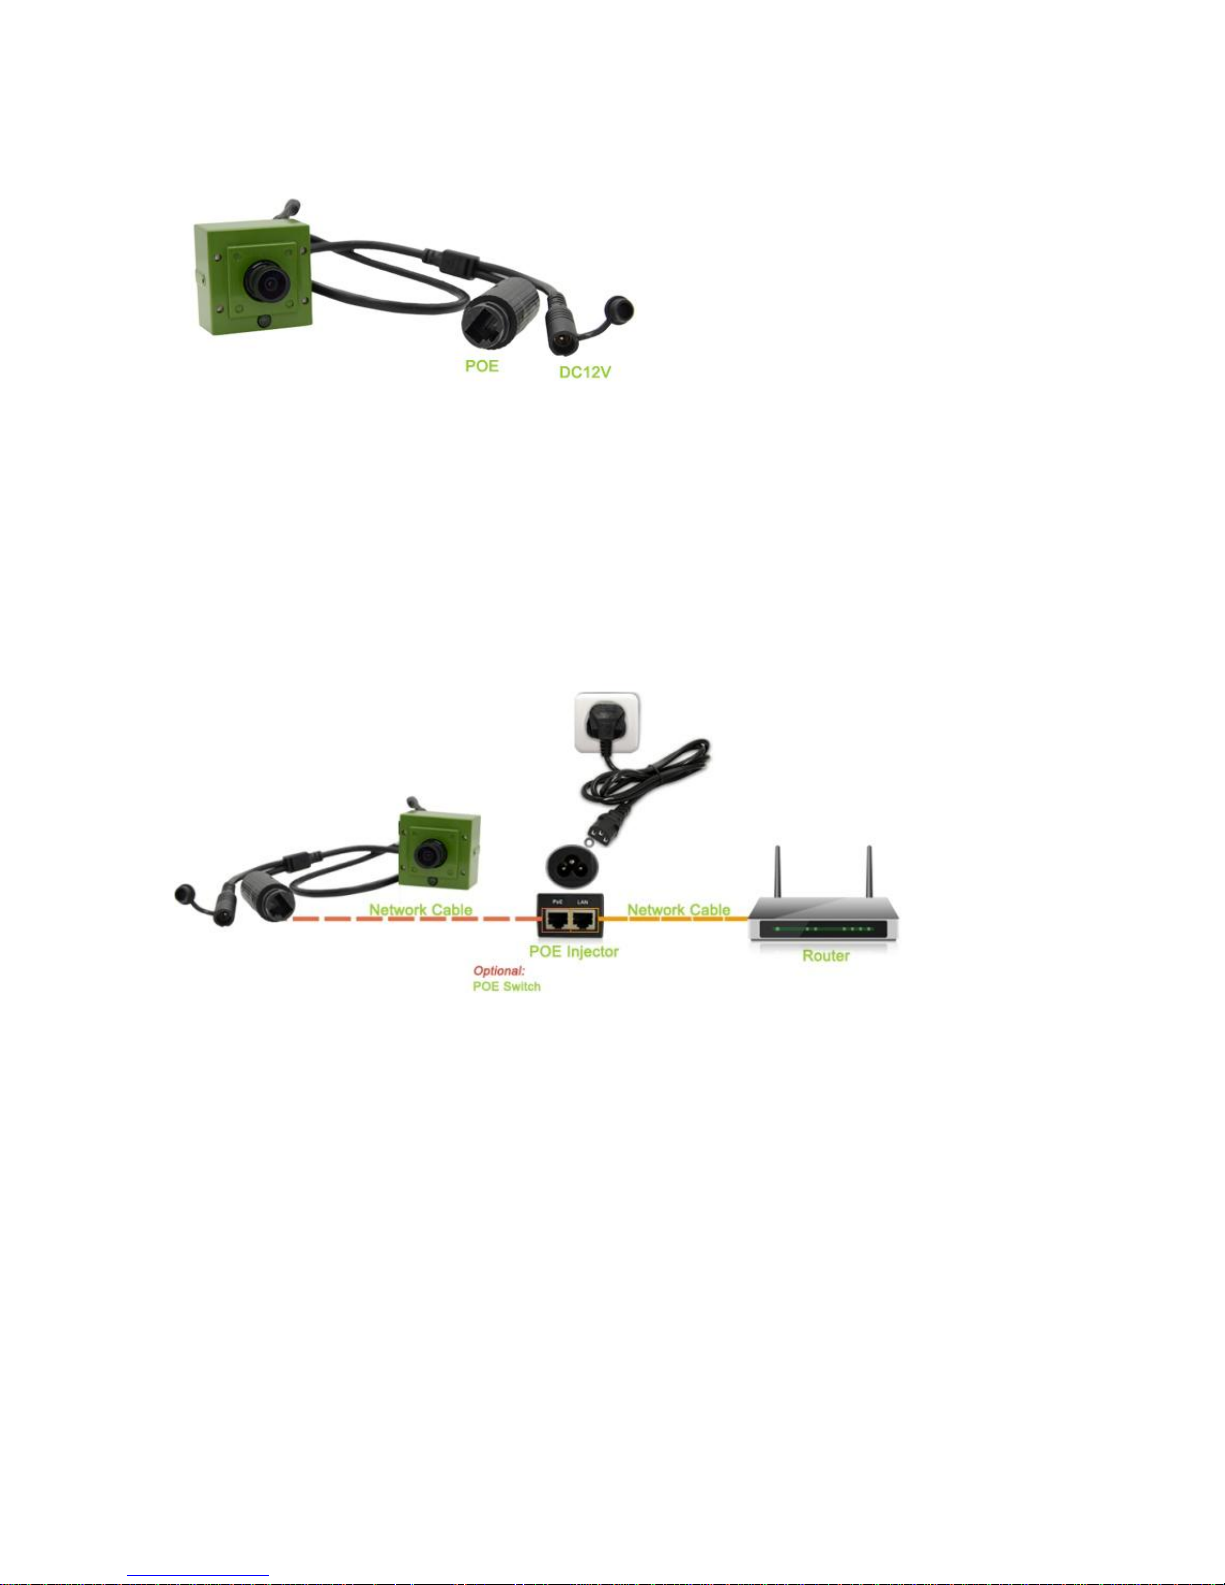
Hardware Installation
Attach the External Power Adapter
Connect the power adapter to the power connector on your camera, then plug the power adapter
into a wall outlet
5
Smartphone or Tablet Apps
Download app
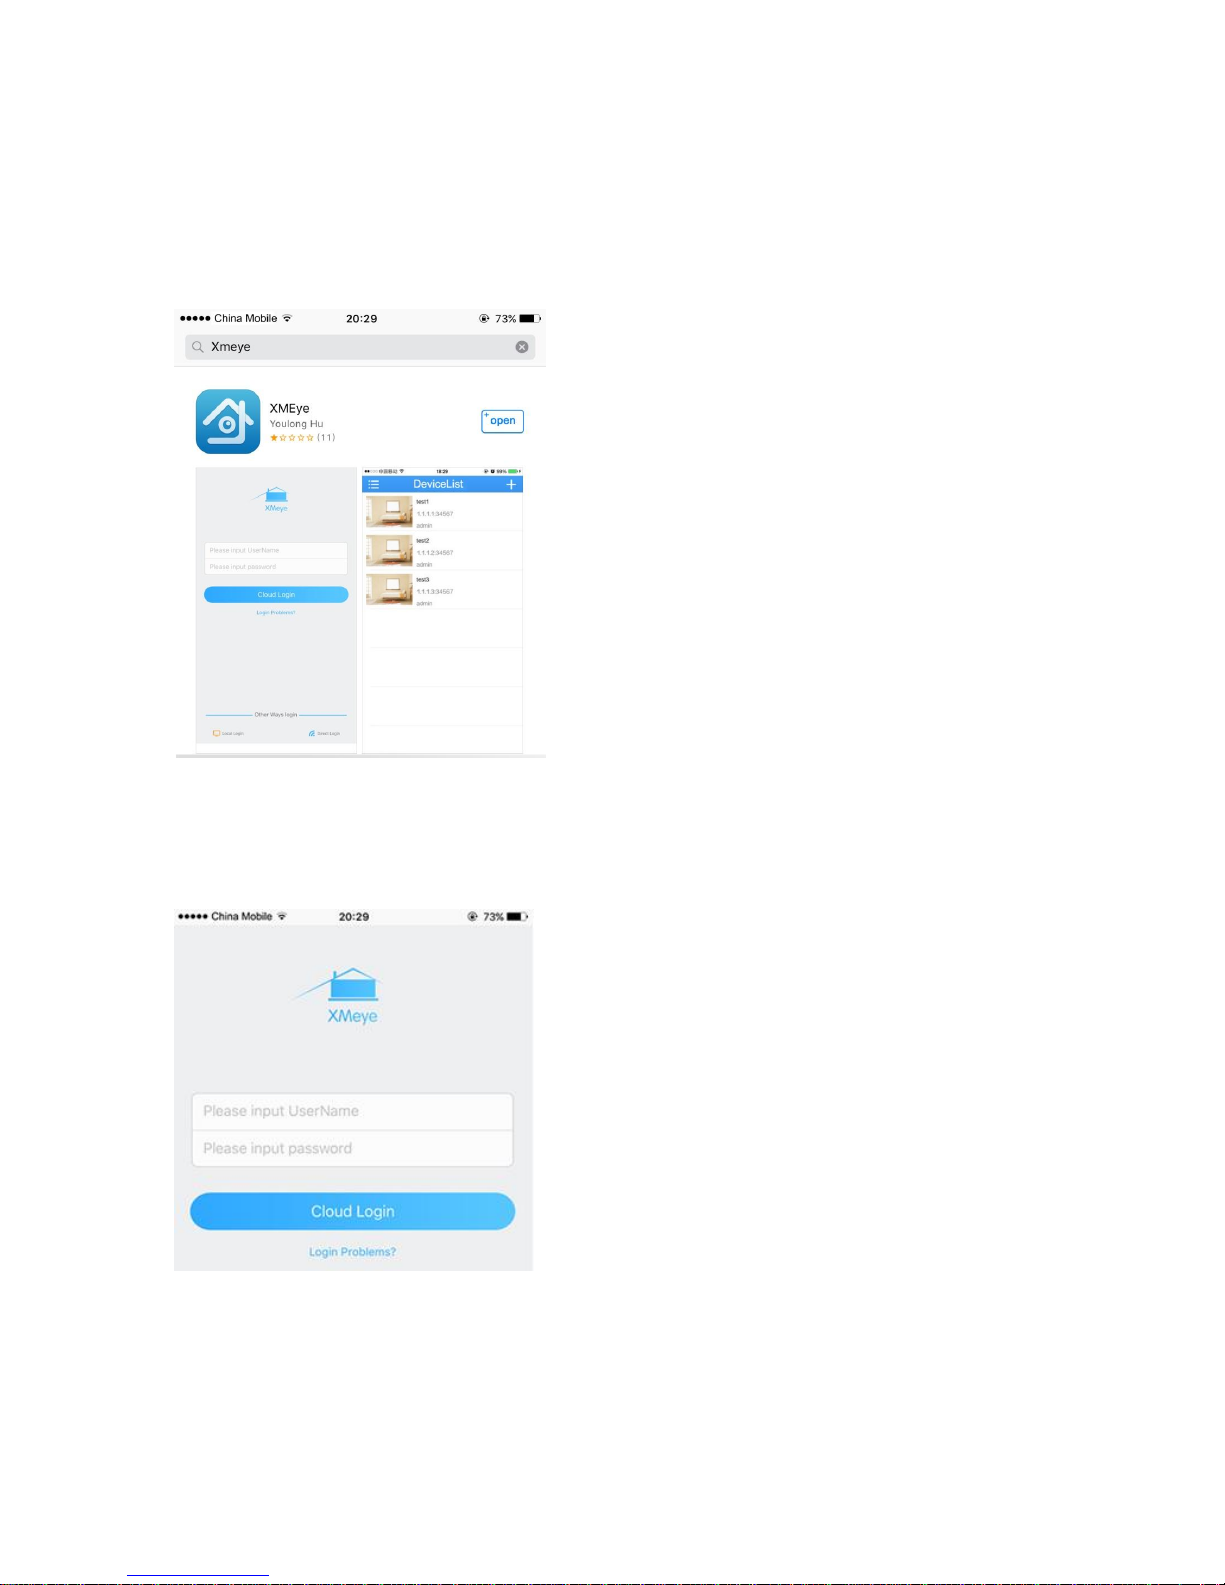
1. Download: Search and install the app “XMEYE” in app store or Google play.
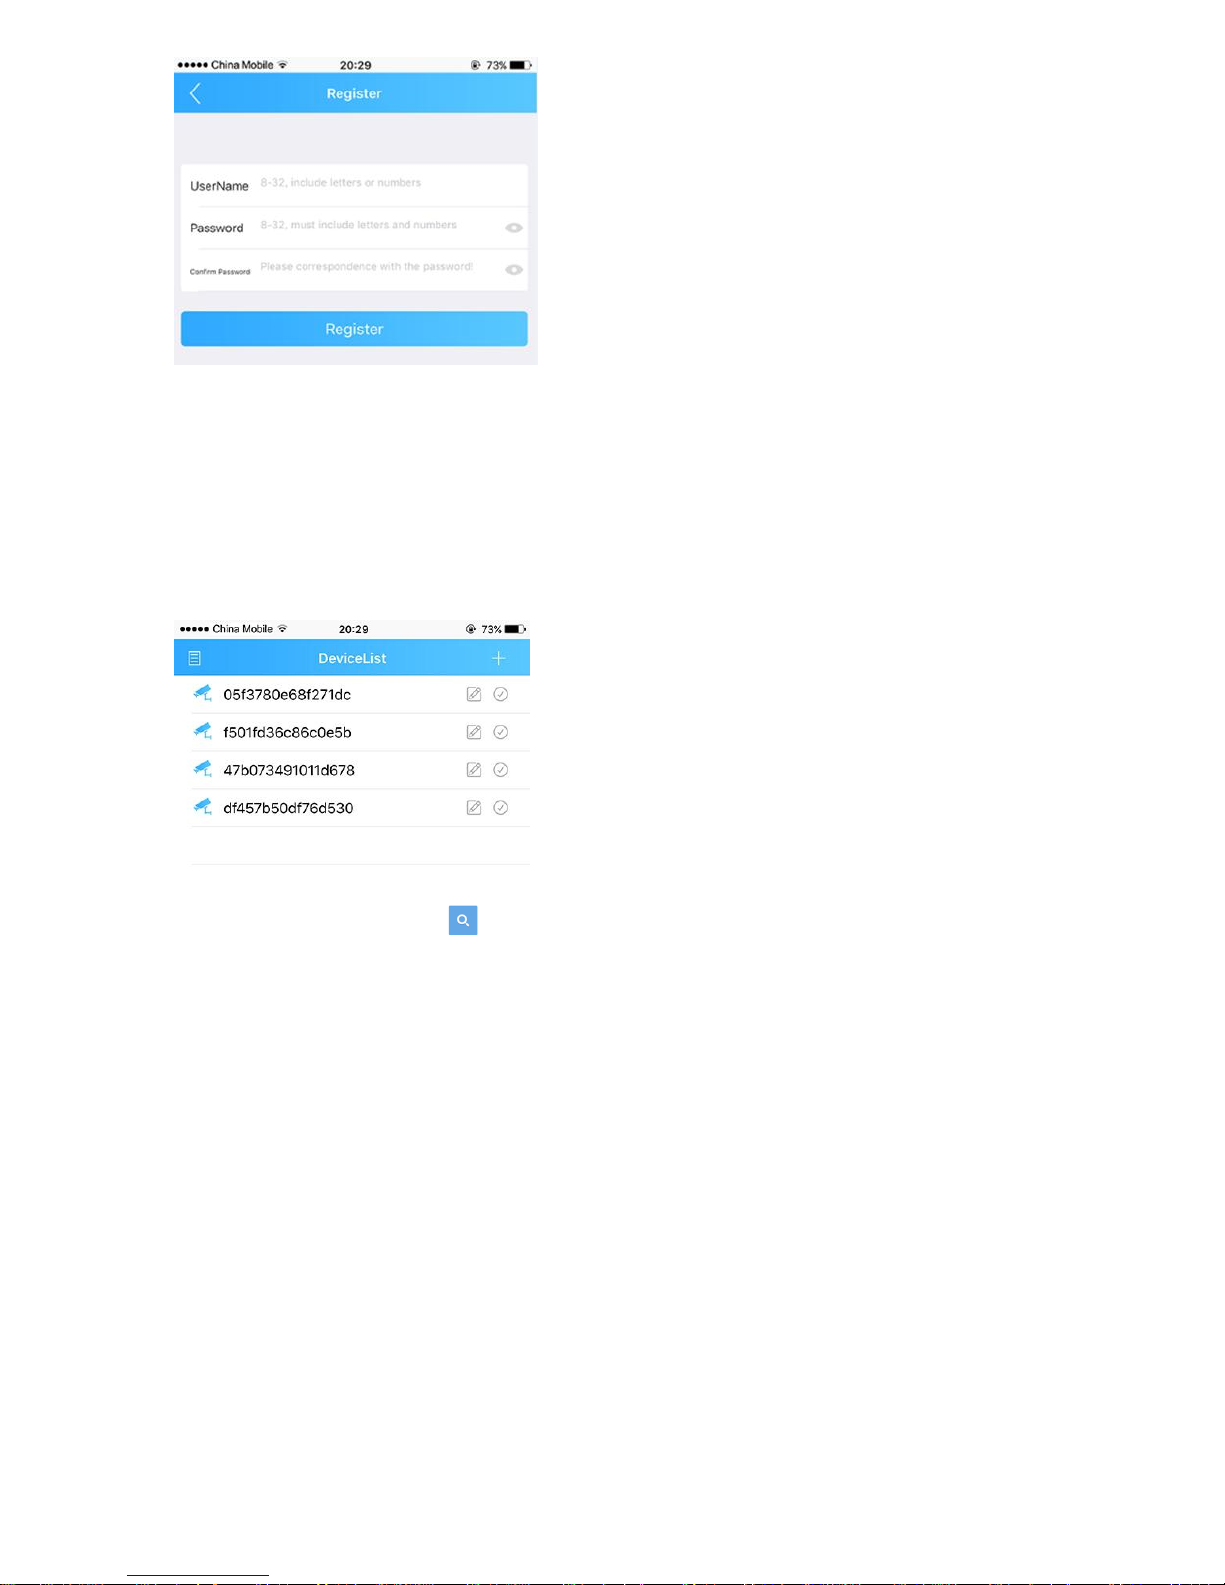
Registration
1. Register: click “login problems”, press “register” to create a new account.
3. Input E-mail, press the icon “get code” to receive a register code.
4. Create a username and password after receive the code.
6
NOTE: the email must be valid to receive the code. The mail box also will use to recover the password in
future.
4. Login: return to the login page, input your username and password, click “Cloud Login”.
Connecting to your ip camera on an smart phone or tablet.
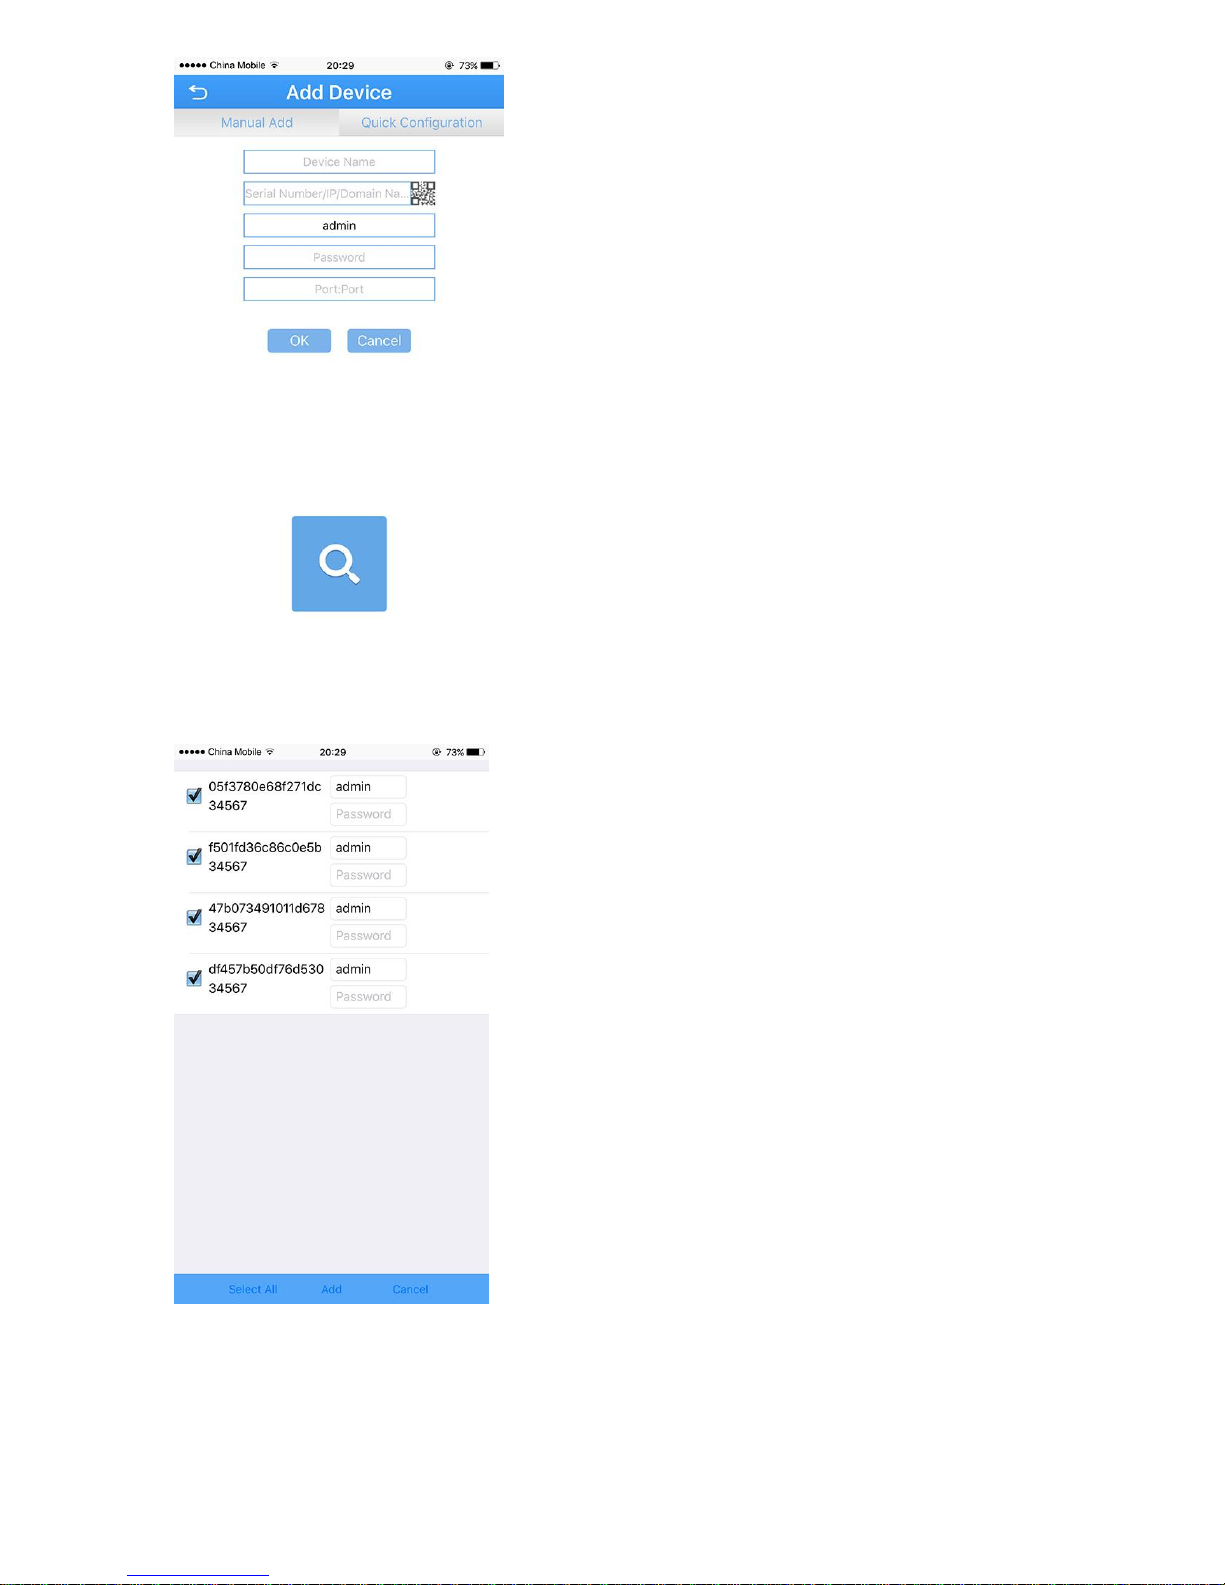
1. Click the icon “+” on the upper right corner to enter search screen.
2. Press the “search” button .
7
NOTE: Make sure your phone has connected to your the local network.
3. Select the check-box, then press the button icon“ Add” .
NOTE: Input the password if required, the default password is blank.
8
Live view interface
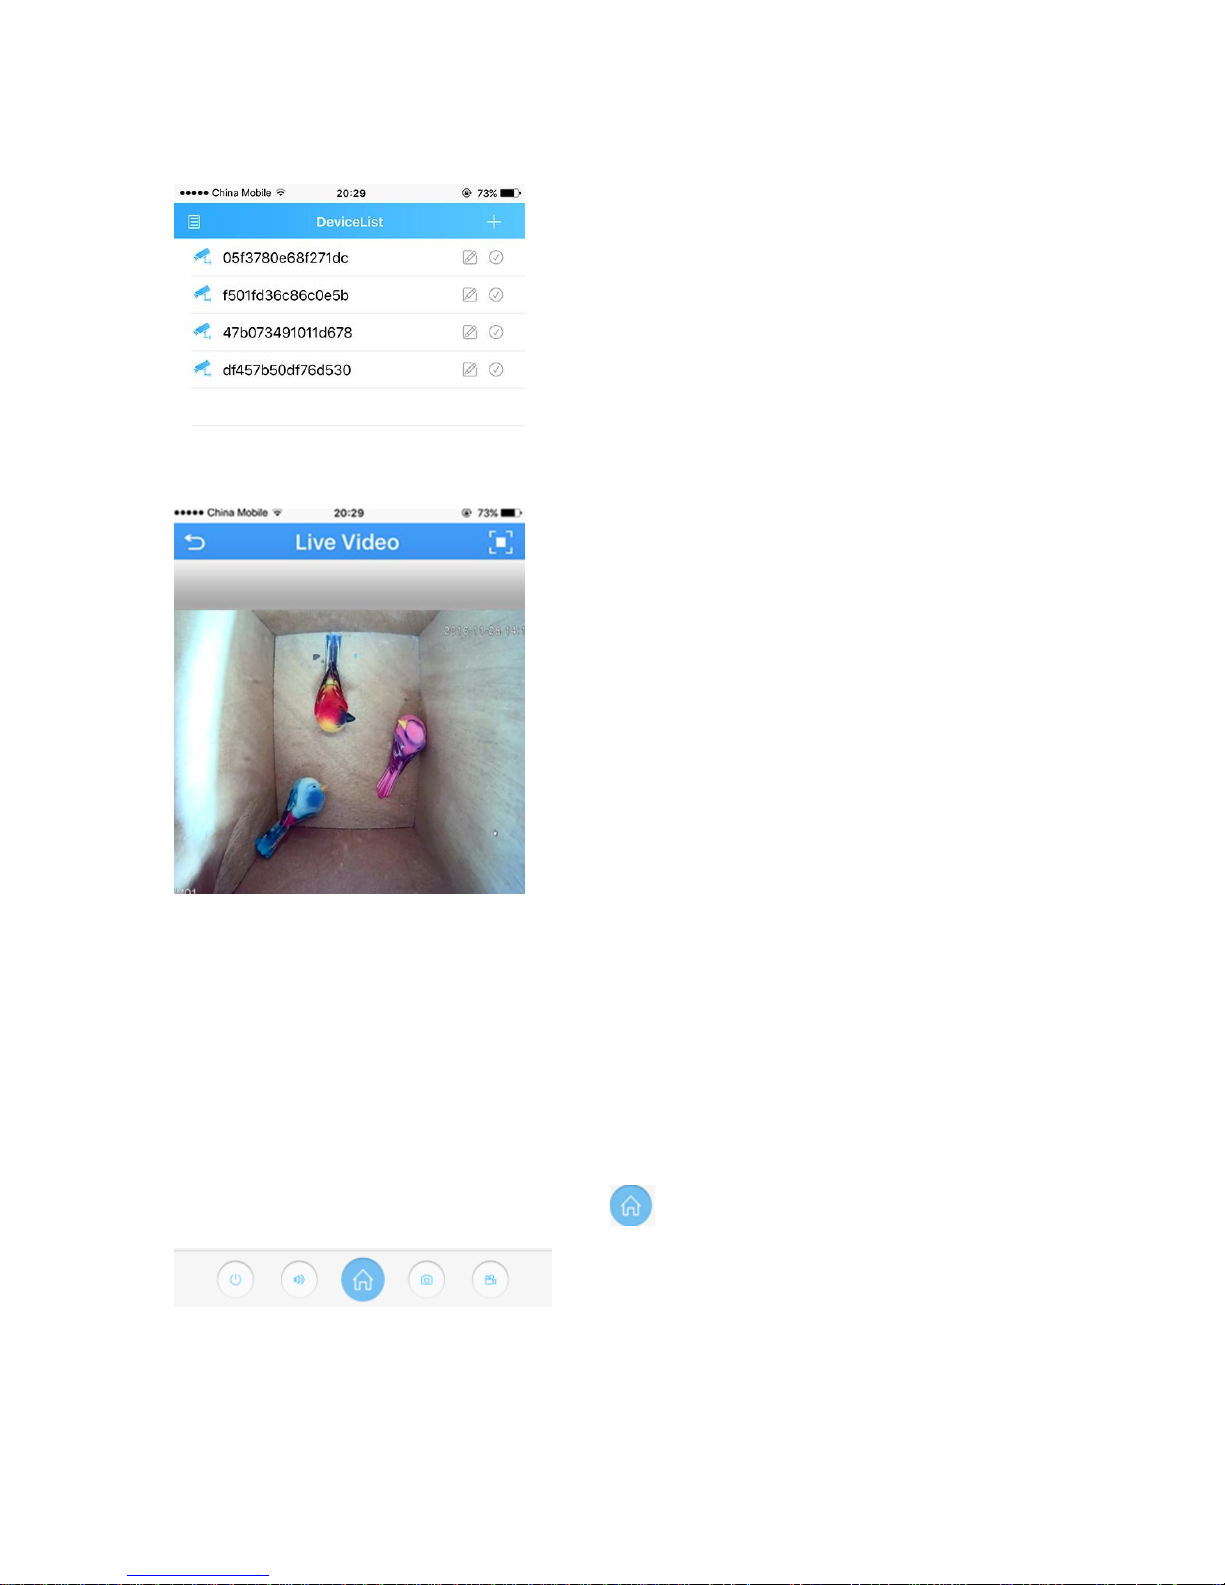
1. Click the camera name in the device list, the live view will display.
2. Press the square icon on the upper right corner to enlarge the video to full screen.
NOTE: The users can zoom in/out on the screen with fingers.
3. Click “SD/HD” to choose the video quality.
NOTE: “SD”: standard definition; “HD”: high definition.
Optional1: How to change the video quality to adapt to low
bandwidth network.
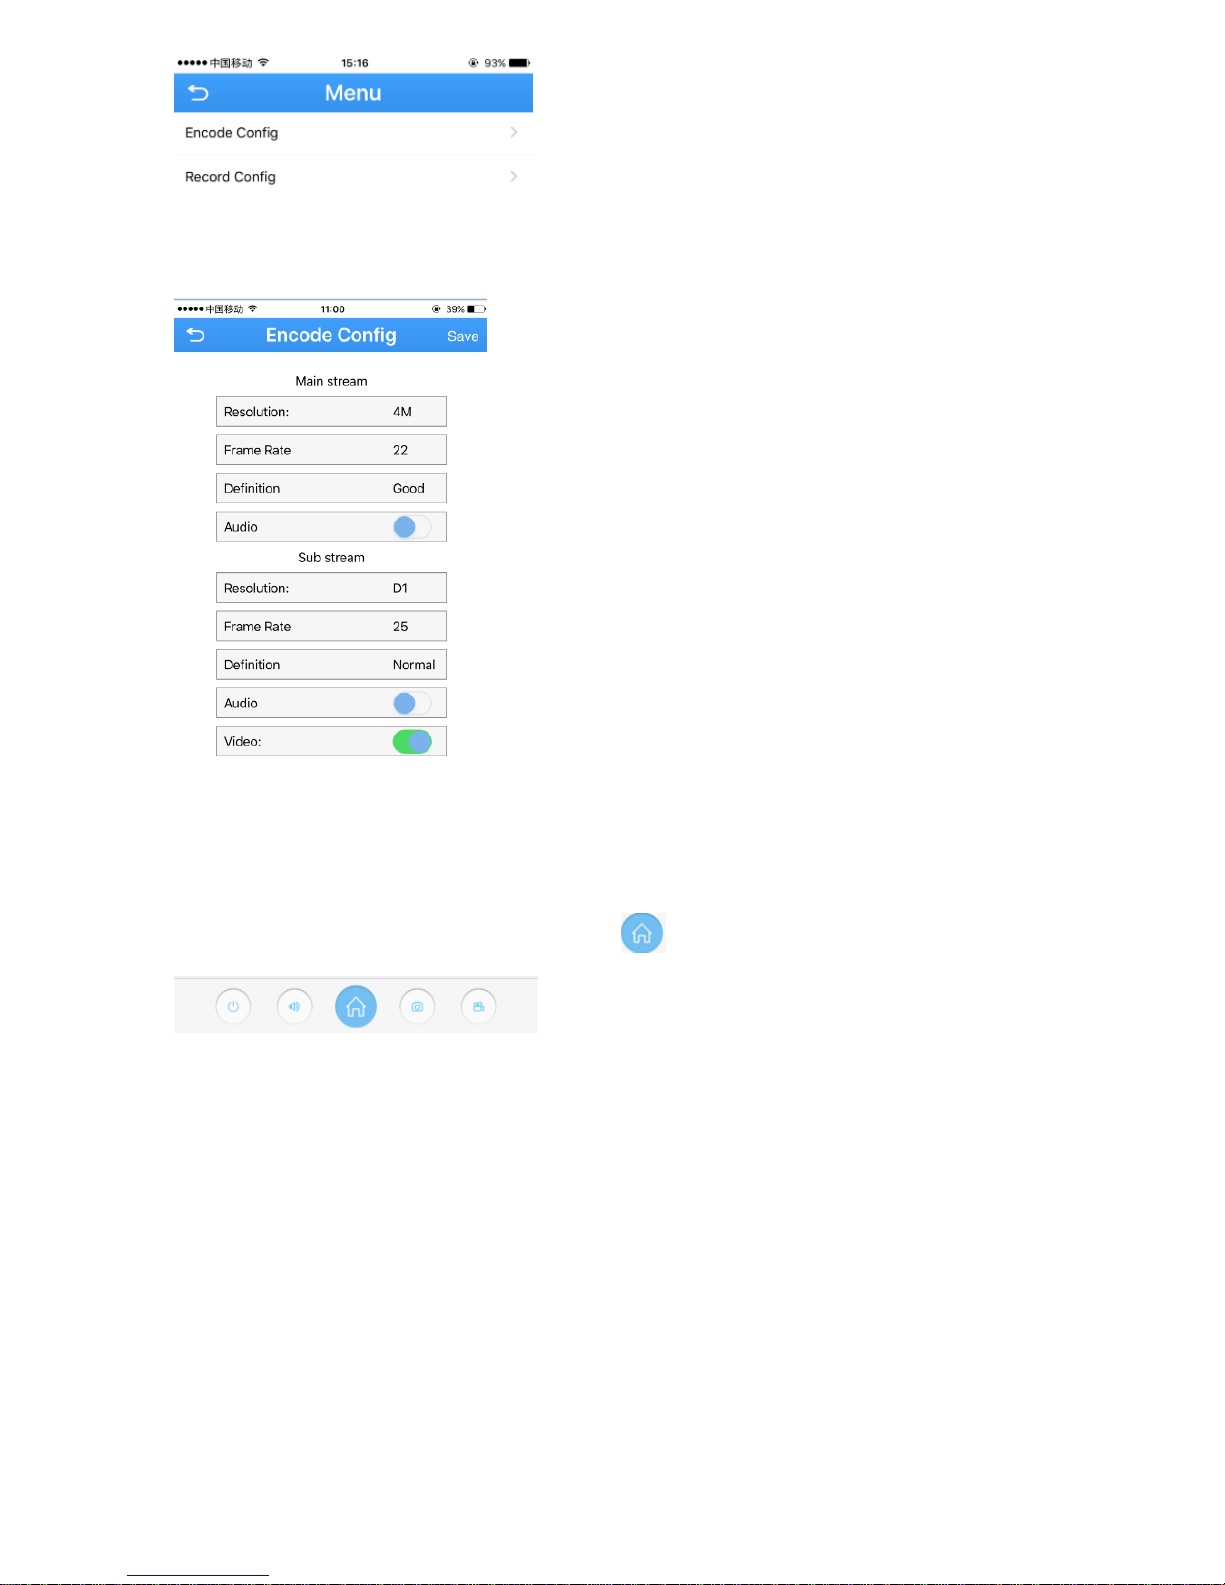
1. In the Live Video page, click the Home icon
2. Touch “Encode” in the menu
9
3. Adjust the main stream and the sub stream to adapt to your network bandwidth.
NOTE: higher frame rate and resolution require higher bandwidth
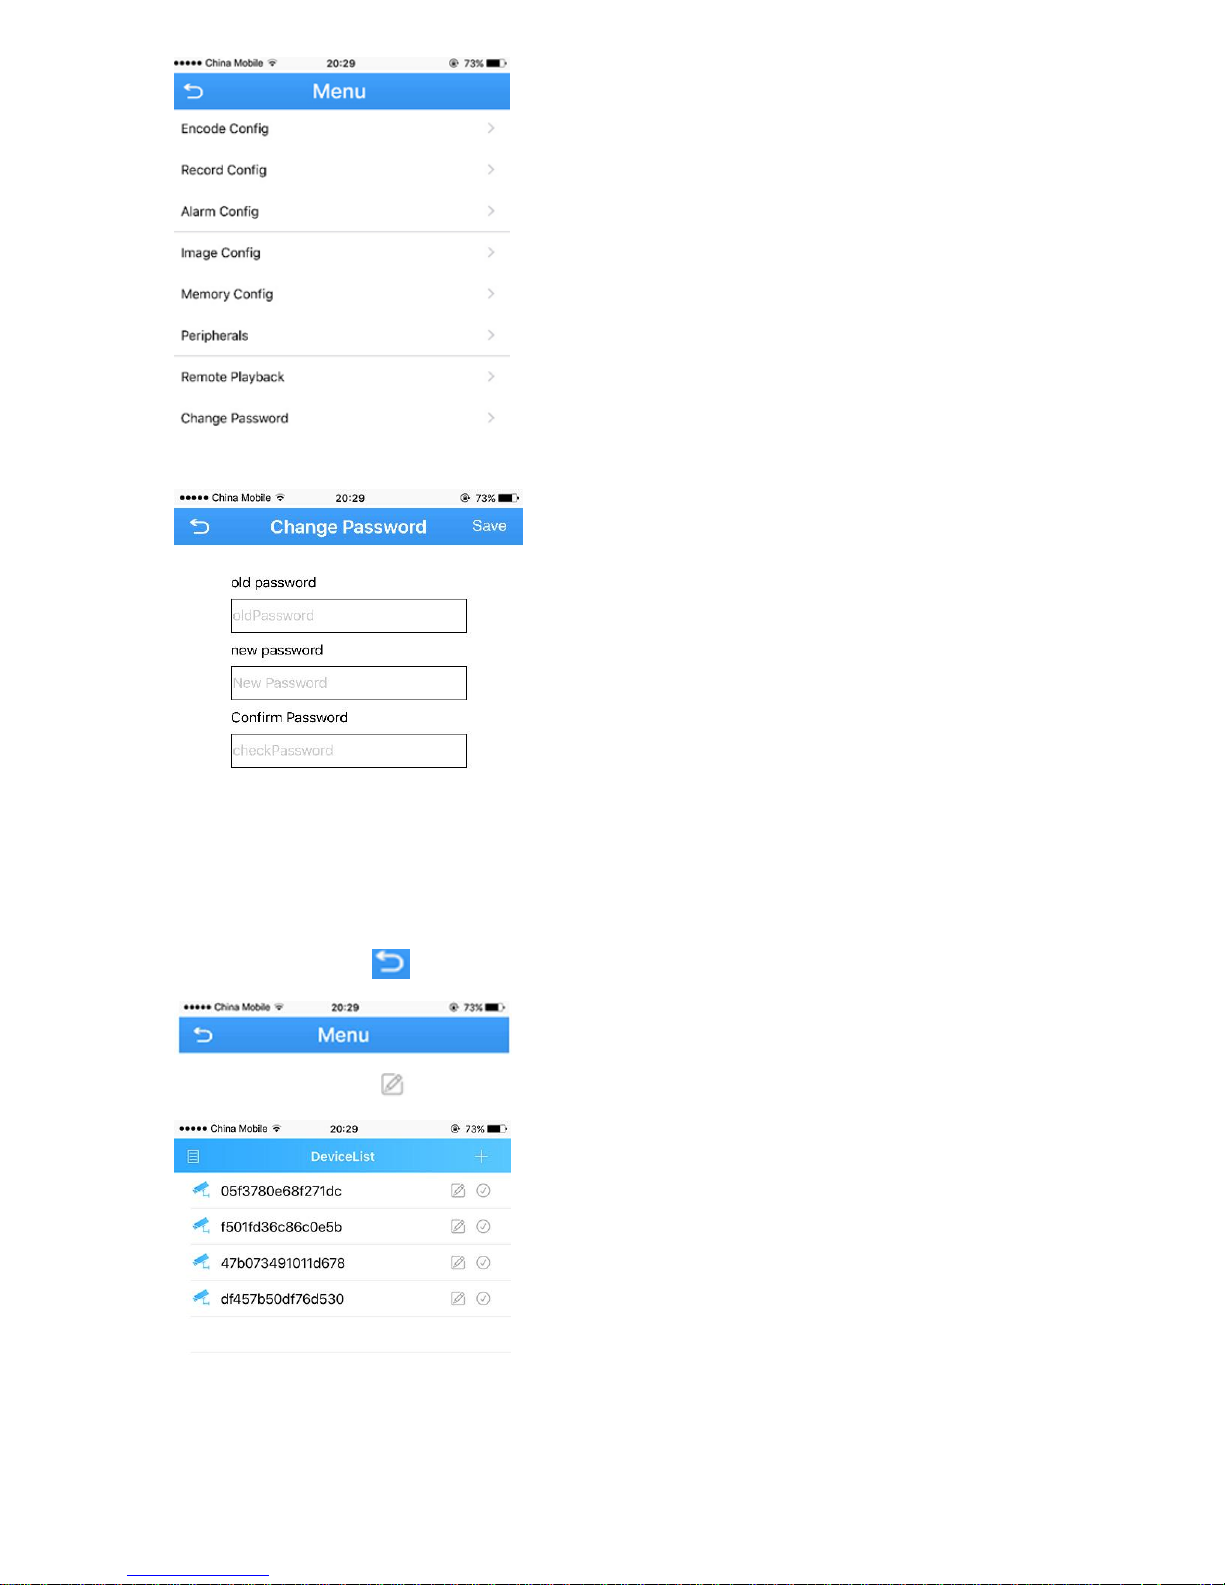
Set a Password for the Camera.
1. In the Live Video page, click the Home icon
2. In the Menu page, press the “Change password ”
10
3. Input old password and a new password. Click “Save”
NOTE: default password is blank.(No need)
4. Click return icon to enter Device list
5. click the edit icon , a new dialog pop up
6. Select “Edit”
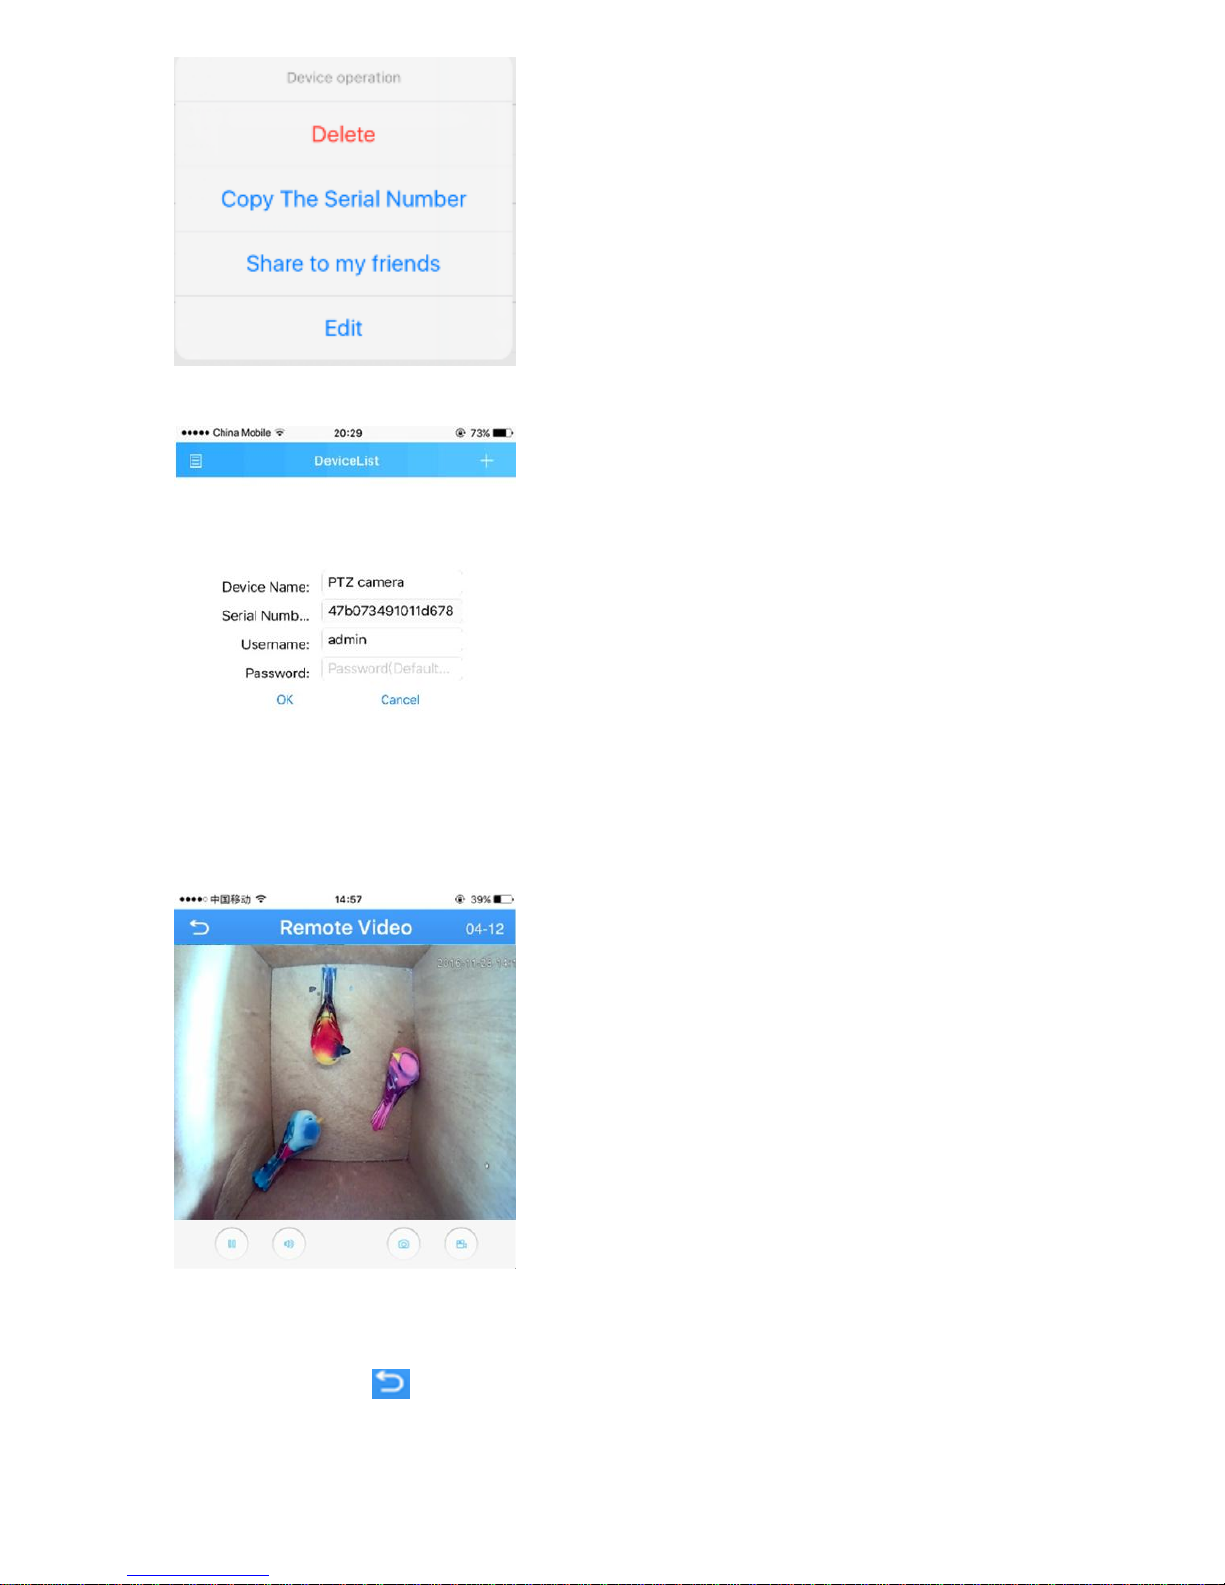
11
7. Name the device, key in the new password. Click OK to save.
Saving live stream to your smart phone
1. In Live Video page, press “camcorder” button to start recording
NOTE: Camcorder button will change to Blue when recording is activated.
2. Press camcorder button again to save the video
3. Click return icon to enter Device list
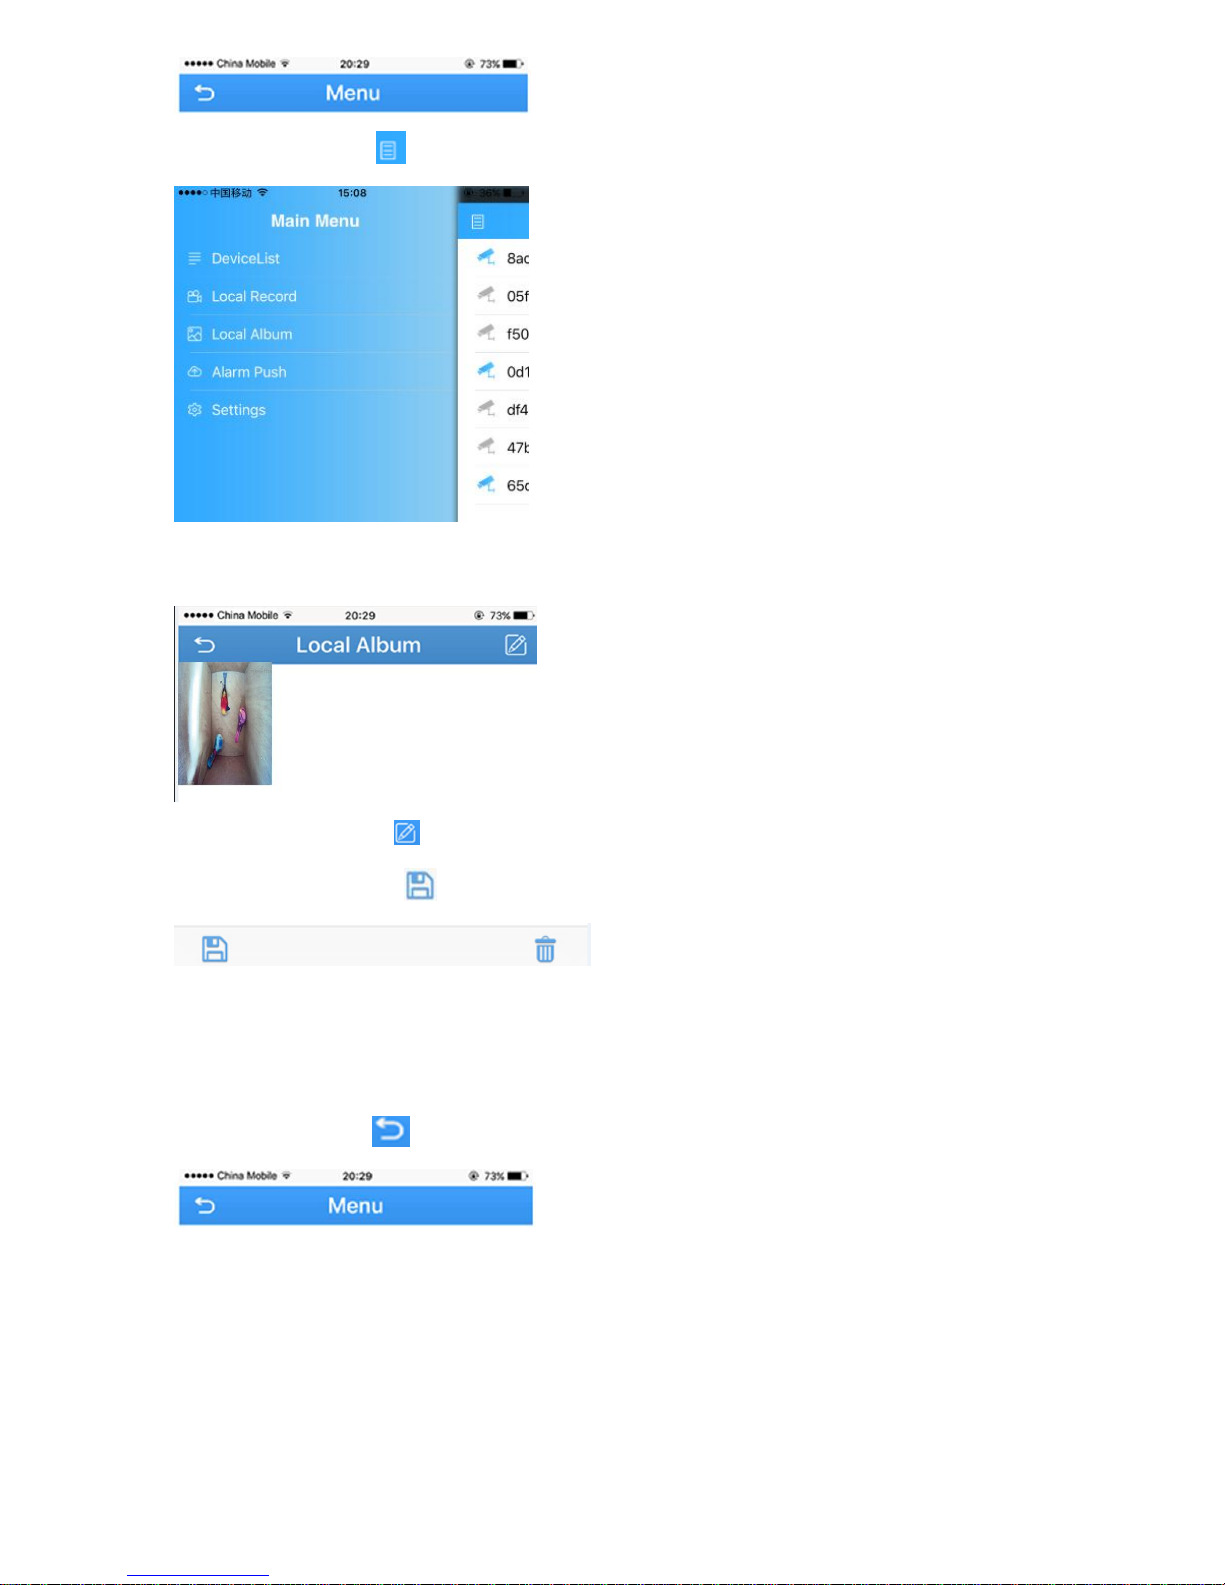
12
4. Press the list icon to enter the main menu
5. Touch “local record” to locate the video on your smart phone. Press the snapshot will start play
the video on your phone.
6. Press the edit icon on top right corner, press snapshot to select the video.
7. Press the save icon to save the video to your phone.
View snapshot at local files
1. Click return icon to enter Device list
2. Press the list icon to enter the main menu
 Loading...