

Page 1
AERATEUR A FERMETURE RAPIDE 105033
NOTICE DE MONTAGE
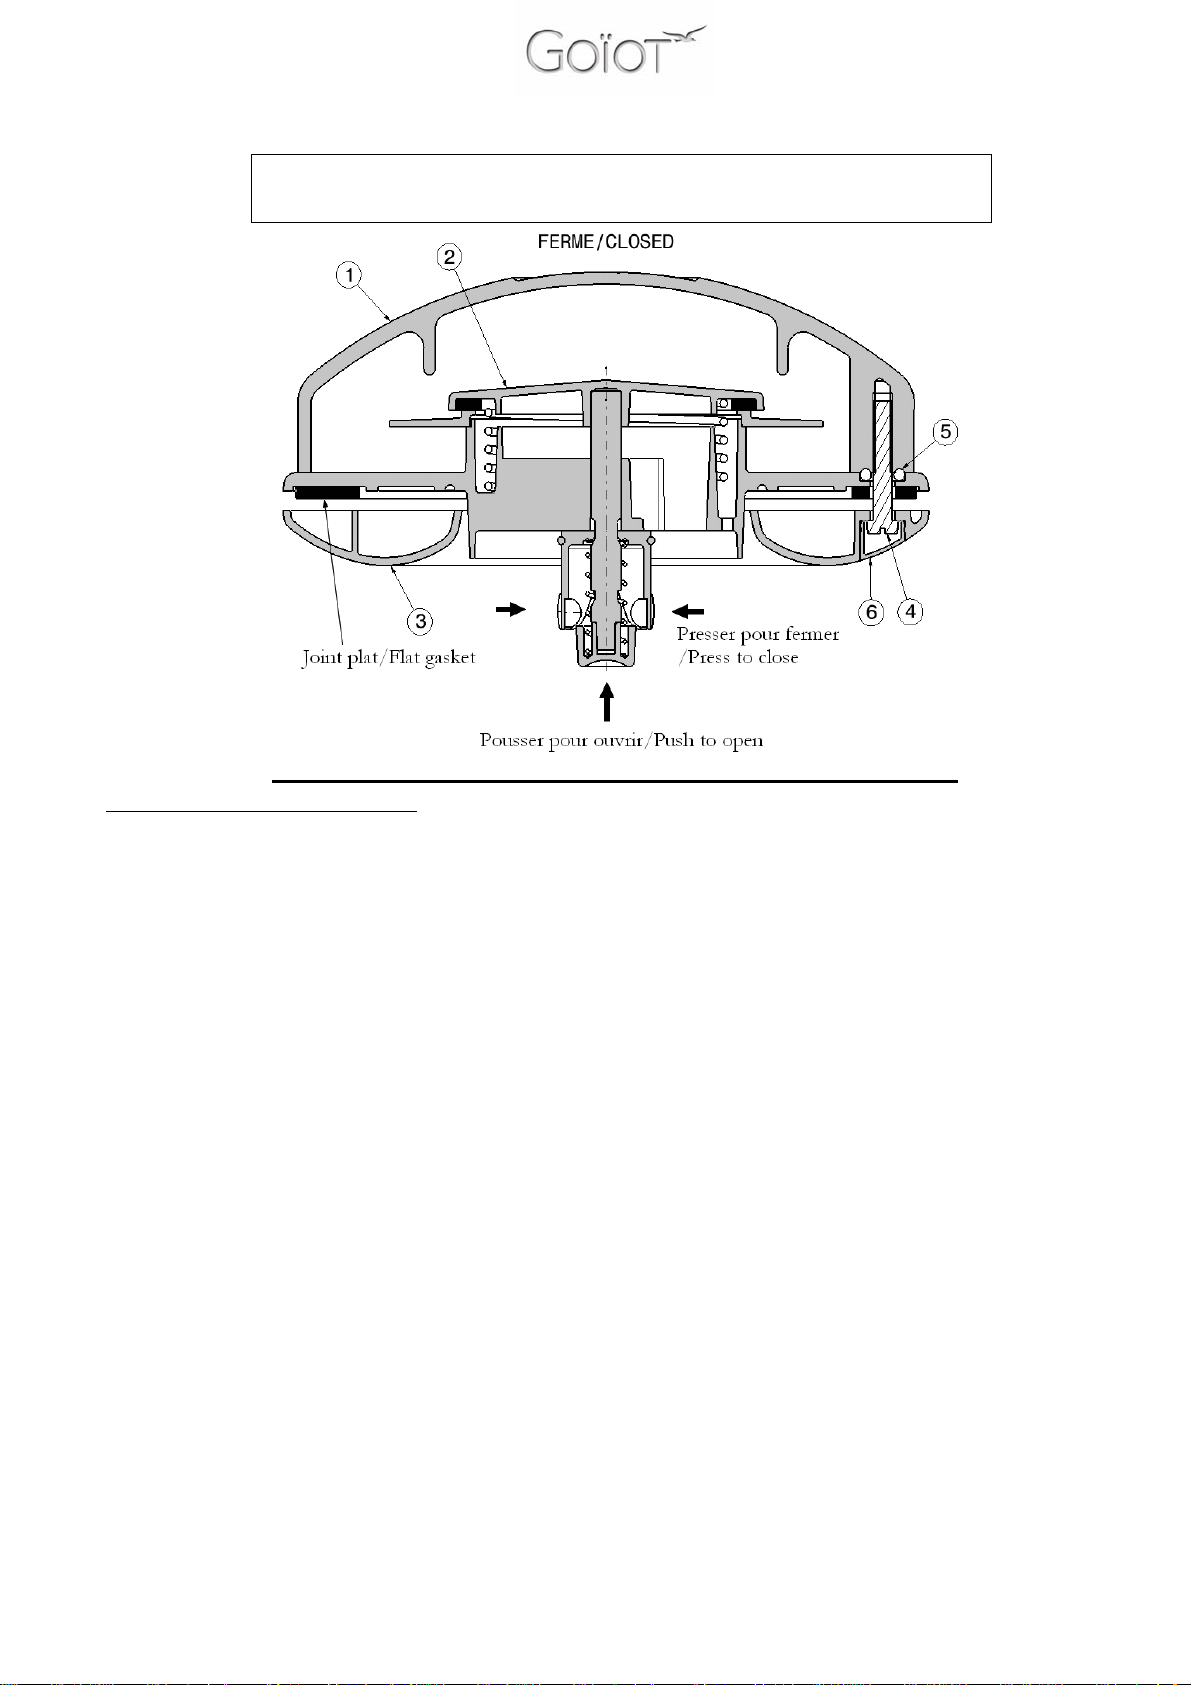
L’ensemble est composé de :
1 – Un capot aluminium
2 – Un mécanisme
3 – Un habillage intérieur
4 – 3 vis
5 – 3 joints toriques
6 – 3 cache-vis
MONTAGE
1. Protéger la glace ou le pont du bateau à l’aide d’un papier adhésif.
2. Repérer l’emplacement de l’aérateur et tracer le centre.
3. Percer à l’aide d’une scie cloche de diamètre 76mm, le trou principal qui reçoit le
conduit en plastique.
Attention à ne pas éclater la glace en traversant l’épaisseur !
Percer sur la moitié de l’épaisseur puis changer de côté pour f nir le trou i
4. Poncer le bord de la découpe pour obtenir une finition bien nette.
5. Utiliser l’habillage intérieur (3) comme gabarit pour tracer la position des 3 trous de vis
6. Percer 3 trous de diamètre 6.5mm (
attention à ne pas éclater la glace
7. Placer le mécanisme (2) dans la découpe, la surface doit être plane et propre. Veillez à
la présence du joint plat sur la face inférieure du mécanisme
8. Mettre les 3 joints toriques (5) dans leur logement et poser le capot (1) par-dessus
9. Enduire le filetage des 3 vis (4) à l’aide d’une pâte type Duralac ou d’un frein à filet
léger type Loctite 243 ; ceci afin de faciliter un éventuel démontage ultérieur.
10. Fixer l’habillage intérieur (3) et serrer de façon uniforme et fermement pour une bonne
étanchéité. Mettre les 3 cache vis (6).
)
Mise à jour/Release : 10/01/06 1 / 2
Page 2
QUICK CLOSING VENTILATOR 105033
INSTALLATION INSTRUCTIONS
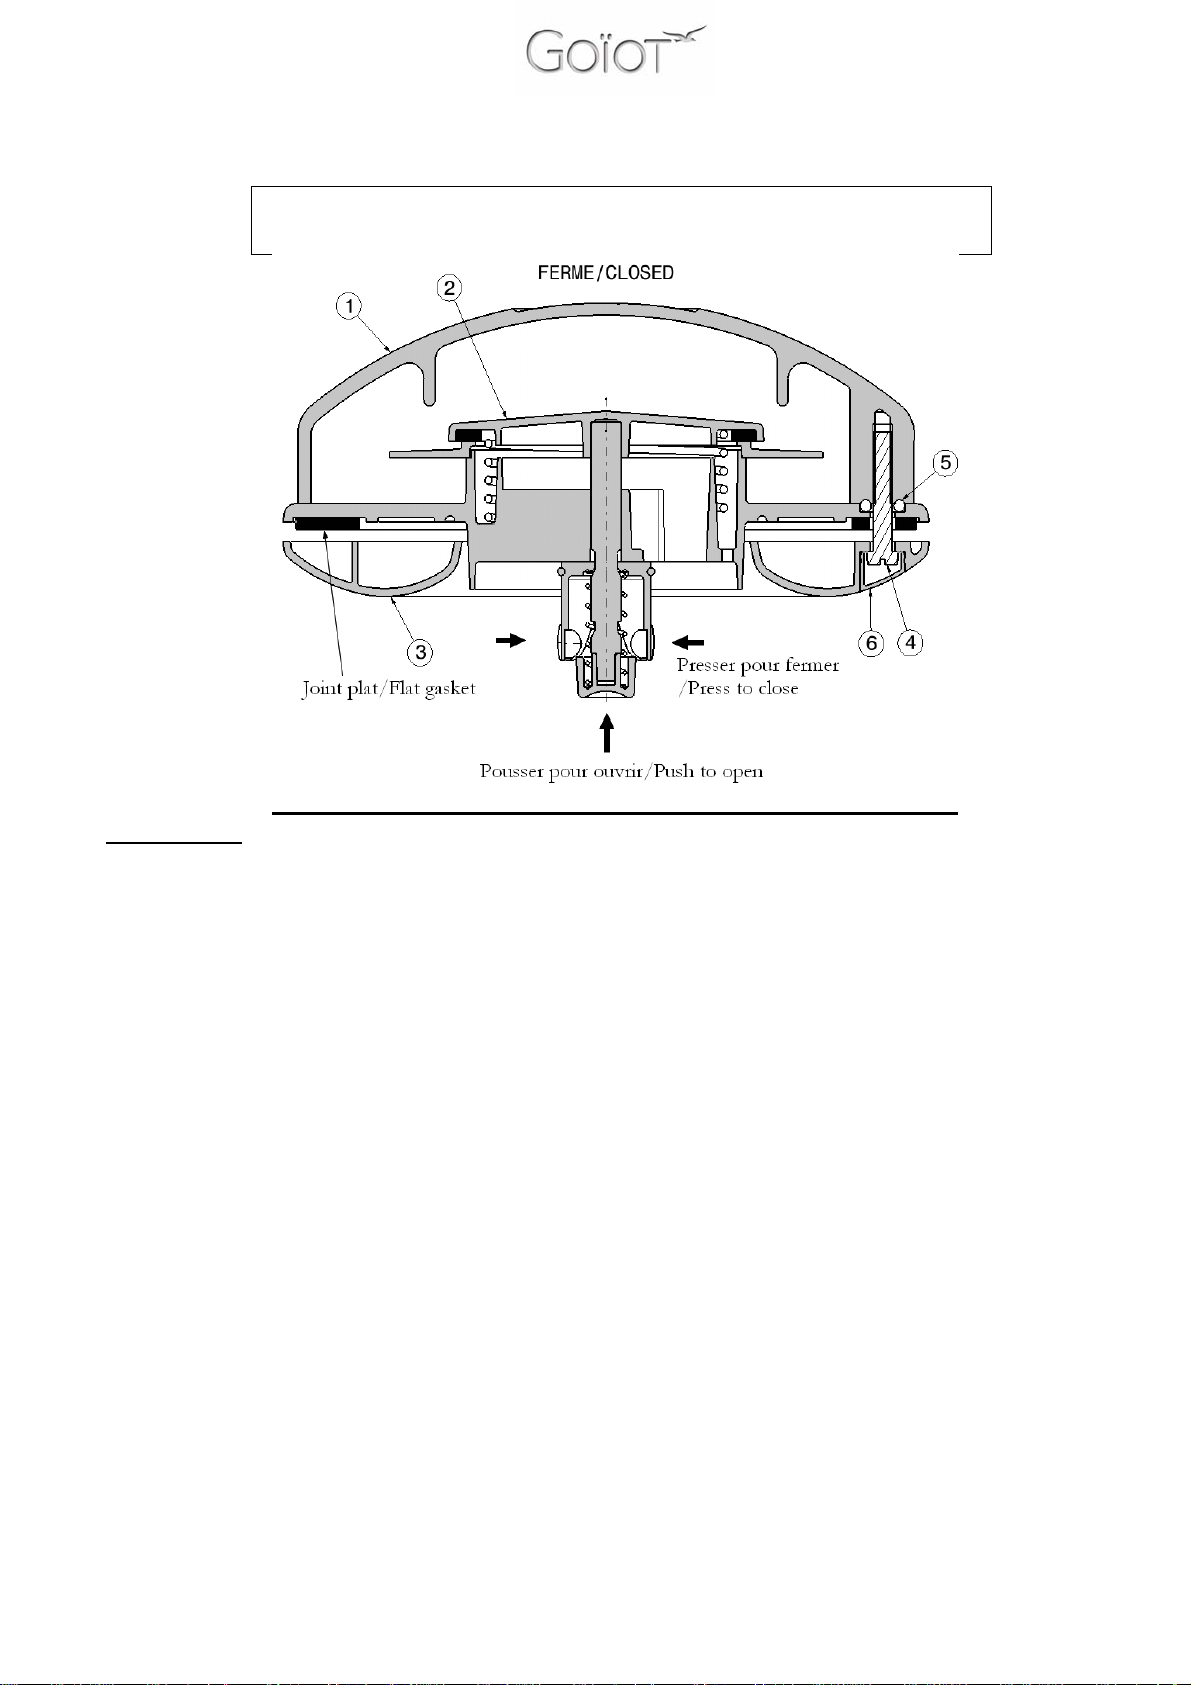
Packing list :
1 – An aluminium cover
2 – A plastic opening mechanism
3 – An inner protection
4 – 3 screws
5 – 3 O-rings
6 – 3 screw covers
ASSEMBLY
1. Protect the acrylic or the roof with adhesive tape.
2. Locate the place to install the ventilator and mark the center.
3. Drill the main hole diameter 76mm.
Be careful not to break out the acrylic when going through the thickness!
Drill only half the thickness then drill on the other side
4. Sand the cut-out edge.
5. Use the inner protection (3) as a template to mark the location of the 3 screws-holes.
6. Drill 3 holes diameter 6.5mm (
be careful not to break out the acrylic
7. Place the mechanism (2) into the main hole, the surface must be plane and clean.
Check that there is a flat gasket on the lower face of the mechanism.
8. Put the 3 O-rings (5) in their housing and put the cover (1) on.
9. Coat the screws (4) with an anti-corrosive compound like Duralac or a nutlock like
Loctite 243 in order to make possible dismantling easier.
10. Fasten the inner protection (3), screw and tighten uniformly for a better watertightness.
Put the 3 screw covers (6) on.
)
Mise à jour/Release : 10/01/06 2 / 2
 Loading...