

Go! Gater Gold STEEL SPIKE N’ SMASH 1-1-18720, STEEL SPIKE N’ SMASH 1-1-18655 Assembly Instructions Manual
STEEL SPIKE N’ SMASH
TM
Assembly Instructions
Model 1-1-18655, 1-1-18720
CONTACT INFO
Hours
Monday to Friday
(9am to 5pm EST)
Technical Support
Email us at: consumerservice@eastpointsports.com
Visit us at: www.eastpointsports.com
Call: 973-585-4747
www.eastpointsports.com
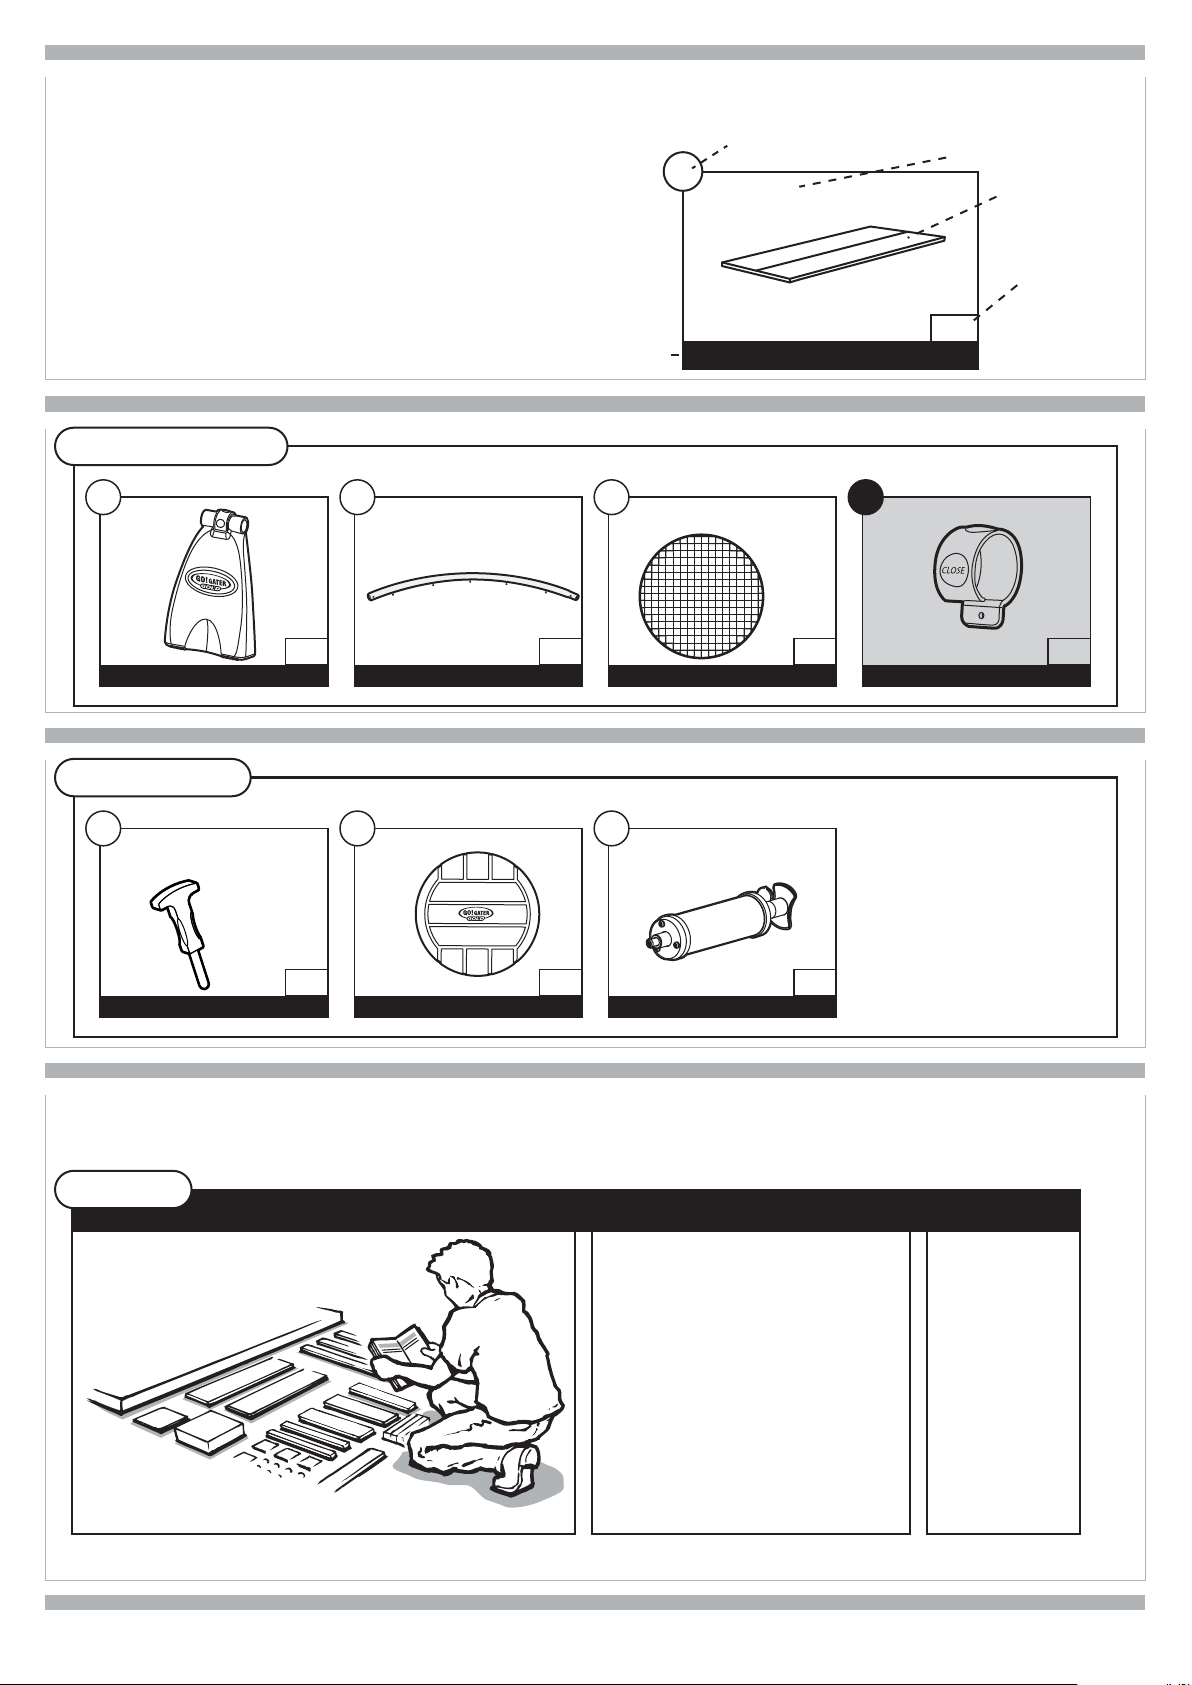
How to use the PARTS IDENTIFIER
Before you begin assembly, please make sure that
you have all the parts listed and in the correct
quantities. This will ensure the quickest and most
organized assembly.
Be sure to work on the assembly on a soft
non-marring surface such as carpet or the inside of
the corrugate box top to prevent causing damage
to the product during assembly.
PARTS IDENTIFIER
1
Leg
STEP 1, 3, 4
CLOSE
x4
2
Pole
STEP 1, 2
x4
Step
Used In
3
Netting
STEP 5
Instructions Parts ID #
1
Part Name
STEP 1
x1
x2
4
Clip
PRE-INSTALLED
Part Name
Part Image
Part Quantity
x4
ACCESSORIES
80
Net Assembly Tool
STEP 6
x1
81
Ball
82
x1
ASSEMBLY INSTRUCTIONS
Game Construction
START
BEFORE BUILDING - Please inspect and layout all your PARTS
All parts are listed in the Parts
Identier and Accessories.
Pump
x1
Please review
the Parts
Identier and
make sure that
you have all
parts before
beginning
assembly.
1
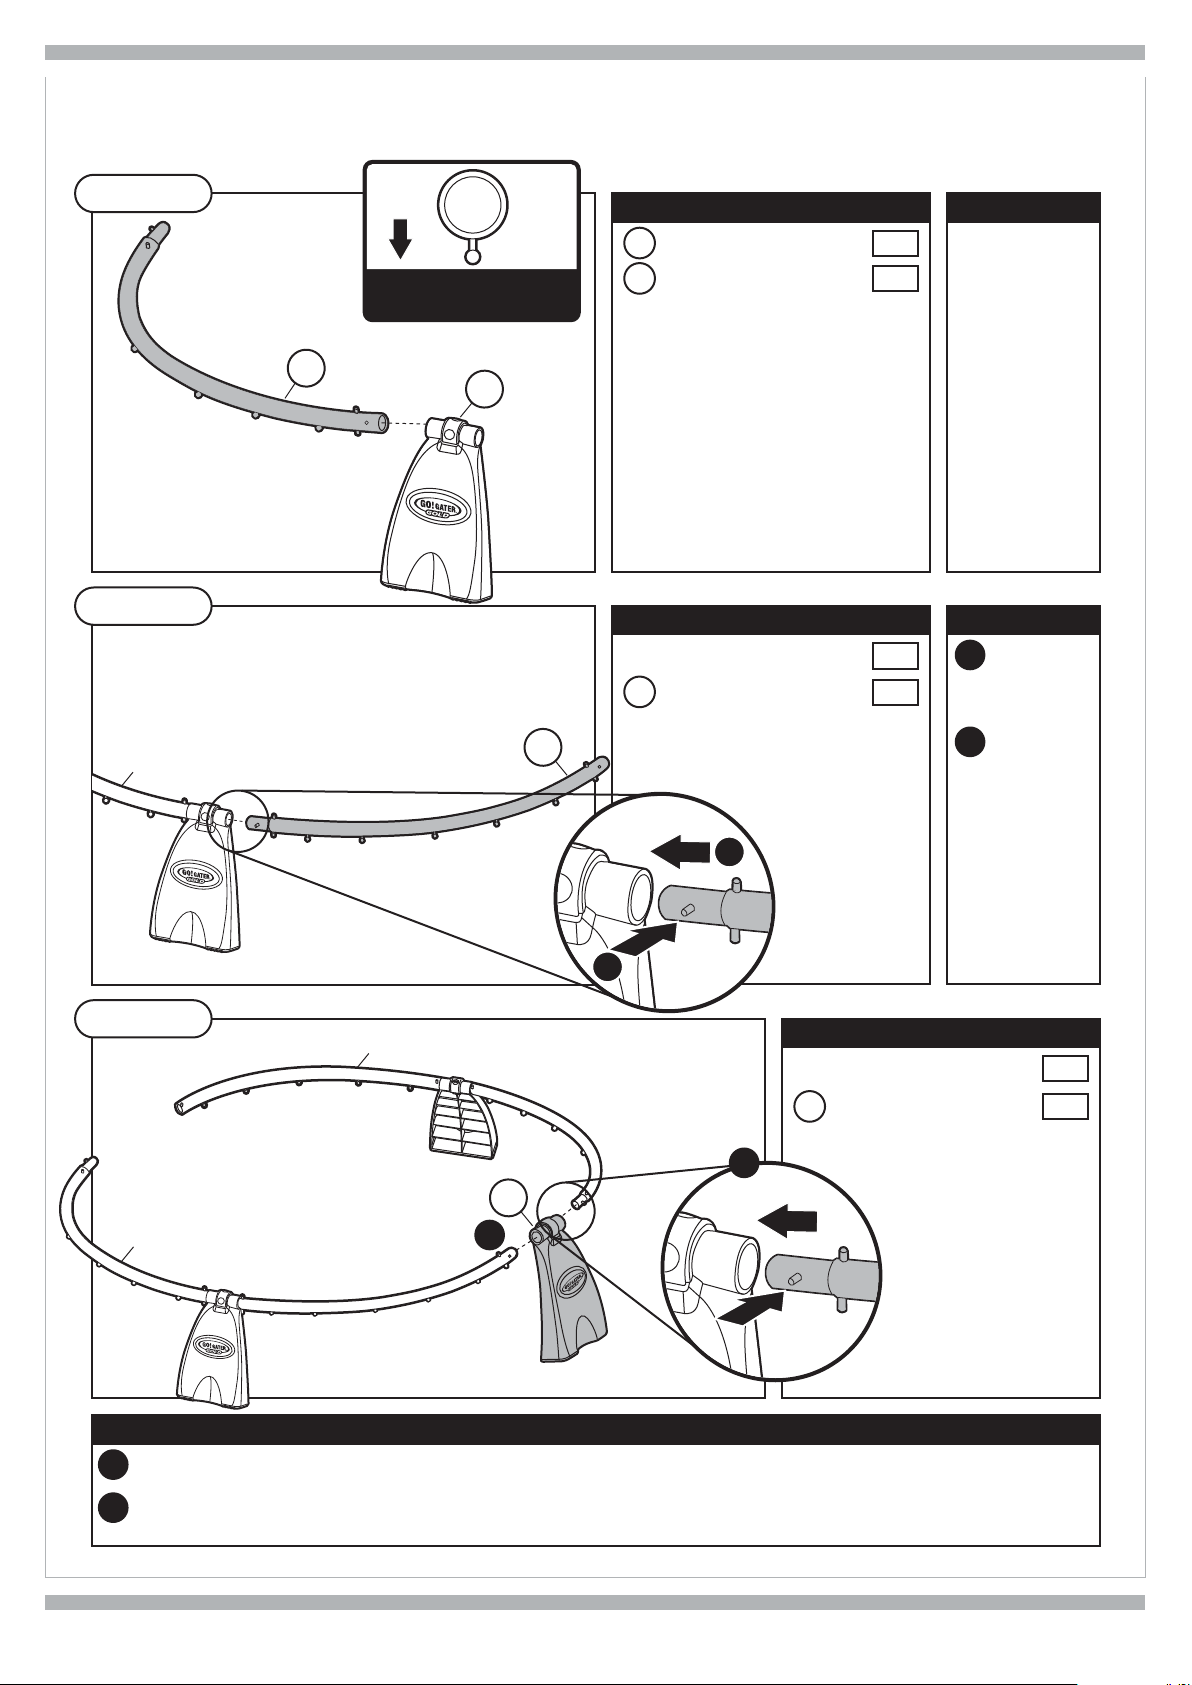
STEP 1
CLOSE
DOWN
NOTE: Make sure the pegs
are facing the ground.
COMPONENTS QTY.
Leg
1
Pole
2
x1
x1
NOTE:
Insert the noncrimped end of
the Pole into
the side of the
leg as shown.
2
1
CLOSE
STEP 2
Step 1 Assembly
STEP 3
Step 2 Assembly
OPEN
COMPONENTS QTY.
Step 1 Assmebly
Pole
2
x1
x1
2
NOTE:
A
Push in the
Pin Lock on the
Pole.
B
Slide the
Pole into the
open end on
the Leg of Step
B
1 Assmebly.
Repeat Steps 1
and 2.
A
COMPONENTS QTY.
Step 2 Assembly
Leg
1
x2
x1
B
1
Step 2 Assembly
CLOSE
NOTE:
Insert the non-crimped end on the Pole of Step 2 Assembly into the side of the Leg as shown.
A
B
Push in the Pin Lock on the crimped end on the Pole of Step 2 Assembly. Then slide the crimped end of the Pole into
the open end on the Leg Assembly.
A
2
 Loading...