

Page 1
®
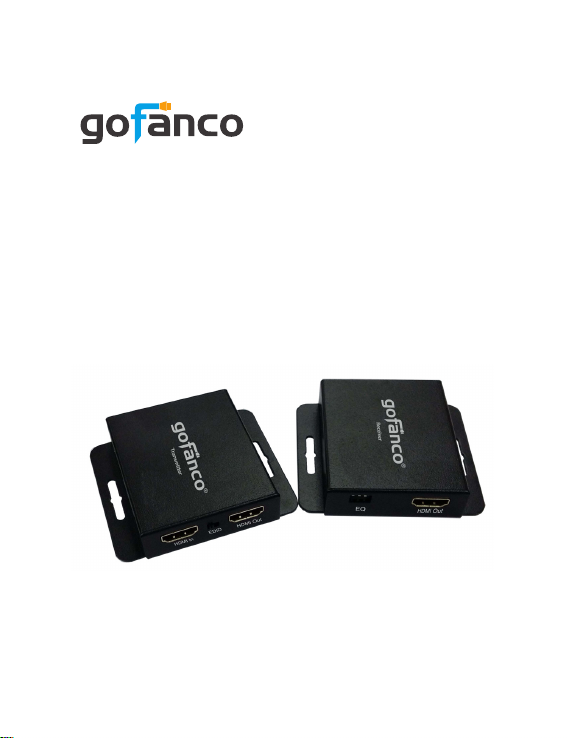
HDMI CAT5e/6 Extender
with IR - 50m
P/N: HDMIExt
G4-0013A
Page 2

Congratulations for owning a gofanco product. Our products
aim to meet all your connectivity needs wherever you go.
Have fun with our products!
Please read this manual carefully before first use.
If you need more information about our products, please
visit www.gofanco.com.
For technical support, please email us at support@gofanco.
com.
For drivers/manuals download, please go to http:// www.
gofanco.com/download.
2
Page 3
Introduction
gofanco HDMI CAT5e/6 Extender with IR - 50m (part# HDMI
Ext) extends HDMI signals over one Cat5e/6 cable up to 50m
(164ft) with an HDMI loop out on the Transmitter (TX) for a
local monitor or cascading.
Specifications
Output Signal HDMI
Resolution Up to 1080p
Audio Up to 7.1 ch
Transmission
Distance
Network Cable CAT5e/6
HDMI Cable Up to 5m (Input & Output)
Power Supply DC 5V/1A
Up to 50m (164ft)
Package Contents
• HDMI CAT5e/6 Extender with IR - 50m (TX & RX)
• 1x Power adapter
• IR Blaster extension cable & IR Receiver extension cable
• User's guide
3
Page 4
Layout
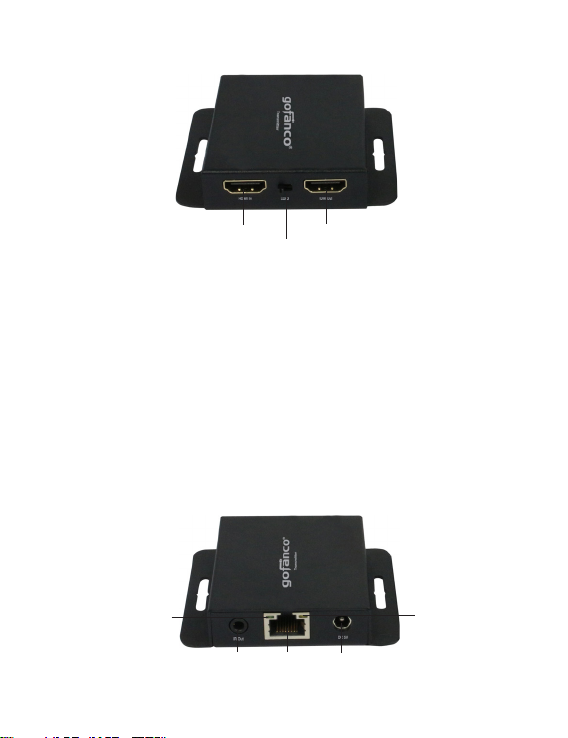
EDID
HDMI Out
HDMI In
Figure 1: Transmitter (TX) - HDMI Device Input
• HDMI In: Connect your HDMI source here with an HDMI
cable (cable not included)
• EDID: EDID learning switch. (Right position: Learn EDID
from the display connected to HDMI loop out; Left
position: Learn EDID from the display connected to
Receiver (RX))
• HDMI Out (optional): Connect to a local HDMI display
here or for cascading HDMI signals
Power LED
RJ45 Power Jack
Figure 2: Transmitter (TX) - RJ45 Output
4
IR Out
Signal LED
Page 5
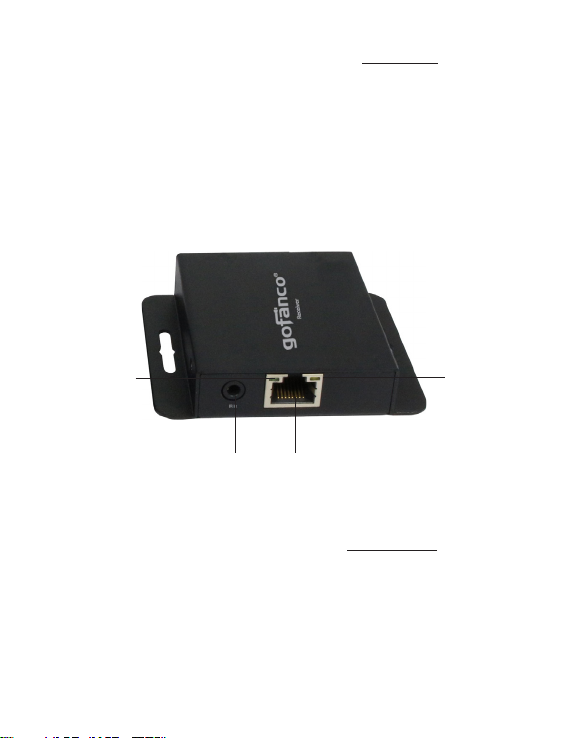
• IR Out: Infrared 3.5mm socket. Plug IR Blaster extension
cable here
• RJ45: Link to the Receiver's RJ45 via a Cat5e/6 cable
• Power Jack: Connect the included 5V DC power adapter
here
• Power LED: On when the Transmitter is powered
• Signal LED: On when the signal is detected
Power LED
IR In
Figure 3: Receiver (RX) - RJ45 Input
RJ45
Signal LED
• IR In: Infrared 3.5mm socket. Plug IR Receiver extension
cable here
• RJ45: Link to the Transmitter's RJ45 via a Cat5e/6 cable
• Power LED: On when the Receiver is powered. (It will be
powered when connected to the TX via Network cable.)
• Signal LED: On when the signal is detected
5
Page 6
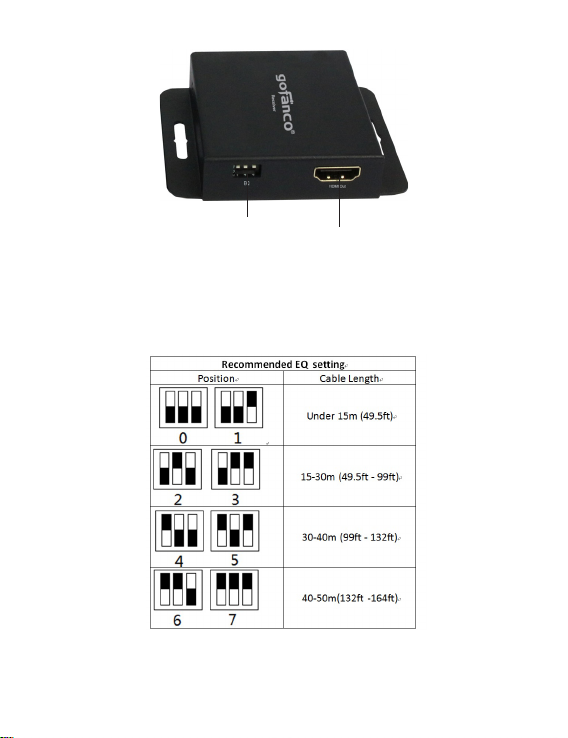
Equalizer control
Figure 4: Receiver (RX) - HDMI Display Output
HDMI Out
• Equalizer control: Adjust the 8-level equalization control
to the received HDMI signals (0~7: weakest to strongest)
• HDMI Out: Connect to your HDMI display here with an
HDMI cable (cable not included)
6
Page 7
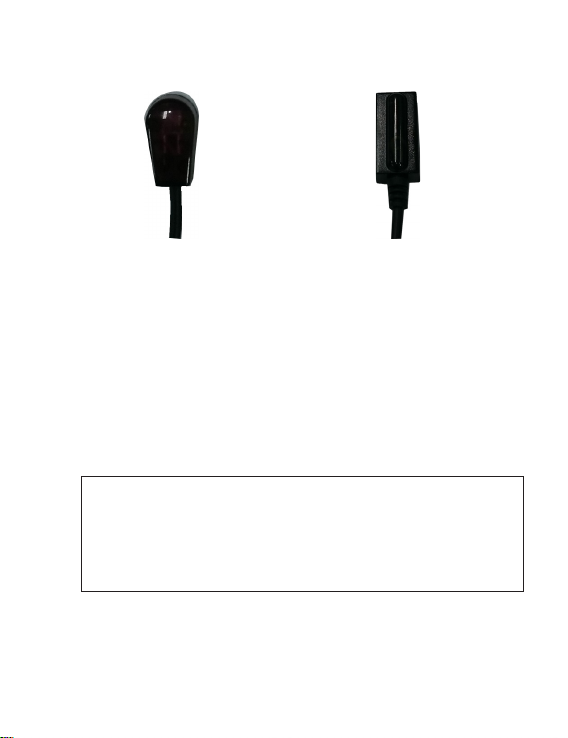
IR Extenders (30KHz - 60KHz)
Figure 5: IR Blaster
(Connect to Transmitter TX)
Figure 6: IR Receiver
(Connect to Receiver RX)
• IR Blaster: Plug into the Transmitter's IR 3.5 socket to
emit IR signals received from the IR Receiver end.
• IR Receiver: Plug into the Receiver's IR 3.5 socket to
receive IR signals from a remote control for the HDMI
device connected to the Transmitter.
Note: Incorrect placement of the IR Blaster and IR
Receiver may result in failure of these cables. Please
check carefully before plugging in the IR cables to
proper IR sockets.
7
Page 8

Hardware Installation
1. Power off all devices including your HDMI source and
display(s).
2. Connect your HDMI source to the Transmitter's HDMI
IN connector.
3. Optional: Connect the IR Blaster extension cable to the
Transmitter's IR Out. Face the eye towards your HDMI
device's IR window.
4. Optional : Connect your HDMI display to the Transmitter's
HDMI OUT. It's only needed when used with a local
monitor or to cascade HDMI output signals.
5. Connect your HDMI display to the Receiver's HDMI OUT
connector with an HDMI cable (cable not included).
6. Optional: Connect the IR Receiver extension cable to the
Receiver's IR In.
7. Connect and link the Transmitter and Receiver by a
CAT5e/6 cable.
8. Plug the included power adapter into the Transmitter's
Power Jack, then plug the power adapter into a reliable
power outlet. (Power will pass through to the RX by PoC)
9. Power on your HDMI device and HDMI display(s).
10. If a flickering or blinking image is seen, adjust the
Receiver's Equalizer control to improve the image quality.
8
Page 9
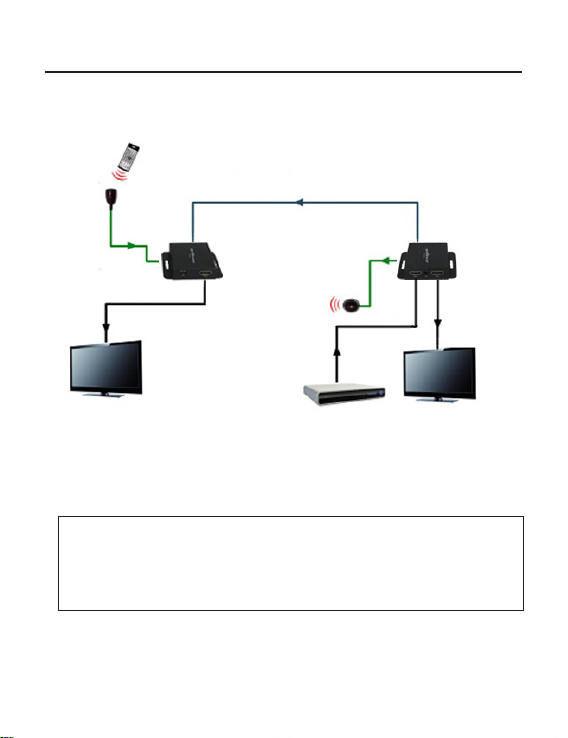
Application
Extend HDMI signals from DVD players, game consoles or
HDMI-equipped computers up to 50m (164ft).
HDMI Monitor-2
Receiver
HDMI Source HDMI Monitor-1
Figure 7: Application
Transmitter
(Optional)
* When using the remote control, please make sure its
distance to the IR Receiver extension cable is within 5
meters and without obstructions.
9
Page 10

Blank Page
10
Page 11

Blank Page
11
Page 12

®
Thank you for choosing gofanco
www.gofanco.com
 Loading...