

Godrej Appliances GMX 25CA1 MIZ User Manual
MODEL: GMX 20 CA5 MKZ
MODEL: GMX 25CA1 MIZ
CONVECTION MICROWAVE OVEN
CONVECTION MICROWAVE OVEN
Please read these instructions carefully before installing and operating the oven.
Please read these instructions carefully before installing and operating the oven.
Record in the space below the SERIAL NO. found on the nameplate on your oven and retain
Record in the space below the SERIAL NO. found on the nameplate on your oven and retain
t
his information for future reference.
this information for future reference.
SERIAL NO.
SERIAL NO.
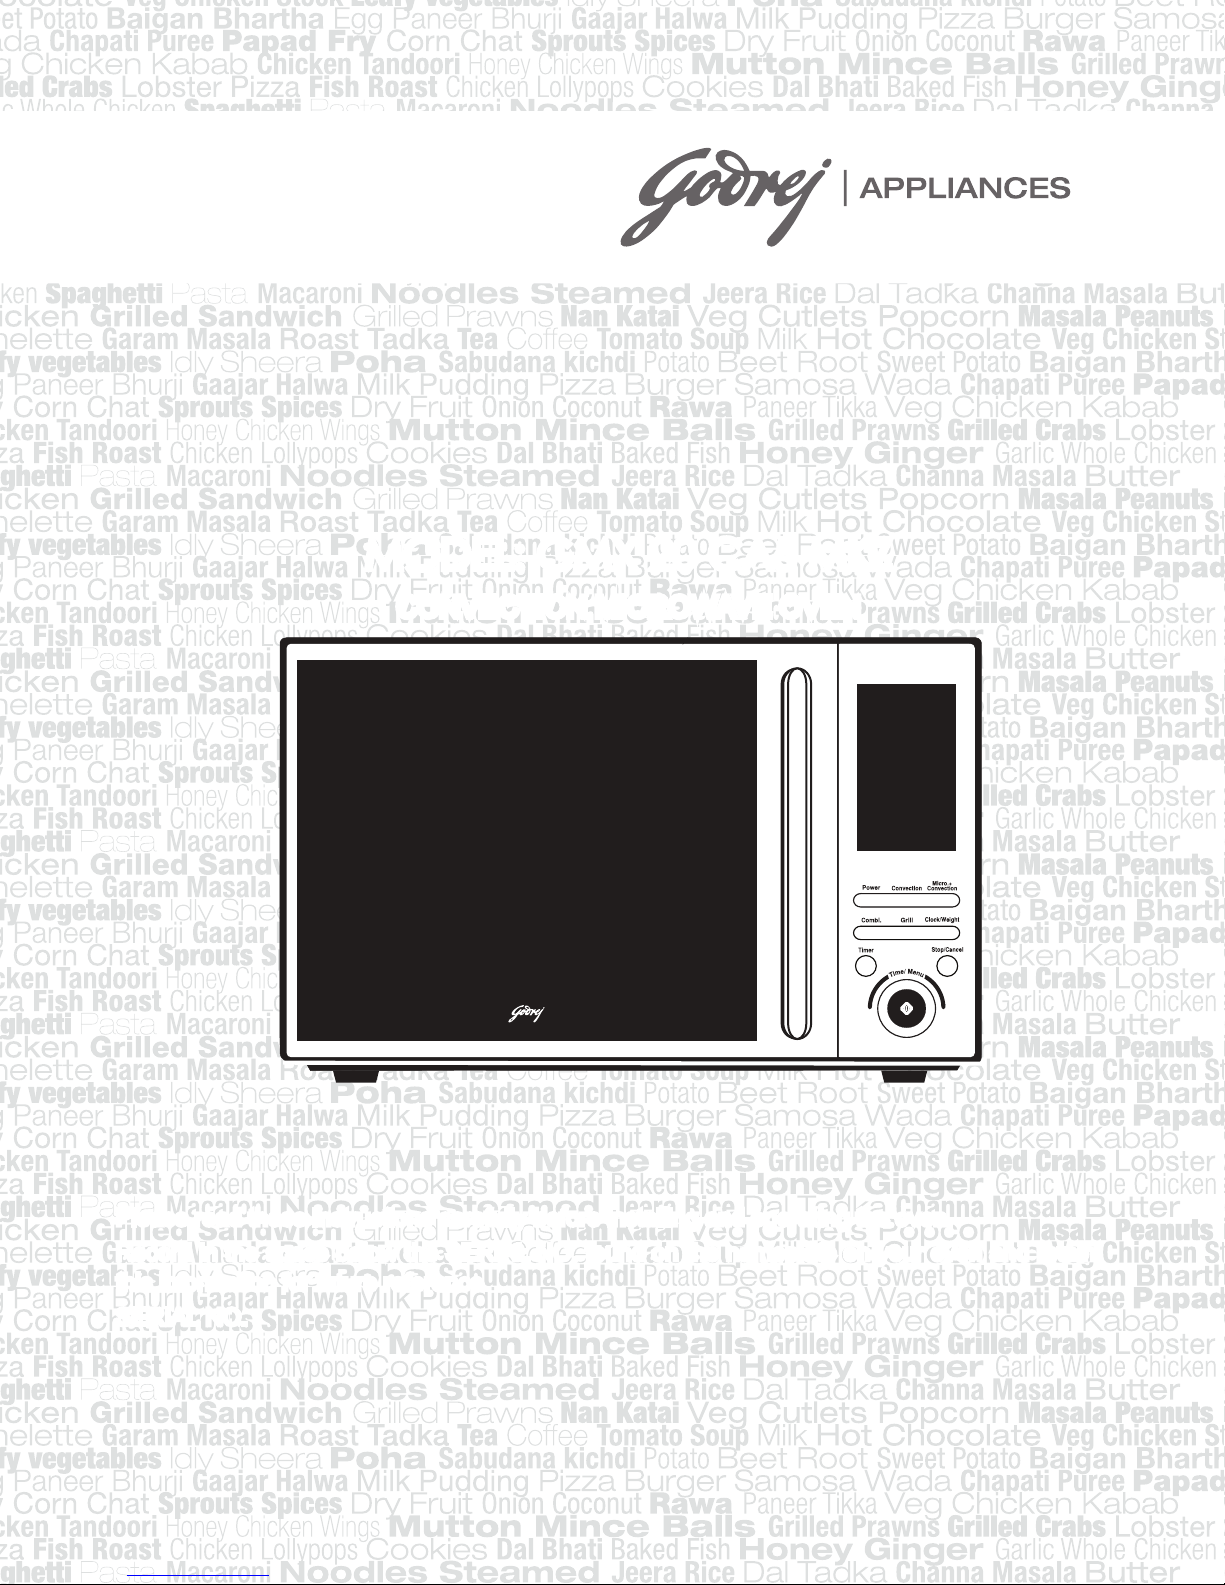
the above image is for representative purpose, actual image of the product may vary
TThhaannkk yyoouu ffoorr ppuurrcchhaassiinngg GGooddrreejj MMiiccrroowwaavvee OOvveenn
Please record the model number and
serial number of this unit for future
reference.
Staple your receipt here for proof of
purchase.
Model No: _______________________
Serial No: _______________________
Dealer:__________________________
________________________________
________________________________
________________________________
Dealer Phone No:__________________
Power Consumption:
Rated Microwave Output:
Operation Frequency:
Product Dimensions:
Oven Capacity:
Cooking Uniformity:
Net Weight:
SSPPEECCIIFFIICCAATTIIOONNSS
230V/50Hz, 1400W(Microwave)
10
00W
(Grill)
1950W(Convection)
900W
2450MHz
28.1c
m(H)×
25Litres
Turntable System
Approx.16.0kg
48.3
cm(W)×
41.4
cm(D)
1

T
T
AABBLLEE OOFF CCOONNTTEENNTT
IMPORTANT SAFETY INSTRUCTIONS 3
UTENSIL GUIDE 5
INSTALLATION INFORMATION 5
GROUNDING INSTRUCTIONS 6
ELECTRICAL REQUIREMENTS 6
RADIO INTERFERENCE 6
EXTENSION CORD INFORMATION 6
PART NAMES 6
CONTROL PANEL 7
OPERATION INSTRUCTIONS 8
INSTACOOK MENUS 12
CLEANING AND CARE 17
TROUBLESHOOTING 18
FAQs 19
WARRANTY 20
2
3
4
UTTEENNSSIILL
U
1. The ideal material for a microwave utensil is
transparent to microwave, it allows energy
to pass through the container and heat the
food.
2. Microwave cannot penetrate metal, so metal
utensils or dishes with metallic trim should
not be used.
3. Do not use recycled paper products when
microwave cooking, as they may contain
small metal fragments which may cause
The list below is a general guide to help you select the correct utensils.
Cookware
Heat–Resistant Glass Yes Yes Yes Yes
Non Heat–Resistant Glass No No No No
Heat–Resistant Ceramics Yes Yes Yes Yes
Microwave–Safe Plastic Dish Yes No No No
Kitchen Paper Yes No No No
Metal Tray No Yes Yes No
Metal Rack No Yes Yes No
Aluminum Foil & Foil
Container
* Combination: applicable for both "microwave+grill", and "microwave+convection" cooking.
Microwave Grill Convection Combination*
GGUUIIDDEE
sparks and/or fires.
4. Round /oval dishes rather than
square/oblong ones are recommend, as
food in corners tends to overcook.
5. Narrow strips of aluminum foil may be used
to prevent overcooking of exposed areas.
But be careful don’t use too much and keep
a distance of 1 inch (2.54cm) between foil
and cavity.
No Yes Yes No
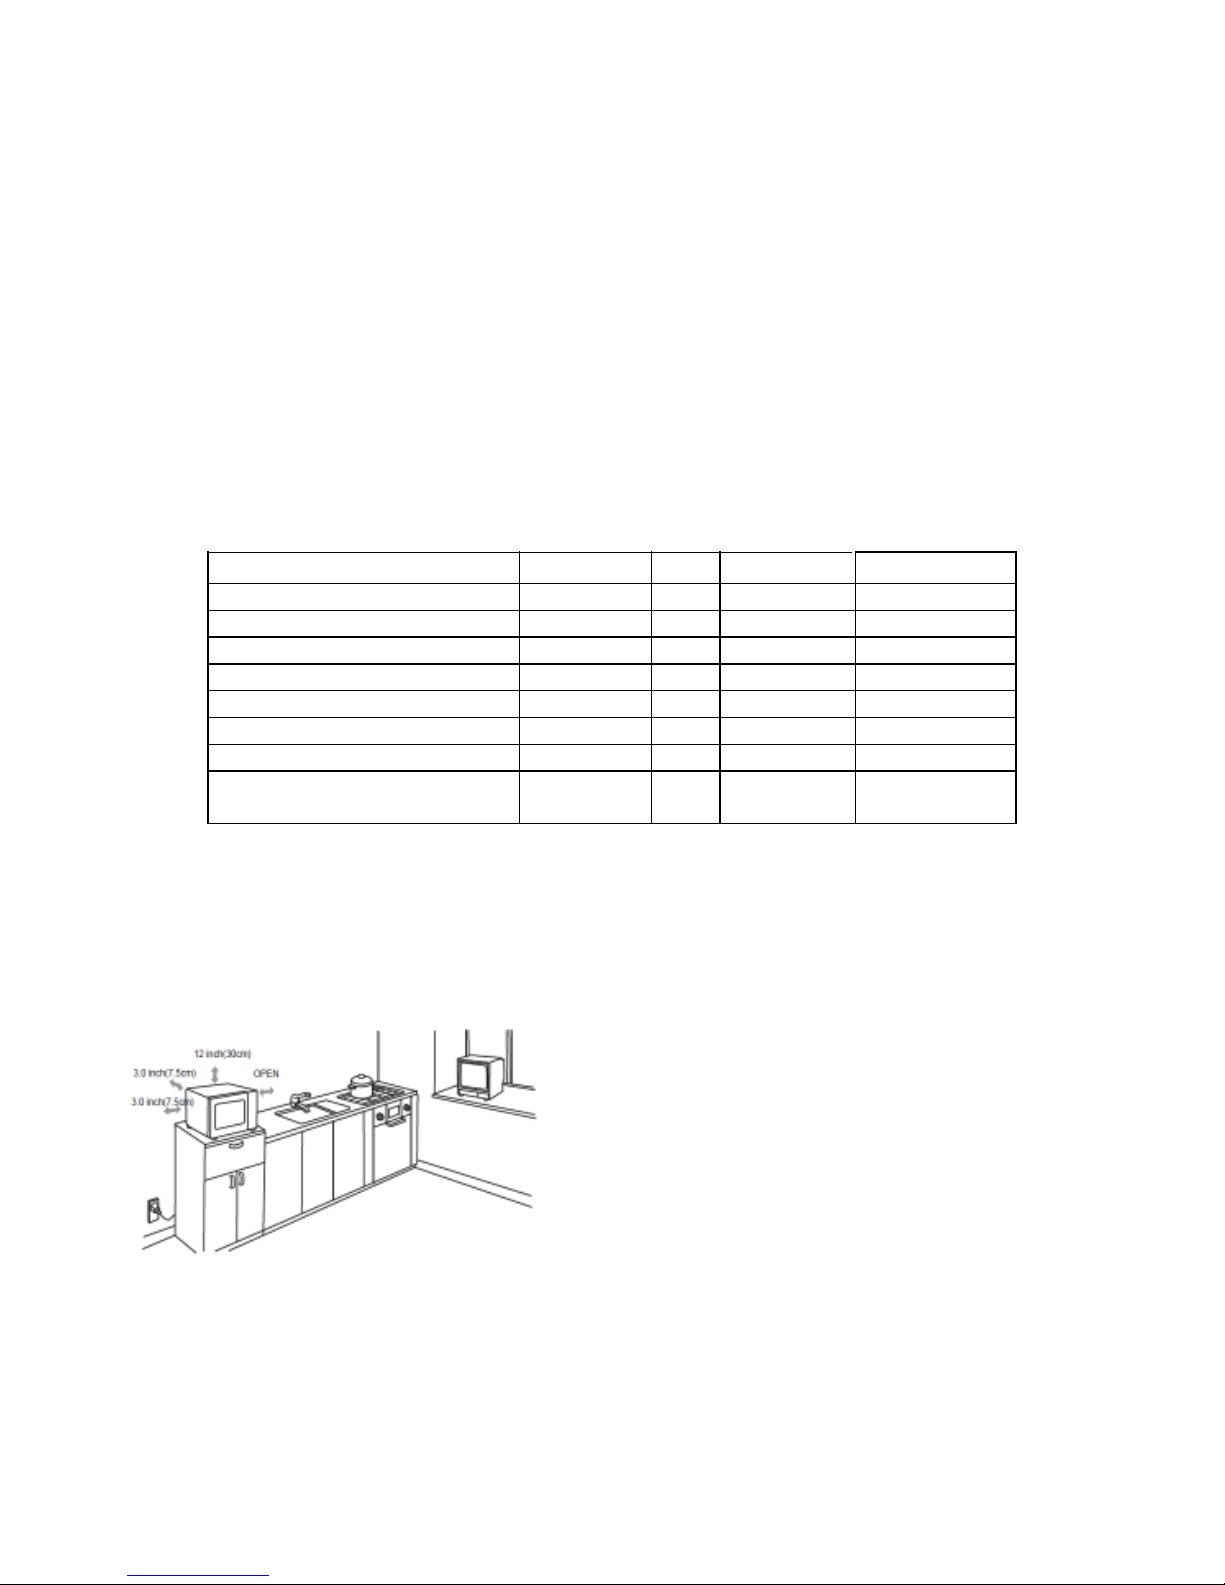
INNSSTTAALLLLAATTIIOONN
1) Select a level surface that provides enough
open space for the intake and/or outlet vents
A minimum clearance of 7.5 cm is required
between the oven and any adjacent walls. One
side must be open.
a) Leave a minimum clearance of 30 cm above
the oven.
b) Do not remove the legs from the bottom of
the oven.
IINNFFOORRMMAATTIIOONN
c) Blocking the intake and/or outlet openings
can damage the oven
d) Place the oven as far away from radios and
TV as possible
2) Plug your oven into a standard household
outlet. Be sure the voltage and frequency is
the same as the voltage and the frequency on
the rating label at the back of the Microwave
Oven.
3) Do not operate the oven without glass tray,
roller support and shaft in their proper
positions (applicable for microwave ovens with
turn tables)
WARNING: Do not install oven over a range
cooktop or other heat-producing appliance. If
installed near or over a heat source, the oven
could be damaged and the warranty would be
void.
5
GRROOUUNNDDIINNGG
G
This appliance must be grounded. This oven is equipped with a cord having a grounding wire with
a grounding plug. It must be plugged into a wall receptacle that is properly installed and grounded.
In the event of an electrical short circuit, grounding reduces risk of electric shock by providing
an escape wire for the electric current. It is recommended that a separate circuit serving only
the oven be provided. Using a high voltage is dangerous and may result in a fire or other accident
causing oven damage.
WARNING Improper use of the grounding plug can result in a risk of electric shock.
Note:
1) If you have any questions about the grounding or electrical instructions, consult a qualified
electrician or service person.
2) Neither the manufacturer nor the dealer can accept any liability for damage to the oven or
personal injury resulting from failure to observe the electrical connection procedures.
The wires in this mains cable are colored in accordance with the following code:
Green and/or Yellow = EARTH, Blue and/or Black = NEUTRAL, Brown and/or Red = LIVE
ELLEECCTTRRIICCAALL
E
IINNSSTTRRUUCCTTIIOONNSS
RREEQQUUIIRREEMMEENNTTSS
The oven is designed to operate on a standard
230V/50Hz household outlet. Be sure the
circuit is at least 15A or 20A and the
microwave oven is the only appliance on the
circuit
RAADDIIOO
R
Operation of the microwave oven can cause
interference to your radio, TV, or similar
equipment.
When there is interference, it may be reduced
or eliminated by taking the following measures:
1.
Clean door and sealing surface of the oven.
2.
Reorient the receiving antenna of radio or
television.
IINNTTEERRFFEERREENNCCEE
EXXTTEENNSSIIOONN
E
1. A short power supply cord is provided to
reduce the risks resulting from becoming
entangled in or tripping over a longer cord
CCOORRDD IINNFFOORRMMAATTIIOONN
PART NAMES
3.
Relocate the microwave oven with respect
to the receiver.
4.
Move the microwave oven away from the
receiver.
5.
Plug the microwave oven into a different
outlet so that microwave oven and receiver
are on different branch circuits.
2. DO NOT USE AN EXTENTION CORD
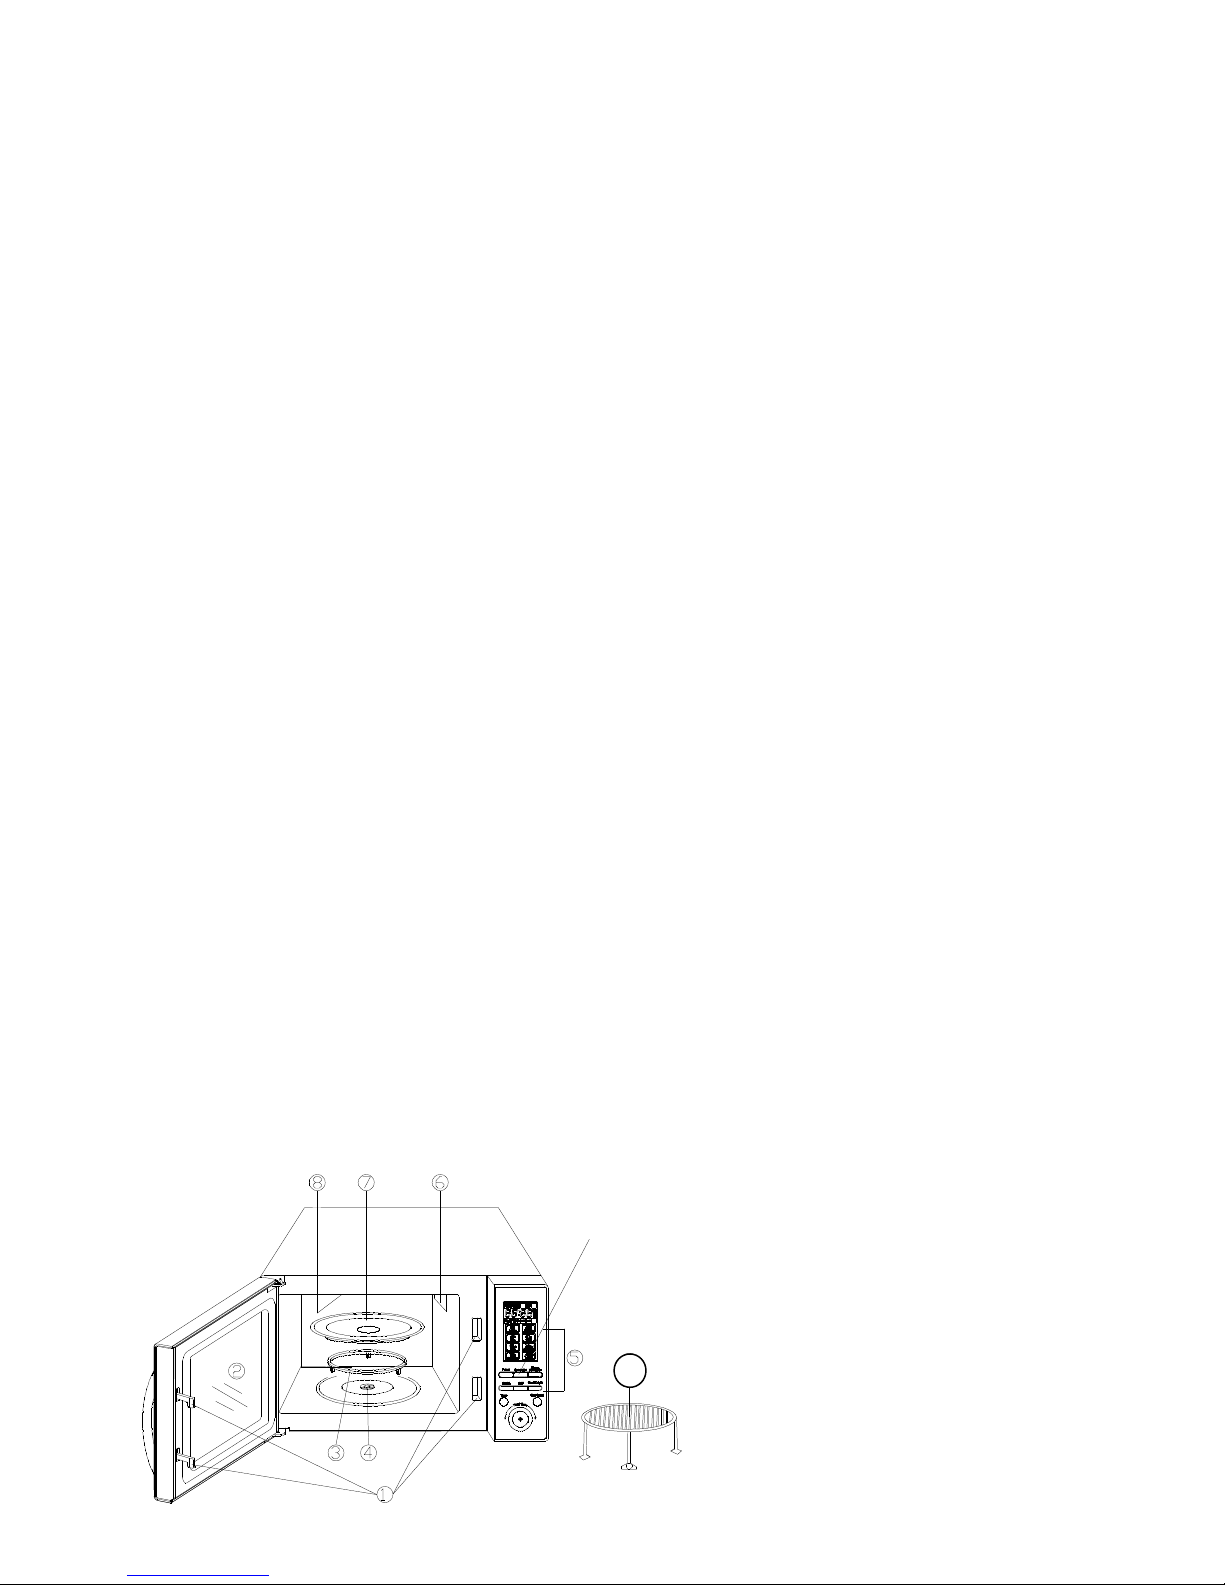
1. Door Safety Lock System
2. Oven Window
3. Roller Ring
4. Shaft
5. Control Panel
6. Oven Air Vent
7. Glass Tray
8. Heater
9. Metal Rack
6
Insta 1 Insta 2
Insta 3 Insta 4
Insta 5 Insta 6
Insta 7 Insta 8
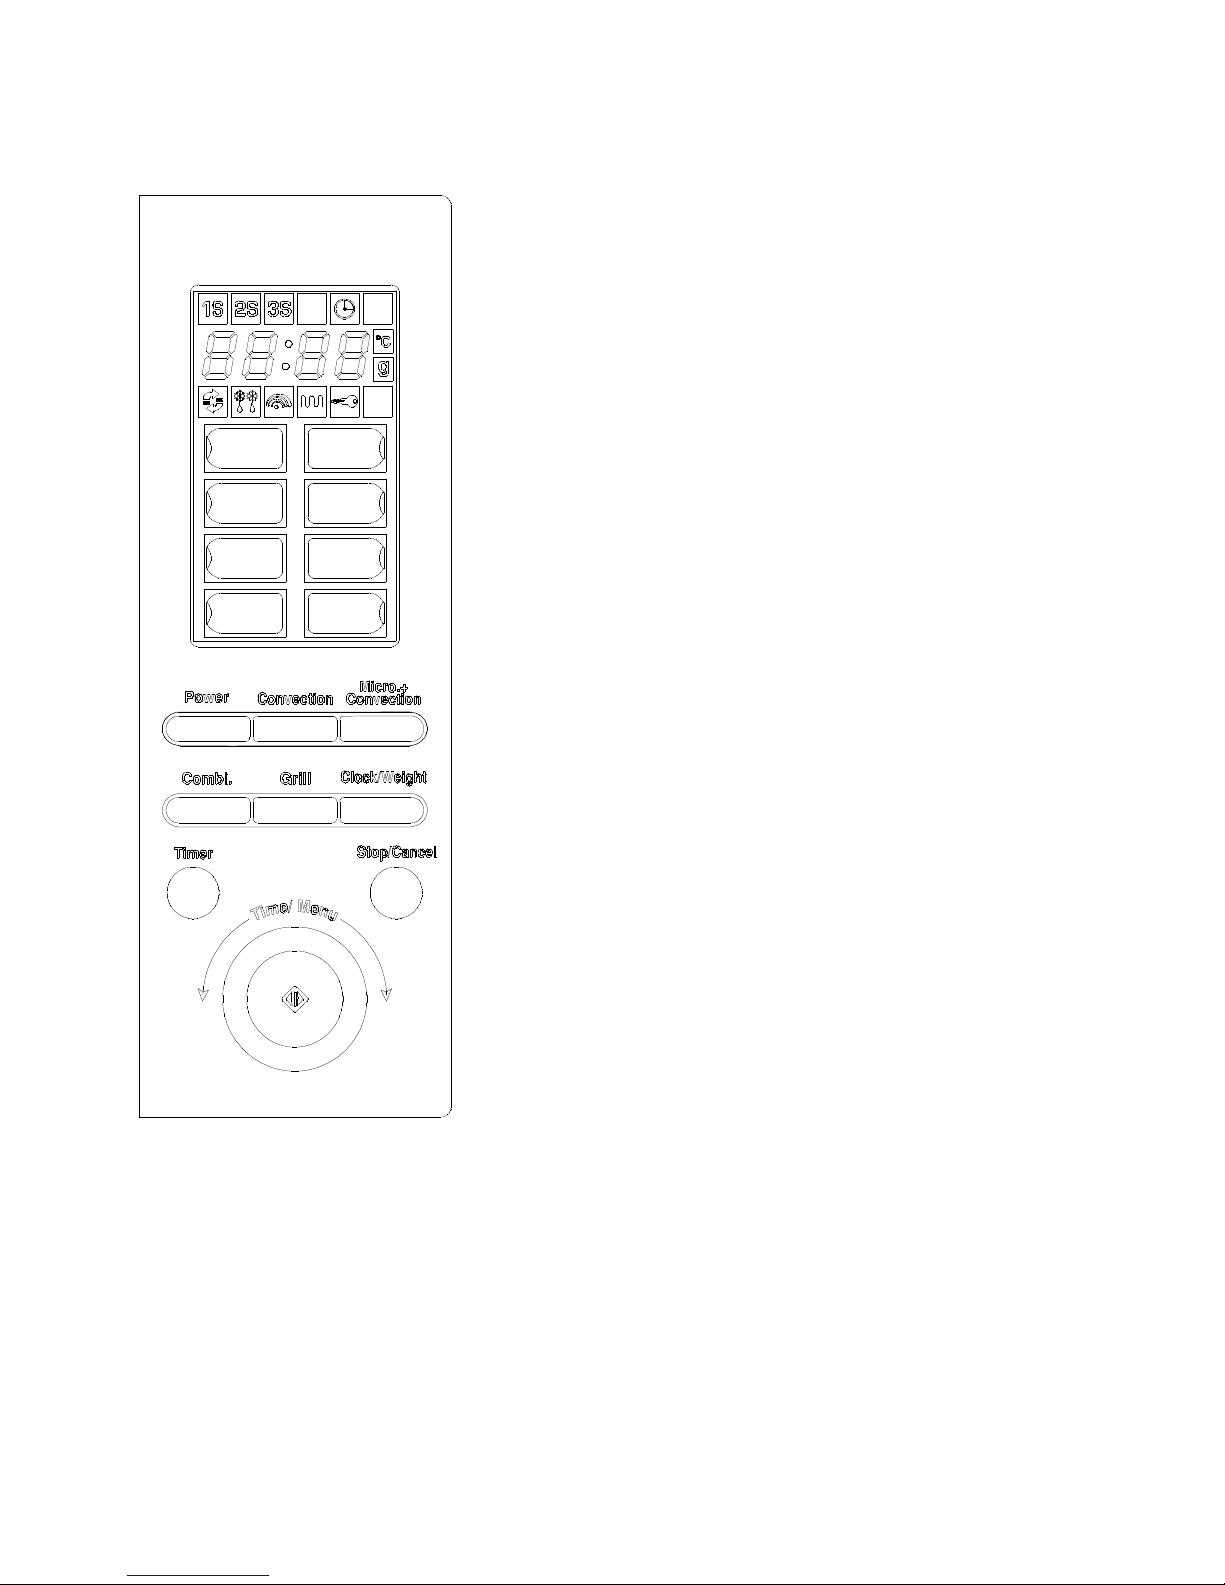
CCOONNTTRROOLL PPAANNEELL
1. DISPLAY SCREEN
• Cooking time, power, indicators and
present time are displayed.
2. POWER
• Press to select microwave power level.
3. GRILL
• Press to set a grill cooking program.
4. CONVECTION
• Press to program convection temperature.
5. COMBI. (MICRO.+GRILL)
• Press to select one of two combination
cooking settings.
6. MICRO.+CONVECTION
• Press to select one of four combination
cooking settings.
7. TIME/MENU (START/QUICK START)
• Rotate to set cooking time or select automenu.
• Press to start cooking program or set
quick start cooking program.
8. CLOCK/WEIGHT
• Used to set clock time or enter food
weight.
9. TIMER
• Used to set the oven timer.
10. STOP/CANCEL
• Touch to stop cooking program or clear all
previous settings before cooking starts.
the above image is for representative purpose, actual image of the product may vary
7
 Loading...