

Goclever FULL HD IR, DVR FULL HD IR Owner's Manual
Przed skorzystaniem z urządzenia zapoznaj się z niniejszą instrukcją obsługi
oraz zachowaj ją na przyszłość
DVR FULL HD IR
OWNER’S MANUAL
DVR FULL HD IR
INSTRUKCJA OBSŁUGI
ODWIEDŹ NASZĄ STRONĘ
WWW.GOCLEVER.COM
ABY ZAPOZNAĆ SIĘ Z INNYMI PRODUKTAMI TAB, NAVIO, DVR, DVB-T

2
Contents / Spis treści
English
3
Polski
10
Warunki gwarancji
18
Karta gwarancyjna
20
3
First steps
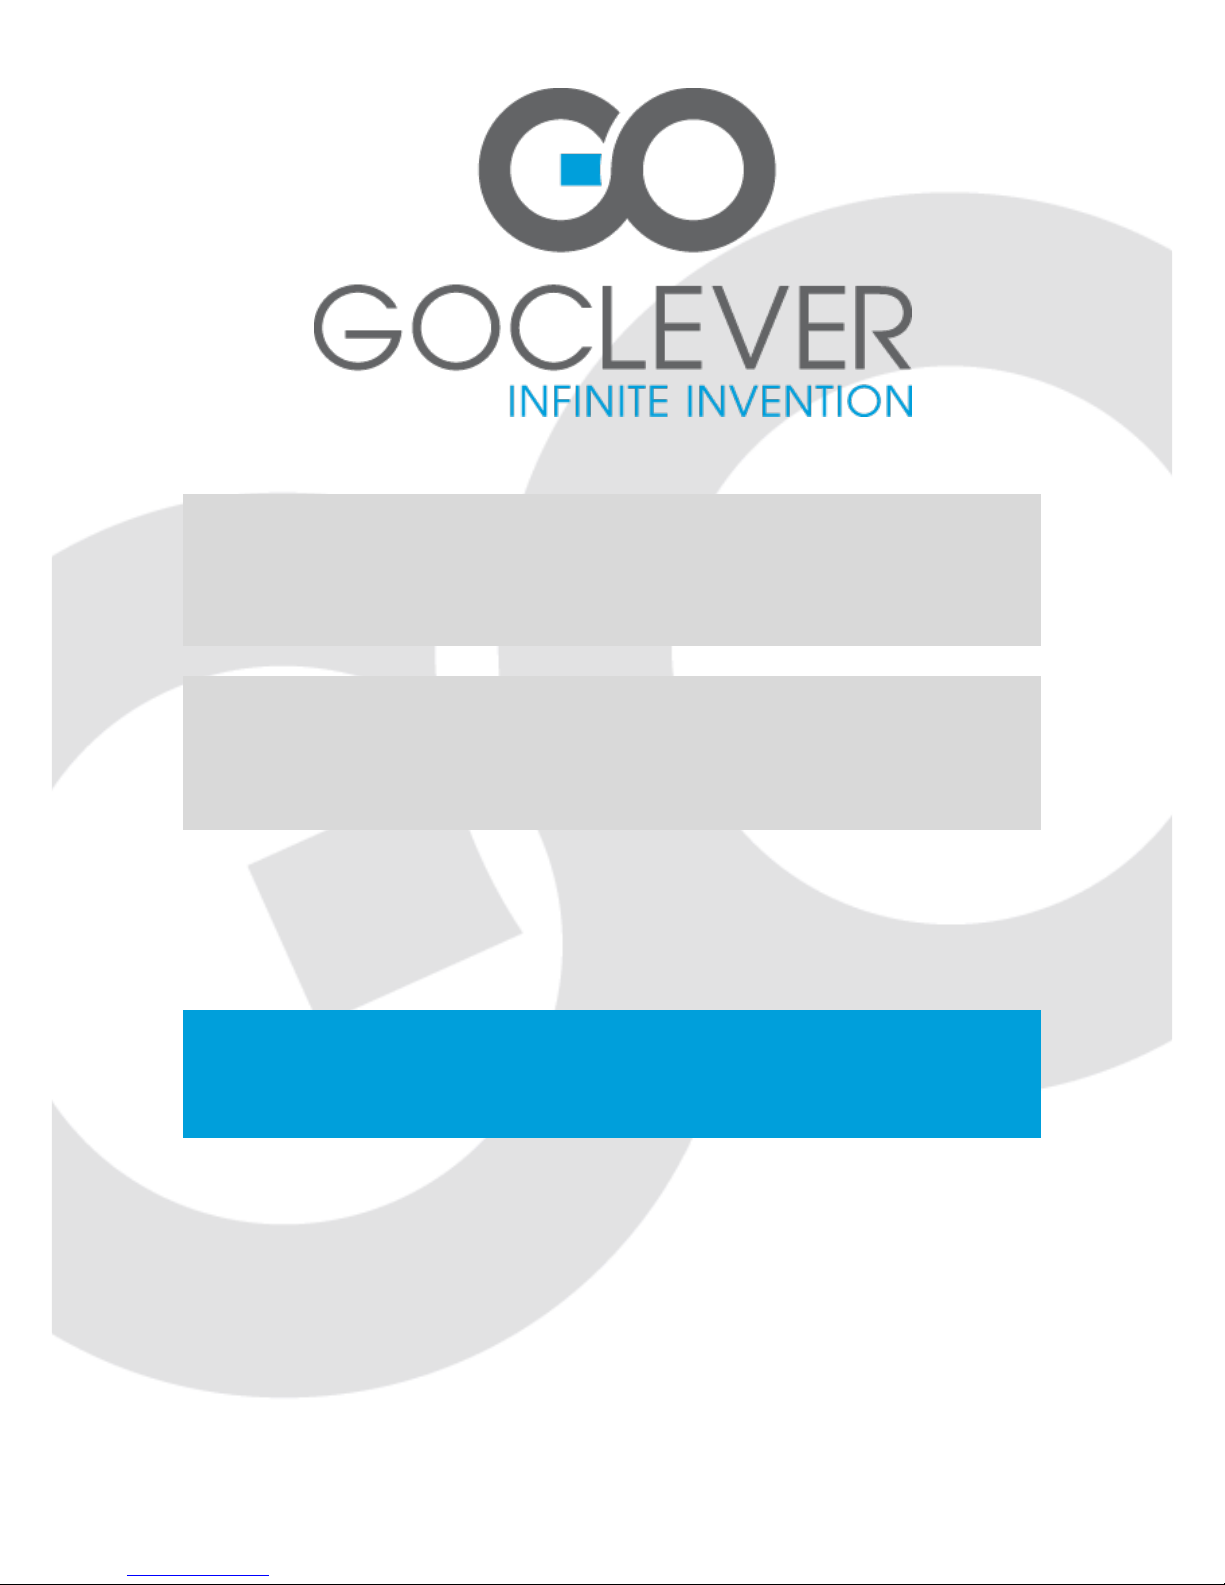
Turning ON/OFF
Press power button once to power on ,blue light indicator is on;
Press again to power off, blue light indicator is off.
Attention: Low battery is displayed before shutting down.
Charging Batteries
There 3 ways of charging the battery. Red light indicator is on while charging; full charge time
is 180 minutes.
Red light indicator will turn off when fully charged
Using the AC adaptor to charge battery
4
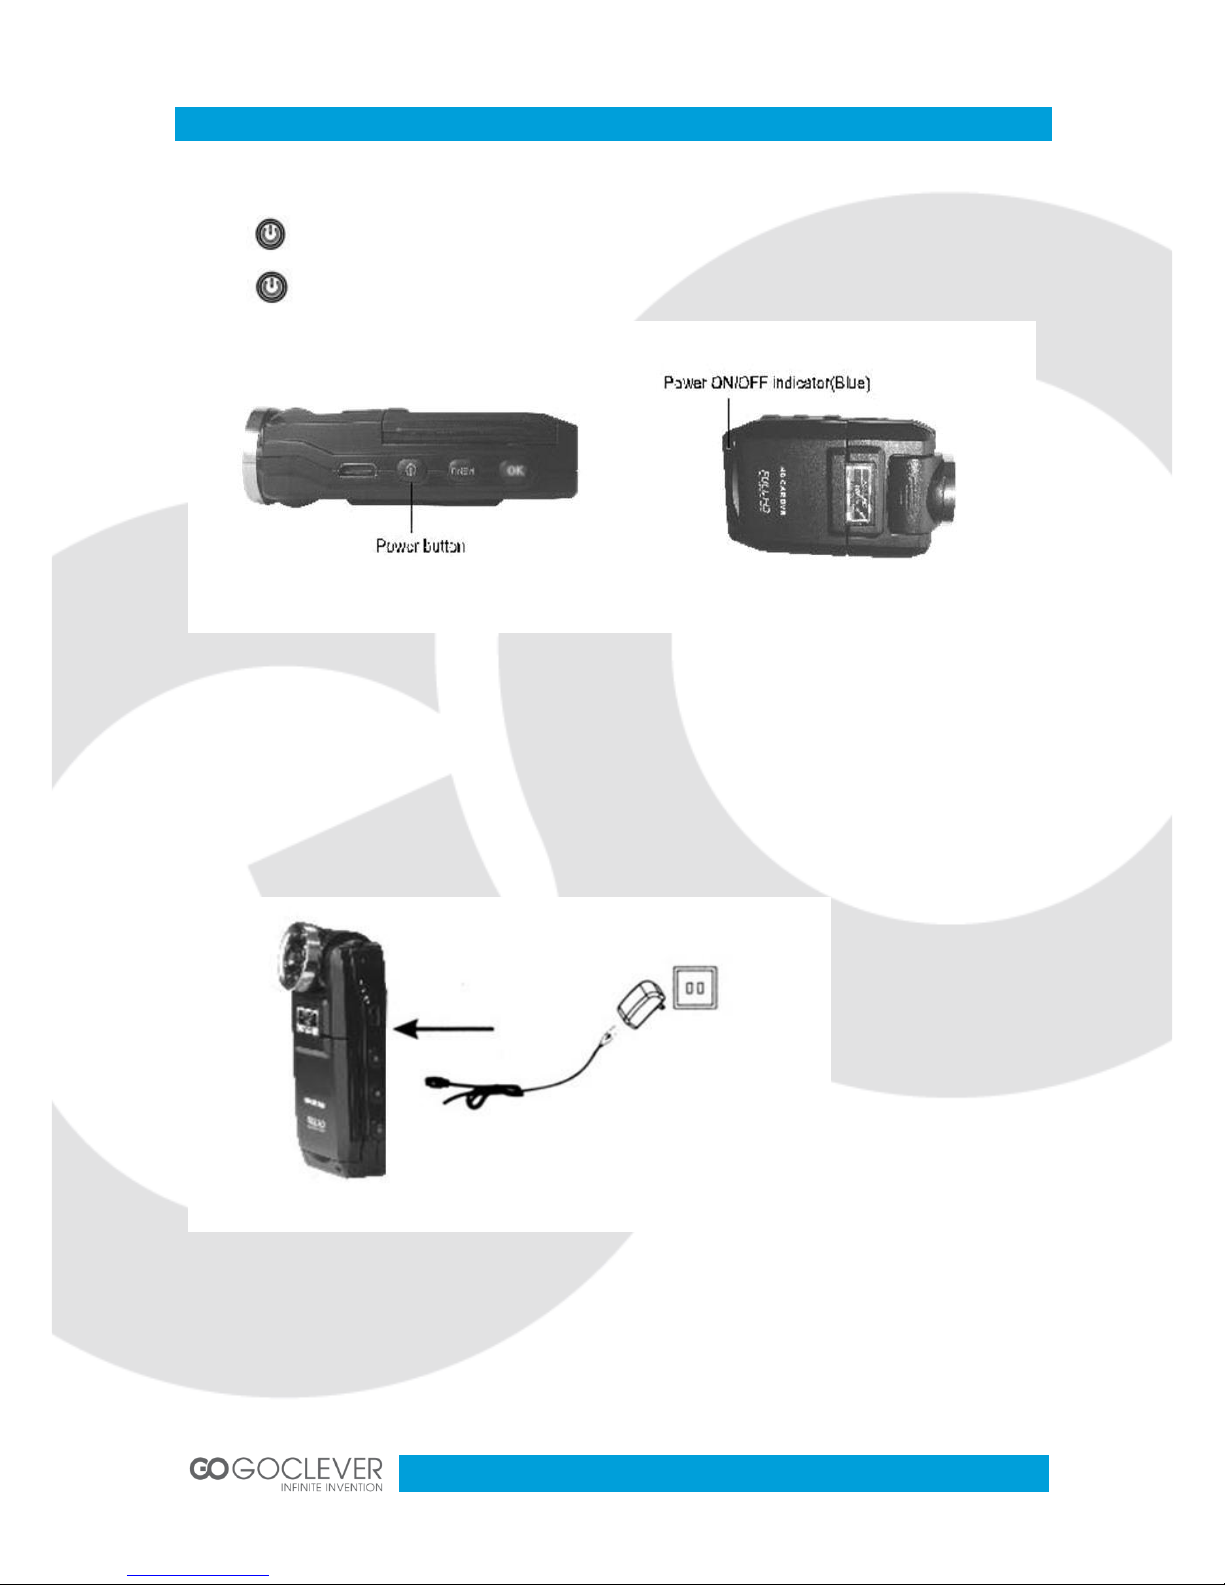
Using USB to charge battery
In-car battery charging
Placing the Micro SD card
Place the micro SD card into the memory card slot according to the image below; press it until
you hear a click sound.
5
Removing Micro SD card: Press it once and remove it after it pops up
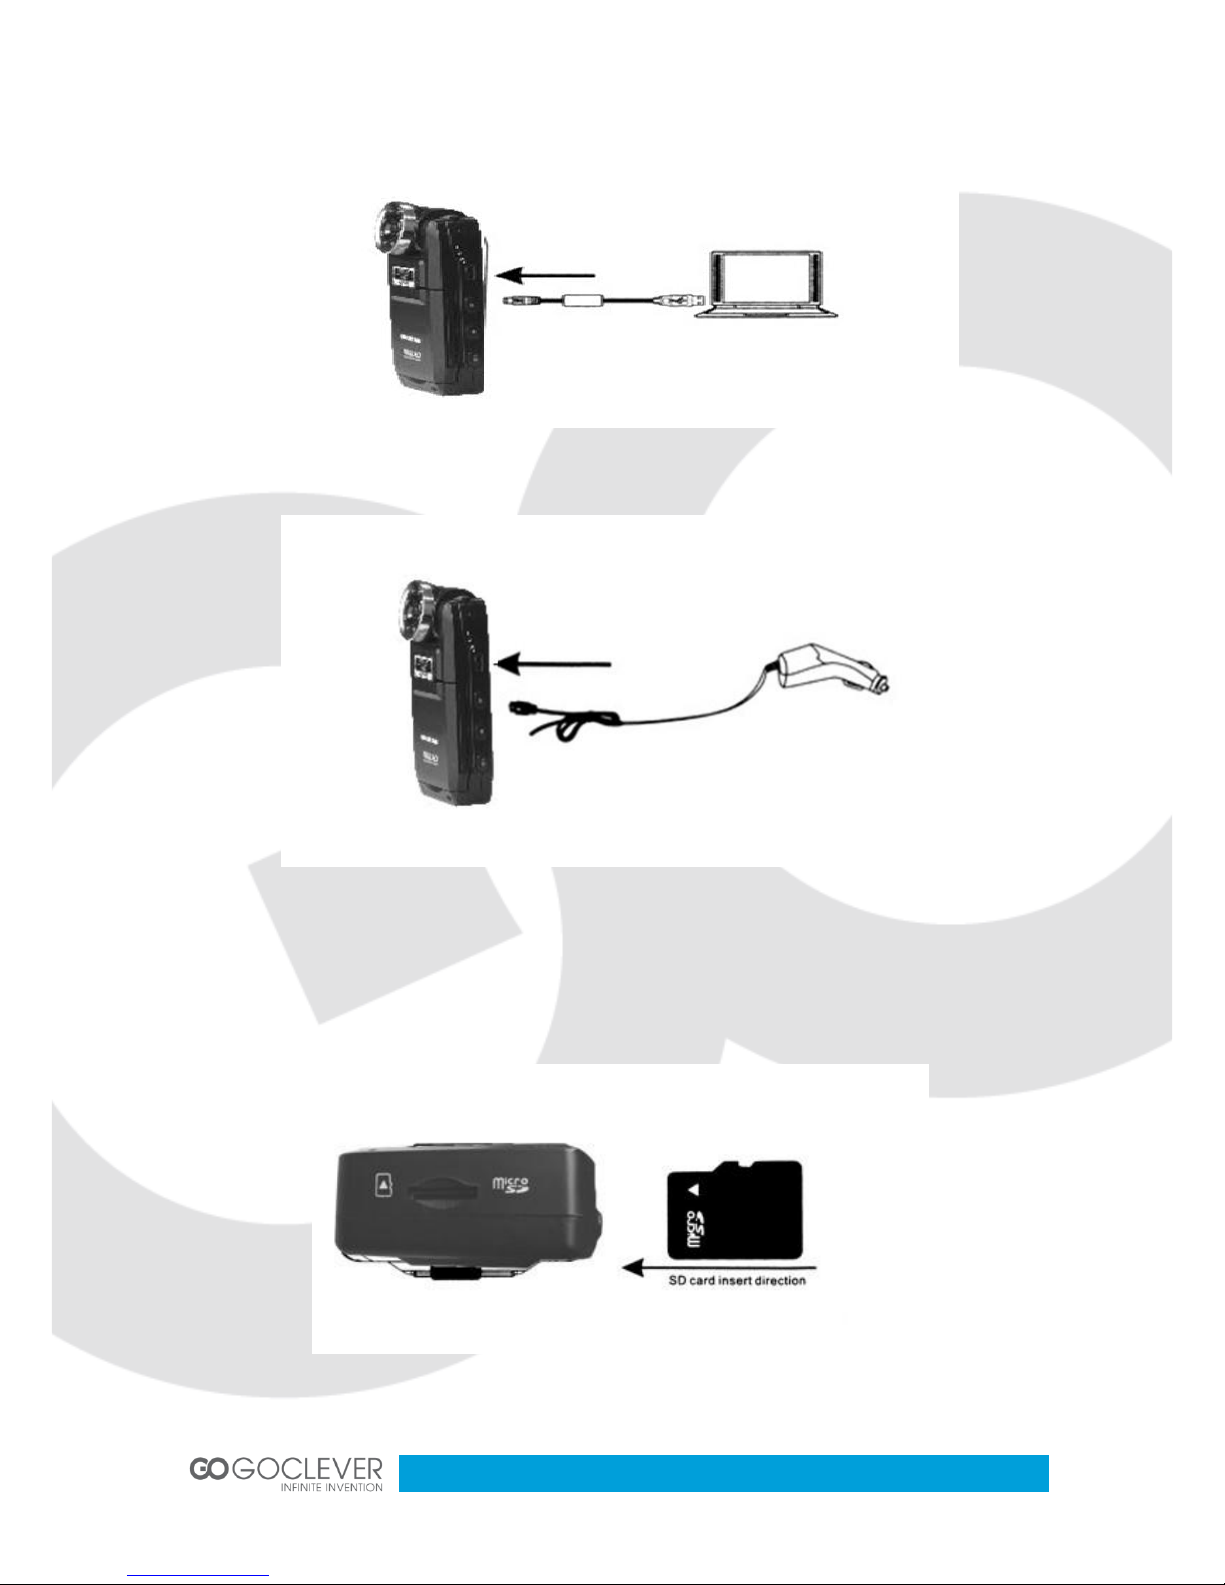
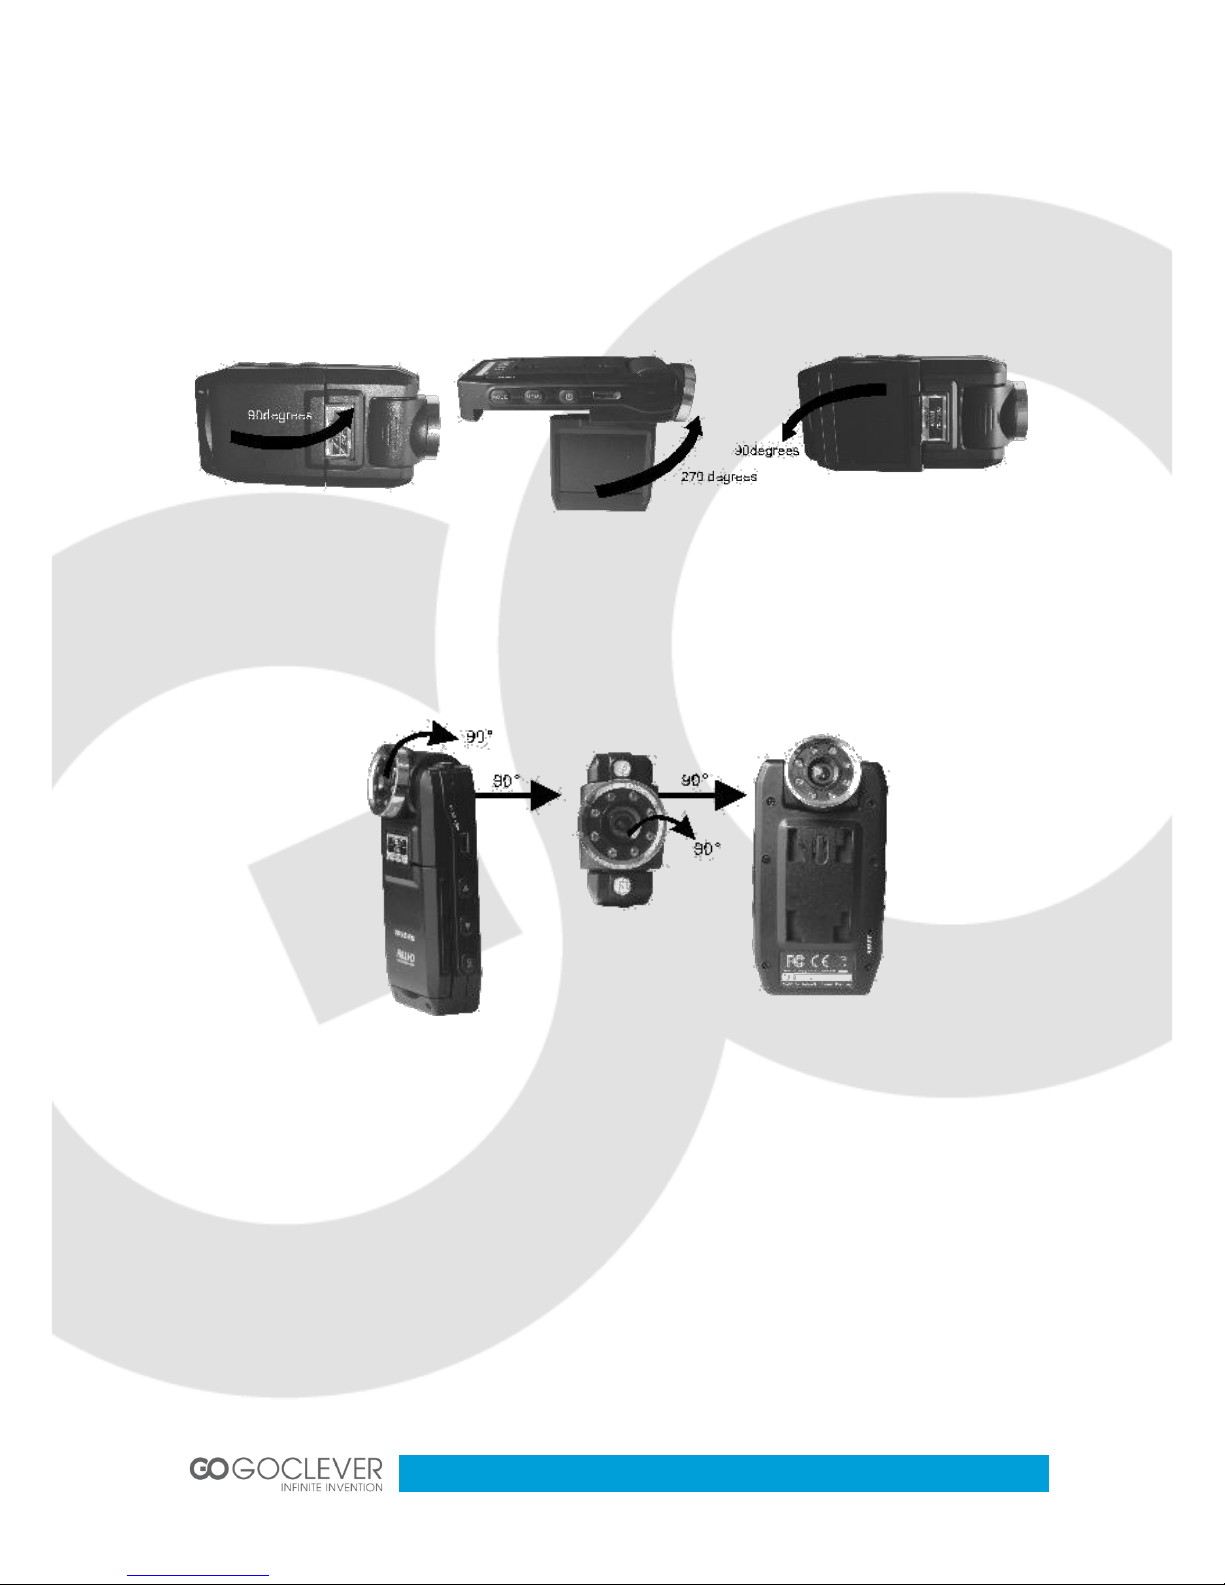
Rotating the LCD display
90°Left will open the LCD display: LCD display can also rotate 90°down.
LCD display can rotate 180°towards lens.
Rotating Lens
Lens cans also rotate 180°as show on images below.
6
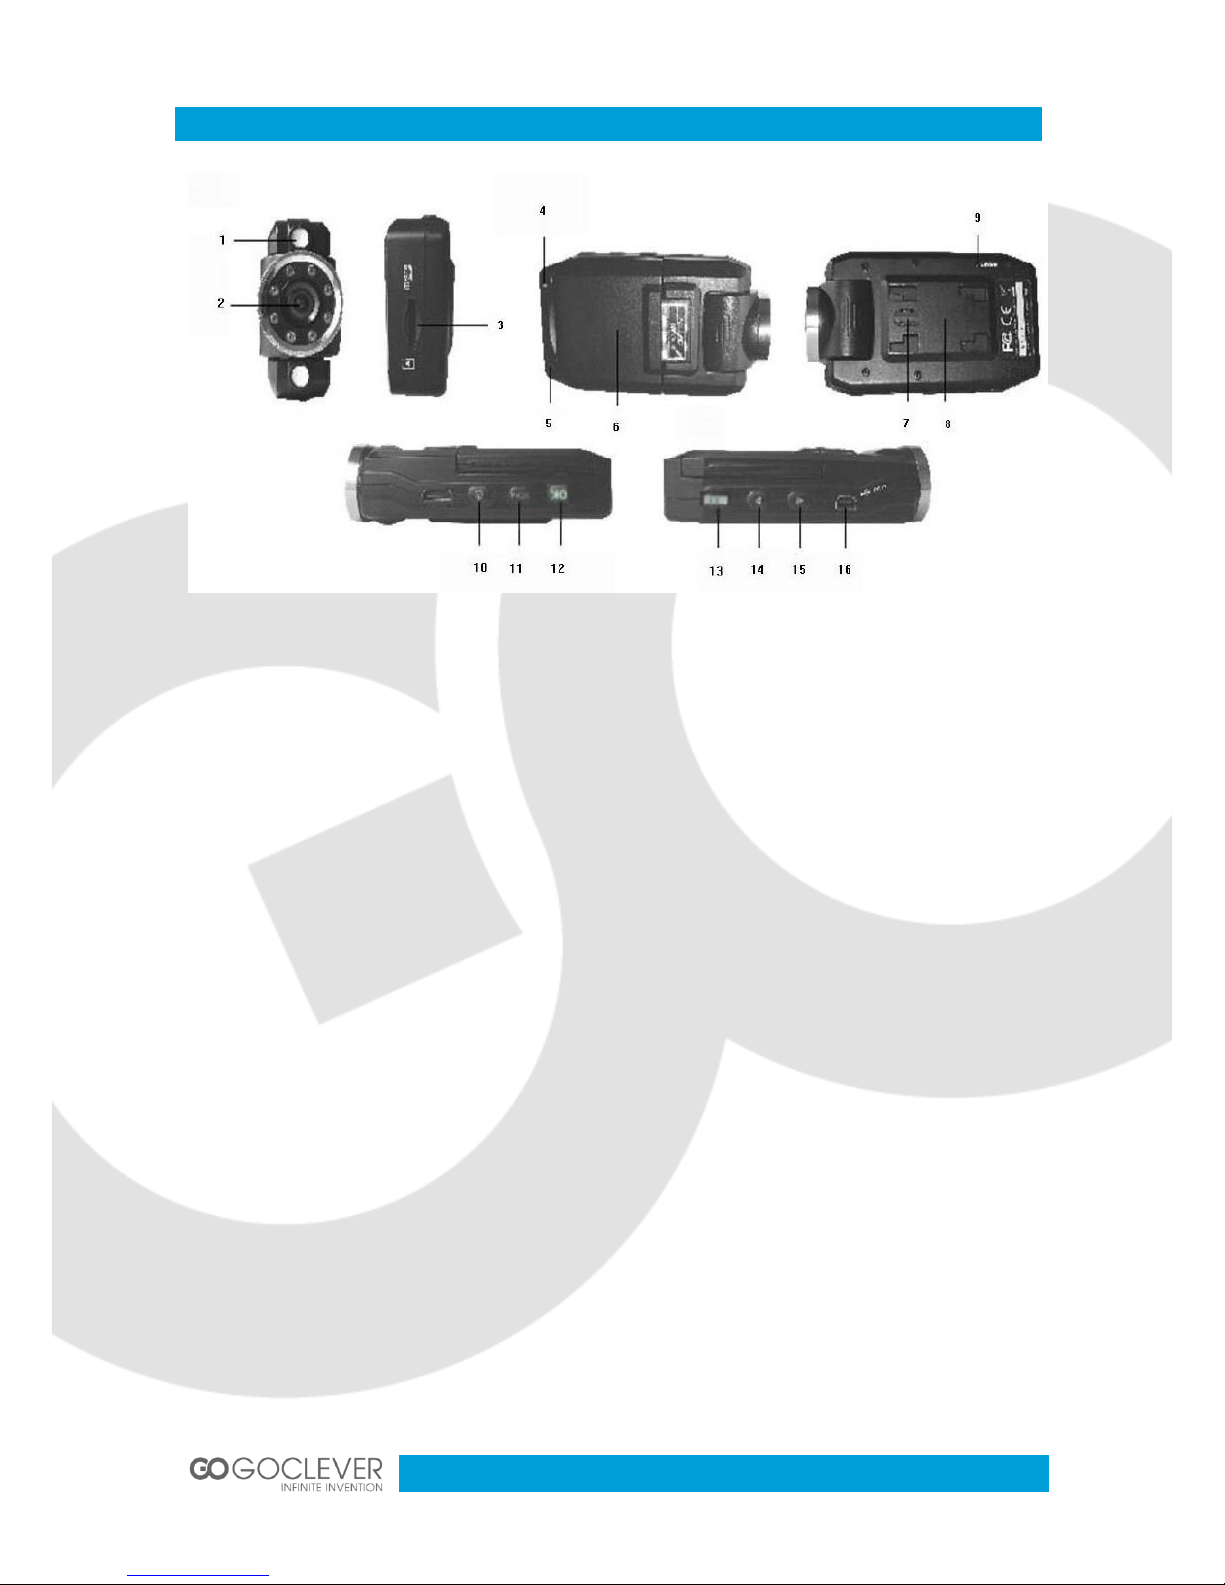
Quick Manual
1) LED Light
2) Lens
3) Micro SD card slot
4) Power indicator ( Blue)
Charging indicator ( Red)
5) Microphone
6) LCD display
7) Speaker
8) In-car arm stand socket
9) Reset button
10) Power button
11) MENU button
12) Confirm (OK) button
13) MODE button
14) Down key
15) Up key
16) USB port
How to switch between video, photos, playback modes
Press MODE to switch modes
How to enter setting mode
Press MENU once, press MENU key again, enter “System Setting” option, a blue background
will be displayed.
Format: Format Micro SD card (this action will delete all data stored in the Micro SD card)
Language setting: Change OSD language
Reset System settings :Cancel /Proceed
Frequency: 50 Hz/60Hz
Date setup: Set Date/Time

7
How to record a video
Press OK to start recording ,press it again to stop.
In video or photo mode press UP key to rotate the image and turn LCD off.
In video or photo mode press DOWN key to activate Day/Night mode
LED light will switch on automatically in low light conditions.
Video option settings
Press MENU key, enter video option setting
Image size:(VGA/D1/HD(1280*960)
Time display:ON/OFF
Auto recording:ON/OFF
Audio recording:ON/OFF
Recording time: 2min/5min/15min
Taking photo
Press OK key to take a photo.
Photo shooting setup option:
Press MENU key, enter photo shooting setup option.
Image resolution: VGA
Continuous shooting: ON/OFF
Self-timer: OFF/1sec/2sec/3sec/5sec/10sec/15sec
Manage Files
1. Press MODE key to enter File Management mode
2. There are 2 types of files: video and image files.
3. Most recent file will be displayed on LCD.
For example: If your last action was photo shooting, the photo will be displayed on LCD.
Video Playback
1. Press UP/DOWN key to select the desired file for playback
2. Press OK key to start/stop the video playback. Press DOWN key while playback to rewind.
3. Press MENU to stop video playback
 Loading...