

Goclever DVR FULL HD 2 Owner's Manual

DVR FULL HD 2
OWNER’S MANUAL
DVR FULL HD 2
INSTRUKCJA OBSŁUGI
ODWIEDŹ NASZĄ STRONĘ
WWW.GOCLEVER.COM
ABY ZAPOZNAĆ SIĘ Z INNYMI PRODUKTAMI TAB, NAVIO, DVR, DVB-T
Przed skorzystaniem z urządzenia zapoznaj się z niniejszą instrukcją obsługi
oraz zachowaj ją na przyszłość

2
Contents / Spis treści
English
3
Polski
9
Warunki gwarancji
16

3
Introduction
This multi-functional high-tech new product includes high-definition video recording, photo taking, sound recording and external TF card memory, using high-performance, high
compression ratio of H.264 video decoding technology, with high-definition multimedia HDMI
interface which can transmit high-quality and uncompressed HD videos and multi-channel
audio data. Mainly used in in-car recording, improving taking traffic evidences, your daily
lives, travels, outdoor activities, and making your life more colorful.
Product Features
120-degree A+ grade high-resolution wide-angle lens, is more convenient for various
occasions to capture and record the high resolution videos .
Built-in 1.0 Mega pixels, 1/3.2 inch low noise and high definition CMOS sensor
component, which can capture very clear picture even in dark places.
Recording resolutions: 1080P(1920*1080)1080(1440*1080) /720P(1280*720)
/WVGA(848*480) /QVGA(320*240).
Built-in 2 inch HD screen, its support videos browse and playback.
With TV/HDMI interface to connect HD TV.
Support real-time ,date display and time watermark on the videos.
Support cycled recording automatically, it will can be cover old videos when memory is
full.
Built-in lithium battery, support recording when charging.
Built-in microphone/speaker.
Support high capacity Micro SD.
Support Self-snapshot ,it will can be previewed photos via the screen to capture ideal
image.
Anti-shaking function.
Motion detecting recording.
4X digital zoom.
Face/Smile detection
4
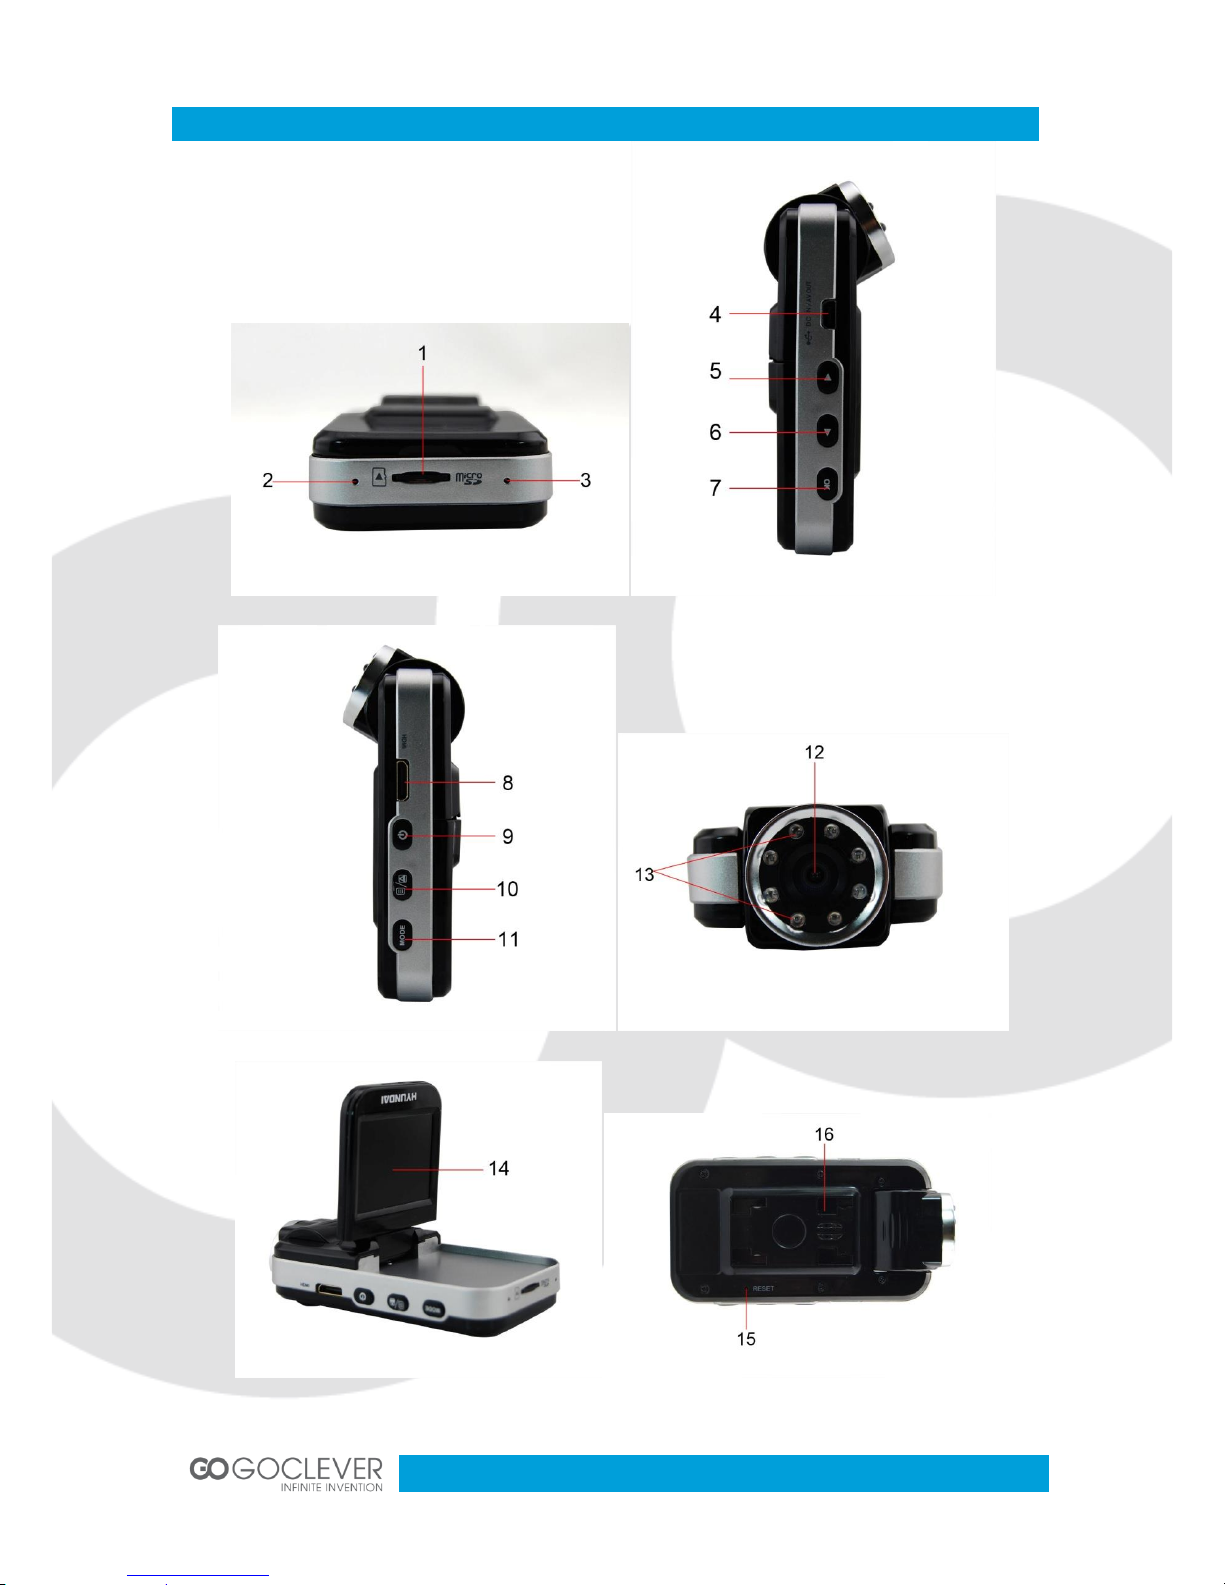
Product Structure
5
1. SD card slot
2. Microphone
3. Work lights
4. USB interface
5. Up key
6. Down key
7. Enter key
8. HDMI interface
9. Power key
10. Menu key
11. Mode key
12. Lens
13. IR Lights
14. Display
15. Reset key
16. Speaker
Buttons and LED indicators
Buttons
Button name
Descriptions
Five keys
OK
1. Short press recording or take photos.
2. Short press choosing the submenu function.
3. Short press Play/Pause videos when preview videos in playback mode.
Down
1. When enter into menu, short press down switch.
2. Press and hold to pull the digital ZOOM OUT function.
UP
1. When enter into menu, short press up switch.
2. Press and hold to pull the digital ZOOM IN function.
MODE key
Switching mode and select menu
Power key
1.power on / off
2. In preview mode and recording mode , short press switch the IR function
Menu button
1.Enter and exit menu 2.on the video recording,
short press can lock /unlock video files.
Light indicators
Name
Description
Power indicator
Red light indicator mean it is on charging, and it will turn off when fully
charged
Working indicator
When power on, blue light will turn on, and led light blinking on the
recording mode.
6
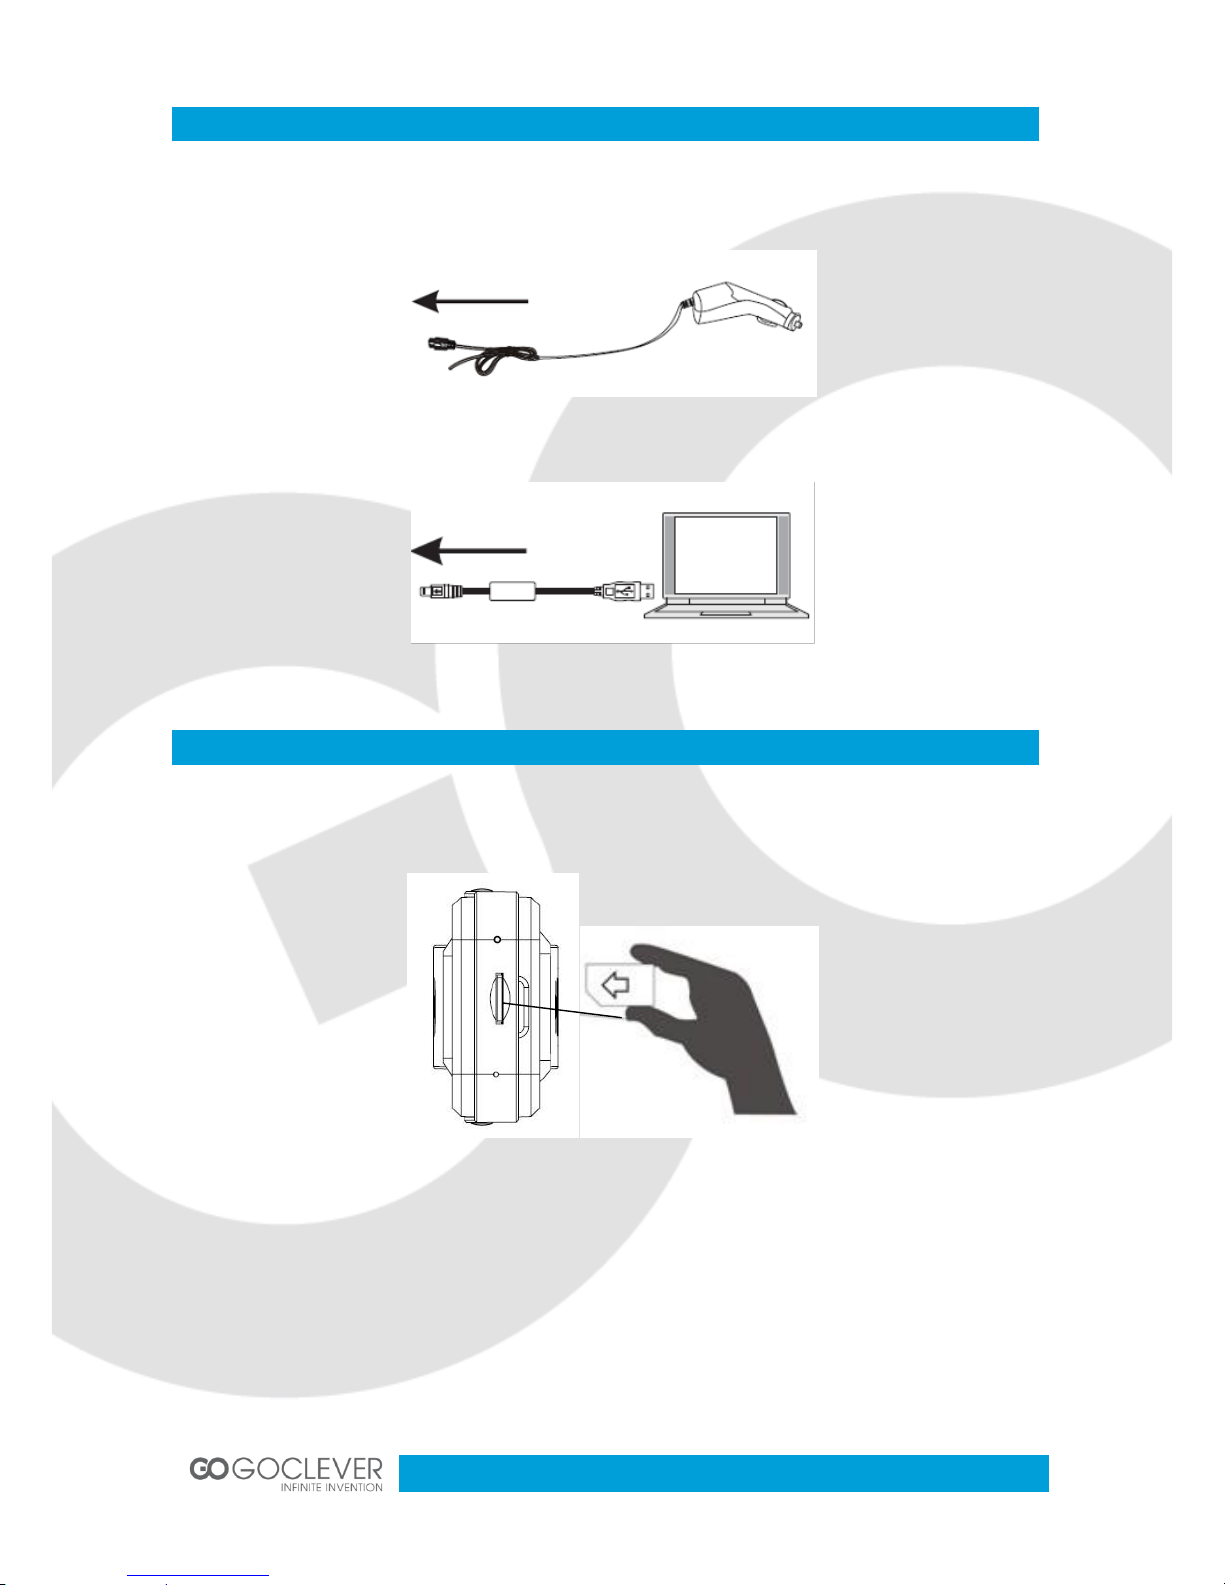
Charging the Battery
1. Car charger – the device can be charged via car charger even when the car engine is off
2. USB charger – can be connected with the PC
Memory Card
1. Insert a memory card to the right slot in your device (see picture)
2. When removing a memory card, press it gently and pull it out after it pop-out
Note: Please use the high-speed micro memory card.
 Loading...