

Goclever Cineo 100 User Manual
1
25
49
73
97
121

1
cineo100
HD Media Player
USER MANUAL
Table of contents
1. Introduction 3
1.1 Preface 3
1.2 Package Contents 4
1.3 Caution 4
2. About the Player 6
2.1 Product Overview 6
2.2 Remote Control 8
2.3 Connection 11
2.4 Use Media Device 15
2.5 First Time Operation 16
3. Setup Menus 17

2
4. Media Playback 18
4.1 Video List 18
4.2 music List 19
4.3 Photo List 20
4.4 Browser 21
5. Appendixes 22
5.1 Specifications 22
5.2 Frequently Asked Questions 23

3
1. Introduction
1.1 Preface
Dear Customer,
Thank you very much for purchasing GoClever Cineo. In the digital
era, this product is a great home entertainment partner. With the
outstanding design, you can enjoy movies and music, and view
photos of precious moments.
Note: All the information contained in this manual was correct at
the time of publication.
However, as our engineers are always updating and improving
the product, your device’s software may have a slightly different
appearance or modified functionality than presented in this
manual.
This player has the following functionality:
• Video Decoder: MPEG1: (Max Bitrate 100Mbps)
• MPEG2: (Max Bitrate 100Mbps)
• MPEG4-XVID: (Max Bitrate 100Mbps)
• DIVX: (Max Bitrate 100Mbps)
• H.264: (Max Bitrate 70Mbps)
• H.263: (Max Bitrate 100Mbps)
• WMV9/VC -1 (Max Bitrate 100Mbps)
• RMVB (Max Bitrate 100Mbps)
• Max Frame Rate: 30fps Max Resolution: 1920 x1280 Video
• File Format: MKV, MP4,VOB, RM/RMVB, MPG, M2TS, FLV,
AVI, ASF,TS/TP,MP4/M4V,MOV,WMV Subtitle supported –SRT,
ASS, SSA, SUB, SMII format Music Playback -Mp3 WMA OGG
FLAC (Lever0 – Lever8) APE AAC
• AC3 (Ac3 only) ATRA DTS (Dts only) Photo Playback -JPEG
PNG BMP GIF
• supports slide show mode, rotate, zoom function. Media Device supports external USB HDD or U disc andSD/MMC memory card

4
We hope that this product will bring you a lot of enjoyment. We
are committed toapply multimedia technology in your work,
entertainment, family, daily life andeverywhere!Welcome to us.
Thank you again for choosing our product.
1.2 Package Contents
Upon opening the shipping box, you should find the following
items:
HD Media player, Remote control, user manual, Power adaptor, battery
Note: The actual contents in the package might be different from
the above list sheet in this manual.
1.3 Caution
This player’s design and manufacture has your safety in mind.
In order to safely and effectively use this player, please read the
following before usage.
1.3.1 PowerThe player’s power voltage: 5V DC When using
this player, please connect the power adpator to the player’s power
jack to the power supply. When connecting the power cable, make
sure it can not getdamaged or be subject to pressure. To reduce
the risk of electric shock, unplugthe adapter first before cleaning it.
Never connect the player in a humid or dustyarea.
1.3.2 Radio interference/compatibilityIf not properly
shielded, almost all electronic devices will get radio interference.
Under some conditions, your player might get interference. The
design of this player has followed the FCC/CE standard, and has
followed the following rules:This player may not cause harmful

5
interference;This player could accept some interference received
including interference that may cause undesired operation.
1.3.3 RepairIf the player has a problem, you should take it to
an appointed repair center and let the specialists do the repair,
never repair the player yourself, you might damage the player or
endanger yourself or your data.
1.3.4 Disposing of the playerWhen you dispose of the player,
be sure to dispose it appropriately. Some countries may regulate
disposal of electrical device, please consult with your local
authority.
1.3.5 OthersWhen using Goclever player, please do not let
the player come into contact with water or other liquid, if water is
accidentally spilled on the player, please use a dry cloth to absorb
the spillage. Electronic products are vulnerable, when using please
avoid shaking or hitting the player, and do not press the buttons
too hard. Do not let the player come into contact with water or
other liquid. Do not disassemble the player; repair the player or
change the design of the Player, any damage done will not be
included in the repair policy. Do not press the buttons of the player
too hard. Avoid hitting the player with hard object, avoid shaking
the player, and stay away from magnetic fields.
During electrostatic discharge and the strong electromagnetic
field, the product will malfunction, and then unplug the power cable
and the product will return to normal performance next time it is
powered on.
6
2. About the Player
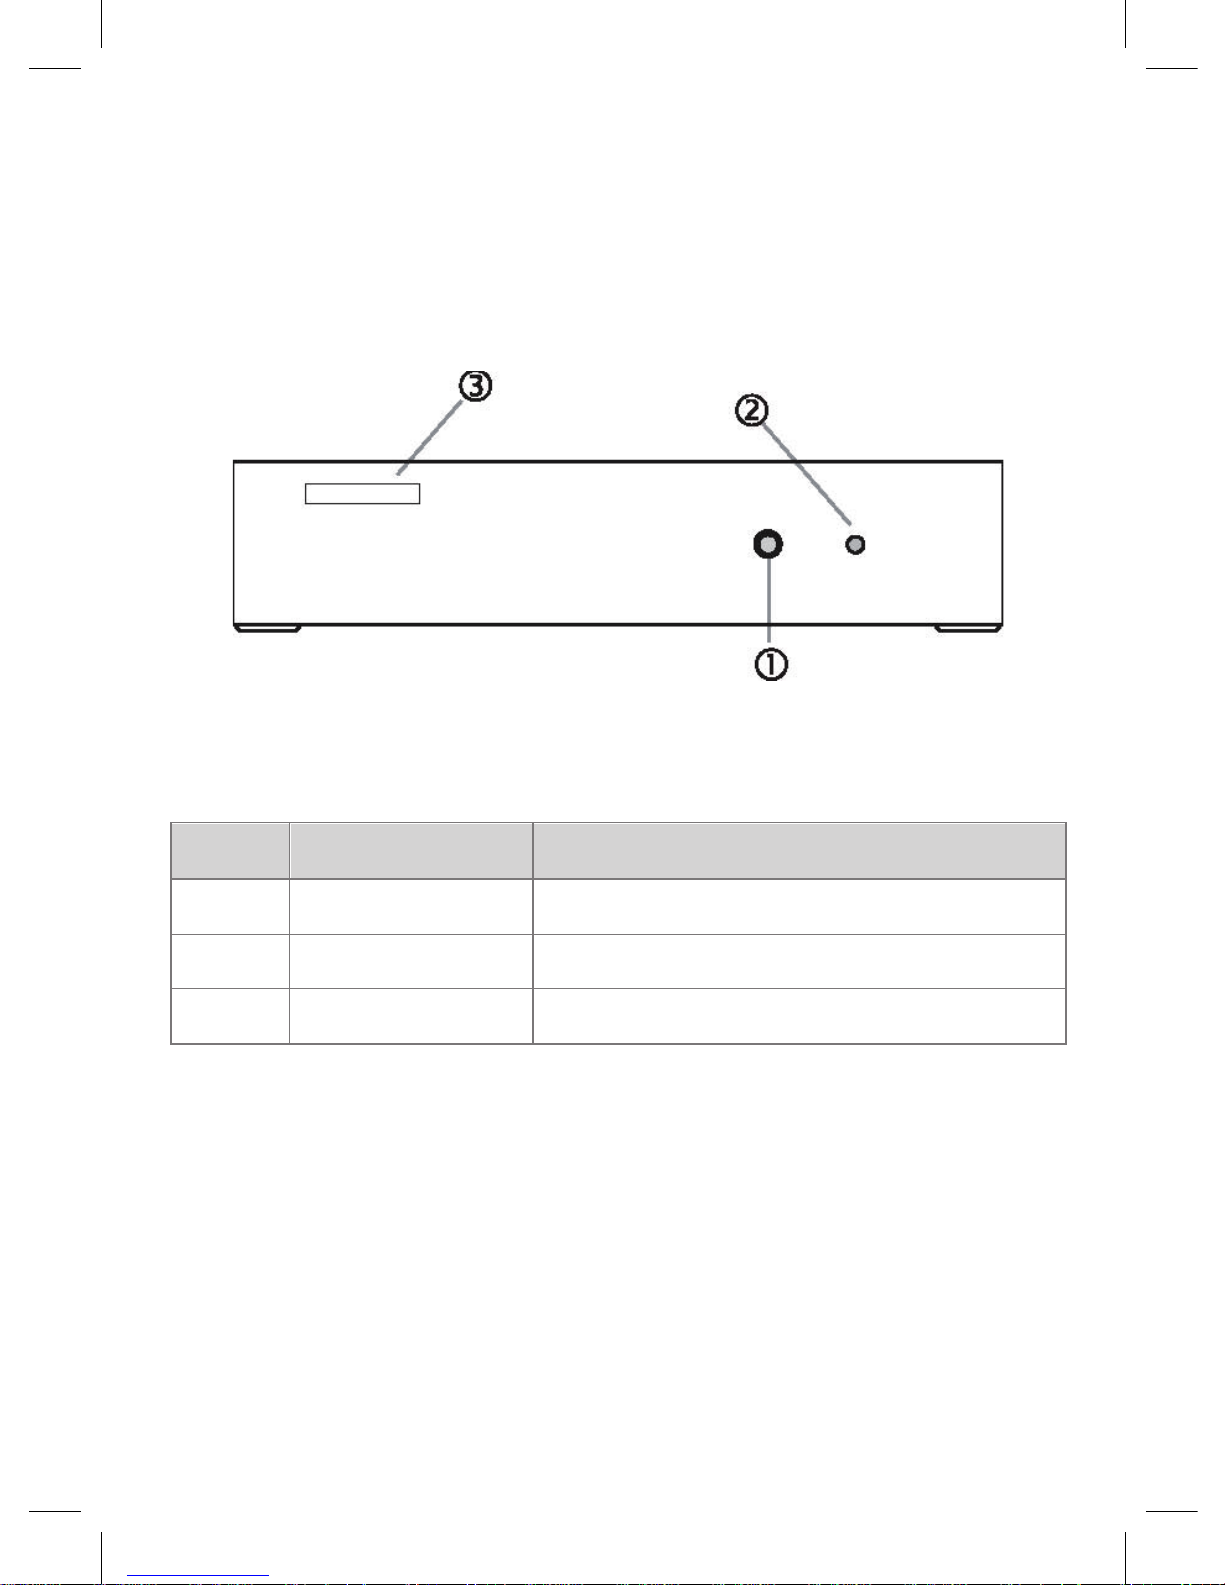
2.1 Product Overview
Item Name Description
1
IR reciver Remote must be toward IR reciver
2
Indicatory Light Working or standby
3
SD card slot Insert SD card into this slot

7
Item Name Description
1
USB USB jack
2
OPTICAL Digital audio signal output
3
YPbPr YPbPr output
4
R-Audio-L Stereo audio output
5
CVBS CVBS output
6
HDMI HDMI jack
7
DC IN DC in jack for power connection
8
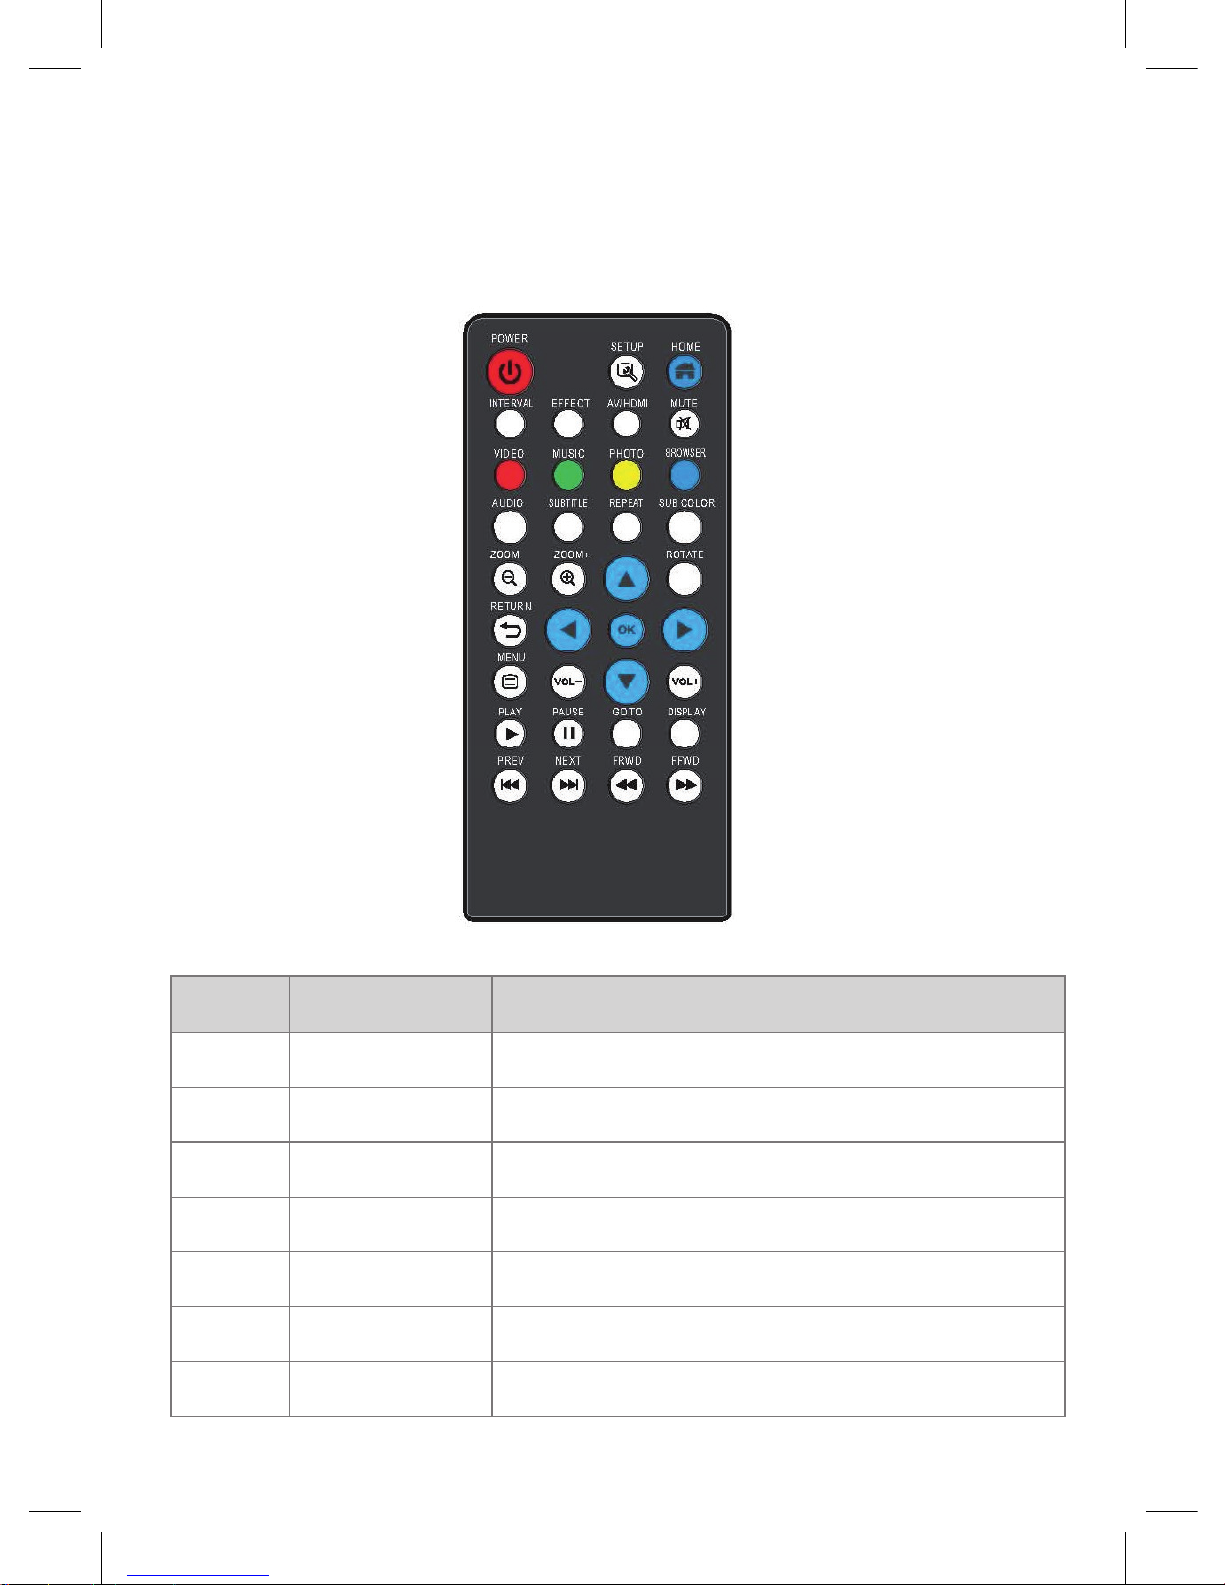
2.2 Remote Control
2.2.1 Remote control functions
Item Key Name
1
Power
Power on/off
2
Setup
Enter setup menu
3
Home
Back to main menu
4
Interval
Select interval mode during photo slide show
5
Effect
Select effect mode during photo slide show
6
AV/HDMI
Switch betweenAV output or HDMI
7
Mute
Mute volume

9
Item Key Name
8
Video
Enter video files list
9
Music
Enter music files list
10
Photo
Enter photo files list
11
Browser
Enter Browser list
12
Sound
Switch among available audio channels
13
Subtitle
This button Switch among available subtitle
languages
14
Repeat
Select repeat mode
15
Sub color
Select subtitle color
17
Zoom-
Zoom out
18
Zoom+
Zoom in
19
Up
Cursor up/ move up one entry
20
Rotate
Rotate the photo display
21
Return
Back to parent menu
22
Left
Cursor left/ Skip up one page or back to top of
page
23
Ok
Confirms selection of an item in the menu or
start playback
24
Right
Cursor right/ Skip down one page or bottom of
last page
25
Menu
Press to display operate menu during playback
26
Volume-
Press to decrease the volume
27
Down
Cursor down/ move down one entry
28
Play
Press to inrease the volume
29
Volume+
Start to playback
30
Pause
Press to pause playback, and press again to
resume

10
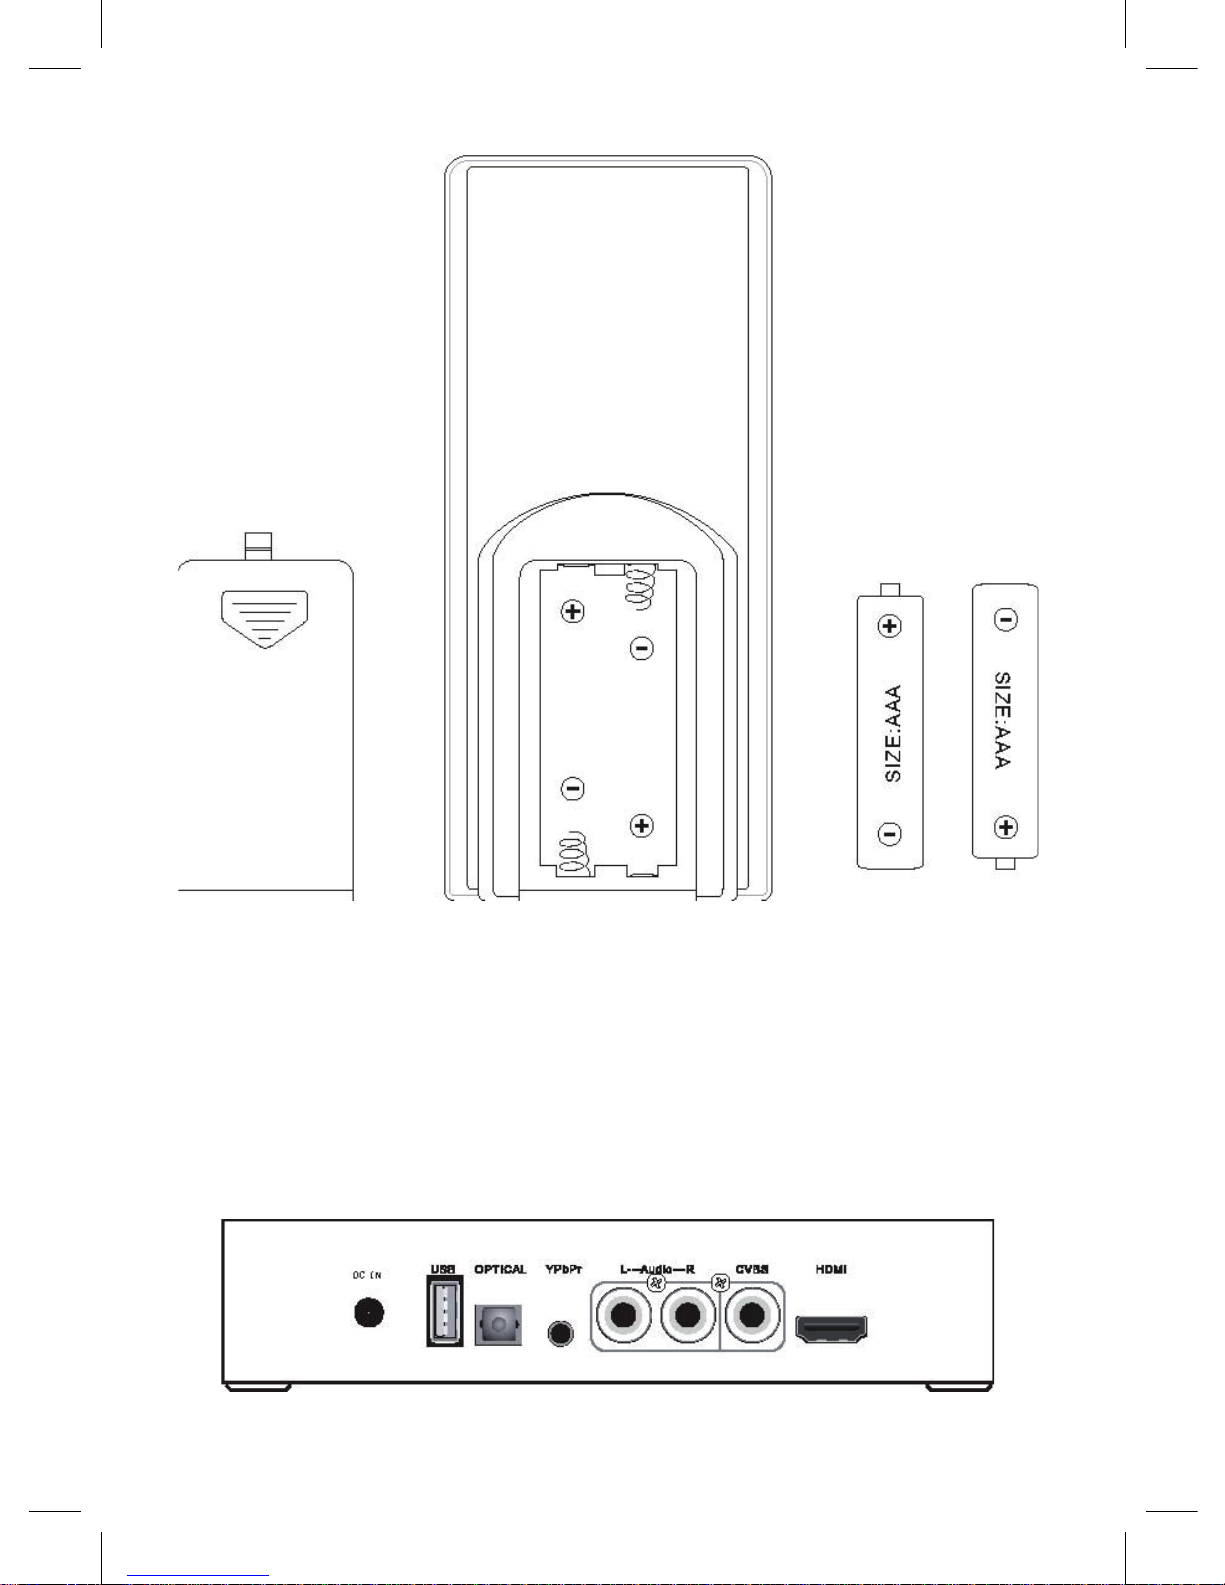
2.4.2 Replacing the Remote Control BatteryRemove the
battery compartment cover by pulling the cover in the direction
of the arrow.Remove the battery. Insert two batteries (size AAA)
making sure that the + and – ends of thebatteries are matched to
the +/– marks printed inside the batterycompartment.Reload the
cover.
Note:
Dispose of used batteries according to local ordinance regulations.
Remove the battery when not using the PLAYER for prolonged
periods.
30
Pause
Press to pause playback, and press again to
resume
31
Goto
Select the Mark time and press Ok button to
start playback at that point
32
Display
Toggle between time counter on/off when
playback
33
Prev
Go to previous file
34
Next
Go to next file
35
FRWD
Fast reverse during playback
36
FFWD
Fast forward during playback
11
2.3 Connection
2.3.1 HDMI OUT
Follow the picture and plug one connector of HDMI cable to the,
player s HDMI jack;Follow the picture and plug the other connector
of HDMI cable to the TV
,
s HDMI jack.
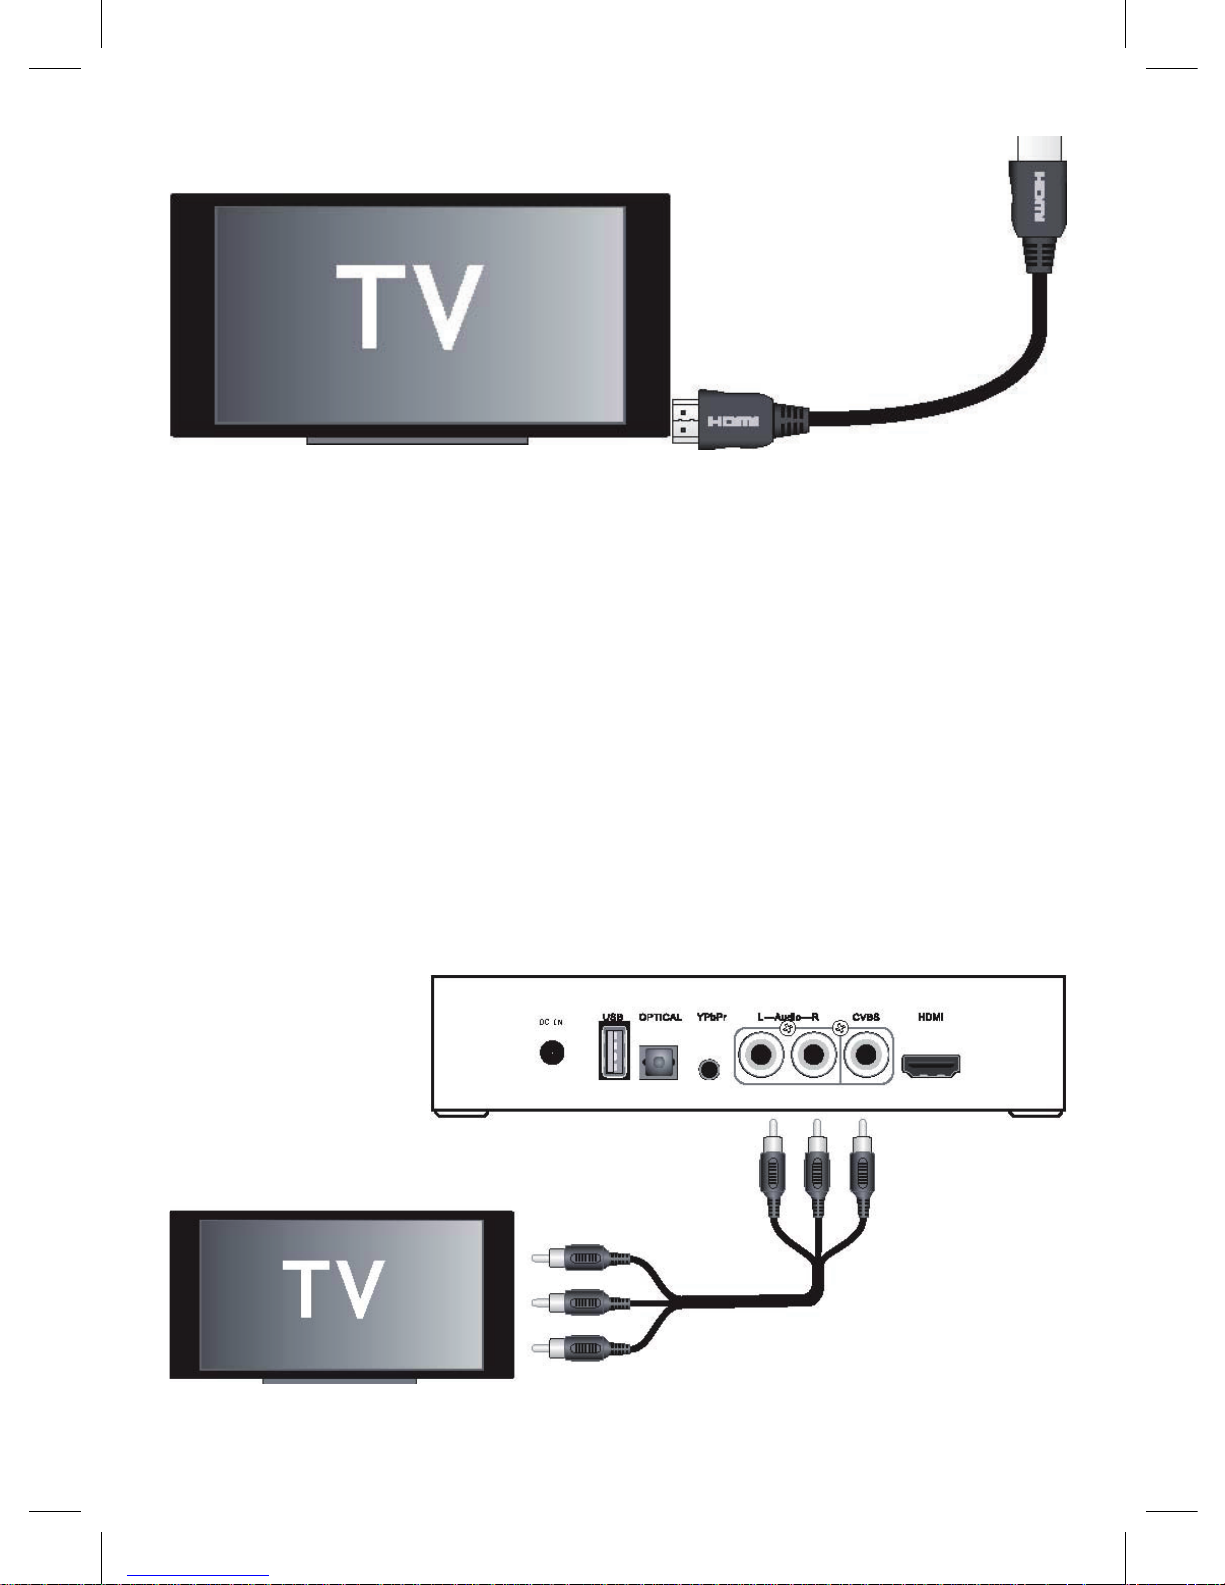
12
In this way, you can have the highest quality video and audio via
a single cable.
2.3.2 A/V OUT
Follow the picture and plug in the 3 color (red/white/yellow)
connector to the player’s A/V OUT jack;
Follow the picture and plug in the 3 color connector to the TV s
A/V IN jack.In this way, you can enjoy the content in the player on
TV or otherdisplay devices.

13
2.3.3 Y/Pb/Pr
Component OUT Follow the picture and plug in the 3 color (green/
blue/red) connector, to the player s Y/Pb/Pr jack;
Follow the picture and plug in the 3 color connector to the TV
s YPbPr jack.Audio Connection while using YPbPr Video out:First
method: use the audio output from the A/V OUT jack; Second
method: use the audio output from the S/PDIF Coaxial or Optical
jack. on TV.
14
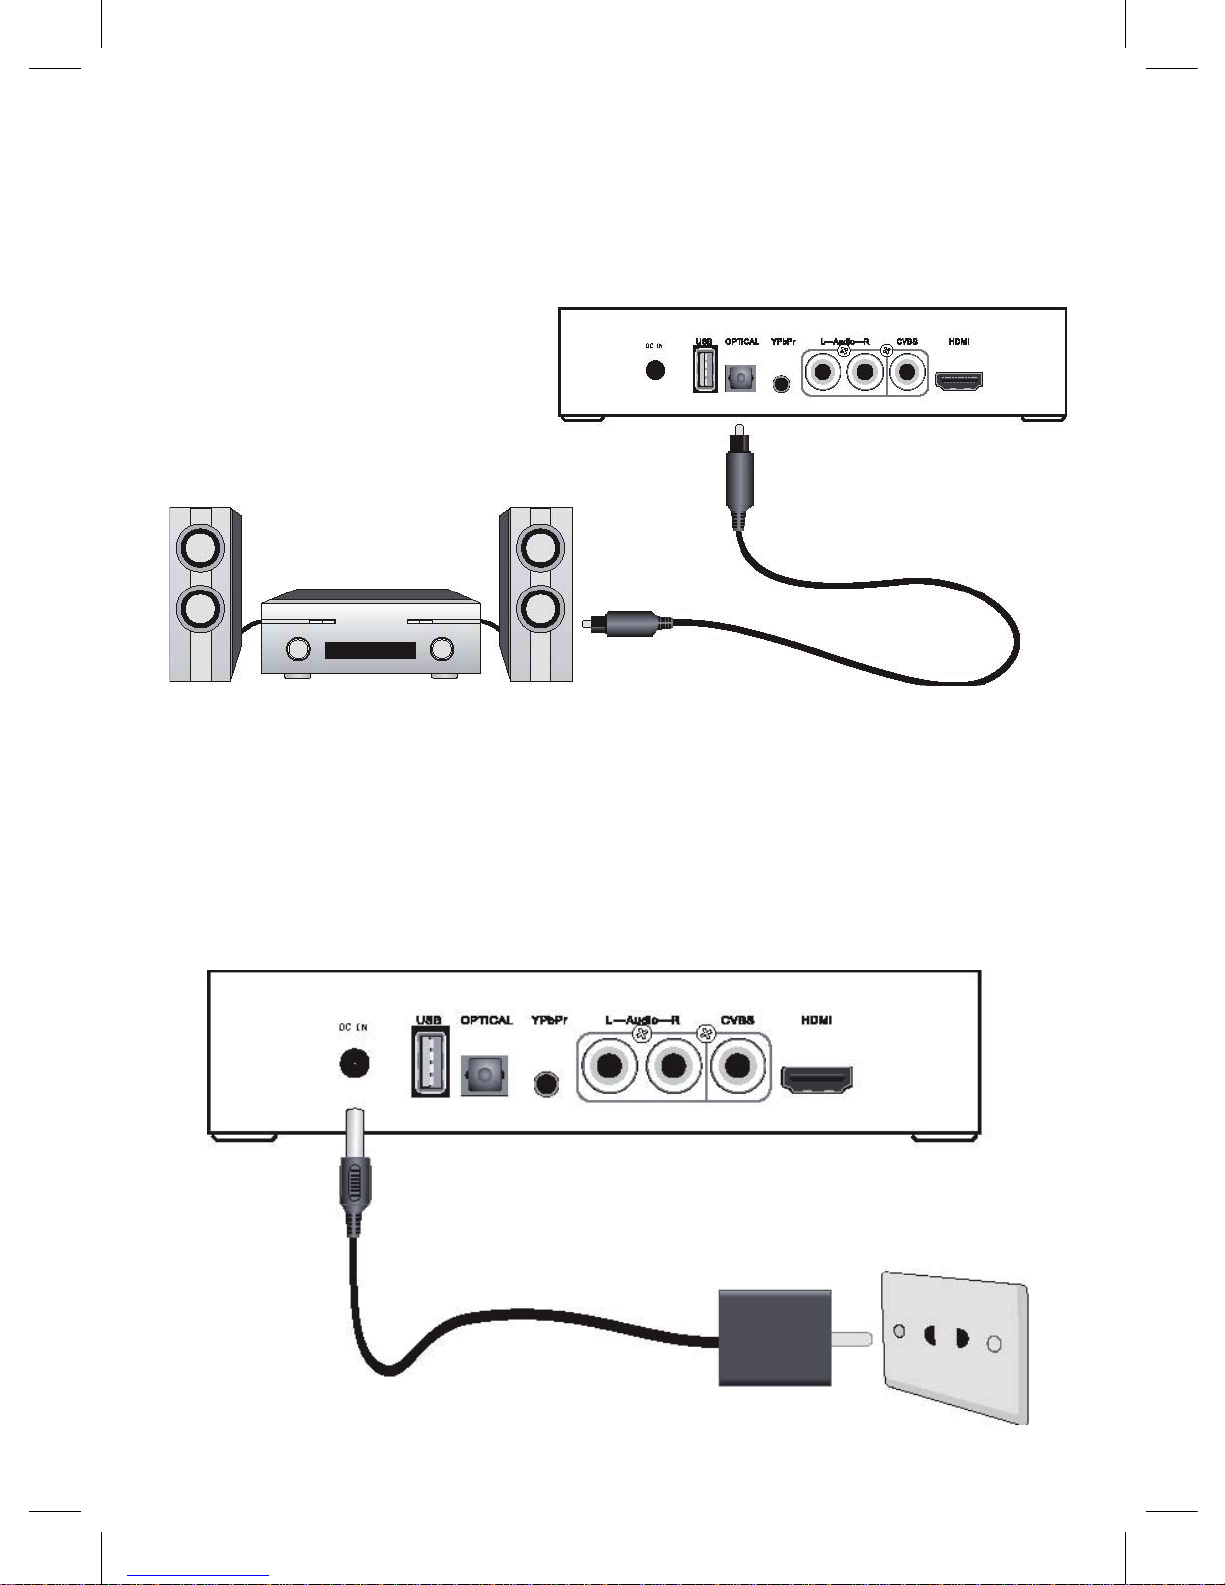
2.3.4 Digital Audio Device connection Follow the picture and
plug in the connector on your optical fiber to the, player s S/PDIF
Optical jack ; Follow the picture and plug in the other connector on
your optical fiber to the digital audio device.
2.3.5 Power connection
Follow the picture and Plug in the power cord to the player s DC
IN jack; Follow the picture and plug in the power cord to the power
outlet.
15
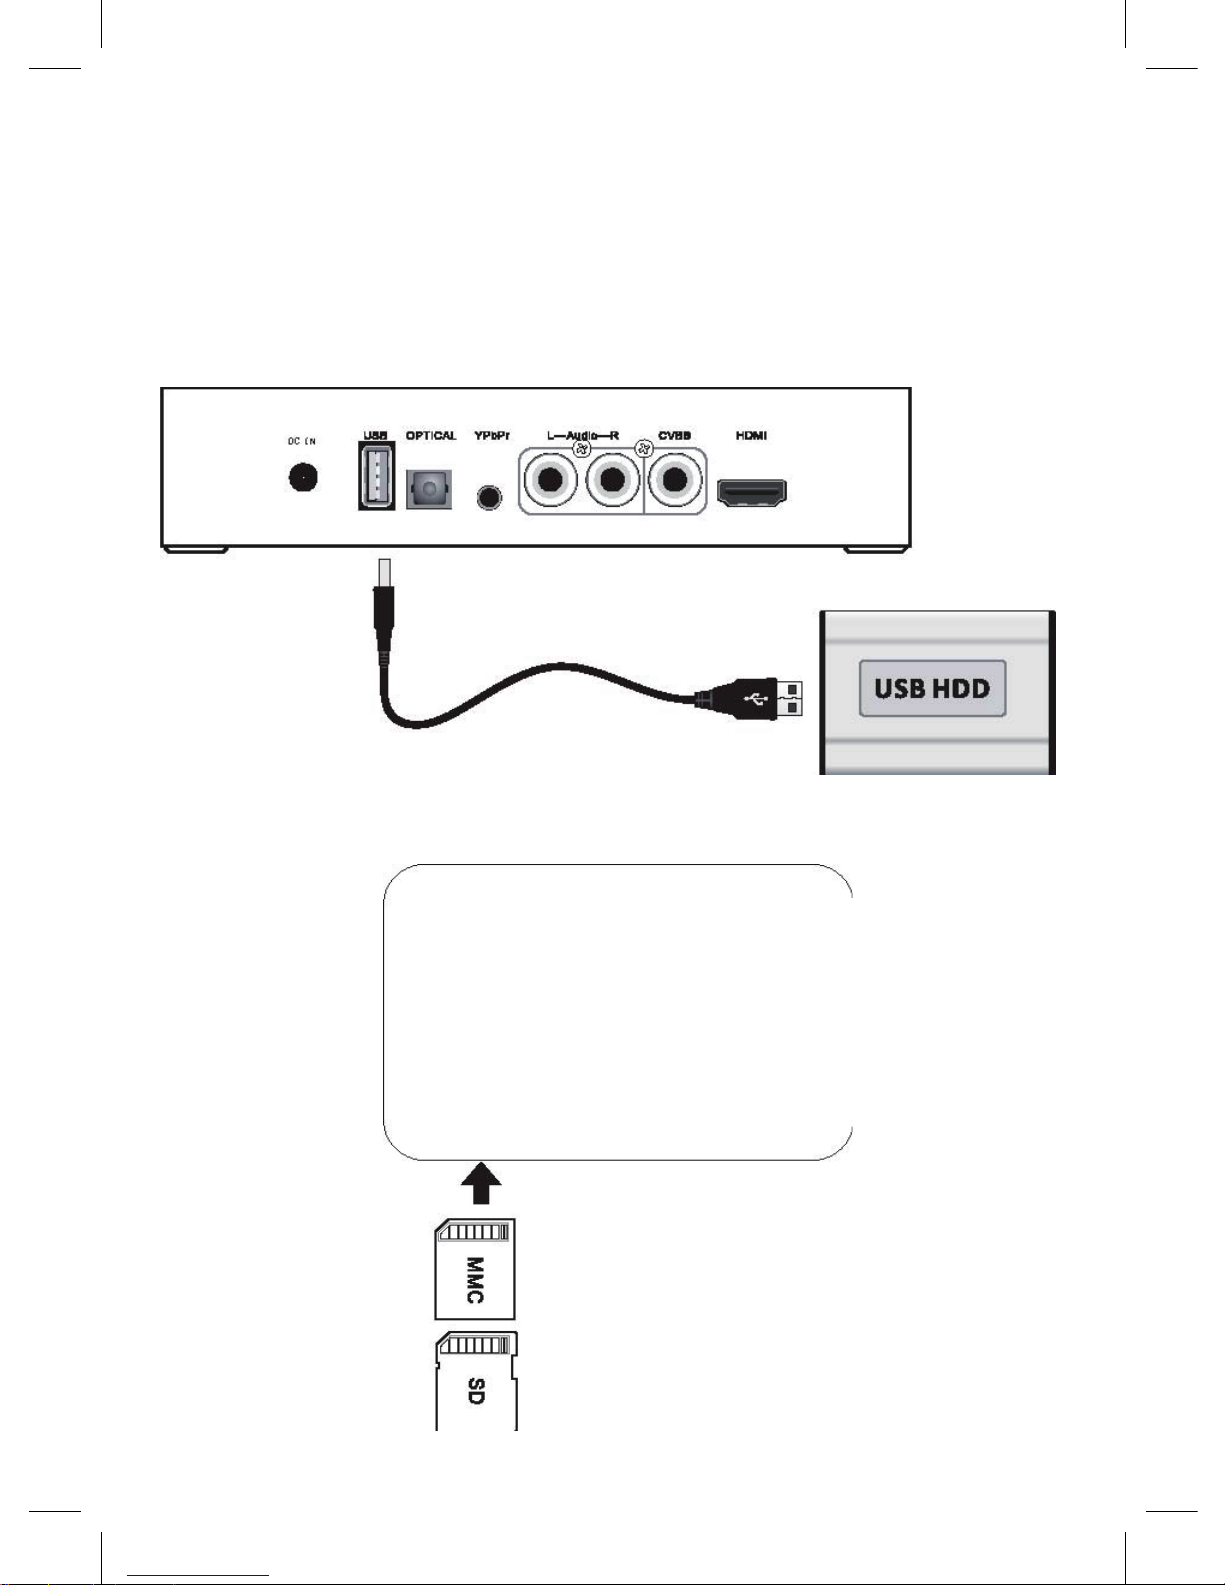
2.4 Use Media Device
2.4.1 USB Mass Storage Device Connection
(like USB Pen Drive, MP3, USB HDD etc.) Make sure the player
is powered on; Plug in the USB Pen Drive or USB HDD etc. to the
USB HOST port of this player.
2.4.2 Using Multiple Memory Cards

16
Note:
1.If the PLAYER does not detect your memory card, try turning the
PLAYER power off then try again.
2.If you do not see your files in the proper order when viewing
them on the TV display, try reformatting your memory card. This
will reinitialize the memory card’s internal tables.
3.Most but not all memory cards are compatible with the PLAYER.
Incompatibilities can arise due to the age of the memory card or
the technology within it. Overall, name brand cards work the best.
4.Memory cards can ONLY be inserted one way. If you find that
the memory card does not fit, please do not force it. Pull the
memory card out and check to see that you have the card in the
proper position before you reinsert it. You can also try turning the
card around.
Caution: Do not unplug the memory card when PLAYER playing
a file from the
2.5 First Time Operation
To setup your Media player, please use the following instructions:
1.Connection TV
2.Plug the power cord into the AC power brick then plug one end
of the power supply into the AC JACK of player and the other
end into a power outlet. Then press the power key.Once you
have photos, videos, or music on the memory card or U disk,
insert the card into the proper slot or plug in U disk to USB jack.
If theplayer with U disk/USB HDD, SD/MMC card at same time
please pressSOURCE on remote control to choose go to which
media device.After the device is selected, the main interface will
be display.

17
3. Setup Menus
The setup menu allows you to configure system settings. Press
the SETUP button on the remote control to enter this menu, and
use the navigational buttons to select items or options. Press OK
to confirm setting.
Video output:PAL NTSC HDMI720P
Audio Select:Nomal Spdif
Language:English
Auto off:5s 10s 20s 30s 1m 5m
Key tone:on/off
Version:1.4 2010.06.15
Restore Default:PAL NTSC HDMI720P
18
4. Media Playback
4.1 Video List
Select the VIDEO icon on the main interface and press OK button
to enter this menu, then select media source and press OK button
to select media type and all of the supported video files stored on
the device will be displayed.
Press the UP/DOWN button to select a video file you wish to
play, and press the OK or PLAY button to begin the playback
Press MENU button to display operation menu during playback,
the icon of operate menu will be show on the bottom of TV display.
Press LEFT/RIGHT button to select icon then press OK button to
open operation menu.
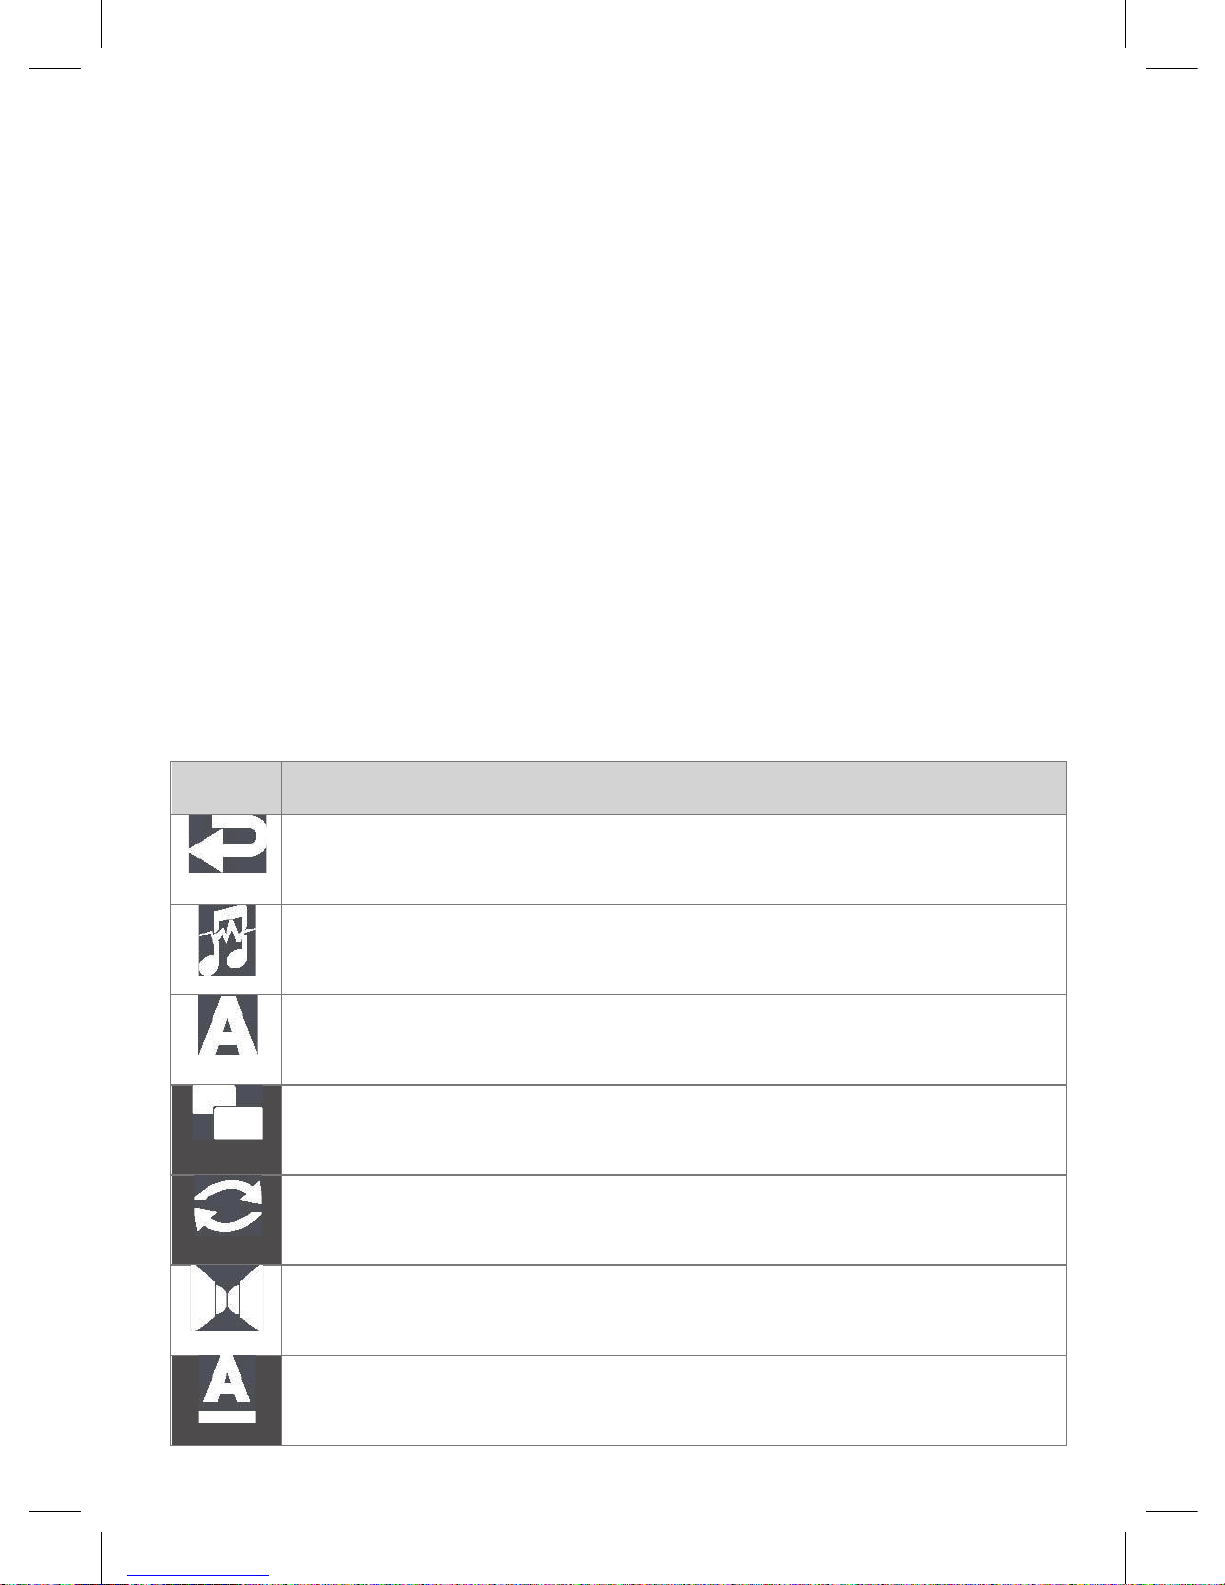
Icon Description Or Sub Menu
Back to current playback
Select sound channel, for exampl:track3
Select subtitle from subtitles list
Display mode:video full screen/screen full screen/default/4:3
/16:9/fit view
Repeat mode:only once/rotate one/rotate all/sequence
/random
Sound system:stereo/left channel/right channel
Select color of underline for subtitle:default/red/blue
19
4.2 music List
Select the music icon on the main interface and press OK button
to enter this menu, then select media source and press OK button
to select media type and all of the supported music files stored on
the device will be displayed.
Press the UP/DOWN button to select a music file you wish to
play, and press the OK or PLAY button to begin the playback.
Press MENU button to display operate menu during playback,
the ico of operate menu will be show on the bottom of TV display.
Press LEFT/RIGHT button to select ico then press OK button to
open operate menu.
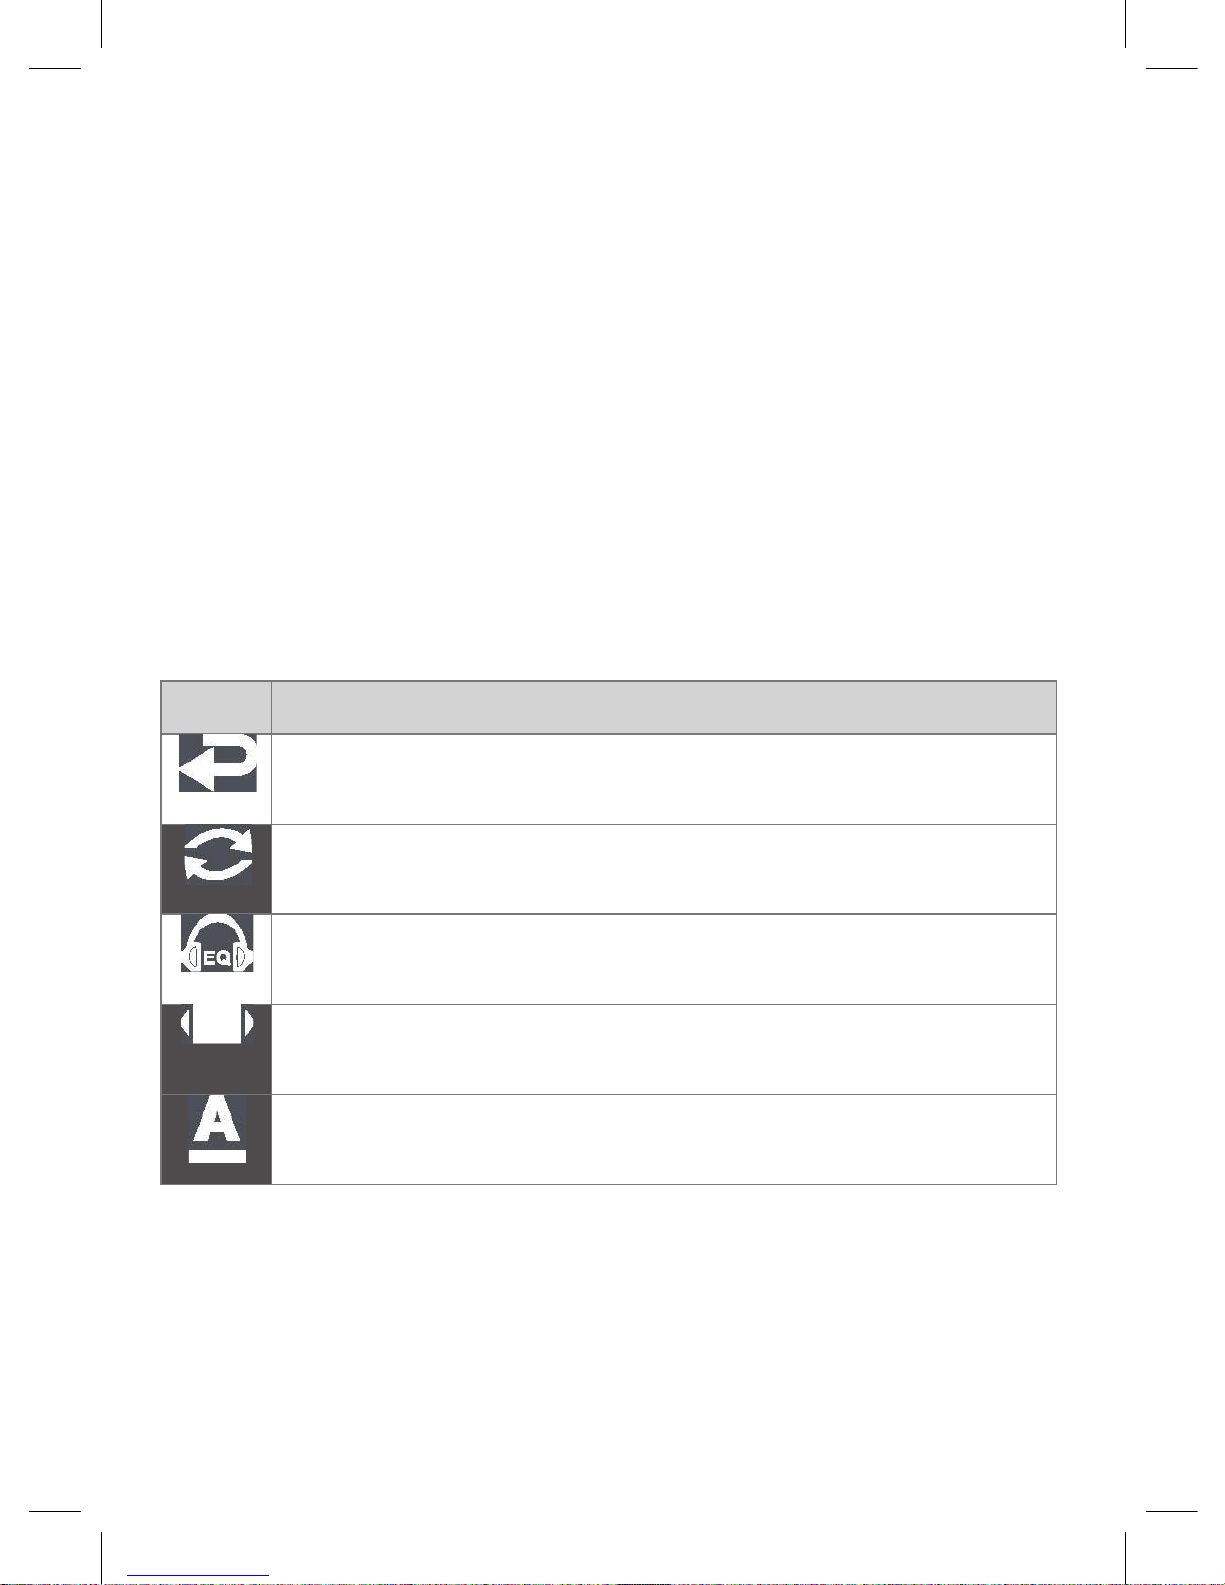
Icon Description Or Sub Menu
Back to current playback
Repeat mode:only once/rotate one/rotate all/sequence
/random
EQ mode:nature/DBB/POP/rock/classic/jazz/vocal/dance
select witch one will be show:spectrum/lyric
Select color of underline for lyric:blue/red/yellow/green
/orange

20
4.3 Photo List
Select the photo icon on the main interface and press OK button
to enter this menu, then select media source and press OK button
to select media type and all of the supported photo files stored on
the device will be displayed.
Press the UP/DOWN button to select a photo file you wish to
play, and press the OK or PLAY button to begin the playback.
Press MENU button to display operate menu during playback,
the ico of operate menu will be show on the bottom of TV display.
Press LEFT/RIGHT button to select ico then press OK button
to open operate menu.
Icon Description Or Sub Menu
Back to current playback
Slideshow or display single photo file
zoom in/out rotate CCW/CW move up/down move left/right
select witch one will be show:spectrum/lyric
Slideshow mode:persian blinds H/persian blinds V/mosaic
/random-switch/defaut
Interval time:1s/3s/5s/10s/30s
Repeat mode:seq next/seq pre/random switch

21
4.4 Browser
Select the Browser icon on the main interface and press OK button
to enter this menu, then select media source and press OK button
to select media type, and all folders and all of the supported photo
files stored on the device will be displayed.
Press the UP/DOWN button to select a folder the press OK
button to open the folder. Press the UP/DOWN button to select a
photo file you wish to play, and press the OK or PLAY button to
begin the playback
22
5. Appendixes
5.1 Specifications
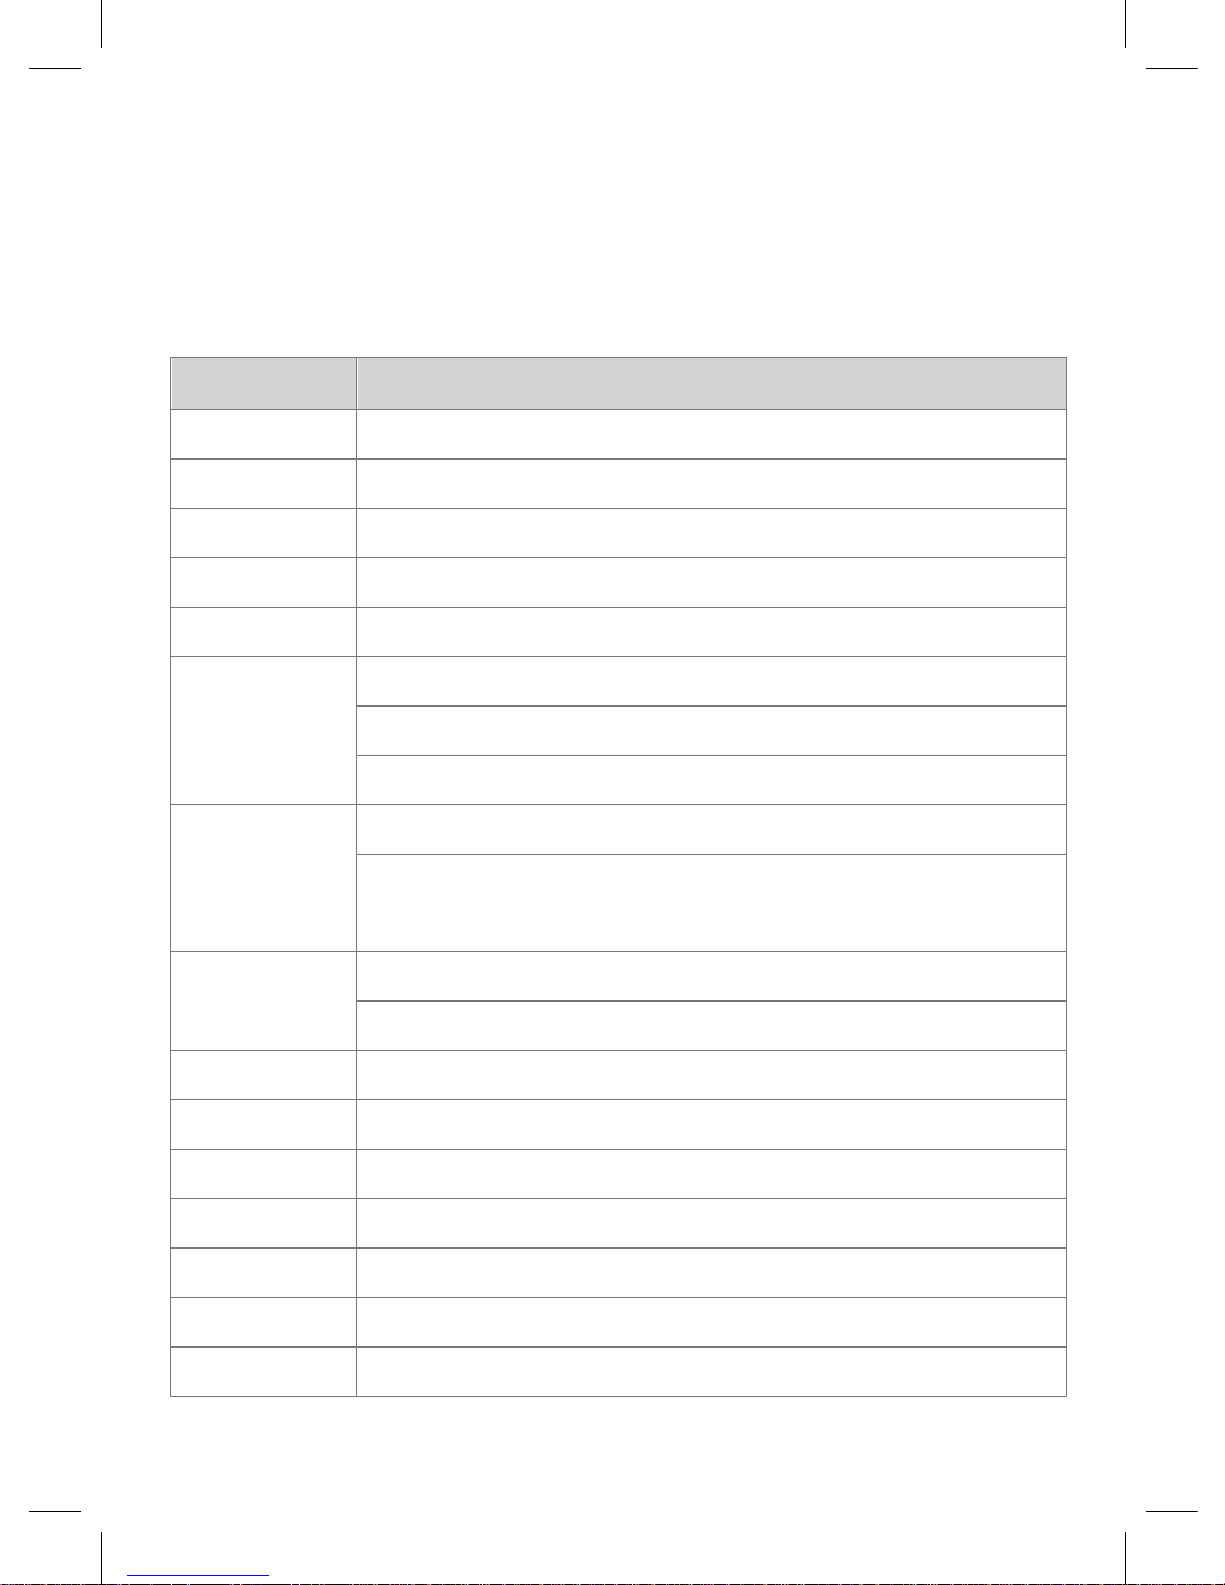
Item Description
Dimension L250mm x W145mm x H42mm
wight 250g
Operating Temp -20~+40 C
Power Rating 15W
Power AC100-240V
Format: AVI, MKV, MP4,RM,RMVB,FLV,ASF
Video Resolution: Up to 1920x1280p
Subtitle: SRT, SSA, SMI
Format: MP3, WMA, FLAC, APE, OGG, AAC
Music
Compression rate: MP3: 32 Kbps~320 Kbps; WMA: 32 Kbps~192 Kbps
Photo
JPEG, PNG, GIF,BMP
Slide Show support, Zoom Rotate
Video Output Composite, Component, HDMI (Version 1.1) up to 1080P/60HZ
Audio Output Stereo RCA, HDMI, SPDIF Optical
TV System PAL, NTSC, 720P, 1080I, 1080P/24HZ, 1080P/50HZ, 1080P/60HZ
USB Interface USB 2.0 high speed port x 1
File System FAT, FAT32, NTFS
Memory Cards SD/MMC
USB Device Up to 2T disk capacity

23
5.2 Frequently Asked Questions
1. My videos don’t play at full screen. What could be the
problem?
Many AVI file is different resolution, Please check your video’s
resolution and make the appropriate adjustments.
2. What is the largest memory card you support?
Generally, now our PLAYER compatible with brand card
in market with multimemory size, such as 1G/2G/4G/8G/12G
memory cards work fine.
3. I see an icon like a hand on the top left position of the monitor
display and theremote will not respond right away. What is the
problem?
If you see the hand icon, your PLAYER is busy or the button
you pushed does not apply to the mode you are in. If your
PLAYER does not respond right away to a button push, please
wait a few seconds. Most likely, the PLAYER is busy processing
files and will respond once it is ready.
4. Can I store and use photos, video, and music on the same
memory card?
Yes. When you have multiple media types on a memory card,
we recommend you put these into separate folders for easier
management.

24
5. Can I play the content of just one folder?
Yes. Press LEFT/RIGHT button to select the Browser icon on
the main interface to enter this menu, press UP/DOWN to
select the folder you would like to play. Once you are inside that
folder, press OK button to start play, press the REPEAT button
to toggle the repeat folder option.
6. I cannot hear sound, or the noise is too loud.
Check whether the volume is set to “0”. Check whether the AV
cable is properlyconnected to the port. Check whether the
media file is damaged.
7. Why I cannot find my DVD movie from video list?
DVD movie only can access from Browser file list. Pls. go to
Browser, refer to 4.4.2
8. Why I connect VP3300 with amplifier to enjoy DVD with AC3,
there is no surround sound?
Pls. Go to go to Setup-General Setup-Video Setup-Audio SPDIF RAW Pls. Remember to change SPDIF RAW to Analog
if you don’t use amplifier
9. Why I cannot get music slideshow function?
Music slideshow function only can access from Browser file
list. Make sure your photo folder already with music files, Pls.
go to Browser file list, go to photo folder, cursor highlight photo,
then press M-Slide, refer to 4.4.1

25
cineo100
HD Media Player
INSTRUKCJA OBSŁUGI
Spis treści
Odtwarzacz multimedialny HD
1. Wstęp 27
1.1 Wprowadzenie 27
1.2 Zawartość opakowania 28
1.3 Ostrzeżenia 28
2. Odtwarzacz - informacje 30
2.1 Przegląd produktu 30
2.2 Pilot 32
2.3 Podłączanie 35
2.4 Używanie urządzeń multimedialnych 39
2.5 Pierwsze uruchomienie 40
3. Menu ustawień 41

26
4. Odtwarzanie multimediów 42
4.1 Lista wideo 42
4.2 Lista muzyki 43
4.3 Lista zdjęć 44
5. Dodatki 46
5.1 Specyfikacja 46
5.2 Najczęściej zadawane pytania 47

27
1. Wstęp
1.1 Wprowadzenie
Drogi kliencie,
Dziękujemy za zakup odtwarzacza GoClever Cineo. W dobie
technologii cyfrowej, produkt ten jest świetnym towarzyszem w domowej rozrywce. Dzięki niesamowitej konstrukcji sprzętu, możesz
cieszyć się filmem i muzyką, oraz przeglądać zdjęcia z niezapomnianych chwil.
Informacja: Wszystkie informacje zawarte w tej instrukcji zosta-
ły sprawdzone w chwili jej publikacji. Jednak ze względu na to,
że nasi inżynierzy często aktualizują i wzbogacają produkt, twój
sprzęt może nieco się różnić w wyglądzie lub działaniu niż przedstawiono w instrukcji.
Odtwarzacz posiada następujące parametry:
• Dekoder wideo: MPEG1: (Maks. Szybkość transmisji bitów
100Mbps)
• MPEG2: (Maks. Szybkość transmisji bitów 100Mbps)
• MPEG4-XVID: (Maks. Szybkość transmisji bitów 100Mbps)
• DIVX: (Maks. Szybkość transmisji bitów 100Mbps)
• H.264: Maks. Szybkość transmisji bitów 70Mbps)
• H.263: (Maks. Szybkość transmisji bitów 100Mbps)
• WMV9/VC -1: (Maks. Szybkość transmisji bitów 100Mbps)
• RMVB: (Maks. Szybkość transmisji bitów 100Mbps)
• Maks. Liczba klatek na sekundę: 30 Maks. rozdzielczość:
1920 x128
• Format plików wideo: MKV, MP4,VOB, RM/RMVB, MPG, M2TS,
FLV, AVI, ASF, TS/TP,MP4/M4V,MOV,WMV
• Obsługiwane napisy dialogowe – SRT, ASS, SSA, SUB, SMII
• Format plików muzycznych: Mp3 WMA OGG FLAC (Lever0
– Lever8) APE AAC AC3 (tylko Ac3) ATRA DTS (tylko Dts)

28
• Format plików graficznych - JPEG PNG BMP GIF – pokaz slajdów, obracanie , zbliżanie.
• Urządzenia multimedialne – obsługa urządzeń zewnętrznych
– USB, HDD (twardy dysk) lub pamięć USB i karty pamięci SD/
MMC
Mamy nadzieję, że ten produkt sprawi ci wiele radości. Jesteśmy
zobowiązani aby zapewnić ci nową technologię w pracy, w czasie
rozrywki, codziennego życia i w każdej innej sytuacji! Dziękujemy
za używanie naszego produktu.
1.2 Zawartość opakowania
Podczas otwierania pudełka z przesyłki, powinieneś znaleźć tam
następujące elementy:
Odtwarzacz multimedialny HD , pilot , instrukcja obsługi, zasilacz, bateria.
Informacja: Aktualna zawartość pudełka może różnić się od listy
przestawionej powyżej.
1.3 Ostrzeżenia
Ten odtwarzać został zaprojektowany z myślą o twoim bezpieczeństwie. Aby bezpiecznie i efektywnie go wykorzystywać, przeczytaj poniższe instrukcje.
1.3.1 Zasilanie Wysokość napięcia wynosi 5V DC. Podczas
użytkowania odtwarzacza, podłącz do gniazda zasilania odtwarzacza i do źródła zasilania. Podczas podłączania kabla zasilającego,
upewnij się, że nie ulegnie on zniszczeniu lub nie jest przygnieciony. Aby zmniejszyć ryzyko porażenia prądem, odłącz zasilacz
 Loading...