

Page 1
1
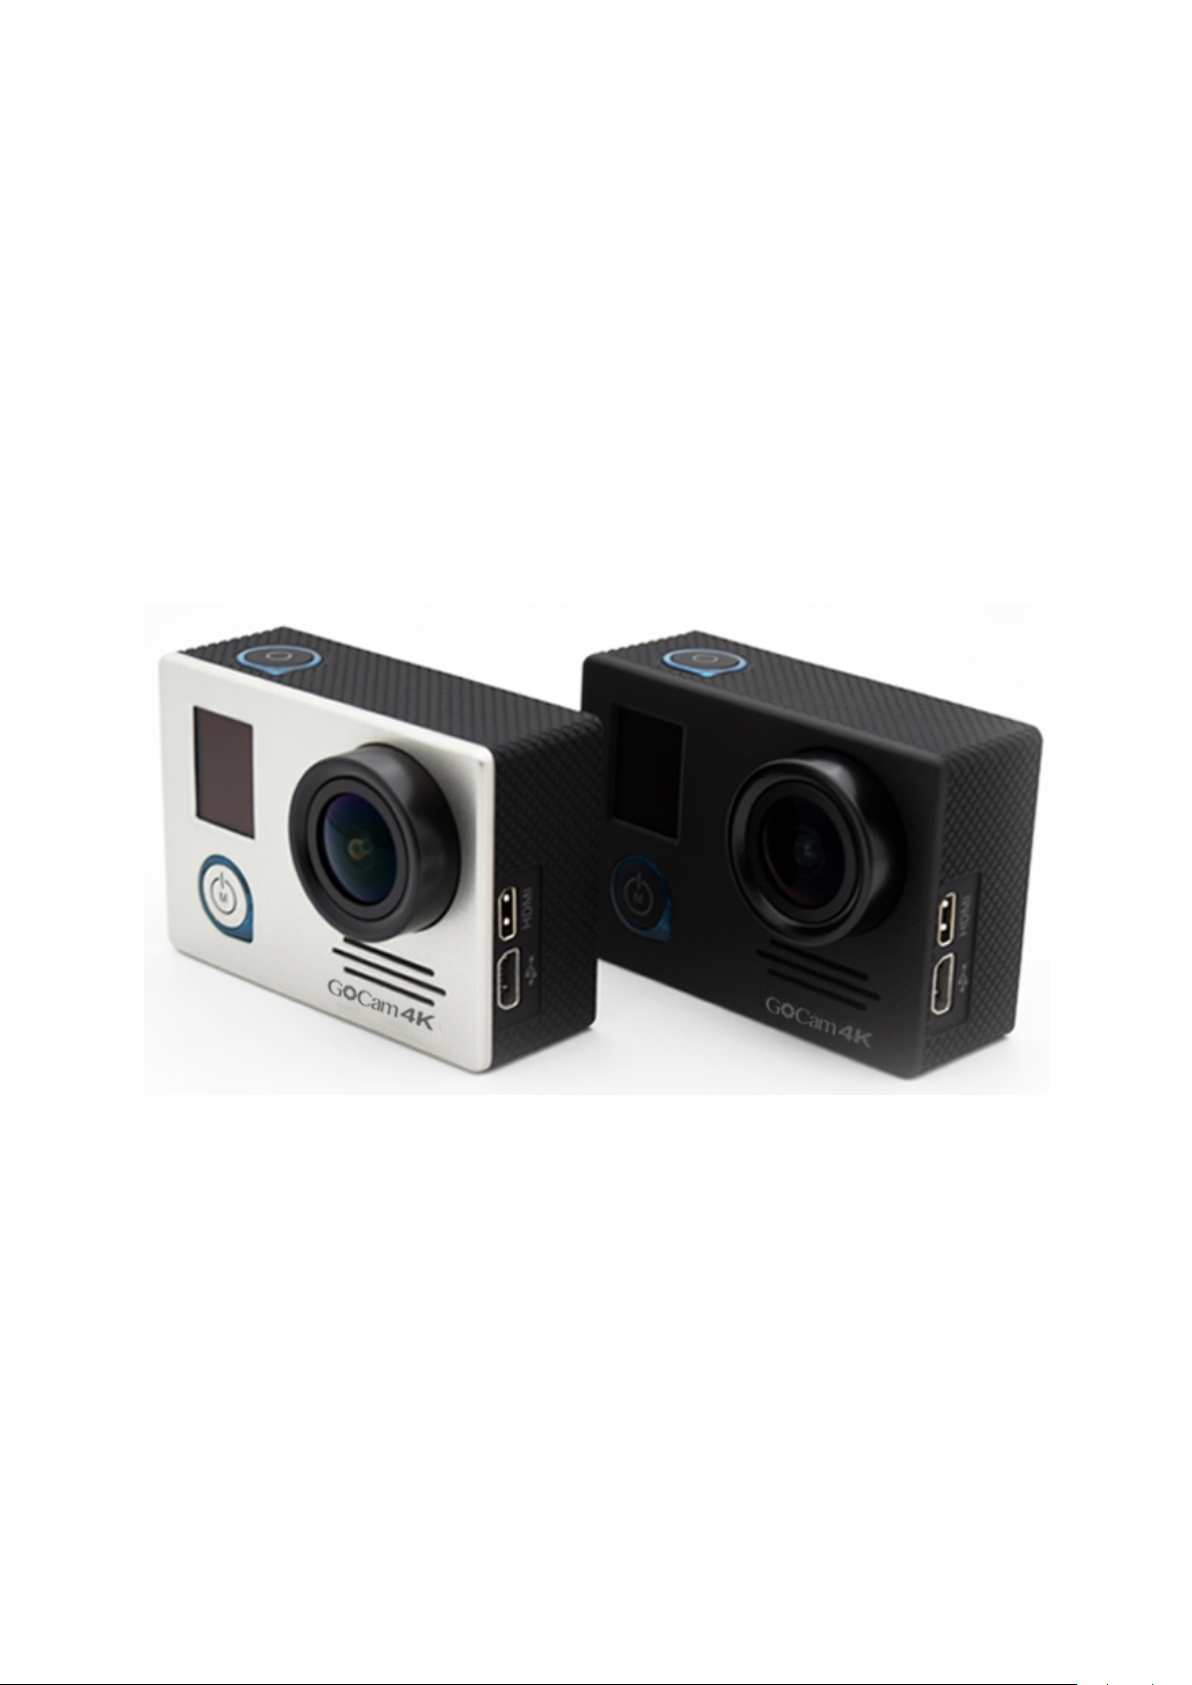
GoCam 4K ActionCam
! Wi-Fi Interconnection
! Electronic Gyro Stabilization
! SONY 16 MP Back-illuminated CMOS Sensor
Ver 2.3
Page 2

2
Contents
Features ............................................................................................................... 3
OLED Status Screen ............................................................................................ 4
Button Functions ................................................................................................. 5
Menu Description ................................................................................................ 6
Wi-Fi Remote ...................................................................................................... 8
Battery Charging ................................................................................................... 9
Transferring Files .................................................................................................. 9
Accessories ........................................................................................................ 9
Instruction for accessories .................................................................................. 10
Time Update ........................................................................................................ 9
Accessories installation instructions (Optional) ...................................................10
Page 3
3
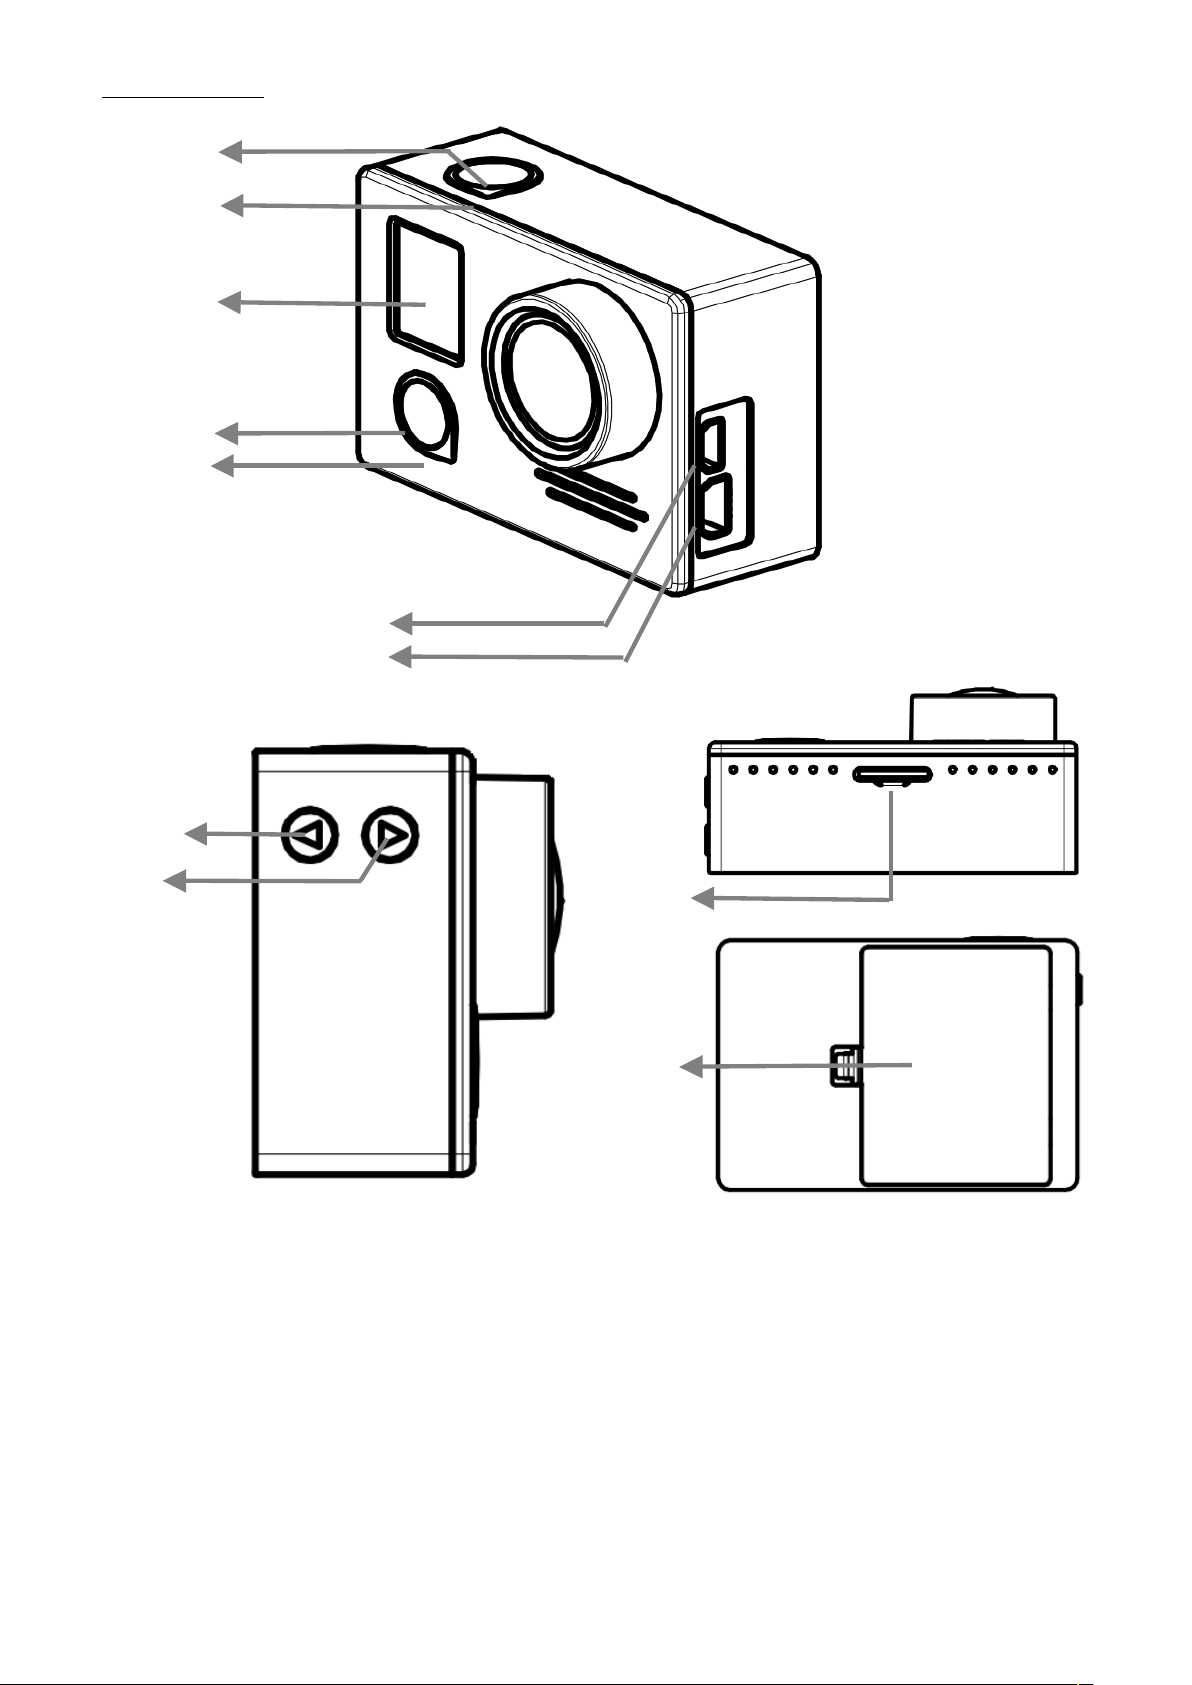
Features :
1
3 4 6
7
8 9 10 2 5
11
1. ENTER (select) Button
2. Camera Status LED
3. OLED Status Screen
4. Power/Mode Button
5. Working/Charging Status Light
6. HDMI Port
7. USB/AV Port
8. Down Button
9. Up Button/ shortcut to WIFI
10. SD Card Slot
11. Battery Door
Page 4
4
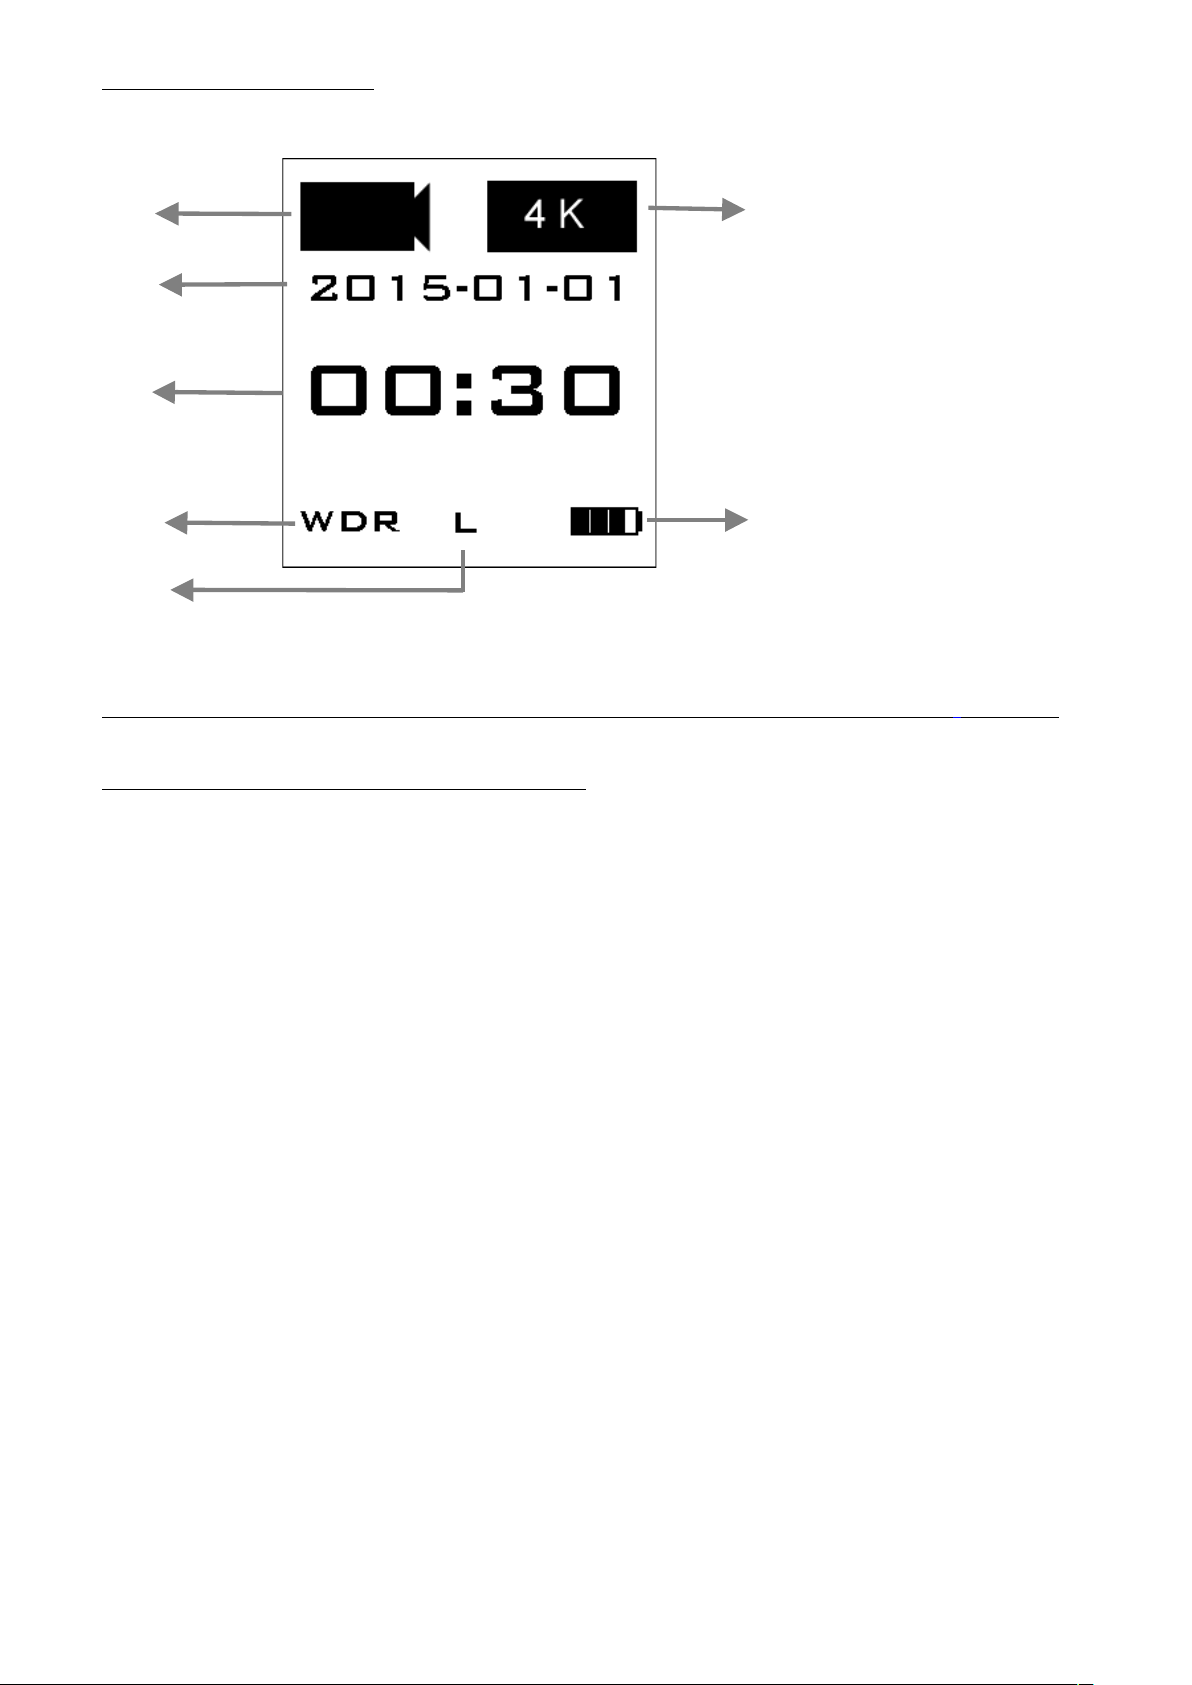
OLED Status Screen
Note: Please use a C10 SD Card ( when the card speed does not match,
display will show “card speed low”). Before using, format the SD card in
FAT32 or EXFAT32 to prepare card for use. (formatting will delete all data
from the SD card; save all useful data to another storage device).
1
2 3 4 5 6
7
1. Modes: Video/Photo
2. Date
3. Resolution
4. Counter
5. WDR Status
6. FOV Level
7. Battery Status。
Page 5
5
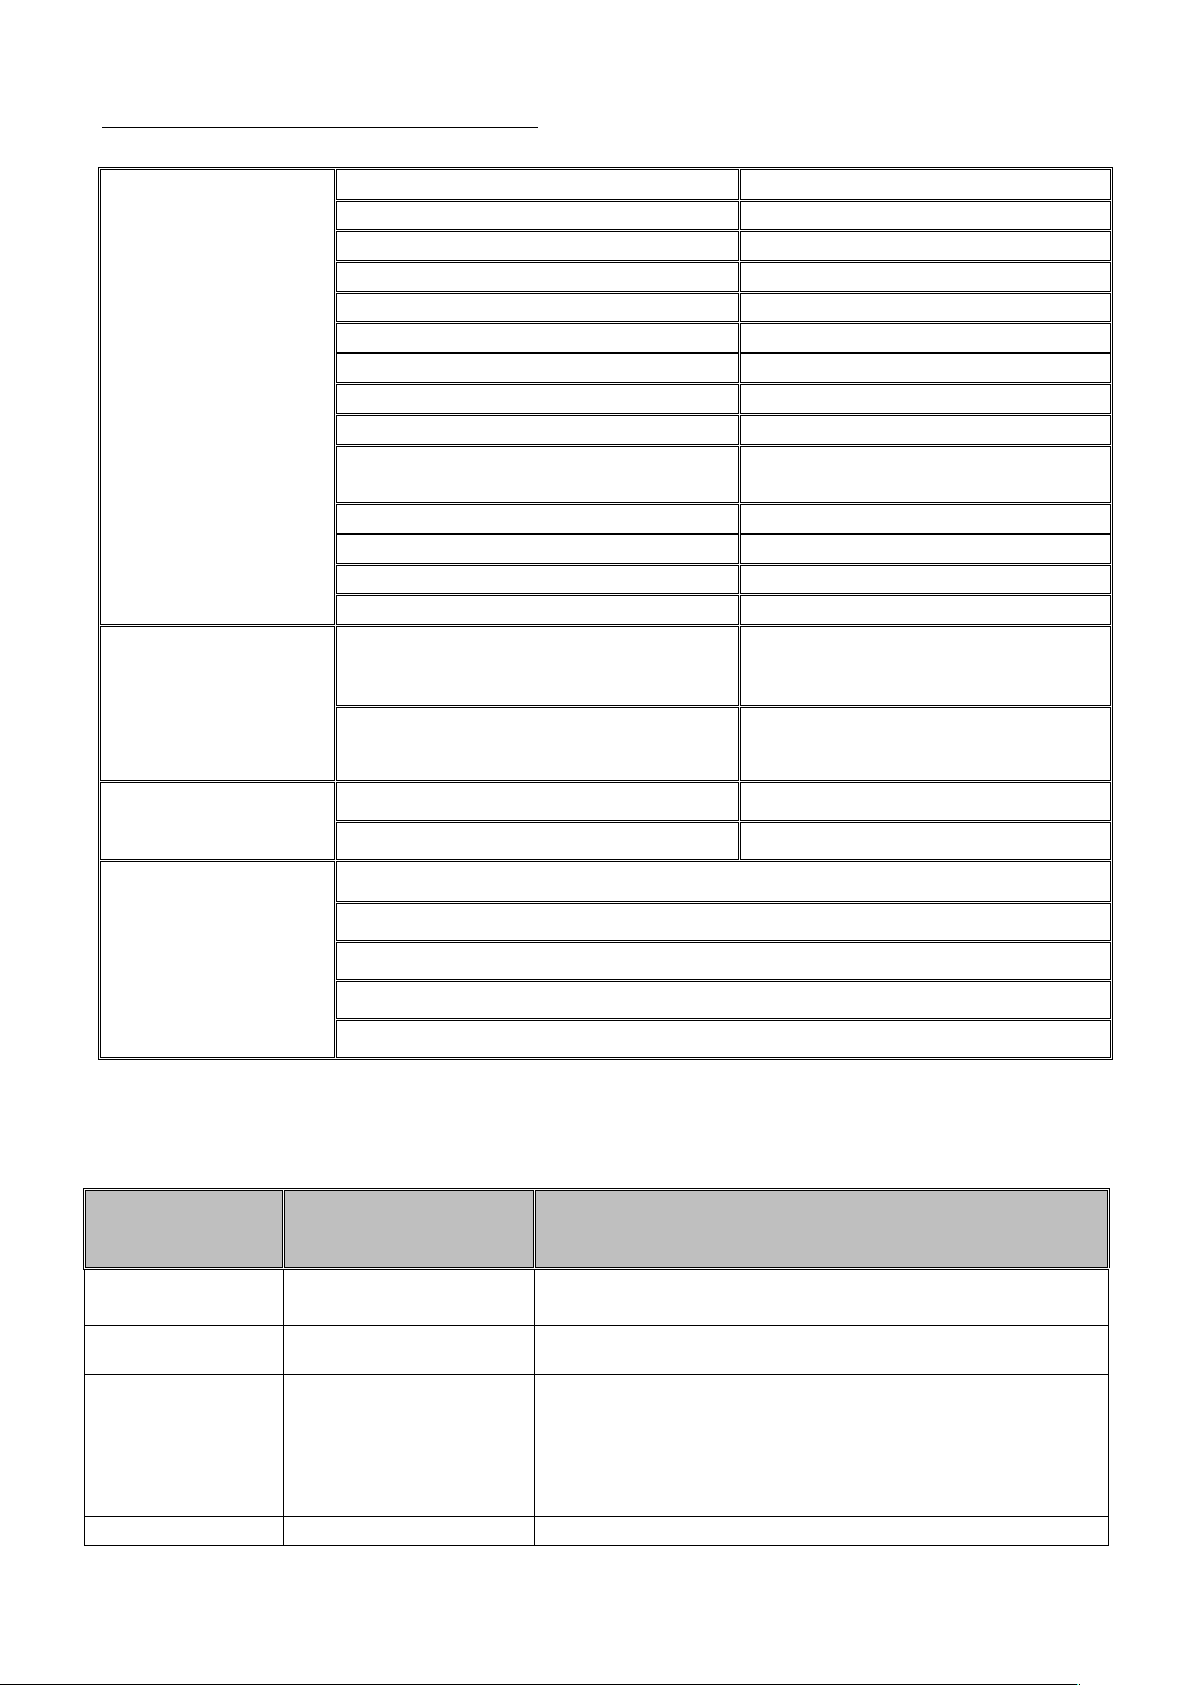
Performance and Specifications:
Specifications
Photo resolution
16M
AV output format
PAL/NTSC
USB Port
YES
HDMI Output
YES
Kind of SD card supported
Micro SDXC - Class 10
Maximum size of SD card supported
64GB
Wi-Fi
YES
Camera size
59×41×21 mm
Weight
70g
Battery Capacity (Battery is
removable)
1600mAH
Battery life
1.5 hours
Time to complete charging
2-3 hours
Compressed format
H264
Video/photo format
*.MP4 / *.JPG
Optical Parameter
Diaphragm
f/2.8 ,7 glasses
Angle
Horizontal 120 degree
Diagonal 170 degree
Electric Parameter
Working Voltage
5 volts
Current
800 mA
Working Modes
Video
Photo
Time-lapse video
Time-lapse photo
11 Burst Photo
Button Functions
Name
Functions
Descriptions
Power/Mode
Button
Turn on/off camera;
select modes
Press once, camera on; press for 3 seconds, camera
off/ press to select photo or video mode.
OK Button
start/stop recording
UP Button
move upwards
Enter menu setting/move upwards / Press for 3 sec,
WIFI ON
DOWN Button
Move downwards
Enter menu setting/move downwards
Page 6
6
Menu Description:
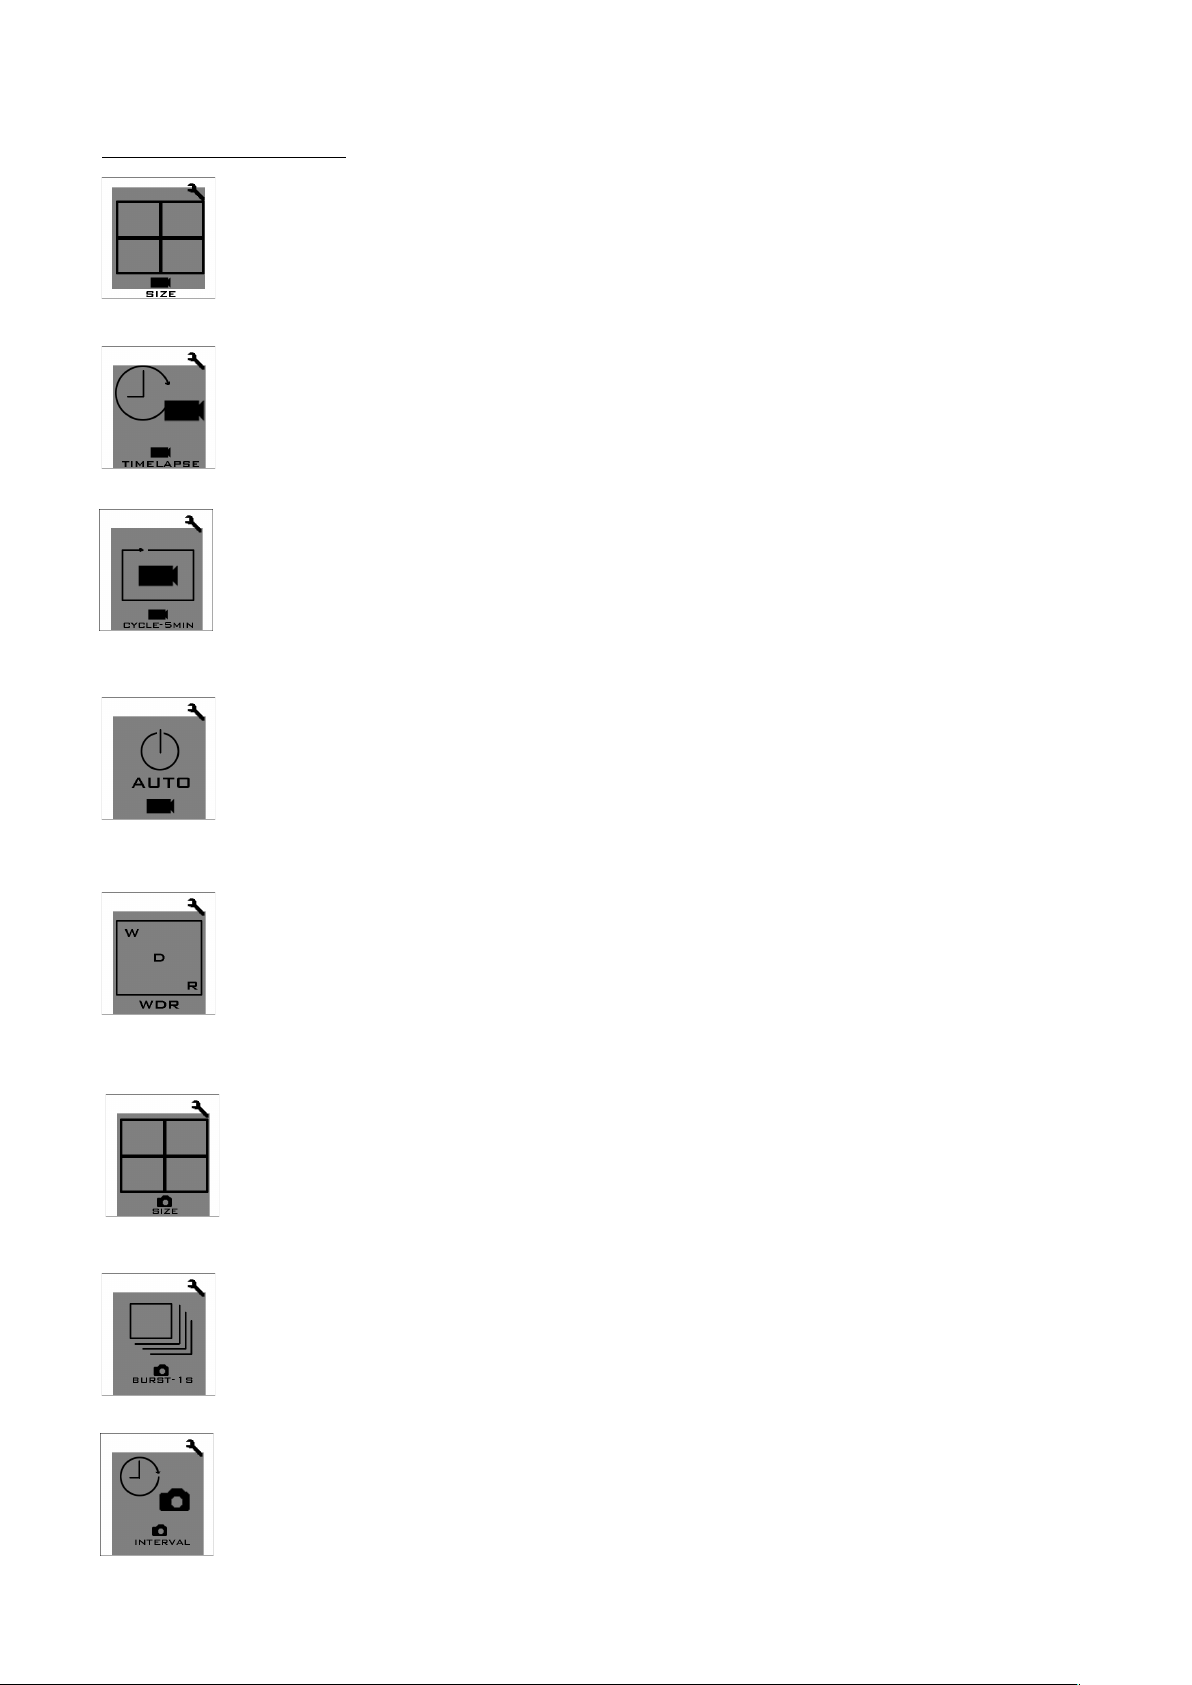
Video resolution: select from 4K@24fps(Quicktime player required),2.5K @30fps,
1080P 60@fps,1080P@30fps and 720p@120fps,VGA@30fps。
Time-lapse video: to start/stop time-lapse video at 0.5 / 1 / 3 / 5 /10 second
intervals.
Cycle recording: If cycle recording mode is selected, the video will be recorded
into 5-minute segments. When card becomes full, the earliest file segments will
over-write the oldest segments (This mode is suggested recording traffic while
mounted on vehicle-dash.)
USB Power Up Auto-record: If this function on, it will automatically start recording
when connected to external power source via USB.
(This mode is suggested when using vehicle-dash mount or aerial
photographing.)
WDR (Wide Dynamic Range): WDR function is suggested to be used in low-light
conditions; ie. a cloudy day/dark indoor environment. It might cause
overexposure on sunny days.
(This mode is NOT suggested to be used on sunny days).
Photo resolution: 16M / 8M / 5M (16M is suggested)
Burst photo: capture 11 photos in 1 second.
Continuous photo: This option allows you to capture photos continuously every 3
/ 5 / 10 / 30 second.
Page 7
7
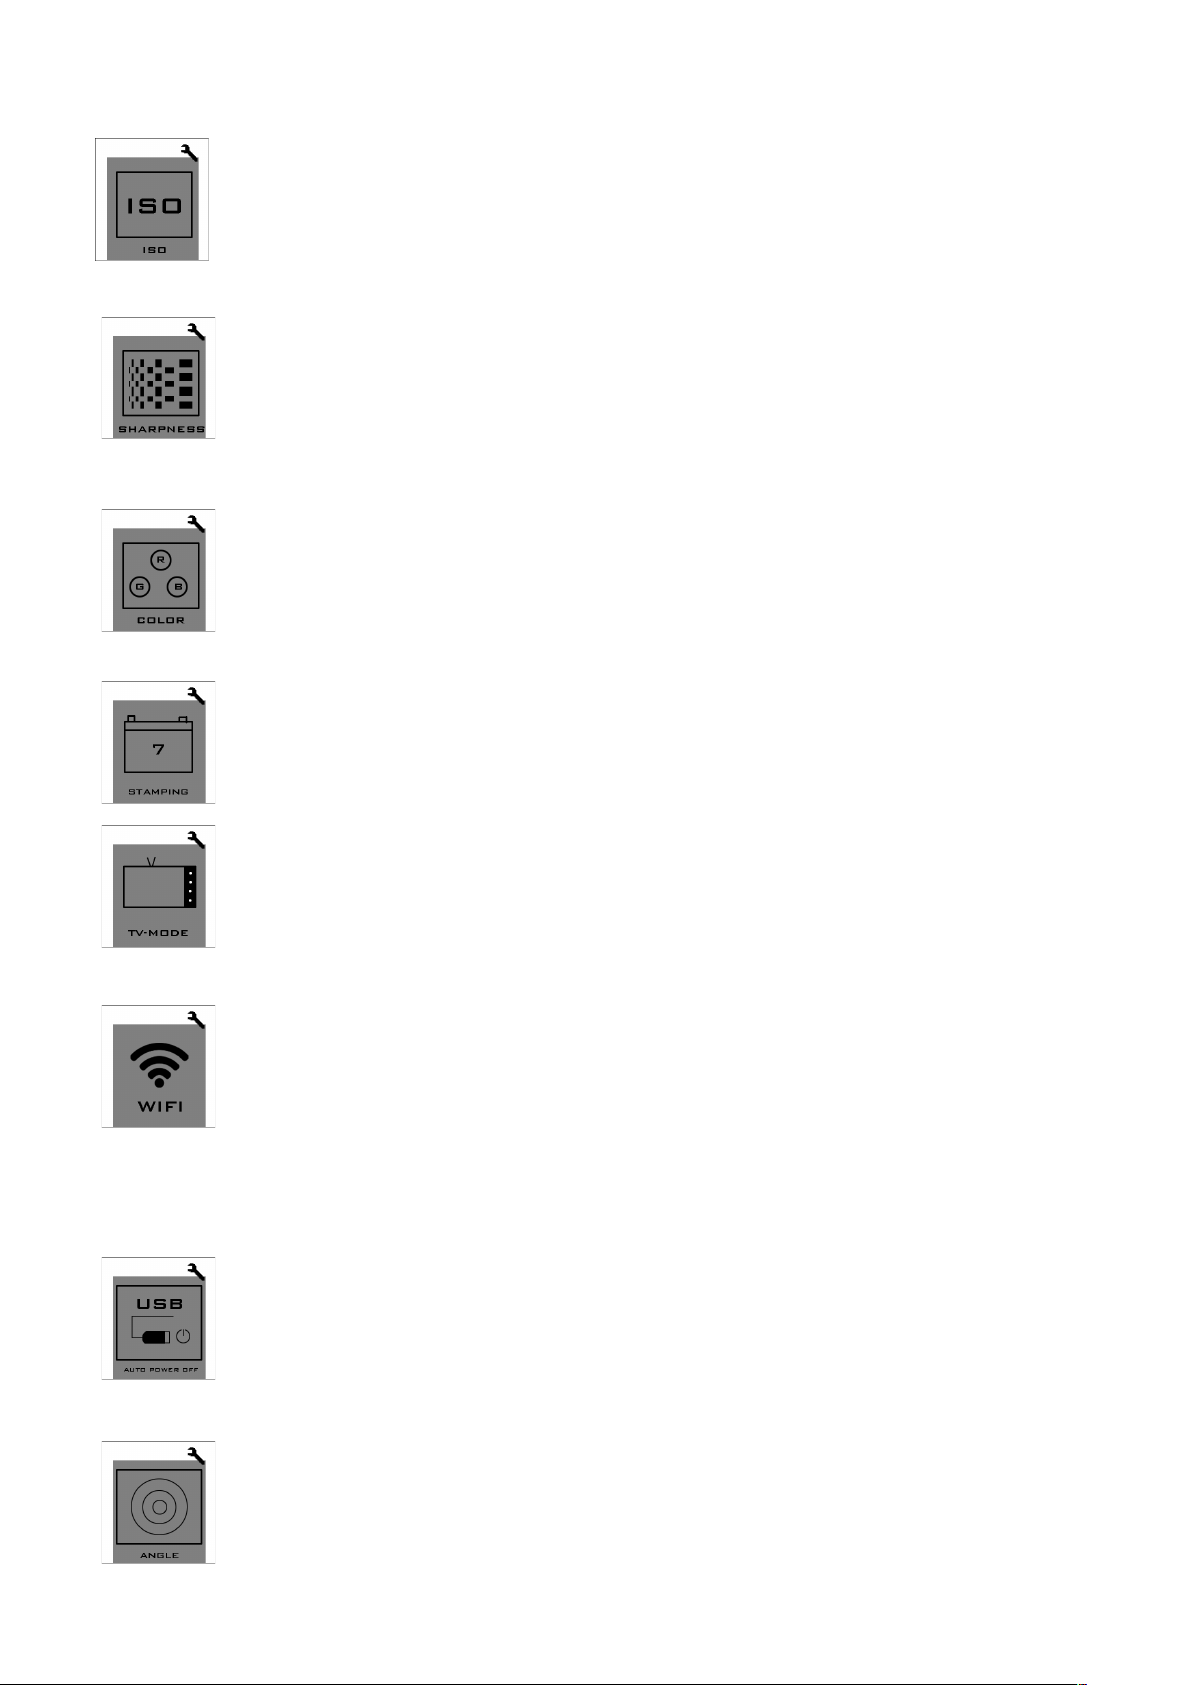
ISO adjustment: AUTO/100/400/1600. ISO of photos can be adjusted. At night,
the lower ISO you select, the better image effect you get.
(Note: please hold your camera steady when taking photos)
Sharpness adjustment: 3 options: High, Medium and Low. Low sharpness is
suggested at night.
(Under recording mode, Medium level is suggested; under photographing mode,
Medium level is suggested for close-shot or in dark environment .
Color adjustment: 2 options: standard and vivid.
(If you want post-production, standard option is suggested.)
Time stamping: this option allows you to stamp the time on the photos or videos.
TV output mode: PAL / NTSC
Wi-Fi remote: the camera’s built-in Wi-Fi allows you to connect to the smart
phone/tablet via the Firefly App. You can view the photos and videos taken by the
camera on your smart phone/tablet; you can also use your smart phone/tablet to
control the camera to capture photos or record videos.
(Note: Having camera too far from smart phone/tablet may weaken Wi-Fi
signal and lose image)
USB Auto power-off: the power will be automatically turned off in 30 seconds
after the USB power supply is cut.
(This function is suggested to be used in aerial photographing.)
Angle adjustment: 2 options: Large / Medium . Small angle can reduce image distortion.
(
Large angle is suggested as using smaller angle will reduce image quality.)
Page 8
8
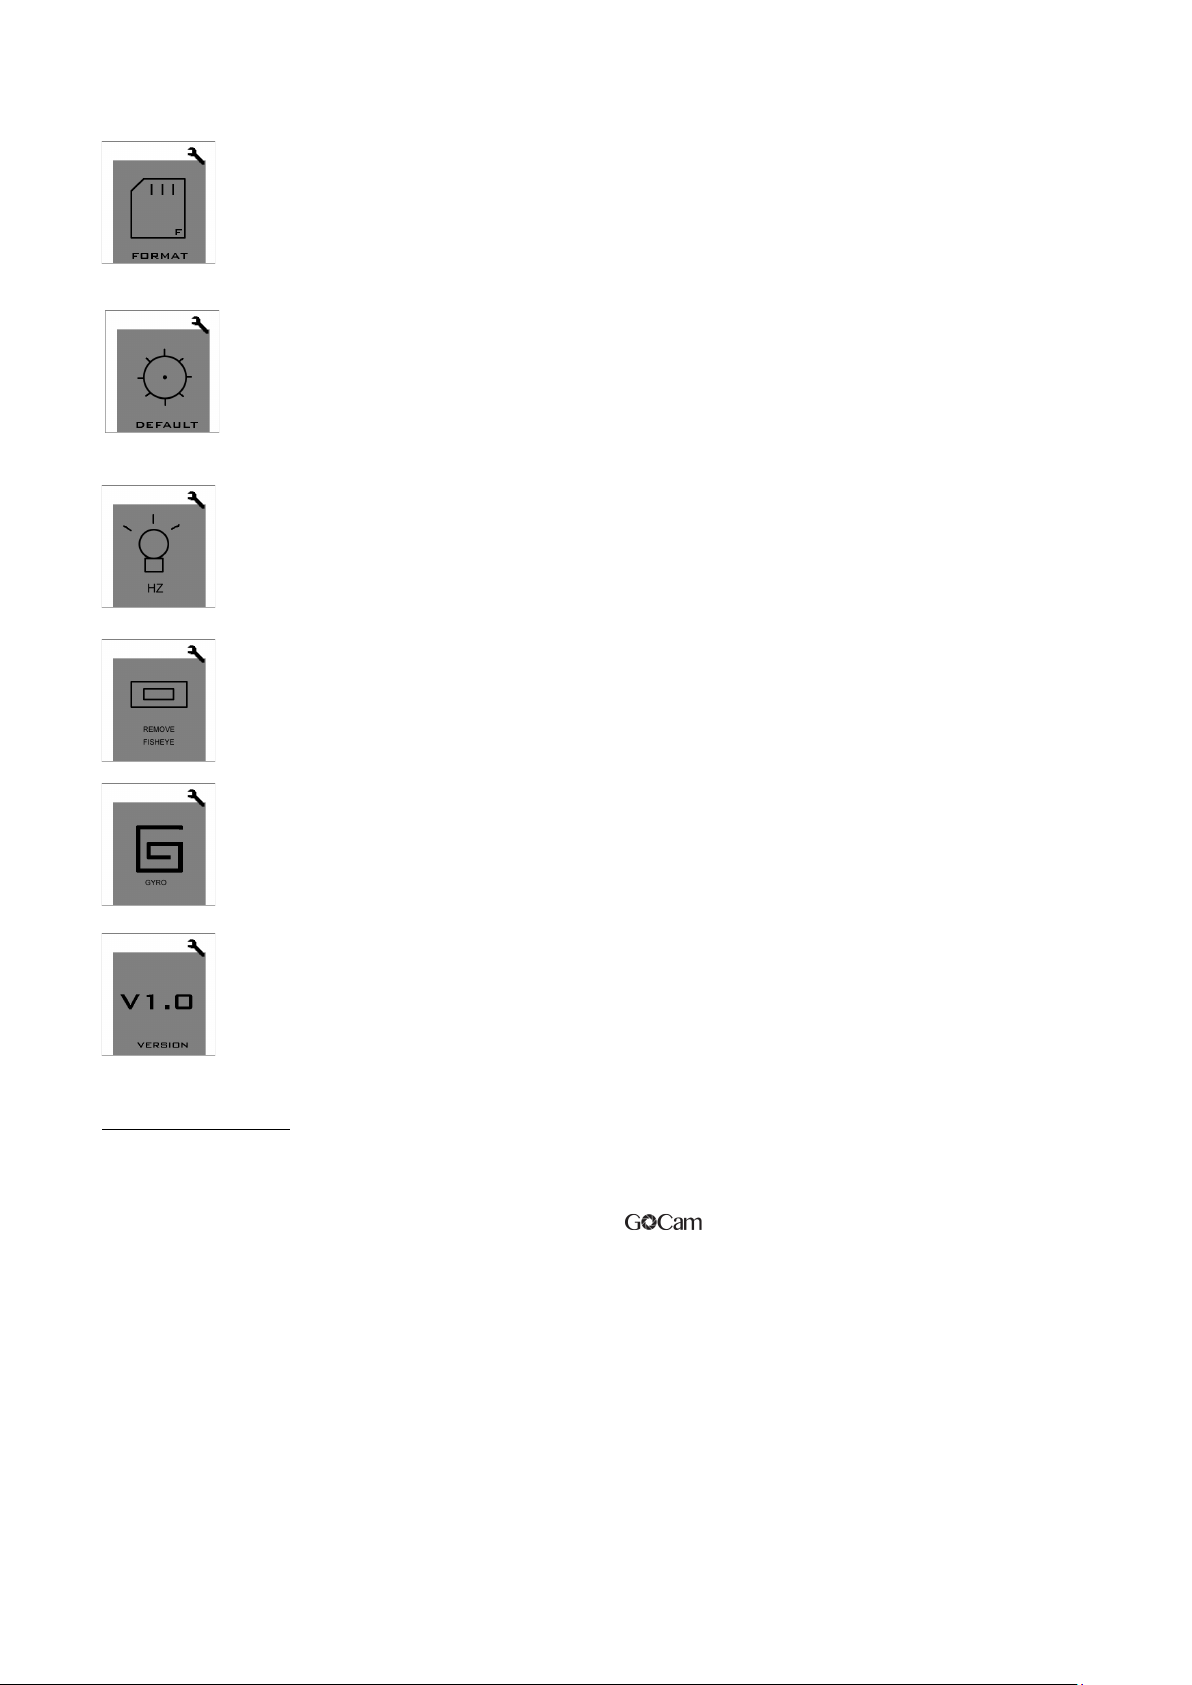
SD Card formatting: After power ON, if the format card does not match the
system, you will see a warning message “please format card”; then re-try format
function again.
Factory default settings: you can use this function to reset all factory default
settings.
(Note: if the camera does not work normally, please reset all factory default
settings and then restart it again.)
50HZ/60HZ Light frequency setting.
ON/OFF. Turn ON to reduce Fish eye effect。
You can use a Smart phone/tablet to view or take photos and videos via Wi-Fi connection.
1. from the app store on your smart
ON/OFF. Image stabilization. Turn ON to enable this stabilize function。
System version: Select to see the system version of the camera.
Wi-Fi Remote:
Download and install “GoCam”app phone/
tablet, or scan the QR code for iOS:
2. Turn camera’s Wi-Fi on.
3. In your smart phone’s or tablet’s Wi-Fi network settings, connect to the camera’s Wi-Fi network
named “GoCam 4K”, enter the password. Default password is “GoCam”.
Android:
4. Open the GoCam app on your smart phone/tablet. You will now be able to control the camera
with your smart phone/tablet plus view, playback and share selected content.
Page 9
9
Time update:
When connected to the Wi-Fi, time will be updated automatically.
Battery Charging:
Connect the camera to a computer or phone charger using the included USB cable. The
ON/OFF button will glow blue. Use 1A charger, and turning off the camera when charging will
increase the charging rate. The Charging Status Light it will turn OFF when the battery is fully
charged.
Transferring Files:
1. Connect the camera to a computer via the included USB cable, and then turn on the
camera.
2. Double click “My Computer” and locate “Removable Disk”. Open “Removable Disk” and
you will find all photo and video files in DV folder.
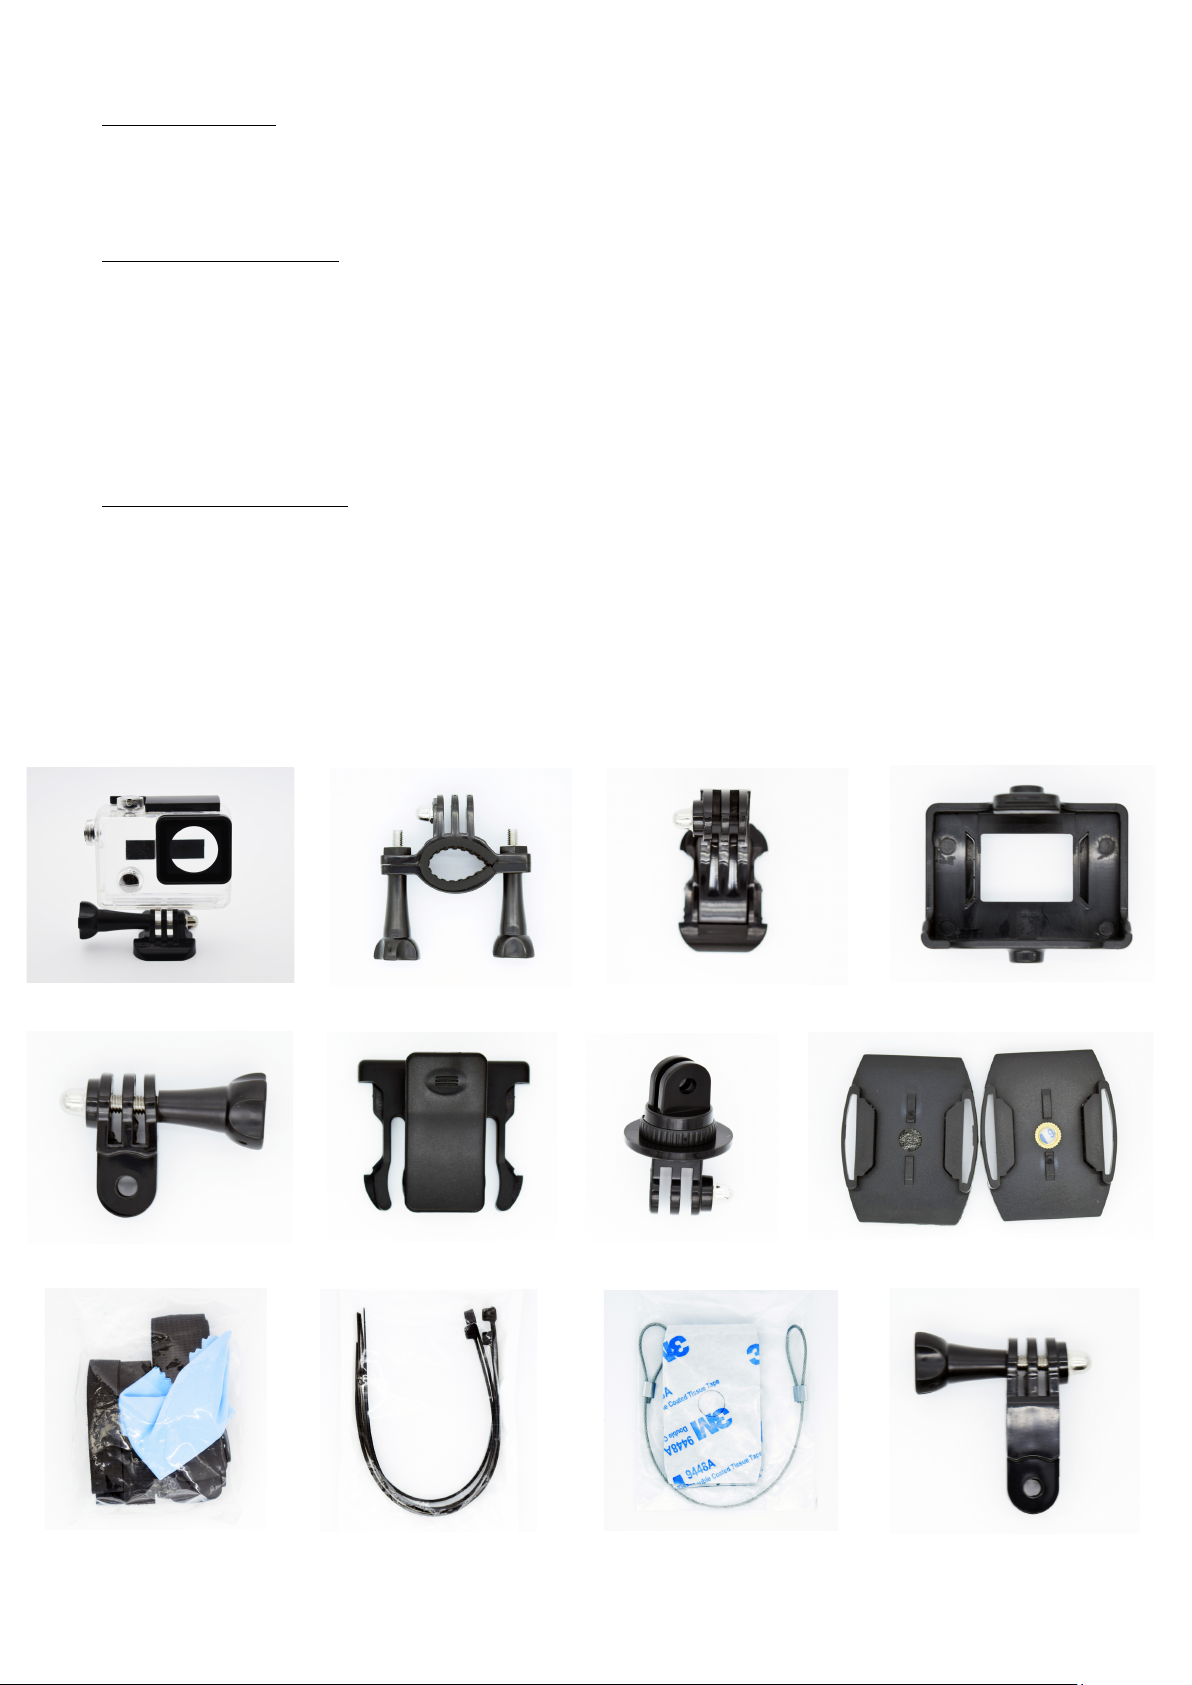
Accessories :
Page 10
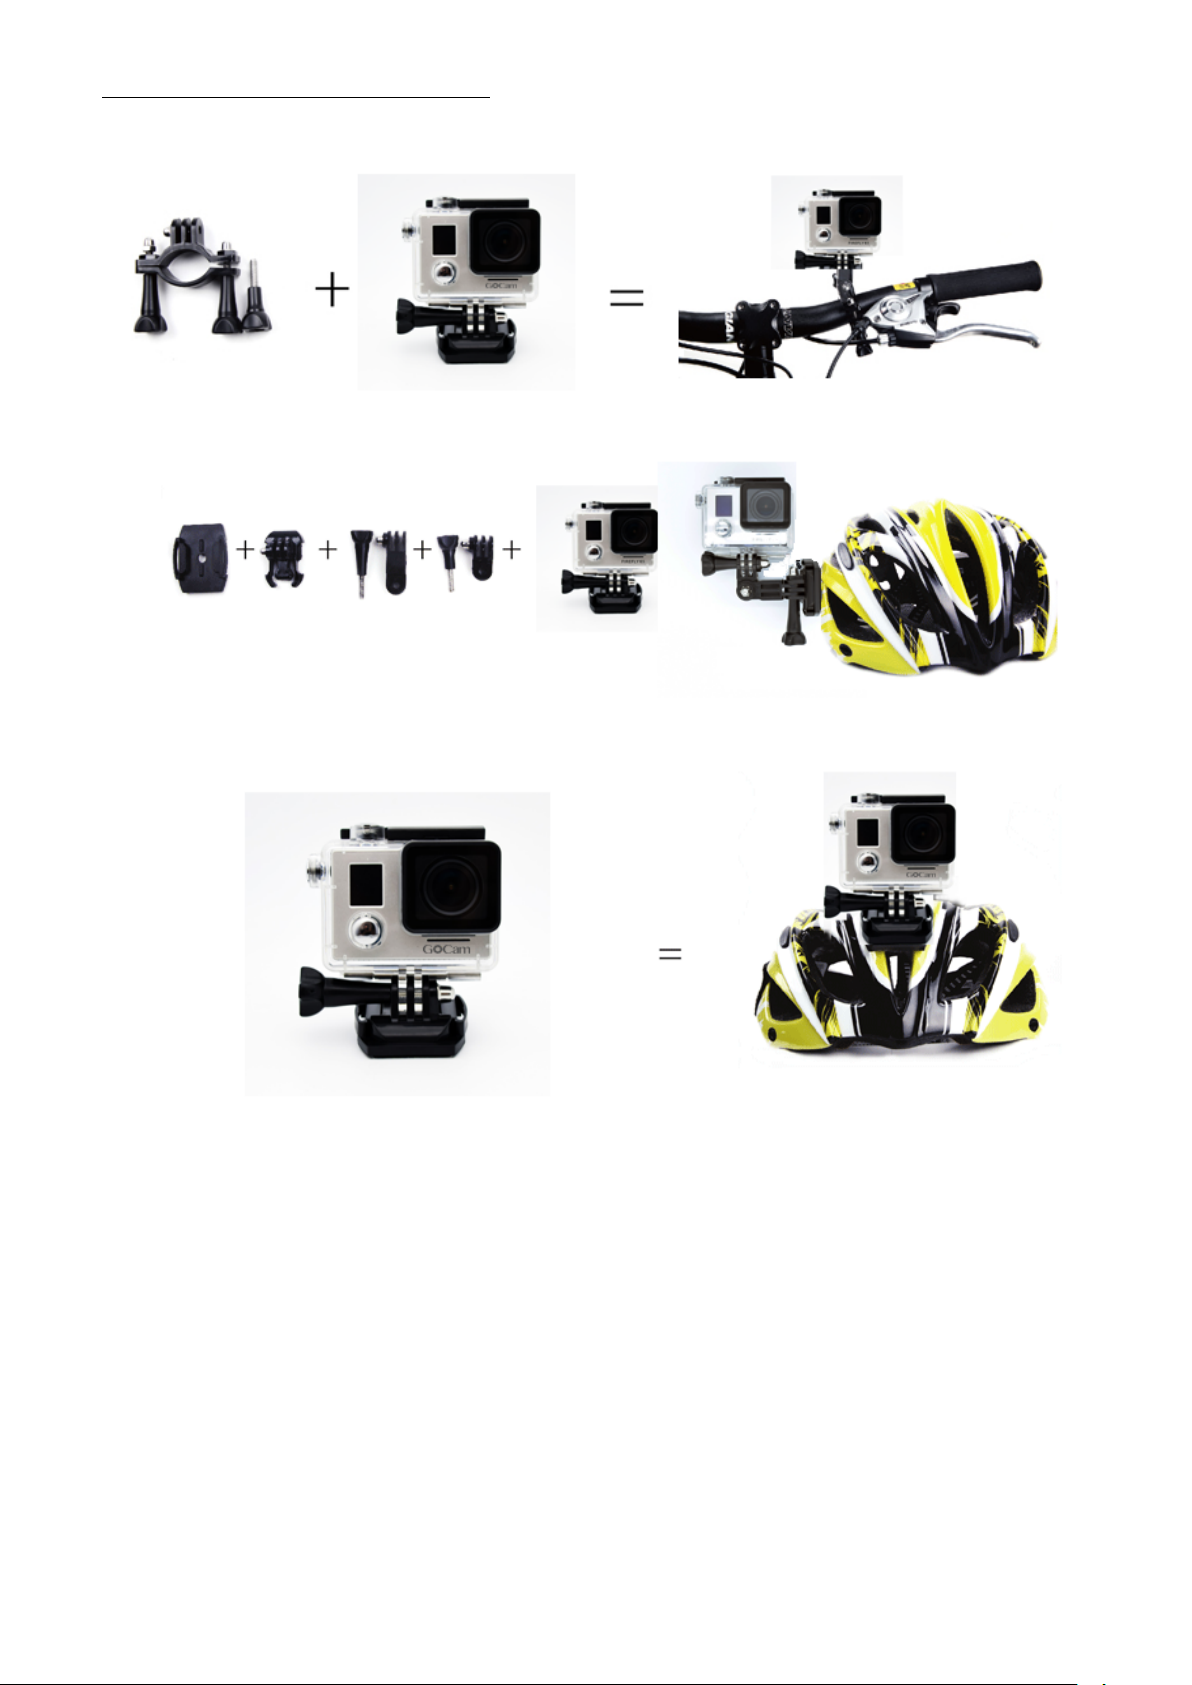
Instruction for accessories:
10
 Loading...