

GOALRILLA YARD GUARD B2800W-2 Owner's Manual

MODEL NO.
B2B2 800W-2
Yard Guard
O W N E R ' S M A N U A L
1. Read this manual carefully before starting assembly. Read each step completely before beginning
each step.
2. Some smaller parts may be shipped inside larger parts. Check inside all parts and cartons
before assembling or ordering parts.
3. To make assembly of your Yard Guard easier, c h eck all cartons for kits.
All hardware may not be located in one kit.
4. Do not tighten hardware until instructed to do so. If hardware is tightened too soon, mounting holes
may not align and parts may not easily fit together. Leave locknuts slightly loose until you are instructed to
tighten them. You will need a 5/8” wrench, two 1/2” wrenches and a
Save these instructions and your proof of purchase (receipt) in the event that the manufacturer
5.
has to be contacted for replacement parts.
Please Do Not Return This Product To The Store!
Contact Escalade® Sports customer service department at:
Phone: 1-888-USA-GOAL Toll – Free !
Fax: 1-866-873-3536 Toll – Free !
E-mail: basketball@escaladesports.com
Mailing Address (correspondence only):
Escalade Sports
PO Box 889
Evansville, IN 47706
Please visit our World Wide Web site at: www.goalrilla.com
ON-LINE TROUBLE SHOOTING TECHNICAL ASSISTANCE
ON-LINE PARTS REQUESTS FREQUENTLY ASKED QUESTIONS
ADDITIONAL ESCALADE® SPORTS PRODUCT INFORMATION
2L-7616-01
Escalade®Sports products may be manufactured and/or licensed under the following patents:
6419596, 6179733,5919102, 5071120, 4798381,4424968, D326128, 7244046
Additional patents may be pending. One or more of the listed patents and/or pending patents may cover specific product.
©
2017 Escalade Sports
®
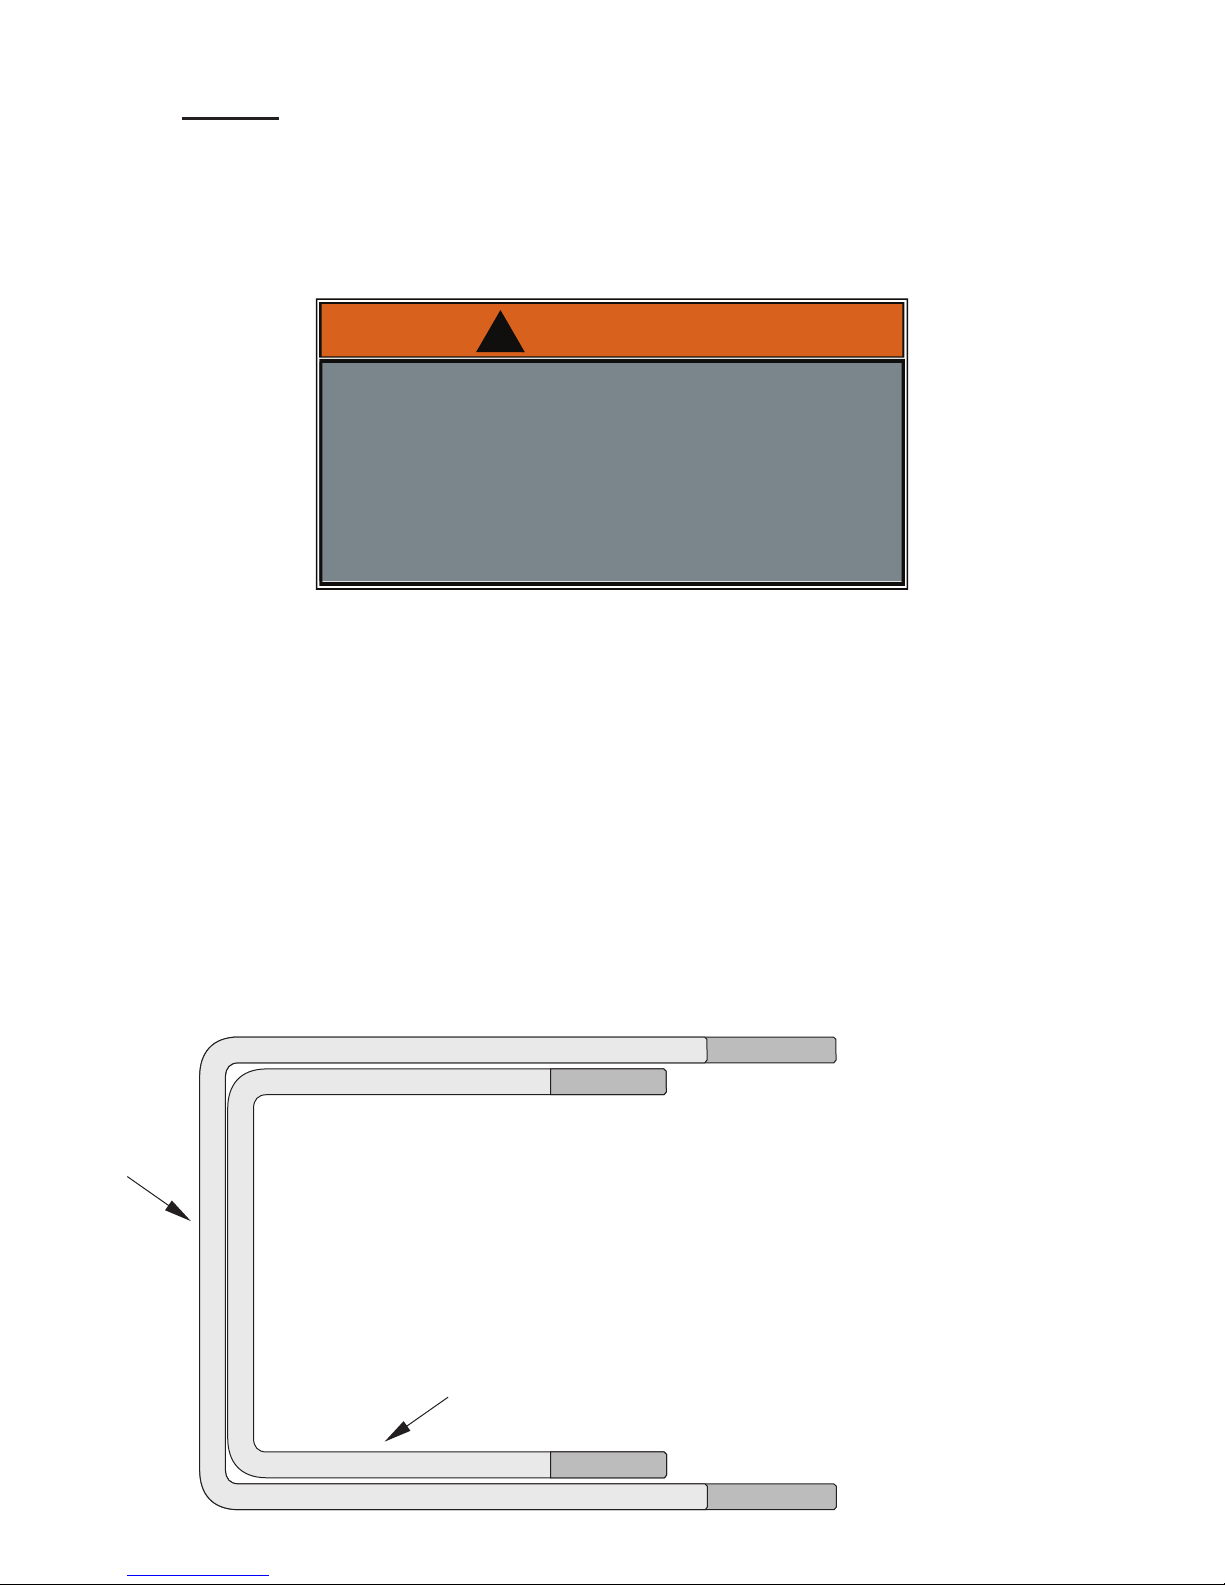
NOTE: ALWAYS place the Yard Guard into the Storage position when not in use,
especially during bad weather. Net sleeves can fill and hold water causing
damage.
Ÿ CHECK PRODUCT FOR DAMAGE AND REPAIR BEFORE EACH USE
(LOOSE HARDWARE, RUST, TORN NETS, INSTABILITY) NEVER PLAY
ON DAMAGED EQUIPMENT!
Ÿ DO NOT CLIMB OR JUMP ON PRODUCT.
Ÿ DURING PLAY DO NO WEAR JEWELRY (WATCHES, RINGS, ECT.)
OBJECTS CAN ENTANGLE IN NET.
Ÿ PUT PRODUCT IN STORAGE POSITION WHEN NOT IN USE, DURING
STORMS, AND DURING AGGRESSIVE PLAY.
WARNING
!
4L-8156-00
INSTALLING THE YARD GUARD
Please Read Manual for Tips that will Greatly Reduce assembly Time!
-Two adults are recommended for the Yard Guard installation.
-Remove all pole pads before installation. The lower pad of the Goalrilla pole pads are not compatible with the
Yard Guard, you will need to replace with the provided lower pad and then place your existing Goalrilla pad on top as
normal.
- A set of two U-bolts is required for installation.
Based upon pole size, use either the 5 x 5, 5.5 x 5.5, 6 x 6, or 6 x 8 labeled sets. These sets should include 2 different
size U-bolts.
Lower
U bolt
#3
NOT TO SCALE
Upper
U bolt
#15
2
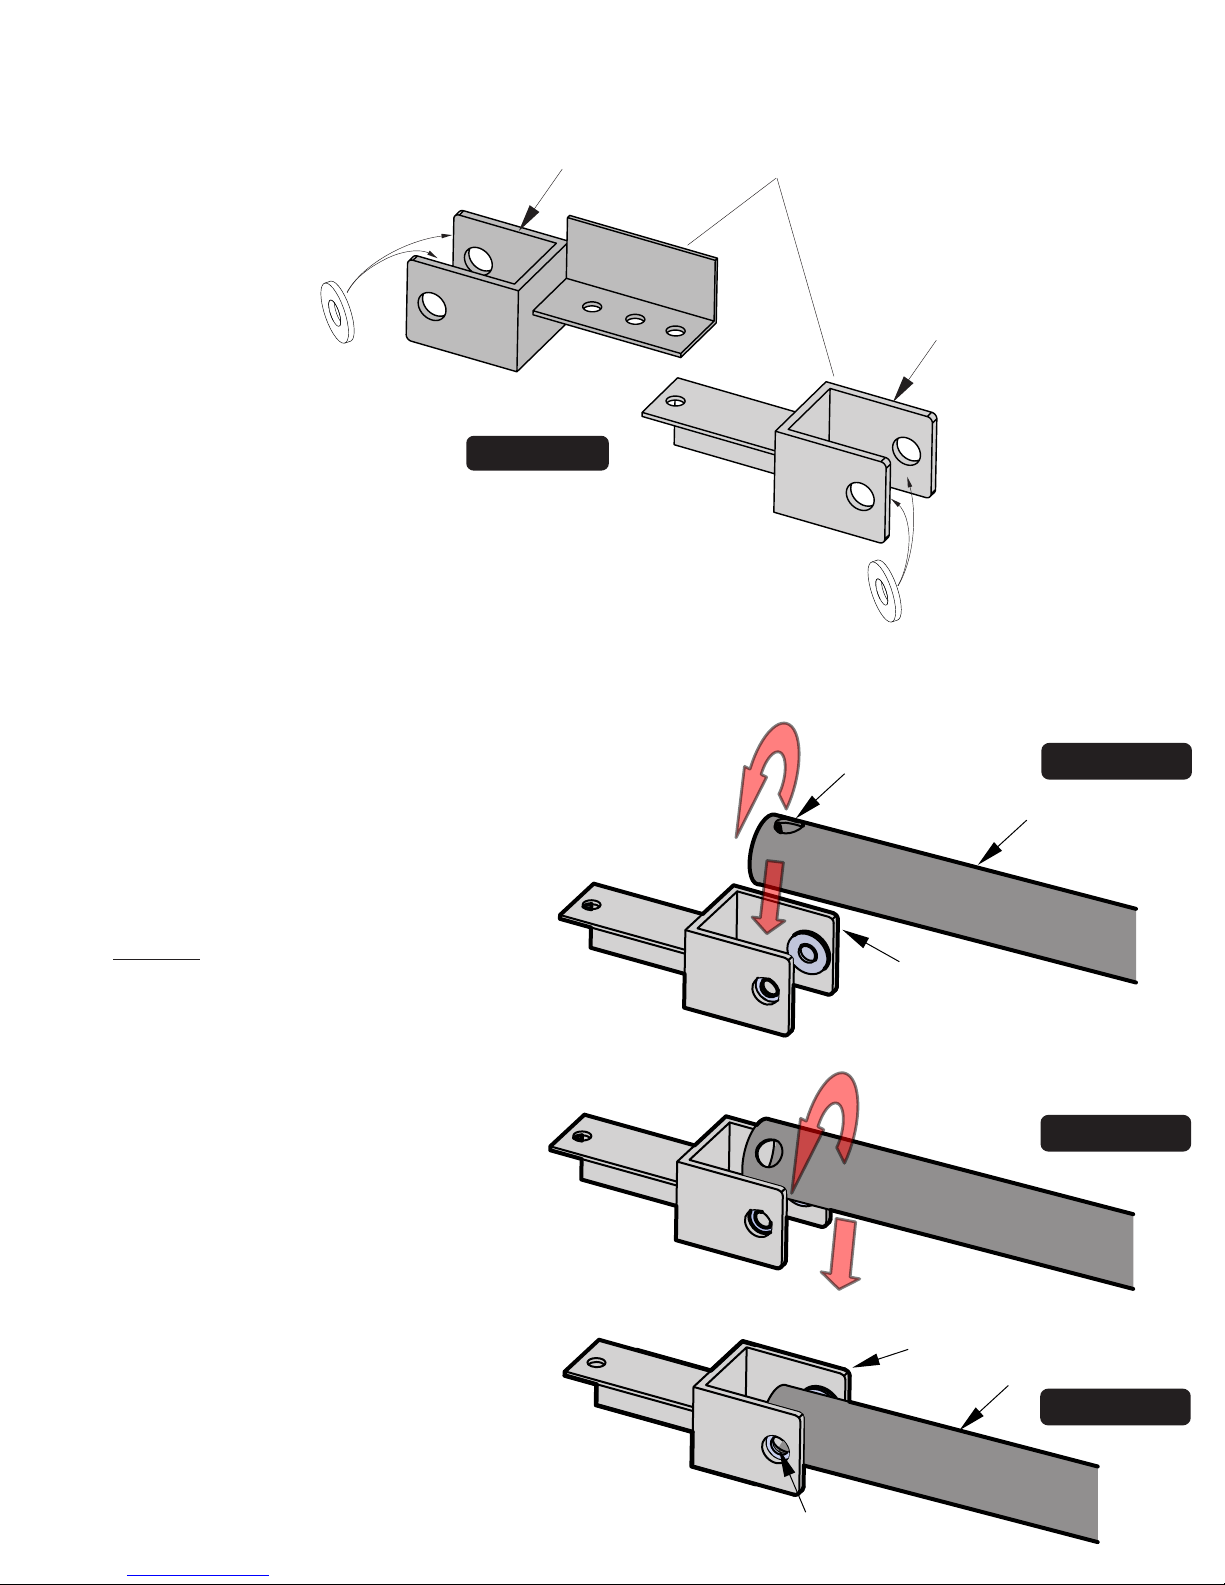
YARD GUARD BRACKET
NOTE: Two brackets (#1 & #2) are required. Bracket #1with three holes goes on top of bracket #2.
A. Before assembly peel and stick washers to Brackets
#1 & #2 as shown in Detail A.
#7
Washers
Detail A
INSERTING #6 POLES TO YARD GUARD BRACKETS
#1
Protective Surface on this
side will face the back of
the pole.
#2
#7
Washers
NOTE: When inserting tube into bracket it
will be a tight fit, this is normal and will
provide stability to the assembly.
NOTE: DO NOT ATTEMPT TO JUST PUSH AND
SLIDE INTO PLACE, THIS WILL BE EXTREMELY
DIFFICULT AND COULD DAMAGE PRODUCT.
FOLLOW INSTRUCTIONS BELOW ON HOW TO
SLIDE AND ROTATE INTO PLACE.
B. To insert tube #6 in brackets slide down and
rotate tube into position until the holes in the
bracket, washer and the tube line up. See
Detail B-D.
Hole in tube
#2
Detail B
#6
Detail C
#2
#6
Detail D
Hole in tube lines up with
3
washers and bracket holes.
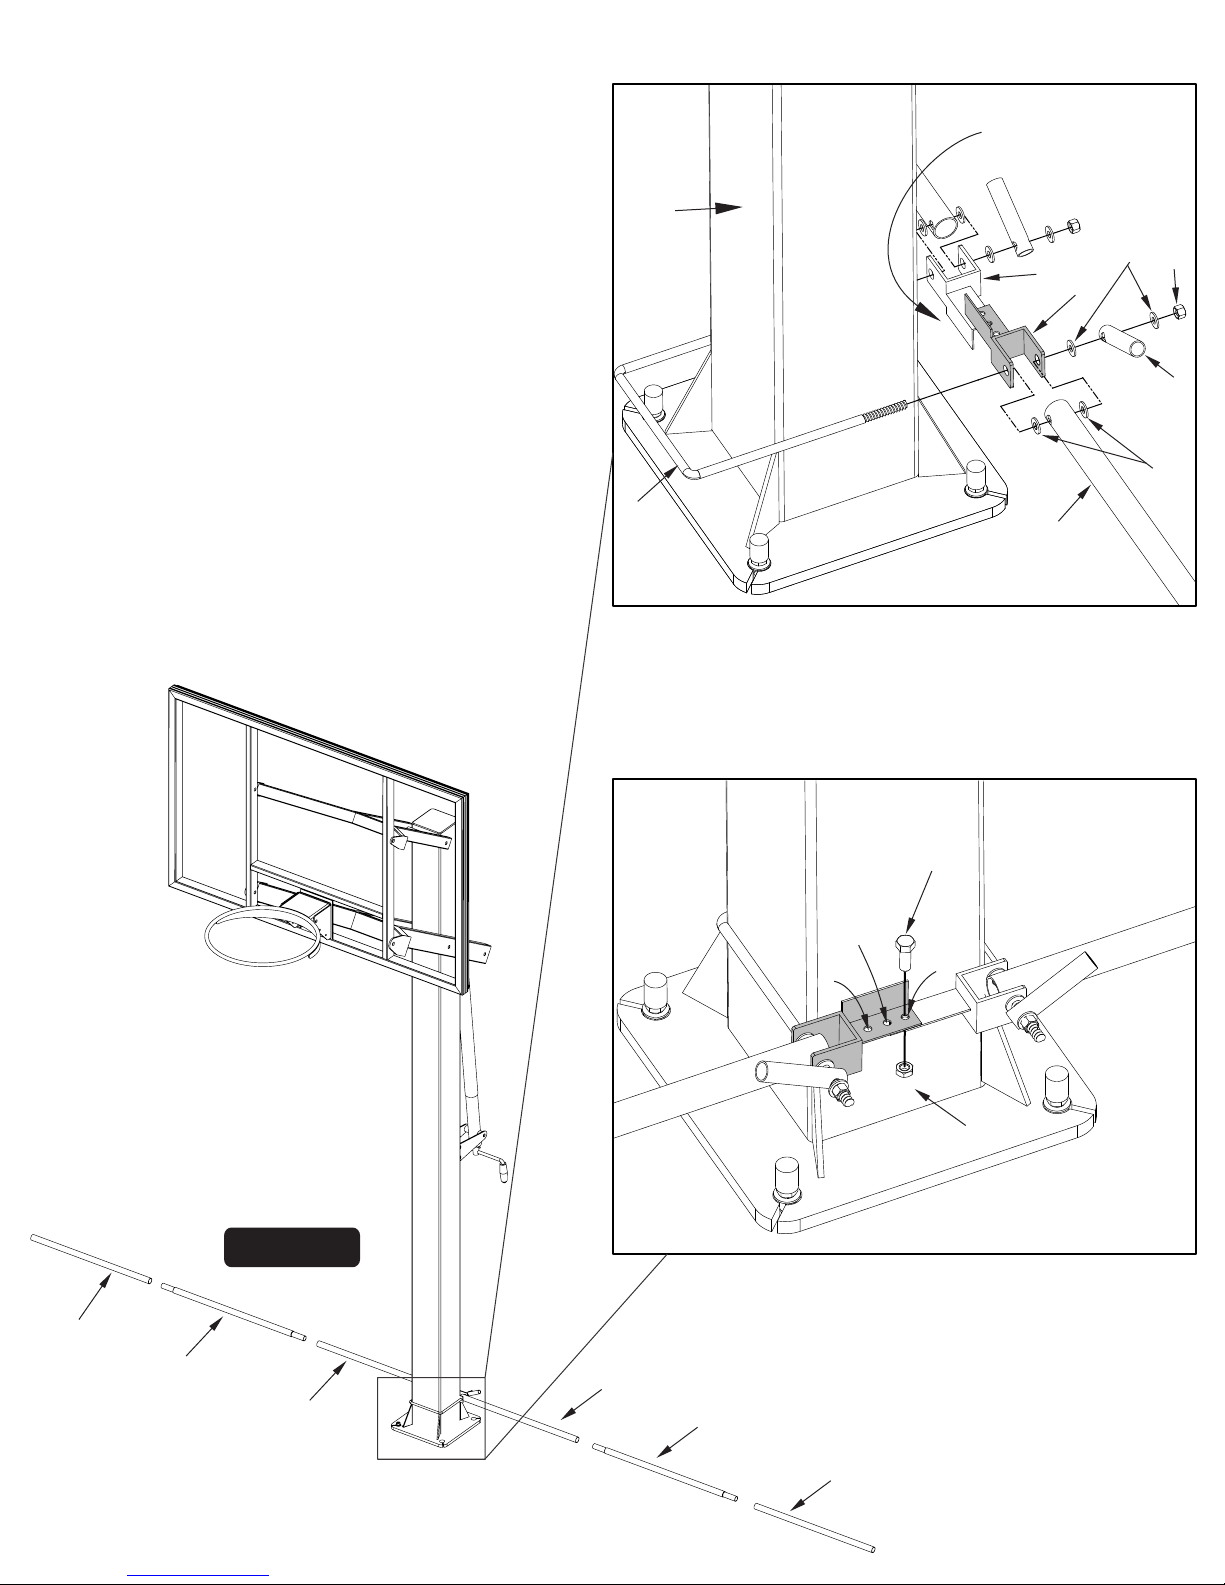
Two 7/16” Wrenches and one 9/16” Wrench will be required for the following steps.
1. Taking the longer U-bolt #3 slide it over the pole as shown
below, . Please be careful not to scratch the paint Detail 1
from your system, packaging foam can help with this.
2. Using the provided #7 washers with double stick tape. Stick
them on the inside of the lower brackets as shown in previous
page. Proceed to then slide the brackets over the U-bolt #3
and complete the rest of the lower assembly, see . Do Detail 1
Not Tighten Nut onto U-bolt yet, use only to keep other items
in place.
F
PO
RO
OF
NT
LE
Protective Surface on
brackets goes facing
the pole to prevent
damaging the pole.
4
2
1
5
3. To attach the brackets to each other, pull them together until
one of the three holes on top bracket #1 align with the single
hole in the bottom bracket #2. shows the location for Detail 2
a 5 x 5, 5.5 x 5.5, 6 x 6, and 6 x 8 pole. Insert screw #9 and
tighten nut #10 to the bottom. After completing the assembly
should be just above the systems triangular gussets. At this
point, tighten U-bolt nuts #5 secure so that front to back
wobble is eliminated but rods and connectors can still pivot.
4. Slide #11 Middle, #12 End & #6 poles together as shown in
Figure 1.
3
Back of Pole
5.5”
5”
8
7
6
Detail 1
9
6”
&
6x8”
Figure 1
12
11
6
10
Detail 2
6
11
12
4
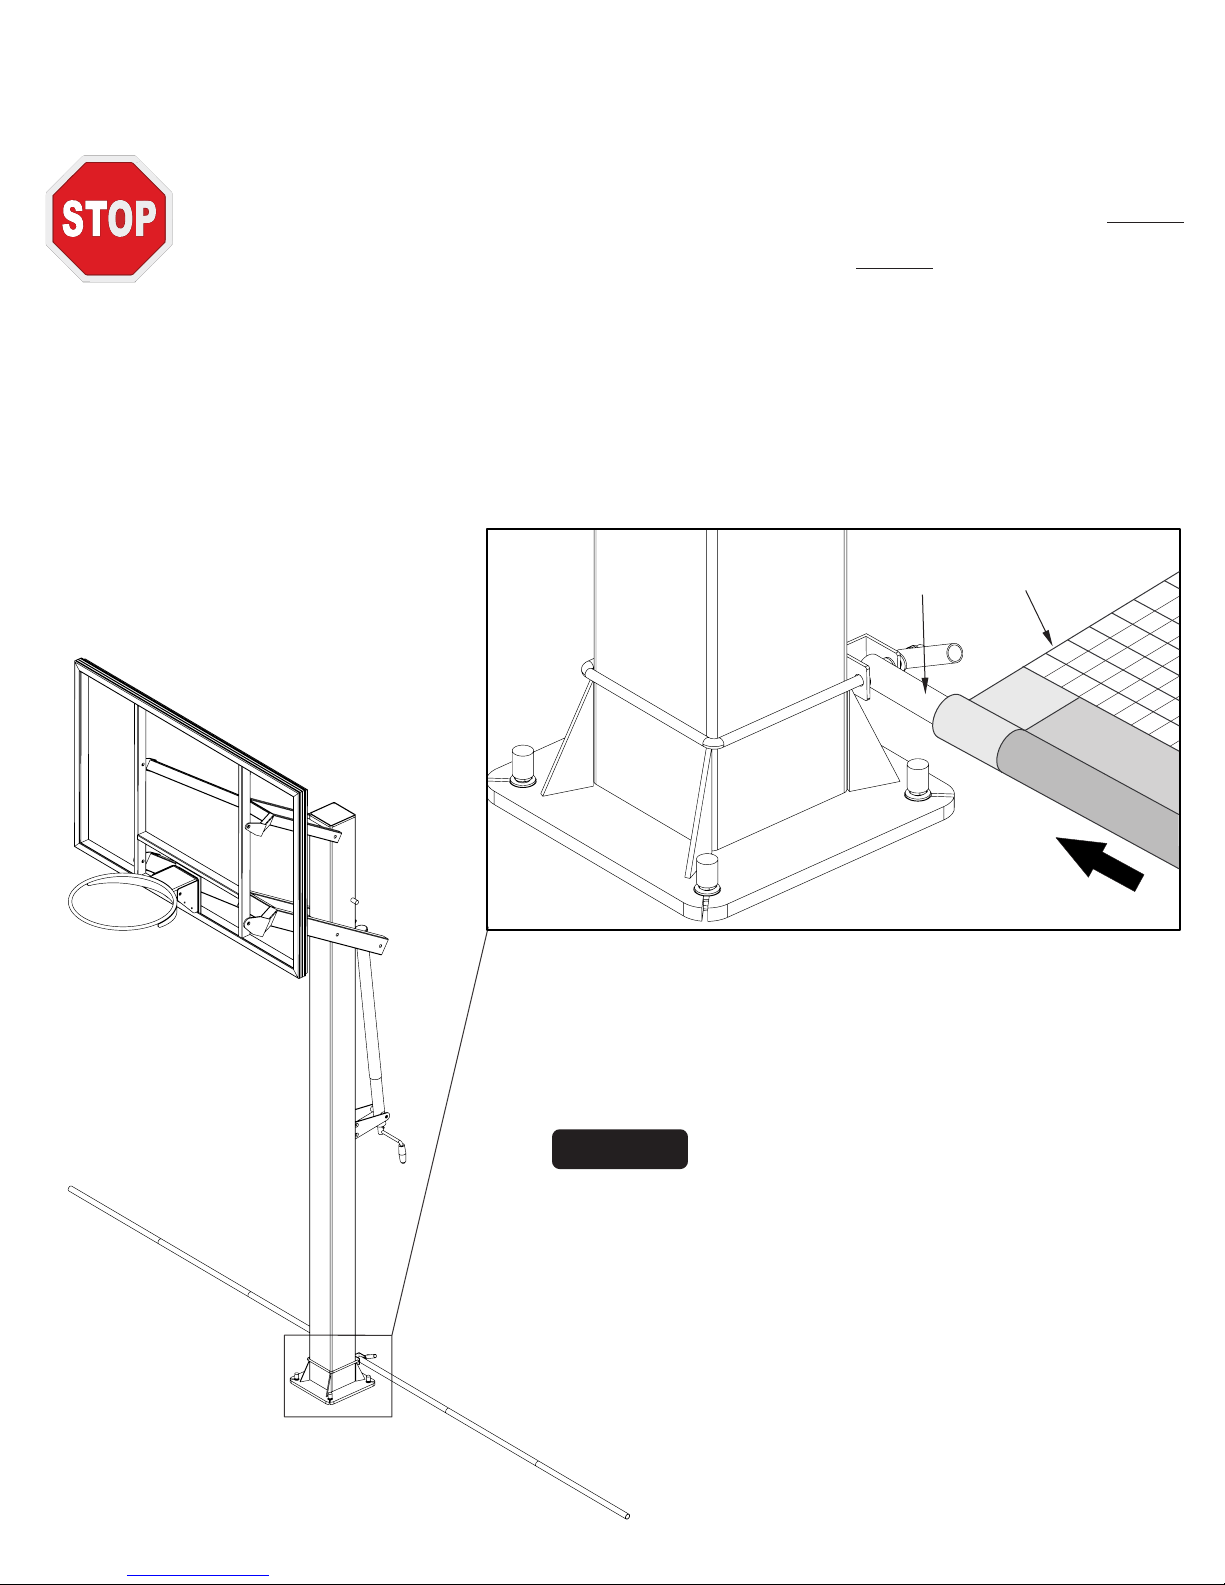
5. Slide Right Yard Guard net (#13) onto Steel Tube assembly as shown in Detail 3. Repeat for Left Yard
Guard Net #14 with Brand and Warning Label. No screws are required for assembly.
BEFORE GOING TO THE NEXT PAGE DETERMINE WHICH BASKETBALL SYSTEM YOU HAVE. IF
YOU HAVE A “FT” SERIES BASKETBALL GOAL (for example B3015,B3016 or B3017) SKIP TO PAGE 7.
FOR ANY OTHER GOALRILLA BASKETBALL SYSTEM CONTINUE TO PAGE 6.
NOTE: To find your model number refer to your Basketball systems owner’s manual. Alternatively,
the Goalrilla basketball units will have a sticker on the back of the pole with the model
number (starts with the letter B).
Left Side
Figure 2
6
13
Detail 3
Right Side
5
 Loading...