

GOALRILLA GAMEMAKER TORCH Owner's Manual

O W N E R ' S M A N U A L
MODEL NUMBER:
Please Do Not Return This Product To The Store!
®
Contact Escalade Sports customer service department at:
Phone: 1-888-USA-GOAL Toll Free !
Fax: 1-866-873-3536 Toll Free !
E-mail: Training@escaladesports.com
Mailing Address:
Escalade Sports
PO Box 889
Evansville, IN 47706
Please visit our Web site at: www.Goalrilla.com
ON-LINE TROUBLE SHOOTING TECHNICAL ASSISTANCE
ON-LINE PARTS REQUESTS FREQUENTLY ASKED QUESTIONS
ADDITIONAL ESCALADE® SPORTS PRODUCT INFORMATION
2L-7589-00
Escalade® Sports products may be manufactured and/or licensed under the following patents.
6419596, 6179733, 5919102, 5071120, 4798381, 4424968, D326128
Additional patents may be pending. One or more of the listed patents and/or pending patents may cover specific product.
2014 Escalade Sports
GM0001W -
GAMEMAKER TORCH
2. If accidentally left at the temperatures above, allow it to reach room temperature before inflating.
3. Do not drag your Gamemaker Torch on concrete, asphalt or gravel.
4. Battery and Charger not included. Please refer to the Battery purchasing card included with your
Gamemaker torch for purchase information.
5. Check bags and all pockets before assembling or ordering parts.
6. Save these instructions and your proof of purchase (receipt) in the event that the manufacturer has to be
contacted for replacement parts.
PLEASE READ AND FOLLOW THIS MANUAL IN ITS ENTIRETY BEFORE USE. DOING SO WILL PROVIDE
HELPFUL HINTS THAT WILL AID IN GETTING MAXIMUM USE OUT OF YOUR GAMEMAKER TORCH.
1. Do not store in temperatures below 32⁰ F. or above 100⁰ F. be aware of keeping your Gamemaker in
Trunk of cars or garages that could reach these temperatures.

2
PARTS LIST
Description
Part #
Qty.
GM0001W - GAMEMAKER TORCH
4A-7990-00
4A-7991-00
4A-7992-00
8S-7704-00
2S-9256-00
4A-7894-00
4A-7994-00
3A-6067-00
3A-6068-01
4A-7995-00
3A-6068-00
2L-7589-00
2L-7590-00
4L-8224-00
TORCH BASE
TORCH LIGHT
TORCH BAG
“L” STAKES
“U” STAKES
SAND BAGS
BATTERY BAG
SMALL PUMP
NOZZLE
METAL RING ASSEMBLY
HOSE
MANUAL
INSTRUCTION CARD
BATTERY PURCHASING CARD
1
1
1
3
3
3
1
1
1
1
1
1
1
1
*Battery and Charger NOT INCLUDED.
STEP 1:
Transporting the Gamemaker
Torch onto a level surface.
Open the three legs into standing position.
STEP 2:
Pre-Inflation Position for
Gamemaker Torch.
3
INFLATING THE GAMEMAKER
After carrying (Do Not Drag) Gamemaker Torch bag
to desired location, place the bag on the ground
(Make sure not to place Torch on rocks, or other
rough surfaces). A quick setup guide can be found
connected to the inside of the Gamemaker bag top.
Please do not lose it. Unpack and separate all items
from the carry bag and unfold inflatable stanchion.
STEP 1:
STEP 2:
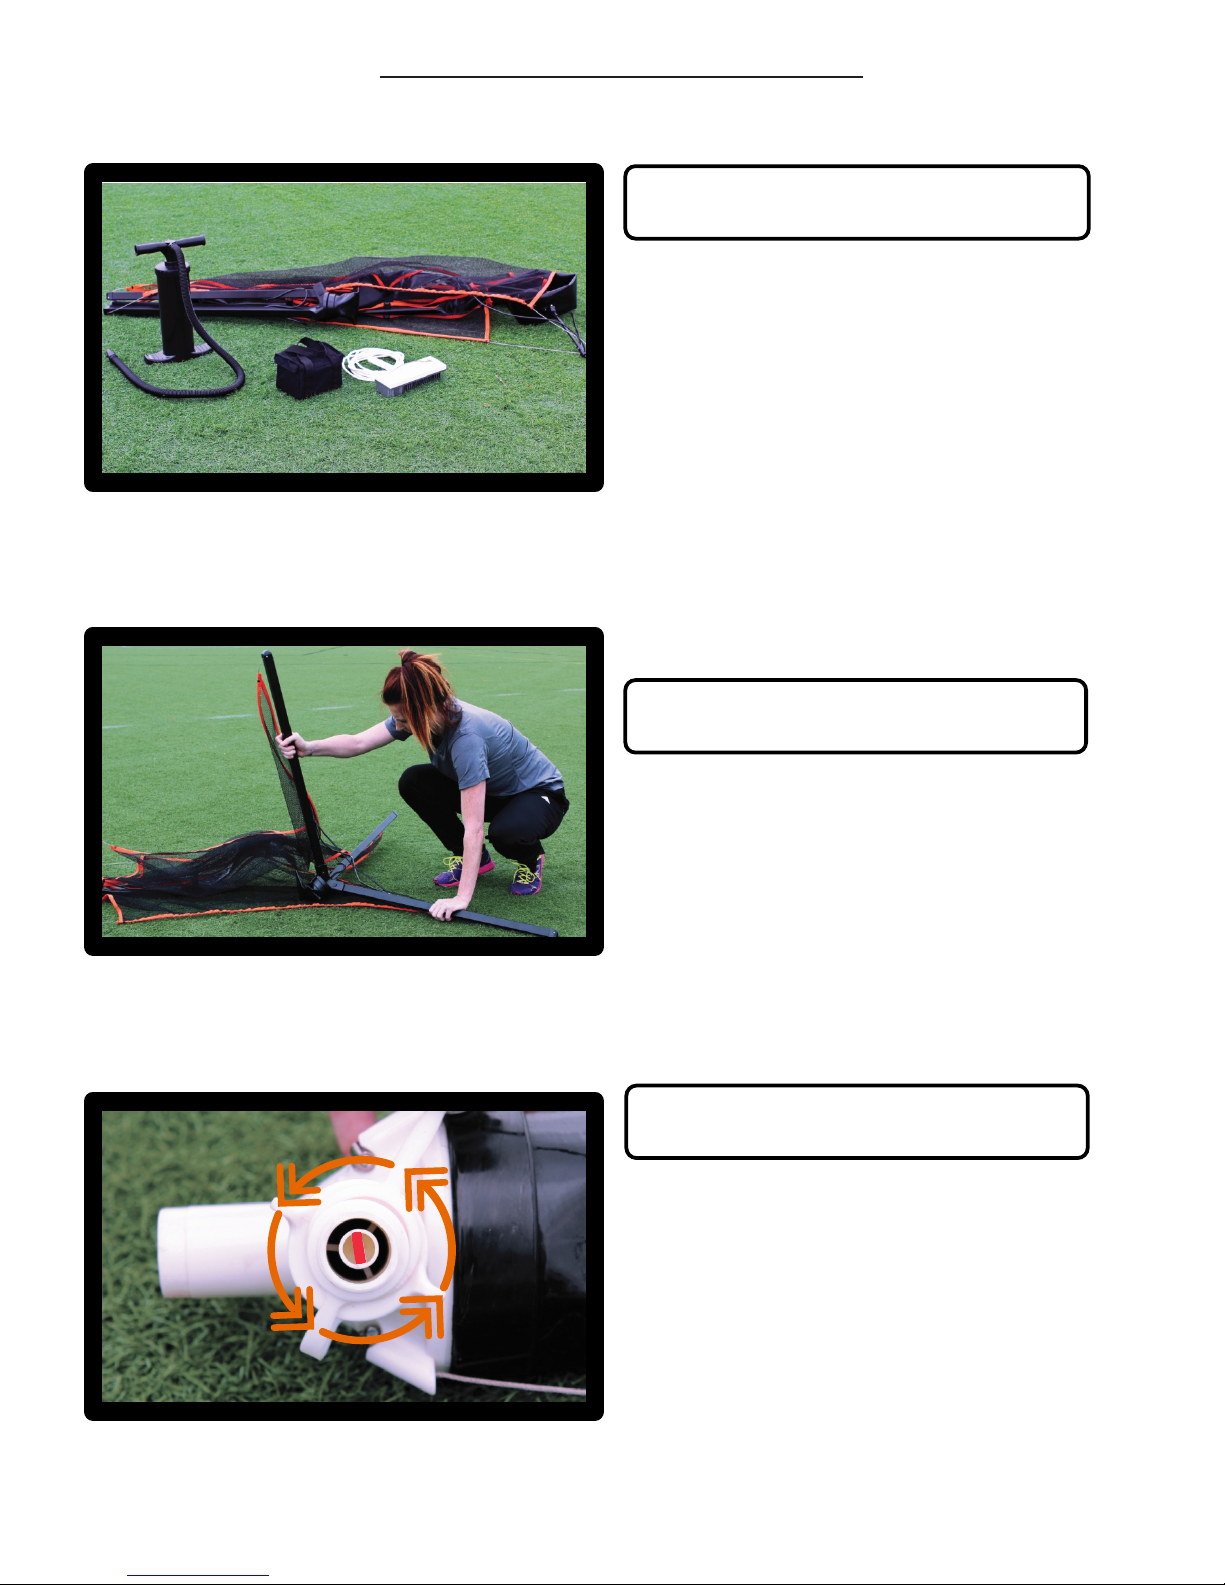
To inflate the Torch, first unscrew the cap located on the
valve see Picture on the Left. Then grab the inflation
valve (The piece with the stripe on the top) and red
push it inward. After doing this, it might be possible to
either twist it clockwise or counterclockwise. To inflate
the Torch, turn counterclockwise and then release. The
nozzle should spring outwards. It is now in the inflate
position. The valve will remain in this position until it is
time to deflate the Torch.
STEP 3:
Properly Setting the Valve
for Inflation.
 Loading...