

Gnom SUPER Operator's Manual
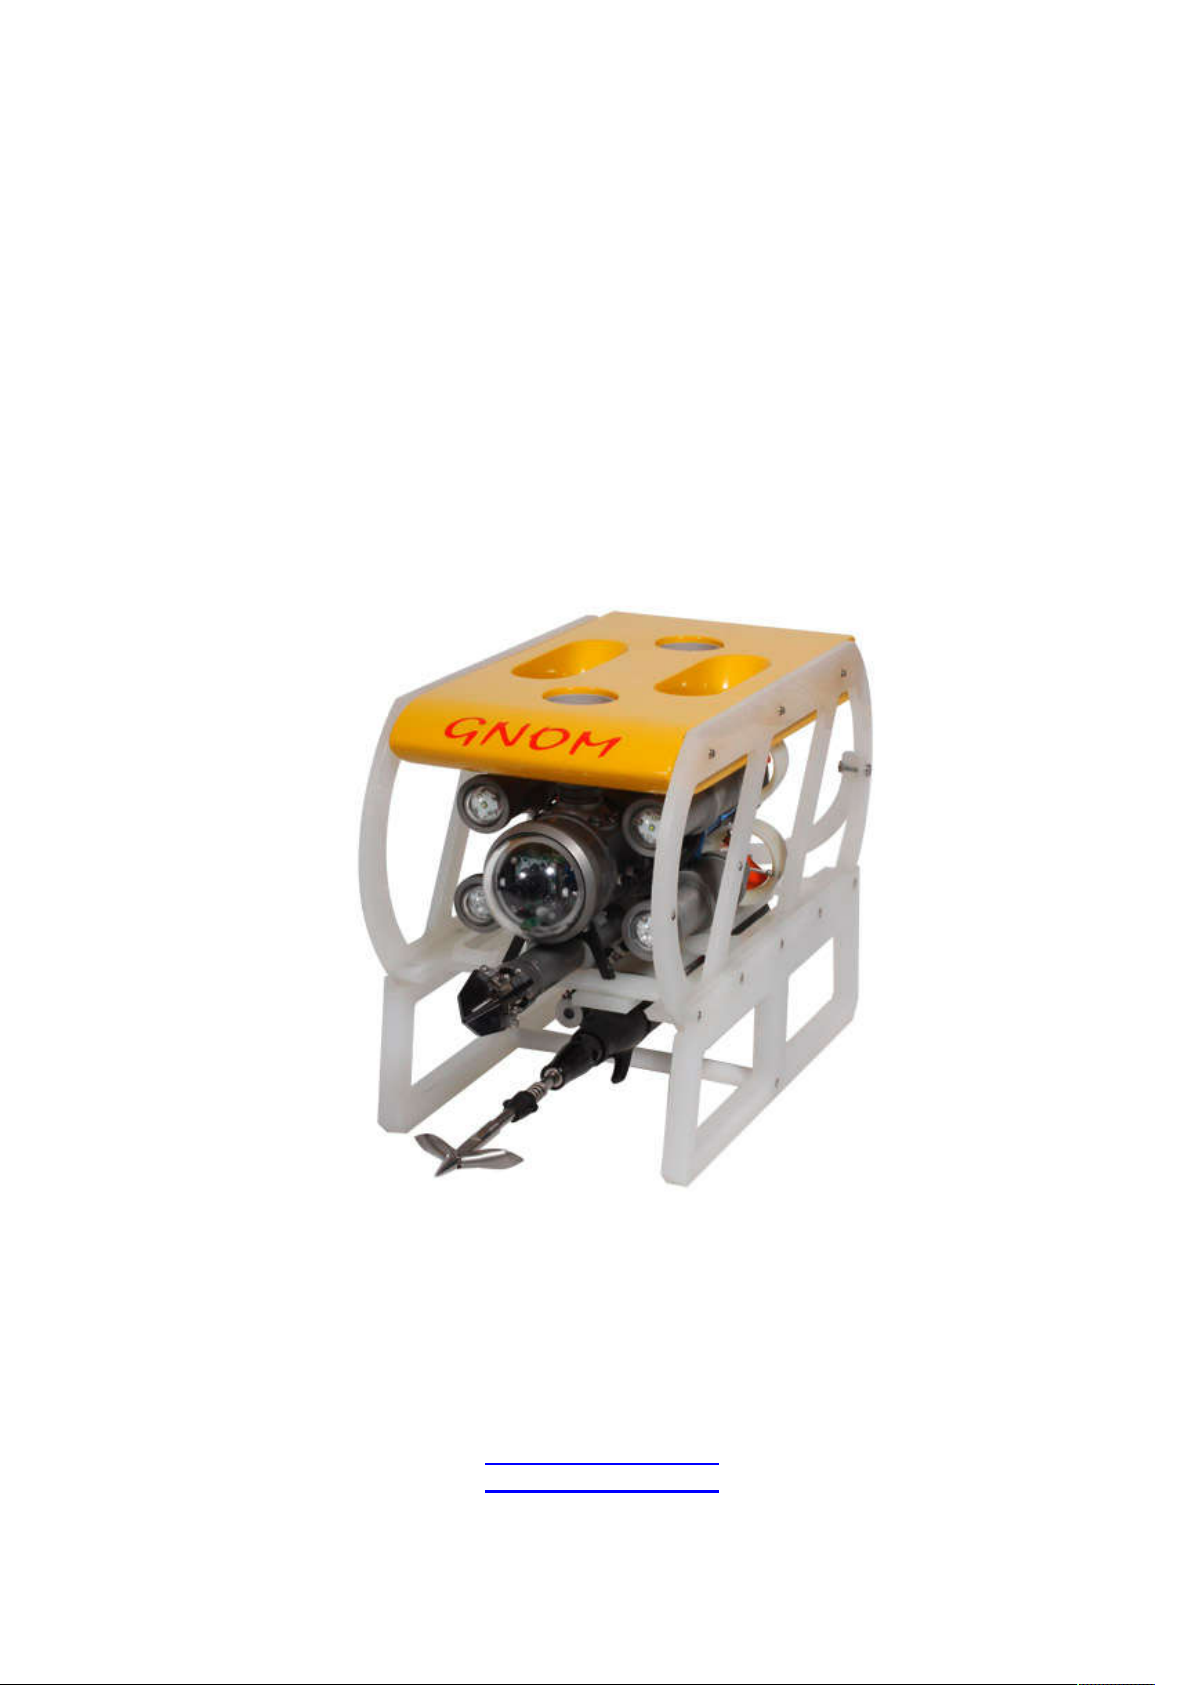
Underwater remotely
operated vehicle for inspections
GNOM SUPER
Operators manual
Underwater robotics LTD.
Nakhimovsky pr., 36, 117997, Moscow, RUSSIA-Slovakia
Tel/Fax +7(499)1292045
info@gnom-rov.com
http://gnom-rov.com
2
TABLE OF CONTENTS
Warning !!!
Voltage on cable 180VDC!
Do not touch the cable in a water during operation!
If any damages happen on a shield of cable it must be repaired or
changed !
Attention! AC power maximum 240V !
1. Description 3
1.1 Purpose 3
1.2 Design 4
1.3 Technical specifications 6
2. User’s manual for operation with GNOM 7
3. Keys and Buttons at the control panel 9
4. Screen modes 13
5. Installation of additional equipment 14
6. Calibration 15
7. Maintenance operation 16
8. Safety requirements 17
9. Warranty statement 18
10. Examples of linking modules 19
11. Appendix 22
V10/2015

3
1. DESCRIPTION
1.1 PURPOSE
Remotely operated underwater vehicle GNOM is intended for inspection of underwater
wrecks and other objects by videocamera.
The modern computer and telecommunication technologies are used in the device, and
made it easy in handling, compact, light and inexpensive.
These solutions allowed to use thin (only 6 mm diameter) and flexible communication cable
for transmission data, power and video signals to/from vehicle. The special Kevlar threads
have been used to improve the cable's tensile strength. Because of this fact, the device
keeps the highest degree of stabilization what is very important for inspections. The vehicle
has a good maneuverability and can easily turn on the spot.
High-effective electric motors with magnetic couplings and hi-tech electronics are used in
the vehicle, provide the fast speed of the GNOM with low power consumption.
One of the most important features of this device is a possibility to operate it from PC and
via Lan/Internet.
The GNOM, in essence, an underwater helicopter with the video-camera which moves in
any direction according to the operator's instructions.
For update info please visit our web site www.vftech.sk
V10/2015
4
1. DESCRIPTION
1.2 DESING
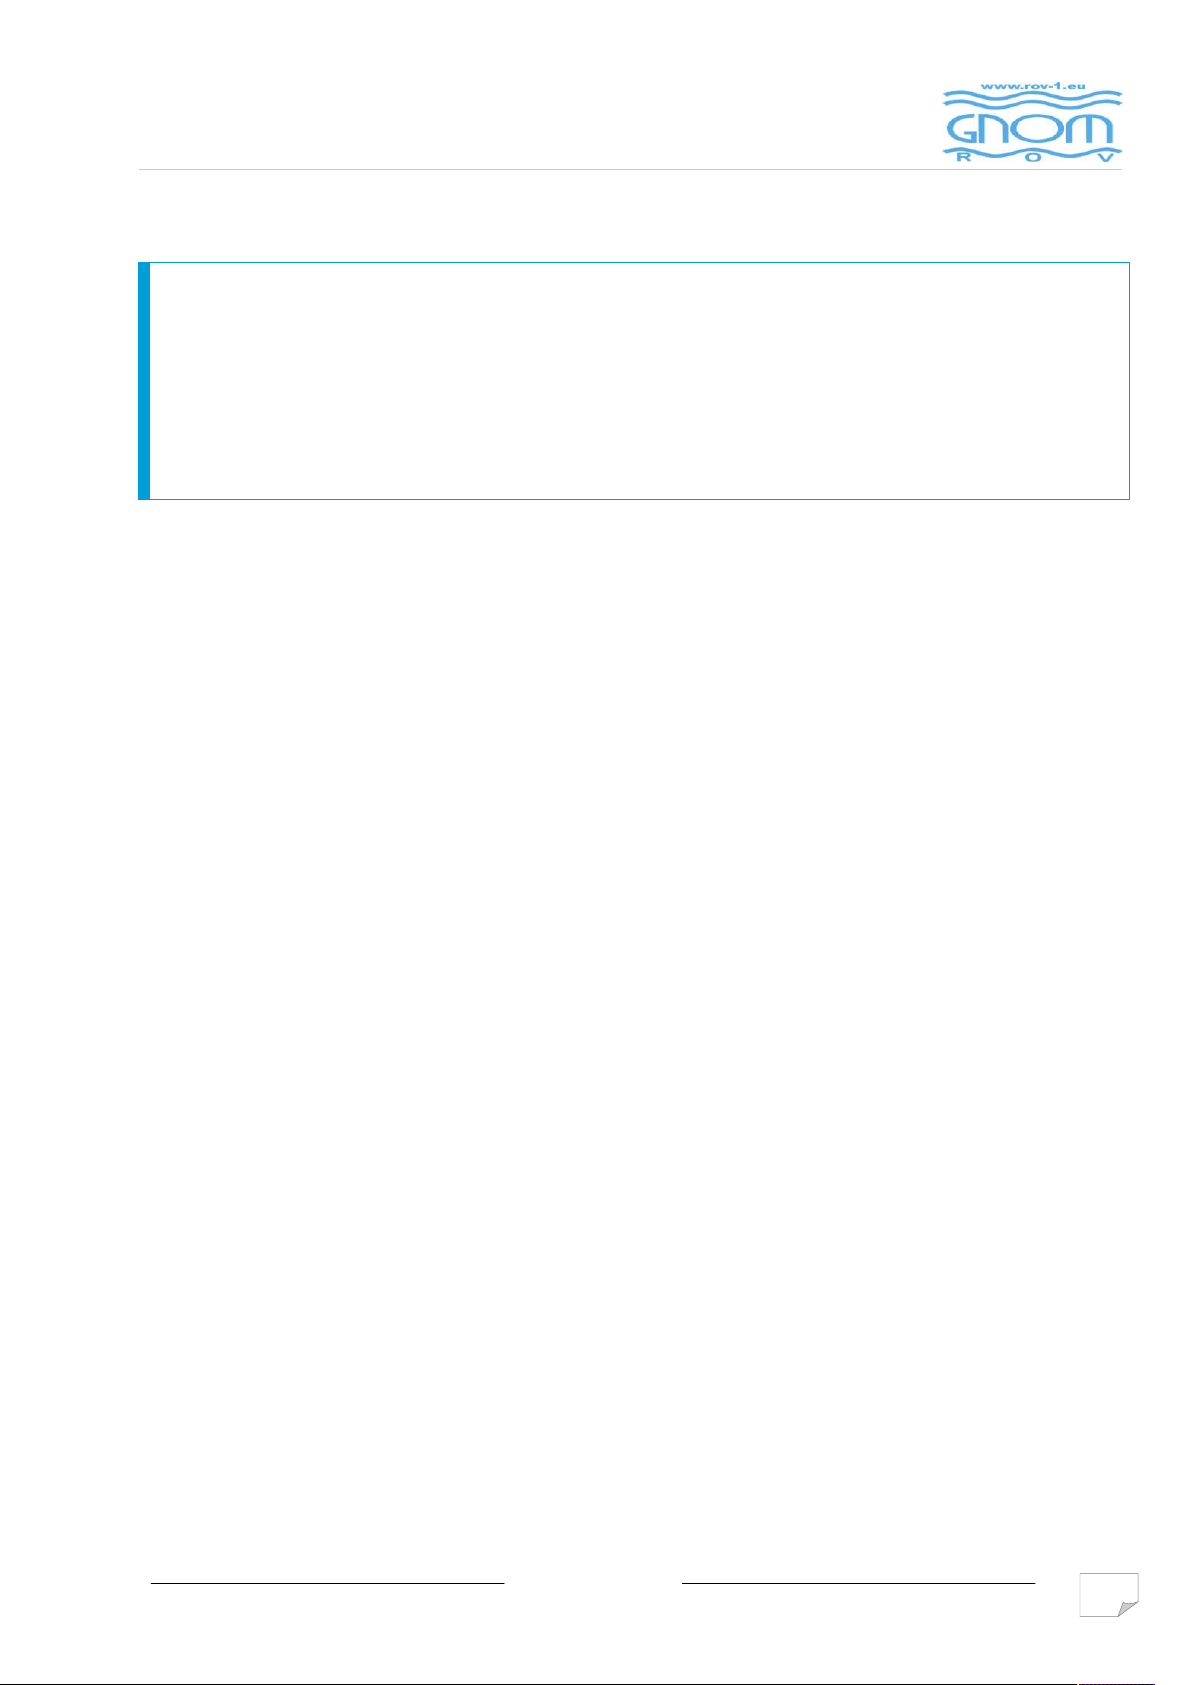
ROV GNOM Super full complete set + options
1 – ROV SuperGNOM 6, 2 – Control box waterproof case integrated, 3 – hand reel with sleep ring, 4 – joystick,
5 –LCD monitor 15", 6 – grabber, 7- underwater speargun with laser, 8- sector sonar, 9- USBL positioning system
ROV GNOM Super basic complete set
1 – ROV GNOM Super
2 – protection polypropylene frame
3 – Hand reel with tether
4 – surface control/power box with joystick
5 – LCD monitor 15“
6 – 2x waterproof cases
Main features
Color High Resolution video-camera with tilt servo and digital zoom
6 thrusters, adjustable speed
Slow/fast mode, tilting vehicle mode
LEDs lights
Flexible thin cable
Device is fitted out with the depth gauge, autodepth mode
Heading (compass), autoheading
Videotext overlays with graphics
On screen menus
Easy game joystick control
Digital data channel
PC interface, Lan/Internet web video/control (option)
All packed in 2 cases, hand carried
V10/2015
5
1. DESCRIPTION
9
4
14
8
5
11
10
6
12
13
3
2 7
1
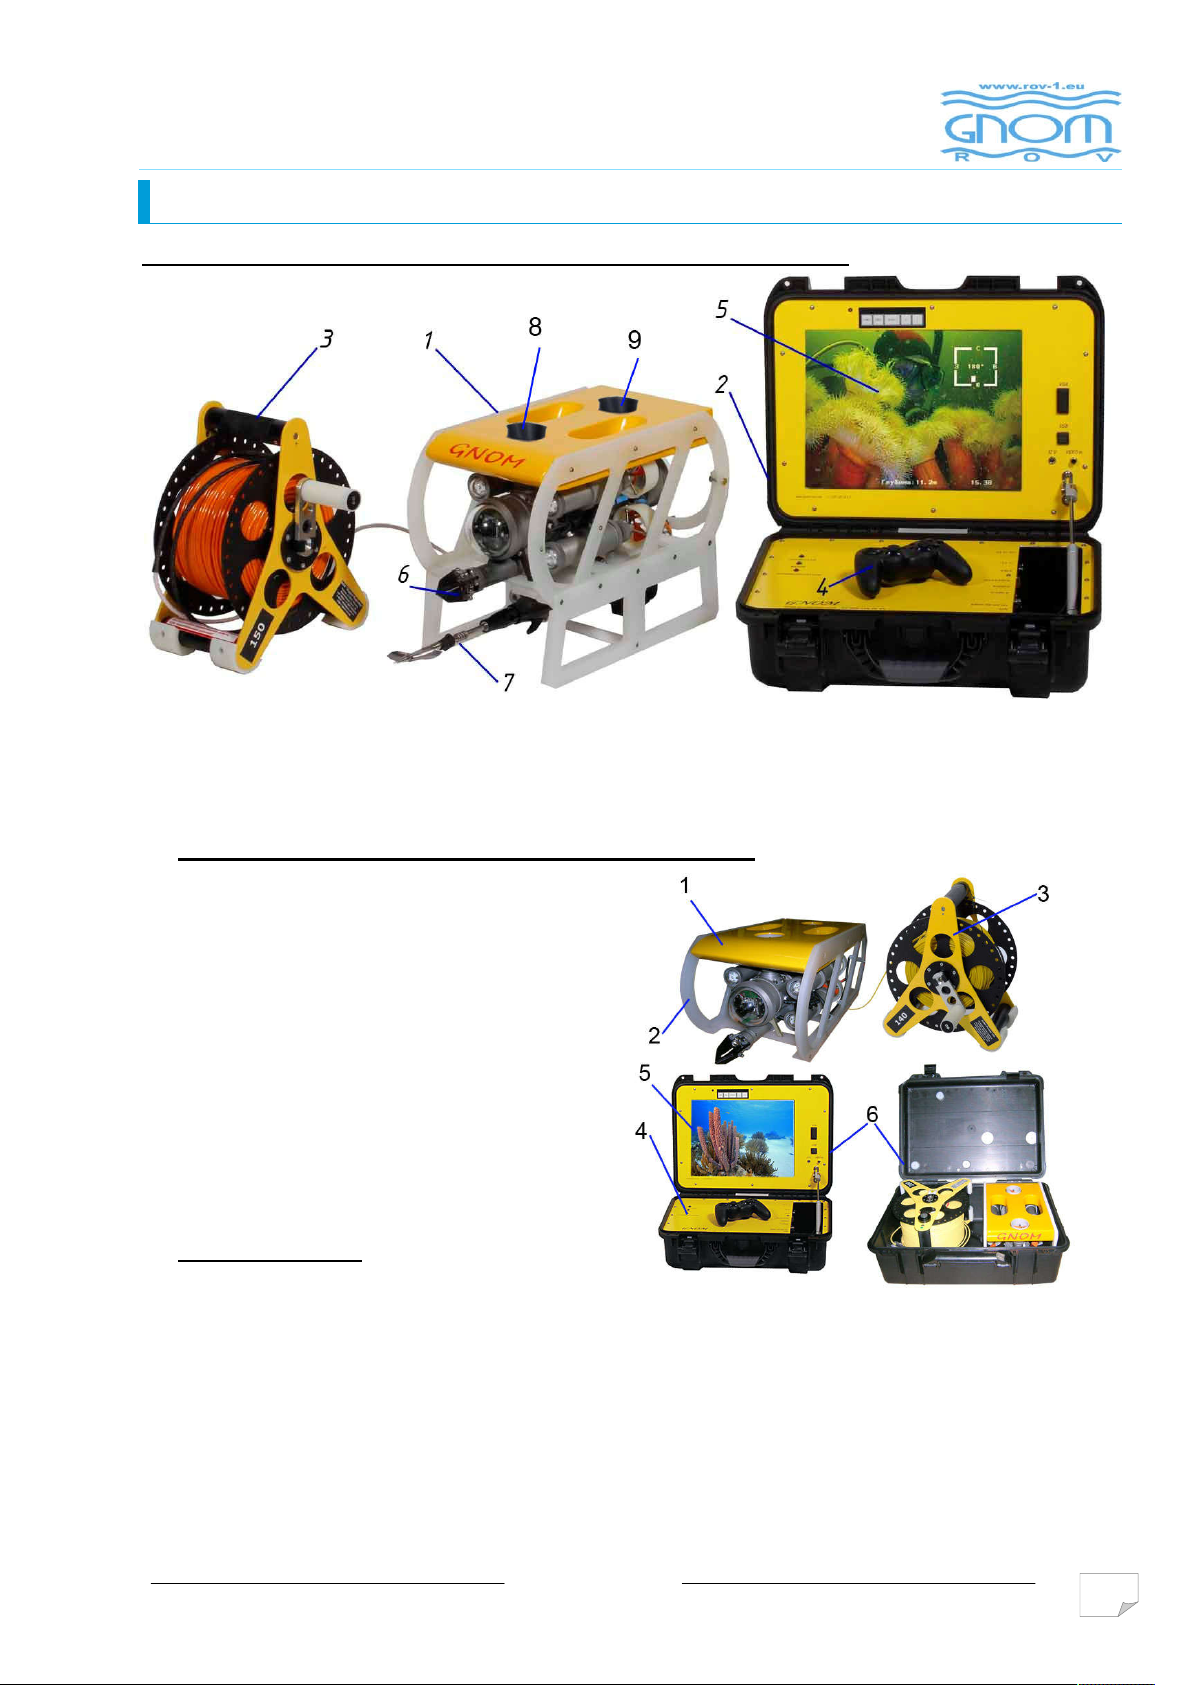
The underwater vehicle contains three aluminium cylinders – the front cylinder 1 , the main
cylinder 2 and the back cylinder 3. The vertical thrusters 4 and 5 are located between cylinders.
In the front part there is a fastening 9 for main camera. In the back part there is a fastening
10 for back camera.
Composit video-signal from cameras – 720 TV lines and sensitivity 0,1 lux is transmitted to the
LCS monitor input or another video device.
View from individual cameras is switched using the controller.
4 horizontal thrusters 6 with LED in the front part 7 are fixed on main cylinder. Plastic buoy 8
installed in the upper part of the protective frame 11 facilitate his buoyancy on water.
6-thrusters ROV version has tilt function and provides vehicle‘s inclination in vertical direction
up and down to 45o - 60o, what increase the field of vision. In the back part of thursters there
are axes with screw propellers 14.
The 4x14 LED lights are on each side of the vehicle, in the front of horizontal thrusters.
Brightness is adjusted from the control panel.
All the electrical part ( the power supply's converter, process unit, electronic compass)
a camera are put into main aluminium hull. On the left in back part of vehicle, the depth sensor
is installed. In the bottom of the module connector is positioned to connect the communication
tether.
V10/2015

6
1. DESCRIPTION
Thrusters are DC motors which are put into the aluminium halls 12. The rotation transmision to
the screw propeller is realized with aid of magnetic coupling disks.
One disk is fastened at the motor's shaft in the body, and the other one – at the screw
propeller's shaft inside the cone-shaped head 13, which is filled up with water. The cone-shaped
head may be removed by operator for cleaning ( see manual).
The vehicle is connected with the operators console via thin cable, which transmits power
voltage, operation instructions, data and video signal from the vehicle.
The cable with diameter 6mm is stregthened by Kevlar threads (breaking effort is 90kg) and by
additional polyehylene shield. The cable length is max up to 250m. To compensate the weight of
vehicle and give neutral buoyancy to it, the float made of foam polysyren is used, and it is put
in front part of vehicle. Similar floats can be put on the cable to change the neutral buoyancy to
little positive buoyancy. Maximum operating depth of vehicle is 200m.
Using the control pads and joystick the operator can move GNOM forward-backward, turn to the
right – left, up – down; adjust the thruster speed and the lights brightness. All data is displayed
on the monitor in "TV-text" mode. By pressing one of the buttons on the joystick the operator
can pass to the menu of tuning up some vehicle's functions – calibrating of the depth sensor
and the compass as well as some other functions.
Control Panel "Sony PS" is connected to the control and power module installed in a
waterproof case in which also 15 "monitor is built. The power supply operates from 100 to
230 VAC or 12 VDC.
1.3 TECHNICAL SPECIFICATION
Speed:
horizontal motion, up to 1,5 m/s
vertical motion, up to 0.5 m/s
(above numbers depend on a length of pooling cable)
Max operating depth 150 m
Power voltage 100-230VAC or 12 VDC
Operating temperature range from -5…+45°C
Operating environment humidity, up to 100%
Weight of the vehicle 6 kg
Full weight of the system 25 kg
Dimensions of vehicle 330x180x160mm
Cable:
diameter 5 mm
length up to 250m
Options:
Rear camera with LEDs (color or b/w with IR lights)
Additional lights
Laser pointers
Grabber
Slip ring cable reel
LCD 8-15" built in case
Sector sonar Micron, Tritech
V10/2015

7
2. USER’S MANUAL FOR OPERATION
2.1 Deployment
1. Before using, please, check up all parts of vehicle especially propellers, cable and dome. Clean it if it is
necessary. Check propellers rotation by finger.
2. Plug in 3-sockets connector to reel, power and video cables to monitor.
WARNING!!!
At use of the built in monitor before its connection it is necessary to
weaken a clamp!
Also AC power cable (if you work from 100-230VAC).
Only for reels with no slip ring connector:
Before connect the reel, please, pull out the cable the length you need.
Connect black cable from control box to the connector on a reel.
To pull out cable longer during operation you should switch power OFF, disconnect black
cable from reel, then pull out the cable.
WARNING!!!
Do not rotate thrusters on air!
Do not switch lights on a full power on air!
Be very careful with cable, do not:
- stand on it;
- press it;
- twist it.
- voltage on a cable is 180VDC! If any damages happen you must
repair or change the cable.
Set switch 230V ON (UP position).
3. After power ON you see message WELCOME. GNOM is ready for operation.
If you use GNOM in a sea than should do GNOM heavier. For that you need to open plastic pipes
which are under the GNOM and fit pieces of metal (the best is lead).
4. Operation.
WARNING!
Do not rotate thrusters on air!
Do not switch lights on a full power on air!
Put the vehicle into the water. To start operation press key HOME (MODE for wireless) on
a joystick
All control functions are displayed on a console draw (see below).
V10/2015

8
USER’S MANUAL FOR OPERATION
# To move vehicle Forward/Back and turn Right/Left use right joystick. You can adjust speed
gradually (128 grades) pressing the joystick. The direction and speed are indicated on an overlay.
# To move vehicle Up/Down use left joystick. Also press left joystick to adjust the Jump mode.
# Slow mode (SLOW). Press right joystick and adjust power gradually (50%, 75%, 100%).
# Simultaneously press X(3)+ R1 to change the intensity of the front lights ( LOOP : 0%
100%, 100%. If press X(3)+R1+ R2 simultaneously 100% brightness turns on.
( Simultaneously press X(3)+ R2 adjust rear lighters – if it is mounted )
# Control the GRABBER (if this is part of device) by keys R1/R2
# To tilt cam Up/Down press L1/L2 pads. If press L1+L2 simultaneously camera goes to the
median position.
# Jump mode allows to push vehicle slightly for a distance 30 – 50 cm them stop. To chose the
jump direction press arrows (Left/Right, Up/Down). To adjust the jump power use left joystick.
# By key SELECT switch - active forward/back camera
# By keys SELECT+X(3) switch-on/switch off laser
# Autodepth mode. Press key ▲(1) to fix the vehicle at the depth you needTo change the depth
use left joystick. Autodepth mode and depth are indicated on an overlay.
# Autoheading controls ON/OFF from the «Start» key (version: left joystick to left – ON, to right
OFF ). You should select forward speed then switch ON autoheading. Autoheading mode holds the
speed and direction.
# You can choose the menu language (Russian/English)
5. Finishing the operation
To finish the operation switch power OFF then disconnect cables and pull into the reel.
Try to avoid nods and twisting of the cable.
After operation please clean propellers and shafts of motors and wash the vehicle in fresh
water.
WARNING !!!
Special Functions
Sleeping mode (Power Saving Mode)
In order to save power and lengthen the using life of batteries, a power saving system is designed in
the wireless joystick. The joystick turns into sleeping mode (power saving mode) under the
following conditions:
A. If there is no operation within 30 seconds since the connection between the controller and the
receiver, the controller will turn into sleeping mode (power saving mode).
B. There is operation since the connection between the controller and receiver. If there is no
operation for 5 minutes, the controller will turn into sleeping mode (power saving mode).
Press【HOME】button can stop this sleeping mode (power saving mode).
V10/2015
9
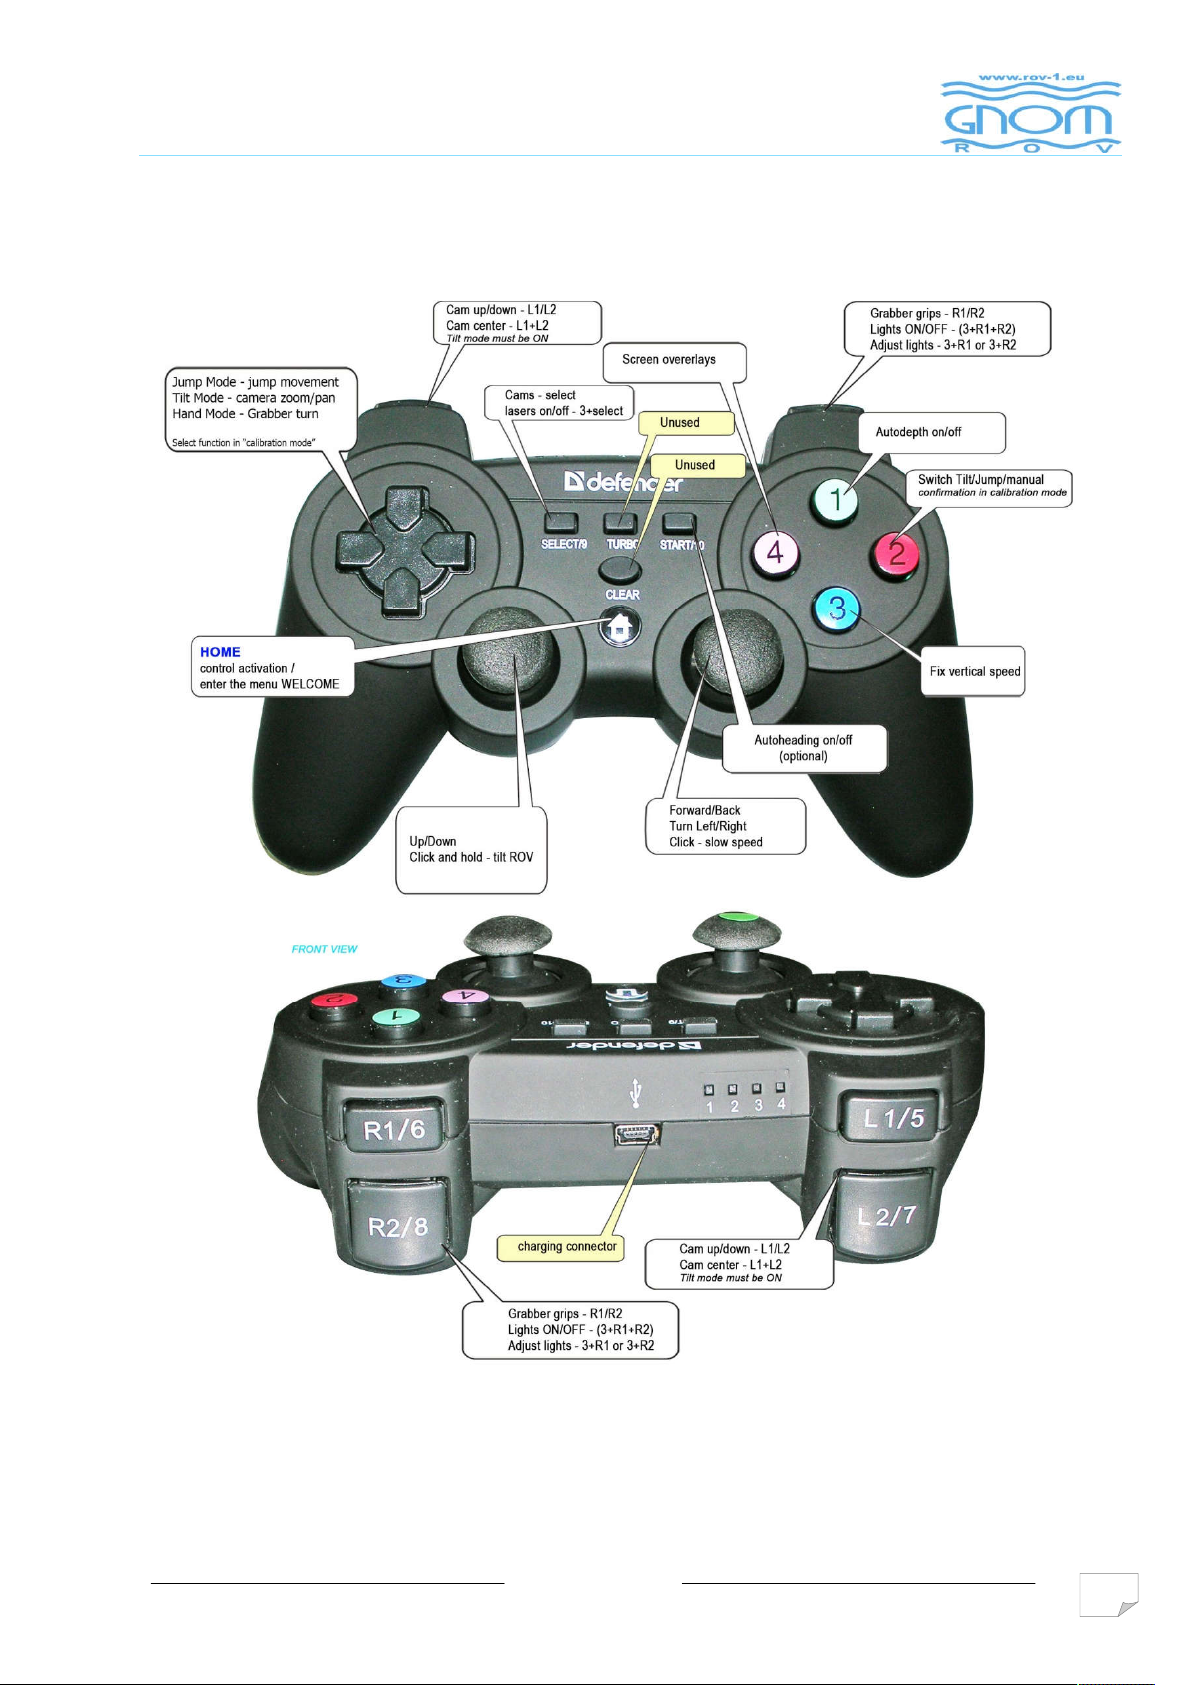
3. KEYS AND BUTTONS AT THE CONTROL PANEL
V10/2015
 Loading...