

GnGelectric
www.gngebike.com Copyright 2012
GnGelectric®
SIDE MOUNTED ELECTRIC BIKE CONVERSION KIT
MY(GX) 1016Z3 motor
User Manual
Thank you for buying our goods!
Please read thoroughly before you start converting your bike into electric.
-Never hit, drop the motor, or drop it into water.
All you need are: a bike with one gear only, electric bike conversion kit, a
24V/36Vbattery
The kit include:
1x24V/36V 350w motor
1x Mounting plate +bolts
2x Brake lever
1x Controller
1x Smart charger
1x Chain
1x Throttle
1x 3 in 1 Headlight
1x Freewheel adapter
1x Freewheel 16T
1x 18mm axis
1x Left hand bar
Things you should beware of:
1. Before you install the kit, you should check whether the kit has been damaged
during transport.
2. The motor should be mounted securely and you should examine the motor
regularly to prevent the chain worn out.
3. The two freewheels should be mounted on same plane. Otherwise, there will be
noise and the chain may wear out easily.
4. Add some lubricating oil regularly to extend the lifespan of the motor and reduce
noise of the motor.
5. To ensure the motor is tuned suitably. You should check the idle current (2.5-2.8).
6. Avoid overloading the motor. Otherwise the motor may burnt out. (Such
man-made damage will not count into warranty provide.)
GnGelectric
www.gngebike.com Copyright 2012
Installation guide
- Preparation
1. Check if the kit is damaged.
2. Check if the existing brake can handle the new power.
3. Prepare basic installing tools.
- Step 1:Install the new freewheel
1. Take off the rear wheel, examine the axis to see whether the original bike axis
should move towards the gear side for 0.5cm or replace the longer axis we
provided.
2. Screw the freewheel adapter we provided into the original bike freewheel,
and then screw the 16T freewheel we provided into the part into the
freewheel adapter. (Beware that the two freewheel should be screwed in the
same direction.)(There is a metal ring included in the adapter. Normally, you
won’t need it.)
3. Reinstall the two chains, connect the Inner one to the crank and the outer
one to the motor, reinstall the rear wheel.
4. The new freewheel should have about 2mm gap away from the bike frame.
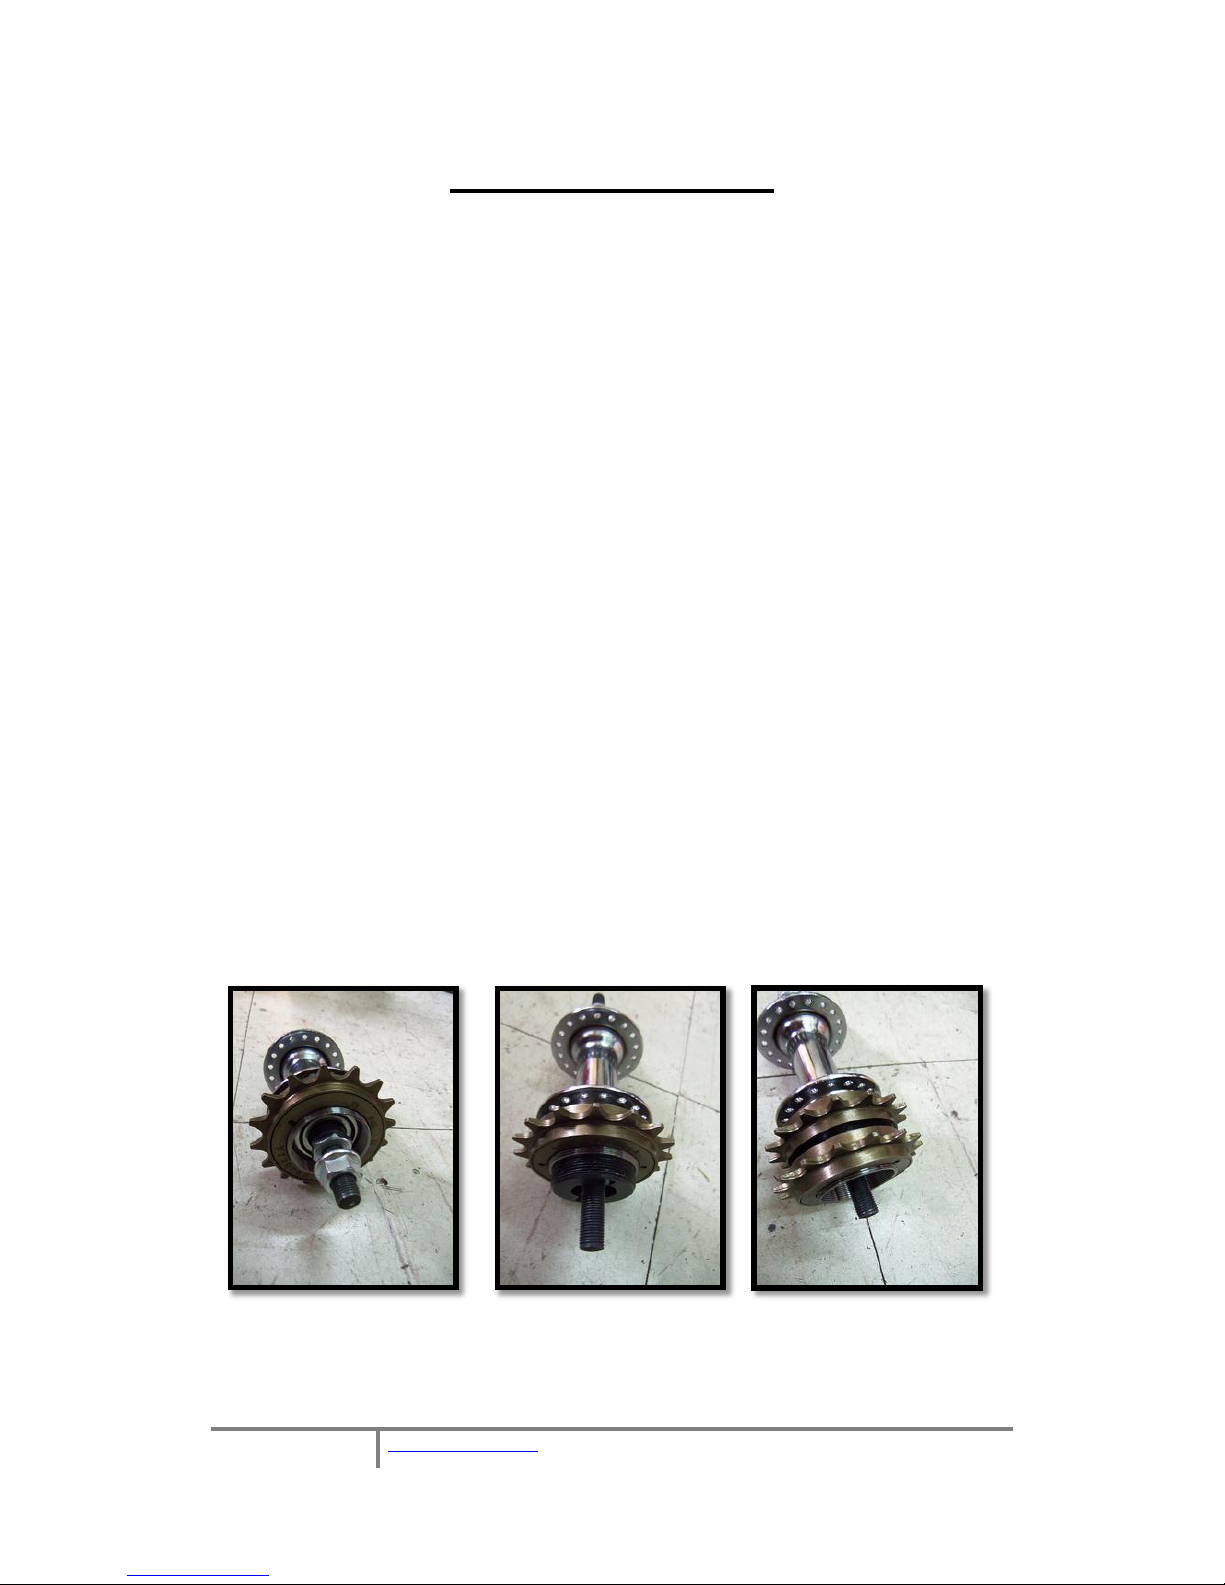
Below is the photo description.
1. Original bike axis and the original freewheel
2. Screw on the freewheel adapter.
3. Screw on the 16T freewheel we provided.

GnGelectric
www.gngebike.com Copyright 2012
- Step 2.Intall the motor
1. Take out the motor and mounting plate we provided, put them on the bike
frame.(Do not secure them now , easier for later adjustment)
2. After put back the chain, push the whole motor and mounting plate towards
the right hand side until the chain is tightened, secure the whole part.
3. Adjust the motor carefully to ensure the motor and freewheel lie on same
plane.
- Step 3. Connecting electric wire
- Step 4. Charging
1. The batteries should be linked together to charge if they are 12v.
2. The charger is 24v12ah
3. Link the charger with the batteries first, then plug it to the socket.
4. When red light is on, the batteries are charging.
Throttle ----Thin blue, red, black Brake lever----Thin black, yellow
Lock----Thin blue, red Motor----thick red, blue
Batteries----Thick red, black

GnGelectric
www.gngebike.com Copyright 2012
5. When green light is on, the batteries have been charged.
6. If two light on together, it means that the batteries have been charged
basically, you can also use the batteries now.
7. If the red light always on, you should take the batteries to check whether
they have damages.
- Step 5.Share your electric bike
After you have finished the e-bike conversion, you can share your experience
and photos in our website: www.gngebike.com. You can also see other e-bike
converted by other buyers.
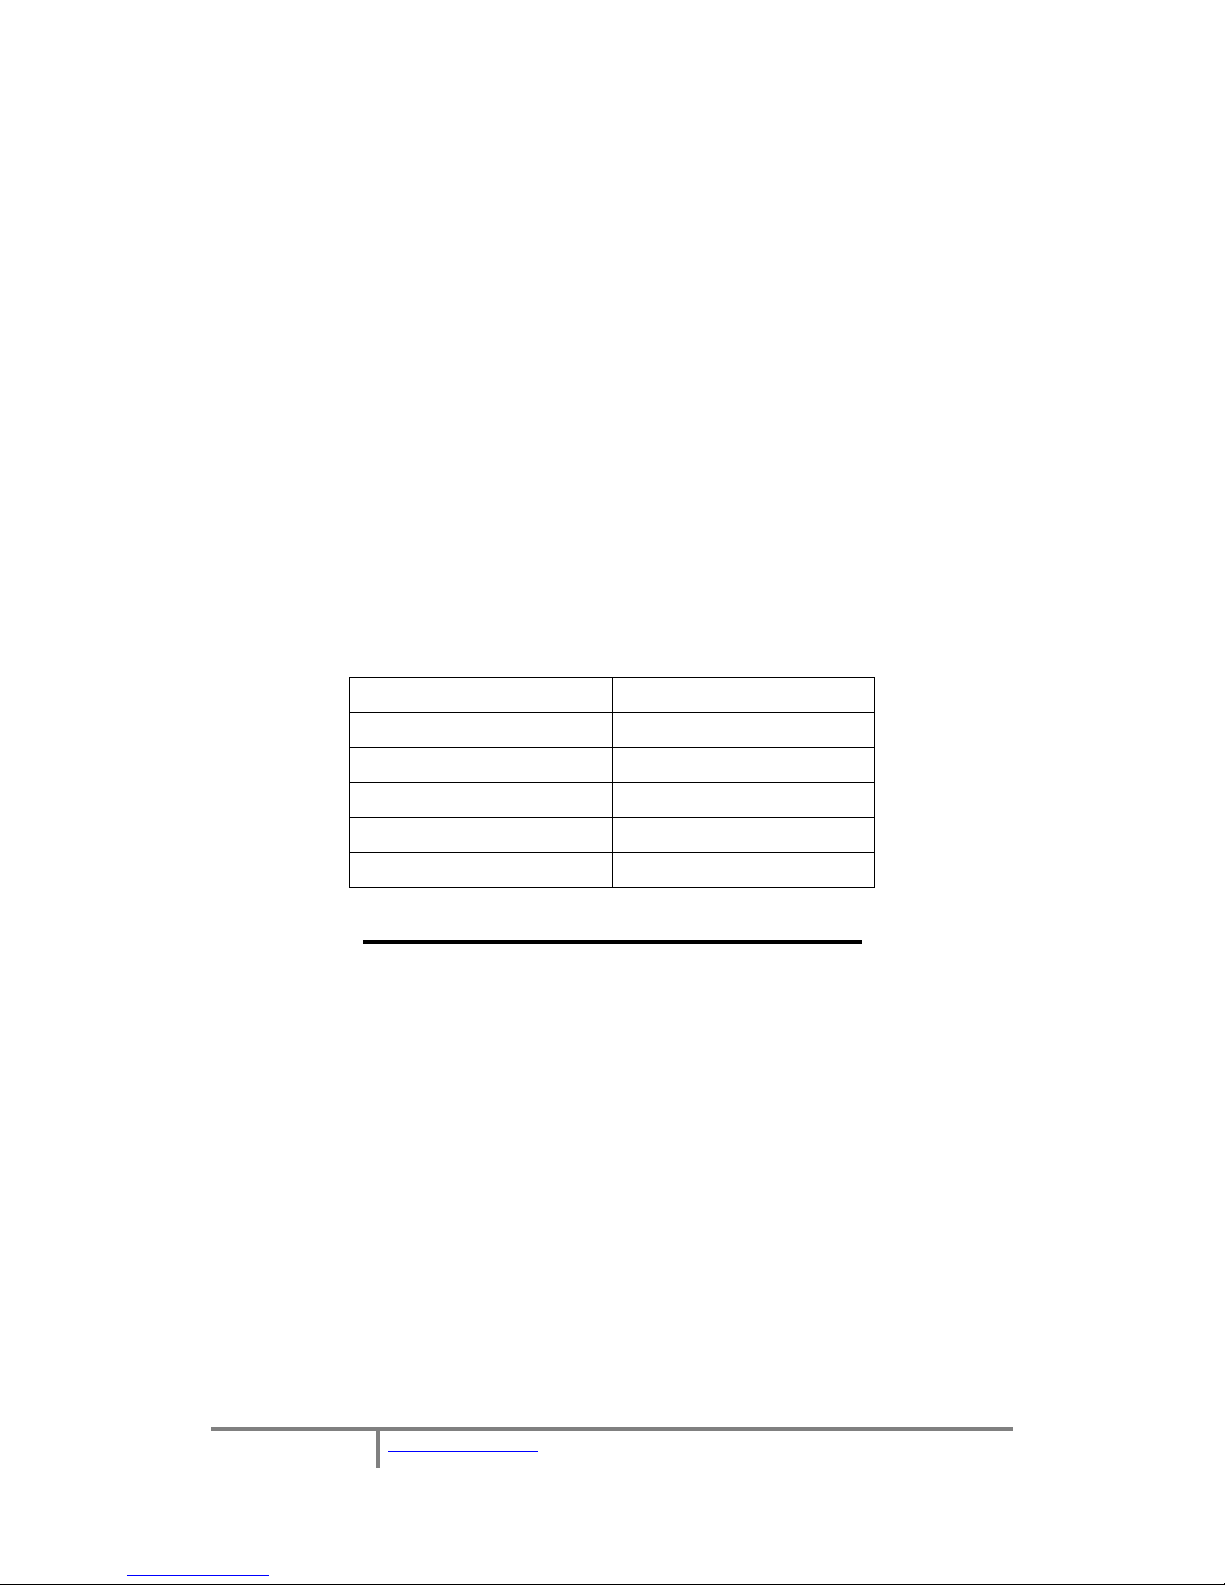
Below is the motor specification.
Motor Specification
MY1016Z3
Rated power
350W
350W
Rated Voltage
24V DC
36V DC
Rated rpm
3000RPM
3200RPM
No-load rpm
3850RPM
3850RPM
Rated current
≤18.70A
≤12.50A
No-load current
≤2.20A
≤2.0A
Rated toque
1.11 Nm
1.11 Nm
efficiency
≥78%
≥78%
Reducing ratio
1:9.87
HAVE A NICE DAY!
If you have any other enquiries, please feel free to contact us,
email: gngelectric@hotmail.com
Website: www.gngebike.com
 Loading...