

GMX GMXK150WHI Assembly Manual

ATV OFF ROAD - GMX SHIFT 150cc QUAD BIKE
ASSEMBLY MANUAL
Read and understand this entire manual before riding!
DO NOT RETURN TO STORE!
NOTE: Manual illustrations are for demonstration purposes only. Illustrations man not reflect exact appearance of actual procduct.
WWW.GMXMOTORBIKES.COM.AU
This assembly guide covers basic step by step instructions to assist you with assembly process. Products are always subject to further improvement,
which will cause some dierence between vechicle and this manual without further notice. W wish you happy riding!
UNPACKING
Please CAREFULLY remove all external packaging and metal frame packaging.
TIP: Metal packaging can be sharp so when unpacking please handle with caution.
CHECK FOR LOOSE PARTS
On most occasions your bike will come 90% assembled (depending on the model). Please go through all lose parts and check packaging that has been
taken out, to ensure no parts get thrown out so you can assemble your GMX Product.
- Be careful to follow fuel/oil ratio requirements and not put to much oil in the fuel.
- Always use clean fuel - Never use old Fuel.
- After your Bike has sat for a period of time the oil in the fuel can settle in the bottom of the carbie bowl so be sure to drain the fuel and
follow points in the trouble shooting to remedy.
- Do not overload the bike with more that the recommended weight capacity as this can cause undue wear/damage to the clutch.
WEAR SAFE
- Always wear a helmet.
- Wear protective clothing and gear such as goggles, long sleeves, long pants, boots and gloves/hand protection.
RIDE SAFE
- Never let children ride quad bikes that are meant for adults – even as passengers.
- Do not carry any passengers on quad bikes that are meant for one person.
- Quad bikes are not all-terrain vehicles so they cannot go safely on all types of terrain. Avoid riding on rough terrain or steep slopes.
- Ride on familiar tracks and beware of obstacles.
- Never ride under the inuence of alcohol/drugs.
- Ensure children are supervised at all times near any quad bike activity.
- Always carry a mobile phone or radio device so you can contact help in case of an emergency.
READ MANUAL
Ensure that you read and go over the manual and UNDERSTAND before assembling this Bike.
PLEASE NOTE: Minor assembly is required, but in the interest of your safety it is recommended that you have this bike assembled by a skilled
bike mechanic.

PLEASE READ AND UNDERSTAND ALL INSTRUCTIONS AND WARNINGS PRIOR TO ASSEMBLY AND OPERATING OF YOUR VEHICLE.
WARNING: This product is powered by a 4 stroke engine and comes with transport oil in the engine.
- THE OIL NEEDS TO BE DRAINED AND REPLACED WITH MOTORCYCLE OIL 10W/40 or 10W/50 IS REQUIRED
- IF THE OIL CHANGE IS NOT PERFORMED YOU MAY INTERNALLY DAMAGE THE ENGINE AND CLUTCH AND VOID YOUR WARRANTY
- DO NOT USE MOTOR CAR OIL
- DO NOT USE OIL WITH FRICTION MODIFIERS
WARNING
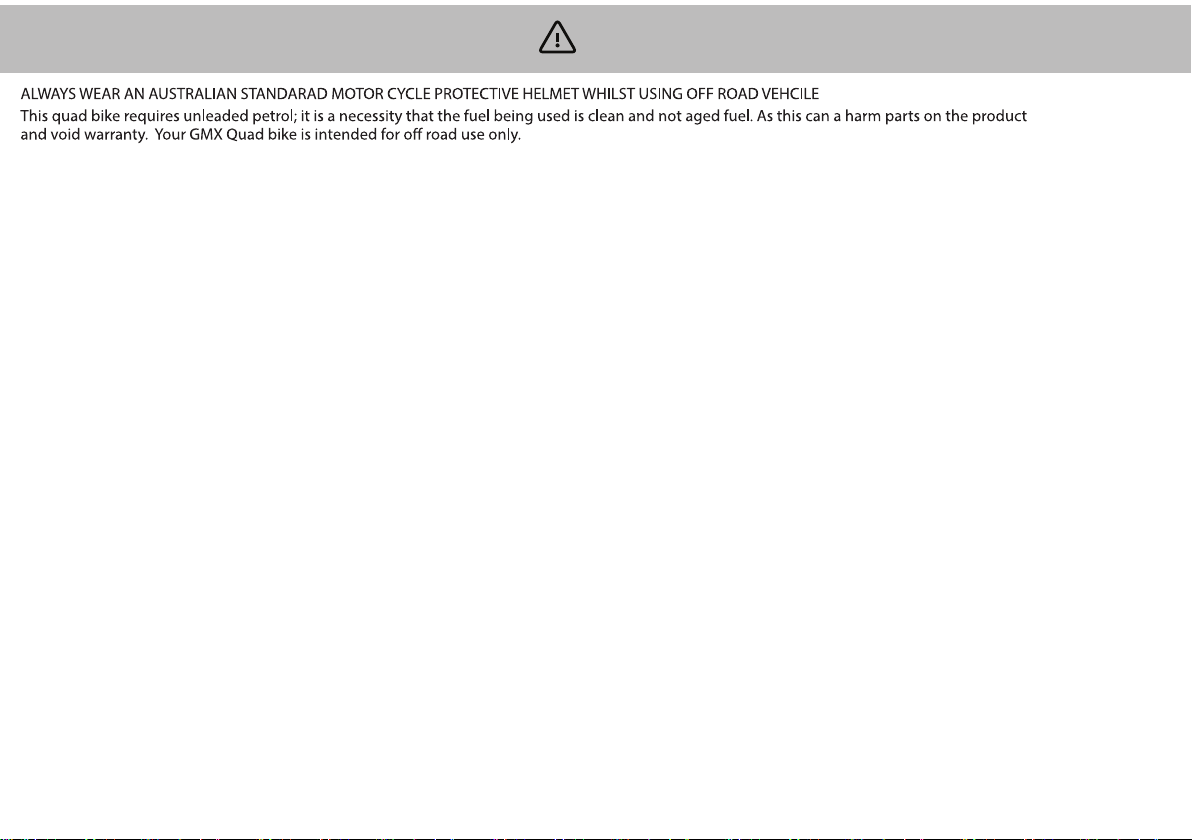
UNLEADED FUEL ONLY
Please use unleaded fuel
90 Octane or above
OIL WILL NEED TO BE CHANGED EVERY 3 MONTHS IN A HOTTER CLIMATE OR THE NOTHERN HEMISPHERE
- There is an oil drain plug located underneath you quad/dirt bike and is highlighted with an oil drain plug sticker. This is a 14mm bolt.
- DO NOT remove the other bolt located under the engine.
- Place an oil receptacle under the drain hole, undo bolt and let oil drain from the vehicle. Please note: Dispose of oil correctly
- Tighten bolt back up, remove dipstick (oil ll point) and ll the vehicle with suggested correct amount of oil required. Tighten
SWING TAG’S & WARNINGS
Swing tags have been placed on your vehicle for you to identify checks that are located within this manual. Once you have performed the
check required remove these swing tags and nylon loops attaching them to the vehicle.
MAKE SURE TO REMOVE THE SWING TAGS AND TAKE SPECIAL NOTICE TO REMOVE THE NYLON LOOP. The tags and loops that need to be removed
from this model
YOU MUST CHECK
THAT THE FRONT
STEERING IS ADJUSTED
CORRECTLY PRIOR
TO RIDING.
STEERING ADJUSTMENT x2 CHAIN ADJUSTMENT
YOU MUST CHECK
THAT THE CHAIN
IS ADJUSTED
CORRECTLY PRIOR
TO RIDING.
CHECK BRAKES
ARE ADJUSTED
CORRECTLY PRIOR
TO RIDING.
BRAKE ADJUSTMENT x3
ALWAYS LEAVE IN
THE OFF POSITION
WHEN NOT IN USE
OR REMOVE KEYS
KEY REMOVAL
ONCE SWING TAGS AND NYLON LOOPS ARE REMOVED YOU ARE ACKNOWLEDGING THAT THESE CHECKS HAVE BEEN
PERFORMED
There may be a “Spare Parts Package” within the carton so please check all of the packaging and DO NOT THROW OUT
GMX Motorbikes WARRANTY
GMX MOTORBIKES WARRANTY
Our goods come with guarantees that cannot be excluded under the Australian Consumer Law. You are entitled to a replacement or refund for a major
failure and compensation for any other reasonably foreseeable loss or damage. You are also entitled to have the goods repaired or replaced if the goods
fail to be of acceptable quality and the failure does not amount to a major failure.
The manufacturer warrants this product to be free of manufacturing defects for a period of 12 months from date of purchase. This Limited Warranty does
not cover normal wear and tear( exclusions apply) or any damage, failure or loss caused by improper assembly, maintenance, or storage or use of the GMX
product. Some parts will have a limited warranty period, please see below. This warranty is a part replacement warranty.
3 Month Parts Replacement Parts
Electrical components, suspension, drive train and brakes/ttings.
30 Days Parts Replacement Parts
Bearings, tires, tubes, cables, clutches, brake pads, seats
Minor assembly is required and in the interest of safety and warranty it is recommended that you have this product assembled by a qualied, skilled small
engine mechanic.
You may need to provide proof of being assembled by a skilled mechanic if not a report from a small engine mechanic advising of the issues to process
your warranty claims.
The warranty is a parts replacement warranty and labor is not included, defective parts may need to be sent back for inspection.
This Limited Warranty will be void if the product is ever;
- Used in a manner other than for recreation or transportation
- Modied in anyway
- Rented or commercial use.
The manufacturer is not liable for incidental or consequential loss or damage due directly or indirectly to the use of this product.
Always adhere to the maximum load of the product, over loading the product will void the warranty.
How a claim is made
When making a claim, you will need to provide proof of purchase, condition photos of the item. This information is required to be submitted via the
support center and communication is made through the support center. When the claim is created, the customer will receive the claim number and the
customer support team should reply within 48 hours.

SAFETY PRECAUTIONS
Please read these warnings carefully.
PARENTS/SUPERVISING ADULTS MUST TEACH CHILDREN HOW TO RIDE
THIS PRODUCT.
If the rider does not use common sense and heed these warnings, there
is an increased risk of damage, serious injury or possibly death.
Riding this product presents potential risks.
Like any OFF ROAD riding product, riding this product can be hazardous
(e.g., falling o or riding into a hazardous situation).
These items are meant to move and it is therefore possible for a rider to
lose control or otherwise get into dangerous situations.
Persons responsible for supervising the rider must recognize that if such
things occur, a rider can be seriously injured or possibly die, even when
using safetyequipment and taking other safety precautions.
1.
rider to be able to handle the hazards. Persons that are supervising need
to select themselves the appropriate product for the age of the user that
is riding and need to take care to prevent any user who may be too
immature or not experienced for a products. characteristics to endanger
themselves around it.
Any rider unable to t comfortable on the product should not attempt to
ride it. It’s a parent’s decision to allow the user to ride this o road vehicle
product, which should be based on the user’s maturity, skill and ability to
follow rules.
Keep this product away from small children and remember that it is
intended for use only by person who are, at the age requirement,
completely comfortable and competent while riding.
Persons with any mental or physical conditions that may make them
susceptible to injury impair their physical dexterity or mental capabilities
to recognise, understand, and follow safety instructions inherent to use of
this product, should not use or are permitted to use products inappropriate
for their ability.
USE PRODUCTS AT YOUR OWN RISK AND USE COMMON SENSE
Parents and adult responsibility and supervision are necessary for any o
road vehicle.
This product can be hazardous and not always appropriate for every age
or size user - age recommendations are found on these items that should
reect the nature of the hazards and the expected mental or physical ability,
or both, of a
Persons with heart conditions, head, back or neck ailments (or prior
surgeries to these areas of the body), or pregnant women, should be
cautioned not to operate such products.

RIDING PRACTICES
2.
This product is designed for o road use. Follow all rules applicable in the
area of intended use.
Ride defensively to avoid dangers that may enter your path.
Always check and obey local laws or regulations which may aect where
the item can be used. Keep safely away from motor vehicles and trac at
all times and only used where allowed and with caution. Watch out for
potential obstacles
The product is intended for use on at, dry surfaces such as concrete or
level ground, without loose debris such as sand, leaves, rocks or gravel.
Riding on wet, slick, bumpy uneven or rough surfaces may give less
traction and in turn increase the risk of accidents.
Watch out for obstacles that could stop or catch your wheel or make you
swerve suddenly or lose control.
Do not ride indoors
Never use near steps or swimming pools.
Do not use the brake and accelerator at the same time as the brake may
make the brakes hot and to fail.
Always have your hands on the handlebars and hold them at all times
when riding.
Do not ride at night or when visibility is low.
Do not attempt to do stunts or tricks on your item.
It is not strong enough to withstand use such as jumping or any other
types of stunts.
Never carry a passenger on an ATV.
Do not allow hands, feet, hair, body parts, clothing or similar articles
come in contact with moving parts, wheels or drive train.
Never use headphones or a mobile phone/s whilst riding.
Do not use under the inuence of drugs and alcohol.
Always wear protective gear, such as an approved safety helmet, gloves,
goggles, boots and protective clothing.
A long sleeve shirt, long pants and gloves are recommended.
Never ride barefoot or in thongs.
Never modify an ATV through improper installation or use of accessories.
Never exceed the stated load capacity for an ATV.
Do not tow a trailer, the vehicle is not designed for such use.
Do not touch the motor or brakes whilst riding or directly after riding as
they can become hot.
Avoid high speeds on downhill slopes where you might lose control.
Turn o vehicle after each ride and make sure keys are placed out of reach
of children.
Always ware an Australian standard Motorcross helmet when riding an
o road vehicle.

1
CONTENTS
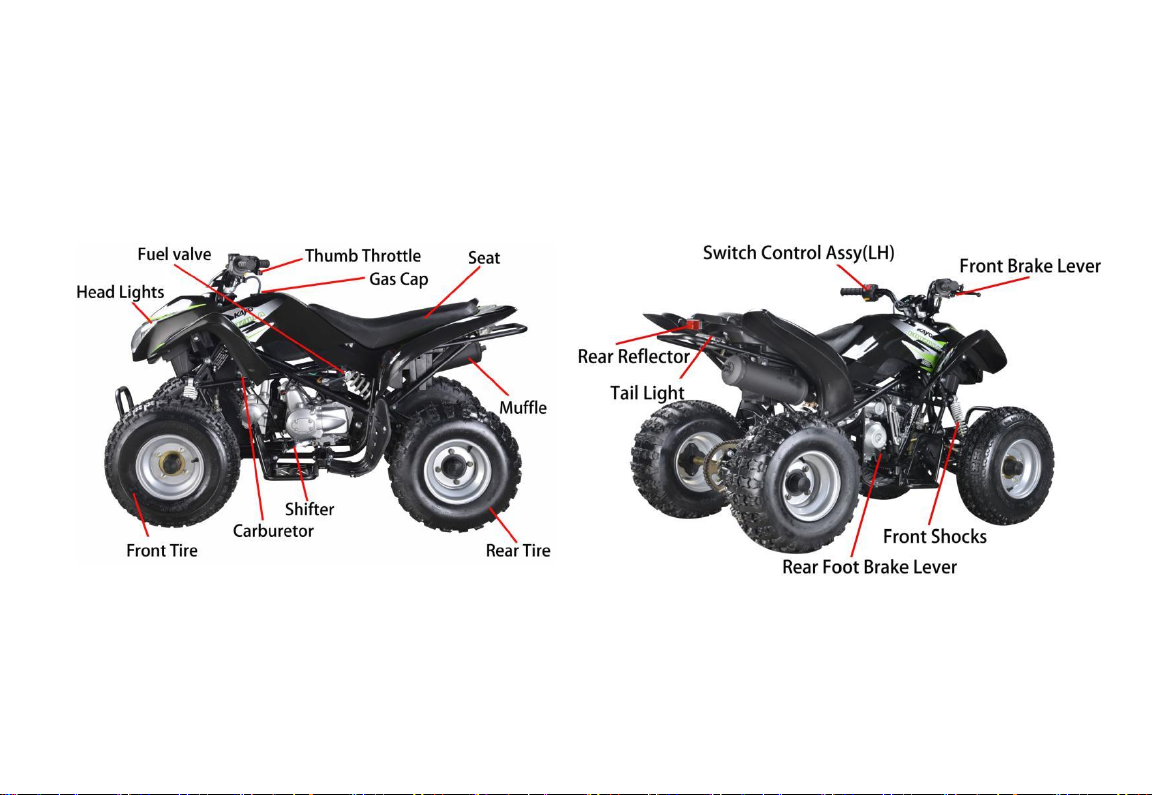
VEHICLE CONSTRUCTURE LOCATIONS …………… 2
VEHICLE PARAMETER ……………………… 3
VEHICLE MARK DESCRIPTION ……………………… 4
CONTROL FUNCTIONS …………………………… 7
ATV DRIVING KNOWLEDGE …………………………… 9
INSPECTION AND MAINTENANCE …………………… 16
TROUBLESHOOTING …………………… 23
UNPACKING ASSEMBLY ………………………… 27
YDF SERIES ELECTRICAL CIRCUIT DIAGRAM ……… 29
2
VEHICLE CONSTRUCTURE LOCATIONS

3
Vehicle size and weigh
Vehicle length
1535mm(60.43 in)
Vehicle width
920mm (36.22 in)
Vehicle height
950mm (37.4 in)
Seat height
705mm (27.76 in)
Wheelbase
1040mm (40.94 in)
Ground clearance
130mm (5.12 in)
Front wheel track
725mm (28.54 in)
Rear wheel track
705mm (27.76 in)
Vehicle weight
119kg
VEHICLE PARAMETER

4
Engine parameters
Engine
Singe cylinder,four stroke,air cooled
Displacement
124ml
54×54mm
Compression ratio
8.7 : 1
Max Power
5.8kw/7500rpm
Max Torque
9.2N.m/5000rpm
Minimum Rev
C.D.I
Lgnition
electric

5
VEHICLE MARK DESCRIPTION
VEHICLE INFORMATION CODE LOCATIONS
6
VIN NO .:
Engraved on the frame plate which was mounted on the frame left front tube, please see it as no. "1" position
above.
ENGINE NO .:
Engine name and no. was engraved on the crankcase, please see it as no. "2" position above.
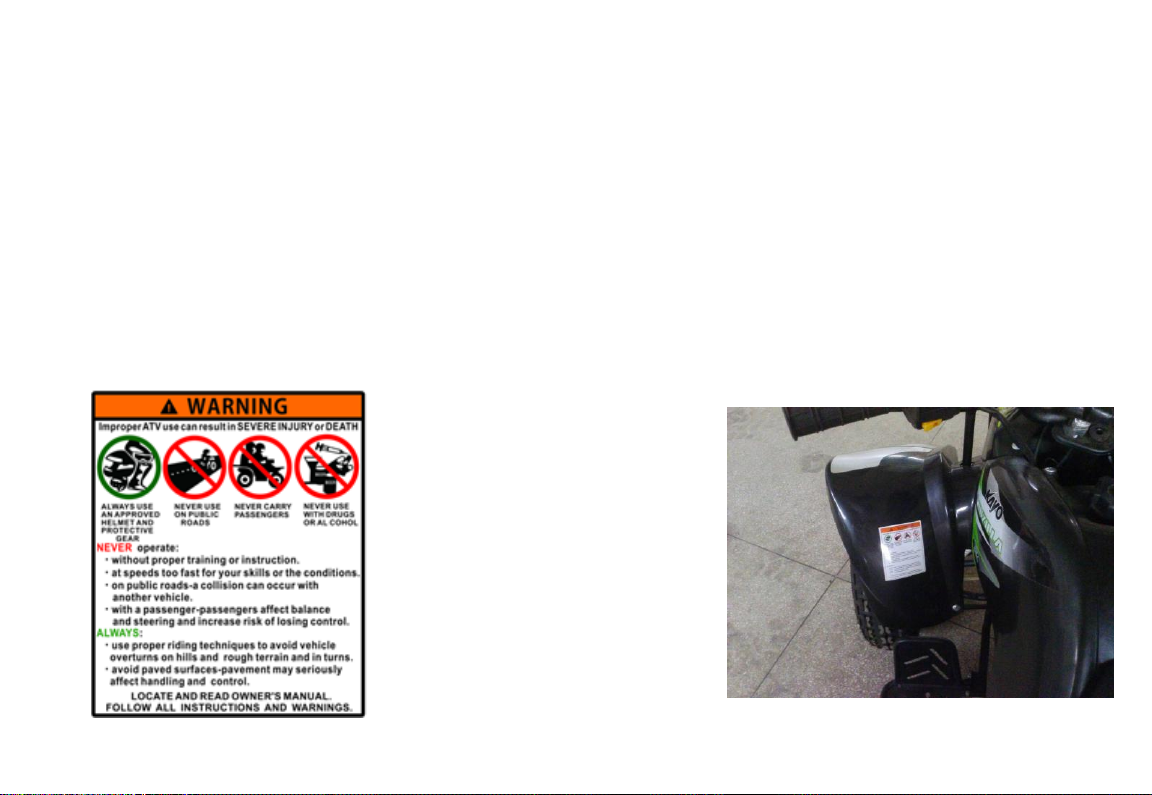
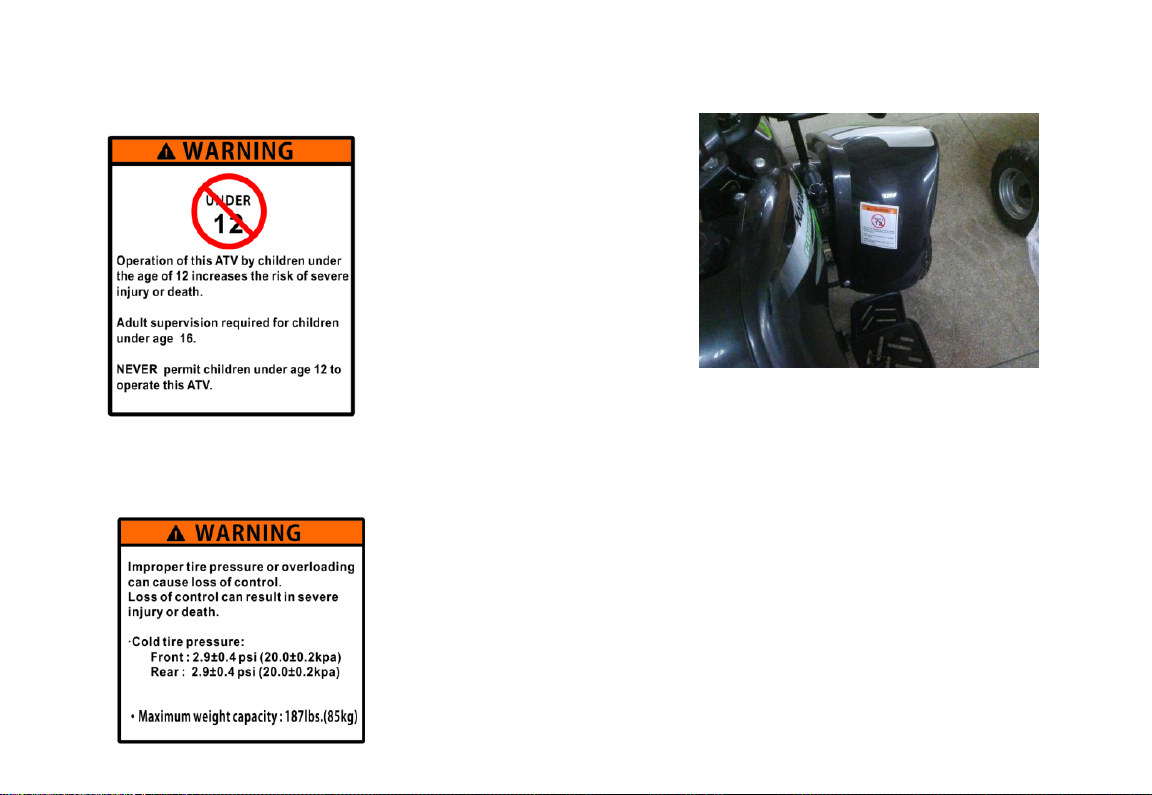
WARNING STICKERS
GENERAL WARNING STICKER
This warning sticker is put on the left
front plastic, same as below picture.
AGE WARNING STICKER
7
TYRE PRESSURE AND OVERLOAD
COMBINED WARNING STICKER
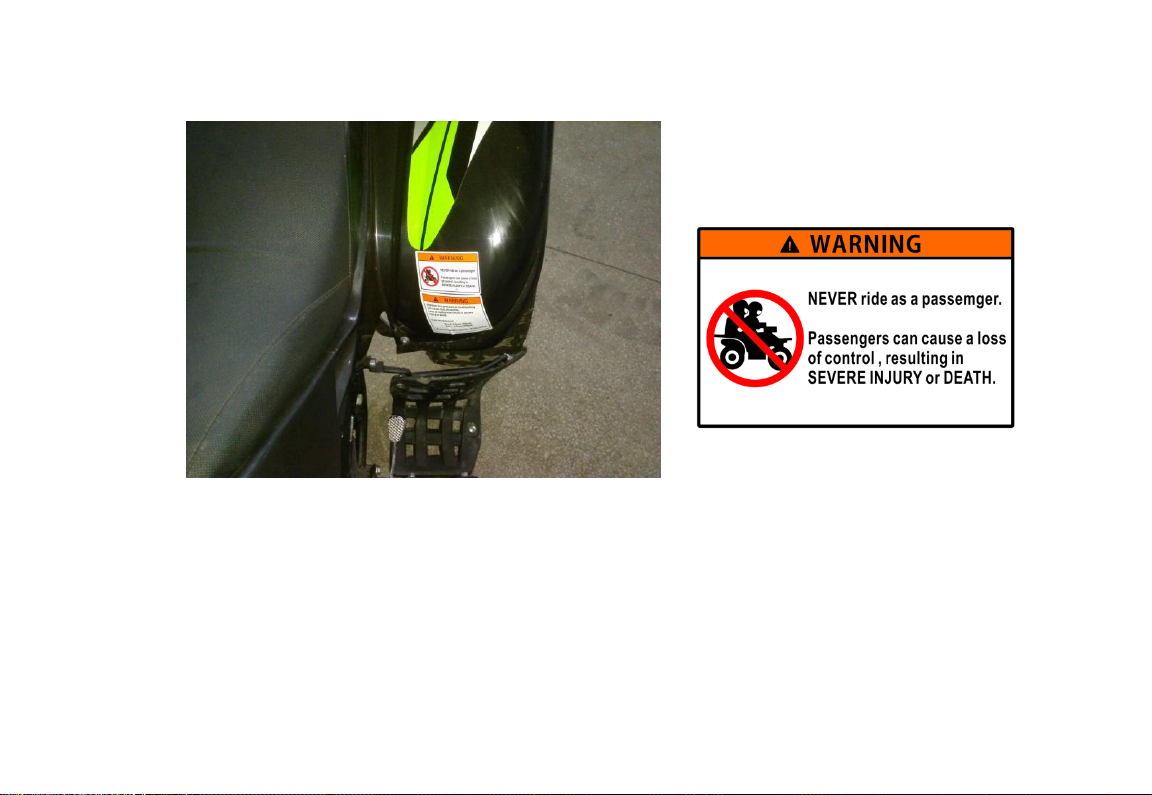
PASSENGERS WARNING STICKER
This warning sticker is put on the left
right plastic, same as below picture.
8
9
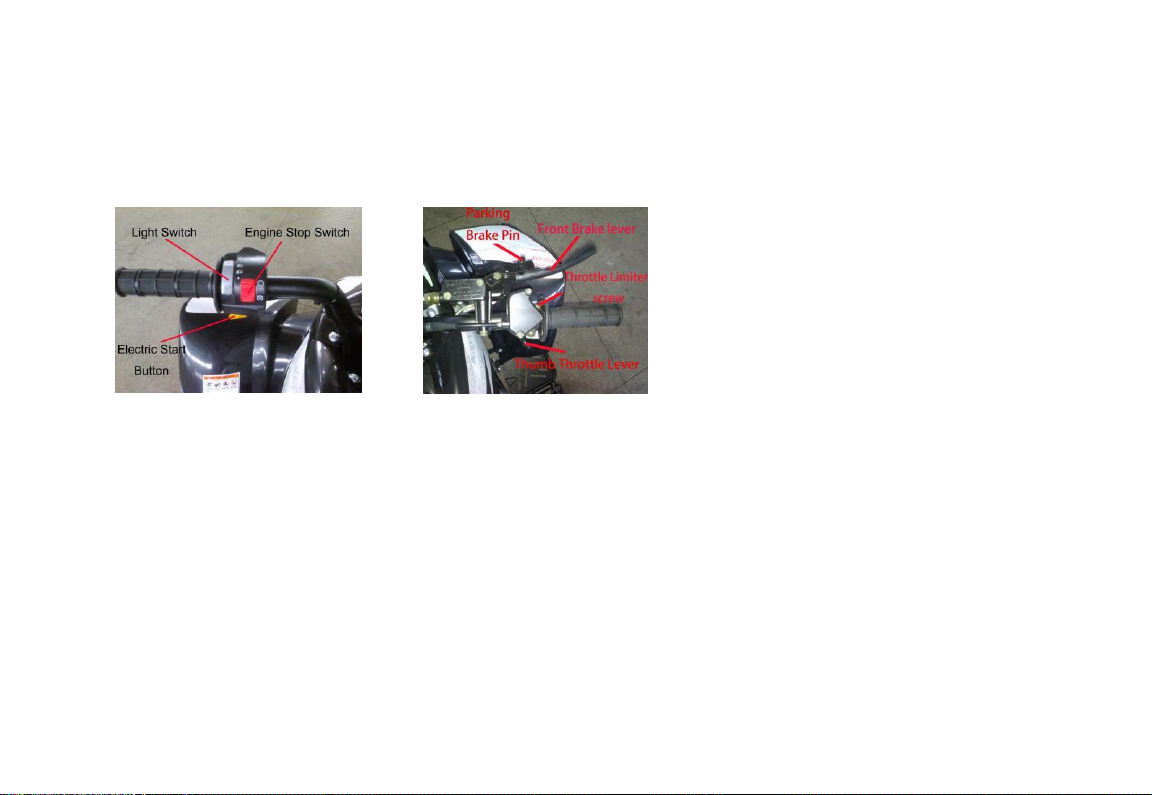
CONTROL FUNCTIONS
HANDLEBAR&SWITCHES
LEFT HANDLEBAR
With the Engine stop switch in the “Stop”position the engine cannot be started. With the Engine stop with in the 'Run"
position .The engine can be started.
Electric starting button
With the key switch in the 'ON' position, pressing this button will automatically start the engine.
RIGHT HANDLEBAR
Throttle Lever

10
Control the engine and ATV speed with the throttle lever. Operate this Iever with your thumb. Push it forward to
increase engine and ATV speed. Release it to decrease engine and ATV speed.
To set parking brake, squeeze front brake lever then depress parking brake pin, set the parking brake lever.
Throttle Adjusting Screw
To limit the throttle, screw in throttle limiter screw.
Use the throttle adjusting screw to restrict maximum speed of the ATV. Adjust this limiter according to the rider’s
skill and experience.
Adjusting procedures:
1. Loosen the Lock nut.
2. Turn the throttle adjusting screw clockwise to restrict maximum speed of the ATV.
3. Turn the throttle adjusting screw counterclockwise to increase the maximum speed of the ATV.
4. After finished, tighten the lock nut
FULE VALVE
There are three positions: “ON","OFF", and "RES".
“ON” position - In this position, fuel will flow to the carburetor when the engine is running or being started.
“OFF” position-No fuel will flow into the carburetor
“RES” position(arrow on valve pointing up)-If fuel level in the fuel tank becomes too low for engine to stay running
while fuel valve is at “ON” position,turn fuel valve to “RESERVE”.Turning fuel valve to “RESERVE” will allow engine

11
to begin using reserve fuel supply.You will need to re-fuel as soon as possible.When fuel valve is placed at
“RESERVE”,spare fuel tank can only be maintained for a limited time.
FUEL TANK CAP
To open the fuel tank cap,take the end of the vent tube out from the vehicle body;turn the fuel tank cap
counterclockwise.To close the fuel tank cap,turn in it clockwise and tighten it securely. Be sure that the vent tube
securely connects to the cap as shown.
ATV DRIVING KNOWLEDGE
WHAT YOU SHOULD KNOW BEFORE RIDING
1. Before riding, you should read all the following information carefully. Operating this ATV without proper
instruction could be hazardous.
 Loading...